elv MAX! Schnellstartanleitung
Quicklinks

Verwandte Anleitungen für elv MAX!


Inhaltszusammenfassung für elv MAX!
- Seite 1 Schnell-Start-Anleitung Quick Start Guide...
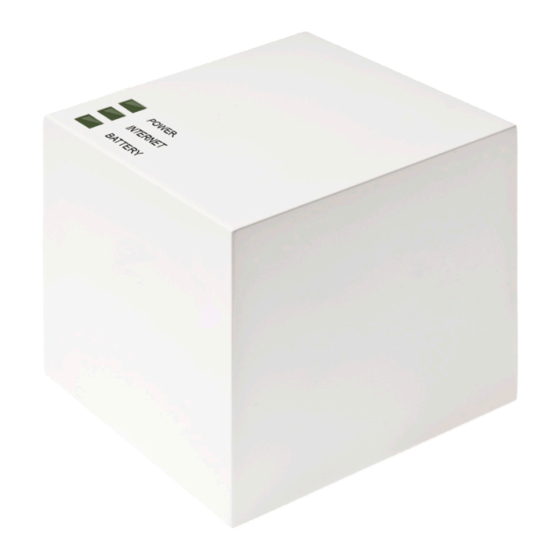
- Seite 2 1. Cube anschließen • Schließen Sie den Cube an die Stromversorgung an. • Verbinden Sie den Cube mit dem Router. Die Power- und die Internet-LED beginnen zu blinken, sobald die Stromversorgung besteht und die Verbindung zum Router und zum Internet aktiv ist. • Nach kurzer Zeit wechselt die Power-LED auf Dauerlicht. Der Cube ist jetzt einsatzbereit. V2.1...
- Seite 3 Connect Cube 1. Connect Cube • Connect the Cube to the power supply. • Connect the Cube to the router. The Power and the Internet LED will start flashing and change to continous light once the power supply and connec- tion to the router and Internet are active. • The Power LED will change to continuous light. The Cube is now ready for use.
- Seite 4 2. Software downloaden und installieren • Öffnen Sie die Seite https://www.max-portal.elv.de. Laden Sie die Installations-Software für Ihr System herunter (1). • Installieren Sie die Software auf Ihrem PC. Die Software startet automatisch und Sie gelangen auf die Softwareoberfläche (2). • Führen Sie die nachfolgenden Schritte raumweise und im Raum Gerät für Gerät durch.
- Seite 5 2. Download and install software • Open page https://www.max-portal.elv.de and download the installation software (1). • Install the software on your PC. The software will start automatically and you will get to the user interface (2). • Please proceed the following steps room-by-room and within a room device-by-device.
- Seite 6 3. Geräte montieren und installieren MAX! Heizkörperthermostat montieren • Entfernen Sie den bestehenden Heizkörperthermostat von Ihrem Heizkörper (1). • Legen Sie die Batterien in Ihren MAX! Heizungssteller ein. • Sobald das Aktivitätssymbol neben der Anzeige erlischt, montieren Sie das Gerät (2). Für einige Ventile ist ein Adapter zu verwenden (siehe Bedienungsanleitung). • Drücken Sie die Boost-Taste kurz. Der Heizkörperthermostat wird adaptiert (im Display erscheint ). Anschließend wird die Raumtemperatur im Display angezeigt. • Das Gerät ist jetzt einsatzbereit.
- Seite 7 3. Mount and install devices MAX! Radiator Thermostat • Remove the existing radiator valve of your radiator (1). • Insert batteries into your MAX! Radiator Thermostat. • As soon as the activity symbol next to on the display disappears, please mount the device (2). In case of certain valves you may need to use an adapter (see operating manual). • Press the Boost button shortly. The Radiator Thermostat will be adapted ( appears in the display). The room temperature appears in the display afterwards. • The device is now ready for use.
- Seite 8 MAX! Heizkörperthermostat anlernen • Bringen Sie den Cube über „Neues Gerät“ in der Software in den Anlernmodus (1). • Drücken Sie die Boost-Taste am MAX! Heizkörperthermostat lang, um ihn an den Cube anzulernen (2). Das Gerät erscheint in der Software. • Gehen Sie in der Software auf ‚Weiter‘, um dem Gerät einen Namen zu geben und einem Raum zuzuordnen. • Verfahren Sie so für alle weiteren Heizkörperthermostate in dem Raum.
- Seite 9 Teaching in the MAX! Radiator Thermostat • Please click on „New device“ in the software to activate the teach mode of the Cube (1). • Press and hold down the Boost button of the MAX! Radiator Thermostat for teaching in to the Cube (2). The device will appear in the software. • In the software, please click ‚Continue‘ to assign a name and to allocate the device to a room. • Please proceed in the same way for all radiator thermostats in this room.
- Seite 10 MAX! Fensterkontakt • Der MAX! Fensterkontakt besteht aus zwei Elementen - einem kleinen Magneten und einer großen Elektronikeinheit. • Legen Sie die Batterien in die Elektronikeinheit und montieren Sie sie mittels Klebestreifen gemäß Abbildung am Rahmen (1). Achtung! Setzen Sie die Kappe noch nicht auf! • Montieren Sie den Magneten am Fenster. • Klicken Sie in der Software auf ‚Neues Gerät‘. • Drücken Sie die Anlerntaste am MAX! Fensterkontakt lang (2). Das Gerät erscheint in der Software. • Gehen Sie in der Software auf ‚Weiter‘, um dem Gerät einen Namen zu geben und es einem Raum zuzuordnen. • Setzen Sie die Kappe auf die Elektronikeinheit auf. • Verfahren Sie so für alle weiteren Fensterkontakte in diesem Raum.
- Seite 11 MAX! Window Sensor • The MAX! window sensor consists of two elements: a smaller magnet and a larger electronic unit. • Please insert the batteries. The electronic unit must be mounted on the frame using adhesive strips as shown in the adjacent figure (1). Attention! Please do not yet place the cap! • Mount the magnet on the window. • Click on ‚New device‘ in the software. • Press and hold down the teach-in button of the MAX! Window Sensor (2). The device will appear in the software. • In the software, please click ‚Continue‘ to assign a name and to allocate the device to a room. • Now place the cap to the elec- tronic unit. • Please proceed in the same way for all window sensors in this room.
- Seite 12 MAX! Eco Taster I Max! Wandthermostat • Legen Sie die Batterien in die Elektronikeinheit C (MAX! Eco Taster) bzw. D (MAX! Wandthermostat) ein. Montieren Sie die Montageplatte A des MAX! Eco Tasters / MAX! Wandthermos- tats mittels Klebestreifen oder Schrauben. • Befestigen Sie den Rahmen B und die Elektronikeinheit C (MAX! Eco Taster) bzw. D (MAX! Wandthermostat) auf der Mon- tageplatte A (1). • Klicken Sie in der Software auf ‚Neues Gerät‘. • Drücken Sie die Auto- oder Eco-Taste am MAX! Eco Taster (2.1) bzw. die Boost-Taste am MAX! Wandthermostat lang (2.2). Das Gerät erscheint in der Software. • Gehen Sie in der Software auf ‚Weiter‘. Der MAX! Eco-Taster wird automatisch dem Haus zugeordnet. Vergeben Sie für den MAX! Wandthermostat einen Namen und ordnen Sie ihn einem Raum zu. • Der MAX! Eco Taster bzw. der MAX! Wandthermostat ist jetzt einsatzbereit.
- Seite 13 MAX! Eco Switch I MAX! Wall Thermostat • Insert the batteries into the electronic unit C (MAX! Eco Switch) or D (MAX! Wall Thermostat). Mount the mounting plate A of the MAX! Eco Switch / MAX! Wall Thermostat using adhesive strips or screws. • Secure frame B and electronic unit C (MAX! Eco Switch) or D (MAX! Wall Thermostat) on mounting plate A (1). • Click on ‚New device‘ in the software. • Press and hold down the Auto or Eco button of the MAX! Eco Switch (2.1) / the Boost button of the MAX! Wall Thermostat (2.2). The device will appear in the software. • In the software, please click ‚Continue‘. The MAX! Eco Swtich will be allocated to the house automatically. For the MAX! Wall Thermostat, please assign a name and allocate it to a room. • The MAX! Eco Switch / MAX! Wall Thermostat is now ready for use. (2.1) (2.2)
-
Seite 14: Internetsteuerung Einrichten
4. Internetsteuerung einrichten • Über den Button „Internetsteuerung“ können Sie Ihr Benutzerkonto für einen Portalbetrieb einrichten. Anschließend können Sie das System auch über Ihr MAX! Portal unter https://www.max-portal.elv.de steuern. • Sie können Ihre MAX! Heizungssteuerung jetzt flexibel steuern und konfigurieren und sowohl von Zuhause als auch über das Internet darauf zugreifen. - Seite 15 4. Set up Internet control Select „Internet control“ to set up your user account for portal • operation. You can then use the system via your MAX! Portal as well (https://www.max-portal.elv.de). • You can now flexibly control and configure your MAX! heating control and access your system at home or via the Internet.