Beurer AS 50 Gebrauchsanleitung
Aktivitätssensor
Vorschau ausblenden
Andere Handbücher für AS 50:
- Gebrauchsanleitung (76 Seiten) ,
- Gebrauchsanleitung (32 Seiten)

Verwandte Anleitungen für Beurer AS 50


Inhaltszusammenfassung für Beurer AS 50
- Seite 1 AS 50 Aktivitätssensor Gebrauchsanleitung Activity-sensor Instruction for Use Beurer GmbH • Söflinger Str. 218 • D-89077 Ulm (Germany) Tel.: +49 (0)7 31 / 39 89-144 • Fax: +49 (0)7 31 / 39 89-255 www.beurer.de • Mail: kd@beurer.de...
- Seite 33 NHALTSVERZEICHNIS Lieferumfang ..................32 Wichtige Hinweise .................33 Aktivität, Gesundheit und Fitness..........35 Wissenswertes über den Aktivitätssensor .........36 Funktionen des Aktivitätssensors ..........39 Inbetriebnahme ................40 Allgemeine Bedienung des Aktivitätssensors......44 Knöpfe des Aktivitätssensors ...........44 Display..................45 Stromsparmodus ..............46 Tastensperre ................46 Grundeinstellungen...............47 Aufzeichnung der Aktivität ............50 Übersicht ..................50 Aktivitätsdaten anzeigen ............51 Empfindlichkeit des Gerätes zur Schrittzählung einstellen..52 Schrittmessung ausschalten ............53...
-
Seite 34: Lieferumfang
IEFERUMFANG Aktivitätssensor Gürtelclip Armband PC-Software EasyFit (CD) und PC-Schnittstellenkabel (USB) Zusätzlich: Diese Gebrauchsanleitung... -
Seite 35: Wichtige Hinweise
Autofahren vorübergehend deaktiviert werden, um Fehlmessungen zu vermeiden. Zur Trainingsaufzeichnung und Pulsmessung von jeglichen ande- ren Sportarten wird auf die Beurer Pulsuhren verwiesen. Da so- wohl die Easy-Fit kompatiblen Beurer Pulsuhren als auch der Beu- rer Aktivitätssensor die Werte in die EasyFit Software übertragen können, sind übergreifende Auswertungen über alle Ihre körperli-... - Seite 36 Aktivitätssensor selbständig zu reparieren! Bei Reklamationen wenden Sie sich an Ihren Händler oder an die Serviceadresse. Batterie vor der Reklamation austauschen. Benutzen Sie den Aktivitätssensor nur mit Beurer Original- Zubehörteilen! Vermeiden Sie Kontakt mit Sonnencremes oder ähnlichem, da diese die Kunststoffteile beschädigen könnten.
-
Seite 37: Aktivität, Gesundheit Und Fitness
Radfahren, Treppensteigen und Hausarbeit ein wesentlicher Anteil zu. Um Ihre tägliche Bewegungsaktivität objektiv einschätzen zu können und zu erfassen, nutzt Ihnen der Beurer Aktivitätssensor. Er kann Sie auf diese Weise auch zu verstärkter Bewegung im Alltag motivieren. Ein tägliches Pensum von mindestens 7.000-10.000 Schritten oder 30 Minuten Aktivität sind optimal (Quelle: nach WHO,... -
Seite 38: Wissenswertes Über Den Aktivitätssensor
ISSENSWERTES ÜBER DEN KTIVITÄTSSENSOR Der Aktivitätssensor bietet Ihnen die Möglichkeit, Ihr tägliches Bewe- gungspensum zu kontrollieren. Er gibt einen Überblick über Ihre tägliche körperliche Aktivität, ermittelt die Anzahl Ihrer Schritte und errechnet daraus Ihren Kalorienverbrauch. Der Aktivitätssensor verfügt über eine zweifache Anzeigefunktion, die Ihnen z. - Seite 39 pel warten, bevor Sie diese überqueren können. Anschließend gehen Sie erneut 5 Minuten schnell am Stück. Ihr Aktivitätssensor zeigt Ihnen jetzt eine Aktivitätszeit von 10 Minuten an. Obwohl Sie an der Ampel eine Pause von 2 Minuten eingelegt haben und die 10 Minu- ten nicht an einem Stück durchgelaufen sind, haben Sie die nächste Aktivitätsstufe erreicht.
-
Seite 40: Auswertung Des Trainings
Auswertung des Trainings Über die PC-Schnittstelle Ihres Aktivitätssensors (Mini-USB an der Seite des Gerätes) können Sie Ihre Trainingsdaten an einen PC übertragen und dort auswerten. Das dafür notwendige Zubehör, bestehend aus einer CD mit der PC-Software EasyFit und einem Übertragungskabel, ist im Lieferumfang enthalten. Die PC-Software EasyFit steuert die Übernahme der Daten von Ihrem Aktivitätssensor und bietet vielfältige Auswertungsmöglichkei- ten. -
Seite 41: Funktionen Des Aktivitätssensors
UNKTIONEN DES KTIVITÄTSSENSORS Aktivitätsfunktionen Zeit-Funktionen Anzahl der Schritte Uhrzeit Gesamt-Aktivitätszeit Das Datum ist einstellbar und wird über die EasyFit Belohnungssystem Software an den PC über- Kalorienverbrauch in [kcal] mittelt. Das Datum ist auf (auf Basis der Geh-/Lauf- dem Display nicht sichtbar. Geschwindigkeit) Fettverbrennung in [g] Einstellungen... -
Seite 42: Inbetriebnahme
NBETRIEBNAHME Batterie einlegen/Batteriewechsel Falls Sie die Batterie nicht selbst einlegen oder wechseln möchten, wenden Sie sich an eine Uhrmacherwerkstätte. Das Batteriefach des Aktivitätssensors befindet sich auf der Rücksei- te des Gerätes. Legen Sie das Gerät mit der Vorderseite auf eine weiche Unterlage und gehen Sie beim Einlegen der Batterie vor wie folgt: Drehen Sie den Deckel des Batteriefachs... - Seite 43 Legen Sie den Batteriefachdeckel so in das Batteriefach, dass er flach mit dem Gehäu- se abschließt. Achten Sie darauf, dass der Pfeil auf dem Deckel und der Pfeil auf dem Gehäuse gegeneinander zeigen. Ziehen Sie den Deckel mit der Münze im Uhrzeigersinn bis zum Anschlag fest, da- mit die Wasserdichtigkeit weiterhin ge- währleistet ist.
- Seite 44 Wechseln Sie zwischen Gürtelclip und Armband nur, wenn nötig. Zu häufiges Wechseln strapaziert das Material des Armbands. Aktivitätssensor am Gürtel/Hosenbund tragen Ihren Aktivitätssensor können Sie mit Hilfe des mitgelieferten Gürtel- clips an Ihrem Gürtel oder am Hosenbund anbringen. Legen Sie dazu den Aktivitätssensor wie folgt in den Gürtelclip ein: Legen Sie das Gehäuse in den Gür- telclip ein.
-
Seite 45: Schrittzählung Am Aktivitätssensor
Aktivitätssensor in der Hosentasche tragen Grundsätzlich können Sie Ihren Aktivitätssensor auch in der Hosen- tasche tragen. Tragen Sie den Aktivitätssensor nicht in der hinteren Hosen- tasche, um Schäden am Gerät oder Verletzungen durch ver- sehentliches Draufsetzen zu verhindern. Aktivitätssensor als Armbanduhr tragen Ihr Aktivitätssensor kann am Handgelenk wie eine Armbanduhr ge- tragen werden. -
Seite 46: Allgemeine Bedienung Des Aktivitätssensors
LLGEMEINE EDIENUNG DES KTIVITÄTSSENSORS Knöpfe des Aktivitätssensors Wechselt zwischen den verschiedenen Einstel- lungen im Einstell-Menü. Drücken des Knopfes für 5 Sekunden schaltet die Tastensperre ein. Drücken des Knopfes für 5 Sekunden schaltet die Tastensperre aus. Stellt Werte ein. Gedrückt Halten beschleunigt die Eingabe von Werten. -
Seite 47: Display
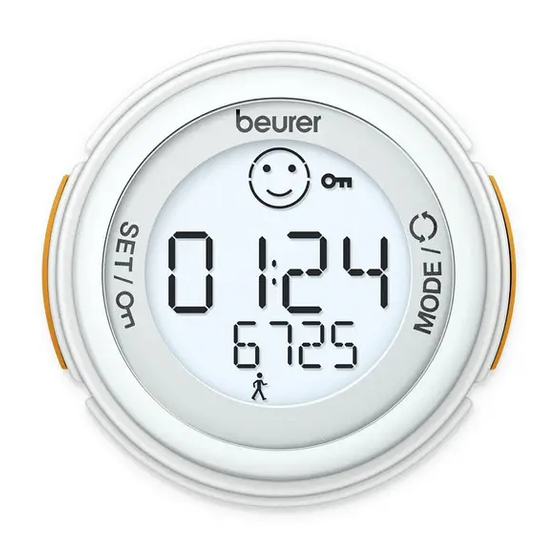
Display Obere Zeile Mittlere Zeile Untere Zeile Symbole: Wechsel zwischen den verschiedenen Einstell-Anzeigen im Einstell-Menü (Pfeil blinkend). Symbole des Belohnungssystems, wechseln je nach Aktivitätsstufe (bei Erreichen einer neuen Aktivitätsstufe blinkt das Symbol für 1 Minute). Bei Erreichen der höch- sten Aktivitätsstufe wechselt die Anzeige zwischen dem großen und kleinen Smiley. -
Seite 48: Stromsparmodus
(weniger als 90 Schritte pro Minute) überwiegt oder die Anzahl der Schritte bei „schnellem Gehen“ größer als 50% der Gesamtschritte ist. Batterie muss nach Anzeige dieses Symbols baldmög- lichst gewechselt werden, um weiterhin genaue Ergeb- nisse zu erhalten. Eine Erklärung der Display-Abkürzungen finden Sie im Abkürzungs- verzeichnis am Ende der Gebrauchsanleitung. -
Seite 49: Grundeinstellungen
RUNDEINSTELLUNGEN Übersicht Werte einstellen mit . Kurzes Drücken = Einzelwerte, langes Drücken = durchlaufend. Im Einstell-Menü können Sie: Ihr persönliches Gewicht eingeben. Der Aktivitätssensor errechnet daraus Ihren Kalorienverbrauch und Ihre Fettverbrennung wäh- rend der körperlichen Aktivität! Grundfunktionen des Aktivitätssensors festlegen. Die Uhrzeit und das Datum einstellen. - Seite 50 Aktivitätsdaten einstellen Eine wichtige Voreinstellung ist die möglichst genaue Eingabe Ihrer individuellen Schrittlänge. Laufen oder gehen Sie eine Strecke, von der Sie die exakte Länge kennen (Referenzstre- cke). Zum Beispiel die 100- Meter-Bahn im Leichtathletik- Stadion. Zählen Sie Ihre dafür benötig- ten Schritte.
- Seite 51 Uhrzeit einstellen wird angezeigt. Die Stun- HOUR den-Einstellung blinkt. Stellen Sie die Stunde (0-23) ein. wird angezeigt. Die Minuten- Einstellung blinkt. Stellen Sie die Minuten (0-59) ein. Datum einstellen wird angezeigt. Die Jah- YEAR res-Einstellung blinkt. Stellen Sie das Jahr (2008-2050) ein.
-
Seite 52: Aufzeichnung Der Aktivität
UFZEICHNUNG DER KTIVITÄT Übersicht Sensitivitätsstufen (1-5) einstellen mit... -
Seite 53: Aktivitätsdaten Anzeigen
Im Aktivitäts-Menü können Sie: Ihre Aktivitätsdaten anzeigen. Die Empfindlichkeit des Gerätes zur Schritt- zählung einstellen. Den Schrittzähler ausschalten. Die Tastensperre ausschalten. Sobald Sie im Aktivitäts-Menü sind, wird in der mittleren Zeile Ihre aktive Zeit (nach dem Lö- schen: 00:00:00) und in der unteren Zeile Ihre bereits zurückgelegten Schritte angezeigt. -
Seite 54: Empfindlichkeit Des Gerätes Zur Schrittzählung Einstellen
Anzeige 3: Mittlere Zeile: Uhrzeit Zurück zu Anzeige 1 Empfindlichkeit des Gerätes zur Schrittzählung einstellen Um ein optimales Ergebnis zu erzielen, sollte die Empfindlichkeit des Gerätes auf den Benutzer individuell eingestellt werden. Hierzu ste- hen fünf Empfindlichkeitsstufen zur Auswahl (1=Empfindlichkeit ge- ring, 5=Empfindlichkeit hoch). -
Seite 55: Schrittmessung Ausschalten
Aktivitätssensor keine exakten Aktivitätsdaten aufnehmen. Schalten Sie ihn darum bei diesen Bewegungsarten aus, um Ihre tatsächlichen Aktivitätszeiten nicht zu beeinträchtigen. Wenn Sie auch mit einer EasyFit-kompatiblen Beurer Pulsuhr Ihre Fitnesswerte (Fahrradfahren, Schwimmen etc.) ermitteln, können Sie die Messdaten beider Geräte über die Software EasyFit gemeinsam auswerten. -
Seite 56: Speicherfunktion
Sie haben die Möglichkeit, die Schrittmessung des Aktivitätssensors auszuschalten: Sie befinden sich im Aktivitäts-Menü. In der mitt- leren Zeile wird Ihre Aktivitätszeit und in der unteren Zeile Ihre Schrittzahl angezeigt. Drücken Sie den Knopf für ca. 5 sec., um die Schrittmessung auszuschalten. -
Seite 57: Systemvoraussetzungen
Installation der Software Sie finden die Installations-Anleitung sowohl auf dem Papiereinleger bei der CD als auch elektronisch in der Datei „Install_Readme“ auf der CD. Bitte folgen Sie den Anweisungen zur Installation der Soft- ware sehr genau und in der angegebenen Reihenfolge. Systemvoraussetzungen Betriebssystem Windows 2000/XP (SP2), Vista... -
Seite 58: Häufige Fragen Und Antworten
Garantiezeit ist durch den Kunden der Nachweis des Kaufes zu führen. Die Garantie ist innerhalb eines Zeitraumes von drei Jah- ren ab Kaufdatum gegenüber der Beurer GmbH, 89077 Ulm, Ger- many, geltend zu machen. Der Kunde hat im Garantiefall das Recht zur Reparatur der Ware bei unseren eigenen oder bei von uns auto- risierten Werkstätten. - Seite 59 Wie kann ich meine persönlichen Angaben ändern? Übertragen Sie Ihre Aktivitätsdaten auf die Software EasyFit, um einen Datenverlust zu vermeiden. Nehmen Sie die Batterie aus dem Aktivitätssensor. Lesen Sie dazu das Kapitel „Austausch der Batterien“. Legen Sie die Batterie wieder in das Gerät ein. Lesen Sie dazu das Kapitel „Batterie einlegen/Batteriewechsel“.
- Seite 60 Die Sensitivität des Gerätes muss je nach Tragevariante indi- viduell eingestellt werden. Die besten Messergebnisse liefert der Aktivitätssensor bei der Befes- tigung des Gerätes am Gürtel bzw. Hosenbund. Warum passiert beim Drücken der Knöpfe nichts? Wird auf dem Display ein Schlüssel angezeigt? Wenn ja, haben Sie die Tastensperre aktiviert.
-
Seite 61: Abkürzungsverzeichnis
Warum werden meine Schritte nicht korrekt aufgezeichnet? Stellen Sie die Sensitivität des Gerätes auf Ihre persönliche Schrittfolge ein (siehe Kapitel „Aufzeichnung der Aktivität“, Ab- schnitt „Empfindlichkeit des Gerätes zur Schrittzählung einstel- len“). Überprüfen Sie den Batteriezustand! Bei leerer Batterie kann keine korrekte Messung stattfinden. Le- gen Sie eine neue Batterie ein (siehe Kapitel „Batterie einle- gen/Batteriewechsel“). -
Seite 62: Stichwortverzeichnis
TICHWORTVERZEICHNIS Abkürzungsverzeichnis 59 Knöpfe 44 Aktivität 33, 35 Aktivität aufzeichnen 50 Lieferumfang 32 Aktivitätsdaten anzeigen 51 Aktivitätsdaten einstellen 48 Anbringen des Aktivitätssensors Pflege 34 Aufzeichnung der Aktivität 50 Reinigung 34 Reparatur 34 Batterien 55 Belohnungssystem 36 Schrittmessung ausschalten 53 Schrittzählung 43 Datum einstellen 49 Software EasyFit 38, 54 Display 45...