
Verwandte Anleitungen für Nordpeis Palma


Inhaltszusammenfassung für Nordpeis Palma
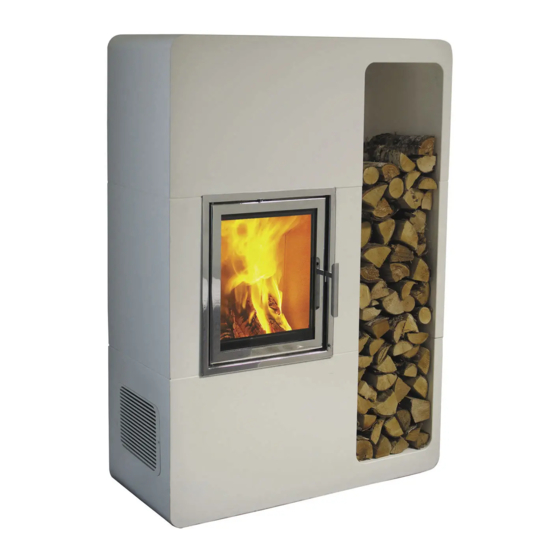
- Seite 1 Montageanleitung Manuel d’installation Installation manual Palma Art.no: FP-PAL00-100 Last updated: 01.01.2013...
-
Seite 2: Allgemeine Information
Mindestabstände. Bei Installation Ihres Kamineinsatzes und glätten die Oberfläche mit einem eingeseiften beachten Sie die länderspezifischen, örtlichen und Schwamm oder der Fingerspitze, um eine erkennbare baurechtlichen Vorschriften. Nordpeis ist nicht für falsch Vertiefung zwischen den Elementen deutlich zu monierte Heizeinsätze verantwortlich. machen. (FIG Z) Vorbehaltlich Druckfehler und Änderungen. - Seite 3 Aufstell- und Bedienungsanleitung für den Raumheizer Palma geprüft nach DIN EN 13240 Aufstellhinweise ist. Während des Anheizens sollte der Aufstellraum Der Raumheizer ist anschlussfertig montiert und muss gut belüftet werden. Ein schnelles Durchlaufen der mit einem Verbindungsstück an den bestehenden Anheizphase ist wichtig, da bei Bedienungsfehlern Hausschornstein angeschlossen werden.
- Seite 4 Aufsicht statthaft. Für die Schornsteinberechnung Es dürfen nur Ersatzteile verwendet werden, die vom ist DIN EN 13384-1 bzw. DIN EN 13384-2 anzuwenden. Hersteller ausdrücklich zugelassen bzw. angeboten Der Raumheizer Palma ist eine Zeitbrand-Feuerstätte. werden. Bitte wenden Sie sich bei Bedarf an Ihren Fachhändler. Verbrennungsluft Die Feuerstätte darf nicht verändert werden!
- Seite 5 FIG 6-8: Platzieren Sie die untere Hitzeschutzplatte und Mindestgröße der Hitzeschutzwand die Seitenelemente. Achten Sie auf ein Spiel zwischen Palma verfügt über eine integrierte Hitzeschutzwand Heizeinsatz und Kaminverkleidung, da sich der Einsatz und kann direkt vor eine brennbare Wand montiert bei Hitze ausdehnt.
- Seite 10 FIG 1 1080 FIG A...
- Seite 11 FIG 2...
- Seite 12 FIG 3 FIG 4 FIG 5 FIG 6...
- Seite 13 FIG 7 FIG 8 FIG 9 FIG 10...
- Seite 14 FIG 10 FIG 11 FIG 13 FIG 12 180°...
- Seite 15 FIG 14 FIG 15 FIG Z...