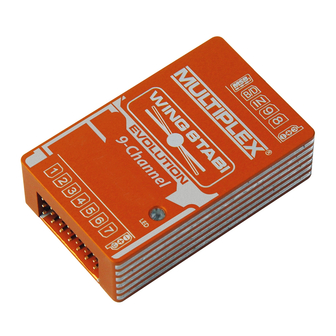
Multiplex WINGSTABI EVOLUTION Serie Benutzerhandbuch
Inhaltsverzeichnis
7
9
channel
channel
3-Achs
# 5 50111
MULTIPLEX Modellsport GmbH & Co.KG • Westliche Gewerbestr. 1 • 75015 Bretten
7
9
RX-7-DR M-LINK
RX-9-DR M-LINK
# 5 50121
# 5 50131
www.modellmarkt24.ch
Sammlung
Collection
Bedienungsanleitungen
User Manuals
Mode d'emploi
12
16
16
channel
# 5 50141
# 5 50151
# 5 50151
www.multiplex-rc.de
www.youtube.com/multiplexmodellsport
• Geschwindigkeitskompensation
über Staurohr oder GPS
Lizensiert durch PowerBox-Systems
Patent: DE 10 2013 201 554 B3
12
12
channel
channel
RX-12-DR M-LINK
RX-12-DR M-LINK
INK
INK
INK
# 5 50161
1
1
1
1
1
16
6
6
6
6
RX-16-DR M-L
RX-16-DR M-L
RX-16-DR M-LINK
M-LINK
INK
# 5 50171
Kapitel
Inhaltsverzeichnis

Verwandte Anleitungen für Multiplex WINGSTABI EVOLUTION Serie


Inhaltszusammenfassung für Multiplex WINGSTABI EVOLUTION Serie
- Seite 1 M-LINK 3-Achs # 5 50111 # 5 50121 # 5 50131 # 5 50141 # 5 50151 # 5 50151 # 5 50161 # 5 50171 www.multiplex-rc.de MULTIPLEX Modellsport GmbH & Co.KG • Westliche Gewerbestr. 1 • 75015 Bretten www.modellmarkt24.ch...
- Seite 2 Teil 1 Basic Teil 2 Erweitert Teil 3 Neufunktionen Part 1 Basic Part 2 Advanced Part 3 New functions Partie 1 Basic Partie 2 Avancé Partie 3 Nouvelles fonctions www.modellmarkt24.ch...
- Seite 3 www.modellmarkt24.ch...
- Seite 4 www.modellmarkt24.ch...
- Seite 5 www.modellmarkt24.ch...
- Seite 6 www.modellmarkt24.ch...
- Seite 7 www.modellmarkt24.ch...
- Seite 8 www.modellmarkt24.ch...
- Seite 9 www.modellmarkt24.ch...
- Seite 10 www.modellmarkt24.ch...
- Seite 11 www.modellmarkt24.ch...
- Seite 12 www.modellmarkt24.ch...
- Seite 13 www.modellmarkt24.ch...
- Seite 14 www.modellmarkt24.ch...
- Seite 15 www.modellmarkt24.ch...
- Seite 16 www.modellmarkt24.ch...
- Seite 17 www.modellmarkt24.ch...
- Seite 18 www.modellmarkt24.ch...
- Seite 19 www.modellmarkt24.ch...
- Seite 20 www.modellmarkt24.ch...
- Seite 21 www.modellmarkt24.ch...
- Seite 22 www.modellmarkt24.ch...
- Seite 23 www.modellmarkt24.ch...
- Seite 24 www.modellmarkt24.ch...
- Seite 25 www.modellmarkt24.ch...
- Seite 26 www.modellmarkt24.ch...
- Seite 27 www.modellmarkt24.ch...
- Seite 28 www.modellmarkt24.ch...
- Seite 29 www.modellmarkt24.ch...
- Seite 30 www.modellmarkt24.ch...
- Seite 31 www.modellmarkt24.ch...
- Seite 32 www.modellmarkt24.ch...
- Seite 33 www.modellmarkt24.ch...
- Seite 34 www.modellmarkt24.ch...
- Seite 35 www.modellmarkt24.ch...
- Seite 36 www.modellmarkt24.ch...
- Seite 37 www.modellmarkt24.ch...
- Seite 38 www.modellmarkt24.ch...
- Seite 39 www.modellmarkt24.ch...
- Seite 40 www.modellmarkt24.ch...
- Seite 41 www.modellmarkt24.ch...
- Seite 42 www.modellmarkt24.ch...
- Seite 43 www.modellmarkt24.ch...
- Seite 44 www.modellmarkt24.ch...
- Seite 45 www.modellmarkt24.ch...
- Seite 46 www.modellmarkt24.ch...
- Seite 47 www.modellmarkt24.ch...
- Seite 48 www.modellmarkt24.ch...
- Seite 49 www.modellmarkt24.ch...
- Seite 50 www.modellmarkt24.ch...
- Seite 51 www.modellmarkt24.ch...
- Seite 52 www.modellmarkt24.ch...
- Seite 53 www.modellmarkt24.ch...
- Seite 54 www.modellmarkt24.ch...
- Seite 55 www.modellmarkt24.ch...
- Seite 56 www.modellmarkt24.ch...
- Seite 57 www.modellmarkt24.ch...
- Seite 58 www.modellmarkt24.ch...
- Seite 59 www.modellmarkt24.ch...
- Seite 60 www.modellmarkt24.ch...
- Seite 61 www.modellmarkt24.ch...
- Seite 62 www.modellmarkt24.ch...
- Seite 63 www.modellmarkt24.ch...
- Seite 64 www.modellmarkt24.ch...
- Seite 65 www.modellmarkt24.ch...
- Seite 66 www.modellmarkt24.ch...
- Seite 67 " " %& & ) ** & & - " %& & %& ) ** * & 1& & %& %& -; & . 4 %" < &6 && & && + 1& )& 6 & " =; 6 '= 3 www.modellmarkt24.ch...
- Seite 68 < & " & " D 1& % 1+: )+ % 1+: ) C " < & ;4+E & & +4 %" ,8+ %*6 % 6& <<1C 4 C 15: <: 9 ,9:C 51GC H 5$ C H, 1& " "...
- Seite 69 '* % ' + $ & " % 1& & 1& " )& & & " www.modellmarkt24.ch...
- Seite 70 & & % 1+: )+ %*6 & '#.C & !C 3C ' & '0 ) & + & & - 7 62 62 K & C & & + & % 1& M " & " & & " " 62 "...
- Seite 71 " /= 3 www.modellmarkt24.ch...
- Seite 72 '* % * & & & " " " " & " & " &% & 1<9+ %*6 6 15: <: 9 " L1& & %& M 62 " & 6 & & " 6& % " K " & "...
- Seite 73 $ " $ 6 " " 6& & 6&+ 6& % & " & " &%% ; " ,& " & L " 2 .C B C ;B " & & " " < )& " " 1& & != 3 www.modellmarkt24.ch...
- Seite 74 6 L " & & & C " " < " F% & )&*6 & " & J " " & & J" & & " J " " "2 & J " < < " % J" &%% < "...
- Seite 75 & " 62 1 & $& " 1+: )+ & <,G4 + 9 " * F $ <,G4 + 9 " 1+: )+ ,&F & & 7& "& $&** & &%% 1+: )+ %*6 " & " " 62 1+: ) & &...
- Seite 76 & <6 & " C " & % <6 " " & 7& & " & C " '* % )& 6 & & M % ) **% & & " 1& " * " "& C " & F% & 1&...
- Seite 77 "( ) ** ' " &"& *& &6 " & & ) ** . & 6 " C & 62 1& & + %& &%6& & " & *4 * "2 ) ** 1& ) ** 1<9+4 ; & ; & " ) ** "...
- Seite 78 ) ** F% & ) ** 2+ F% & ) ** & & " C " ) ** & L) ** * & M " % & " & F% & C &%% % & & % 1& & 6 &...
- Seite 79 & & & & K &% C & " < % 1& & " 7& ''((C '/(( '3((C 1<9+ '(((C '/(( ((( %*6 " & " 6& " & & 62 K & C " & %& & &* % &...
- Seite 80 " " ' & " & & " " MC " " " L'M+ F% & " < < $ %*6 & G* % < 7& & . < & R & +1& S$ &* -% ; 6 &* C " "...
- Seite 81 & &% & &%% " T=+'( & " 6 T=+'(C & " & " )&%*& & 6 <C 6& " <C 6 & & & &%% " & & & '/= 3 www.modellmarkt24.ch...
- Seite 82 1& " & 1& & "( " " '" & " " &P % J 2 1& '0= 3 www.modellmarkt24.ch...
- Seite 83 " <+ " < $+, & " " & " 6& <+ <+ M" " " <+ & C &%% " &%% " " & & U+ " %& 7 " & 1& <+ & " 1& 1& & C " %&...
- Seite 84 &P & & " &P & < & & " " " & " " C " " & & 1& & " & " % ,2 &% &P 6& ;& 1& +< & & ;& " ;& & " "...
- Seite 85 / (( " 6C " )& " & & " & & & " 1& & C &%% " &%% " &" -% N N% I. " &" & & " )& & & % " L& & " '3= 3 www.modellmarkt24.ch...
- Seite 86 %% " +1& "2 "2 " " $ %*6 -< & < %% " 1& & &%% " %& & %%" ' " " 1& 1& &66 %%" & " 7& " " " 6 & %%" %%" & & &...
- Seite 87 & & C " " % < &6 ,&F &6 " / . &" 62 K & " "& 1& & J" & < & < &6 9 " & & G* & 6& % " 00 " G* & " &...
- Seite 88 ) ** % ) * L) ** M -" & . " C " ) ** F% & & )& 6 & 1& & + &+. %& " &%* I 1& " )& 6 & %& " " & % = * .C *&...
- Seite 89 * & L) ** VW ) ** ) ** " " %& 2C " ) ** L) ** G* & L< & M & " K & 62 ) ** 'M ) ** L) ** F% & & ) ** L *&...
- Seite 90 / 62 /( 62 & & ) ** " '0 ) ** # %% & & % < " " " & C " ) ** & "2 & /( 6 ( & 7& C " & " ) ** "...
- Seite 91 ) ** *& & & & " % & " & & " & ) ** ) ** " " *& L< &*& & *& " ) ** * &*& & " & 7& ) ** L & M &" &% % 1&...
- Seite 92 %& -; & . %& & ) ** ) ** ) ** & C 4 *+ =& *& & % 4 2 ) ** " ) ** ) ** G* & & * & " & *& &%% & & % 4 2 D 4 * <...
- Seite 93 ) ** " " " & " & & & ) ** %& ) ** L< " " % & % J" % %*6 &% & 62 4 * *& "2 62 ) ** & &% &%% & " ) ** "...
- Seite 94 % " " ) ** ) ** " ) ** " &"& ) ** < &*& & 62 4 * *& " * &*& & % ) ** C %2 ) ** "2 " " * &*& & & *& % ) ** "...
- Seite 95 " " " & 4 * 62 ) ** & & ' (X ; 6 C & 0(X & " ) ** & ) ** * & ) ** " 2 * &*& & 4 * C & *& " * &*&...
- Seite 96 F% & " & 4 %" & C " " G* & " & G* & " 4 "0( " %2 " '* % )& 6 & & & 4 %" & (= 3 www.modellmarkt24.ch...
- Seite 97 &6 " < &6 & 62 O C ;B & & " 1& & 7 " 7& & & " 6& & ' & & & & / *& & 0 & ! VW ; * VW J & & # VW ;...
- Seite 98 62 O C ;B & 6 & % 15: <: 9 : 6& & " F% & VW Y <,G4 " " & &" " "2 % ; 6 <6 F% & & ! 3.54 0 " '* % & G* &...
- Seite 99 && + & + 1<9 1& && < F & & & &%% " " <8+: % < F & L15: <: 9 1& M 42 & 6 & & 1<9 : % <8 & " &P6 <8+ " " 1<9 &&...
- Seite 100 && + & 15: <: 9 % <8 " & && &" C " && )&** +1& <8 % " &% % 8G1+4 &% & " " '* % ' + 1 & < "& -< . 1<9 && + )&** &...
- Seite 101 )& 6 & 6& " +1& &% & &** +1& & + F & % )&** +1& < +? & & &D 7 < "& C && + & < 1& 1& ** & && + &% & +1& &6 " &...
- Seite 102 6& )& 6 & & & 1& & " & " 1 " " 0= 3 www.modellmarkt24.ch...
- Seite 103 < &%% 6& % & " & & &% && " 6& &% 5 % <8 "& " 7 " " F% & & MC L L4 %" " " && % <8 * )& 6 & )& 6 " "...
- Seite 104 " " % <8 & 6 & 6&+ F% & " ; " &P & '" '* % ' + $ & + & & & 2 62 I*& C %*& % & L15: <: 9M J &% & + <6 &...
- Seite 105 " =; 6 4 % 15: <: 9 1& *& % ; S 8& ) & )& 7 " & &" 7 *6 4 % 15: <: 9 1& *& % ; S 8& ) & " " 15: <: 9 1& *&...
-
Seite 106: Inhaltsverzeichnis
Ex t e n d e d i n s t r u c t i o n s f o r t h e WI N GST A B I f r o m Fi r m w a r e -V e r s i o n 1 .2 .7 Co n t e n t s Basics .......................... -
Seite 107: Basics
12CH mode of the FASSTest receiver. Transmission systems which work with the MULTIPLEX telemetry protocol can process the WINGSTABI telemetry data at the MSB port (Multiplex Sensor Bus) and connect with the MSB input of your receiver. For the WINGSTABI with integrated M-LINK receiver, this connection is switched internally and additional external sensors can be connected at the MSB port. -
Seite 108: Installation Position
I n s t a l l a t i o n p o s i t i o n Figure 1: Installation position side view Figure 2: Installation position view from above IMPORTANT NOTE: The gyro must be installed completely in parallel to the flight axis securely in the model. -
Seite 109: Channels
Ch a n n e l s All WINGSTABI versions with or without integrated M-LINK receiver generally accept up to 16 control channels on the input side (or even 18, depending on RC system). On the output side, 7, 9, 12 or 16 channels (the more channels the higher the transfer rate) are available for analog or digital servos, depending on the version. - Seite 110 Figure 3: WINGSTABI socket assignment Figure 4: WINGSTABI pro socket assignment Seite 5/39 www.modellmarkt24.ch...
- Seite 111 For external receivers, the correct signal setting must be observed. External MPX receivers must be set via launcher to MULTIPLEX SRXL; other systems require other settings for the serial data connection. Observe the instructions of your receiver for this.
-
Seite 112: Individualization
I n d i v i d u a l i za t i o n However you made your basic settings, you eventually end up at the start screen. Manual settings must be made from here. To do this, (almost) every screen page for basic settings has a basic page and an advanced page for the more seldom required fine adjustments. -
Seite 113: Extending Control Channels
When you now switch to “Advanced”, you will see the currently defined RC input channels, all currently assigned servo outputs and the three integrators, which of course only show deflections if the gyro actually becomes active in the selected phase. Ex t e n d i n g c o n t r o l c h a n n e l s In the next step, click the radio symbol in the top bar to reach the basic window for channel assignment. - Seite 114 Figure 6: WINGSTABI channel asignment On the same screen page, you will be shown the telemetry settings for MSB systems. Here, select M-LINK standard or PROFI-TX (telemetry display) as desired. The PROFI- TX and the telemetry display emit longer value identifiers than for instance the M-LINK standard of the Royal SX.
-
Seite 115: Three Available Basic Models
A red flashing arrow at the top right, as in all menus which enable changes, indicates in certain situations that the changes you made should be transferred to the gyro, simply by clicking on the field with the arrow. If you now switch to the advanced window, you will find the default settings which shouldn’t be modified unless absolutely necessary. -
Seite 116: Activating The Flap Control
Figure 7: Model and flap pre-selection A c t i v a t i n g t h e f l a p c o n t r o l Both spoilers and flaps can be configured in various shapes and forms (via gyro phases, switch channel or special flap phases) from software version 1.2.7 onwards, meaning four-flap wing for motor models and six-flap wing for glider models can always comfortably be achieved along with all the necessary elevator compensation. -
Seite 117: Servo Outputs Of The Wingstabi
In order to set up the activated flaps in this menu item, a new flap menu symbol appears after activation behind the airplane symbol. Of course, controllers and channels for flap control must likewise be assigned at the transmitter end, such as control channels and flap servos in the WINGSTABI. -
Seite 118: Setting Up The Gyro Sensor
Now you can define the function and type of the servo on the right hand side. Depending on the gyro version, varying numbers of outputs are available. In the middle next to the conventional HiTEC servo, adjust the servo center and the two end positions as required in the model for the designated rudder deflections. -
Seite 119: Gyro Phase Settings
Gy r o p h a s e s e t t i n g s We are now approaching the actual gyro settings, which will of course be different in each of the switchable gyro phases. For safety reasons, no changes should be made in gyro phase 1;... -
Seite 120: Regulation (Basic)
Re g u l a t i o n (b a s i c ) Figure 9: Basic regulations Sensitivity via transmitter With the aid of a special sensitivity channel, the global sensitivity (gain) of the axis can be influenced from the transmitter. Various areas can be adjusted – for example +/-10. If, for example, you have set the global sensitivity to 40, and the area to +/-10, you can vary the sensitivity via the transmitter from 30 to 50. -
Seite 121: Regulation (Advanced)
Maneuverability / roll rate If for instance the model reacts too strongly to control inputs, reduce the value to under 100. If you want the model to respond faster, set the value to over 100. Increments of 10 make sense here. Re g u l a t i o n (a d v a n c e d ) Figure 10: Advanced settings in gyro phase 3 Direct input... - Seite 122 Proportional (P input) The P input of the PID regulation reacts quickly to regulation deviations. This is a factor of the recognized regulation error (deviation between the actual and setpoint values). The main input of the regulation comes from the P input. Sensitivity If the P input is set too low, the control feeling can be too “soft”.
- Seite 123 A big integrator ensures a very stable regulation, as a great many errors influences can be detected and corrected. During aerobatics, an integrator that is too large can lead to problems for maneuvers involving stalls, as the integrator is filled during the stall, but cannot be controlled.
-
Seite 124: Tool Menu
Differential (D input) The D input reacts to how strongly the last correction was regulated against. The D factor therefore serves to accelerate the regulation. Please use the D input very carefully. Increase the D sensitivity in small increments starting at 0. If the D input is set too high, this quickly causes the model to oscillate. -
Seite 125: Trimming The Model
T r i m m i n g t h e m o d e l It is generally not allowed to trim on the transmitter when using the WINGSTABI, as in heading mode every trim would be received as a desired control surface position change. -
Seite 126: Trimming Using Special Trimming Channels
T r i m m i n g u s i n g s p e c i a l t r i m m i n g c h a n n e l s If it is possible to use the trim controllers of your transmitter for special servo channels, for instance with the Profi TX and the Royal SX (from software 3.52) as well as several transmitters from other manufacturers, you can set up a special trim channel for each axis and trim your model as normal this way. -
Seite 127: Programming The Flap Control
Pr o g r a m m i n g t h e f l a p c o n t r o l The “Activating the flap control” section (above) shows how to activate the flap control symbol and subsequently reach the menu behind it. Corresponding to the configurations for motor and (electric) glider models specified there, we go into more detail on this complex subject here, using the same model examples. - Seite 128 The first step is to program a switch channel with three stages in the transmitter and then enter this in the receiver menu of the WINGSTABI under “Flap control => flap phases”. We will do without the fourth flap phase here for the time being. Now, in the model menu, as explained previously, activate the flap control under “Flap settings =>...
- Seite 129 The elevator compensation must actually be acquired through flight, but in our example the values 25 for half extended and 50 for full are a good start. The elevator goes down around 16mm with full flaps, and only 8mm with half flaps. This therefore results in a linear function.
- Seite 130 The alternative method Another possible way of achieving the same thing is to assign a spoiler channel instead of the flap phases in the receiver menu. This is then controlled at the transmitter end by a slider or alternatively a three-stage switch (defined as a controller). The servo assignment is the same as above, as are the basic settings in the flap control.
-
Seite 131: Glider Model With Four-Flap Wing (Heron)
Glider model with four-flap wing (Heron) For a glider model with four or more flaps, the flaps in combination with the ailerons must carry out significantly more tasks. On the one hand, the flaps support the ailerons in their function. On the other, the ailerons also share flap and/or spoiler functions. Definitions: For one wing with six flaps, we have the ailerons on the outside (also called outer flaps), the middle and the inner flaps. - Seite 132 All three specified changes to the flap positions inevitably effect changes to the lift, which must be compensated for with elevator or hydroplane corrections. All specified functions are structured logically with the WINGSTABI and can be achieved without limitations. Activate flap control in the model menu under flap settings “Via switch channel”.
- Seite 133 Figure20: Basic glider flap settings Setting the flap phase 1 is still the last step, as the other flap phases are not used. In the flap phase, we activate both the aileron mixer for the inner flaps and the proportional inputs for flaps and spoilers.
- Seite 134 Figure 21: Alternative input channel assignment In the basic settings, we set the mixes of flaps for the inner flaps to the full travels, i.e. 120% and for the ailerons to half, i.e. 60%. This leaves ample travel for the aileron effectiveness on the outer flaps.
-
Seite 135: Firmware-Updates
Fi r m w a r e -u p d a t e s The symbol on the right next to the toolbox leads to a menu item which you should always bear in mind. It contains the different firmware versions which are installed on your launcher when you are online. -
Seite 136: Profi Tx Trims And Telemetry For Wingstabi
A PPEN DI X Pr o f i T X t r i m s a n d t e l e m e t r y f o r WI N GST A B I With the Profi TX software from V2.42, it is possible to operate the WINGSTABI so that the channels for ailerons, elevator and rudder can be transferred without the trim and the trims transferred to separate channels instead. - Seite 137 In the controller menu, set the trim for ailerons, elevator and rudder under “Step” to off. Now perform the basic configuration of the WINGSTABI in the MULTIPLEX launcher using the assistant. Then the output of the WINGSTABI sensor values / telemetry is activated.
-
Seite 138: Bluetooth And Android
Playstore free of charge and, as with the PC launcher, is continually updated. Search for “MULTIPLEX Mobile Launcher” in Playstore. However, the MPX Launcher on the PC is always the best solution for basic configuration, particularly because there are no setup assistants in the app. - Seite 139 You can of course establish a connection to your PC or Notebook using Windows with the MULTIPLEX Bluetooth adapter, provided your computer has Bluetooth. This connection must be manually activated after linking the BT module to the PC in the launcher.
-
Seite 140: Mobile Launcher
After the configuration has successfully been transmitted, cut the power to the BT module and delete the linked BT module from the Android system. After switching on and linking again, the BT module is then available with the new settings. However, it is not without risk that the name and PIN are changed: Should you forget the password you assigned, the Bluetooth adapter can no longer be used. -
Seite 141: Menu Structure
Menu structure Figure 28: Mobile Launcher WINGSTABI menu structure Seite 36/39 www.modellmarkt24.ch... -
Seite 142: Status
Status The bottom item in the menu bar “Status” is by no means the least important; this is where you can receive all information relating to the connection between your WINGSTABI and the transmitter. You can observe the functions of the RC and gyro channels displayed graphically and read out all values as numbers. -
Seite 143: Gyro Phases
“MULTIPLEX”. The arrow in the box on the top right allows you to transmit data from the Android device to the WINGSTABI. -
Seite 144: Warranty/Disclaimer
Wa r r a n t y /d i s c l a i m e r MULTIPLEX Modellsport GmbH & Co.KG accepts no liability for loss, damage or costs which arise due incorrect use and operation, or which are in any way connected with such use. - Seite 145 M o d e d ’ e m p l o i a v a n c é p o u r l a v e r s i o n 1 . 2 . 7 d u f i r m w a r e WI N GST A B I So m m a i r e Généralités ........................
-
Seite 146: Généralités
Les systèmes de transmission travaillant avec le protocole de télémétrie de MULTIPLEX peuvent récupérer les données de télémétrie du WINGSTABI sur le port MBS (Multiplex Sensor Bus) et se raccorder à l’entrée MSB de votre récepteur. Pour un WINGSTABI avec récepteur M-LINK intégré, ce raccordement est réalisé en interne, le port MSB peut alors recevoir des capteurs externes additionnels. -
Seite 147: Pos. Montage
Po s . m o n t a g e Illustration 1 : Montage, vue latérale Illustration 2 : Montage, vue du dessus INDICATION IMPORTANTE : Le gyroscope doit être monté de manière parfaitement horizontale par rapport à l’axe de vol et ne pas se déplacer par rapport à... -
Seite 148: Voies De Commande
V o i e s d e c o m m a n d e Toutes les versions WINGSTABI avec ou sans récepteur M-LINK intégré acceptent au niveau de l’entrée en général jusqu’à 16 canaux de commande (suivant le matériel RC parfois jusqu’à... - Seite 149 Illustration 3 : Attribution des branchements WINGSTABI Illustration 4 : WINGSTABI par attribution des branchements Seite 5/39 www.modellmarkt24.ch...
- Seite 150 Sur les récepteurs externes, veiller à un bon paramétrage des signaux. Les récepteurs MPX externes doivent être paramétrés à l’aide du Launcher sur MULTIPLEX SRXL, d’autres systèmes nécessitent d’autres paramétrages pour la transmission des données en série. Tenir ici impérativement compte des consignes du récepteur.
-
Seite 151: Individualisation
I n d i v i d u a l i s a t i o n Quel que soit le chemin emprunté pour accéder aux réglages de base, l’utilisateur atterrit toujours sur l’écran de démarrage. Ici aussi, des réglages de base sont à l’ordre du jour. -
Seite 152: Extension Des Canaux De Commande
Passer maintenant à « Avancé » pour voir les canaux d’entrée RC présentement définis, les sorties de servo attribuées et les trois intégrateurs qui bien évidemment n’indiquent que des débattements si dans la phase sélectionnée le gyroscope est effectivement actif. Ex t e n s i o n d e s c a n a u x d e c o m m a n d e Pour l’étape suivante, cliquer sur le symbole Radio dans la barre de titre pour parvenir à... - Seite 153 Illustration 6 : Attribution des canaux WINGSTABI Le même écran propose les paramétrages de télémétrie pour les systèmes MSB. Sélectionner là au choix « M-LINK-Standard » ou « PROFI-TX » resp. « Affichage télémétrie ». PROFI-TX et Affichage télémétrie donnent de plus longues appellations de valeurs que par exemple M-LINK-Standard de Royal SX.
-
Seite 154: Une Offre De Trois Modèles De Base
Une flèche clignotante rouge en haut à droite indique, comme dans tous les menus acceptant des modifications, selon la situation, qu’il faut transmettre les modifications effectuées au gyroscope ; cliquer pour cela tout simplement sur le champ avec la flèche. La fenêtre «... -
Seite 155: Activation De La Commande Des Aérofreins
Illustration 7 : Présélection des modèles et volets A c t i v a t i o n d e l a c o m m a n d e d e s a é r o f r e i n s À... -
Seite 156: Sorties De Servo Du Wingstabi
Pour régler les volets activés à cette entrée de menu, un nouveau symbole menu de volets apparaît derrière le symbole avion après l’activation. Bien entendu, au niveau de l’émetteur, les commandes et canaux des volets doivent être attribués comme les canaux de commande et servos de volets dans le WINGSTABI. -
Seite 157: Régler Le Capteur Gyroscopique
Définir ensuite sur le côté droit la fonction et le type du servo. Suivant la version du gyroscope, un certain nombre de sorties sont disponibles. Au milieu, à côté du servo HiTEC représenté, régler le neutre du servo et les deux fins de course comme ces points sont requis pour les battements de gouverne prévus. -
Seite 158: Réglages Des Phases Du Gyroscope
Ré g l a g e s d e s p h a s e s d u g y r o s c o p e Le présent paragraphe expose plus en détail le réglage propre du gyroscope, qui bien évidemment est particulier pour chaque phase de gyroscope. -
Seite 159: Regulation (Base)
Re g u l a t i o n (b a s e ) Illustration 9 : Paramétrages de régulation de base Sensibilité selon l’émetteur Un canal de sensibilité spécifique permet d’influencer la sensibilité globale (gain) des axes. Différentes plages peuvent être réglées, p. ex. ±10. Si par exemple la sensibilité globale est réglée à... -
Seite 160: Regulation (Avancé)
Manœuvrabilité / vitesse de tonneau Si par exemple le modèle réagit trop fortement aux commandes, réduire la valeur à moins de 100. Si l’on souhaite voir son modèle réagir avec plus d’ardeur, mettre la valeur au-dessus de 100. On recommande ici des pas de 10. Re g u l a t i o n (a v a n c é... - Seite 161 Proportionnel (composante P) La composante P de la régulation est une composante de la régulation PID qui réagit rapidement aux écarts de régulation. Il s’agit d’un facteur du défaut de régulation reconnu (écart entre valeur de consigne et valeur réelle). La majeure partie de la régulation se fait via la composante P.
- Seite 162 Un intégrateur important assure une régulation très stable car beaucoup de sources d’erreurs peuvent être reconnues et corrigées. En vol acrobatique, un intégrateur trop important peut entraîner des problèmes lors de figures avec des décrochages car l’intégrateur peut recevoir des informations, mais ne peut pas piloter. Dès que l’action des gouvernes est à...
-
Seite 163: Menu Outils
Différentiel (composante D) La composante D réagit en fonction de l’importance de la précédente contre-régulation. Le facteur D sert donc à accélérer la régulation. La composante D est à utiliser avec beaucoup de prudence. La sensibilité D doit être accrue par petits pas à partir de 0. Une composante D trop importante entraîne une oscillation du modèle. -
Seite 164: Compensation Du Modèle
Co m p e n s a t i o n d u m o d è l e En fonctionnement avec le WINGSTABI, la compensation ne doit pas être faite au niveau de l’émetteur car dans les modes Heading, chaque compensation serait comprise comme un souhait de déplacement des gouvernes. -
Seite 165: Compensation Via Des Canaux De Compensation Dédiés
Co m p e n s a t i o n v i a d e s c a n a u x d e c o m p e n s a t i o n d é d i é s Celui qui a la possibilité... -
Seite 166: Programmation De La Commande Des Aérofreins
Pr o g r a m m a t i o n d e l a c o m m a n d e d e s a é r o f r e i n s Le chapitre « Activation de la commande des aérofreins » (ci-après) montre comment activer le symbole «... - Seite 167 La première étape est la programmation d’un canal de commutation à trois positions dans l’émetteur et la transcription de celui-ci dans le menu « Récepteur » du WINGSTABI sous « Commande des aérofreins → Phases de volets ». Dans un premier temps, on renonce à...
- Seite 168 La correction de la gouverne de profondeur est un réglage expérimental, mais dans l’exemple présent, les valeurs de 25 pour à moitié-sorti et de 50 pour entièrement sorti constituent une base. Avec les volets entièrement sortis, la gouverne de profondeur descend d’environ 16 mm, avec les volets à...
- Seite 169 La voie alternative Une autre voie possible pour le même objectif est, à la place des phases de volets dans le menu réception, d’attribuer un canal de spoiler qui sera piloté depuis l’émetteur par un curseur ou un interrupteur à trois positions (défini comme commande). L’attribution des servos se fait comme ci-dessus, les réglages de base de la Commande des aérofreins aussi.
-
Seite 170: Modèle De Planeur Avec Ailes À 4 Volets (Heron)
Modèle de planeur avec ailes à 4 volets (Heron) Sur un modèle de planeur avec 4 volets ou plus, ces volets doivent effectuer beaucoup plus de mouvements en relation avec les ailerons. D’un côté les volets aident les ailerons dans leur fonctionnement, d’un autre côté les ailerons peuvent aussi prendre en charge des fonctions de volets et/ou de spoilers. - Seite 171 Les trois modifications citées des positions des volets provoquent des modifications forcées de la portance qui doivent être corrigées à l’aide des gouvernes de profondeur. Toutes les fonctions citées sont logiquement structurées avec le WINGSTABI et réalisables sans limitations. Activer la Commande des aérofreins dans le menu «...
- Seite 172 Illustration 20 : Réglages de base des volets - planeur La dernière étape est le réglage de la phase d’aérofreins 1, car les autres phases de volets ne sont pas exploitées. Dans cette phase d’aérofreins, tant le mixage des ailerons pour les aérofreins intérieurs que les entrées proportionnelles pour les volets et spoilers sont activés.
- Seite 173 Illustration 21 : Attribution des canaux d’entrée alternative Dans les réglages de base, pour le mixage des volets, nous mettons la course maximale pour les aérofreins intérieurs, soit 120% et la moitié pour les ailerons, soit 60%. Cela laisse suffisamment de course pour l’effet des ailerons sur les volets extérieurs.
-
Seite 174: Mis À Jour Du Firmware
M i s à j o u r d u f i r m w a r e Le symbole à droite à côté de la boîte à outils propose une entrée de menu dont il faut toujours tenir compte : Ici se trouvent les différentes versions de firmware pouvant être intégrées au Launcher quand on est en ligne. -
Seite 175: Annexe
A N N EX E Co m p e n s a t i o n Pr o f i T X e t t é l é m é t r i e p o u r WI N GST A B I Le logiciel du Profi TX à... - Seite 176 « Pas ». Réaliser maintenant la configuration de base du WINGSTABI dans le Launcher MULTIPLEX à l’aide de l’assistant. Ensuite a lieu l’activation de la sortie des valeurs de capteur/de la télémétrie du WINGSTABI. Cliquer ensuite sur le symbole d’antenne →, puis sur «...
-
Seite 177: Adapteur Bluetooth
Mobile Launcher est disponible gratuitement dans le Google Playstore et est constamment actualisée tout comme le Launcher PC. Dans le Playstore, effectuer une recherche « MULTIPLEX Mobile Launcher ». Pour la configuration de base, le Launcher MPX sur PC est toutefois toujours la meilleure solution, en particulier parce que l’appli ne dispose pas d’assistant de réglage. - Seite 178 L’adaptateur Bluetooth de MULTIPLEX peut bien entendu aussi établir une liaison avec un PC ou un Notebook sous Windows, si l’unité en question est équipée de Bluetooth. La liaison doit être activée manuellement dans le Launcher après le couplage du module BT sur le PC.
-
Seite 179: Launcher Mobile
Une fois la configuration correctement transmise, mettre le Module BT hors tension et effacer le Module BT couplé du système Android. Après un nouveau démarrage et un nouveau couplage, le module BT est à nouveau disponible avec les nouveaux paramétrages. Cette modification de nom et de mot de passe n’est toutefois pas sans risque : en cas d’oubli du nouveau mot de passe, l’adaptateur Bluetooth ne peut plus jamais être utilisé. -
Seite 180: Structure De Menu
Structure De Menu Illustration 28 : Structure de menu Mobile Launcher WINGSTABI Seite 36/39 www.modellmarkt24.ch... -
Seite 181: État
État Le point inférieur de la liste de menu « État » n’est pas le moins intéressant, il propose en effet toutes les informations sur la liaison entre le WINGSTABI et l’émetteur. Le fonctionnement des canaux RC et gyroscopiques est représenté graphiquement, mais des valeurs chiffrées peuvent aussi être lues. -
Seite 182: Phases De Gyroscope
être atteint via le symbole de menu en haut à gauche à côté de « MULTIPLEX ». Pour la transmission des données depuis l’appareil Android vers le WINGSTABI, utiliser la flèche encadrée en haut à... -
Seite 183: Garantie/Exclusion De Responsabilité
à l’événement dommageable de la société MULTIPLEX Modellsport GmbH & Co.KG. Ceci ne fait pas foi si la société MULTIPLEX Modellsport GmbH & Co.KG est soumise à une responsabilité illimitée liée à... - Seite 184 !"#"$ 1 140 www.modellmarkt24.ch...
- Seite 185 & ' (% Grundsätzliches ....................... 3 Regelung ......................... 3 Achskopplung ......................3 Kreiselausblendung...................... 4 Stopp-Verhalten ......................6 Geschwindigkeitsabhängige Regelung ................ 7 Regelungsmodus "optimierte Dämpfung" ..............9 Getrennter Empfindlichkeitskanal für Höhe/Seite ............9 Verbesserung der Funkprotokolle .................. 10 MLINK ........................10 Spektrum Unterstützung ....................
- Seite 186 ) ' (% Diese Anleitung beschreibt die Erweiterungen und die neuen Funktionen im Wingstabi Evolution betrieben im Modus Easy Control. Weitere Details und Funktionserklärungen entnehmen Sie bitte der Basis-Anleitung bzw. in der erweiterten Anleitung Das Regelverhalten im Wingstabi Evolution wurde grundlegend hinsichtlich der Performance und Latenz optimiert.
- Seite 187 "# % "# "# & "# ()# # () * !"# 4 140 www.modellmarkt24.ch...
- Seite 188 Im Menü „Geräteinformation“ ist die aktuelle Kreiselausblendung durch Bewegen der Senderknüppel gut sichtbar. Am Beispiel des Querruders kann man am unten gezeigten Beispiel erkennen, dass bei Neutralstellung eine Kreiselempfindlichkeit von 42 gegeben ist. Durch Bewegung des Querruderknüppels verringert sich hier die Kreiselempfindlichkeit mit zunehmendem Querruderausschlag.
- Seite 189 Das Stopp-Verhalten wurde eingeführt, um das Modell mit aktiver Regelung natürlicher fliegen zu können. Bei einem harten Stopp greift die Regelung, besonders bei hohen Empfindlichkeiten nun weicher ein und das Modell rastet weniger stark. Zusätzlich wird auch ein Überschwingen bei harten Steuerbefehlen gedämpft. Das Stopp-Verhalten kann pro Achse über die erweiterten Einstellungen der jeweiligen Kreiselphase zwischen 0-10 gesetzt werden.
- Seite 190 Somit wird auch ein Aufschwingen bei höheren Geschwindigkeiten vermieden ohne das Fluggefühl zu verfälschen. Um diese Funktion zu aktivieren, muss entweder ein Multiplex Airspeed-Sensor oder ein Multiplex GPS-Sensor an den MSB angeschlossen werden. Nun kann die Funktion über den Launcher unter „Allgemeinen Einstellungen“ aktiviert werden, indem die für den Geschwindigkeitssensor dir korrekte Sensor-Adresse...
- Seite 191 Der Reduktionsfaktor also die Reduzierung die Empfindlichkeit kann nun in den erweiterten Einstelllungen jeder Kreiselphase separat eingestellt werden. Wir geben hier einen Standard-Wert von 60 vor. Rechenbeispiel: Wir haben hier eine initiale Empfindlichkeit von 100, eine Maximalgeschwindigkeit von 100 km/h und eine Empfindlichkeitsreduzierung von 50. 0 km/h Empfindlichkeit 100 50 km/h...
- Seite 192 1) +2 Bei Wingstabi Evolution kann zwischen dem „normalen Dämpfungsmodus“ in einem optimierten Dämpfungsmodus umgeschaltet werden. Dieser optimierte Dämpfungsmodus hat einen I (Integral-Anteil), der normalerweise im Heading Hold-Modus verwendet wird. Durch diesem I-Anteil wird bei Bedarf das Flugverhalten noch einmal zusätzlich stabilisiert. Der optimierte Dämpfungsmodus eignet sich für weiträumiges fliegen.
- Seite 193 Bei Multiplex M-LINK ist nun der LQI und eine MSB Prio-Adresse direkt einstellbar. Zusätzlich kann das Binding des Wingstabis direkt per Launcher ausgelöst werden. Neu digitale Signalunterstützung daher ist hier kein PPM mehr nötig. Es werden folgende Empfänger unterstützt: -Spektrum Empfänger mit altem SRXL-Ausgang (z.B. AR9020) -Spektrum Empfänger mit neuem SRXL-Ausgang (z.B.
- Seite 194 Im Auslieferungszustand erkennt das Wingstabi Evolution beim Einlernvorgang alle Herstellerprotokolle/ Empfängertypen automatisch. Bei Problemen mit der Erkennung können bestimmte Protokolle gezielt durch Entfernen des Hakens abgeschaltet werden. Verfügt Ihr Wingstabi über eine SRXL-Buchse und soll per Jumper eingelernt werden, so muss dieser in den B/D- Anschluss gesteckt werden.
- Seite 195 ( +' "# "# "# % "# ( +' .+,/0 "# 12 140 www.modellmarkt24.ch...
- Seite 196 1 & Mit dem Wingstabi Evolution wurde eine Diversity-Funktion integriert, um eine maximale Empfangssicherheit zu gewährleisten. Die Empfänger Diversity-Funktion funktioniert sowohl bei M-LINK, als auch bei Fremdfabrikaten. 1 & Bei der Verwendung von M-LINK kann bei allen Wingstabi RX 7/9 DR und RX 12/16 DR pro ein zusätzlicher Satellitenempfänger eingesetzt werden.
- Seite 197 1 & Für den Diversity Betrieb wird das Wingstabi und der zweite Empfänger mit einem Patchkabel an der MSB-Buchse oder falls verfügbar, an der SRXL-Buchse miteinander verbunden. Dazu muss zuvor im Launcher „Diversity aktivieren“ durch Setzen eines Hakens durchgeführt werden. Wenn der Diversity-Betrieb aktiviert ist, muss das System einmal aus- und wieder eingeschaltet werden.
- Seite 198 WICHTIGER HINWEIS: Es ist zwingend erforderlich, dass der Satelliten- Empfänger über eine ausreichende Anzahl an Kanälen verfügt. Seite 15/140 www.modellmarkt24.ch...
- Seite 199 Für die Entwicklung des Wingstabi Evolution haben wir im Laufe der Jahre eine enorme Datenbasis über die verschiedensten Fulgmodelle schaffen können. So wurde es uns nun möglich ein ideales Basis-Setup vorzugeben mit dem Sie nahezu bei jedem Modell ein hervorragendes Ergebnis erzielen. Welche Parameter wurden für das Wingstabi-Evolution geändert? 1.) Die Offsetwerte der Kreisempfindlichkeiten: QR ->...
- Seite 200 #"# Der SRXL-Anschluss: Die Hardware 1.1 ist für alle Wingstabi Evolution mit integriertem Empfänger erhältlich. Diese zeichnet sich dadurch aus, dass der IN-Anschluss durch einen SRXL-Anschluss ersetzt wurde. Im Laucher unter „Allgemeine Einstellungen“ gibt es folgende Möglichkeiten, wie in der untenstehenden Abbildung zu sehen, den SRXL-Anschluss zu konfigurieren: Standard ist „Deaktiviert“...
- Seite 201 Diversity Analyse: Wurde das Empfängerdiversity aktiviert, so ist es mit der Hardware 1.1 möglich, eine detaillierte Anayse der empfangenen Daten vorzunehmen. Diese findet sich unter Geräteinformationen -> Erweitert. Hier lässt sich die eingestellte Übertragungsrate, (20ms Standard und 14ms Fast- Response) sowie die empfangenen Pakete auslesen. Des Weiteren wird auch jede Umschaltung zum Diversity-Empänger in der Fehlerspeicheransicht dokumentiert.
- Seite 202 Verluste, Schäden oder Kosten, die sich aus fehlerhafter Verwendung und Betrieb ergeben oder in irgendeiner Weise damit zusammenhängen. Soweit gesetzlich zulässig, ist die Verpflichtung der Firma MULTIPLEX Modellsport GmbH & Co.KG zur Leistung von Schadenersatz, gleich aus welchem Rechtsgrund, begrenzt auf den Rechnungswert der an dem schadenstiftenden Ereignis unmittelbar beteiligten Warenmenge der Firma MULTIPLEX Modellsport GmbH &...
- Seite 203 !"#"$ 20 140 www.modellmarkt24.ch...
- Seite 204 Inhalt Grundsätzliches ......................22 Regelung ........................22 Achskopplung ......................22 Kreiselausblendung....................23 Rollenoptimierung ...................... 25 Dynamische Integratorgrösse ..................26 Stopp-Verhalten ......................27 Geschwindigkeitsabhängige Regelung ..............28 Mischer .......................... 30 8-Klappen + Störklappen ................... 30 Canard-Unterstützung und Höhenruderoffset ............32 Steuerung ........................34 Expo ...........................
- Seite 205 ) ' (% "# " & "# "# " "# !"# "# $ "# "# & "# "# 1"# "# "# !"# "# "# !"# "# 3+433 " 22 140 www.modellmarkt24.ch...
- Seite 206 " "# % "# "# & "# ()# # () * !"# 23 140 www.modellmarkt24.ch...
- Seite 207 Im Menü „Geräteinformation“ ist die aktuelle Kreiselausblendung durch Bewegen der Senderknüppel gut sichtbar. Am Beispiel des Querruders kann man am unten gezeigten Beispiel erkennen, dass bei Neutralstellung eine Kreiselempfindlichkeit von 42 gegeben ist. Durch Bewegung des Querruderknüppels verringert sich hier die Kreiselempfindlichkeit mit zunehmendem Querruderausschlag.
- Seite 208 & & & +& & 9/+! ; #1 "# 25 140 www.modellmarkt24.ch...
- Seite 209 .% "# "# %< "# "# "# & 26 140 www.modellmarkt24.ch...
- Seite 210 +; # & ) "# & "# "# "# "# > "# +; # !"# "# 3+43 ? $ %< "# < "# "# ()# 8 @ 5 () "# 27 140 www.modellmarkt24.ch...
- Seite 211 "# "# "# % "# & "# "# & "# "# ! ( "# "# (1 "# B $' + "# "# "# "# < "# "# "# "# < "# "# "# 28 140 www.modellmarkt24.ch...
- Seite 212 & & "# "# "# "# "# "# "# "# "# "# # "# "# 29 140 www.modellmarkt24.ch...
- Seite 213 7 (% 9., ++ "# "# I < "# ( "# "# "# "# 30 140 www.modellmarkt24.ch...
- Seite 214 31 140 www.modellmarkt24.ch...
- Seite 215 0 "# "# % "# .% "# % "# "# "# ) "# % "# "# "# ( "# "# 32 140 www.modellmarkt24.ch...
- Seite 216 "# "# + (( "# "# "# . "# "# 33 140 www.modellmarkt24.ch...
- Seite 217 "# % "# /0$ 7! / () * !"# "# 34 140 www.modellmarkt24.ch...
- Seite 218 & <.8 & "# % "# () * & ( 1"# 1 "# () * 35 140 www.modellmarkt24.ch...
- Seite 219 & & "# # #( # "# "# 36 140 www.modellmarkt24.ch...
- Seite 220 "# "# 37 140 www.modellmarkt24.ch...
- Seite 221 & + Für das Setzen der Fail Safe Positionen gibt es im Servomenü grundsätzlich drei Möglichkeiten, die im Auswahlmenü aktiviert werden können. Position halten: bei einem Empfangsverlust wird hier die letzte Servoposition gehalten, die kurz vor dem Empfangsverlust noch angesteuert wurde. Position setzen: hier kann man eine definierte Servoposition setzen, die im Falle eines Empfangsverlustes angesteuert werden soll Servo deaktivieren: hier wird das Servo deaktiviert bzw.
- Seite 222 Falls in der Auswahl „Position setzen“ aktiviert wird, so kann durch einen Klick auf „Aktuelle Servoposition übernehmen“ die Servoposition übernommen werden, ohne die Impulslänge des Servos manuell eingeben zu müssen. So kann beispielsweise bei Verbrennermodellen das Gasservo auf die gewünschte Fail Safe Position mit dem Senderknüppel gebracht werden.
- Seite 223 Bei Multiplex M-LINK ist nun der LQI und eine MSB Prio-Adresse direkt einstellbar. Zusätzlich kann das Binding des Wingstabis direkt per Launcher ausgelöst werden. Neu digitale Signalunterstützung daher ist hier kein PPM mehr nötig. Es werden folgende Empfänger unterstützt: -Spektrum Empfänger mit altem SRXL-Ausgang (z.B. AR9020) -Spektrum Empfänger mit neuem SRXL-Ausgang (z.B.
- Seite 224 1 & Mit dem Wingstabi Evolution wurde eine Diversity-Funktion integriert, um eine maximale Empfangssicherheit zu gewährleisten. Die Empfänger Diversity-Funktion funktioniert sowohl bei M-LINK, als auch bei Fremdfabrikaten. 1 & Bei der Verwendung von M-LINK kann bei allen Wingstabi RX 7/9 DR und RX 12/16 DR pro ein zusätzlicher Satellitenempfänger eingesetzt werden.
- Seite 225 1 & Für den Diversity Betrieb wird das Wingstabi und der zweite Empfänger mit einem Patchkabel an der MSB-Buchse oder falls verfügbar, an der SRXL-Buchse miteinander verbunden. Dazu muss zuvor im Launcher „Diversity aktivieren“ durch Setzen eines Hakens durchgeführt werden. Wenn der Diversity-Betrieb aktiviert ist, muss das System einmal aus- und wieder eingeschaltet werden.
- Seite 226 43 140 www.modellmarkt24.ch...
- Seite 227 Für die Entwicklung des Wingstabi Evolution haben wir im Laufe der Jahre eine enorme Datenbasis über die verschiedensten Fulgmodelle schaffen können. So wurde es uns nun möglich ein ideales Basis-Setup vorzugeben mit dem Sie nahezu bei jedem Modell ein hervorragendes Ergebnis erzielen. Welche Parameter wurden für das Wingstabi-Evolution geändert? 1.) Die Offsetwerte der Kreisempfindlichkeiten: QR ->...
- Seite 228 #"# Der SRXL-Anschluss: Die Hardware 1.1 ist für alle Wingstabi Evolution mit integriertem Empfänger erhältlich. Diese zeichnet sich dadurch aus, dass der IN-Anschluss durch einen SRXL-Anschluss ersetzt wurde. Im Laucher unter „Allgemeine Einstellungen“ gibt es folgende Möglichkeiten, wie in der untenstehenden Abbildung zu sehen, den SRXL-Anschluss zu konfigurieren: Standard ist „Deaktiviert“...
- Seite 229 Diversity Analyse: Wurde das Empfängerdiversity aktiviert, so ist es mit der Hardware 1.1 möglich, eine detaillierte Anayse der empfangenen Daten vorzunehmen. Diese findet sich unter Geräteinformationen -> Erweitert. Hier lässt sich die eingestellte Übertragungsrate, (20ms Standard und 14ms Fast- Response) sowie die empfangenen Pakete auslesen. Des Weiteren wird auch jede Umschaltung zum Diversity-Empänger in der Fehlerspeicheransicht dokumentiert.
- Seite 230 Verluste, Schäden oder Kosten, die sich aus fehlerhafter Verwendung und Betrieb ergeben oder in irgendeiner Weise damit zusammenhängen. Soweit gesetzlich zulässig, ist die Verpflichtung der Firma MULTIPLEX Modellsport GmbH & Co.KG zur Leistung von Schadenersatz, gleich aus welchem Rechtsgrund, begrenzt auf den Rechnungswert der an dem schadenstiftenden Ereignis unmittelbar beteiligten Warenmenge der Firma MULTIPLEX Modellsport GmbH &...
- Seite 231 !"#"$ 48 140 www.modellmarkt24.ch...
- Seite 232 Contents Basic information ......................50 Regulatory characteristics ..................... 50 Axis coupling ......................50 Gyro suppression ....................... 51 Stop characteristics ....................53 Speed-dependent gyro response ................54 “Optimised damping” regulatory mode ............... 55 Separate gain channel for elevator / rudder ............... 56 Improving radio protocols ....................
- Seite 233 These instructions describe the expanded features and new functions of the Wingstabi Evolution when operated in Easy Control mode. For additional information and explanations of the functions please refer to the basic instructions and / or the expanded instructions. The regulatory behaviour of the Wingstabi Evolution has been systematically optimised in respect of performance and latency.
- Seite 234 We have now implemented the gyro suppression function in the Wingstabi Evolution EasyControl. Gyro suppression means that gyro response is reduced in proportion to the travel of the corresponding transmitter stick. The net result is that the pilot has the same sensation of control as when no gyro is present, even though the gyro’s regulatory effect is active.
- Seite 235 The “Device Information” menu clearly displays the current level of gyro suppression when the transmitter sticks are moved. Using the ailerons as an example, the screen-shot below shows that a gyro gain of 42 is currently set at the stick neutral position. When the aileron stick is moved away from centre, gyro gain is reduced as aileron travel increases.
- Seite 236 + (% The Stop Characteristics feature has been introduced in order to allow the model to be flown more naturally when gyro regulation is active. When a sharp stop command is given, gyro regulation now intervenes more gently, especially when gyro gain is set to a M # "...
- Seite 237 This also helps to avoid the model oscillating at high speeds, but without altering the pilot’s sensation of control. To activate this function, you must connect either a Multiplex airspeed sensor or a Multiplex GPS sensor to the MSB.
- Seite 238 Typical variation in gyro response: In this example we have set an initial gyro gain of 100, a maximum speed of 100 km/hr and a gain reduction of 50. 0 km/hr Gain 100 50 km/hr Gain 75 100 km/hr Gain 50 150 km/hr Gain 50 IMPORTANT NOTE: if the Wingstabi Evolution fails to pick up a valid speed...
- Seite 239 & Until now it was only possible to use one channel with the Wingstabi Easy Control for adjusting gyro gain. As an option it is now possible to assign separate gain channels for each axis (rudder and elevator). This is selected in the Wingstabi’s Expanded Settings. This allows all the gain values to be adjusted from the transmitter independently of each other.
- Seite 240 & Multiplex M-LINK systems now allow the LQI and an MSB Priority address to be adjusted directly. The binding process for the Wingstabi can now also be initiated directly from Launcher. New digital signal support hence PPM is no longer necessary.
- Seite 241 In its default state as delivered, the Wingstabi Evolution automatically detects all the manufacturer protocols / receiver types. If problems arise with the detection process, specific protocols can be switched off by unticking the corresponding box. If your Wingstabi features an SRXL socket, and if you wish to carry out the learning process using a jumper, then it must be plugged into the B/D socket.
- Seite 242 The Failsafe positions can be set using Launcher, and with a mobile phone and the matching Bluetooth module via Mobile LauncherM # " same way. Alternatively it is still possible to set the Failsafe positions from the transmitter, for example, using an M-LINK "...
- Seite 243 1 & The Wingstabi Evolution now features an integral Diversity function, designed to ensure maximum possible security of reception. The receiver diversity function works both with M-LINK and other makes of equipment. 1 & % 7. If an M-LINK system is used, an additional satellite receiver can be employed in conjunction with any Wingstabi RX 7/9 DR and RX 12/16 DR pro unit.
- Seite 244 At both external receivers the manufacturer’s corresponding Sum signals must be activated, for example: EXBUS for Jeti. The Sum signal of both external receivers must carry as many channels as are used by the Wingstabi. Important: the MSB telemetry function is not available with non-Multiplex systems. Seite 61/140 www.modellmarkt24.ch...
- Seite 245 IMPORTANT NOTE: it is absolutely essential that the satellite receiver features a sufficient number of channels. Seite 62/140 www.modellmarkt24.ch...
- Seite 246 Over several years’ development of the Wingstabi Evolution, we have been able to create an enormous database covering a vast range of model aircraft. This has now made it possible for us to define an ideal basic set-up, with which you will achieve outstanding results with virtually any model.
- Seite 247 #"# SRXL socket: Hardware 1.1 is available for all Wingstabi Evolution units with integral receiver. The important change here is that the IN socket has been replaced by an SRXL socket. “General Settings” in Launcher includes the following options for configuring the SRXL socket, as shown in the following illustration: Default is “Disabled”...
- Seite 248 Diversity analysis: If receiver diversity is active, Hardware 1.1 allows you to carry out a detailed analysis of the received data. This can be found under Device Information -> Expanded. Here you can read out the set transmission rate (20ms Standard and 14ms Fast- Response) as well as the received signal packets.
- Seite 249 Unless the law expressly states otherwise, the liability on the part of MULTIPLEX Modellsport GmbH & Co.KG to pay damages, regardless of the legal argument employed, is limited to the invoice value of those products supplied by MULTIPLEX Modellsport GmbH &...
- Seite 250 !"#"$ 67 140 www.modellmarkt24.ch...
- Seite 251 Basic information ......................69 Regulatory characteristics ..................... 69 Axis coupling ......................69 Gyro suppression ....................... 70 Roll optimisation ......................72 Dynamic integrator level ..................... 73 Stop characteristics ....................74 Speed-dependent gyro response ................75 Mixers ..........................77 8 flaps + airbrakes ...................... 77 Canard support, elevator offset ..................
- Seite 252 These instructions describe the expanded features and new functions of the Wingstabi Evolution Classic. For additional information and explanations of the functions please refer to the basic instructions and / or the expanded instructions. The regulatory behaviour of the Wingstabi Evolution has been systematically optimised in respect of performance and latency.
- Seite 253 We have now implemented the gyro suppression function - as used in the EasyControl - in the Wingstabi Evolution Classic. Gyro suppression means that gyro response is reduced in proportion to the travel of the corresponding transmitter stick. The net result is that the pilot has the same sensation of control as when no gyro is present, even though the gyro’s regulatory effect is active.
- Seite 254 The “Device Information” menu clearly displays the current level of gyro suppression when the transmitter sticks are moved. Using the ailerons as an example, the screen-shot below shows that a gyro gain of 42 is currently set at the stick neutral position. When the aileron stick is moved away from centre, gyro gain is reduced as aileron travel increases.
- Seite 255 Roll optimisation intervenes in the gyro’s regulatory response in order to enable rolls to be flown more accurately. In particular, rudder support is increased in multi-point rolls and in torque-rolling manoeuvres. Roll optimisation is effective in gyro phases in which a Heading value (I-value) is set. A further advantage is an improvement in model stability, especially in windy conditions.
- Seite 256 & Another new feature in the Wingstabi Evolution is the facility to activate a level of dynamic integrator. The Expanded Settings for each gyro phase contain this feature, which allows the integrator to be adjusted dynamically to match the gain you have set. The result is improved stopping characteristics when sharp control commands are given.
- Seite 257 + (% The Stop Characteristics feature has been introduced in order to allow the model to be flown more naturally when gyro regulation is active. When a sharp stop command is given, gyro regulation now intervenes more gently, especially when gyro gain is set to a M # "...
- Seite 258 This also helps to avoid the model oscillating at high speeds, but without altering the pilot’s sensation of control. To activate this function, you must connect either a Multiplex airspeed sensor or a Multiplex GPS sensor to the MSB.
- Seite 259 Typical variation in gyro response: In this example we have set an initial gyro gain of 100, a maximum speed of 100 km/hr and a gain reduction of 50. 0 km/hr Gain 100 50 km/hr Gain 75 100 km/hr Gain 50 150 km/hr Gain 50 IMPORTANT NOTE: if the Wingstabi Evolution fails to pick up a valid speed...
- Seite 260 9 2 + : It is now a straightforward matter to program the Wingstabi Evolution for an 8-flap wing: the outer flap and inner flap functions have now been supplemented by centre flap. For more on wing flap control please refer to the basic Wingstabi instructions. Step 1: Simply assign servos to the left centre flap and right centre flap functions within Servo Settings, and transfer the configuration to the Wingstabi Evolution.
- Seite 261 Step 2: Now we shift to flap control, as shown in the illustration, and set the desired values for the centre flaps. Seite 78/140 www.modellmarkt24.ch...
- Seite 262 & Another innovation is support for canards. Until now canards always had to be declared as elevators, if the gyro was required to operate on these surfaces. The drawback to this was that it was not possible to increase the canard deflection, for example, for take-off or landing.
- Seite 263 Step 2: Canard differential can be set under Model Type. Step 3: Under “Expanded Model Type” you can now set the appropriate offset speeds and mixer values for the canards. Seite 80/140 www.modellmarkt24.ch...
- Seite 264 Step 4: If you wish to be able to alter the canard deflection separately for each gyro phase, enter Expanded Settings for the corresponding gyro phase, then set the Canard Elevator Offset parameter, and if necessary - as already mentioned - the elevator offset. The WINGSTABI Evolution now allows you to set an exponential (Expo) function for each axis directly, in each gyro phase.
- Seite 265 & <.+ & One extremely important improvement in the Wingstabi Evolution concerns servo output: it is now possible to program 5-point curves for each servo within Servo Settings. If you have a model with multiple servos per control surface, this feature is particularly useful for fine-tuning the travel of each servo.
- Seite 266 & A further new feature of the Wingstabi Evolution is the option to activate or disable individual servos in particular gyro phases. This function is absolutely ideal for arrangements such as a retractable tricycle undercarriage with a nosewheel which is steerable, but only when extended. Another example is a vector control system, which again is only required to be active in particular gyro phases.
- Seite 267 It is now possible to adjust the duration of Hold and Failsafe individually in the Wingstabi Evolution. These parameters are located under Receiver in the Basic Settings, as shown in the illustration. Seite 84/140 www.modellmarkt24.ch...
- Seite 268 & + " can be activated in the Select menu. Hold position: if reception is lost, this option maintains the last servo position, i.e. the position corresponding to a control command received just before loss of signal. Set position: here you can set a defined servo position to which the servo will move if the receiver signal is lost.
- Seite 269 If you select “Set position” in the Select menu, a click on “Accept current servo position” accepts the servo position, without having to enter the servo’s pulse width manually. For example, the throttle servo in an I.C. powered model can be moved to the desired Failsafe position using the throttle stick.
- Seite 270 & Multiplex M-LINK systems now allow the LQI and an MSB Priority address to be adjusted directly. The binding process for the Wingstabi can now also be initiated directly from Launcher. New digital signal support hence PPM is no longer necessary.
- Seite 271 1 & The Wingstabi Evolution now features an integral Diversity function, designed to ensure maximum possible security of reception. The receiver diversity function works both with M-LINK and other makes of equipment. 1 & % 7. If an M-LINK system is used, an additional satellite receiver can be employed in conjunction with any Wingstabi RX 7/9 DR and RX 12/16 DR pro unit.
- Seite 272 The Sum signal of both external receivers must carry as many channels as are used by the Wingstabi. Important: the MSB telemetry function is not available with non-Multiplex systems. IMPORTANT NOTE: it is absolutely essential that the satellite receiver features a sufficient number of channels.
- Seite 273 Seite 90/140 www.modellmarkt24.ch...
- Seite 274 Over several years’ development of the Wingstabi Evolution, we have been able to create an enormous database covering a vast range of model aircraft. This has now made it possible for us to define an ideal basic set-up, with which you will achieve outstanding results with virtually any model.
- Seite 275 #"# SRXL socket: Hardware 1.1 is available for all Wingstabi Evolution units with integral receiver. The important change here is that the IN socket has been replaced by an SRXL socket. “General Settings” in Launcher includes the following options for configuring the SRXL socket, as shown in the following illustration: Default is “Disabled”...
- Seite 276 Diversity analysis: If receiver diversity is active, Hardware 1.1 allows you to carry out a detailed analysis of the received data. This can be found under Device Information -> Expanded. Here you can read out the set transmission rate (20ms Standard and 14ms Fast- Response) as well as the received signal packets.
- Seite 277 Unless the law expressly states otherwise, the liability on the part of MULTIPLEX Modellsport GmbH & Co.KG to pay damages, regardless of the legal argument employed, is limited to the invoice value of those products supplied by MULTIPLEX Modellsport GmbH &...
- Seite 278 " # $ %& '()(* 95 140 www.modellmarkt24.ch...
- Seite 279 Sommaire Informations de base ..................... 97 Contrôle ......................... 97 Accouplement des axes ..................... 97 Suppression du gyroscope ..................98 Arrêter le comportement ..................100 Contrôle en fonction de la vitesse ................101 Mode de contrôle "amortissement optimisé ............. 103 Canal de sensibilité séparé pour la profondeur et la direction ........103 Amélioration des protocoles d'émission ...............
- Seite 280 N" " O B " " " " " " N N ( " 6 " " " " N N " " " " " " " " " " " ( " N " O (( " "P N "...
- Seite 281 " " O (( " "# " " " " " N " " "N " " "# 6 98 140 www.modellmarkt24.ch...
- Seite 282 T / ( " " " "# N N" N " + " "# " " " " O 99 140 www.modellmarkt24.ch...
- Seite 283 " " " " " " " " " " , " "N " " " " " " " " " 100 140 www.modellmarkt24.ch...
- Seite 284 & " " " N " " B " ,O (( " " O (( " " " " " " " N " " " N " N " " " " 6 OV " " " " , ( " "...
- Seite 285 " " J " " N 433 N GF N F3 N F3 " N" 102 140 www.modellmarkt24.ch...
- Seite 286 ! " N " " " " " N" " D D+ 6 OV " " "N " "# 6 " 103 140 www.modellmarkt24.ch...
- Seite 287 Avec le Multiplex M-LINK, il est désormais possible de régler directement le LQI et une adresse prioritaire MSB. En outre, la procédure Binding du Wingstabi peut être déclenchée directement via le Launcher. Le support du nouveau signal numérique n'est donc plus nécessaire ici, plus besoin de Les récepteurs suivants sont pris en charge :...
- Seite 288 N" " " E ++ " " N" " " " " " " " N" ( 6 " N " "# &X, " +" "#N " 105 140 www.modellmarkt24.ch...
- Seite 289 "# N N # "# " .+,/0 " 106 140 www.modellmarkt24.ch...
- Seite 290 1 & Avec le Wingstabi Evolution, une fonction Diversity a été intégrée pour assurer une fiabilité de réception maximale. La fonction de Diversity du récepteur fonctionne avec M-LINK ainsi qu'avec d'autres marques. 1 & & ( 7. En utilisant M-LINK, un récepteur satellite supplémentaire peut être utilisé avec tous les Wingstabi RX 7/9 DR et RX 12/16 DR pro.
- Seite 291 1 & & ( Pour le fonctionnement en mode Diversity, le Wingstabi et le second récepteur sont reliés l'un à l'autre par un câble de raccordement à la prise MSB ou, si disponible, à la prise SRXL. Pour ce faire, il faut d'abord effectuer l'opération "Activer le mode Diversity" dans le Launcher en la cochant.
- Seite 292 N" N" 109 140 www.modellmarkt24.ch...
- Seite 293 Pour le développement du Wingstabi Evolution, nous avons pu créer une énorme base de données des modèles les plus divers au fil des ans. Nous avons maintenant pu définir une configuration de base idéale avec laquelle vous pouvez obtenir un excellent résultat avec presque tous les modèles. Quels paramètres ont été...
- Seite 294 #"# "" &X, J "" &X, J, " N" " " N " " "N " " &X, "# " " &X, " " + " N &X,T " " " N" N" &X, " N" "# 111 140 www.modellmarkt24.ch...
- Seite 295 N" " N " O (( " +Y N N N 9A3 "# 6 N" " 112 140 www.modellmarkt24.ch...
- Seite 296 GmbH & Co.KG de verser des dommages et intérêts, quelle que soit la raison juridique, est limitée à la valeur facturée de la quantité de marchandises de la société MULTIPLEX Modellsport GmbH & Co.KG directement impliquée dans le fait générateur du dommage.
- Seite 297 " # $ %& '()(* 114 140 www.modellmarkt24.ch...
- Seite 298 Sommaire Informations de base ....................116 Contrôle ........................116 Accouplement des axes ................... 116 Suppression du gyroscope ..................117 Optimisation des tonneaux ..................119 Taille de l'intégrateur dynamique ................120 Stopper le comportement ..................121 Contrôle en fonction de la vitesse ................122 Mixages ........................
- Seite 299 N" " " ' O B " " " " " " N N ( " 6 " " " " N N " " " " " " " " " " " ( " N " O (( "...
- Seite 300 ! " " " " O (( " "# " " " N " " " "N " " "# 6 T / ( " " " "# " N " + " 117 140 www.modellmarkt24.ch...
- Seite 301 "# " " " " O 118 140 www.modellmarkt24.ch...
- Seite 302 " BN" " " " "" (( " " " " " 9" " " " "N "# 6 " 119 140 www.modellmarkt24.ch...
- Seite 303 " " N N O " "N "# 6 " /" O N" N N N " 120 140 www.modellmarkt24.ch...
- Seite 304 Le comportement d'arrêt a été introduit afin de pouvoir faire voler le modèle plus naturellement avec une commande active. Dans le cas d'un arrêt brutal, la commande intervient désormais plus doucement, surtout à des sensibilités élevées, et le modèle clique moins fort. En outre, le dépassement des limites avec des commandes de contrôle difficiles est également atténué.
- Seite 305 également plus faible. Cela permet également d'éviter une montée à des vitesses plus élevées sans dénaturer la sensation de vol. Pour activer cette fonction, un capteur de vitesse d'air Airspeed Multiplex ou un capteur GPS Multiplex doit être connecté au MSB.
- Seite 306 Le facteur de réduction, c'est-à-dire la réduction de la sensibilité, peut désormais être défini séparément dans les paramètres avancés de chaque phase du gyroscope. Nous avons fixé une valeur par défaut de 60 ici. Exemple de calcul : Ici, nous avons une sensibilité initiale de 100, une vitesse maximale de 100 km/h et une réduction de sensibilité...
- Seite 307 9 & Dans le Wingstabi Evolution, une aile à 8 volets peut maintenant être programmée sans problème. Les fonctions des volets extérieurs et intérieurs ont été complétées par les volets centraux. Plus d'informations sur la commande des volets dans le manuel de base Wingstabi.
- Seite 308 Étape 2 : Nous passons maintenant à la commande des volets comme indiqué et nous pouvons régler les valeurs pour les volets du milieu ici. Seite 125/140 www.modellmarkt24.ch...
- Seite 309 & Une autre nouvelle caractéristique est le support des canards. Jusqu'à présent, les canards devaient toujours être déclarés comme des gouvernes de profondeur pour pouvoir être contrôlés. L'inconvénient est qu'il n'est pas possible d'actionner les canards pendant le décollage ou l'atterrissage, par exemple. L'utilisateur a maintenant toutes les possibilités de régler la commande des canards individuellement.
- Seite 310 Étape 2 : Une différenciation des canards peut maintenant être définie sous Modèle de vol. Étape 3 : Sous "Modèle de vol étendu", les vitesses d'offset et les proportions de mixage pour les canards peuvent maintenant être réglées en conséquence. Étape 4 : Afin de pouvoir ajuster les canards en fonction des phases du gyro, réglez le paramètre Profondeur Offset canard dans les paramètres avancés de la phase de gyro respective...
- Seite 311 Il est maintenant possible dans le WINGSTABI Evolution de définir une fonction exponentielle pour chaque axe, directement dans chaque phase du gyroscope. Cela simplifie la programmation du système, car auparavant l'Expo devait toujours être programmée via l'émetteur. Seite 128/140 www.modellmarkt24.ch...
- Seite 312 & - F < + Une amélioration extrêmement importante du Wingstabi Evolution concerne la sortie servo. Il est désormais possible de programmer des courbes à 5 points pour chaque servo dans les paramètres des servos. En particulier pour les modèles avec plusieurs servos par gouverne, la course peut être ajustée avec précision pour chaque servo.
- Seite 313 Dans le Wingstabi Evolution, le temps de maintien et de sécurité peut maintenant être réglé individuellement. Les paramètres se trouvent, comme le montre l'illustration, sous Récepteur dans les Paramètres de base. Seite 130/140 www.modellmarkt24.ch...
- Seite 314 & Il existe en principe trois options pour régler les positions Failsafe dans le menu servo, qui peuvent être activées dans le menu de sélection. Maintien de la position : en cas de perte de réception, la dernière position du servo qui était encore contrôlée peu avant la perte de réception est maintenue ici.
- Seite 315 Si "Définir la position" est activé dans la sélection, la position du servo peut être reprise en cliquant sur "Reprendre la position actuelle du servo" sans avoir à saisir manuellement la longueur d'impulsion du servo. Par exemple, sur les modèles à combustion, le servo de la manette des gaz peut être amené...
- Seite 316 Avec le Multiplex M-LINK, le LQI et une adresse prio MSB peuvent maintenant être réglés directement. En outre, la fixation du Wingstabi peut être déclenchée directement via le Launcher. Le support du nouveau signal numérique n'est donc plus nécessaire ici.
- Seite 317 1 & Avec le Wingstabi Evolution, une fonction Diversity a été intégrée pour assurer une fiabilité de réception maximale. La fonction Diversity du récepteur fonctionne avec M-LINK ainsi qu'avec d'autres marques. 1 & & ( 7. En utilisant M-LINK, un récepteur satellite supplémentaire peut être utilisé avec tous les Wingstabi RX 7/9 DR et RX 12/16 DR pro.
- Seite 318 1 & & ( 2 - ( Pour le fonctionnement en mode Diversity, le Wingstabi et le second récepteur sont reliés l'un à l'autre par un câble de raccordement à la prise MSB ou, si disponible, à la prise SRXL. Pour ce faire, il faut d'abord effectuer l'opération "Activer Diversity"...
- Seite 319 Seite 136/140 www.modellmarkt24.ch...
- Seite 320 Pour le développement du Wingstabi Evolution, nous avons pu créer une énorme base de données des modèles les plus divers au fil des ans. Nous avons maintenant pu définir une configuration de base idéale avec laquelle vous pouvez obtenir un excellent résultat avec presque tous les modèles. Quels paramètres ont été...
- Seite 321 #"# La connexion SRXL : La version 1.1 est disponible pour tous les Wingstabi Evolution avec récepteur intégré. Elle se caractérise par le fait que le connecteur IN a été remplacé par un connecteur SRXL. Dans le Launcher, sous "Paramètres généraux", vous trouverez les options suivantes pour configurer la connexion SRXL, comme le montre l'illustration ci-dessous : - La valeur par défaut est "Désactivé...
- Seite 322 Analyse du mode Diversity : Si la Diversity du récepteur a été activée, il est possible avec la version 1.1 d'effectuer une analyse détaillée des données reçues. Vous pouvez le trouver sous Informations -> étendue. Vous pouvez y lire la vitesse de transmission réglée (20 ms en réponse standard et 14 ms en réponse rapide) et les paquets reçus.
- Seite 323 GmbH & Co.KG de verser des dommages et intérêts, quelle que soit la raison juridique, est limitée à la valeur facturée de la quantité de marchandises de la société MULTIPLEX Modellsport GmbH & Co.KG directement impliquée dans le fait générateur du dommage.