Herunterladen Inhalt Inhalt Diese Seite drucken

Phottix Odin Benutzerhandbuch

Ttl flash trigger for sony
Vorschau ausblenden Andere Handbücher für Odin:

Werbung

Verfügbare Sprachen
  • DE

Verfügbare Sprachen

  • DEUTSCH, seite 17
En
INSTRUCTION MANUAL
De
BENUTZERHANDBUCH
Fr
MANUEL D'UTILISATION
Es
MANUAL DE INSTRUCCIONES
Pl
INSTRUKCJA OBSŁUGI
Ru
Cn
Simp
说明书
Cn
Trad
說明書
Phottix Odin TTL Flash Trigger
2
17
31
46
61
76
93
106
for Sony

Werbung

Inhaltsverzeichnis
loading

Inhaltszusammenfassung für Phottix Odin

  • Seite 1 Phottix Odin TTL Flash Trigger for Sony INSTRUCTION MANUAL BENUTZERHANDBUCH MANUEL D’UTILISATION MANUAL DE INSTRUCCIONES INSTRUKCJA OBSŁUGI Simp 说明书 Trad 說明書...
  • Seite 2 Parts Transmitter Control Unit(TCU) 1. LCD Screen 10. High Speed Sync Button 2. Options Button 11. Modeling Light Button 3. Mode Button 12. Test Button 4. Zoom Button 13. Battery Compartment 5. Power Button 14. Hot Shoe Lock Release 6. LED Button 7.
  • Seite 3: En Instruction Manual

    INSTRUCTION MANUAL Receiver 1. Power Switch 2. Group Selection Switch 3. 3.5mm Output Port 4. USB Port 5. 5V DC Power Port 6. Channel Selection Switch 7. LED 8. Hot Shoe Mount 9. Locking Ring 10. Cold Shoe / ¼” Tripod Lug 11.
  • Seite 4 Please Note Tips: Turn o all devices – ashes/strobes, After turning on the Phottix Odin TCU and cameras, and the Phottix Odin TCU and receivers, slave mode does not need to be set receivers – when connecting and disconnect- on ashes on Phottix Odin receivers, but ing devices.
  • Seite 5 Strato II Multi receivers. issues with ash sync when using Strato and 4. The Odin TCU set to Channel 1, 2, 3 or 4 in Strato II Multi receivers. TTL/Mixed mode (Group A, B and C) and in...
  • Seite 6: Inserting Batteries

    LED functions tions. Modeling light functions cannot be set on the Odin TCU. A ash’ s custom function The LED on the TCU and receiver units will turn settings must be con gured to enable this, green when the camera is focusing and red consult your ash manual for details about when a photo is being taken.
  • Seite 7 3. The TCU will allow EV, Power Level and Zoom setting adjustments to be set for each 1. To turn on the Phottix Odin TCU: Press and group of receivers set to same channel (if the hold the Power Button until an image appears group is not disabled on the TCU).
  • Seite 8 TTL/Mixed Functions Screen 5. Turn on the camera. The Selection Button allows you to cycle Functions through groups A, B, and C, and Channel selec- The TCU has two main function screens: tions. Active selections will ash on the LCD. TTL/Mixed Function Screen and Ratio.
  • Seite 9 INSTRUCTION MANUAL EV level of each group can be adjusted up or Press the Selection button to access Ratio down (see above). adjustments. Press the + / - button until the desired A:B ratio is achieved. Flashes are set in Manual mode and power levels adjusted up or down (see above).
  • Seite 10 Adjusting ash zoom 3. With groups A, B or C active: Press the Mode The Phottix Odin allows the zoom level of Button to change from TTL to Manual mode. In ashes to be set wirelessly. Zoom can be set as Manual Zoom, press the - / + buttons to adjust TTL or Manual.
  • Seite 11 The test button will re all ashes connected to Phottix Odin receivers that are on the same 1. Second Curtain Sync cannot be set on the channel as the TCU.
  • Seite 12 3. Ensure the Phottix Odin TCU and receivers AF Assist Illuminator Functions cannot be set are set to the same channel. on the Odin TCU. These functions need to be set on the camera – consult your camera Connecting a ash to the Odin...
  • Seite 13 INSTRUCTION MANUAL Connecting the Odin receiver to studio lights or ashes by cable 1. Turn o the ash/strobe and the Phottix Odin receiver. 2. Connect a cable to the receiver’ s 3.5 mm Output Port. 3. Connect the opposite end of the cable to a ash or studio strobe (A 6.3 mm adapter is...
  • Seite 14: Technical Speci Cations

    Technical Speci cations Frequency: 2.4 GHz Distance: 100m+ Channels: 4 channels Groups: 3 groups – A, B, C Batteries: 2 x AA batteries (TCU and Receiver), 5V DC on receiver (external power port) Max sync speed: 1/8000 sec* Output: Hot shoe, 3.5 mm port (receiver) Input Port: USB port (transmitter and receiver) Attachment: 1/4 tripod lug, cold shoe (Receiver) Input voltage: 2.4-3.2V...
  • Seite 15 - Do not use harsh chemical(s) or solvents to clean the body. Use a soft cloth or lens paper. - Interference: The Phottix Odin transmits and receives radio signals at 2.4 GHz. Its perfor- mance can be a ected by electrical current, magnetic elds, radio signals, wireless routers, cellular phones, and other electronic devices.
  • Seite 16 This device complies with part 15 of the FCC Rules. Operation is subject to the following two conditions: (1) This device may not cause harmful interference, and (2) this device must accept any interference received, including interference that may cause undesired operation.
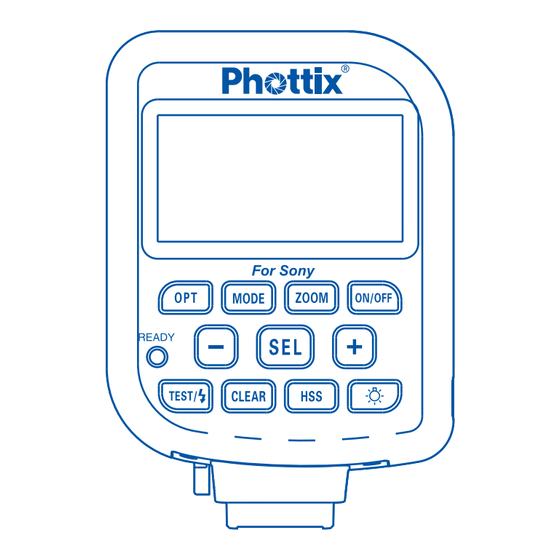
  • Seite 17 Bezeichnungen Sender / Transmitter Control Unit (TCU) 1. LCD Monitor 11. Einstelllicht-Taste 2. Options-Taste 12. Prüftaste 3. Modus-Taste 13. Batteriefach-Deckel 4. Zoom-Taste 14. Blitzschuh Release-Taste 5. ON/OFF 15. Blitzschuh (hot) 6. Kontroll-LED 16. USB Port 7. Auswahl +/- 8. Auswahl-Taste 9.
  • Seite 18: Empfänger / Receiver

    BENUTZERHANDBUCH Empfänger / Receiver 1. ON/OFF Schalter 2. Gruppenauswahl-Schalter 3. 3,5mm Synchron-Buchse 4. USB Port 5. 5V DC Netzteilanschluss 6. Kanalauswahl-Schalter 7. Kontroll-LED 8. Standard Blitzschuh (Hot) 9. Feststellring 10. Standard Blitzschuh (Cold) ¼“ Stativanschluss 11. Batteriefach-Deckel...
  • Seite 19: Kompatibilität Mit Der Phottix Strato Serie

    Hinweis ert für das Sony ADI TTL System. Es ist nicht sicher gestellt, dass das Odin TTL Set auch mit Nach dem Anschluss und dem Einschalten Blitzgeräten von Drittanbietern funktioniert. müssen Sie ein Foto zur Synchronisation machen, damit der Phottix Odin TCU sich auf H i n w e i s : Während des Anschließens...
  • Seite 20 übertragen. Die Blitzgeräte, die auf Phottix Odin werden nicht übertragen. den Strato Empfängern montiert sind, müssen 4. Ist der Odin Transmitter auf Kanal 1, 2, 3, 4 im manuellen Modus betrieben werden. eingestellt und be ndet sich im TTL/Mixed 1.
  • Seite 21: Lcd Hintergrundbeleuchtung

    Phottix Odin Empfänger leuchten und automatisch wieder aus gehen, nicht auslösen. wenn Sie keine Taste am TCU drücken. 8. Phottix Odin für Sony kann keine Phottix Odin für Canon oder Nikon Empfänger Einstelllicht-Taste auslösen. Durch Drücken der Einstelllicht-Taste am 9.
  • Seite 22: Batterien Einsetzen

    4. Verschließen Sie das Batteriefach mit dem Batteriefach-Deckel bis er einrastet. Gruppen und Kanäle 5. Wenn das Akku-Symbol im Display des 1. Das Phottix Odin TTL System verfügt über 3 Transmitters leer ist, wechseln Sie bitte die Gruppen und 4 Übertragungskanäle. Batterien/Akkus.
  • Seite 23: Tcu Mit Der Kamera Verbinden

    1. Schalten Sie die Kamera und den TCU aus vorgenommen werden. (siehe oben). Ratio ist vergleichbar mit dem Sony ADI TTL 2. Schieben Sie den Odin TCU in den Standard System. Das Verhältnis der Gruppen A und B Blitzschuh Ihrer Kamera. kann von 8:1 bis 1:8 eingestellt werden.
  • Seite 24 BENUTZERHANDBUCH TTL/Mixed Modus TTL: Im TTL-Modus wird die automatische TTL-Belichtungsmessung übertragen. Mit SEL wechseln Sie zwischen den Gruppen A, Belichtungskorrektur (EV) einzelnen B, C und den Kanälen. Mit der Auswahltaste Gruppen kann nach oben oder unten korrigiert SEL wählen Sie eine Gruppe oder einen Kanal werden (siehe oben).
  • Seite 25 Ratio Modus Zoom Mit SEL wählen Sie im Ratio-Modus die A:B, EV Der Phottix Odin ermöglicht Ihnen das Einstel- Einstellung und die Kanal-Auswahl. len des Zoomfaktors. Im TTL-Modus wird der Zoom automatisch eingestellt. Im Manuellen- Drücken Sie SEL bis das Verhältnis blinkt (1:1), Modus kann der Zoom manuell eingestellt um das Verhältnis zwischen A:B einzustellen zu...
  • Seite 26 Belichtungszeiten für kreative E ekte genutzt High-Speed-Synchron (HSS) werden. Durch drücken der HSS-Taste schalten Sie die 1. Zweiter Vorhang Sync kann nicht am Odin High-Speed-Synchron-Funktion ein oder aus. Transmitter eingestellt werden. HSS ermöglicht kürzere Verschlusszeiten, als 2. Zweiter Vorhang Sync muss an der Kamera...
  • Seite 27: Af-Hilfslicht Funktion

    Der Phottix Odin Empfänger Testtaste Gruppen einstellen am Empfänger Mit der Testtaste können Sie alle angeschloss- 1. Der Phottix Odin hat kann auf 3 Gruppen enen Blitzgeräte auslösen, die sich im selben eingestellt werden. Kanal wie der TCU (Sender) be nden.
  • Seite 28: Kanäle Einstellen Am Empfänger

    Kanal. 1. Schalten Sie den Empfänger und das 3. Stellen Sie sicher, dass der Odin TCU auf dem Blitzgerät aus. selben Kanal wie der Empfänger eingestellt ist. 2. Stecken Sie den 3,5 mm Stecker in den Emp- fänger.
  • Seite 29: Technische Daten

    Technische Daten Frequenz: 2.4 GHz Reichweite: bis zu 100m Kanäle: 4 Gruppen: 3 – A, B, C Batterien: je 2 x AA/Mignon Batterien (TCU und Empfänger), 5V DC am Empfänger (extern Power) Max. Synchronzeit: 1/8000 sec* Output: Hot Shoe, 3,5mm (Empfänger) Input: USB Port (Transmitter und Empfänger) Anschlüsse: ¼“...
  • Seite 30 BENUTZERHANDBUCH Warnhinweise - Das Phottix Odin TTL System ist ein präzises elektronisches Gerät. Es ist kein Spielzeug und gehört somit nicht in Kinderhände. - Setzen Sie es nicht in staubiger oder feuchter Umgebungen ein. - Nicht fallen lassen oder zerlegen.
  • Seite 31 Éléments Émetteur - Unité de Contrôle (TCU) 1. Écran LCD 11. Commande Lumière à 2. Commande Options e et modelant 3. Commande Mode 12. Commande Test de l'éclair 4. Commande Zoom 13. Compartiment de la 5. Interrupteur batterie d'alimentation 14. Mécanisme de verrouillage 6.
  • Seite 32: Fr Manuel D'utilisation

    MANUEL D’UTILISATION Récepteur 1. Commutateur marche-arrêt On/O 2. Commutateur de sélection de groupe 3. Port sortie 3.5 mm 4. Port USB 5. 5V DC Port d'alimentation 6. Sélecteur de canal 7. LED 8. Gri e ash 9. Mécanisme de verrouillage 10.
  • Seite 33 / de studio, les appareils photo, Auto, le niveau doit être mis en Auto (ou la et le système Phottix Odin (TCU et récepteurs) – valeur maximale 1/1) et AF sur ON (Reportez- avant toute connexion ou déconnexion.
  • Seite 34 Phottix Strato II Multi réglés sur un du Phottix Strato réglés au même canal 1, 2, 3 canal 1, 2, 3 ou 4 et sur un groupe A, B ou C. ou 4. D'autres fonctions du TCU n'auront 5.
  • Seite 35 Multi ne déclencheront pas les récepteurs du aucune autre commande ne sera pas enfon- Phottix Odin. cée, le rétroéclairage s'éteindra. 8. Les TCU du Phottix Odin pour Sony ne déclencheront pas les récepteurs du Phottix Commande de lumière à e et Odin pour Canon ou Nikon.
  • Seite 36: Insertion Des Batteries

    1. Appuyez sur la commande marche/arrêt 1. Ouvrez le volet du logement des piles en le pour mettre le TCU sous tension. Une image poussant vers l'arrière du Phottix Odin TCU ou apparaît sur l'écran LCD. du récepteur. Le volet du logement des piles sera ouvert.
  • Seite 37 Groupes et Canaux 3. Le mécanisme de verrouillage va cliquer 1. Le système Phottix Odin est équipé avec les lorsque le TCU est bien mis en place, le TCU 3 groupes: A, B et C, et les 4 canaux de trans- sera bloqué.
  • Seite 38 MANUEL D’UTILISATION 2. Les commandes - / + permettent de changer groupes A et B de 8:1 à 1:8. Egalement les le canal de transmission (1, 2, 3 ou 4) lorsque le niveaux EV peuvent être réglés de -3 à +3 canal est sélectionné.
  • Seite 39: Sortie Rapide

    souhaité. la sélection du O (signalisée par les trois soulignes _ _ _) éteint le groupe choisi et ne Appuyez sur la commande Sélection pour vous déclenche aucun ash dans ce groupe. déplacer du réglage actuel au réglage EV. Appuyez sur la commande + / - pour choisir le Sortie rapide niveau EV souhaité.
  • Seite 40: Fonction Zoom

    2. Appuyez sur la commande Sélection pour Réglage de zoom de ash basculer entre les groupes A, B et C, et le canal Le Phottix Odin permet d'ajuster le niveau de de transmission. zoom à distance. Le zoom peut être ajusté...
  • Seite 41 La vitesses d'obturation jusqu'à 1/8000 sec. est appareil photo. possible avec Phottix Odin ainsi qu'avec les Commande d'e acement appareils et les ashes compatibles. 1. La commande d'e acement permet d'e acer...
  • Seite 42 Phottix savoir plus. Odin et réglés sur le même canal que le TCU. 1. Appuyez sur la commande pour faire un test Récepteur Phottix Odin de l’éclair.
  • Seite 43 1. Faites éteindre le ash / ash de studio et le récepteur Phottix Odin. 3. Assurez-vous que le Phottix Odin TCU et les récepteurs sont ajustés sur le même canal. 2. Branchez un câble au Port PC Sync 3,5 mm du récepteur.
  • Seite 44: Spéci Cations Techniques

    MANUEL D’UTILISATION Spéci cations techniques Fréquence: 2,4 GHz Distance: 100m + Canaux: 4 canaux Groupes: 3 groupes – A, B, C Batteries: 2 x piles AA (TCU et récepteur), 5V DC sur le récepteur (le port d'alimentation externe) Temps de synchronisation max: 1 / 8000 sec * Port sortie: Gri e ash, Port de 3,5 mm (récepteur) Port prise: Port USB (émetteur et récepteur) Montures: letage trépied 1/4, gri e sans contact (récepteur)
  • Seite 45 - C'est un système électronique. Ne manipulez immeubles, murs, arbres, camions peuvent pas le produit avec les mains mouillées, ne perturber le signal radio. Si le récepteur Phottix l’ immergez pas et ne l’ exposez pas à l’ eau, Odin ne déclenche pas les ashes veuillez à...
  • Seite 46 Partes Transmisor - Unidad de Control (TCU) 1. LCD 13. Tapa del compartimento 2. Botón de opción de las pilas 3. Botón Mode 14. Mecanismo de bloqueo de 4. Botón Zoom la base de montaje 5. Botón On/O 15. Zapata de ash 6.
  • Seite 47 MANUAL DE INSTRUCCIONES Receptor 1. Botón de encendido/apagado On/O 2. Botón de selección de grupos 3. Puerto de salida de 3.5 mm 4. Puerto USB 5. Puerto de alimentación 5V DC 6. Botón de selección de canales 7. Indicador LED 8.
  • Seite 48 Modo Slave en los serán consideradas. ashes montados sobre los receptores Phottix Odin, los ashes tienen que estar ajustados en Indicación: Apague todo el equipamiento – modo TTL, el zoom del ash tiene que estar en los ashes / ashes de estudio, las cámaras y el...
  • Seite 49 1. El TCU ajustado a un canal 1, 2, 3 o 4 y a un Phottix Strato II Multi ajustados a un canal 1, 2, 3 o 4, de los grupos A, B o C.
  • Seite 50 10 seg. Si se pulsa receptores del Phottix Odin. ningún otro botón, la luz apagará. 8. El TCU del Phottix Odin para Sony no puede Botón de iluminador de modelado disparar los receptores del Phottix Odin para Presione el botón de lámpara de modelaje del...
  • Seite 51: Instalación De Las Pilas

    Para apagar: presione el botón Of/O hasta en la dirección de la parte posterior del Phottix que la pantalla LCD se apague. Odin TCU o del receptor. La tapa de la batería 2. Para encender el receptor Phottix Odin: se abre.
  • Seite 52 La pantalla Ratio permite ajustar los grupos A y B de 8:1 hasta 1:8. También permite ajustar la 2. Acople el Phottix Odin TCU a la zapata de cantidad de compensación EV de -3 a +3 accesorios de la cámara.
  • Seite 53 MANUAL DE INSTRUCCIONES Funciones de la pantalla TTL/Mixed ajustes EV de cada grupo pueden estar aumen- t a d o s o r e d u c i d o s ( v é a s e m á s a r r i b a ) . El botón de selección permite pasar entre los grupos A, B, C y los canales.
  • Seite 54 Ratio. Presione el botón + / - para Ajuste de Zoom del ash seleccionar la proporción de aspecto Ratio A: B. El Phottix Odin permite con gurar los ajustes Presione el botón de selección para pasar del zoom desde una distancia. El zoom puede desde la con guración actual hasta la con gu-...
  • Seite 55 - / + para ajustar el zoom del ash. velocidad del ash se activa. La velocidad de Se puede hacer ningún ajuste en el modo TTL. 1/8000seg. es posible con el Phottix Odin y las cámaras y ases compatibles. Notar: Después haber seleccionado la...
  • Seite 56 1. La sincronización a la cortinilla trasera no se ashes conectados a los receptores Phottix puede ajustar directamente en el TCU. Odin, ajustados en el mismo canal como el 2. La sincronización a la cortinilla trasera debe TCU. ajustarse en la cámara. Para obtener más infor- 1.
  • Seite 57 Acoplamiento de un ash en la Ajuste de los grupos en el receptor zapata de Phottix Odin 1. Apague el ash y el receptor Phottix Odin. 1. El receptor Phottix Odin tiene los 3 ajustes de grupos posibles. 2. Acople el ash en la zapata del receptor.
  • Seite 58 Conexión del receptor Phottix Odin a través de un cable 1. Apague el ash/ ash de estudio y el recep- tor Phottix Odin. 2. Conecte un cable al puerto de sincronización PC 3,5 mm del receptor. 3. Conecte el otro extremo del cable a un ash/ ash de estudio (un adaptador de 6,3 mm para los ashes de estudio está...
  • Seite 59: Especi Caciones Técnicas

    MANUAL DE INSTRUCCIONES Especi caciones técnicas Frecuencia: 2.4 GHz Distancia: 100m + Canales: 4 canales Grupos: 3 grupos - A, B, C Baterías: 2 pilas AA (TCU y receptor), 5 V DC en el receptor (el puerto de alimentación externa) Tiempo sincrónico máximo: 1 / 8000 seg * Conexión: Zapata de ash (activa), Puerto de 3,5 mm (receptor) Puertos: Puerto USB (transmisor y receptor)
  • Seite 60: Precauciones De Uso

    - No usar detergentes químicos para limpiar la unidad. Usar una bayeta. - Interferencias : Para transmitir y recibir la señal radio el sistema Phottix Odin usa la frecuencia 2.4 GHz. Manténgase lejos de campos magnéticos potentes: las cargas estáti- cas fuertes y los campos electromagnéticos...
  • Seite 61 Elementy Kontroler ( nadajnik) 1. Wyświetlacz LCD 11. Przycisk światła 2. Przycisk Opcji (Options) modelującego 3. Przycisk Tryb (Mode) 12. Przycisk Test 4. Przycisk pokrycia błysku 13. Komora baterii (Zoom) 14. Pierścień mocujący 5. Przycisk zasilania 15. Gorąca stopka 6. Kontrolki LED 16.
  • Seite 62: Pl Instrukcja Obsługi

    INSTRUKCJA OBSŁUGI Odbiornik 1. Przełącznik zasilania 2. Przełącznik wyboru grup 3. Port synchronizacyjny 3.5mm 4. Port USB 5. Wejście zasilania 5V DC 6. Przełącznik wyboru kanałów 7. Kontrolki LED 8. Mocowanie na gorącą stopkę 9. Pierścień mocujący 10. Zimna stopka / mocowanie gwint ¼’’ 11.
  • Seite 63 Uwaga lampami błyskowymi rmy Sony oraz trybem ADI TTL. Problemy techniczne dotyczące Po włączeniu kontrolera i i odbiorników Odin współpracy z innymi lampami błyskowymi niż lampy błyskowe powinny być ustawione w Sony nie będą rozwiązywane przez wsparcie tryb TTL, Zoom lampy musi być ustawiony na techniczne Phottix.
  • Seite 64 Phottix Odin jest kompatybilny z odbiornikami ustawionych w grupie D. Inne funkcje nada- Phottix Strato i Strato II Multi. Nadajnik Phottix jnika Phottix Odin ( TTL, moc lamp) nie będą Odin wyzwoli odbiorniki Phottix Strato bez miały wpływu na odbiorniki Strato.
  • Seite 65 ś n i ę t y 8. Nadajnik Odin w wersji dla Sony nie wyzwoli podświetlenia zostanie wyłączone.
  • Seite 66: Umieszczanie Baterii

    ON. Aby wyłączyć do zatrzaśnięcia. odbiornik przesuń przełącznik na pozycję OFF. 5. Kiedy ikona zasilania bateryjnego na nada- jniku pokaże niski poziom baterii wymień Grupy i kanały baterie. 1. System Phottix Odin posiada 3 grupy: A,B i C...
  • Seite 67 1. Wyłącz aparat. Tryb rozdziału siły błysku umożliwia ustawienie grup A i B na poziomie od 8:1 do 1:8. Poziom 2. Wsuń nadajnik Phottix Odin na gorącą kompensacji może być również ustawiony od stopkę aparatu. -3 do +3. (Podobnie jak w niektórych lampach...
  • Seite 68 INSTRUKCJA OBSŁUGI Sony w systemie ADI TTL). (Channel). To zmieni kanał na którym kontroler nadaje sygnał. Zmiana funkcji na wyświetlaczu TTL/M/Wyłączony (O ) Po wciśnięciu przycisku Option na kontrolerze będzie możliwa zmiana funkcji pomiędzy Gdy grupy A,B lub C są wybrane, wciśnięcie trybem TTL/Mieszanym (Mixed) i rozdziela- przycisku Mode zmieni tryb na: TTT, M - tryb niem siły (Ratio).
  • Seite 69 (Ratio). Proszę wcisnąć przycisk +/- aż wybrany Ustawianie pokrycia błysku (zoom) zostanie właściwy poziom rozdziału A:B. Phottix Odin pozwala na bezprzewodowe Ponowne wciśnięcie przycisku wyboru prze- ustawianie pokrycia błysku lamp. Pokrycie niesie aktualny wybór do części ustawień kom- może być...
  • Seite 70 INSTRUKCJA OBSŁUGI Tryb TTL: Ustawienie pokrycia błysku może być przycisku wyboru trybu (Mode) zmieni tryb z ustawiane dynamicznie wraz ze zmianą ognis- TTL na ręczny (M). W trybie manualnego usta- kowej obiektywu. lania pokrycia wciśnięcie przycisku +/- zmieni kąt pokrycia błysku. W trybie TTL nie ma Tryb ręczny: pokrycie błysku może zostać...
  • Seite 71 Używanie trybu szybkiej 1. Tryb RCS nie może być aktywowany na nadajniku. synchronizacji (High Speed Sync - HSS) 2. Tryb RCS musi zostać ustawiony w aparacie (więcej informacji w instrukcji obsługi lampy Wciśnięcie przycisku HSS będzie włączało tryb błyskowej). H S S . T r y b s z y b k i e j s y n c h r o n i z a c j i , z maksymalną...
  • Seite 72 1,2,3 lub 4, aby wybrań właściwy kanał. mogą zostać ustawione na nadajniku. Te funk- cje muszą być ustawione a aparacie. Więcej 3. Upewnij się, że kontroler Phottix Odin i informacji w podręczniku lampy błyskowej. odbiorniki są ustawione na tym samym kanale.
  • Seite 73 3.5mm. Odin 3. Podłącz przeciwną stronę przewodu do lampy studyjnej lub reporterskiej (przejściówka 1. Wyłącz lampę błyskową i odbiornik Phottix na 6.3mm w zestawie). Odin. 4. Włącz lampę studyjną lub reporterską i 2. Wsuń lampę błyskową na gorącą stopkę...
  • Seite 74: Dane Techniczne

    INSTRUKCJA OBSŁUGI Dane techniczne Częstotliwość: 2.4 GHz Zasięg: 100m+ Ilość kanałów: 4 kanały Ilość grup: 3 grupy – A, B, C Zasilanie: 2 x AA Baterie (Kontroler i odbiornik), 5V DC w odbiorniku (zewnętrzny port zasilania) Max czas synchronizacji: 1/8000 sek* Wyjście: Gorąca stopka, port 3.5 mm (odbiornik) Wejście: Port USB (kontroler and odbiornik) Mocowanie: gwint ¼'', zimna stopka (odbiornik)
  • Seite 75 - Nie używać żrących środków chemicznych do czyszczenia urządzenia. Używaj miękkiej szmatki lub ściereczki do czyszczenia obiekty- wów. - Zakłócenia: Phottix Odin nadaje i odbiera na częstotliwości 2.4 GHZ. Jego sprawność może zostać zakłócona przez działanie urządzeń elektrycznych, pola magnetyczne, sygnały radiowe, routery bezprzewodowe, telefony komórkowe i inne urządzenia elektroniczne.
  • Seite 76 (TCU) (Opt) (Mode) (Zoom) (ON/OFF) + / - / (SEL) (Clear) (HSS)
  • Seite 77 ¼”...
  • Seite 78 T T L Phottix Odin T T L Phottix Odin Phottix Odin. – TTL, S o n y ADI TTL. 1/1), – Phottix Odin TCU –...
  • Seite 79 Odin TCU 1, 2, 3 Phottix Phottix Strato 1, 2, (journal.phottix.com). Odin TCU Strato. Phottix Odin TCU Phottix Strato Test Phottix Odin TCU Strato Phottix Strato Phottix Strato II Multi. O d i n T C U Strato II Multi...
  • Seite 80 Odin TCU, Odin TCU Odin TCU T T L / M i x e d Strato II Multi. Strato II Multi Odin TCU (TTL, Strato Strato II Multi Odin. Strato II Multi. Phottix Odin TCU Sony Odin TCU Odin Canon...
  • Seite 81 Sony HVL-F58AM HVL-F43AM Odin TCU. Odin Odin Odin . assist-focus.
  • Seite 82 Phottix Odin: ''On” , ''O ” Phottix Odin : 1, 2, 3, 4. -TCU - T C U :...
  • Seite 83 T C U : TTL/Mixed Ratio. TCU). TTL/Mixed A, B C TTL, Manual ( OFF ( « » Ratio ( 8 : 1 Odin TCU « » +3 ( Sony ADI Odin TCU. T C U TTL/Mixed Ratio.
  • Seite 84 TTL/Mixed TTL, (M) TTL: TTL. - / + - / + (1, 2, 3 Chan- nel. _ _ _) TTL / M / O (Mode)
  • Seite 85 - / + (1, 2, 3 Channel. Ratio ( S E L ) P h o t t i x O d i n...
  • Seite 86 Mode, TCU. TTL. (CH) TTL/Mixed Ratio. Zoom, – TTL/Mixed Ratio.
  • Seite 87 (HSS) ( H S S ) 1/8000 Odin TCU. P h o t t i x O d i n – (Clear) TCU.
  • Seite 88 TTL/M/O , Ratio, Zoom EV TCU. Clear (1, 2, 3 TCU. ( est) Odin TCU. – Phottix Odin TCU. Phottix Odin Phottix Odin...
  • Seite 89 « ». Phottix Odin. Phottix Odin Odin 1, 2, 3 Phottix Phottix Odin. O d i n T C U PC Sync Port. Odin Phottix Odin.
  • Seite 90 Phottix Odin. (Manual) –...
  • Seite 91 : 2.4 : 100 + – , , : 1/8000 , 3.5 : USB ¼, : 2.4 – 3.2 : 6 ( ) ≤300 ( : 94( ) 66 ( ) 35 ( ) – , 90( ) 45( ) 40( ) –...
  • Seite 92 Phottix Odin P h o t t i x O d i n 2 . 4...
  • Seite 93 零部件 发射器控制单元(TCU) 1. 液晶屏 11. 造型灯按钮 2. 选项按钮 12. 测试按钮 3. 模式按钮 13. 电池仓 4. 变焦按钮 14. 热靴锁定释放按钮 5. 电源按钮 15. 热靴 6. LED指示灯 16. USB端口 7. + / -按钮 8. 选择按钮 9. 清除按钮 10. 高速同步按钮...
  • Seite 94: Cn Simp 说明书

    说明书 Simp 接收器 1. 电源开关 2. 组选择开关 3. 3.5mm输出端口 4. USB端口 5. 5V DC 电源端口 6. 频道选择开关 7. LED指示灯 8. 热靴装置 9. 锁环 10. 冷靴/ ¼”三脚架螺口 11. 电池仓...
  • Seite 95 热靴端口接触良好,以便所有装置工作最 与 Phottix Strato 系闪光灯触发器之间的兼容性 佳。 Phottix Odin 发射器与 Phottix Strato 和 尽管很多 TTL 闪光灯测试都没问题,但是 Phottix Strato II Multi 接 收 器 相 兼 容。 我们不能保证其他厂家的 TTL 闪光灯和 Odin 发射器可以触发 Strato 系接收器, Phottix Odin 能配合使用。它是专为采用 但是不能传输 TTL 或功率控制数据。把闪 ADI TTL 系统的索尼原装闪光灯设计和优...
  • Seite 96 器上的闪光灯。 处 于 D 组 的 Strato II Multi 接 收 器。 7. Strato 以及 Strato II Multi 发射器不能 Odin 发 射 器 上 的 其 他 功 能(TTL 功 能、 触发 Odin 接收器。 功率控制功能)对 Strato II Multi 接收器 8. Phottix Odin 索 尼 发 射 器 不 能 触 发...
  • Seite 97 相 机 聚 焦 时,发 射 器 和 接 收 器 上 的 LED “TEST M” ,设置详情请参阅闪光灯使用 指示灯会变绿;相机拍照时,LED 指示灯 手册。 会变红。 使用 LCD 背光灯 装入电池 按发射控制器上的任一按钮都将会使 LCD 1. 当推开 Phottix Odin 发射器和接收器 背光灯持续亮 10 秒钟左右。如果不再按 上的电池盖时, 按住电池盖方向轻轻外推, 发射控制器上的按钮,背光灯就会熄灭。 电池盖就会滑开。 2. 取下电池盖。 使用造型灯按钮 3. 按图所示插入 AA 电池。...
  • Seite 98 3. 发射器自动锁定到位。 关打到“ON”的位置。 4. 开启 Odin 发射器。 关闭:将电源开关打到“OFF”的位置。 5. 开启相机。 组和频道 功能 1. Phottix Odin 有三个组:A, B, C 以及 四个频道:1,2,3,4。 发射器有两种工作模式:TTL/M 混合模 式和比率模式。 2. 接收器可同时被设置组和频道。 TTL/M 混合模式允许单独设置 A,B 和 C 3. 发射器允许对设置在同一频道的接收器 组 的 TTL,手 动,关 闭 功 能,同 时 伴 随...
  • Seite 99 TTL/ 手动 / 关闭 可以从 8:1 到 1:8 ,EV 值可以从 -3 到 +3 进 行 调 整(和 索 尼 一 些 闪 光 灯 上 的 当选择 A,B 或 C 组时,按模式按钮将选择 ADI TTL 系统类似) 。 该组闪光灯的工作模式,有 TTL,手动和 关闭三种模式。 改变工作模式 TTL: 采用 TTL 测光触发闪光灯,每组的 按发射器上的选项按钮能在...
  • Seite 100 说明书 Simp 比率模式 调整闪光灯变焦 选择按钮允许在 A:B 比率调节,EV 调节 Phottix Odin 拥有闪光灯变焦水平的无线 和频道选择三种状态之间循环切换。 设置。变焦可以设置为 TTL 或手动模式。 按选择按钮进行 A:B 比率调节,按 +/- 按 TTL 变焦:闪光灯变焦将会随相机变焦环 钮,直到期望的 A:B 闪光比出现。 的调整而同步变化。 再按选择按钮会使主动选项移至 EV 调整 手动变焦:可以在发射器上将闪光灯变焦 区域:按 +/- 按钮直到期望的 EV 值出现。 设置成一个定值,此时,闪光灯变焦将不 会随相机镜头焦距的调整而改变。 选择按钮还可使主动选项移至频道选择。 选择频道时,按 +/- 按钮可以改变发射器...
  • Seite 101 后帘同步是在曝光快结束时触发闪光灯, 式下闪光灯变焦不能做任何调整。 而不是在曝光开始时触发闪光灯,它可以 结合长时间曝光达到创意性效果。 注 意:频 道 选 择 后 按 选 择 按 钮 可 以 在 TTL/M 混合模式和比率模式之间切换。 1. 后 帘 同 步 功 能 无 法 直 接 在 Phottix Odin 发射器上设置。 快速退出 2. 请在相机上设置后帘同步功能,设置详 改变设置后,按发射器上的电源按钮将退 情,请参阅相机使用手册。...
  • Seite 102 Simp 频道 (1,2,3,4),发射器将保留用户之前所 照明功能,设置详情,请参阅相机使用手 选择的频道。 册。 Phottix Odin 接收器 使用测试按钮 测 试 按 钮 可 以 触 发 所 有 安 装 到 Phottix 接收器上设置组 Odin 接收器的闪光灯,当然这些接收器 1.Phottix Odin 接收器上有三个组可供设 要与发射器在同一频道上。 置。 1. 按下测试按钮。 2. 将组选择开关打到 A,B 或 C 上,为每...
  • Seite 103 闪 光 灯 是 通 过 连 接 线 触 发 , 就 不 能 采 用 1.关闭闪光灯和Phottix Odin接收器。 TTL功能。 2.滑动闪光灯到接收器的热靴装置。 3. 闪光灯部件自动锁定到位。 4.开启闪光灯和Phottix Odin接收器。 通过连接线连接 Odin 接收器和闪光灯 / 影楼灯 1.关闭闪光灯/影楼灯和Phottix Odin接收 器。 2 . 将 连 接 线 的 一 端 插 入 接 收 器 上 的 3 . 5 mm输出端口。 3.将线的另一端连接到闪光灯/影楼灯(内...
  • Seite 104 说明书 Simp 技术参数 频率:2.4 GHz 距离:100m+ 频道:4个频道 组: 3个组— A, B, C 电池:2 x AA电池(发射器和接收器),接收器上的5V DC(外接电源端口) 最快同步速度:1/8000s 输出:热靴,3.5 mm端口(接收器) 输入端口:USB端口(发射器和接收器) 固定方式:1/4英寸三脚架螺口,冷靴(接收器) 输入电压:2.4V-3.2V 闪光端口电压处理:6V(发射器)≤300V(接收器) 主体尺寸:94(L) x 66(W) x 35(H) mm(发射器);90(L) x 45(W) x 40(H) mm (接收器) 天线:内置PCB天线 重量:94g(发射器),63g(接收器)— 不含电池 工作温度:-15—65 ℃ 储存温度:-30—85 ℃...
  • Seite 105 警告 - 本产品属精密电子仪器,请注意防潮防 尘。 - 不要摔落或碰撞。 - 请勿拆卸。 - 不要用化学或有机溶剂清洁机身 , 请用 柔软干净的布或镜头纸对其外表面进行擦 拭。 - 干扰:Phottix Odin 以 2.4GHz 传送和 接收无线电信号。 它的执行将会受到电流, 磁场和无线电信号、无线路由器、移动电 话以及其他电子设备的影响,还会受诸如 大型建筑或墙壁、大树、栅栏或汽车等周 边 事 物 的 影 响。如 果 您 的 Phottix Odin 接收器不能触发,请稍微移动它的位置。...
  • Seite 106 零部件 發射器控制單元(TCU) 1. 液晶屏 11. 造型燈按鈕 2. 選項按鈕 12. 測試按鈕 3. 模式按鈕 13. 電池倉 4. 變焦按鈕 14. 熱靴鎖定釋放按鈕 5. 電源按鈕 15. 熱靴 6. LED指示燈 16. USB埠 7. + / -按鈕 8. 選擇按鈕 9. 清除按鈕 10. 高速同步按鈕...
  • Seite 107: Cn Trad 說明書

    說明書 Trad 接收器 1. 電源開關 2. 組選擇開關 3. 3.5mm輸出埠 4. USB埠 5. 5V DC 電源埠 6. 頻道選擇開關 7. LED指示燈 8. 熱靴裝置 9. 鎖環 10. 冷靴/ ¼”三腳架螺口 11. 電池倉...
  • Seite 108 請確保 TCU 與相機、閃光燈與接收器的 與 Phottix Strato 系閃光燈觸發器之間的相容性 熱靴埠接觸良好, 以便所有裝置工作最佳。 Phottix Odin 發射器與 Phottix Strato 和 儘管很多 TTL 閃光燈測試都沒問題,但是 Phottix Strato II Multi 接 收 器 相 容。 我們不能保證其他廠家的 TTL 閃光燈和 Odin 發射器可以觸發 Strato 系接收器, Phottix Odin 能配合使用。它是專為採用 但是不能傳輸 TTL 或功率控制資料。把閃...
  • Seite 109 器上的閃光燈。 處 於 D 組 的 Strato II Multi 接 收 器。 7. Strato 以及 Strato II Multi 發射器不能 Odin 發 射 器 上 的 其 他 功 能(TTL 功 能、 觸發 Odin 接收器。 功率控制功能)對 Strato II Multi 接收器 8. Phottix Odin 索 尼 發 射 器 不 能 觸 發...
  • Seite 110 置 來 啟 動 該 功 能 — 將 測 試 閃 光 設 置 成 指示燈會變綠;相機拍照時,LED 指示燈 “TEST M” ,設置詳情請參閱閃光燈使用 會變紅。 手冊。 使用 LCD 背光燈 裝入電池 按發射控制器上的任一按鈕都將會使 LCD 1. 當推開 Phottix Odin 發射器和接收器 背光燈持續亮 10 秒鐘左右。如果不再按 上的電池蓋時, 按住電池蓋方向輕輕外推, 發射控制器上的按鈕,背光燈就會熄滅。 電池蓋就會滑開。 2. 取下電池蓋。 使用造型燈按鈕 按一下發射控制器上的造型燈按鈕,就能...
  • Seite 111 3. 發射器自動鎖定到位。 關打到“ON”的位置。 4. 開啟 Odin 發射器。 關閉:將電源開關打到“OFF”的位置。 5. 開啟相機。 組和頻道 功能 1. Phottix Odin 有三個組:A, B, C 以及 發射器有兩種工作模式:TTL/M 混合模 四個頻道:1,2,3,4。 式和比率模式。 2. 接收器可同時被設置組和頻道。 TTL/M 混合模式允許單獨設置 A,B 和 C 3. 發射器允許對設置在同一頻道的接收器 組 的 TTL,手 動,關 閉 功 能,同 時 伴 隨...
  • Seite 112 TTL/ 手動 / 關閉 +3 進 行 調 整(和 索 尼 一 些 閃 光 燈 上 的 ADI TTL 系統類似) 。 當選擇 A,B 或 C 組時,按模式按鈕將選擇 該組閃光燈的工作模式,有 TTL,手動和 改變工作模式 關閉三種模式。 按發射器上的選項按鈕能在 TTL/M 混合 TTL: 採用 TTL 測光觸發閃光燈,每組的 模式和比率模式之間進行切換。 EV 值既可以調大,也可以調小(如上所 示)...
  • Seite 113 說明書 Trad 比率模式 調整閃光燈變焦 Phottix Odin擁有閃光燈變焦水準的無線 選擇按鈕允許在 A:B 比率調節,EV 調節 設置。變焦可以設置為TTL或手動模式。 和頻道選擇三種狀態之間迴圈切換。 TTL變焦:閃光燈變焦將會隨相機變焦環 按選擇按鈕進行 A:B 比率調節,按 +/- 按 的調整而同步變化。 鈕,直到期望的 A:B 閃光比出現。 手動變焦:可以在發射器上將閃光燈變焦 再按選擇按鈕會使主動選項移至 EV 調整 設置成一個定值,此時,閃光燈變焦將不 區域:按 +/- 按鈕直到期望的 EV 值出現。 會隨相機鏡頭焦距的調整而改變。 選擇按鈕還可使主動選項移至頻道選擇。 選擇頻道時,按 +/- 按鈕可以改變發射器 使用變焦按鈕 頻道 (1,2,3,4)。這也會改變發射器用來發...
  • Seite 114 式下閃光燈變焦不能做任何調整。 後簾同步是在曝光快結束時觸發閃光燈, 而不是在曝光開始時觸發閃光燈,它可以 注 意:頻 道 選 擇 後 按 選 擇 按 鈕 可 以 在 結合長時間曝光達到創意性效果。 TTL/M 混合模式和比率模式之間切換。 1. 後 簾 同 步 功 能 無 法 直 接 在 Phottix 快速退出 Odin 發射器上設置。 改變設置後,按發射器上的電源按鈕將退 2. 請在相機上設置後簾同步功能,設置詳 出設定模式。發射器將保存當前設置。...
  • Seite 115 Phottix Odin 接收器 所選擇的頻道。 接收器上設置組 使用測試按鈕 1. Phottix Odin 接 收 器 上 有 三 個 組 可 供 測 試 按 鈕 可 以 觸 發 所 有 安 裝 到 Phottix 設置。 Odin 接收器的閃光燈,當然這些接收器 2. 將組選擇開關打到 A,B 或 C 上,為每...
  • Seite 116 2. 滑動閃光燈到接收器的熱靴裝置。 3. 閃光燈部件自動鎖定到位。 4. 開啟閃光燈和 Phottix Odin 接收器。 通過連接線連接 Odin 接收器和閃光燈 / 影樓燈 1. 關閉閃光燈 / 影樓燈和 Phottix Odin 接收器。 2. 將 連 接 線 的 一 端 插 入 接 收 器 上 的 3.5 mm 輸出埠。 3. 將線的另一端連接到閃光燈 / 影樓燈 (內...
  • Seite 117 說明書 Trad 技術參數 頻率:2.4 GHz 距離:100m+ 頻道:4個頻道 組: 3個組— A, B, C 電池:2 x AA電池(發射器和接收器),接收器上的5V DC(外接電源埠) 最快同步速度:1/8000s 輸出:熱靴,3.5 mm埠(接收器) 輸入埠:USB埠(發射器和接收器) 固定方式:1/4英寸三腳架螺口,冷靴(接收器) 輸入電壓:2.4V-3.2V 閃光埠電壓處理:6V(發射器)≤300V(接收器) 主體尺寸:94(L) x 66(W) x 35(H) mm(發射器);90(L) x 45(W) x 40(H) mm (接收器) 天線:內置PCB天線 重量:94g(發射器),63g(接收器)— 不含電池 工作溫度:-15—65 ℃ 儲存溫度:-30—85 ℃...
  • Seite 118 警告 - 本產品屬精密電子儀器,請注意防潮防 塵。 - 不要摔落或碰撞。 - 請勿拆卸。 - 不要用化學或有機溶劑清潔機身 , 請用 柔軟乾淨的布或鏡頭紙對其外表面進行擦 拭。 - 干擾:Phottix Odin 以 2.4GHz 傳送和 接收無線電信號。 它的執行將會受到電流、 磁場和無線電信號、無線路由器、行動電 話以及其他電子設備的影響,還會受諸如 大型建築或牆壁、大樹、柵欄或汽車等周 邊 事 物 的 影 響。如 果 您 的 Phottix Odin 接收器不能觸發,請稍微移動它的位置。...

Inhaltsverzeichnis