Bose LT3202 Installationshandbuch
Panaray lt series iii
®
Bose
Panaray
®
LT3202
III Mid/High Loudspeaker
®
LT4402
III Mid/High Loudspeaker
TM
LT9402
III Mid/High Loudspeaker
®
LT9702
III Mid/High Loudspeaker
LT6400 Mid/High Loudspeaker
LT9400 Mid/High Loudspeaker
Nur zur Montage durch einen Fachinstallateur
Para el uso de instaladores experimentados
Pour des installateurs chevronnés uniquement
L'utilizzo è riservato agli installatori esperti
Uitsluitend bestemd voor gekwalificeerde installateurs
®
LT Series III Loudpeakers
Installation Guide
Installationsvejledning
Installationshandbuch
Guía de instalación
Guide d'installation
Guida all'installazione
Installatiehandleiding
Installationsanvisning
LT6403 Full-Range Loudspeaker
LT9403 Full-Range Loudspeaker
LTMB12 Modular Bass Loudspeaker
LTMB24 Modular Bass Loudspeaker
For use by trained installers only
Kun til faguddannede montører
Endast för professionella användare
Inhaltsverzeichnis

Verwandte Anleitungen für Bose LT3202


Inhaltszusammenfassung für Bose LT3202
- Seite 1 Panaray LT Series III Loudpeakers Installation Guide Installationsvejledning Installationshandbuch Guía de instalación Guide d’installation Guida all’installazione Installatiehandleiding Installationsanvisning ® LT3202 III Mid/High Loudspeaker ® LT4402 III Mid/High Loudspeaker LT6403 Full-Range Loudspeaker LT9402 III Mid/High Loudspeaker ® LT9403 Full-Range Loudspeaker LT9702...
-
Seite 2: Mounting Guidelines
® or non-Bose mounting products. While Bose Corporation cannot be held responsible for the proper design and use of non-Bose mounting systems, we offer the following informa- tion and guidelines for the permanent installation of your Panaray LT loudspeakers: • Obtain your mounting system from a reputable manufacturer. Select a system design that works for your loudspeaker of choice and its intended use. - Seite 3 ® eller en anden producent påkrævet. Selv om Bose Corporation ikke kan holdes ansvarlig for design og brug af produkter fra andre producenter end Bose, tilbyder vi følgende oplysninger og retningslinjer til permanent installation af dine Panaray LT-højttalere. • Køb monteringssystemet fra en anerkendt producent. Vælg et systemdesign, der er velegnet til højttalerens placering og tilsigtede brug.
-
Seite 4: Lt Serie Lll-Lautsprecher Montieren
Lautsprecherbefestigung. Beachten Sie bei der Installation des Befestigungssystems die geltenden Bauvorschriften. Wenden Sie sich vor der Installation dieses Produkts an die zust ndige beh rde. Benutzen Sie zur Installation der LT-Lautsprecher das Befestigungszubehör von Bose ® oder von anderen Anbietern. Bose Corporation kann bei Gebrauch von anderen Befestigungssystemen nicht zur Verantwortung gezogen werden. -
Seite 5: Instrucciones De Montaje
Consulte a las autoridades locales pertinentes antes de instalar este producto. La instalación del altavoz LT requiere el uso de productos de montaje de Bose ®... -
Seite 6: Instructions D'installation
L installation du syst me de montage doit tre r alis e en conformit avec toutes les normes de construction applicables. Consultez les autorit s locales comp tentes avant d installer ce produit. L’installation de l’enceinte LT peut être effectuée avec des accessoires de montage Bose ®... -
Seite 7: Indicazioni Per Il Montaggio
Prima di installare il prodotto, chiedere informazioni all autorit locale preposta. L’installazione del diffusore LT richiede l’utilizzo di prodotti di montaggio Bose ®... -
Seite 8: Montagerichtlijnen
LT-luidspreker. Alhoewel Bose Corporation niet verantwoordelijk is voor het juiste ontwerp en gebruik van montagesystemen die niet door Bose zijn gemaakt, bieden wij wel de volgende informatie en richtlijnen voor het permanent installeren van uw Panaray LT- luidsprekers •... - Seite 9 Kontakta ber rd lokal myndighet innan du installerar produkten. För installation av LT-högtalare kan monteringsprodukter från Bose ® eller andra tillverkare användas. Bose Corporation kan inte hållas ansvarigt för att monteringssystem från andra tillverkare är korrekt utformade samt används på...
- Seite 10 If you have not read page 2 completely, please do so now. ® ® ™ ® The LT3202 III, 4402 III, 9402 III, 9702 III, 6400, 9400, 6403, 9403, MB12 and MB24 loudspeakers have a total of 16 inserts located on each cabinet (see pages 25-27, and 29-31 for insert locations). Use only these 16 inserts for mounting or suspending the loudspeakers.
- Seite 11 ® ® ® ™ ® An jeder Box der Lautsprecher LT3202 III, 4402 III, 9402 III, 9702 III, 6400, 9400, 6403, 9403, MB12 und MB24 befinden sich 16 Montagelöcher (Lage siehe S. 25-27, 29-31). Benutzen Sie zur Montage oder zum Aufhängen der Lautsprecher nur die vorgegebenen 16 Montagelöcher.
- Seite 12 7. Se non ha ancora letto completamente la pagina 7, lo faccia adesso. ® ® ™ ® Sui cabinet dei diffusori LT3202 III, 4402 III, 9402 III, 9702 III, 6400, 9400, 6403, 9403, MB12 e MB24 sono presenti 16 inserti (per le posizioni degli inserti, consulti le pagine 25-27, 29-31). Utilizzi esclusivamente questi 16 inserti per il montaggio dei diffusori.
- Seite 13 Panaray ® -højttalere sendes i passiv konfiguration. Hver højttaler er udstyret med en valgbar intern crossover, der gør det muligt at ændre konfigurationen fra passiv til bi-amp eller bi-amp dobbelt mellemtone (kun LT3202 ® III). Hvis du vil ændre crossover-funktionen, skal du følge nedenstående trin Note: Der er ingen passive komponenter in-line, n r konfigurationerne bi-amp eller bi-amp dobbelt mellemtone er valgt.
- Seite 14 -högtalarna levereras med passiv konfiguration. Varje högtalare är utrustad med ett valbart internt delningsfilter, vilket gör att du kan ändra konfiguration från passiv till dubbelförstärkning eller dubbelförstärkning med två mellanregister (endast LT3202 ® III). Följ stegen nedan när du vill ändra övergångsläge.
- Seite 15 Pour reconfigurer votre enceinte LT3202 ® III (uniquement) : Per riconfigurare il diffusore LT3202 ® III (solo): Ga als volgt te werk om (uitsluitend) uw LT3202 ® III luidspreker te configureren: Så här konfigurerar du om din LT3202 ® III högtalare (endast): 1.
- Seite 16 Internal Loudspeaker Configuration Or, place in the bi-amped dual mid-range position. Eller placer den i positionen for bi-amp dobbelt mellemtone. Alternativ stecken Sie die Steckbrücke in den Anschluss für den Bi-Amp-Modus mit einzeln separierten Mitteltönern. También puede colocarlo en la posición de frecuencia media biamplificada dual.
- Seite 17 Internal Loudspeaker Configuration To Configure Your LT 6403 or LT 9403 Full Range Loudspeaker 1. Remove the rear connector plate. 1. Fjern den bageste konnektorplade. 1. Entfernen Sie die Anschlussplatte auf der Rückseite der Box 1. Retire la placa trasera del conector. 1.
- Seite 18 Internal Loudspeaker Configuration Internal Configuration ® ® Bose Panaray LTMB24 modular bass loudspeakers ship in parallel configuration. Each loudspeaker allows you to change the configuration from parallel to discrete. To change your mode follow the steps listed below. Intern højttalerkonfiguration Interne stikforbindelser Panaray LT MB24-højttaleren leveres med parallel stikforbindelse.
- Seite 19 Internal Loudspeaker Configuration To Configure Your LTMB24 Modular Bass Loudspeaker: Sådan konfigurerer du LTMB24 højttaleren: So konfigurieren Sie die Lautsprecher LTMB24: Para configurar el altavoz LTMB24: Pour configurer votre enceinte LTMB24: Per configurare il diffusore LTMB24: Ga als volgt te werk om uw LTMB24-luidspreker te configureren: Så...
- Seite 20 Internal Loudspeaker Configuration 3. Place in the discrete position. 3. Placer stikket i position adskilt forbindelse. 3. Ptecken Sie die Steckbrücke in den Anschluss für den Diskret-Modus. 3. Colóquelo en la posición discreta. 3. Placez-le en position inserts. 3. Metterlo nella posizione “discreto”. 3.
- Seite 21 Technical/Teknisk/Technische Daten/Aspectos técnicos/Informations techniques/ Dati tecnici/Technisch/Technical ® ™ ® LT 9702 III, 9402 III and 4402 III Mid/High Loudspeakers Wiring Schematic Ledningsføring Anschluss-Schema Esquema del cableado Schéma de câblage Schemi di cablaggio passive mode passif Bedradingsschema passiv passivo Passiv-Modus passief pasiva passiv Kabeldiagram...
- Seite 22 Technical/Teknisk/Technische Daten/Aspectos técnicos/Informations techniques/ Dati tecnici/Technisch/Technical LT 6403 and LT 9403 Full Range Loudspeakers Wiring Schematic Ledningsføring passive mode passif passiv passivo Passiv-Modus passief Anschluss-Schema pasiva passiv Esquema del cableado Schéma de câblage Schemi di cablaggio Bedradingsschema Kabeldiagram Wiring Schematic LT 6403 and LT 9403 Full Range Loudspeakers Ledningsføring bi-amp...
- Seite 23 Technical/Teknisk/Technische Daten/Aspectos técnicos/Informations techniques/ Dati tecnici/Technisch/Technical LT 6400 Mid/High Loudspeakers passive mode passif Wiring Schematic passiv passivo Passiv-Modus passief pasiva passiv Ledningsføring Anschluss-Schema Esquema del cableado Schéma de câblage Schemi di cablaggio Bedradingsschema Kabeldiagram Wiring Schematic LT 9400 Mid/High Loudspeakers passive mode passif passiv...
- Seite 24 Technical/Teknisk/Technische Daten/Aspectos técnicos/Informations techniques/ Dati tecnici/Technisch/Technical LT MB12 Modular Bass Loudspeaker Wiring Schematic passive mode passif passiv passivo Ledningsføring Passiv-Modus passief pasiva passiv Anschluss-Schema Esquema del cableado Schéma de câblage Schemi di cablaggio Bedradingsschema Kabeldiagram Wiring Schematic LT MB24 Modular Bass Loudspeaker Ledningsføring Parallel Parallèle...
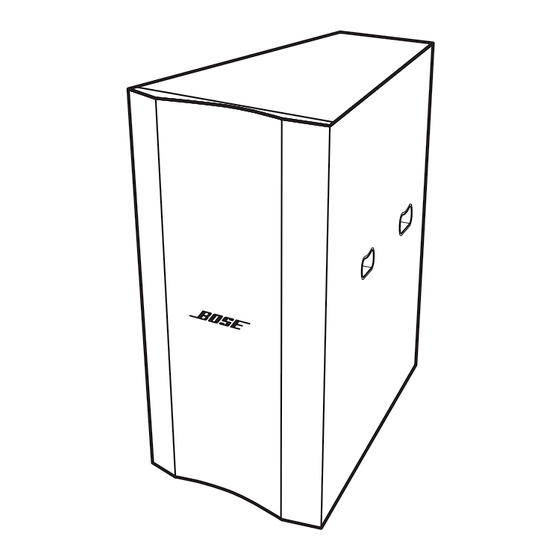
- Seite 25 Technical/Teknisk/Technische Daten/Aspectos técnicos/Informations techniques/ Dati tecnici/Technisch/Technical LT Series III Loudspeaker Attach grille Påsæt frontstof Gitter anbringen Fijación de la rejilla Fixation de la grille Montare la griglia Rooster bevestigen Montera fronten ® LT 3202 III Mid/High Loudspeaker Dimensions Mål Abmessungen Dimensiones Top/Bottom Haut/Bas...
- Seite 26 Technical/Teknisk/Technische Daten/Aspectos técnicos/Informations techniques/ Dati tecnici/Technisch/Technical ® LT 4402 III Mid/High Loudspeaker Dimensions Mål Top/Bottom Haut/Bas Abmessungen Top/bund Alto/Basso Oberseite/Unterseite Bovenkant/onderkant Dimensiones Parte superior/inferior Ovansida/undersida Dimensions Dimensioni Afmetingen Mått Rear Arrière Side Côté Front Avant Front (with Grille) Bagside Retro Side Lato Forside...
- Seite 27 Technical/Teknisk/Technische Daten/Aspectos técnicos/Informations techniques/ Dati tecnici/Technisch/Technical Dimensions ® LT 9702 III Mid/High Loudspeaker Mål Abmessungen Dimensiones Top/Bottom Haut/Bas Top/bund Alto/Basso Oberseite/Unterseite Bovenkant/onderkant Dimensions Parte superior/inferior Ovansida/undersida Dimensioni Afmetingen Mått Front (with Grille) Forside (med frontstof) Vorderseite (mit Gitter) Parte frontal (con rejilla) Rear Arrière Side...
- Seite 28 Technical/Teknisk/Technische Daten/Aspectos técnicos/Informations techniques/ Dati tecnici/Technisch/Technical Rotating the 6403 and 9403 waveguides Rotation des guides d'ondes 6403 et 9403 Sådan roteres Waweguide-model 6403 og 9403 Rotazione delle guide d'onda 6403 e 9403 Drehen der 6403- und 9403-Waveguides De 6403- en 9403-waveguide draaien Giro de las guías de ondas 6403 y 9403 Rotera vågledarna 6403 och 9403.
- Seite 29 Technical/Teknisk/Technische Daten/Aspectos técnicos/Informations techniques/ Dati tecnici/Technisch/Technical Dimensions LT 6403 Full Range Loudspeaker Top/Bottom Mål Top/bund Oberseite/Unterseite Abmessungen Parte superior/inferior Haut/Bas Alto/Basso Dimensiones Bovenkant/onderkant Ovansida/undersida Dimensions Dimensioni Afmetingen Mått Rear Arrière Front Avant Side Côté Front (with Grille) Bagside Retro Forside Fronte Side Lato...
- Seite 30 Technical/Teknisk/Technische Daten/Aspectos técnicos/Informations techniques/ Dati tecnici/Technisch/Technical Dimensions 12.36 [314.0mm] LT 6400 Mid/High Loudspeaker 10.25 [260.3mm] Mål 3.46 [87.8mm] Top/Bottom Abmessungen Top/bund 10.60 [269.2mm] Oberseite/Unterseite 14.19 [360.5mm] Dimensiones Parte superior/inferior Haut/Bas 22.60 [574.0mm] Alto/Basso Dimensions Bovenkant/onderkant Ovansida/undersida Dimensioni 15.33 [389.4mm] Afmetingen 24.10 [612.2mm] Mått 22.59 [573.9mm]...
- Seite 31 Technical/Teknisk/Technische Daten/Aspectos técnicos/Informations techniques/ Dati tecnici/Technisch/Technical Dimensions LT MB12 Modular Bass Loudspeaker 15.82 [401.9mm] 2.09 [53.0mm] Mål Abmessungen Dimensiones Dimensions Top/Bottom Top/bund Oberseite/Unterseite Dimensioni Parte superior/inferior Haut/Bas Afmetingen Alto/Basso Bovenkant/onderkant Ovansida/undersida Mått 20.00 [508.0mm] 25.44 [646.2mm] 12.72 [323.1mm] Rear Arrière Front (with Grille) Side Côté...
- Seite 32 ©2005 Bose Corporation, The Mountain Framingham, MA 01701-9168 USA 276859 AM Rev.03 CCM-001756...