Multiplex LEARJET Bedienungsanleitung
Inhaltsverzeichnis
Verfügbare Sprachen
Verfügbare Sprachen
Quicklinks
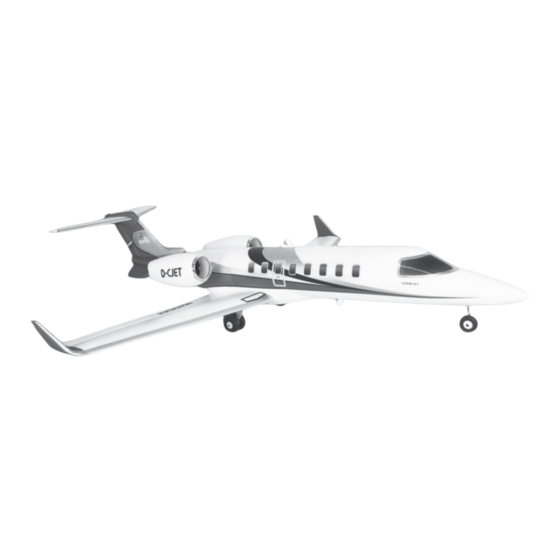
Gesamtlänge / Overall Length / Longueur hors tout: 1233 mm
Spannweite / Wingspan / Envergure: 1060 mm
Sicherheitshinweise
DE
Lieferumfang, Technische Daten
Conseils de sécurité
FR
Liste de colisage, Caractéristiques
Erhältliche Varianten
Available versions
Version disponible
© Copyright by MULTIPLEX Modellsport GmbH & Co. KG 2023
2 - 3
4 - 5
6 - 8
9 - 10
11
22 - 23
24 - 25
26 - 28
29 - 30
31
#1-02870
www.modellmarkt24.ch
Safety information
EN
Product Packing List, Speci cations
12 - 13
14 - 15
16 - 18
19 - 20
21
Inhaltsverzeichnis
Fehlerbehebung

Verwandte Anleitungen für Multiplex LEARJET


Inhaltszusammenfassung für Multiplex LEARJET
-
Seite 1: Inhaltsverzeichnis
Liste de colisage, Caractéristiques 24 - 25 Instructions de montage 26 - 28 Test des gouvernes de commande 29 - 30 Résolution des problèmes Erhältliche Varianten Available versions Version disponible #1-02870 © Copyright by MULTIPLEX Modellsport GmbH & Co. KG 2023 www.modellmarkt24.ch... -
Seite 2: Sicherheitshinweise Für Multiplex-Flugmodelle
WERDEN. ERSTICKUNGSGEFAHR! Eine Haftp ichtversicherung (Modell ugzeug mit Antrieb) ist daher Die Multiplex Modellsport GmbH & Co. KG ist nicht haftungsp ichtig für obligatorisch. Falls Sie Mitglied in einem Verein oder Verband sind, Verluste, Beschädigungen und Folgeschäden jeder Art, die aufgrund können Sie ggf. -
Seite 3: Sicherheitshinweise Für Multiplex-Bausätze
Sicherheitshinweise für MULTIPLEX-Flugmodelle • Feuergefahr durch Fehlfunktion der Elektronik: Akkus sind sicher drückliche Erlaubnis der Multiplex Modellsport GmbH & Co. KG (in schriftlicher Form) - auch nicht auszugsweise in Print- oder aufzubewahren. Sicherheitshinweise der Elektronikkomponenten im Modell, des Akkus und des Ladegeräts sind zu beachten. Elektronik elektronischen Medien reproduziert und / oder veröffentlicht... -
Seite 4: Produktübersicht
Sie mit dem Zusammenbau beginnen. Falls ein Teil fehlt bzw. defekt ist, Ersatzteilliste dieser Anleitung an, die eine vollständige Aufzählung aller setzen Sie sich bitte im ersten Fall mit MULTIPLEX Modellsport GmbH Bauteile enthält. &Co.KG in Verbindung. Bitte die Bezeichnung bzw. die Teilnummer des A:Rumpf B:Höheneleitwerk C:Trag ächensatz... -
Seite 5: Technische Daten
Steuerkanäle: RC-Funktionen: QR, HR, SR, Flap, Gas Flugzeit: 5min Ersatzteilliste Artikelnummer Artikelbezeichnung 1-02871 RR Rumpf Learjet 1-02872 RR Trag ächen Learjet 1-02873 RR Höhenleitwerk Learjet 1-02874 RR Akkudeckel Learjet 1-02875 RR Nase Learjet 1-02876 RR Winglets Learjet 1-02877 Hauptfahrwerksbeine Learjet... -
Seite 6: Bauanleitung
Bauanleitung Trag ächenmontage 1. Montieren sie die Trag äche auf den Rumpf. 2. Verwenden sie die im Lieferumfang enthaltenen Schrauben um die Trag äche zu befestigen. (bitte überdrehen sie die Schrauben nicht) 3. Stecken sie die Winglets an und verriegeln sie diese durch das Schieben in die oben gezeigte Richtung. 4. - Seite 7 Bauanleitung Fahrwerksmontage Stecken sie die Fahrwerksbeine in die dafür vorgesehenen Schlitze und drücken sie diese mit Gefühl bis die Beine einrasten. Rumpfnasen Installation Stecken sie die Nase richtig herum auf den Rumpf, sie wird durch Magnete an Ihrer Position gehalten. www.modellmarkt24.ch...
-
Seite 8: Einbau Der Ruderhörner
Einbau der Ruderhörner Sicherstellen, dass alle Servos genau mittig stehen, anschliessend die Gestänge wie abgebildet einbauen bzw. einstellen. Folgende Abbildungen zeigen die empfohlenen Einstellungen für die Ruderhörner und Gestänge für den ersten Flug. Anlenkgestänge position für folgende Ruderklappen: -Querruder -Landeklappe -Höhenruder -Seitenruder Einbau des Flugakkus... -
Seite 9: Ruderprüfungen
Ausschlagrichtung müssen richtig sein. A C HT U NG: SI C HE RH EI T I ST DAS OBE RS TE GEBOT! Firma Multiplex empfiehlt ausdrücklich, dass ein Reichweiten- Bitte die Lufschraube(n) entfernen, bevor die Antriebe geprüft test der Anlage vor jedem Flug durchgeführt wird! werden. -
Seite 10: Dual Rates (Herabgesetzte Ruderausschläge)
Dual Rates (herabgesetzte Ruderausschläge) Querruder Landeklappen Höhenruder Seitenruder Bemerkung: wenn die Landeklappen nach unten ausschlagen, hebt sich der Bug des Modells. Um schöne Landungen zu erzielen müssen also etwas Tiefe zugeschaltet werden. Bei vollem Landeklappenausschlag reicht etwa 1mm Tiefe, bzw. 2mm Tiefe bei reduziertem Klappenausschlag. Querruder Höhenruder Seitenruder... -
Seite 11: Fehlerbehebung
Fehlerbehebung Problem Möglicher Grund Lösung - Motorregler falsch eingestellt - Regler laut Anleitung einstellen Flugmodell reagiert nicht auf Gas, reagiert - Gas ausgeschaltet am Sender - Gas am Sender freischalten aber auf andere Geber - Motorkabel nicht eingesteckt - Kabel prüfen, ggfs. reparieren - Luftschraube lose bzw. - Seite 12 If you are a member of a group or association, you might be able to take out the appropriate insurance there. Multiplex Modellsport GmbH & Co. KG is not liable for loss, damage and consequential damage of any kind caused by incorrect operation,...
- Seite 13 This model is not made of Styrofoam™! Therefore, adhesions using white glue, polyurethane or epoxy are not possible. These glues only stick MULTIPLEX model kits are subjected to constant material inspection super cially and may peel off in severe cases. Only use cyanoacrylate/ during production.
-
Seite 14: Product Overview
Product Overview The MULTIPLEX Learjet is an optically very attractive and easy to y assembled.It has aileron, rudder and elevator, landing aps, nose impeller model in the form of the legendary business jet. The model has wheel and engine controls.All tools required to assemble the model a very high speed range, so it ies very slowly with the landing aps set, are included. -
Seite 15: Speci Cations
RR Winglets Learjet 1-02877 Main Landing gears Learjet 1-02878 nose gear Learjet 1-02879 small parts Learjet 1-02881 RR service hatch bottom Learjet 1-02837 MULTIcont BL-40 SX 1-02511 Servo MS-12015 DIGI 50mm 12-Blade Fan with motor ROXXY 1-02869 BL Outrunner C26-46-4600KV... -
Seite 16: Assembly Instructions
Assembly instructions Main Wing Installation 1.Install the main wing on the fuselage. 2.Use the included screws to secure the main wing (please do not overtighten screws). 3.Install the winglets and slide into place by the direction as shown. 4.Connect flap servos and control horns with linkages. Horizontal Stabilizer Installation Install the horizontal stabilizer into the tail section and secure with supplied screws (please do not overtighten the screws). - Seite 17 Assembly instructions Main Landing Gears Installation Mount the main landing gears into the slots under the main wing and click them into place. Nose Cone Installation Slide the nose cone into place. Magnets will secure the nose cone to the fuselage. www.modellmarkt24.ch...
-
Seite 18: Battery Installation
Control Horns Installation Make sure all servos are in their central position and adjust the linkages to the indicated positions. The following pictures show the default factory settings for the control horns and linkages recommended for use for initial flight. Hole reference for following de ection surfaces: -Aileron -Flap -Elevator -Rudder Battery Installation... -
Seite 19: Control Surface Testing
N OT E : SA FE T Y FI RS T! ! Please remove the propeller(where Multiplex-RC recommends you also perform a full range test applicable) before carrying out any pre-flight maintenance to prior to each flight! - Seite 20 Dual Rate Setting Aileron Flap Elevator Rudder Note: When aps are released, the aircraft will be heading up, so mixed elevator control is required for good landings. It requires 1mm height lower for high dual-rate ap and 2mm lower for low dual-rate ap. Aileron Elevator Rudder...
-
Seite 21: Trouble Shooting
Trouble Shooting Problem Possible Cause Solution - Calibrate ESC according to manual - ESC not calibrated Aircraft not responding to the throttle but - activate throttle on radio - throttle deactivated on radio responding to other controls - check motor wires and connect/repair as - motor wire disconnected required - Tighten and/or Replace damaged parts... - Seite 22 RISQUE D’ÉTOUFFEMENT ! Raison pour laquelle vous devez obligatoirement souscrire une assurance Multiplex Modellsport GmbH & Co. KG décline toute responsabilité en cas responsabilité civile (aéromodélisme motorisé). Si vous êtes membre de perte, dommages et dommages consécutifs de toute nature, dus à une d’un club ou d’une fédération, vous pourrez éventuellement y souscrire...
- Seite 23 Multiplex Modellsport GmbH & Co. KG. La reproduction et / ou la publication, même partielle, des Conseils de sécurité pour les kits de construction MULTIPLEX Familiarisez-vous avec le kit d’assemblage ! Les kits d’assemblages MULTIPLEX sont soumis pendant la production Ce modèle n’est pas réalisé...
-
Seite 24: Aperçu Du Produit
Aperçu du produit deux moteurs. Tous les outils nécessaires pour assembler le modèle Le Learjet MULTIPLEX est un semi-maquette à turbines électriques du sont inclus. Il peut être assemblé en 15 minutes sans collage. légendaire jet d‘affaires. Il est facile à piloter et offre une très grande plage de vitesse. - Seite 25 1-02877 Train d’atterrissage principal Learjet 1-02878 Train avant Learjet 1-02879 Petites pièces Learjet 1-02881 RR fond de la trappe de service Learjet 1-02837 Contrôleur MULTIcont BL-40 SX 1-02511 Servo MS-12015 DIGI Fan 50mm 12-pales avec moteur ROXXY 1-02869 BL Outrunner C26-46-4600KV...
-
Seite 26: Instructions De Montage
Instructions de montage Installation de l‘aile 1. Positionnez l‘aile principale sur le fuselage. 2. Installez les winglets et faites-les glisser en place en suivant la direction indiquée. 3. Utilisez les vis fournies pour xer l‘aile principale (ne serrez pas trop les vis !). 4. - Seite 27 Instructions de montage Installation du train principal Insérez les trains d‘atterrissage principaux dans les logements situés sous l‘aile jusqu’au ‘click’ de verrouillage. Installation du cone de nez Faites glisser le cône de nez en place. Des aimants maintiennent le cône de nez sur le fuselage. www.modellmarkt24.ch...
-
Seite 28: Installation De La Batterie
Installation des commandes Assurez-vous que tous les servos sont en position ‘neutre’ et ajustez les tringleries aux positions indiquées. Les images suivantes montrent les réglages d‘usine par défaut pour les guignols de commande et les tringleries recommandés pour une utilisation lors du premier vol. -
Seite 29: Test Des Gouvernes De Commande
Note : LA SÉCURITÉ D‘ABORD ! Veuillez retirer l‘hélice (le cas Multiplex-RC vous recommande également d‘effectuer un échéant) avant d‘effectuer toute maintenance sur le système test de portée complet avant chaque vol ! d‘alimentation afin d‘éviter toute blessure potentielle due à... - Seite 30 Réglage des doubles-débattements (Dual Rates D/R) Ailerons Volets (Flaps) Profondeur (Elevator) Direction (Rudder) Note: Lorsque les volets sont baissés, l‘avion a naturellement tendance à se cabrer et monter. Un mixage volet -> profondeur est le bienvenu pour faciliter l’atterrissage. Il faut abaisser le volet de profondeur de 1 mm pour un volet (grands débattements – High dual rate) et de 2 mm (petits débattements –...
-
Seite 31: Résolution Des Problèmes
Résolution des problèmes Problem Causes possibles Solutions - Calibrer l‘ESC selon le manuel - Variateurs ESC non calibrés - Activer le manche de commande des gaz Le modèle ne répond pas à la commande des - Manche de commande des gaz désactivé sur l’émetteur gaz mais répond aux autres commandes sur l‘émetteur... - Seite 32 MULTIPLEX Modellsport GmbH & Co.KG · Westliche Gewerbestrasse 1 · D-75015 Bretten-Gölshausen www.multiplex-rc.de www.modellmarkt24.ch...