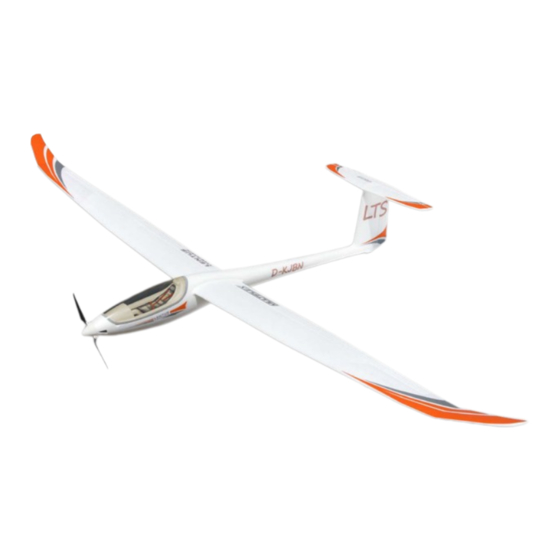
Multiplex LENTUS Thermik Bauanleitung
Inhaltsverzeichnis
Sicherheitshinweise
DE
Zubehör, Lieferumfang, Ersatzteile
Conseils de sécurité
FR
Instrucciones de seguridad
ES
Accesorios, suministro, repuestos
Ilustraciónes
Erhältliche Varianten | Available versions
Version disponible | Varianti disponibili
Variantes disponibles
© Copyright by MULTIPLEX Modellsport GmbH & Co. KG 2020
2 - 3
4 - 5
8 - 15
36 - 43
30 - 31
44 - 51
36 - 43
66 - 67
68 - 69
72 - 79
36 - 43
# 1-00899
www.modellmarkt24.ch
www.modellmarkt24.ch
Safety information
EN
Accessories, contents, spare parts
Istruzioni di sicurezza
IT
# 1- 00900
16 - 17
18 - 19
22 - 29
36 - 43
52 - 53
58 - 65
36 - 43
Inhaltsverzeichnis

Verwandte Anleitungen für Multiplex LENTUS Thermik


Inhaltszusammenfassung für Multiplex LENTUS Thermik
-
Seite 1: Inhaltsverzeichnis
68 - 69 Instrucciones de montaje 72 - 79 Ilustraciónes 36 - 43 Erhältliche Varianten | Available versions Version disponible | Varianti disponibili Variantes disponibles # 1-00899 # 1- 00900 © Copyright by MULTIPLEX Modellsport GmbH & Co. KG 2020 www.modellmarkt24.ch www.modellmarkt24.ch... -
Seite 2: Sicherheitshinweise Für Multiplex-Flugmodelle
Auch wenn das Modell vorschriftsmäßig und unter Beachtung aller Sicherheitsaspekte betrieben wird, besteht immer ein Restrisiko. Die Multiplex Modellsport GmbH & Co. KG ist nicht haftungsplichtig für Verluste, Beschädigungen und Folgeschäden jeder Art, die aufgrund Eine Haftplichtversicherung (Modelllugzeug mit Antrieb) ist daher falschen Betriebs, nicht bestimmungsgemäßer Verwendung oder... -
Seite 3: Sicherheitshinweise Für Multiplex-Bausätze
Folgeschäden bei späteren Flügen zu technischem und Materialversagen und Abstürzen führen. drückliche Erlaubnis der Multiplex Modellsport GmbH & Co. KG (in schriftlicher Form) - auch nicht auszugsweise in Print- oder • Feuergefahr durch Fehlfunktion der Elektronik: Akkus sind sicher elektronischen Medien reproduziert und / oder veröffentlicht... -
Seite 4: Zubehör Und Werkzeug
• 1x ROXXY EVO LiPo 4-2600M 40C # 1-01025 (Bodenstart mit 8 x 6" Prop.) • 1x Multiplex Empfänger RX-7-DR light M-LINK 2,4 GHz # 55810 • 1x 2 Klappluftschraubenblätter 8“ x 6“ # 1-01970 • 1x ServoSet mit Kabelsatz M6/UNI LENTUS (komplett) # 1-01288 (Bodenstart mit 4S) •... -
Seite 5: Ersatzteile
Gummirad Ø 32mm, Nabe 2,1mm 1-00127 Ruderhorn "FunRay" 12x20 mit Anschluss, 2 Satz 1-01286 Kabelsatz (komplett) für Rumpf und Flächen 1-02077 Fahrwerksklappe mit Scharnieren Weitere Infos zum Inhalt der Ersatzteile inden Sie auf unserer Homepage unter www. multiplex-rc.de www.modellmarkt24.ch www.modellmarkt24.ch... - Seite 6 Stückliste KIT Lentus # 1-00899 + RR Lentus # 1-00900 lfd. Nr Bezeichnung Material Abmessungen Bauanleitung KIT Zusatzanleitung RR Reklamationsmeldung Modelle Hinweise Luftverkehrsordnung Dekorbogen Design (A) bedruckte Klebefolie 670 x 930 mm Dekorbogen Schriftzüge (B) bedruckte Klebefolie 220 x 280 mm Aufkleber SLW Klebefolie weiß...
- Seite 7 Stückliste KIT Lentus # 1-00899 + RR Lentus # 1-00900 Kunststoffteilesatz (Flächen / Rumpf+Leitwerke) lfd. Nr Bezeichnung Material Abmessungen Motorspant mit Flansch Kunststoff gespritzt Fertigteil M6 Steckerhalterhälfte Kunststoff gespritzt Fertigteil SLW Rumpfspant Kunststoff gespritzt Fertigteil Spornradhalter Kunststoff gespritzt Fertigteil HK-Scharnier Achsaufnahme Kunststoff gespritzt Fertigteil Hohlkehl-Scharnier Achse...
-
Seite 8: Bauanleitung
Bauanleitung Die beiden GFK-4kt-Stäbe 5,5 x 3,5 x 250 mm mittig in die Nut der Hinweis: Bildseiten aus der Mitte der Bauanleitung heraustrennen! ⓾ ⓫ Rumpfhälften kleben. Abb. 3 + 4 1. Vor der Montage 4. Reglerbefestigung (Halter für Kabelbinder) ㉔... - Seite 9 Bauanleitung 11. Seitenruderscharniere 18. Steckerhalter vorbereiten Die drei Hohlkehlscharniere (Achsaufnahme) in die rechte Rumpfhälfte Die beiden rumpfseitigen Kabelbäume (beide Anschlusskabel sind hier kleben. Abb. 7 gleich lang) mit dem Rand der grünen Stecker von innen in die Rastnasen der Steckerhalterhälften einrasten.
- Seite 10 Bauanleitung ㉛ SR-Gestänge (50 mm) von oben im äußersten Loch am Servohebel Halter danach mit dem Vierkantrohr verkleben. Abb. 18 einhängen, Servo und Ruder in Neutralstellung bringen und Gestänge im ㉙ Kardanbolzen mit Inbusschlüssel festklemmen. Abb. 15 27. Rumpffüllstück (Fahrwerk) montieren Tipp: Zum Ausrasten und entfernen des Seitenruders, zuerst das Wird kein Einziehfahrwerk eingebaut, stecken Sie das Rumpffüllstück ⓬...
- Seite 11 Bauanleitung 33. Wurzelrippen montieren Kleber einige Zeit trocknen lassen. Verwenden Sie den Kleber sparsam, damit der Rahmen nicht mit dem Rumpf verklebt, ggf. eine dünne Folie Zuerst erfolgt eine Probemontage ohne Klebstoff! Wenn alles passt zwischen Rumpf und Haubenrahmen legen. Abschliessend kann der kleben Sie die Wurzelrippen mit Zacki ELAPOR volllächig an...
- Seite 12 Bauanleitung 38. Querruderservos vorbereiten damit diese nicht über die Kontur der Flügel herausstehen. Zum Schluss werden die Kabel mit einem matten, transparenten, ca. 20mm breiten Klebestreifen überklebt und gesichert. Achtung: Die Servohebel sind aufgrund der ungeraden Zähnezahl nicht exakt um 180° tauschbar. Achten Sie daher darauf die 43.
- Seite 13 – 3 mm Elektroversion: Gaszumischung in Höhe – 1 mm Beim Lentus ist der Einbau des Multiplex TEK-Vario + TAS (TrueAirspeed) Sensors serienmäßig vorbereitet. Dieser kann in wenigen Minuten auch Flapzumischung ins Höhenruder ca. – 1 / 1,5 mm beim fertig gebauten RR Modell installiert werden.
- Seite 14 Bauanleitung Querruder Lesen Sie hierzu die Anleitung Ihrer Fernsteuerung! Soll das Modell aus großer Höhe absteigen (z.B. starke Thermik an der nach oben / unten ca. + 24 / – 11 mm Sichtgrenze), empfehlen wir im Normallug das Butterly auszufahren Speed (nach oben) ca.
- Seite 15 Leitwerke. Kontrollieren Sie auch die Funktion aller Ruder! bei den ersten Schlepps, Überlüge über Kopf. Zum Ausklinken wird auf Wir, das MULTIPLEX-Team, wünschen Ihnen beim Bauen und später beim Kommando die Schleppkupplung des Seglers geöffnet. Die Schleppkupplung Fliegen viel Freude und Erfolg.
- Seite 16 Third-party liability insurance (powered model airplane) is therefore mandatory. If you are a member of a group or association, you might be Multiplex Modellsport GmbH & Co. KG is not liable for loss, damage able to take out the appropriate insurance there.
- Seite 17 This model is not made of Styrofoam™! Therefore, adhesions using white glue, polyurethane or epoxy are not possible. These glues only stick MULTIPLEX model kits are subjected to constant material inspection supericially and may peel off in severe cases. Only use cyanoacrylate/ during production.
- Seite 18 # 1-01970 • 1x Multiplex Zacki2 ELAPOR 20g (Blister) # 1-01291 (ground take-off with 4S) • 1x Multiplex Zacki ELAPOR super liquid 10g VE1 # 852728 • 1x COCKPIT SX 9 transmitter # 45161 • 1x RX-9 M-LINK 2.4 GHz receiver, telemetry-capable...
-
Seite 19: Replacement Parts
Rubber wheel Ø 32mm, hub 2,1mm 1-00127 "FunRay" control surface horn, 12 x 20 with 1-01286 Lentus cable set (complete) connector, 2 sets 1-02077 Wheel door with hinges For further information about the contents of the replacement parts, please visit www. multiplex-rc.de www.modellmarkt24.ch www.modellmarkt24.ch... - Seite 20 Parts List KIT Lentus # 1-00899 + RR Lentus # 1-00900 Description Material Dimensions Building instructions, KIT Supplementary instructions, RR Model complaint notiication Notes on air trafic regulations Decal sheet, motifs (A) Printed self-adhesive ilm 670 x 930 mm Decal sheet, name placards (B) Printed self-adhesive ilm 220 x 280 mm Fin sticker...
- Seite 21 Parts List KIT Lentus # 1-00899 + RR Lentus # 1-00900 Plastic parts set (wings / fuselage + tail) Description Material Dimensions Flanged motor bulkhead Injection-moulded plastic Ready made M6 connector holder, half-shell Ready made Injection-moulded plastic Fin former Injection-moulded plastic Ready made Tailwheel holder Injection-moulded plastic...
-
Seite 22: Assembly Instructions
Building instructions Glue the two rectangular-section GRP rods (5.5 x 3.5 x 250 mm) in ⓾ ⓫ Note: remove the picture pages from the centre of the building instructions! the centre channel in the fuselage shells . Figs. 3 + 4 1. - Seite 23 Building instructions 11. Rudder hinges 18. Preparing the connector holder Glue the three knuckle hinge lugs (pivots) in the right-hand fuselage Locate the two cable looms in the fuselage (both leads are the same shell. Fig. 7 length) and allow the lange of the green connector to snap into the internal securing lugs of the connector holder halves .
- Seite 24 Building instructions ㉛ 27. Installing the fuselage in-ill piece (wheel well) Working from the top, connect the rudder pushrod (50 mm) to the outermost hole in the servo output arm, centre the servo and rudder, and ⓬ If you don’t wish to it a retractable wheel, it the fuselage in-ill piece tighten the retaining screw in the barrel connector to secure the pushrod, ㉙...
- Seite 25 Building instructions 34. Installing the wing retaining clips round to conceal the joint line. We recommend high-lex grey adhesive tape for this. Fig. 22 Position the retaining clips inside the raised frame on the root ribs ㊴ (left) and (right), and secure them using the screws .
- Seite 26 Building instructions 39. Preparing the lap servos 45. Fitting the wingtip skids For the lap servos the servo output arms should be angled back relative Glue the dummy wheel / skid to the underside of each wing tip over to the case by 1 spline. The two servos should form a mirror-image pair. the raised moulding;...
- Seite 27 52. TEK-Vario + TAS (TrueAirspeed) sensor Spoiler (down-elevator) approx. – 3 mm The Lentus is prepared as standard for the installation of the Multiplex TEK- Electric version: throttle mixed to elevator – 1 mm Vario + TAS (TrueAir-speed) sensor. The unit can be installed in just a few Flap mixed to elevator for Speed / Thermal approx.
- Seite 28 Building instructions Note: when you apply a “right” aileron command, the right aileron - as The transmitter battery and light pack must be fully charged in accordance seen from the tail, looking forward - delects up. At the same time the with the manufacturer’s recommendations.
- Seite 29 With the electric version you have the optimum level of autonomy and independence. You can ly from a lat ield and carry out about seven We - the MULTIPLEX team - hope you have many hours of pleasure climbs to a sensible gliding height (around 150 m) from a single battery building and lying your new model.
-
Seite 30: Utilisation Conforme
Un risque résiduel persiste même en cas d’utilisation conforme et de respect de toutes les consignes de sécurité. Multiplex Modellsport GmbH & Co. KG décline toute responsabilité en cas de perte, dommages et dommages consécutifs de toute nature, dus à une Raison pour laquelle vous devez obligatoirement souscrire une assurance utilisation erronée, à... - Seite 31 électroniques, est interdite sans l’autorisation expresse (écrite) le variateur et les batteries. Multiplex Modellsport GmbH & Co. KG. Conseils de sécurité pour les kits de construction MULTIPLEX Familiarisez-vous avec le kit d’assemblage ! Les kits d’assemblages MULTIPLEX sont soumis pendant la production Ce modèle n’est pas réalisé...
-
Seite 32: Caractéristiques Techniques
# 1-01970 • 1x Multiplex Zacki2 ELAPOR 20g (Blister) # 1-01291 (décollage du sol avec 4S) • 1x Multiplex Zacki ELAPOR super liquid 10g VE1 # 852728 • 1x Emetteur COCKPIT SX 9 # 45161 • 1x Récepteur RX-9 M-LINK 2,4 Ghz, compatible avec... - Seite 33 Roue en caoutchouc Ø 32mm, moyeu 2,1mm 1-00127 Guignol "FunRay" 12x20 avec raccord , 2 lots 1-01286 Lot complet de cordons Lentus 1-02077 Porte de train d'atterrissage avec charnières Informations complémentaires sur la composition des pièces détachées sur notre site web www. multiplex-rc.de www.modellmarkt24.ch www.modellmarkt24.ch...
- Seite 34 Nomenclature Lentus # 1-00899 + RR Lentus # 1-00900 Rep. Désignation Matériau Dimensions Notice de montage version KIT Notice complémentaire version RR Fiche de réclamation Recommandations en matière de traic aérien Planche de décoration Design (A) Adhésif imprimé 670 x 930 mm Planche de déco.
- Seite 35 Nomenclature Lentus # 1-00899 + RR Lentus # 1-00900 Lot pces plastiques pour (Ailes/Fuselage +Empen.) Rep. Désignation Matériau Dimensions Couple moteur avec bride plastique moulé pièce terminée Demi ixation prise M6 plastique moulé pièce terminée Couple dérive plastique moulé pièce terminée Support roulette de queue plastique moulé...
-
Seite 36: Abbildungen
Abbildungen · Illustrations · Illustrazioni · Ilustraciónes Abb. / Fig. 1 Abb. / Fig. 2 11x7“ # 1-00106 bei 3S 8x6“ # 1-01970 bei 4S www.modellmarkt24.ch www.modellmarkt24.ch... - Seite 37 Abbildungen · Illustrations · Illustrazioni · Ilustraciónes Abb. / Fig. 3 Abb. / Fig. 4 Abb. / Fig. 5 Abb. / Fig. 6 Abb. / Fig. 7 Abb. / Fig. 8 Abb. / Fig. 9 Abb. / Fig. 10 www.modellmarkt24.ch www.modellmarkt24.ch...
- Seite 38 Abbildungen · Illustrations · Illustrazioni · Ilustraciónes Abb. / Fig. 11 Abb. / Fig. 12 Abb. / Fig. 13 Abb. / Fig. 14 Abb. / Fig. 15 Abb. / Fig. 16 50 mm Abb. / Fig. 17 Abb. / Fig. 18 -1 Option / en option Option / en option opzionale / opción...
- Seite 39 Abbildungen · Illustrations · Illustrazioni · Ilustraciónes Abb. / Fig. 18 - 2 Abb. / Fig. 18 - 3 Option / en option opzionale / opción Option / en option # 1-01759 opzionale / opción # 1-01759 Abb. / Fig. 19 Abb.
- Seite 40 Abbildungen · Illustrations · Illustrazioni · Ilustraciónes Abb. / Fig. 25 Abb. / Fig. 26 1-01286 / 1-01288 Abb. / Fig. 27 Abb. / Fig. 28 Abb. / Fig. 29 Abb. / Fig. 30 Abb. / Fig. 31 Abb. / Fig. 32 www.modellmarkt24.ch www.modellmarkt24.ch...
- Seite 41 Abbildungen · Illustrations · Illustrazioni · Ilustraciónes Abb. / Fig. 33 Abb. / Fig. 34 Abb. / Fig. 35 67mm www.modellmarkt24.ch www.modellmarkt24.ch...
- Seite 42 Abbildungen · Illustrations · Illustrazioni · Ilustraciónes www.modellmarkt24.ch www.modellmarkt24.ch...
- Seite 43 Abbildungen · Illustrations · Illustrazioni · Ilustraciónes www.modellmarkt24.ch www.modellmarkt24.ch...
- Seite 44 Notice de montage Collez d’abord les deux renforts de fuselage (330 mm) à l’avant de la Conseil: Détachez les pages illustrées du milieu de la notice. ⓾ ⓫ face intérieure dans la rainure des demi-lancs Collez le rond en GFK de Ø 2 mm , d’une longueur de 800 mm dans ⓫...
-
Seite 45: Notice De Montage Illustrations
Notice de montage 10. Renfort de dérive l’ouverture à l’arrière du demi-lanc gauche. Vue 11 Collez par l’intérieur, respectivement une baguette CFK de 3x1x120 17. Montage et sécuriser les rallonges mm (demi-lanc gauche et droit) dans la rainure de la dérive – à l’extrémité, remplissez les logements ronds avec une goutte de colle chaude. -
Seite 46: Montage Du Variateur
Notice de montage ㉖ ㉘ (en option) prévu à cet effet. Collez le guignol orienté vers l’avant, vissez les vis sans tête dans ㉗ la vis d’articulation et montez-les dans le trou le plus à l’extérieur du Montage du train rentrant # 1-01759 (en option) palonnier. - Seite 47 Notice de montage 33. Montage de la nervure d’emplanture Collez la verrière , par exemple, avec de la colle contact transparente sur le cadre de verrière. Contrairement à ce qui est préconiser généralement, On fait d’abord un montage à blanc, sans colle! Si tout est bon, collez ne laissez pas s’évaporer les solvants de la colle contact, mais dès que la les nervures d’emplanture avec de la colle Zacki ELAPOR...
- Seite 48 Notice de montage 43. Montage des tringles de commande des gouvernes Mettez tout d’abord les servos en position neutre. Montez ensuite les palonniers 1 dent orienté vers l’avant par rapport au boîtier (2 servos ㉚ Fixez l’extrémité en Z de la tringle de commande (50 mm) des en effet miroir).
- Seite 49 Speed /thermique 52. Capteur TEK – Vario + TAS (TrueAirspeed) Direction D’origine, sur le Lentus, le montage du MULTIPLEX TEK-Vario + TAS vers la gauche et vers le droite env. 35 mm (TrueAirspeed) est prévu. Celui-ci peut être monté en quelques minutes même sur un modèle monté, version RR.
- Seite 50 Notice de montage Spoiler (Butterfly) Offset émetteur permet des débattements encore Conseil: en fonction du terrain (par ex. lorsque l’herbe est haute) nous plus grands! vous conseillons de retirer la coniguration Butterly juste avant de toucher le sol, pour ne pas endommager les charnières et les tringles de commande.
- Seite 51 Pour décrocher, il sufira d’actionner la commande du crochet. fonctionnement de toutes les gouvernes! 61. Vol électrique Nous, le Team MULTIPLEX, vous souhaitons beaucoup de plaisir et de succès pendant la construction et le pilotage. Avec la version électrique, vous avez atteint le plus haut niveau d’indépen- dance.
- Seite 52 Multiplex Modellsport GmbH & Co. KG non è responsabile per perdite e danni di qualunque tipo che si vengono a creare come conseguenza Quindi è obbligatorio stipulare un’assicurazione di responsabilità civile di un utilizzo sbagliato o dell’abuso di questi prodotti, compresi i relativi...
- Seite 53 GmbH & Co. KG. che il regolatore e il pacco batteria siano sufficientemente raffreddati. Istruzioni di sicurezza per i kit di montaggio MULTIPLEX Familiarizzare con il contenuto della scatola di montaggio! Questo modello non è in Styropor ™! Pertanto non è possibile Le scatole di montaggio per modelli MULTIPLEX vengono sottoposte incollare con colla vinilica, poliuretano o colla epossidica.
-
Seite 54: Dati Tecnici
• 1x Multiplex Zacki2 ELAPOR 20g (Blister) # 1-01291 • 1x Radio COCKPIT SX 9 # 45161 • 1x Multiplex Zacki ELAPOR super liquid 10g VE1 # 852728 # 55812 • 1x Ricevente RX-9 M-LINK 2,4 Ghz telemetrica • 1x Ricevente WINGSTABI RX-9-DR M-LINK... -
Seite 55: Pezzi Di Ricambio
Ruota in gomma Ø 32mm, mozzo 2,1mm 1-00127 Squadretta per timone "FunRay" 12x20 con 1-01286 Set cavi Lentus (completo) collegamento, 2 set 1-02077 Flap con cerniere carrello Per ulteriori informazioni sui ricambi consultare la nostra homepage all’indirizzo www. multiplex-rc.de www.modellmarkt24.ch www.modellmarkt24.ch... - Seite 56 Elenco dei pezzi KIT Lentus # 1-00899 + RR Lentus # 1-00900 N° Denominazione Materiale Dimensioni Istruzioni di montaggio KIT Istruzioni aggiuntive RR Modulo di reclamo modelli Informazioni sulla regolamentazione tedesca in materia di trafico aereo Decals design (A) Foglio adesivo stampato 670 x 930 mm Decals caratteri (B) Foglio adesivo stampato...
- Seite 57 Elenco dei pezzi KIT Lentus # 1-00899 + RR Lentus # 1-00900 Set componenti in materiale plastico Superfici alari / Fusoliera+Componenti impennaggio N° Denominazione Materiale Dimensioni Ordinata langiata Plastica iniettata Finito Supporti connettore M6 Plastica iniettata Finito Ordinata deriva Plastica iniettata Finito Supporto ruotino di coda Plastica iniettata...
-
Seite 58: Istruzioni Di Montaggio
Istruzioni di montaggio ⓫ semiguscio di destra nella parte posteriore, in alto in corrispondenza Nota: Staccare dal centro delle istruzioni le pagine con i disegni! della scanalatura sul retro della fusoliera. Incollare le due aste quadrate in vetroresina da 5,5 x 3,5 x 250 mm ⓾... - Seite 59 Istruzioni di montaggio 17. Montare/issare il cavo di prolunga sinistro e destro) nella scanalatura della deriva, inine riempire gli alloggiamenti rotondi con una goccia di colla a caldo. Fig. 7 Collegare i cavi dei servi del timone di quota e di quello direzionale con i cavi di prolunga da 1000 mm (inclusi in # 1-01286 e # 1-01288).
- Seite 60 Istruzioni di montaggio 22. Montare il timone direzionale e collegare i rinvii parte posteriore della fusoliera (eseguire un montaggio di prova per veriicare la posizione e il montaggio del lap del carrello). Far scorrere Posizionare con precisione il direzionale con gli assi delle cerniere nei il supporto anteriore in plastica sul tubo a sezione quadrata e avvitarlo relativi supporti e inserirlo da dietro nella fusoliera esercitando pressione al carrello.
- Seite 61 Istruzioni di montaggio 33. Montare i supporti alari la colla, issare la capottina e tenerla in posizione con del nastro adesivo. Lasciare asciugare la colla per qualche minuto. Utilizzare al colla con Prima di tutto effettuare un montaggio di prova senza colla! Se non parsimonia per evitare che il telaio si incolli alla fusoliera;...
- Seite 62 Istruzioni di montaggio (2 servi speculari). Questa impostazione consente la differenziazione Inserire le altre estremità attraverso i bulloni cardanici delle squadrette ㉘ ㉗ meccanica dell’alettone. e serrare dopo aver regolato i grani nei bulloni cardanici . Per Differenziazione dell’alettone. La regolazione meccanica della impostare l’offset (trasmettitore) regolare in modo corrispondente la differenziazione fa sì...
- Seite 63 Il modello Lentus è predisposto di serie per l'installazione del sensore Versione elettrica: miscelazione motore in quota – 1 mm Multiplex TEK-Vario + TAS (TrueAirspeed). Può essere installato in pochi minuti anche sul modello RR già montato. In questo modo è possibile miscelazione lap in timone di quota per ca.
- Seite 64 Istruzioni di montaggio Flap butterly e di spingere il modello verso il basso con cautela e in modo uniforme (non troppo ripido). Questo può eventualmente richiedere del alettone (lap solo verso l’alto) ca. + 10 mm tempo, ma è anche il modo più sicuro per evitare di sovraccaricare il impostazione volo Speed (verso l’alto) ca.
- Seite 65 60. Traino FunCub XL e LENTUS, la coppia ideale per effettuare o allenarsi al Il prodotti MULTIPLEX sono stati sviluppati da aeromodellisti esperti in base traino. Per il traino usare una corda intrecciata con un diametro di ca. alle loro esperienze pratiche. Volare sempre in modo responsabile! Volare 1 –...
- Seite 66 Aunque el modelo se opere de acuerdo con todos los aspectos de seguridad, siempre existe un riesgo residual. Multiplex Modellsport GmbH & Co. KG no se responsabiliza por pérdidas, daños y perjuicios consecuentes de cualquier tipo resultantes de un Un seguro de responsabilidad civil (modelo de aeroplano con propulsión) funcionamiento incorrecto, uso no adecuado a las normativas o abuso de es por lo tanto obligatorio.
- Seite 67 ¡Este modelo no está hecho de Styropor™! Por lo tanto, no es posible enlazar con pegamento, poliuretano o epoxi. Esos adhesivos son Los kits de modelo MULTIPLEX están supeditados a un control de material supericiales y pueden soltarse en caso grave. Utilice sólo pegamento constante durante la producción.
-
Seite 68: Datos Técnicos
• 1x Multiplex Zacki2 ELAPOR 20g (Blister) # 1-01291 • 1x Receptor RX-9 M-LINK 2,4 GHz compatible con # 55812 telemetría • 1x Multiplex Zacki ELAPOR super liquid 10g VE1 # 852728 • 1x Receptor WINGSTABI RX-9-DR M-LINK # 55013 Herramienta necesaria •... - Seite 69 Horns "FunRay" 12x20 con conexión, 2 juegos 1-01286 Juego de cables Lentus (completo) 1-02077 Porta carrello di piano con cerniere Se puede encontrar más información sobre el contenido de las piezas de repuesto en nuestra página principal en www.multiplex-rc.de www.modellmarkt24.ch www.modellmarkt24.ch...
- Seite 70 Lista de piezas KIT Lentus # 1-00899 y RR Lentus # 1-00900 n° Designación Material Dimensiones Instrucciones de montaje KIT Instrucciones adicionales RR Modelos de notiicación de reclamaciones Notas sobre el reglamento de tráico aéreo Hoja de decoración, diseño (A) Lámina adhesiva impresa 670 x 930 mm Hoja de decoración, letras B...
- Seite 71 Lista de piezas KIT Lentus # 1-00899 y RR Lentus # 1-00900 Conjunto de piezas de plástico superficies / estabilizador+conjuntos de cola n° Designación Material Dimensiones Vano de motor con reborde Plástico moldeado Pieza terminada M6 Mitad de soporte de enchufe Plástico moldeado Pieza terminada Vano de fuselaje de estabiliz.
-
Seite 72: Instrucciones De Montaje
Instrucciones de montaje Pegar la varilla GRP de Ø2 mm con una longitud de 800 mm en Nota: ¡Separe las páginas de ilustraciones del centro de las ⓫ la mitad derecha del fuselaje hacia atrás, en la ranura de la parte instrucciones de montaje! posterior del fuselaje. - Seite 73 Instrucciones de montaje 10. Refuerzo en el estabilizador lateral 17. Montar / fijar el cable de extensión Pegar un listón de CFRP de 3x1x120 mm respectivamente desde Conectar el servo con los cables de extensión de 1000 mm (comprendido el interior (mitad izquierda y derecha del fuselaje) en la ranura del en # 1-01286 y # 1-01288).
- Seite 74 Instrucciones de montaje ㉖ 26. Acoplamiento de arrastre en el planeador (opción) Pegar el cuerno de alerón orientado hacia adelante, atornillar el ㉘ ㉗ pasador roscado en el perno de cardán y montarlo en los oriicios Como alternativa, se puede construir el modelo como planeador. Para exteriores.
- Seite 75 Instrucciones de montaje instrumentos y el asiento. Si la pintura está seca, pegue con exactitud los carbono (GRP) que está recubierto con tubos de aluminio de precisión. adhesivos para el panel de instrumentos y el asiento. Los tubos de larguero ya están instalados en las alas. Si es necesario, ㉓...
- Seite 76 Instrucciones de montaje 37. Cortar alerones + aletas para sacarlos Asegurar el conector con un poco de termoadhesivo del lado del cable. Ahora conectar el cable servo con las extensiones y del servo empujarlos Cortar los timones en los lados delanteros con una cuchilla/sierra y gire a ras en las ranuras.
- Seite 77 Instrucciones de montaje el hueco detrás del regulador. A continuación, las mangueras deben ser al servo de timón y del timón de profundidad y cerrar las aberturas acortadas a la longitud apropiada - esto es más fácil de hacer en el tubo restantes del estabilizador lateral.
-
Seite 78: Indicación De Seguridad
Instrucciones de montaje Alerón mezcladoras correspondientes. ¡Lea las instrucciones de su mando a distancia! hacia arriba/abajo aprox. + 24 / – 11 mm Si el modelo va a descender desde una gran altura (por ejemplo, térmicas Velocidad (hacia arriba) aprox. + 3 mm fuertes en el límite de visibilidad), recomendamos que extienda el butterly Termal (hacia abajo) aprox. -
Seite 79: Seguridad
Los productos MULTIPLEX son el resultado práctico de la práctica de la maniobra, frenar y, simultáneamente, nivelar el avión para aterrizar. - Seite 80 MULTIPLEX Modellsport GmbH & Co.KG · Westliche Gewerbestraße 1 · D-75015 Bretten-Gölshausen www.multiplex-rc.de www.modellmarkt24.ch www.modellmarkt24.ch...