Herunterladen Inhalt Inhalt Diese Seite drucken
Inhaltsverzeichnis

Werbung

Verfügbare Sprachen
  • DE

Verfügbare Sprachen

  • DEUTSCH, seite 240
Guide

Werbung

Inhaltsverzeichnis
loading

Inhaltszusammenfassung für Samsung SMT-4011

  • Seite 1 Guide...
  • Seite 2 Safety Instructions Notational Power Installation Clean Others Introduction The color and appearance of the product may vary depending on the model, and the product specifications are Connections subject to change without prior notice for reasons of performance enhancement. Using the Software Safety Instructions Adjusting the LCD monitor Troubleshooting...
  • Seite 3 Use only a properly grounded plug and receptacle. An improper ground may cause electric shock or equipment damage.(Class l Equipment only.) Insert the power plug firmly so that it does not come loose. A bad connection may cause fire. Do not excessively bend the plug and wire nor place heavy objects upon them, which could cause damage.
  • Seite 4 Failure to do so may cause serious damage to your LCD monitor. Place your LCD monitor in a location with low humidity and a minimum of dust. Failure to do so may cause electric shock or fire inside the LCD monitor. Do not drop the LCD monitor when moving it.
  • Seite 5 Put down the LCD monitor carefully. Failing to do so may damage the LCD monitor. Do not place the LCD monitor face down. This may damage the TFT-LCD surface. The installation of the bracket must be done by a qualified professional.
  • Seite 6 If the connector between the plug and the pin is dusty or dirty, clean it properly using a dry cloth. A dirty connector may cause electric shock or fire. Make sure to unplug the power cord before cleaning the product. Otherwise, this may cause electric shock or fire.
  • Seite 7 Disconnect the plug from the outlet during storms or lightning or if it is not used for a long period of time. Failure to do so may cause electric shock or fire. Do not try to move the LCD monitor by pulling only the wire or the signal cable.
  • Seite 8 Do not insert metal objects such as chopsticks, wire and tools or inflammable objects such as paper or matches into the vent, headphone port or AV ports or etc. This may cause electric shock or fire. If an alien substances or water enters the product, turn the product off, unplug the power connector from the wall outlet and contact the Service Center.
  • Seite 9 Make sure there are more than two people when moving the product. Dropping the product may cause a malfunction or injury to the person carrying it. Place the product out of children’s reach, as they could damage by hanging onto it. A falling product may cause injury to the person or even fatality.
  • Seite 10 The customer can return used or rechargeable batteries to a nearby public recycling center or to a store selling the same type of the battery or rechargeable battery. © 1995~2008 SAMSUNG. ALL Rights Reserved...
  • Seite 11: Inhaltsverzeichnis

    Contents Safety Instructions ..................... 1 ......................1 Notational ......................... 1 Power ......................2 Installation ........................4 Clean ......................... 5 Others Introduction ......................12 ....................12 Package Contents ....................13 Your LCD Monitor ....................20 Machanical Layout Connections ......................26 ..................26 Installing the Stand KIT ..................
  • Seite 12 ........................... PowerSaver ..........................Preset Timing Modes ......................Information ....................... 70 ....................70 For Better Display ............ 70 PRODUCT INFORMATION (Image Retention Free) Appendix ......................74 ................74 Contact SAMSUNG WORLDWIDE ....................... 74 Terms ....................77 Correct Disposal ......................77 Authority...
  • Seite 13: Safety Instructions

    Safety Instructions Introduction Package Contents Your LCD monitor Machanical Layout Connections The color and appearance of the product may vary depending on the model, and the product specifications are Using the Software subject to change without prior notice for reasons of performance enhancement. Adjusting the LCD monitor Troubleshooting Introduction...
  • Seite 14 Other Remote Control Batteries (AAA X 2) Cover-Hole BNC to RCA Semi Stand Adaptor Jack Sold separately Wall Mount KIT Speaker Set Stand KIT DVI Cable BNC Cable Your LCD monitor Front MENU Opens the on-screen menu and exits from the menu or closes the adjustment menu. Navigate buttons (Up-Down buttons) Moves from one menu item to another vertically or adjusts selected menu values.
  • Seite 15 Adjusts the audio volume. ENTER Activates a highlighted menu item. SOURCE Switches from PC mode to Video mode. Changing the source is only allowed for external devices that are connected to the LCD monitor at the time. [PC] [BNC] [DVI] [AV] [S-Video] [Component]...
  • Seite 16 POWER S/W ON [ | ] / OFF [O] Switches the LCD monitor On/Off. POWER IN The power cord plugs into the LCD monitor and the wall plug. RS232C OUT/IN (RS232C Serial PORT) MDC(Multiple Display Control) Program Port DVI / PC IN [DVI(HDCP)] (PC Video Connection Terminal) Using a DVI Cable (DVI-D to DVI-D) - DVI mode (Digital PC)
  • Seite 17 Audio Connection Terminal (Input)) 11) AV OUT [VIDEO] (VIDEO Connection Terminal): AV mode (Output) 12) AV IN [VIDEO] (VIDEO Connection Terminal) (Input) 13) AV OUT [S-VIDEO] (S-VIDEO Connection Terminal): S-VIDEO mode (Output) 14) AV IN [S-VIDEO] (S-VIDEO Connection Terminal) (Input) 15) EXT SPEAKER(8 )[- - L - +, - - R - +] (EXT Speaker Connection Terminal)
  • Seite 18 DUAL/MTS SOURCE SWAP SIZE STOP PLAY/PAUSE ON / OFF Turns the LCD monitor On/Off. MAGICNET MagicNet Quick Launch Button. - This fuction does not work for this monitor. MDC Quick Launch Button. LOCK Activates or deactivates all function keys on both the remote control and the LCD monitor except for the Power and LOCK buttons.
  • Seite 19 TV channels provide text information services via teletext. - This fuction does not work for this monitor. MENU Opens the on-screen menu and exits from the menu screen or closes the screen adjustment menu. ENTER Activates a highlighted menu item. P.MODE When you press this button, current picture mode is displayed on the lower center of the screen.
  • Seite 20 The image in the PIP window will appear on the main screen, and the main screen image will appear in the PIP window. SIZE Switches the PIP Picture Size. Rewind STOP Stop PLAY / PAUSE Play/Pause Fast forward © 1995~2008 SAMSUNG. ALL Right Reserved...
  • Seite 21 Mechanical Layout Monitor Head Stand Speaker Installation VESA Bracket Wall Bracket Installation 1. Mechanical Layout 2. Monitor Head...
  • Seite 22 After your order is placed, installation professionals will visit you and install the bracket. At least 2 persons are needed in order to move the LCD Monitor. Samsung is not responsible for any product damage or any injury caused by installation at customer's discretion. Dimensions...
  • Seite 23 6. Wall Bracket Installation Contact a technician for installing the wall bracket. Samsung Electronics is not responsible for any damages to the product or harm to customers when the installation is done by the customer. This product is for installing on cement walls. The product may not stay in place when installed on plaster or wood.
  • Seite 24 There are two hinges(left and right). Use the correct one. Before drilling into the wall, check if the length between the two locking holes at the back of the product is correct. If the length is too short or long, loosen all or some of the 4screws on the wall bracket to adjust the length.
  • Seite 25 Remove the 4 screws on the back of the product. Insert the screw B into the plastic hanger. 1. Mount the product on the wall bracket and make sure it is properly fixed to the left and right plastic hangers. 2.
  • Seite 26 1. Fix the product to the wall bracket. Make sure to use the top center, and not the 2. Hold the product at the top in the center and pull it forward leftor the right side of the product to adjust the (direction of the arrow) to adjust the angle.
  • Seite 27: Connections

    Installing the Stand KIT Appendix Note • Only the supplied bolts should be used. Caution Samsung Electronics will not be responsible for damages caused by using a base other than those specified. Installing the Semi Stand Left stand Right stand...
  • Seite 28 This stand is designed for adjusting the screen angle. The company is not responsible for any problem caused when using this stand. Under no circumstances use the product as a stand for placing something on. Installing the Stand KIT (sold separately) A 'Cover-Protector' is used to protect the hole at the bottom of the LCD monitor , where the stand is inserted.
  • Seite 29 Connect the audio cable for your LCD monitor to the audio port on the back of your computer. Turn on both your computer and the LCD monitor. Note • The DVI cable or BNC cable is optional. Contact a local Samsung Electronics Service Center to buy optional items.
  • Seite 30 Connecting Digital DVD Note • Input devices such as digital DVD are connected to the DVI IN terminal of the monitor using the DVI cable. • Then, start the DVD with a DVD disc inserted. • Select Digital using the SOURCE button. Note •...
  • Seite 31 Connect a set of audio cables between the COMPONENT AUDIO IN [L-AUDIO-R] on the LCD monitor and the AUDIO OUT jacks on the DVD player. Connect a Component cable between the BNC/COMPONENT IN - P port on the LCD monitor and , Y, P the P , Y, P...
  • Seite 32 (If not, check your local electronics store.) If your camcorder is stereo, you need to connect a set of two cables. Connecting to a DTV Set Top Box Note • The connections for a typical Set Top Box are shown below. Connect a Component cable between the BNC / COMPONENT IN - P , Y, P port on the LCD monitor and...
  • Seite 33 The speaker-bracket for connecting the SET speaker my become damaged. Connecting to an Audio System Connect a set of audio cables between the AUX L, R jacks on the AUDIO SYSTEM and the AUDIO OUT [L-AUDIO-R] on LCD monitor. © 1995~2008 SAMSUNG. ALL Right Reserved...
  • Seite 34: Main Screen

    Therefore, a serial cable should be connected between the serial port on a PC and the serial port on a monitor. Main Screen Click Start > Program > Samsung > MDC System to start the program. Select a set to see the volume of the selected set within the slider.
  • Seite 35 Main Icons Select Button Remocon Info Grid Safety Lock Monitor Selection Port Selection Control Tools 1. Use the main icons to switch into each screen. 2. Allows you to enable or disable the remote control signal receiving function of the monitor unit. 3.
  • Seite 36: Power Control

    1. The Multiple Display Control is originally set to COM1. 2. If any port other than COM1 is used, COM1 through COM4 can be selected in the Port Selection Menu. 3. If the exact port name that is connected to the LCD monitor using a serial cable is not selected, communication will be unavailable.
  • Seite 37 Info Grid shows some basic information necessary to Power Control. (Power Status) 2) Input 3) Image Size 4) On Timer 5) Off Timer 2. Use the Select All button or Check Box to choose a monitor to control. Power Control allows controlling some of the functions of the selected monitor. 1) Power On/Off...
  • Seite 38: Input Source

    - Turns the power of the selected monitor On/Off. 2) Volume - Controls the volume level of the selected monitor. It receives the volume value of the selected monitor from the sets and monitors it in the slider. (When you cancel the selection or choose Select All, the value returns to the default value 10) (Mute On/Off) - Turns on/off the Mute function of the selected monitor.
  • Seite 39 Info Grid shows some basic information necessary to Input Source Control. 1) PC - Changes the Input Source of the selected monitor to PC. 2) BNC - Changes the Input Source of the selected monitor to BNC. 3) DVI - Changes the Input Source of the selected monitor to DVI. 4) TV - Changes the Input Source of the selected monitor to TV.
  • Seite 40 Info Grid shows some basic information necessary to Image Size Control. ( Power Status) - Shows the power status of the current monitor. 2) Image Size - Shows the current Image Size of the monitor in use. 3) Input - Shows the current Input Source of the monitor in use. 4) Info Grid Displays only the monitors whose Input Source is PC, BNC, DVI.
  • Seite 41 Info Grid shows some basic information necessary to Image Size Control. 1) Click the Video Source tab to adjust Image Size for TV, AV, S-Video, Component. , DVI(HDCP). Click Select All or use Check Box to select a monitor to control. 2) Info Grid Displays only the monitor having TV, AV, S-Video, Component or DVI(HDCP) as input source.
  • Seite 42 Info Grid shows some basic information necessary to Time Control. 1) Current Time - Set the current time for the selected monitor (PC Time). - To change the current time, first change the PC Time. 2) On Time Setup - Set the Hour, Minute, AM/PM of On Time Setup, Status, Source, Volume of the selected monitor. 3) Off Time Setup - Set the Hour, Minute, and AM/PM, Status for Off Time Setup of the selected monitor.
  • Seite 43 Info Grid shows some basic information necessary to PIP Size Control. 1) PIP Size - Shows the current PIP Size of the monitor in use. 2) OFF - Turns off the PIP of the selected monitor. 3) Large - Turns on the PIP of the selected monitor and changes the size to Large. 4) Small - Turns on the PIP of the selected monitor and changes the size to Small.
  • Seite 44 • PIP S-Video Mode Info Grid shows some basic information necessary to PIP Source Control. 1) PIP Source - PIP Source can be controlled with turning on the LCD monitor power. 2) PC - Changes the source of the PIP of the selected monitor to PC. 3) BNC - Changes the source of the PIP of the selected monitor to BNC.
  • Seite 45 6) AV - Changes the source of the PIP of the selected monitor to AV. 7) S-Video - Changes the source of the PIP of the selected monitor to S-Video. 8) Component - Changes the source of the PIP of the selected monitor to Component. 9) Channel - Channel arrow appears when the PIP Source is TV.
  • Seite 46 - Available only for NT. 7) Color Tone - Adjusts the Color Tone for the selected monitor. The Input source of MagicNet works only on MagicNet model. This feature is available only for the monitors whose power status is ON and if no selection is made, the factory default is Displayed.
  • Seite 47 Settings Audio 1. Click Settings of the main icons and the Settings Control screen appears. Info Grid shows some basic information necessary to Settings Control. When each function is selected, the set value of the selected function is Displayed in the slide. When selected, each function fetches the value for the set and Display s it on the slide bar.
  • Seite 48: Lamp Control

    Info Grid shows some basic information necessary to Settings Control. 1) Image Lock - Available only for PC, BNC. 2) Coarse - Adjusts Coarse of the selected monitor. 3) Fine - Adjusts Fine of the selected monitor. 4) Position - Adjusts Position of the selected monitor. 5) Auto Adjustment - Self-Adjust to the incoming PC signal.
  • Seite 49 An "Info Grid" showing several basic data items appears. 1) Maintenance - Allows the Maintenance Control function for all input sources. 2) Auto Lamp Control - Automatically adjusts the backlight of the selected monitor at a specified time. The Manual Lamp Control automatically turns off if you adjust using the Auto Lamp Control. 3) Manual Lamp Control - Allows you to adjust the backlight of the selected monitor regardless of the time.
  • Seite 50: Video Wall

    1) Safety Screen - Eliminates the afterimages that can result when the selected monitor stays in Pause mode for an extended period of time. You can set the repeat cycle timer by selecting the "Interval" by hour and "Second" by second. It can be set to Scroll, Pixel, Bar and Eraser by Screen Type.
  • Seite 51 Select a mode from Screen divider. Select a display from Display Selection. The place will be set up by pressing a number in the selected mode. The MDC program supplied by Samsung supports up to 4x4 LCD monitores. 3) On / Off...
  • Seite 52: Settings Value Display In Multiple Display Mode

    - Turns on/off the Video Wall function of the selected monitor. 4) Format - The format can be selected to see a divided screen. Full Natural You may not operate this function in MagicNet. The Maintenance Control function is available only for the monitors where the power status is ON. Troubleshooting 1.
  • Seite 53: Adjusting The Lcd Monitor

    Safety Instructions Introduction Connections Using the Software Adjusting the LCD monitor Input The color and appearance of the product may vary depending on the model, and the product specifications are Picture subject to change without prior notice for reasons of performance enhancement. [PC / BNC /DVI Mode] Picture Adjusting the LCD monitor...
  • Seite 54 3) Swap [MENU] [ENTER] [ENTER] [ENTER] Swaps the contents of the PIP and main image. The image in the PIP window will appear on the main screen, and the main screen image will appear in the PIP window. [The direct button on the remote control is the 'SWAP' button.] 4) Size [MENU] [ENTER]...
  • Seite 55 4) Custom Although the values are carefully chosen by our engineers, the pre-configured values may not be comfortable for your eyes depending on your taste. If this is the case, Adjusts the brightness and contrast by using the OSD menu. [The direct button on the remote control is the 'M/B' button.] Custom [MENU]...
  • Seite 56: Picture [Av / S-Video /Component / Dvi-Video Mode]

    Auto Adjustment [MENU] [ENTER] [ENTER] The values of Fine, Coarse, Position are adjusted automatically. By changing the resolution in the control panel, the auto function is performed. (Available in PC, BNC mode only) [The direct button on the remote control is the 'AUTO' button.] Signal Balance This is used to make up for the weak RGB signal transmitted by a long signal cable.
  • Seite 57 1) Dynamic 2) Standard 3) Movie 4) Custom [The direct button on the remote control is the 'P.MODE' button.] Custom [MENU] [ENTER] [ENTER] [ENTER] [< / >] [ENTER] By using the on-screen menus, the contrast and brightness can be changed to your personal preference. 1) Contrast Adjusts the Contrast.
  • Seite 58: Sound

    PIP Picture [MENU] [ENTER] [ENTER] [ENTER] [ENTER] [< / >] [ENTER] Adjusts the PIP Screen Settings. 1) Contrast Adjusts the Contrast of the PIP window on the screen. 2) Brightness Adjusts the Brightness of the PIP window on the screen. Available Modes: PIP Sound Available Modes...
  • Seite 59: Setup

    SRS TS XT [MENU] [ENTER] [ENTER] [ENTER] SRS TS XT is a patented SRS technology that solves the problem of playing 5.1 multichannel content over two speakers. TruSurround delivers a compelling, virtual surround sound experience through any two-speaker playback system, including internal television speakers. It is fully compatible with all multichannel formats.
  • Seite 60 Menu Transparency [MENU] [ENTER] [ENTER] [ENTER] Changes the opaqueness of the OSD background. 1) High 2) Medium 3) Low 4) Opaque Safety Lock PIN [MENU] [ENTER] [ENTER] [0~9] [0~9] [0~9] [0~9] The password can be changed. Energy Saving [MENU] [ENTER] [ENTER] [ENTER] [MENU]...
  • Seite 61 - The Screen Scroll function scrolls the screen for the specified period of time. - This function is not available when the power is turned off. 1) Safety Screen [MENU] [ENTER] [ENTER] [ENTER] [ENTER] Determines whether to turn the Screen Scroll function Off or On. 2) Interval [MENU] [ENTER]...
  • Seite 62: Multi Control

    The preset password on the LCD monitor is "0000". Note • Resetting the password for the function key lock. Press MUTE On. The password will be reset to '0000'. The remote control is required for resetting the password. © 1995~2008 SAMSUNG. ALL Right Reserved...
  • Seite 63: Troubleshooting

    Safety Instructions Introduction Connections Using the Software Adjusting the LCD monitor Troubleshooting The color and appearance of the product may vary depending on the model, and the product specifications are Self-Test Feature Check subject to change without prior notice for reasons of performance enhancement. Check List Q &...
  • Seite 64 Do not use benzene, thinner or other flammable substances, or a wet cloth. • We recommend that a Samsung cleansing agent is used to prevent damage to the screen. Maintaining the Flat Panel monitor Screen. Clean with a soft cloth (cotton flannel) smoothly.
  • Seite 65 Problems related to the Installation (PC Mode) Note • Problems related to the LCD monitor installation and their solutions are listed. Problems Solutions The LCD monitor screen flickers. Check if the signal cable between the computer and the LCD monitor is securely connected. (Refer to Connecting to a Computer)
  • Seite 66 blinks every 0.5 or 1 seconds. The screen is blank and it is If you see the "TEST GOOD" message on the screen when you pressing the MENU button, check the cable connection between blinking. the LCD monitor and the computer to ensure that the connector is properly connected.
  • Seite 67 LCD monitor. How can I play the video? The video supports the MPEG1 and WMV codecs only. Install the corresponding codec to play the video. Note that some of the codecs can be incompatible. © 1995~2008 SAMSUNG. ALL Right Reserved...
  • Seite 68: Specifications

    PowerSaver Specifications Preset Timing Modes Information General Appendix General General Model Name SMT-4011 LCD Panel Size 40 " Diagonal (101.6 cm) Display area 885.168 mm (H) x 497.664 mm (V) Pixel Pitch 0.648 mm (H) x 0.648 mm (V) Synchronization...
  • Seite 69: Display Mode

    ENERGY2000 compliant when used with a computer equipped with VESA DPM functionality. ® As an E NERGY STAR Partner, SAMSUNG has determined that this ® product meets the E NERGY STAR guidelines for energy efficiency. Preset Timing Modes...
  • Seite 70 Like a fluorescent lamp, the screen has to repeat the same image many times per second to display an image to the user. The frequency of this repetition is called the Vertical Frequency or Refresh Rate. Unit: Hz © 1995~2007 SAMSUNG. ALL Right Reserved...
  • Seite 71: Information

    Safety Instructions Introduction Connections Using the Software Adjusting the LCD monitor Troubleshooting The color and appearance of the product may vary depending on the model, and the product specifications are Specifications subject to change without prior notice for reasons of performance enhancement. Information For Better display Information...
  • Seite 72 Power Off, Screen Saver, or Power Save Mode Turn the power off for 4 hours after 20 hours in use Turn the power off for 2 hours after 12 hours in use Set the Monitor to power off with the PC display Properties Power Scheme. Use a Screen saver if possible - Screen saver in one color or a moving image is recommended.
  • Seite 73 Every 30 minutes, change the characters with movement. All area display Moving image together with Logo periodically. - Cycle: Display moving image together with Logo for 60 seconds after 4 hours in use. The best way to protect your monitor from Image retention is to turn Power off, or set your PC, or System to operate a Screen Saver program when you are not using it.
  • Seite 74 . Time Interval : 1 ~ 10 hours ( Recommend : 1 ) . Time Period : 10 ~ 50 second ( Recommend : 50 ) Note • ( Please check CD's User Guide at "OSD Function", some model's will not available ) © 1995~2008 SAMSUNG. ALL Right Reserved...
  • Seite 75: Appendix

    Appendix Appendix Contact SAMSUNG WORLDWIDE Contact SAMSUNG WORLDWIDE Terms Correct Disposal Authority Note • If you have any questions or comments relating to Samsung products, please contact the SAMSUNG customer care center. North America 1-800-SAMSUNG(726-7864) http://www.samsung.com/us U.S.A CANADA 1-800-SAMSUNG(726-7864) http://www.samsung.com/ca...
  • Seite 76 CZECH REPUBLIC DENMARK 70 70 19 70 http://www.samsung.com/dk FINLAND 030-6227 515 http://www.samsung.com/fi 3260 SAMSUNG(726-7864) FRANCE http://www.samsung.com/fr 08 25 08 65 65 (€ 0,15/min) GERMANY 01805-121213 (€ 0,14/Min) http://www.samsung.de HUNGARY 06-80-SAMSUNG(726-7864) http://www.samsung.com/hu ITALIA 800-SAMSUNG(726-7864) http://www.samsung.com/it LUXEMBURG 0035 (0)2 261 03 710 http://www.samsung.com/be...
  • Seite 77: Multiple Display Control (Mdc)

    0800-329-999 http://www.samsung.com/tw TAIWAN VIETNAM 1 800 588 889 http://www.samsung.com/vn Middle East & Africa SOUTH AFRICA 0860-SAMSUNG(726-7864 ) http://www.samsung.com/za TURKEY 444 77 11 http://www.samsung.com.tr 800-SAMSUNG (726-7864) U.A.E http://www.samsung.com/mea 8000-4726 Terms Sync Signal Sync (Synchronized) Signals refer to the standard signals that are required to display desired colors on the LCD monitor.
  • Seite 78: Correct Disposal

    Reproduction in any manner whatsoever without the written permission of Samsung Electronics Co., Ltd. is strictly forbidden. Samsung Electronics Co., Ltd. shall not be liable for errors contained herein or for incidental or consequential damages in connection with the furnishing, performance, or use of this material.
  • Seite 80: Veiligheidsvoorschriften

    Veiligheidsvoorschriften Noterend Stroom Installatie Reinigen Overig Inleiding De kleur en het uiterlijk van het apparaat kunnen variëren afhankelijk van het model, en de productspecificaties Aansluitingen kunnen zonder voorgaand bericht worden gewijzigd met als doel het product te verbeteren. De software gebruiken Veiligheidsvoorschriften De monitor aanpassen Problemen oplossen...
  • Seite 81 Dit kan leiden tot elektrische schokken en brand. Gebruik alleen een stekker en stopcontact die zijn voorzien van een aardeaansluiting. Wanneer het apparaat niet goed is geaard, kan dit leiden tot schokken of schade aan het apparaat. (Apparatuur van klasse I.) Sluit het netsnoer goed aan, zodat deze niet losraakt.
  • Seite 82 gewerkt wordt met chemische oplossingen of waar de monitor 24 uur per dag in werking is, zoals een vliegveld of treinstation. Als u dit niet doet, kan er schade aan het apparaat ontstaan. Zet uw monitor in een ruimte met een lage luchtvochtigheid en zo weinig mogelijk stof.
  • Seite 83 Installeer het product niet op een plek met slechte ventilatie, zoals bijvoorbeeld een boekenplank of kast. Verhoging van de temperatuur binnenin het product kan brand veroorzaken. Zet de monitor voorzichtig op zijn plaats. Zo voorkomt u schade aan de monitor. Leg de monitor nooit met de voorkant omlaag.
  • Seite 84 Gebruik een aanbevolen schoonmaakmiddel en een zachte doek. Als er stof of vuil tussen de pootjes van de stekker zit, moet u dit zorgvuldig verwijderen met een droge doek. Vuil tussen de stekker kan leiden tot elektrische schokken en brand. Controleer dat het netsnoer uit het stopcontact is gehaald voordat u het product reinigt.
  • Seite 85 Schakel de stroom niet in als het buiten onweert en bliksemt of maak gedurende een langere periode geen gebruik van de monitor. Een defecte monitor kan een elektrische schok of brand veroorzaken. Probeer het beeldscherm niet te verplaatsen door enkel aan het snoer of de signaalkabel te trekken.
  • Seite 86 Dit kan brand of een elektrische schok veroorzaken. Als er vloeistoffen of water het product invloeien, zet het product dan uit, haal de stekker uit het stopcontact en neem contact op met het servicecentrum. Als het beeld gedurende langere tijd stilstaat, kan de afbeelding licht "inbranden".
  • Seite 87 erplaats het product altijd met 2 personen. Het laten vallen van het product kan een defect aan het product of fysieke schade veroorzaken. Houd het product uit de buurt van kinderen. Zij zouden het product kunnen beschadigen door er aan te zitten. Een vallend product kan schade, of zelfs de dood, veroorzaken.
  • Seite 88 De klant kan de gebruikte of oplaadbare accu afgeven bij het dichtstbijzijnde gemeentelijke afvaldepot of bij een winkel die eenzelfde type accu of oplaadbare accu verkoopt. © 1995~2008 SAMSUNG. Alle rechten voorbehouden...
  • Seite 89 Inhoud Veiligheidsvoorschriften .................. 1 ......................1 Noterend ......................... 1 Stroom ......................2 Installatie ......................... 4 Reinigen ......................... 5 Overig Inleiding ......................12 ..................12 Inhoud van de verpakking ....................13 Uw monitor ..................20 Mechanische vormgeving Aansluitingen ......................26 ..................26 De voet installeren ..................
  • Seite 90 Informatie ....................... 72 ..................72 Voor een betere weergave ………………………….. 72 PRODUCTINFORMATIE (bestand tegen beeld vasthouden) Appendix ......................76 ............76 Neem contact op met SAMSUNG WORLDWIDE ......................78 Woordenlijst ................79 Correcte verwijdering van dit product ………..................... 79 Rechten...
  • Seite 91: Veiligheidsvoorschriften

    Veiligheidsvoorschriften Inleiding Inhoud van de verpakking Uw monitor Mechanische vormgeving Aansluitingen De kleur en het uiterlijk van het apparaat kunnen variëren afhankelijk van het model, en de productspecificaties De software gebruiken kunnen zonder voorgaand bericht worden gewijzigd met als doel het product te verbeteren. De monitor aanpassen Problemen oplossen Inleiding...
  • Seite 92 Afstandsbediening MagicNet Batterijen (AAA X 2) Afdekplaat Adapteruitgang voor BNC Tijdelijke voet naar RCA. Apart verkrijgbaar Muurbevestigsset Luidsprekerset Voet DVI-kabel BNC-kabel Uw monitor Voorkant MENU Als het menu beeldinstellingen niet geactiveerd is, maak dan gebruik van deze knop om de OSD te openen en vervolgens een menu-onderdeel te activeren.
  • Seite 93 Links/rechts-knop Hiermee kunt u horizontaal van het ene naar het andere menu-onderdeel gaan of kunt u de geselecteerde menuwaarden aanpassen. ENTER De optie wordt gebruikt om het OSD-menu te selecteren. SOURCE Hiermee schakelt u over van de pc-modus op de videomodus. Het veranderen van de bron is alleen toegestaan bij externe apparaten, die momenteel zijn aangesloten op de monitor.
  • Seite 94 POWER S/W (Ein/Aus-Schalter) ON [ | ] / OFF [O] Hiermee zet u de monitor aan of uit. POWER IN (Signalbuchse): Netvoeding; wordt op de monitor en het stopcontact aangesloten. RS232C OUT/IN (Serieller ANSCHLUSS RS232C) MDC (Multiple Display Control)-Programm-Anschluss DVI / PC IN [RGB] (PC-Video-Anschlussbuchse) Verwenden des 15-polig, D-Sub –...
  • Seite 95 10) AV AUDIO IN [L-AUDIO-R](MONITOR-Audio- Anschlussbuchse (Eingang)) 11) AV OUT [VIDEO](Video-Anschlussbuchse) : AV-Modus (Ausgang) 12) AV IN [VIDEO](Video-Anschlussbuchse) (Eingang) 13) AV OUT [S-VIDEO] (S-Video- Anschlussbuchse) : S-Video-Modus (Ausgang) 14) AV IN [S-VIDEO](S-Video-Anschlussbuchse) (Eingang) 15) EXT SPEAKER(8 ) [- - L - +, - - R - +] (Uitgang luidsprekers (8 16) AUDIO OUT [L-AUDIO-R] (MONITOR-Audio- Anschlussbuchse (Ausgang))
  • Seite 96 links-rechts knop S.MODE 21. STILL 22. FM RADIO 23. P.SIZE DUAL/MTS SOURCE SWAP SIZE STOP PLAY/PAUSE ON / OFF Gebruik deze knop als u de monitor wilt in- of uitschakelen. MAGICNET MagicNet knop voor snelstart. - Deze functionaliteit is voor deze monitor niet beschikbaar. MDC knop voor snelstart.
  • Seite 97 Tv-kanalen bieden informatiediensten via teletekst. [TTX / MIX wordt hoofdzakelijk in Europa gebruikt. ] MENU Als het menu beeldinstellingen niet geactiveerd is, maak dan gebruik van deze knop om de OSD te openen en vervolgens een menu-onderdeel te activeren. ENTER De optie wordt gebruikt om het OSD-menu te selecteren.
  • Seite 98 De afbeelding in het PIP-venster verschijnt op het hoofdscherm, terwijl de afbeelding van het hoofdscherm in het PIP-venster verschijnt. SIZE U kunt het beeldformaat wijzigen. Terugspoelen STOP Stoppen PLAY / PAUSE Afspelen / Pauze Snel vooruit © 1995~2008 SAMSUNG. Alle rechten voorbehouden...
  • Seite 99: Mechanische Vormgeving

    Mechanische vormgeving Monitor head Standaard Speaker Aanwijzingen voor het installeren van de VESA-beugel Installatie van de wandsteun 1. Mechanische vormgeving 2. Monitor head...
  • Seite 100 Let er bij het installeren van VESA op, dat u voldoet aan de internationale VESA-normen. Informatie over en aankoop en installatie van de VESA-beugel: Neem contact op met uw dichtsbijzijnde Samsung distributeur om een bestelling te plaatsen. Nadat de bestelling is geplaatst, zal een professioneel team de beugel bij u komen installeren.
  • Seite 101 6. Installatie van de wandsteun Neem contact op met een technicus alvorens de wandsteun te bevestigen. Samsung Electronics aanvaardt geen aansprakelijkheid voor enige schade aan het product of letsel bij de klant als de installatie uitgevoerd wordt door de klant zelf.
  • Seite 102 Er zijn twee scharnieren (links en rechts). Use the correct one. Controleer voordat u in de wand gaat boren of de lengte tussen de twee schroefgaten aan de achterkant van het product juist is. Als de afstand te klein of te groot is, maakt u alle of enkele van de vier schroeven van de muurbevestigingsbeugel los om de afstand aan te passen.
  • Seite 103 Verwijder de 4 schroeven aan de achterkant van het product. Plaats de schroef B in de kunststof drager. 1. Monteer het product op de wandsteun en controleer dat het goed is bevestigd aan de linker en rechter kunststof dragers. 2. Wees voorzichtig bij het installeren van het product op de steun.
  • Seite 104 1. Bevestig het product aan de wandsteun. Zorg ervoor dat u het midden van het product 2. Houd het product bovenop in het midden vast en trek het naar gebruikt om de stand aan te passen, en niet de voren (in de richting van de pijl) om de stand aan te passen. linker- of rechterkant.
  • Seite 105: Aansluitingen

    De voet installeren Appendix Opmerking • Gebruik hiervoor alleen de meegeleverde schroeven. Waarschuwing Samsung Electronics is niet verantwoordelijk voor eventuele schade die veroorzaakt wordt door het gebruik van een andere voet dan aangegeven. De tijdelijke voet installeren. Linker voet Right stand Waarschuwing Plaats het label "caution"...
  • Seite 106 Waarschuwing Deze standaard is oorspronkelijk bedoeld voor het aanpassen van de hoek waar in het scherm is gepositioneerd. Het bedrijf is niet aansprakelijk voor problemen die worden veroorzaakt door gebruik van deze standaard. Gebruik dit product nooit als een standaard waarop voorwerpen worden geplaatst. 2.
  • Seite 107 Sluit de audiokabel van uw monitor aan op de audiopoort van uw computer. Zet zowel uw computer als uw monitor aan. Opmerking • De DVI of BNC-kabel is optioneel. Neem contact op met een lokaal servicecentrum van Samsung Electronics, om optionele onderdelen te kopen.
  • Seite 108 Digitale DVD-speler aansluiten Opmerking • Invoerapparaten zoals een digitale DVD-speler worden aangesloten op de DVI IN-aansluiting van de monitor met gebruik van de DVI-kabel. • Schakel de DVD-speler in en zorg dat een schijf in de speler is geplaatst. • Selecteer Digital met behulp van de toets SOURCE. Opmerking •...
  • Seite 109 Sluit op COMPONENT AUDIO IN [L-AUDIO-R] van de monitor een audiokabel aan en verbindt deze met de AUDIO-UITGANG van de dvd-speler. Sluit op de BNC/COMPONENT IN - voor aansluiting op P poort van de monitor een videokabel , Y, P aan en verbindt deze met de P , Y, P van de dvd-speler.
  • Seite 110 Als u een stereo camcorder heeft, moet u twee kabels aansluiten. D-TV Set Top Box aansluiten Opmerking • De aansluitingen voor een dergelijke Set Top Box worden hieronder weergegeven. Sluit op de BNC/COMPONENT IN - voor aansluiting op P , Y, P poort van de monitor een videokabel aan en verbindt deze met de P , Y, P...
  • Seite 111 De luidsprekerbeugel voor bevestiging van de SET-luidspreker is mogelijk beschadigd. Aansluiten op een stereo-installatie Sluit op de AUX L en R van de stereo-installatie een audiokabel aan en verbindt deze met de linker en rechter AUDIO OUT [L-AUDIO-R] van de monitor. © 1995~2008 SAMSUNG. Alle rechten voorbehouden...
  • Seite 112 Begin - Hoofdscherm Klik op Start > Program > Samsung > MDC System, om het programma te starten. Selecteer een apparaat, om het volume van het geselecteerde apparaat in de schuifbalk te kunnen zien.
  • Seite 113 Hoofdpictogrammen Selectieknop Remocon Overzicht Safety Lock Selectie beeldscherm Poortselectie Bedieningsgereedschappen 1. Gebruik de hoofdpictogrammen om over te schakelen naar ieder beeldscherm. 2. Met deze optie kunt u de signaalontvangst van de afstandsbediening van de betreffende beeldschermeenheid in- en uitschakelen. 3. Stelt de slotfunctie in. Wanneer u de slotfunctie instelt, kunt u de knoppen power <aan/uit>...
  • Seite 114: Power Control

    1. De Meervoudige Display Control wordt oorspronkelijk ingesteld op COM1. 2. Als u een andere poort dan COM1 gebruikt, kunt u COM1 tot en met COM4 selecteren in het menu Port selection. 3. Als de exacte poortnaam die op de monitor met een seriële kabel is aangesloten, niet is geselecteerd, is communicatie niet mogelijk.
  • Seite 115: Input

    In het overzicht treft u basisinformatie aan die noodzakelijk is voor Power Control. (Power Status (resterend vermogen)) 2) Input 3) Image Size 4) On Timer 5) Off Timer 2. Gebruik de knop Alles selecteren of het aankruisvakje, om een beeldscherm te selecteren dat u wilt bedienen. Met de optie Power Control kunt u sommige functies bedienen van het geselecteerde beeldscherm.
  • Seite 116: Input Source

    - Schakelt het geselecteerde beeldscherm Aan/Uit. 2) Volume - Controleert het volumeniveau van het geselecteerde scherm. Het ontvangt de volumewaarde van het geselecteerde beeldscherm en geeft dit weer in de schuifbalk. (Als u een selectie annuleert of de optie Alles selecteren selecteert, zal de waarde de standaardwaarde 10 aannemen) Mute On/Off (Mute Aan/Uit) - Schakelt de Mute van het geselecteerde beeldscherm Aan/Uit.
  • Seite 117 Het overzicht toont u basisinformatie die noodzakelijk is voor de Input Source Control. 1) PC - Verandert de ingangsbron van het geselecteerde display in PC. 2) BNC - Verandert de ingangsbron van het geselecteerde display in BNC. 3) DVI - Verandert de ingangsbron van het geselecteerde display in DVI. 4) TV - Verandert de ingangsbron van het geselecteerde display in TV.
  • Seite 118 Het overzicht toont u basisinformatie die noodzakelijk is voor het instellen van het beeldformaat. (Power Status (resterend vermogen)) - Geeft aan of het huidige beeldscherm in of uitgeschakeld is. 2) Image Size - Geeft aan of het huidige Image Size in of uitgeschakeld is. 3) Input - Geeft de huidige Ingangsbron aan van het beeldscherm dat u momenteel gebruikt.
  • Seite 119 Het overzicht toont u basisinformatie die noodzakelijk is voor het instellen van het beeldformaat. 1) Klik op het tabblad Video Source (videobron) om de beeldgrootte aan te passen voor TV, AV, S-Video, Component. Klik op de optie Alles selecteren of maak gebruik van het aankruisvakje, om een beeldscherm te selecteren dat u wilt bedienen.
  • Seite 120 Het overzicht toont u basisinformatie die noodzakelijk is voor Tijdcontrole. 1) Current Time - Stel de huidige tijd in voor het geselecteerde beeldscherm (PC-tijd) - U moet eerst de PC-tijd veranderen, voordat u de huidige tijd kunt veranderen. 2) On Time Setup - Stelt de uren, minuten, AM/PM en het volume van het geselecteerde beeldscherm in op de gewenste starttijd.
  • Seite 121 Het overzicht toont u basisinformatie die noodzakelijk is voor het instellen van het PIP-formaat. 1) PIP Size - Geeft het huidige PIP-formaat aan van het beeldsherm dat u momenteel gebruikt. 2) OFF - Schakelt de PIP uit van het geselecteerde display. 3) Large - Schakelt de PIP in van het geselecteerde display en verandert het formaat in Large.
  • Seite 122 • PIP S-Video Mode Het overzicht toont u basisinformatie die noodzakelijk is voor het instellen van het PIP-bron. 1) PIP Source - U kunt de PIP-bron instellen, zodra u de monitor heeft ingeschakeld. 2) PC - Verandert de PIP-bron van het geselecteerde display in PC. 3) BNC - Verandert de PIP-bron van het geselecteerde display in BNC.
  • Seite 123: Picture [Pc / Bnc /Dvi Mode]

    6) AV - Verandert de PIP-bron van het geselecteerde display in AV. 7) S-Video - Verandert de PIP-bron van het geselecteerde display in S-Video. 8) Component - Verandert de PIP-bron van het geselecteerde display in Component. 9) Channel - De pijl voor het kanaal verschijnt wanneer de tv als PIP Source (PIP-bron) is ingesteld. Opmerking: Sommige PIP-bronnen kunnen wellicht niet worden geselecteerd.
  • Seite 124 7) Color Tone - Wijzigt de kleurtoon voor de geselecteerde display. Indgangskilden for MagicNet fungerer kun på MagicNet-modellen. Deze optie is alleen beschikbaar voor de weergaven met stroomstatus AAN, en indien er geen selectie is gemaakt, wordt de fabrieksinstelling weergegeven. Settings Picture PC 1.
  • Seite 125 Settings Audio 1. Klik in de hoofdpictogrammen op Instellingen en vervolgens zal het scherm Settings Control op uw beeldscherm verschijnen. Het overzicht toont u basisinformatie die noodzakelijk is voor Settings Control. Nadat elke functie is geselecteerd, wordt de ingestelde waarde voor de geselecteerde functie weergegeven in de schuifbalk. Wanneer de selectie is gemaakt, zal elke functie de waarde van de instelling ophalen en weergeven in de schuifbalk.
  • Seite 126: Lamp Control

    Het overzicht toont u basisinformatie die noodzakelijk is voor Settings Control. 1) Image Lock - Alleen beschikbaar voor PC, BNC. 2) Coarse - Met deze optie kunt u de Coarse instellen van het geselecteerde beeldscherm. 3) Fine - Met deze optie kunt u de Fine instellen van het geselecteerde beeldscherm. 4) Position - Met deze optie kunt u de positie instellen van het geselecteerde beeldscherm.
  • Seite 127 Op het informatieraster ziet u een aantal basisgegevens verschijnen. 1) Maintenance - Hiermee is de functie Maintenance Control mogelijk voor alle ingangsbronnen. 2) Auto Lamp Control - Regelt automatisch de achtergrondverlichting van de geselecteerde display op een specifieke tijd. De Manual Lamp Control (handmatige lampbediening) wordt automatisch uitgeschakeld als u overschakelt naar de Auto Lamp Control (automatische lampbediening).
  • Seite 128: Video Wall

    1) Safety Screen - Elimineert de nabeelden die zich kunnen voordoen wanneer de geselecteerde display langere tijd in de modus Pause staat. U kunt de timer voor de herhalingscyclus instellen door de "Interval" op uur en "Second" op seconde te selecteren. U kunt dit per Screen Type (Schermtype) instellen op Scroll (Verschuiven), Pixel, Bar (Balk) en Eraser (Wisser).
  • Seite 129 Selecteer een modus in Screen divider (Schermindeling). Selecteer in Display Selection (Weergaveselectie) een weergave. U kunt de plaats selecteren door in de geselecteerde modus op een nummer te drukken. Het MDC-programma van Samsung ondersteunt een videoscherm van maximaal 4x4. 3) On / Off...
  • Seite 130: Problemen Oplossen

    - U kunt de plaats selecteren door in de geselecteerde modus op een nummer te drukken. 4) Format - De indeling kan worden geselecteerd om het scherm te splitsen. Full Natural U mag deze functie niet gebruiken in MagicNet. De functie Maintenance Control is alleen beschikbaar voor beeldschermen die AANSTAAN. Problemen oplossen 1.
  • Seite 131 van de waarde van ID1 weer en de waarde van ID3. 4. Alle apparaten selecteren via de optie Alles selecteren: alle waarden zullen worden ingesteld op de standaard fabrieksinstellingen.
  • Seite 132: Picture [Av / S-Video /Component / Dvi-Video Mode]

    Veiligheidsvoorschriften Inleiding Aansluitingen De software gebruiken De monitor aanpassen Input De kleur en het uiterlijk van het apparaat kunnen variëren afhankelijk van het model, en de productspecificaties Picture kunnen zonder voorgaand bericht worden gewijzigd met als doel het product te verbeteren. [PC / BNC /DVI] Picture De monitor aanpassen...
  • Seite 133 [De rechtstreekse knop op de afstandsbediening is de knop 'SOURCE'.] 3) Swap [MENU] [ENTER] [ENTER] [ENTER] De inhoud van de PIP en de hoofdafbeelding verwisselen. De afbeelding in het PIP-venster verschijnt op het hoofdscherm, terwijl de afbeelding van het hoofdscherm in het PIP-venster verschijnt.
  • Seite 134 Voor documenten of het werken met veel tekst. 4) Custom Ondanks het feit dat de waarden zorgvuldig door onze technici zijn geselecteerd, kan het zijn dat u de voorgeconfigureerde waarden niet prettig vindt voor uw ogen. Ondanks het feit dat de waarden zorgvuldig door onze technici zijn geselecteerd, kan het zijn dat u de voorgeconfigureerde waarden niet prettig vindt voor uw ogen.
  • Seite 135 [ENTER] Bepaalt de locatie op het scherm, zowel horizontaal als verticaal. Auto Adjustment [MENU] [ENTER] [ENTER] De waarden van Fine (fijn), Coarse (grof) en Position (positie) worden automatisch aangepast. Als u de resolutie wijzigt in het regelpaneel, wordt de functie Auto Adjustment uitgevoerd. (Alleen beschikbaar in modus PC/BNC.) [De rechtstreekse knop op de afstandsbediening is de knop 'AUTO'.] Signal Balance...
  • Seite 136 Mode [MENU] [ENTER] [ENTER] [ENTER] De monitor heeft vier automatische beeldinstellingen ("Dynamic", "Standard", "Movie" en "Custom") die op de fabriek tevoren zijn ingesteld. U kunt Dynamic, Standard, Movie of Custom activeren. U kunt Dynamic, Standard, Movie of Custom activeren. 1) Dynamic 2) Standard 3) Movie 4) Custom...
  • Seite 137 Niet beschikbaar in modus (DVI-Video) 1) Off 2) On PIP Picture [MENU] [ENTER] [ENTER] [ENTER] [ENTER] [< / >] [ENTER] U kunt de instellingen van het PIP-scherm aanpassen. 1) Contrast Past het contrast van het PIP-venster op uw scherm aan. 2) Brightness Past de helderheid van het PIP-venster op uw scherm aan.
  • Seite 138 SRS TS XT [MENU] [ENTER] [ENTER] [ENTER] SRS TS XT (SRS-tekst) is een gepatenteerde SRS-technologie die ervoor zorgt dat het afspelen van 5.1- inhoud van meerdere kanalen via twee luidsprekers verloopt. Trusurround biedt een fascinerende virtuele surround geluidservaring via elk weergavesysteem met twee luidsprekers, waaronder ook ingebouwde televisieluidsprekers.
  • Seite 139 4) Off Timer [MENU] [ENTER] [ENTER] [ENTER] [< / >] [ENTER] Hiermee kunt u de modus en het geluidsniveau regelen op het moment dat de monitor automatisch wordt ingeschakeld. Opmerking • Als u Yes selecteert bij On Timer, Off Timer terwijl u Clock Set niet hebt ingesteld, zal “Set the clock first" verschijnen.
  • Seite 140 4 x 4 5 x 5 1 x 2 2 x 1 1 x 5 5 x 1 Opmerking • Wanneer de Video Wall (Videomuur) aanstaat, zijn PIP (BIB), Auto Adjustment (Auto-afstellen), Image Lock (Beeldblokkering) en Size (Formaat)-functies niet beschikbaar. Als u Video Wall (Videomuur) start terwijl PIP (BIB) aanstaat, wordt PIP Off (BIB uit) gezet.
  • Seite 141: Directe Bedieningsfuncties

    Lamp Control [MENU] [ENTER] [ENTER] [ENTER] [< / >] [ENTER] Wordt gebruikt om het achtergrondlicht aan te passen en zo energie te besparen. Power On Adjustment [MENU] [ENTER] [ENTER] [ENTER] [ENTER] Past de Power On time voor het scherm aan. *Waarschuwing: Verhoog de Power On time ter voorkoming van een te hoog voltage.
  • Seite 142 Het standaard ingestelde password (wachtwoord) op het beeldscherm is “0000”. Opmerking • Het wachtwoord voor de functie key lock (toetsvergrendeling) terugstellen. Druk op MUTE On. Het wachtwoord wordt teruggesteld naar '0000'.Voor het terugstellen van het wachtwoord hebt u de afstandsbediening nodig. © 1995~2008 SAMSUNG. Alle rechten voorbehouden...
  • Seite 143: Problemen Oplossen

    Veiligheidsvoorschriften Inleiding Aansluitingen De software gebruiken De monitor aanpassen Problemen oplossen De kleur en het uiterlijk van het apparaat kunnen variëren afhankelijk van het model, en de productspecificaties Controle van de kunnen zonder voorgaand bericht worden gewijzigd met als doel het product te verbeteren. zelftestfunctie Controlelijst Problemen oplossen...
  • Seite 144 Geen benzeen, verfverdunner of andere ontvlambare stoffen en ook geen natte doek gebruiken. • Wij raden u een reinigingsmiddel van Samsung aan om schade aan het scherm te voorkomen. Het Flat Panel Display-scherm onderhouden Reinig het beeldscherm voorzichtig met een zachte doek (katoenflanel).
  • Seite 145 Problemen met de installatie Opmerking • Hier worden problemen met de installatie van de monitor en hun oplossingen beschreven. problemen Mulige løsninger Het monitorscherm knippert Controleer of de signaalkabel tussen de computer en de monitor goed is aangesloten en bevestigd. (Zie Aansluiten op een computer)
  • Seite 146 Druk op een toets op het toetsenbord. of knippert elke halve seconde of elke seconde. Indien u de melding “TEST GOOD” op het scherm ziet wanneer Het scherm is leeg en knippert. u de knop MENU indrukt, dient u de kabelverbinding tussen monitor en computer te controleren om er zeker van te zijn dat de connector goed is aangesloten.
  • Seite 147 Zorg dat er geen resten reinigingsmiddel achterblijven en voorkom krassen op de behuizing en het schermoppervlak. Zorg beslist dat er geen water e.d. in de monitor terecht kan komen. © 1995~2008 SAMSUNG. Alle rechten voorbehouden...
  • Seite 148: Specificaties

    Algemeen Energiebeheer Specificaties Voorkeurinstellingen informatie Algemeen Appendix Algemeen Algemeen Model SMT-4011 LCD-scherm Afmeting 40 inch diagonaal (101,6 cm) Beeldgrootte 885,168 mm (H) x 497,664 mm (V) Pixel Pitch 0,648 mm (H) x 0,648 mm (V) Synchronisatie Horizontaal 30 ~ 81 kHz...
  • Seite 149 Deze monitor voldoet aan de EPA ENERGY STAR en ENERGY2000 normen bij aansluiting op een computer die beschikt over VESA DPM functionaliteit. ® Als ENERGY STAR Partner heeft SAMSUNG vastgesteld dat dit product ® voldoet aan de ENERGY STAR richtlijnen voor efficiënt energiegebruik. Voorkeurinstellingen Voorkeurinstellingen Als het signaal dat van de computer wordt ontvangen gelijk is aan een van de volgende voorkeurinstellingen, wordt de monitor hier automatisch op ingesteld.
  • Seite 150 Net als een tl-buis moet ook een monitor om flikkeren te voorkomen het beeld een groot aantal keren per seconde herhalen (verversen). Dit wordt aangeduid als verticale frequentie of refresh rate, met Hz als eenheid. met: Hz © 2008 Samsung Electronics Co., Ltd. Alle rechten voorbehouden...
  • Seite 151: Informatie

    Veiligheidsvoorschriften Inleiding Aansluitingen De software gebruiken De monitor aanpassen Problemen oplossen De kleur en het uiterlijk van het apparaat kunnen variëren afhankelijk van het model, en de productspecificaties Specificaties kunnen zonder voorgaand bericht worden gewijzigd met als doel het product te verbeteren. Informatie Voor een betere weergave Informatie...
  • Seite 152 Uitschakelen, schermbeveiliging of energiebesparende modus Schakel de monitor 4 uur uit nadat deze 20 uur achterelkaar in gebruik is geweest. Schakel de monitor 2 uur uit nadat deze 12 uur achterelkaar in gebruik is geweest. Stel de monitor in op uitschakelen met Power Scheme (Energiebeheerschema) in Display Properties (Eigenschappen beeldscherm) van de computer.
  • Seite 153 Wijzig elke 30 minuten de bewegende tekens. Voor alle delen op het scherm geldt dat u regelmatig een bewegend beeld met logo moet weergeven. - Cyclus: geef na 4 uur gebruik 60 seconden een bewegend beeld met logo weer. De beste manier om uw monitor te beschermen tegen inbranding is om het scherm uit te schakelen of uw computer of systeem in te stellen met een schermbeveiliging wanneer u de monitor niet gebruikt.
  • Seite 154 . Tijdsinterval: 1 ~ 10 uur (aanbevolen: 1) . Tijdsduur: 10 ~ 50 seconden (aanbevolen: 50) Opmerking • (Controleer in de Gebruikershandleiding op de cd het onderwerp 'OSD-functies'. Voor sommige modellen is dit niet beschikbaar.) © 1995~2008 SAMSUNG. Alle rechten voorbehouden...
  • Seite 155: Appendix

    Neem contact op met SAMSUNG WORLDWIDE Woordenlijst Correcte verwijdering van dit product Opmerking Rechten • Wanneer u suggesties of vragen heeft met betrekking tot Samsung producten, gelieve contact op te nemen met de consumenten dienst van Samsung North America 1-800-SAMSUNG(726-7864) http://www.samsung.com/us U.S.A...
  • Seite 156 CZECH REPUBLIC DENMARK 70 70 19 70 http://www.samsung.com/dk FINLAND 030-6227 515 http://www.samsung.com/fi 3260 SAMSUNG(726-7864) FRANCE http://www.samsung.com/fr 08 25 08 65 65 (€ 0,15/min) GERMANY 01805-121213 (€ 0,14/Min) http://www.samsung.de HUNGARY 06-80-SAMSUNG(726-7864) http://www.samsung.com/hu ITALIA 800-SAMSUNG(726-7864) http://www.samsung.com/it LUXEMBURG 0035 (0)2 261 03 710 http://www.samsung.com/be...
  • Seite 157: Woordenlijst

    0800-329-999 http://www.samsung.com/tw TAIWAN VIETNAM 1 800 588 889 http://www.samsung.com/vn Middle East & Africa SOUTH AFRICA 0860-SAMSUNG(726-7864 ) http://www.samsung.com/za TURKEY 444 77 11 http://www.samsung.com.tr 800-SAMSUNG (726-7864) U.A.E http://www.samsung.com/mea 8000-4726 Woordenlijst Sync-signaal Sync-signalen (gesynchroniseerde) hebben betrekking op signalen die nodig zijn om de gewenste kleuren op de monitor te kunnen weergeven.
  • Seite 158: Correcte Verwijdering Van Dit Product

    Reproductie op welke wijze dan ook zonder schriftelijke toestemming van Samsung Electronics Co., Ltd. is uitdrukkelijk verboden. Samsung Electronics Co., Ltd. kan niet aansprakelijk worden gesteld voor eventuele fouten in dit document of voor rechtstreekse, indirecte of gevolgschade die samenhangt met de verstrekking, kwaliteit of gebruik van dit materiaal.
  • Seite 160 Consignes de sécurité Signalement Alimentation Installation Nettoyage Autres Introduction La couleur et l'aspect du produit peuvent varier en fonction du modèle, et ses spécifications peuvent être Connexions modifiées sans préavis pour des raisons d'amélioration des performance. Utilisation du logiciel Consignes de sécurité Réglage du moniteur Réglage du moniteur Signalement...
  • Seite 161 Utiliser uniquement des prises correctement reliées à la terre. Un sol inadapté peut causer un choc électrique ou un incendie. (Appareils de CLASSE l uniquement.) Branchez la prise d’alimentation, en veillant à ce qu’elle ne bouge pas. Une mauvaise connexion entraîne des risques d’incendie. Ne pas tordre ni la prise ni son cordon.
  • Seite 162 chimiques, ou s’il fonctionne sans interruption, par exemple dans les aéroports, les gares, etc. Le non-respect de ce qui précède peut gravement endommager le moniteur. Mettez votre moniteur dans un endroit peu humide et non poussiéreux. Un choc électrique ou un incendie peuvent être provoqués à l'interieur du moniteur.
  • Seite 163 Placer le moniteur sur une surface plane et stable. Il peut être ainsi abîmé ou cassé. Ne pas utiliser le moniteur sans son support. La surface de TFT-LCD peut ainsi être abîmée. L'installation du support mural doit être réalisée par un installateur professionnel.
  • Seite 164 Si le connecteur entre la prise et la broche est poussiéreux ou sale, le nettoyer correctement avec un chiffon sec. Un connecteur sale peut causer une décharge électrique ou un incendie. Assurez-vous que le cordon d’alimentation est débranché avant de nettoyer le produit.
  • Seite 165 Laissez votre moniteur éteint en cas d'orage et d'éclairs ou lorsque vous avez besoin de le laisser inutilisé pendant une période assez longue. Le moniteur pourrait mal fonctionner, provoquant une électrocution ou un incendie. N’essayez pas de déplacer le moniteur en tirant uniquement sur le fil ou sur le câble de signal.
  • Seite 166 tension, débranchez le connecteur d'alimentation de la prise murale et contactez le centre de services. Si vous visualisez un écran fixe pendant une longue période de temps, une image résiduelle ou floue peut apparaître. Passez en mode économie d'énergie ou réglez l'économiseur d'écran sur image mobile lorsque vous devez vous éloigner du moniteur pendant une période prolongée.
  • Seite 167 Vérifiez que deux personnes sont présentes lors de tout déplacement du produit. La chute du produit peut entraîner un dysfonctionnement du matériel ou des blessures. Tenez le produit hors de portée des enfants, qui pourraient l’endommager en s’y accrochant. La chute d’un produit peut causer des blessures et parfois la mort. Si vous prévoyez de ne pas utiliser le produit pendant une longue période, débranchez-le.
  • Seite 168 Le client peut mettre au rebus les batteries usées dans un centre de recyclage local ou dans un magasin vendant le même type de batterie. © 1995~2008 Samsung Electronics Co., Ltd. Tous droits résérvés.
  • Seite 169 Sommaire Consignes de sécurité ................... 1 ......................1 Signalement ......................1 Alimentation ......................2 Installation ......................4 Nettoyage ......................... 5 Autres Introduction ......................12 ..................12 Contenu de l’emballage ....................13 Votre moniteur ..................20 Agencement mécanique Connexions ......................26 ..............
  • Seite 170 Présélection des modes de temporisation Information ....................... 72 ..................72 Pour un meilleur affichage ..... 72 INFORMATIONS RELATIVES AU PRODUIT (Image sans fantôme résiduel) Annexe ......................76 ............... 76 Comment contacter Samsung dans le monde ....................... 78 Terme ................79 ......................79 Autorité...
  • Seite 171: Consignes De Sécurité

    Consignes de sécurité Introduction Contenu de l’emballage Votre moniteur Agencement mécanique Connexions Utilisation du logiciel La couleur et l'aspect du produit peuvent varier en fonction du modèle, et ses spécifications peuvent être Réglage du moniteur modifiées sans préavis pour des raisons d'amélioration des performance. Dépannage Caractéristiques techniques Introduction...
  • Seite 172: Autres

    Autres Télécommande Piles (AAA X 2) Bouchon Jack adaptateur BNC/RCA Support provisoire Vendu séparément Kit de fixation au mur Kit haut-parleurs Support fixe Câble DVI Câble BNC Votre moniteur Façade MENU Il permet d’ouvrir l’OSD et d’activer un élément de menu en surbrillance. Bouton Monter-Descendre Déplace d’un poste du menu à...
  • Seite 173 Bouton Gauche-Droite / Bouton Volume Déplace d’un poste du menu à un autre horizontalement ou ajuste la valeur du menu sélectionné. Ajuste également le volume du son. ENTER Pour sélectionner le menu d'affichage à l'écran OSD. SOURCE SOURCE llume l’indicateur du signal d’entrée en cours de présentation. Le changement de source n'est possible que pour les appareils externes connectés au moniteur.
  • Seite 174 POWER SW (Interrupteur Marche / Arrêt) ON/OFF Allume et éteint le moniteur. POWER IN (Port d'alimentation) Cordon d'alimentation, connecte le moniteur et la prise murale. RS232C OUT/IN (port série RS232C) : programme port MDC (Multi Device Control) DVI / PC IN [RGB] (Connexion vidéo PC) Utilisation d'un 15 broches D-Sub mode PC (PC analogue) DVI / PC IN [DVI(HDCP)] (Connexion...
  • Seite 175 10) AV AUDIO IN [L-AUDIO-R](Connexion MONITOR audio (entrée)) 11) AV OUT [VIDEO](Connexion vidéo ): mode AV (sortie) 12) AV IN [VIDEO](Connexion vidéo ) (entrée) 13) AV OUT [S-VIDEO](Connexion S-Vidéo ): mode S-Vidéo (sortie) 14) AV IN [S-VIDEO](Connexion S-Vidéo ) (entrée) 15) EXT SPEAKER(8 )[- - L - +, - - R - +] (Terminal de connexion haut-parleur (8...
  • Seite 176 EXIT 19. Haut - Bas et Gauche-Droite S.MODE 21. STILL 22. FM RADIO 23. P.SIZE DUAL/MTS SOURCE SWAP SIZE STOP PLAY/PAUSE ON / OFF Il allume et éteint le moniteur. MAGICNET Bouton de lancement rapide MagicNet. - Cette fonction n'est pas disponible sur ce moniteur. Bouton de lancement rapide MDC.
  • Seite 177 Les chaînes de télévision proposent des services d'informations écrites via le Télétexte. [TTX / MIX sont principalement utilisés en Europe. ] MENU Il permet d’ouvrir l’OSD et d’activer un élément de menu en surbrillance. ENTER Active le menu mis en surbrillance. P.MODE Bouton Canal précédent - Ce bouton sert à...
  • Seite 178 L’image de la fenêtre PIP apparaît sur l’écran principal et celle de l’écran principal apparaît dans la fenêtre PIP. SIZE Pour changer la Taille de la fenêtre PIP. Rembobinage STOP Arrêt PLAY / PAUSE Lecture / Pause Avance rapide © 1995~2008 Samsung Electronics Co., Ltd. Tous droits résérvés.
  • Seite 179 Agencement mécanique Tête du moniteur Socle Haut-parleur Installation de la fixation VESA Installation murale 1. Agencement mécanique 2. Tête du moniteur...
  • Seite 180: Haut-Parleur

    Lorsque vous installez VESA, vérifiez que vous le faites en conformité avec les normes internationales VESA. Achat et installation d'une fixation conforme aux normes VESA : veuillez vous adresser au revendeur Samsung le plus proche pour passer commande et prendre rendez-vous. Des installateurs professionnels se déplaceront alors à...
  • Seite 181: Installation Murale

    6. Installation murale Faites appel à un technicien pour installer la fixation murale. Samsung Electronics ne saurait être tenu responsable des dommages matériels ou corporels qui pourraient être causés en cas d'installationpar le client. Ce produit doit être installé sur des murs en ciment. Le produit risque de glisser s'il est installé sur du plâtre ou du bois.
  • Seite 182 Il y a deux bras (gaucheet droit). Utilisez le brasapproprié. Avant de percer le mur, vérifiez si la distance entre lesdeux coches d'enclenchement situées au dos du produitest correcte. Si elle est trop longue ou trop courte, desserrez les 4 visde la fixation murale pour régler la distance.
  • Seite 183 Retirez les 4 vis à l'arrière du produit. Insérez la vis Bdans la suspension en plastique. 1. Après avoir monté le produit sur la fixation murale, assurezvous qu'il est correctement fixé aux suspensions en plastiquedroite et gauche. 2. Lors de l'installation du produit sur son support, veillez à...
  • Seite 184 1. Installez le produit sur la fixation murale. Veillez à tenir la partie centrale supérieure et non 2. Tenez fermement la partie centrale supérieure du produit et tirez lecôté droit ou gauche du produit pour régler celui-cidans la direction des flèches afin de régler l'angle. l'angle.
  • Seite 185: Introduction

    Seuls les boulons fournis doivent être utiliser. Remarque • Seuls les boulons fournis doivent être utiliser. Attention Samsung Electronics ne peut être tenu pour responsable de dommages causés par l’emploi d’une base autre que celles spécifiées. Installer le Support simple Support...
  • Seite 186 Attention Ce pied est conçu pour régler l'angle de l'écran. La société décline toute responsabilité en cas de problème découlant de l'utilisation de ce pied. N'utilisez pas le produit comme support. Installer un support fixe (vendu séparément) Un "couvercle protecteur" est utilisé pour protéger l'orifice au bas du moniteur, à l'endroit vient s'insérer le support.
  • Seite 187 Raccordez un câble ici pour reproduire le son en provenance de la carte son de votre ordinateur. Mettre sous tension l’ordinateur et le moniteur. Remarque • Le câble DVI ou BNC est optionnel. Prendre contact avec un Centre d'Assistance Samsung Electronics pour l’achat d’équipements optionnels.
  • Seite 188 Connexion d'un lecteur de DVD numérique Remarque • Des périphériques d'entrée tels qu'un lecteur de DVD numérique sont branchés au connecteur DVI IN du moniteur à l'aide du câble DVI. • Ensuite, démarrez le lecteur DVD contenant un DVD. • Sélectionnez Digital à l'aide du bouton SOURCE. Remarque •...
  • Seite 189 Branchement d'un Lecteur DVD Player Branchez un groupe de câbles audio reliant les jacks COMPONENT AUDIO IN [L-AUDIO-R] du Moniteur aux jacks SORTIE AUDIO sur le lecteur DVD. Branchez un câble vidéo entre les jacks BNC/COMPONENT IN - connecte les ports P , Y, P sur le moniteur et les jacks P...
  • Seite 190 Remarque • Les câbles audio-vidéo qui sont représentés dans ce document sont généralement fournis avec le caméscope. (dans le cas contraire, demandez conseil auprès de votre revendeur). Si votre caméscope fonctionne en stéréo, vous devez brancher un ensemble de deux câbles. Branchement du décodeur DTV Remarque •...
  • Seite 191 Le support de fixation des haut-parleurs au téléviseur/moniteur pourrait être endommagé. Branchement vers un Système Audio Branchez un groupe de câbles audio entre les jacks AUX L, R du SYSTEME AUDIO et les jacks AUDIO OUT [L-AUDIO-R] du Moniteur. © 1995~2008 Samsung Electronics Co., Ltd. Tous droits résérvés.
  • Seite 192: Main Screen

    PC et l'écran. Par conséquent, un câble en série devra relier le port en série du PC au port en série de l'écran. Main Screen Cliquez sur Start > Program > Samsung > Commande d'écrans multiples pour lancer le programme. Sélectionnez un poste pour voir le volume du poste sélectionné dans la case de défilement.
  • Seite 193 Icônes du Menu Principal Bouton Sélectionner Remocon Tableau d'information Safety Lock Sélection de l'écran Port Selection Outils de contrôle 1. Utilisez les icônes du menu principal pour passer d'une fenêtre à l'autre. 2. Vous permet d'activer ou de désactiver la fonction de réception du signal de la télécommande de l'écran. 3.
  • Seite 194: Port Selection

    Port Selection 1. Le contrôle multiple d'affichage est normalement défini en COM1. 2. Si un port autre que COM1 est utilisé, vous pouvez alors, dans le menu de sélection, sélectionner des ports de COM1 à COM4. 3. Si le nom exact du port auquel est connecté le moniteur via un câble série n'est pas sélectionné, la communication ne sera pas possible.
  • Seite 195 Le Tableau d'Information fournit l'information de base nécessaire au Contrôle de l'Alimentation. (Power Status (Indicateur d'Alimentation)) 2) Input 3) Image Size 4) Minuterie ON 5) Minuterie OFF 2. Utilisez le bouton Sélectionner Tout ou cochez une case pour sélectionner un écran à contrôler. Le Contrôle d'Alimentation permet de commander certaines des fonctions de l'écran sélectionné.
  • Seite 196: Input Source

    - Permet d'allumer ou d'éteindre l'écran sélectionné [AF1] 2) Volume - Contrôle le niveau de volume de l'écran sélectionné. Il reçoit la valeur du volume de l'écran sélectionné depuis les postes et l'affiche dans la case de défilement. (Lorsque vous modifiez la sélection ou choisissez Sélectionner Tout, la valeur par défaut 10 est restituée) Mute On/Off (Marche/Arrêt de la fonction Muet) - Coupe ou rétablit le son de l'écran sélectionné...
  • Seite 197 Le Tableau d'Information fournit l'information de base nécessaire au Contrôle de la Source d'Entrée. 1) PC - Remplace la source d'entrée de l'affichage sélection par PC. 2) BNC - Remplace la source d'entrée de l'affichage sélection par BNC. 3) DVI - Remplace la source d'entrée de l'affichage sélection par DVI.
  • Seite 198 La grille d'information affiche des informations sommaires nécessaire au Contrôle de la taille de l'image. (Power Status (Indicateur d'Alimentation)) - Indique l'état d'alimentation de l'écran utilisé. 2) Image Size - Affiche la taille actuelle de l'image dans l'affichage sélectionné. 3) Input - Indique la Source d'Entrée actuelle de l'écran utilisé.
  • Seite 199 La grille d'information affiche des informations sommaires nécessaire au Contrôle de la taille de l'image. 1) Cliquer sur l'onglet Video Source (Source vidéo) pour régler la taille de l'image pour TV (TV), AV (AV), S-Video (S- Vidéo), Component (Composant). Cliquez sur "Tout sélectionner" ou cochez la Case Contrôle pour faire afficher un type d'affichage. 2) La grille d'information n'affiche que l'affichage ayant TV, AV, S-VIDEO, COMPONENT, DVI(HDCP) comme source d'entrée.
  • Seite 200 Le Tableau d'Information fournit l'information de base nécessaire au Contrôle de l'Heure. 1) Current Time (Heure Actuelle) - Permet de régler l'heure actuelle pour l'écran sélectionné (Heure PC) - Pour modifier l'heure actuelle, modifiez d'abord l'Heure PC. 2) On Time Setup (Réglage Heure de Marche) Réglez Hour (Heure), Minute (Minute), AM/PM (Matin/Après-midi) de On Time Setup (Réglage heure mise en marche), ainsi que Status (Statut), Source (Source), Volume (Volume) pour l'écran sélectionné.
  • Seite 201 La grille d'information affiche des informations sommaires nécessaire au Contrôle de la taille de la fenêtre PIP. 1) PIP Size (Taille de la fenêtre PIP) - Affiche la taille actuelle de la fenêtre PIP affichée. 2) OFF (Arrêt) - Désactive la fonction PIP de l'affichage sélectionné. 3) Large - Active la fonction PIP de l'affichage sélectionné...
  • Seite 202 • PIP S-Video Mode La grille d'information affiche des informations sommaires nécessaire au Contrôle de la Source PIP. 1) PIP Source - La source de la fenêtre PIP peut se régler après avoir allumé le moniteur. 2) PC - Remplace la source de la PIP de l'affichage sélectionné par PC. 3) BNC - Remplace la source de la PIP de l'affichage sélectionné...
  • Seite 203 6) AV - Remplace la source de la PIP de l'affichage sélectionné par AV. 7) S-Video - Remplace la source de la PIP de l'affichage sélectionné par S-Video. 8) Component - Remplace la source de la PIP de l'affichage sélectionné par Component. 9) Channel (Chaîne) - La flèche de la chaîne s'affiche lorsque la PIP Source (Source PIP) est TV.
  • Seite 204 7) Color Tone (Nuance Coul.) - Permet de régler le ton des couleurs pour l'affichage sélectionné. La source d’entrée de MagicNet ne fonctionne que sur le modèle MagicNet. Cette fonction est disponible uniquement pour les affichages dont l’alimentation est active. Si aucune sélection n’a été...
  • Seite 205 Audio 1. Cliquez sur l'icône Réglages dans le menu principal pour afficher l'écran de Contrôle des Paramètres. Le Tableau d'Information fournit l'information de base nécessaire pour le Contrôle des Paramètres. Lorsque toutes les fonctions sont sélectionnées, la valeur réglée pour la fonction sélectionnée est affichée sur la réglette. Lorsqu'elles sont sélectionnées, les fonctions extraient la valeur pour l'ensemble et l'affichent sur la réglette.
  • Seite 206: Lamp Control

    Le Tableau d'Information fournit l'information de base nécessaire pour le Contrôle des Paramètres. 1) Verrouillage Image - Disponible que pour PC, BNC. 2) Coarse (Regl. Base) - Permet de régler la Coarse de l'écran sélectionné. 3) Fine (Regl. Prec) - Permet de régler la Fine de l'écran sélectionné. 4) Position - Permet de régler la Position de l'écran sélectionné.
  • Seite 207 S'affiche alors une "Grille d'informations" affichant différentes données de base. 1) Maintenance - Autorise la fonction Maintenance Control (Contrôle de maintenance) pour toutes les sources d'entrée. 2) Auto Lamp Control - Permet de régler automatiquement le rétro-éclairage de l'affichage sélectionné à une heure donnée. Le Manual Lamp Control (Contrôle automatique de la lampe) s'arrête automatiquement si vous effectuez le réglage via Auto Lamp Control (Contrôle auto lampe).
  • Seite 208: Video Wall

    1) Screen Scroll - Permet d'éliminer les images résiduelles pouvant restées à l'écran lorsque l'affichage est resté en mode Pause pendant longtemps. Vous pouvez activer le minuteur pour répéter le cycle en sélectionnant "Interval" en heures et "Second" en secondes. Peut être réglé...
  • Seite 209 Sélectionnez un mode dans la fonction Division de l'écran. Sélectionnez un affichage dans la fonction Display Selection. L'emplacement sera défini en appuyant sur un numéro dans le mode sélectionné. Le programme MDC fourni par Samsung prend en charge jusqu'à 4x4 écrans LCD. 3) On / Off...
  • Seite 210 - Active/désactive la fonction Wall (Mur) de l'affichage sélectionné. 4) Format - Le format peut être sélectionné pour afficher un écran divisé. Plein Natural Cette fonction peut ne pas être active dans MagicNet. La fonction de Maintenance n'est disponible que pour les affichages dont le statut est "ACTIVÉ". Troubleshooting 1.
  • Seite 211 de l'ID1, récupère et affiche la valeur de l'ID3. 4. Tous les postes sélectionnés en utilisant « Sélectionner Tout » : Rétablit la Valeur d'Usine par Défaut.
  • Seite 212: Réglage Du Moniteur

    Consignes de sécurité Introduction Connexions Utilisation du logiciel Réglage du moniteur Entrée La couleur et l'aspect du produit peuvent varier en fonction du modèle, et ses spécifications peuvent être Image modifiées sans préavis pour des raisons d'amélioration des performance. [PC / BNC /DVI Mode] Image Réglage du moniteur [AV / S-Video /...
  • Seite 213 - Composant : PC / DVI Mode [L'accès direct peut se faire par le bouton de la télécommande 'SOURCE'.] 3) Intervertir [MENU] [ENTER] [ENTER] [ENTER] Echange du contenu des images main et PIP. L’image de la fenêtre PIP apparaît sur l’écran principal et celle de l’écran principal apparaît dans la fenêtre PIP.
  • Seite 214 4) Personnalisé Bien que rigoureusement choisies par nos ingénieurs, les valeurs préconfigurées peuvent ne pas vous convenir. Si tel est le cas, réglez la Brightness (Luminosité) et le Contrast (Contraste) en utilisant le menu de l'OSD. [L'accès direct peut se faire par le bouton de la télécommande 'M/B'.] Personnalisé...
  • Seite 215 Permet de régler la position horizontale et verticale de l'écran. Réglage Automatique [MENU] [ENTER] [ENTER] Les valeurs du réglage fin, du réglage de base et de la position sont automatiquement ajustées. Si vous modifiez la résolution à partir du panneau de configuration, la fonction Réglage Automatique sera exécutée.
  • Seite 216 [MENU] [ENTER] [ENTER] [ENTER] Le moniteur a quatre paramétrages automatiques de l'image : ("Dynamique", "Standard""Cinéma", et "Personnel" ). Vous pouvez activer indifféremment le Personnel, Dynamique, Standard ou Cinéma. Vous pouvez sélectionner "Personnel" qui rappellera automatiquement vos paramètres personnels d'image. 1) Dynamique 2) Standard 3) Cinéma 4) Personnalisé...
  • Seite 217 [MENU] [ENTER] [ENTER] [ENTER] Vous pouvez activer ou désactiver le mode Film. Réduit les différences de volume entre les différents programmes. (Non disponible en mode DVI-Video.) 1) Arrêt 2) Marche Image PIP [MENU] [ENTER] [ENTER] [ENTER] [ENTER] [< / >] [ENTER] Vous pouvez définir les paramètres de l’écran PIP.
  • Seite 218 Volume auto [MENU] [ENTER] [ENTER] [ENTER] Réduit les différences de volume entre les différents programmes. 1) Arrêt 2) Marche SRS TS XT [MENU] [ENTER] [ENTER] [ENTER] La technologie SRS TS XT est une technologie SRS brevetée qui répond au problème de lecture des contenus multicanaux 5.1 sur deux haut-parleurs.
  • Seite 219 [ENTER] Permet de paramétrer le lancement automatique du moniteur à une heure prédéfinie. Permet de contrôler le mode et le niveau du volume au moment où le moniteur se met automatiquement en marche. 4) Minuterie OFF [MENU] [ENTER] [ENTER] [ENTER] [<...
  • Seite 220 • L'emplacement sera défini en appuyant sur un numéro dans le mode sélectionné. 2 x 2 3 x 3 4 x 4 5 x 5 1 x 2 2 x 1 1 x 5 5 x 1 Remarque • Lorsque le Mur d'images est en cours d'exécution, les fonctions PIP, Réglage automatique, Verrouillage Image et Taille ne sont pas disponibles.
  • Seite 221 Contrôle de la lampe [MENU] [ENTER] [ENTER] [ENTER] [< / >] [ENTER] Permet de régler le rétro-éclairage afin de réduire la consommation d’énergie. Activation au réglage [MENU] [ENTER] [ENTER] [ENTER] [ENTER] Règle la fonction Power On time (Heure marche) pour l'écran. *Attention: Définissez la fonction Power On time sur un temps plus long pour éviter la surpression.
  • Seite 222 • Réinitialisation du mot de passe pour le verrouillage des touches de fonction. Appuyez sur MUTE On. Le mot de passe est réinitialisé (sa valeur devient '0000'). La télécommande est nécessaire pour réinitialiser le mot de passe. © 1995~2008 Samsung Electronics Co., Ltd. Tous droits résérvés.
  • Seite 223: Dépannage

    Consignes de sécurité Introduction Connexions Utilisation du logiciel Réglage du moniteur Dépannage La couleur et l'aspect du produit peuvent varier en fonction du modèle, et ses spécifications peuvent être Vérification de la fonction modifiées sans préavis pour des raisons d'amélioration des performance. Autotest Liste de vérification Dépannage...
  • Seite 224 N’utilisez pas de benzène, de diluant ni d’autres substances inflammables, ni de chiffon humide. • Nous vous conseillons d’utiliser un produit de nettoyage Samsung pour éviter d’endommager votre écran. Entretien de l’Ecran Plat. Nettoyez doucement à l'aide d'un chiffon doux (coton).
  • Seite 225 • Les problèmes liés à l’installation du moniteur et leurs solutions sont listés ci-dessous. Problèmes Solutions Contrôler que le câble de signal VGA entre l’ordinateur et le L’écran du moniteur scintille. moniteur est correctement connecté et bien serré. (Se reporter à la rubrique Se connecter à...
  • Seite 226: Q & R

    l'écran lorsque vous appuyez sur le bouton MENU, vérifiez le câble entre le moniteur et l'ordinateur pour être sûr que les prises soient correctement branchées. Problèmes liés à l'audio. Remarque • Les problèmes liés aux signaux audio et leurs solutions sont listés ci-dessous. Problèmes Solutions Veillez à...
  • Seite 227 Panneau LCD? chiffon doux imprégné d'une solution de nettoyage ou d'eau. Ne pas laisser de détergent ni faire d'égratinure sur la boîtier. Ne pas laisser l'eau s'infiltrer dans le moniteur. © 1995~2008 Samsung Electronics Co., Ltd. Tous droits résérvés.
  • Seite 228: Caractéristiques Techniques

    Caractéristiques techniques Présélection des modes de temporisation Généralités Information Généralités Annexe Généralités Nom du Modèle SMT-4011 Panneau LCD Taille Diagonale de 40" (101,6 cm) Zone d'Affichage 885,168 mm (H) x 497,664 mm(V) Pixel Pitch 0,648 mm (H) x 0,648 mm(V) Synchronisation...
  • Seite 229: Présélection Des Modes De Temporisation

    Entrée audio 1 Prise RCA Rouge(R) Blanc(L), 0,5 Vrms (-9 dB) Entrée audio 2 Prise RCA Rouge(R) Blanc(L), 0,5 Vrms (-9 dB) Entrée audio PC Prise stéréo diamètre 3,5, 0,5 Vrms (-9 dB) Fréquence HF : 80 Hz ~ 15 kHz (à -3 dB) Réponse A/V : 80 Hz ~ 15 kHz (à...
  • Seite 230 Comme une lampe fluorescente, l'écran doit répéter la meme image plusieurs fois par seconde pour afficher une image visible pour l'utilisateur. La fréquence de répétition est appelée Fréquence Verticale ou le Taux de Rafraîchissement Unité: Hz © 1995~2008 Samsung Electronics Co., Ltd. Tous droits résérvés.
  • Seite 231: Information

    Consignes de sécurité Introduction Connexions Utilisation du logiciel Réglage du moniteur Dépannage La couleur et l'aspect du produit peuvent varier en fonction du modèle, et ses spécifications peuvent être Caractéristiques techniques modifiées sans préavis pour des raisons d'amélioration des performance. Information Pour un meilleur affichage Information...
  • Seite 232 Arrêt, Economiseur d'écran ou Mode économie d'énergie Mettez le moniteur hors tension pendant 4 heures après 20 heures d'utilisation Mettez le moniteur hors tension pendant 2 heures après 12 heures d'utilisation Réglez le moniteur sur la mise hors tension à l'aide du PC Display Properties Power Scheme. Utilisez un économiseur d'écran si possible - Un économiseur d'écran monochrome ou celui d'une image en mouvement est recommandé.
  • Seite 233 Toutes les 30 minutes, modifiez les caractères avec un mouvement. Toutes les zones affichent périodiquement une image en mouvement associée à un logo. - Cycle : affichez une image en mouvement associée à un logo pendant 60 secondes après 4 heures d'utilisation.
  • Seite 234 . Durée : 10 ~ 50 secondes ( recommandé : 50 ) Remarque • ( Vérifiez le Manuel d'utilisation du CD à "Fonction OSD". Certains modèles ne seront pas disponibles ) © 1995~2008 Samsung Electronics Co., Ltd. Tous droits résérvés.
  • Seite 235: Annexe

    Samsung dans le monde Comment contacter Samsung dans le monde Terme Comment éliminer ce produit Remarque Autorité • Si vous avez des suggestions ou des questions concernant les produits Samsung, veuillez contacter le Service Consommateurs Samsung. North America 1-800-SAMSUNG(726-7864) http://www.samsung.com/us U.S.A CANADA 1-800-SAMSUNG(726-7864) http://www.samsung.com/ca...
  • Seite 236 CZECH REPUBLIC DENMARK 70 70 19 70 http://www.samsung.com/dk FINLAND 030-6227 515 http://www.samsung.com/fi 3260 SAMSUNG(726-7864) FRANCE http://www.samsung.com/fr 08 25 08 65 65 (€ 0,15/min) GERMANY 01805-121213 (€ 0,14/Min) http://www.samsung.de HUNGARY 06-80-SAMSUNG(726-7864) http://www.samsung.com/hu ITALIA 800-SAMSUNG(726-7864) http://www.samsung.com/it LUXEMBURG 0035 (0)2 261 03 710 http://www.samsung.com/be...
  • Seite 237: Terme

    0800-329-999 http://www.samsung.com/tw TAIWAN VIETNAM 1 800 588 889 http://www.samsung.com/vn Middle East & Africa SOUTH AFRICA 0860-SAMSUNG(726-7864 ) http://www.samsung.com/za TURKEY 444 77 11 http://www.samsung.com.tr 800-SAMSUNG (726-7864) U.A.E http://www.samsung.com/mea 8000-4726 Terme Signaux de synchronisation Les signaux de synchronisation font référence aux signaux standards nécessaires pour afficher les couleurs voulues sur le moniteur.
  • Seite 238: Autorité

    Logo de Samsung sont des marques commerciales déposées de Samsung Electronics Co., Ltd.; " Microsoft ", " Windows ", " Windows NT " sont des marques commerciales déposées de Microsoft Corporation. " VESA ", "...
  • Seite 239 TFT-LCD Monitor...
  • Seite 240 Sicherheitshinweise Zeichenerklärung Ein/Aus Installation Reinigen Anderes Einführung Farbe und Aussehen des Geräts sind modellabhängig, und jederzeitige Änderungen der technischen Daten des Anschlussmöglichkeiten Geräts zum Zweck der Leistungssteigerung sind vorbehalten. Verwenden der Software Sicherheitshinweise Einstellen des Monitors Fehlerbehebung Zeichenerklärung Technische Daten Informationen Anhang Bitte lesen Sie die folgenden Sicherheitshinweise sorgfältig durch, um Schäden an Personen oder...
  • Seite 241 Benutzen Sie nur einwandfrei geerdete Netzstecker und Steckdosen. Unsachgemäße Erdung könnte zu elektrischem Schlag oder Beschädigung der Geräte führen. (Nur Geräte der Klasse I) Stecken Sie den Netzstecker in die Steckdose, und stellen Sie sicher, dass er fest in der Steckdose sitzt. Wackelkontakte können Brände verursachen.
  • Seite 242 hoher Luftfeuchtigkeit, in unmittelbarer Nähe zu chemischen Lösungsmitteln oder für den Dauerbetrieb, z.B. auf Bahn- oder Flughäfen, aufgestellt werden soll. Nicht fachgerechte Aufstellung kann zu schweren Schäden am Monitor führen. Stellen Sie Ihren Monitor an einen möglichst staubfreien Ort mit niedriger Luftfeuchtigkeit.
  • Seite 243 Stellen Sie das Gerät nicht an schlecht belüfteten Orten, wie z.B. in Regalen oder Schränken, auf. Jede Erhöhung der Innentemperatur des Geräts kann einen Brand verursachen. Setzen Sie den Monitor vorsichtig ab. Er könnte sonst beschädigt werden oder zerbrechen. Stellen Sie den Monitor nicht mit dem Bildschirm nach unten ab. Die TFT-LCD-Oberfläche könnte sonst beschädigt werden.
  • Seite 244 Benutzen Sie das empfohlene Reinigungsmittel mit einem weichen Tuch. Wenn das Verbindungsstück zwischen dem Stecker und dem Stift staubig oder schmutzig ist, reinigen Sie es sorgfältig mit einem trockenen Tuch. Ein verschmutztes Verbindungsstück kann elektrischen Schlag oder Feuer verursachen. Ziehen Sie vor dem Reinigen des Geräts den Netzstecker. Andernfalls kann ein elektrischer Schlag oder Brand verursacht werden.
  • Seite 245 Bewegen Sie den Monitor nicht nach rechts oder links, indem Sie diesen am Signalkabel festhalten. Dies könnte aufgrund von Kabelbeschädigung Funktionsausfall, elektrischen Schlag oder Feuer verursachen. Decken Sie nichts über die Lüftungsöffnungen des Monitorgehäuses. Unzureichende Belüftung könnte Funktionsausfall oder Feuer verursachen. Stellen Sie keine Wasserbehälter, chemischen Produkte oder kleinen Gegenstände aus Metall auf den Monitor.
  • Seite 246 Stellen Sie Auflösung und Frequenz auf die für das Modell optimalen Werte ein. Durch eine ungeeignete Auflösung und Frequenz können Ihre Augen geschädigt werden. 40 Zoll (101,6 cm) - 1360 X 768 Halten Sie genügend Sitzabstand zum Monitor, da ständiges Betrachten des Monitors aus zu geringer Entfernung die Sehfähigkeit beeinträchtigen kann.
  • Seite 247 Für das Zuführen der verbrauchten Batterien und Akkus zum Recycling ist der Kunde als Verbraucher der Batterien verantwortlich. Der Kunde kann die verbrauchten Batterien und Akkus bei einem öffentlichen Recycling-Center oder einem Händler, der den gleichen Batterie- bzw. Akkutyp führt, abgeben. © 1995~2008 SAMSUNG. ALL Rights Reserved...
  • Seite 248 Inhalt Sicherheitshinweise ..................... 1 ......................1 Zeichenerklärung ......................... 1 Ein/Aus ......................2 Installation ........................4 Reinigen ......................... 5 Anderes Einführung ......................12 ....................12 Lieferumfang ....................13 Der Monitor ....................20 Bauplan Anschlussmöglichkeiten ..................25 ..................25 Installieren der Füße ..................
  • Seite 249 ........................67 Allgemein ......................68 Stromsparmodus ................... 68 Voreinstellte Timer-Modi Informationen ....................70 ................70 Zur Verbesserung der Anzeigequalität ............ 70 PRODUKTINFORMATION (Bildkonservierungsfrei) Anhang ......................74 ................74 Kontakt zu Samsung ......................76 Bezeichnungen ..................77 Ordnungsgemäße Entsorgung ......................77 Autorisierung...
  • Seite 250: Sicherheitshinweise

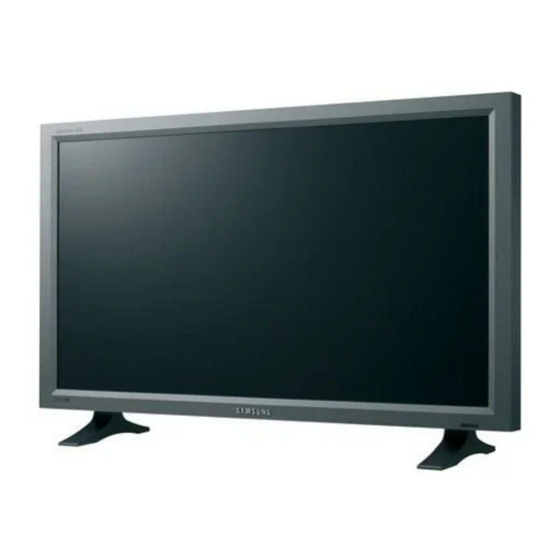
    Sicherheitshinweise Einführung Lieferumfang Der Monitor Bauplan Anschlussmöglichkeiten Farbe und Aussehen des Geräts sind modellabhängig, und jederzeitige Änderungen der technischen Daten des Verwenden der Software Geräts zum Zweck der Leistungssteigerung sind vorbehalten. Einstellen des Monitors Fehlerbehebung Einführung Technische Daten Informationen Lieferumfang Anhang Hinweis •...
  • Seite 251 Tasten der Fernsteuerung Batterien (AAA X 2) Kappe BNC-auf-RCA- Provisorische Füße Adapterstecker Separat erhältlich Wandmontageset Lautsprecherset Füße DVI-Kabel BNC-Kabel Der Monitor Vorderseite MENU Drücken Sie diese Taste, um das OSD-Menü zu öffnen und das hervorgehobene Menüelement zu aktivieren. Auf/Ab-Taste Wenn das Menü zur Bildschirmeinstellung aktiv ist: Schließen Sie mit der Exit-Taste (Ende) den Menübildschirm oder das Einstellungsmenü.
  • Seite 252 Links/Rechts-Taste / Lautstarke -Taste Drücken Sie diese Taste, um vertikal von einem Menübefehl zum nächsten zu wechseln oder die Werte für das ausgewählte Menü anzupassen. ENTER Diese Tasten dienen dazu, Optionen auf dem Menü hervorzuheben und einzustellen. SOURCE Schaltet die LED für Eingangssignal ein, das zurzeit angezeigt wird. Die Quelle kann nur auf externe Geräte umgeschaltet werden, die derzeit an den Monitor angeschlossen sind.
  • Seite 253 POWER S/W (Ein/Aus-Schalter) ON/OFF Ein- und Ausschalten des Monitors. POWER IN (Signalbuchse) Netzkabel (Anschluss an Monitor und Wandsteckdose) RS232C OUT/IN (Serieller ANSCHLUSS RS232C) MDC (Multiple Display Control)-Programm-Anschluss DVI / PC IN [RGB] (PC-Video-Anschlussbuchse) Verwenden des 15-polig, D-Sub – PC-Modus (Analog DVI / PC IN [DVI(HDCP)] (PC-Video- Anschlussbuchse) Verwenden des DVI-D an DVI-D –...
  • Seite 254 10) AV AUDIO IN [L-AUDIO-R] (MONITOR-Audio- Anschlussbuchse (Eingang)) 11) AV OUT [VIDEO](Video-Anschlussbuchse) : AV-Modus (Ausgang) 12) AV IN [VIDEO](Video-Anschlussbuchse) (Eingang) 13) AV OUT [S-VIDEO](S-Video- Anschlussbuchse) : S-Video-Modus (Ausgang) 14) AV IN [S-VIDEO] (S-Video-Anschlussbuchse) (Eingang) 15) EXT SPEAKER(8 )[- - L - +, - - R - +] (Lautsprecheranschlussbuchse (8 16) AUDIO OUT [L-AUDIO-R] (MONITOR-Audio- Anschlussbuchse (Ausgang))
  • Seite 255 21. STILL 22. FM RADIO 23. P.SIZE DUAL/MTS SOURCE SWAP SIZE STOP PLAY/PAUSE ON / OFF Drücken Sie diese Taste, um den Monitor ein- und auszuschalten. MAGICNET MagicNet-Schnellstarttaste - Diese Funktion ist bei diesem Monitor nicht verfügbar. MDC-Schnellstarttaste LOCK Mit dieser Taste werden alle Funktionstasten sowohl auf der Fernbedienung als auch am Monitor mit Ausnahme der Netztaste und der Taste LOCK aktiviert oder deaktiviert.
  • Seite 256 Fernsehsender bieten Informationen per Videotext an. [TTX / MIX wird hauptsächlich in Europa verwendet. ] MENU Drücken Sie diese Taste, um das OSD-Menü zu öffnen und das hervorgehobene Menüelement zu aktivieren. ENTER Aktivieren Sie mit dieser Taste das hervorgehobene Menüelement. P.MODE Wenn Sie diese Taste drücken, wird der aktuelle Modus unten mittig auf dem Bildschirm angezeigt.
  • Seite 257 Das Bild vom PIP-Fenster wird auf dem Hauptbildschirm und das Bild vom Hauptbildschirm wird im PIP- Fenster angezeigt. SIZE Ermöglicht die Auswahl verschiedener Bildgrößen. Rücklauf STOP Stop (Stopp) PLAY / PAUSE Wiedergabe/Pause Schneller Vorlauf © 1995~2008 SAMSUNG. ALL Right Reserved...
  • Seite 258: Bauplan

    Bauplan Monitoroberteil Ständer Lautsprecher Montageanleitung für VESA-Halterung Montage der Wandhalterung 1. Bauplan 2. Monitoroberteil...
  • Seite 259: Abmessungen

    Hinweise zu Kauf und Montage der VESA-Halterung: Wenden Sie sich für die Bestellung der Halterung an Ihren nächsten Samsung-Fachhändler. Unser Montagepersonal montiert nach Eintreffen der Bestellung die Halterung an Ihrem Monitor. Für das Anheben des Monitors sind mindestens 2 Personen erforderlich. Samsung haftet nicht für Verletzungen oder Schäden, die bei der Montage durch Kunden entstehen. Abmessungen...
  • Seite 260: Montage Der Wandhalterung

    6. Montage der Wandhalterung Wenden Sie sich zur Montage der Wandhalterung an einen Techniker. Samsung Electronics haftet nicht für Schäden an Gerät oder Personen, wenn die Montage vom Kunden selbst durchgeführt wird. Die Halterung ist zur Montage an Betonwänden vorgesehen. Die Stabilität der Halterung bei Montage auf Putz oder an Täfelungen kannnicht garantiert werden.
  • Seite 261: So Montieren Sie Das Gerät An Der Wandhalterung

    Es sind zwei Scharniere(links und rechts)vorhanden. VerwendenSie das richtige. Bevor Sie die Löcher in die Wand bohren, vergewissern Siesich, dass deren Abstand dem der beiden Montagebohrungenauf der Rückseite der Halterung entspricht. Wenn der Abstand zu groß oder klein ist, lösen Sie alle odereinen Teil der 4 Schrauben der Wandhalterung und passenden Abstand an.
  • Seite 262 Entfernen Sie die 4 Schrauben auf der Rückseite desGeräts. Setzen Sie die Schraube B in das Hängelager ein. 1. Befestigen Sie das Gerät an der Wandhalterung, und vergewis-sern Sie sich, dass es ordnungsgemäß am linken und rechtenHängelager angebracht ist. 2. Achten Sie bei der Montage des Geräts an der Halterung darauf,dass Sie sich Ihre Finger nicht einklemmen.
  • Seite 263 1. Befestigen Sie das Gerät an der Wandhalterung. Fassen Sie das Gerät immer oben in der Mitte 2. Fassen Sie das Gerät oben in der Mitte fest, und ziehen Sie es undnicht an der linken oder rechten Seite an, um nach vorne(in Pfeilrichtung), um den Winkel einzustellen.
  • Seite 264: Anschlussmöglichkeiten

    Installieren der Füße Anhang Hinweis • Sie sollten nur die mitgelieferten Schrauben verwenden. Achtung Samsung Electronics übernimmt keine Haftung für Schäden, die durch Verwendung eines anderen Sockels als dem hier beschriebenen entstehen. Montage der provisorischen Füße Linker Fuß Rechter Fuß...
  • Seite 265 Dieser Fuß wurde für die Anpassung der Bildschirmneigung entwickelt. Das Unternehmen übernimmt keine Verantwortung für Probleme, die durch die Verwendung des Fußes entstehen. Verwenden Sie das Gerät niemals, um Gegenstände darauf abzustellen. Installieren der Füße (separat erhältlich) Die Öffnung an der Monitorunterseite, wo der Fuß montiert wird, ist durch eine Schutzabdeckung geschützt. Beachten Sie, dass die Schutzabbdeckung bei der Montage der mitgelieferten provisorischen Füße oder des Fuß-Sets (separat erhältlich) zu entfernen ist.
  • Seite 266 Schließen Sie das Audiokabel für den Monitor an den Audioanschluss an der Rückseite des Computers an. Schalten Sie sowohl den Computer als auch den Monitor ein. Hinweis • Das DVI- oder BNC-Kabel ist als Zubehör erhältlich. Für Informationen über optionales Zubehör setzen Sie sich mit einem Kundendienstzentrum von Samsung Electronics in Ihrer Nähe in Verbindung.
  • Seite 267 Digitaler DVD-Anschluss Hinweis • Eingangsgeräte wie digitale DVD-Geräte werden mit dem DVI-Kabel an den DVI IN-Anschluss des Monitors angeschlossen. • Legen Sie dann eine DVD ein, und starten Sie das DVD-Gerät. • Wählen Sie mit der Taste SOURCE () die Option Digital aus. Hinweis •...
  • Seite 268 Schließen Sie einen Satz Audiokabel zwischen der linken und der rechten COMPONENT AUDIO IN [L- AUDIO-R] am Monitor und den Audioausgangsbuchsen (AUDIO OUT) am DVD-Player an. Schließen Sie ein Component kabel zwischen den BNC/COMPONENT IN - Anschluss von P , Y, P port am Monitor und den P , Y, P...
  • Seite 269 • Die hier abgebildeten Audio-Videokabel sind in der Regel im Lieferumfang eines Camcorders enthalten. (Falls dies nicht der Fall sein sollte, sind diese in einem Elektronikfachgeschäft in Ihrer Nähe erhältlich.) Wenn Sie einen Stereo-Camcorder besitzen, müssen Sie ein Satz mit zwei Kabeln anschließen. Anschließen einer D-TV Set Top Box Hinweis •...
  • Seite 270 Sonst können die Halterungen, mit denen die Lautsprecher am GERÄT befestigt sind, beschädigt werden. Anschließen an eine Audioanlage Schließen Sie die Audio (L)- und Audio (R)-Anschlüsse eines Videorekorders oder Camcorders mit den Audiokabeln an den AUDIO OUT [L-AUDIO-R]-Anschluss des Monitors an. © 1995~2008 SAMSUNG. ALL Right Reserved...
  • Seite 271: Main Screen

    Einführung Main Screen Klicken Sie auf Start > Programme > Samsung > MDC, um das Programm zu starten. Wählen Sie eine Wertegruppe, um die Lautstärke für diese Wertegruppe am Schieberegler anzuzeigen.
  • Seite 272: Port Selection

    Hauptsymbole Auswahlschaltfläche Remocon Info-Gitter Safety Lock Display-Auswahl Port Selection Control-Werkzeuge 1. Klicken Sie auf Hauptsymbole, um zu den jeweiligen Programmbildschirmen zu wechseln. 2. Sie können für das Display den Empfänger für Signale der Fernsteuerung aktivieren bzw. deaktivieren. 3. Dient zum Einstellen der Sperrfunktion. Wenn die Lock function (Sperrfunktion) eingestellt ist, können auf der Fernbedienung und am Gerät nur noch die Netztaste und die Sperrtaste verwendet werden.
  • Seite 273: Power Control

    1. Die Multiple Display Control ist ursprünglich auf COM1 eingestellt. 2. Wird ein anderer Anschluss als COM1 benutzt, stehen im Anschlusswahlmenü COM1 bis COM4 zur Auswahl. 3. Wenn nicht die genaue Bezeichnung des Anschlusses, der mit dem Monitor über ein serielles Kabel verbunden ist, ausgewählt wird, ist eine Datenübertragung unmöglich.
  • Seite 274 Im Info-Gitter erscheinen einige wesentliche Informationen, die von Power Control benötigt werden. Power Status (Energiestatus) 2) Input 3) Image Size 4) On Timer 5) Off Timer 2. Klicken Sie auf die Schaltfläche "Select All" oder aktivieren Sie ein Kontrollkästchen, um ein Display auszuwählen. Mit Power Control können Sie einige Funktionen des ausgewählten Display festlegen.
  • Seite 275: Input Source

    (Wenn Sie diese Auswahl rückgängig machen oder "Select All" auswählen, werden die Standardeinstellungen wieder aktiviert.) Power Control betrifft alle Displays. Dieses Programm ist nur für das Modell Samsung SyncMaster 403T bestimmt. Es ist nicht für andere Modelle zugelassen. Input Source 1.
  • Seite 276 Im Info-Gitter erscheinen einige wesentliche Informationen, die für die Steuerung der Eingangsquelle erforderlich sind. 1) PC - Ändert die Signalquelle des gewählten Displays auf PC. 2) BNC - Ändert die Signalquelle des gewählten Displays auf BNC. 3) DVI - Ändert die Signalquelle des gewählten Displays auf DVI. 4) TV - Ändert die Signalquelle des gewählten Displays auf TV.
  • Seite 277 Das Informationsgitter zeigt einige grundlegende Informationen an, die zur Einstellung der Bildgröße erforderlich sind. Power Status (Energiestatus) - Zeigt den Energiestatus für das aktuelle Display an. 2) Image Size - Legt den Image Size für das gewählte Display fest. 3) Input - Zeigt die aktuelle Eingangsquelle für das verwendete Display an.
  • Seite 278 Das Informationsgitter zeigt einige grundlegende Informationen an, die zur Einstellung der Bildgröße erforderlich sind. 1) Klicken Sie auf die Registerkarte Video Source (Videoquelle), um die Bildgröße für TV, AV, S-Video und Component einzustellen. Klicken Sie „Select All“ (Alle auswählen) oder ein Kontrollkästchen an, um das Darstellungsfeld, das eingestellt werden soll, auszuwählen.
  • Seite 279 Im Info-Gitter erscheinen einige wesentliche Informationen, die für die Zeiteinstellung erforderlich sind. 1) Current Time - Legt die aktuelle Zeit für das gewählte Display fest (PC-Zeit) - Um die aktuelle Zeit zu ändern, müssen Sie zunächst die Zeiteinstellung auf dem PC ändern. 2) On Time Setup - Legen Sie die Stunde, Minute und AM/PM für den On-Timer des ausgewählten Displays fest.
  • Seite 280 Das Informationsgitter zeigt einige grundlegende Informationen an, die zur Einstellung der PIP-Größe erforderlich sind. 1) PIP Size - Zeigt die aktuelle PIP-Größe des derzeit benutzten Darstellungsfelds an. 2) OFF - Schließt das PIP-Fenster des gewählten Displays. 3) Large - Öffnet das PIP-Fenster des gewählten Displays und ändert die Größe auf Large. 4) Small - Öffnet das PIP-Fenster des gewählten Displays und ändert die Größe auf Small.
  • Seite 281 • PIP S-Video Mode Das Informationsgitter zeigt einige grundlegende Informationen an, die zur Einstellung der PIP-Quelle erforderlich sind. 1) PIP Source - Die PIP-Quelle kann beim Einschalten des Monitors festgelegt werden. 2) PC - Ändert die PIP-Quelle des gewählten Displays auf PC. 3) BNC - Ändert die PIP-Quelle des gewählten Displays auf BNC.
  • Seite 282 -Ändert die PIP-Quelle des gewählten Displays auf TV. 6) AV - Ändert die PIP-Quelle des gewählten Displays auf AV. 7) S-Video - Ändert die PIP-Quelle des gewählten Displays auf S-Video. 8) Component - Ändert die PIP-Quelle des gewählten Displays auf Component. 9) Channel (Kanal) - Bei TV als PIP-Source (PIP-Signalquelle) wird der Channel-Pfeil (Kanal-Pfeil) angezeigt.
  • Seite 283 - Legt den Farbton für das gewählte Display fest. 7) Color Tone (Farbtemp.) - Stellt den Farbton für das gewählte Display ein. Die Eingabequelle für MagicNet funktioniert nur bei MagicNet-Modellen. Diese Funktion ist nur für Anzeigen verfügbar, deren Netzstatus "Ein" lautet. Wenn keine Auswahl vorgenommen ist, werden die Werkseinstellungen angezeigt.
  • Seite 284 Settings Audio 1. Klicken Sie auf das Hauptsymbol "Settings" (Einstellungen). Der Bildschirm "Settings" wird angezeigt. Im Info-Gitter erscheinen einige wesentliche Informationen, die für die Einstellungen erforderlich sind. When each function is selected, the set value of the selected function is displayed in the slide. When selected, each function fetches the value for the set and displays it on the slide bar.
  • Seite 285 Im Info-Gitter erscheinen einige wesentliche Informationen, die für die Einstellungen erforderlich sind. 1) Bildjustierung - Nur verfügbar für PC, BNC. 2) Coarse (Grob) - Legt die Coarse für das gewählte Display fest. 3) Fine (Fein) - Legt die Fine für das gewählte Display fest. 4) Position - Legt die Position für das gewählte Display fest.
  • Seite 286: Video Wall

    1) Screen Scroll - Beseitigt Nachbilder, die entstehen können, wenn das ausgewählte Display längere Zeit im Pausenmodus bleibt. Sie können den Wiederholungszyklus-Timer einstellen und hierfür den "Interval" in Stunden und die "Second" in Sekunden auswählen. Sie können den Screen Type (Bildschirmtyp) einzeln auf Scroll (Blättern), Pixel (Pixel), Bar (Balken) oder Eraser (Löschen) einstellen.
  • Seite 287 Sie können zum Segmentieren mehrere Bildschirme mit unterschiedlicher Anordnung auswählen. Wählen Sie einen Bildsegmentierungsmodus aus. Wählen Sie in der Bildschirmauswahl einen Bildschirm aus. Die Stelle wird durch Eingeben einer Zahl im ausgewählten Modus festgelegt. Das von Samsung bereitgestellte MDC-Programm unterstützt maximal 4 x 4 LCD-Displays. 3) On / Off...
  • Seite 288: Lamp Control

    - Aktiviert oder deaktiviert die Video Wallfunktion des ausgewählten Bildschirms. 4) Format - Das Format für das segmentierte Bild kann ausgewählt werden. Full(Vollbild ) Natural Diese Funktion dürfen Sie bei MagicNet nicht verwenden. Die Funktion zur Steuerung der Wartung ist nur für eingeschaltete Displays (Betriebszustand = ON) verfügbar.
  • Seite 289 Beleuchtungssteuerfunktion vorgenommen wird. Die Funktion zur Steuerung der Wartung ist nur für eingeschaltete Displays (Betriebszustand = ON) verfügbar. Die Eingabequelle für MagicNet funktioniert nur bei MagicNet-Modellen. Troubleshooting 1. Das gewünschte Display wird nicht auf dem Info-Gitter "Power Control" (Stromeinstellungen) angezeigt. Überprüfen Sie die Verbindung mit der RS232C-Schnittstelle.
  • Seite 290: Einstellen Des Monitors

    Sicherheitshinweise Einführung Anschlussmöglichkeiten Verwenden der Software Einstellen des Monitors Eingang Farbe und Aussehen des Geräts sind modellabhängig, und jederzeitige Änderungen der technischen Daten des Bild Geräts zum Zweck der Leistungssteigerung sind vorbehalten. [PC / BNC / DVI Modus] Bild Einstellen des Monitors [AV / S-Video / Komp.
  • Seite 291: Bild [Pc / Bnc / Dvi Modus]

    - AV / S-Video: PC / BNC / DVI Modus - Komp.: PC / DVI Modus [Die Direkttaste auf der Fernbedienung ist 'SOURCE'.] 3) Tauschen [MENU] [ENTER] [ENTER] [ENTER] Tauscht PIP- und Hauptbild-Inhalt. Das Bild vom PIP-Fenster wird auf dem Hauptbildschirm und das Bild vom Hauptbildschirm wird im PIP- Fenster angezeigt.
  • Seite 292 2) Internet Mittlere Helligkeit Optimal für eine Mischung aus Texten und Bildern, wie z. B. Grafiken. 3) Text Normale Helligkeit Für Unterlagen, Dokumentation und alle Arbeiten mit umfangreichem Text. 4) Benutzerdef. Obwohl die vorkonfigurierten Werte sorgfältig von unseren Ingenieuren ausgesucht wurden, entsprechen sie unter Umständen nicht Ihren Sehgewohnheiten.
  • Seite 293: Bild [Av / S-Video / Komp. / Dvi-Video Modus]

    2) Fine (Fein) [MENU] [ENTER] [ENTER] [ENTER] [< / >] [ENTER] Entfernt Störungen, wie horizontale Streifenbildung. Wenn die Störung auch nach der Fine-Einstellung bestehen bleibt, wiederholen Sie die Feineinstellung nach dem Anpassen der Frequenz (Taktgeschwindigkeit). 3) Position [MENU] [ENTER] [ENTER] [ENTER] [<...
  • Seite 294 S-Video Komp. DVI-Video Modus [MENU] [ENTER] [ENTER] [ENTER] Der Monitor verfügt über vier werksseitige Bildeinstellungen ("Dynamisch", "Standard", "Film" und "Benutzerdef."). Sie können eine der Einstellungen "Dynamisch", "Standard", "Film" oder "Benutzerdef." aktivieren. Bei Auswahl von "Benutzerdef." werden automatisch Ihre benutzerdefinierten Bildeinstellungen angewendet. 1) Dynamisch 2) Standard 3) Filme...
  • Seite 295: Ton

    Die digitale Rauschbeseitigung sorgt für ein klareres, gestochen scharfes Bild. 1) Aus 2) Ein Filmmodus [MENU] [ENTER] [ENTER] [ENTER] Sie können den Filmmodus ein- bzw. ausschalten. Die Filmmodus-Funktion bietet ein Seherlebnis in Kinoqualität. (Im DVI-Video-Modus nicht verfügbar) 1) Aus 2) Ein PIP-Bild [MENU] [ENTER]...
  • Seite 296 Lautsprecher. [Der Ton ist auch dann noch hörbar, wenn er auf "0" geregelt ist.] Hinweis • Wenn Sie das Bild mit der Sound Custom-Funktion (Angepasster Ton) einstellen, wechselt der Sound Mode (Sound-Modus) zu Custom Mode (Angepasster Modus). Auto. Lautst. [MENU] [ENTER] [ENTER] [ENTER]...
  • Seite 297 Zeit einstellen [MENU] [ENTER] [ENTER] [ENTER] [< / >] [ENTER] Aktuelle Zeiteinstellung 2) Sleep-Timer [MENU] [ENTER] [ENTER] [ENTER] [< / >] [ENTER] [< / >] [ENTER] Dient zum Einstellen des Zeitraums, nach dessen Ablauf der Monitor automatisch abgeschaltet wird. (Aus, 30, 60, 90, 120, 150, 180) 3) Autom.
  • Seite 298 Diese Option ergibt ein Vollbild ohne Ränder. Natural Diese Option ergibt eine natürliche Bildwiedergabe im ursprünglichen Seitenverhältnis angezeigt. 3) Videowand-Setup [MENU] [ENTER] [ENTER] [ENTER] [ENTER] Das Bild kann segmentiert werden. Sie können zum Segmentieren mehrere Bildschirme mit unterschiedlicher Anordnung auswählen. •...
  • Seite 299: Farbe Zurücksetzen

    • Eine Menüauswahl ist nur zulässig, wenn als Grafikauflösung 1024 x 768 bei 60 Hz, 1280 x 768 bei 60 Hz, 1360 x 768 bei 60 Hz oder 1366 x 768 bei 60 Hz eingestellt ist. Lampensteuerung [MENU] [ENTER] [ENTER] [ENTER] [<...
  • Seite 300 Das voreingestellte Password (Kennwort) für den Monitor lautet „0000“. Hinweis • Zurücksetzen des Kennworts für die Funktionstaste lock. Drücken Sie MUTE On. Das Kennwort wird auf den Wert ‘0000’ zurückgesetzt. Zurücksetzen des Kennworts wird die Fernbedienung benötigt. © 1995~2008 SAMSUNG. ALL Rights Reserved...
  • Seite 301: Fehlerbehebung

    Sicherheitshinweise Einführung Anschlussmöglichkeiten Verwenden der Software Einstellen des Monitors Fehlerbehebung Farbe und Aussehen des Geräts sind modellabhängig, und jederzeitige Änderungen der technischen Daten des Selbsttest zur Geräts zum Zweck der Leistungssteigerung sind vorbehalten. Funktionsprüfung Checkliste Fehlerbehebung F & A Technische Daten Selbsttest zur Informationen Funktionsprüfung...
  • Seite 302 • Verwenden Sie zur Reinigung kein Benzol, Verdünner oder andere brennbare Substanzen oder feuchte Tücher. • Wir empfehlen die Verwendung eines milden Samsung- Reinigungsmittels, um Schäden am Monitor zu vermeiden. Pflege der Flachbildschirmoberfläche. Zum Reinigen ein weiches Tuch (Baumwollflanell) verwenden.
  • Seite 303 • In der folgenden Tabelle werden mögliche Probleme sowie deren Lösungen aufgeführt. Bevor Sie den Kundendienst benachrichtigen, sollten Sie die Informationen in diesem Abschnitt lesen und feststellen, ob Sie das Problem nicht selbständig lösen können. Falls Sie dennoch Hilfe benötigen, rufen Sie die Telefonnummer auf der Garantiekarte, die Telefonnummer im Abschnitt Informationen oder benachrichtigen Sie Ihren Fachhändler.
  • Seite 304 OSD Color Adjustment an. mit dunklen Schatten. Weiße Farbe wird schlecht wiedergegeben. Der Monitor speichert gegenwärtig Änderungen, die an den Die Betriebsanzeige blinkt grün. Einstellungen im OSD-Speicher vorgenommen wurden. Der Bildschirm ist leer und die Der Monitor arbeitet zurzeit im Energiesparmodus. Betriebsanzeige leuchtet grün Bewegen Sie die Maus oder drücken Sie eine Taste auf der oder blinkt alle 0.5 oder 1...
  • Seite 305 Trennen Sie das Netzkabel, und reinigen Sie den Monitor dann mit LCD-Bildschirm gereinigt? einem weichen Tuch und entweder Reinigungslösung oder klarem Wasser. Hinterlassen Sie keine Reinigungsmittelrückstände und zerkratzen Sie das Gehäuse nicht. Passen Sie auf, daß kein Wasser in den Monitor gerät. © 1995~2008 SAMSUNG. ALL Right Reserved...
  • Seite 306: Technische Daten

    Allgemein Stromsparmodus Technische Daten Voreinstellte Timer-Modi Informationen Allgemein Anhang Allgemein Allgemein Modellbezeichnung SMT-4011 LCD-Bildschirm Grösse 40,0 Zolldiagonale (101,6 cm) Display Fläche 885,168 mm (H) x 497,664 mm (V) Pixel Stufe 0,648 mm (H) x 0,648 mm (V) Synchronisierung Horizontal 30 ~ 81 kHz...
  • Seite 307 Dieser Monitor entspricht dem EPA Energy STAR und Energy2000- Standard, wenn er mit einem Computer mit VESA DPM-Funktionalität eingesetzt wird. ® Als Energy STAR -Partner hat SAMSUNG festgestellt, daß dieses ® Produkt die Energy STAR -Richtlinien für Energieeffizienz erfüllt. Voreinstellte Timer-Modi Voreinstellte Timer-Modi Wenn das vom Computer übermittelte Signal dasselbe ist wie die folgenden voreingestellten Anzeigemodi, dann...
  • Seite 308 Horizontalfrequenz. Einheit: kHz Vertikalfrequenz Wie eine Leuchtstofflampe muß der Bildschirm dasselbe Bild viele Male pro Sekunde wiederholen, um dem Benutzer ein Bild anzuzeigen. Die Frequenz dieser Wiederholung wird Vertikalfrequenz oder Auffrischrate genannt. Einheit: Hz © 1995~2008 SAMSUNG. ALL Right Reserved...
  • Seite 309: Informationen

    Sicherheitshinweise Einführung Anschlussmöglichkeiten Verwenden der Software Einstellen des Monitors Fehlerbehebung Farbe und Aussehen des Geräts sind modellabhängig, und jederzeitige Änderungen der technischen Daten des Technische Daten Geräts zum Zweck der Leistungssteigerung sind vorbehalten. Informationen Zur Verbesserung der Informationen Anzeigequalität PRODUKTINFORMATION Zur Verbesserung der Anzeigequalität (Bildkonservierungsfrei) Anhang...
  • Seite 310 Abschaltung, Bildschirmschoner oder Stromsparmodus Schalten Sie den Strom nach 20-stündigem Einsatz für 4 Stunden ab Schalten Sie den Strom nach 12-stündigem Einsatz für 2 Stunden ab Verwenden Sie das Energieschema der Energieverwaltung bei den Anzeigeeigenschaften Ihres PCs, um den Monitor entsprechend einzustellen. Verwenden Sie möglichst einen Bildschirmschoner - Wir empfehlen einen einfarbigen Bildschirmschoner oder ein bewegtes Bild.
  • Seite 311 Alle 30 Minuten die bewegten Zeichen wechseln. Anzeigen eines regelmäßig bewegten Bildes und eines Logo auf der gesamten Fläche. - Regelmäßig : Nach 4 Betriebsstunden 60 Sekunden lang ein bewegtes Bild mit Logo anzeigen. Am besten schützen Sie Ihren Bildschirm vor Bildkonservierung, indem Sie ihn abschalten bzw. den PC oder das System so einrichten, dass ein Bildschirmschoner aktiviert wird, wenn Sie ihn nicht verwenden.
  • Seite 312 . Zeitabstand: 1 – 10 Stunden ( Empfehlung: 1 ) . Zeitdauer: 10 – 50 Sekunden ( Empfehlung: 50 ) Hinweis • ( Lesen Sie im Benutzerhandbuch auf der CD unter “OSD-Funktionen” nach, da einige Modelle nicht verfügbar sind) © 1995~2008 SAMSUNG. ALL Right Reserved...
  • Seite 313: Anhang

    Informationen Anhang Anhang Kontakt zu Samsung Bezeichnungen Kontakt zu Samsung Ordnungsgemäße Entsorgung Autorisierung Hinweis • Falls Sie Fragen oder Anregungen zu Samsung-Produkten haben, wenden Sie sich bitte an den Samsung- Kundendienst. North America 1-800-SAMSUNG(726-7864) http://www.samsung.com/us U.S.A CANADA 1-800-SAMSUNG(726-7864) http://www.samsung.com/ca MEXICO 01-800-SAMSUNG(726-7864) http://www.samsung.com/mx...
  • Seite 314 CZECH REPUBLIC DENMARK 70 70 19 70 http://www.samsung.com/dk FINLAND 030-6227 515 http://www.samsung.com/fi 3260 SAMSUNG(726-7864) FRANCE http://www.samsung.com/fr 08 25 08 65 65 (€ 0,15/min) GERMANY 01805-121213 (€ 0,14/Min) http://www.samsung.de HUNGARY 06-80-SAMSUNG(726-7864) http://www.samsung.com/hu ITALIA 800-SAMSUNG(726-7864) http://www.samsung.com/it LUXEMBURG 0035 (0)2 261 03 710 http://www.samsung.com/be...
  • Seite 315: Bezeichnungen

    0800-329-999 http://www.samsung.com/tw TAIWAN VIETNAM 1 800 588 889 http://www.samsung.com/vn Middle East & Africa SOUTH AFRICA 0860-SAMSUNG(726-7864 ) http://www.samsung.com/za TURKEY 444 77 11 http://www.samsung.com.tr 800-SAMSUNG (726-7864) U.A.E http://www.samsung.com/mea 8000-4726 Bezeichnungen Sync.-Signal Sync- (synchronisierte) Signale bezieht sich auf die Standardsignale, die zur Anzeige der gewünschten Farben auf dem Monitor erforderlich sind.
  • Seite 316: Korrekte Entsorgung Dieses Produkts (Elektromüll) - Nur Europa

    Reproduktion jeglicher Art ohne schriftliche Einwilligung von Samsung Electronics Co., Ltd. ist strengstens untersagt. Samsung Electronics Co., Ltd. haftet nicht für hierin enthaltene Fehler oder für direkt oder als Folge entstandene Schäden im Zusammenhang mit der Bereitstellung, Leistung oder Verwendung dieses Materials.
  • Seite 318 Istruzioni di sicurezza Notazionale Alimentazione Installazione Pulizia Altro Introduzione La forma e il colore del prodotto possono variare in base al modello, e le specifiche del prodotto sono soggette Collegamenti a modifiche senza preavviso allo scopo di migliorarne le prestazioni. Uso del software Istruzioni di sicurezza Regolazione del monitor...
  • Seite 319 elettriche o incendi. Usare solo una spina e una presa opportunamente collegata a massa. Una massa inadatta può causare scosse elettriche o danni alle apparecchiature. (Classe l solo attrezzatura.) Inserire saldamente la spina in modo che non possa scollegarsi dalla presa. Una connessione non sicura può...
  • Seite 320 chimiche o nel caso in cui il monitor sarà in funzione 24 ore al giorno come negli aeroporti, nelle stazioni ferroviarie, ecc. La mancata osservanza di questa precauzione può causare gravi danni allo schermo. Posizionare il monitor in un luogo in cui l'umidità e la presenza di polvere siano minime.
  • Seite 321 Non installare il prodotto in una posizione con scarsa ventilazione, per esempio su una mensola, in un armadietto ecc. Un innalzamento della temperatura interna del prodotto può causare un incendio. Fissare il monitor con cura. L’inosservanza di questa precauzione può comportare danni o rottura dell’apparecchio.
  • Seite 322 Usare il prodotto detergente raccomandato versandolo su un panno morbido. Se il connettore tra la spina e il pin è impolverato o sporco, pulirlo in modo opportuno con un panno asciutto. Un connettore sporco può essere causa di scosse elettriche o incendi. Assicurarsi di scollegare il cavo di alimentazione prima di pulire il prodotto.
  • Seite 323 Tenere il monitor spento quando fuori ci sono fulmini e lampi oppure lasciare che il monitor resti inutilizzato per un lungo periodo di tempo. Il monitor potrebbe non funzionare correttamente, causando scosse elettriche o un incendio. Non tentare di spostare il monitor tirando il cavo elettrico o il cavo di segnale.
  • Seite 324 Può causare un incendio o una scossa elettrica. Se una sostanza estranea o acqua penetra nel prodotto, spegnere l'unità, scollegare la spina di alimentazione dalla presa a parete e contattare il centro di assistenza. Se si visualizza una schermata fissa per un periodo di tempo prolungato, può...
  • Seite 325 Quando si sposta il prodotto, assicurarsi che siano disponibili più di due persone. La caduta del prodotto può causare un malfunzionamento o un danno all'apparecchiatura. Posizionare il prodotto fuori dalla portata dei bambini, poiché potrebbero provocare danni all'apparecchio. La caduta del prodotto può causare lesioni personali o addirittura la morte. Se non si utilizza il prodotto per un lungo periodo di tempo, scollegarlo dalla presa elettrica.
  • Seite 326 Il cliente può portare la batteria esausta o ricaricabile per lo smaltimento presso un centro di riciclaggio o un negozio che vende lo stesso tipo di batteria o di batteria ricaricabile. © 1995~2008 SAMSUNG. ALL Rights Reserved...
  • Seite 327 Contenuto Istruzioni di sicurezza ..................... 1 ......................1 Notazionale ....................... 1 Alimentazione ......................2 Installazione ........................4 Pulizia ......................... 5 Altro Introduzione ......................12 ..................12 Contenuto della confezione ....................13 Il monitor ....................20 Layout meccanico Collegamenti ......................26 ..................
  • Seite 328 Modalità di timing predefinite Informazioni ....................... 72 ................72 Per una migliore visualizzazione ......72 INFORMAZIONI SUL PRODOTTO (Assenza di ritenzione dell'immagine) Appendice ......................76 ................76 Contatti SAMSUNG NEL MONDO ....................... 78 Termini ....................79 Corretto smaltimento ......................79 Autorità...
  • Seite 329: Istruzioni Di Sicurezza

    Istruzioni di sicurezza Introduzione Contenuto della confezione Il monitor Layout meccanico Collegamenti La forma e il colore del prodotto possono variare in base al modello, e le specifiche del prodotto sono soggette Uso del software a modifiche senza preavviso allo scopo di migliorarne le prestazioni. Regolazione del monitor Introduzione Risoluzione del problemi...
  • Seite 330 Altro Pulsanti del telecomando Batterie (AAA X 2) Il tappo della bocchetta Jack adattatore da Supporto temporaneo BNC a RCA Venduto separatamente Kit per il montaggio a muro Gruppo di altoparlanti kit dei supporti Cavo DVI Cavo BNC Il monitor Parte anteriore MENU Utilizzare questo pulsante per aprire la visualizzazione OSD e attivare una voce di menu selezionata.
  • Seite 331 Tasto Sinistra-Destra / Volume Pulsante Consente di selezionare le voci di menu orizzontalmente oppure di regolare i valori del menu selezionato. Inoltre, questi pulsanti consentono di regolare il volume dell’audio. ENTER Utilizzato per selezionare il menu OSD. SOURCE SOURCE Passa dalla modalità PC alla modalità Video. Il cambiamento dell'origine è...
  • Seite 332 POWER SW (Interruttore di accensione / spegnimento) ON/OFF Attiva e disattiva il monitor. POWER IN (Porta di segnale) Con il cavo di alimentazione collegare il monitor alla presa a muro. RS232C OUT/IN (porta seriale RS232C) porta di programma MDC (Multiple Display Control) PC IN(RGB) (Terminale di collegamento video del PC) : Utilizzo del D-Sub a 15 pin - modalità...
  • Seite 333 10) AV AUDIO IN (Terminale di collegamento audio MONITOR (ingresso)) 11) AV OUT [VIDEO](Terminale di collegamento Video) : modalità AV (uscita) 12) AV IN [VIDEO](Terminale di collegamento Video) (ingresso) 13) AV OUT [S-VIDEO](Terminale di collegamento S-Video) : modalità S-Video (uscita) 14) AV IN [S-VIDEO](Terminale di collegamento S- Video) (ingresso) 15) EXT SPEAKER(8...
  • Seite 334 EXIT 19. Up-Down Left-Right tasti S.MODE 21. STILL 22. FM RADIO 23. P.SIZE DUAL/MTS SOURCE 28. SWAP SIZE STOP PLAY/PAUSE ON / OFF Utilizzare questo pulsante per accendere e spegnere il monitor. MAGICNET Tasto MagicNet Quick Launch. - Funzione non disponibile per questo monitor. Tasto MDC Quick Launch.
  • Seite 335 I canali TV forniscono servizi informativi scritti mediante il Televideo. [Per informazioni relative alle regolazioni dello schermo. ] MENU Utilizzare questo pulsante per aprire la visualizzazione OSD e attivare una voce di menu selezionata. ENTER Attivare una voce di menu selezionata. P.MODE Premendo questo pulsante, viene visualizzata la modalità...
  • Seite 336 L’immagine nella finestra PIP appare nella schermata principale mentre l’immagine nella schermata principale appare nella finestra PIP. SIZE Consente di selezionare le diverse dimensioni dell'immagine. Riavvolgimento STOP Arresto PLAY / PAUSE Riprod./Pausa Avanzamento veloce © 1995~2008 SAMSUNG. ALL Right Reserved...
  • Seite 337: Layout Meccanico

    Layout meccanico Testa del monitor Supporto di sostegno Altoparlante Installazione del supporto VESA Installazione della staffa a parete 1. Layout meccanico 2. Testa del monitor...
  • Seite 338 Dopo aver effettuato l'ordine, l'installazione del supporto verra eseguita da installatori professionisti. Sono necessarie almeno 2 persone per maneggiare il monitor LCD. Samsung non e responsabile di alcun danno al prodotto, ne di possibili infortuni derivanti da un'installazione eseguita a discrezione del cliente.
  • Seite 339 6. Installazione della staffa a parete Contattare un tecnico per eseguire l'installazione della staffa a parete. Samsung Electronics non è responsabile per danni al prodotto o lesioni personali qualora l'installazione sia stata eseguita direttamente dal-l'acquirente del prodotto. Questo prodotto è adatto all'installazione su pareti in cemento. Il prodotto può risultare instabile se installato su pareti in gesso o legno.
  • Seite 340 Sono forniti due cardini(sinistro e destro). Utilizzare quello corretto. Prima di perforare la parete, controllare che la distanza trai due fori di bloccaggio sul retro del prodotto sia corretta. Se la distanza è troppo corta o lunga, svitare tutte o alcunedelle 4 viti serrate in precedenza sulla staffa a parete perregolarla.
  • Seite 341 Rimuovere le 4 viti sul retro del prodotto. Inserire la vite Bnel blocco in plastica. 1. Montare il prodotto sulla staffa a parete e assicurarsi che siaadeguatamente fissato ai blocchi in plastica sinistro e destro. 2. Fare attenzione quando si installa il prodotto sulla staffapoiché...
  • Seite 342 1. Fissare il prodotto alla staffa a parete. Per regolare l'angolatura, assicurarsi di inclinare 2. Tenere il prodotto prendendolo al centro in alto e tirarlo in avanti ilprodotto prendendolo dal centro in alto, e non (nelladirezione indicata dalla freccia) per regolarne dallato sinistro o destro.
  • Seite 343: Collegamenti

    Installazione del kit dei supporti Appendice Nota • È consigliabile utilizzare esclusivamente i quattro bulloni forniti. Attenzione Samsung Electronics non è da ritenersi responsabile per danni causati dall’utilizzo di un supporto diverso da quelli specificati. Installazione del Semi supporto Supporto Supporto sinistro...
  • Seite 344 Attenzione Questo supporto è stato appositamente progettato per consentire di regolare l'angolazione dello schermo. La società non può essere ritenuta responsabile per qualsiasi problema causato da altri usi di questo supporto. Non usare mai il prodotto come supporto per altri oggetti. Installazione del kit dei supporti (venduto separatamente) Un apposito tappo serve a proteggere il foro situato sotto al monitor, dove si inserisce il supporto.
  • Seite 345 Collegare il cavo audio per il monitor alla porta audio posta sul retro del computer. Accendere il computer e il monitor. Nota • I cavi DVI e BNC sono opzionali. Contattare il centro servizi Samsung Electronics più vicino per acquistare prodotti opzionali.
  • Seite 346 Collegamento di un DVD digitale Nota • I dispositivi di ingresso quali i DVD digitali sono collegati al terminale DVI IN dello schermo attraverso il cavo DVI. • Quindi, accendere il DVD con un disco DVD inserito. • Selezionare Digitale utilizzando il tasto SOURCE. Nota •...
  • Seite 347 player.Collegare un set di cavi audio agli ingressi Audio sinistro COMPONENT AUDIO IN [L-AUDIO-R] del monitor e alle uscite AUDIO OUT del lettore DVD. Collegare un cavo Component agli ingressi BNC/COMPONENT IN - porta P di collegamento del , Y, P monitor e alle uscite P , Y, P del lettore DVD.
  • Seite 348 (in caso contrario, recarsi dal negozio di componenti elettronici di fiducia). Se la videocamera è stereo, è necessario collegare un set composto da due cavi. Collegamento di una Set Top Box DTV Nota • I collegamenti di una tipica Set Top Box sono illustrati di seguito. Collegare un cavo video agli ingressi BNC/COMPONENT IN - porta P , Y, P di collegamento del monitor...
  • Seite 349 La staffa di fissaggio dell'altoparlante allo schermo potrebbe danneggiarsi. Collegamento di un Sistema audio Collegare un set di cavi audio agli ingressi sinistro (L) e destro (R) AUX del Sistema e alle MONITOR IN [L-AUDIO-R] del monitor. © 1995~2008 SAMSUNG. ALL Right Reserved...
  • Seite 350 PC e alla porta seriale di un monitor. Main Screen Fare clic su Click Start > Program > Samsung > MDC System per avviare il programma. Selezionare un set per visualizzarne il volume nell'indicatore scorrevole.
  • Seite 351: Port Selection

    Icone principali Pulsante di selezione Remocon Tabella centrale Safety Lock Selezione monitor Port Selection Strumenti di controllo 1. Utilizzare le icone principali per passare alla varie schermate. 2. Consente di attivare o disattivare la funzione di ricezione del segnale di controllo dell’unità dei monitor. 3.
  • Seite 352: Power Control

    1. Multiple Display Control è originariamente impostato su COM1. 2. Se è utilizzata una porta diversa da COM1, è possibile selezionare una porta compresa tra COM1 e COM4 nel menu Port Selection (selezione porta). 3. Se non viene selezionata il nome dell’esatta porta collegata al monitor con il cavo seriale, la comunicazione non sarà possibile.
  • Seite 353 La tabella centrale mostra alcune informazioni di base necessarie al controllo dello stato generale. (Power Status (Stato dell'alimentazione)) 2) Input 3) Image Size 4) Timer accensione 5) Timer spegnimento 2. Utilizzare il pulsante Select All (seleziona tutto) oppure le caselle di controllo per selezionare i monitor da controllare. Power Control (controllo dello stato generale) consente di controllare alcune delle funzioni del monitor selezionato.
  • Seite 354: Input Source

    - Accende/spegne il monitor selezionato. 2) Volume - Controlla il livello di volume del monitor selezionato. Questa barra riceve il valore del volume del monitor selezionato dal set e lo visualizza sull'indicatore scorrevole (quando si annulla la selezione o si sceglie Select All (seleziona tutto), il valore ritorna all'impostazione predefinita (Mute On/Off) - Attiva/disattiva l'audio del monitor selezionato.
  • Seite 355 La tabella centrale mostra alcune informazioni di base necessarie a Input Source. 1) PC - Cambia l'origine in ingresso del monitor selezionato in PC. 2) BNC - Cambia l'origine in ingresso del monitor selezionato in BNC. 3) DVI - Cambia l'origine in ingresso del monitor selezionato in DVI. 4) TV - Cambia l'origine in ingresso del monitor selezionato in TV.
  • Seite 356 Riquadro informazioni visualizza alcune informazioni basilari necessarie per Controllo dimensioni immagine. (Power Status (Stato dell'alimentazione)) - Mostra lo stato dell'alimentazione del monitor corrente. 2) Image Size - Mostra le dimensioni correnti dell'immagine sul monitor selezionato. 3) Input - Mostra l'origine dell'input corrente del monitor in uso. 4) Riquadro informazioni visualizza solo i monitor la cui origine in ingresso è...
  • Seite 357 Riquadro informazioni visualizza alcune informazioni basilari necessarie per Controllo dimensioni immagine. 1) Fare clic sulla scheda Video Source (Sorgente video) per regolare le dimensioni dell’immagine per le modalità TV, AV, S-Video e Component. Fare clic su Seleziona tutto oppure utilizzare le singole caselle di controllo per selezionare un monitor da gestire. 2) Il riquadro informazioni visualizza solo il monitor che ha TV, AV, S-VIDEO, Component, DVI(HDCP) come origine in ingresso.
  • Seite 358 La tabella centrale mostra le informazioni di base necessarie alla funzione di controllo dell'orario. 1) Current Time - Imposta l'ora corrente per il monitor selezionato (ora del PC). - Per modificare l'ora corrente modificare prima l'ora del PC. 2) On Time Setup - Imposta ora, minuti e AM/PM dell'On Timer (timer di attivazione) per il monitor selezionato.
  • Seite 359 Riquadro informazioni visualizza alcune informazioni basilari necessarie per Controllo dimensioni PIP. 1) PIP Size - Visualizza le dimensioni PIP (immagine nell'immagine) del monitor in uso. 2) OFF - Disattiva la funzione PIP per il monitor selezionato. 3) Large - Attiva la funzione PIP per il monitor selezionato e modifica le dimensioni in Large. 4) Small - Attiva la funzione PIP per il monitor selezionato e modifica le dimensioni in Small.
  • Seite 360 • PIP S-Video Mode Riquadro informazioni visualizza alcune informazioni basilari necessarie per Controllo Origine PIP. 1) Origine PIP - L'origine PIP può essere controllata quando si accende il monitor. 2) PC - Cambia l'origine PIP per il monitor selezionato in PC. 3) BNC - Cambia l'origine PIP per il monitor selezionato in BNC.
  • Seite 361 6) AV - Cambia l'origine PIP per il monitor selezionato in AV. 7) S-Video - Cambia l'origine PIP per il monitor selezionato in S-Video. 8) Component - Cambia l'origine PIP per il monitor selezionato in Component. 9) Channel - La freccia del canale appare quando la PIP Source (Sorgente PIP) è impostata su TV. Nota: Alcune delle origini PIP potrebbero non essere disponibili per la selezione, sulla base del tipo di origine in ingresso della schermata principale.
  • Seite 362 7) Color Tone - Adjusts Color Tone of the selected display. La sorgente di ingresso di MagicNet funziona solo sul modello MagicNet. La funzione è disponibile solo per i display in cui lo stato di alimentazione è ON e se non viene fatta alcuna selezione viene visualizzato il valore predefinito.
  • Seite 363 Audio 1. Fare clic su Settings (impostazioni) tra le icone principali per visualizzare la schermata di controllo delle impostazioni. La tabella centrale mostra le informazioni di base necessarie alla funzione di controllo delle impostazioni. Quando ogni funzione è selezionata, il relativo valore appare nella dispositiva. Al termine della selezione, il valore viene assegnato alle funzioni e visualizzato nella barra di scorrimento.
  • Seite 364: Lamp Control

    La tabella centrale mostra le informazioni di base necessarie alla funzione di controllo delle impostazioni. 1) Blocco immagine - Disponibile solo per PC, BNC. 2) Grossa - Regola la Coarse del monitor selezionato. 3) Fine - Regola la Fine del monitor selezionato. 4) posizione - Regola la posizione del monitor selezionato.
  • Seite 365 Appare una tabella informativa "Info Grid" che mostra diverse voci di dati di base. 1) Maintenance - Consente di utilizzare la funzione Maintenance Control (Controllo manutenzione) per tutte le sorgenti di ingresso. 2) Auto Lamp Control - Regola automaticamente la retroilluminazione dello schermo selezionato in un momento specifico. L’opzione Manual Lamp Control (Controllo manuale lampada) si disattiva automaticamente se si effettua la regolazione tramite Auto Lamp Control (Controllo automatico lampada).
  • Seite 366: Video Wall

    1) Screen Scroll - Elimina le immagini persistenti che possono verificarsi quando lo schermo selezionato si trova in modalità Pausa per un periodo di tempo prolungato. È possibile impostare il timer di ripetizione ciclico selezionando il "Interval" per ora e "Second" per secondo. Le opzioni disponibili per Screen Type (Tipo di schermo) sono Scroll (Scorri), Pixel (Pixel), Bar (Barra) e Eraser (Eraser).
  • Seite 367 Selezionare una modalità dall'opzione Suddivisione Schermi. Selezionare un display da Display selection (Selezione display). La posizione verrà configurata premendo un numero nella modalità selezionata. Il programma MDC fornito da Samsung supporta fino a 4x4 schermi LCD. 3) On / Off...
  • Seite 368 - Accendere/Spegnere la funzione Video Wall (Parete video) del display selezionato. 4) Format - Il formato può essere selezionato per vedere uno schermo suddiviso. 2) Formato : Naturale È possibile utilizzare questa funzione in MagicNet. La funzione Maintenance Control (controllo manutenzione) è disponibile solo per gli schermi il cui stato di alimentazione è...
  • Seite 369 1. Nessuna selezione: visualizzazione del valore predefinito di fabbrica. 2. Un monitor selezionato: rilevamento e visualizzazione del valore di impostazione del monitor selezionato. 3. Un monitor selezionato (ID1) e aggiunta di un altro monitor (ID3): il programma, che visualizzava il valore di impostazione ID1, rileva e visualizza il valore ID3.
  • Seite 370: Regolazione Del Monitor

    Istruzioni di sicurezza Introduzione Collegamenti Uso del software Regolazione del monitor Inserisci La forma e il colore del prodotto possono variare in base al modello, e le specifiche del prodotto sono soggette Immagine a modifiche senza preavviso allo scopo di migliorarne le prestazioni. [PC / BNC /DVI] Immagine Regolazione del monitor...
  • Seite 371 - Comp: : PC / DVI Mode [Il pulsante diretto sul telecomando è il tasto 'SOURCE'.] 3) Swap [MENU] [ENTER] [ENTER] [ENTER] Scambia il Descrizione della finestra PIP con l'immagine principale. L’immagine nella finestra PIP appare nella schermata principale mentre l’immagine nella schermata principale appare nella finestra PIP.
  • Seite 372 Per documenti o lavori che prevedono l'uso frequente di testo. 4) Personalizzata Sebbene tali valori preimpostati sono stati scelti con cura dagli ingegneri, essi potrebbero non risultare comodi per le preferenze dell'utente. In questo caso, regolare Luminosità e Contrasto utilizzando il menu a schermo. [Il pulsante diretto sul telecomando è...
  • Seite 373 Consente di regolare la posizione orizzontale e verticale dello schermo. Regolazione auto [MENU] [ENTER] [ENTER] Tutti i valori di sintonia vengono automaticamente regolati. Se si cambia la risoluzione nel pannello di controllo, viene eseguita la funzione Regolazione auto. (Disponibile solo in modalità PC/BNC) [Il pulsante diretto sul telecomando è...
  • Seite 374 Modalità [MENU] [ENTER] [ENTER] [ENTER] Regolazione dell'atmosfera di visualizzazione. 1) Dinamica 2) Standard 3) Film 4) Personalizzata [Il pulsante diretto sul telecomando è il tasto 'P.MODE'.] Personalizzata [MENU] [ENTER] [ENTER] [ENTER] [< / >] [ENTER] Utilizzando i menu a schermo è possibile regolare contrasto e luminosità secondo le proprie preferenze. 1) Contrast (contrasto) Aggiunge un tono naturale all'immagine.
  • Seite 375 Immagine PIP [MENU] [ENTER] [ENTER] [ENTER] [ENTER] [< / >] [ENTER] Consente di impostare le opzioni relative alla schermata PIP. 1) Contrast (contrasto) Regola il contrasto della finestra PIP su schermo. 2) Brightness (luminosità) Regola la luminosità della finestra PIP su schermo. Modalità...
  • Seite 376 TS XT SRS [MENU] [ENTER] [ENTER] [ENTER] TS XT SRS è una tecnologia SRS brevettata che risolve il problema della riproduzione di contenuti multicanale 5.1 su due altoparlanti. TruSurround offre una straordinaria esperienza Surround Sound virtuale attraverso un sistema di riproduzione a due altoparlanti, inclusi gli altoparlanti interni del televisore. È...
  • Seite 377 [ENTER] Consente di controllare la modalità, il livello del volume e l’ora di spegnimento del monitor. Nota • Selezionando l'opzione Sì di Timer accensione o Timer spegnimento senza avere impostato Imposta Ora, apparirà il messaggio "Impostare prima l'orologio". Trasparenza menu [MENU] [ENTER] [ENTER]...
  • Seite 378 2 x 1 1 x 5 5 x 1 Nota • Quando Video Wall è attivo, le funzioni PIP, Regolazione auto, Blocco immagine e Formato non sono disponibili. Il lancio di Video Wall mentre è attiva la funzione PIP provocherà la chiusura della funzione PIP (PIP Off).
  • Seite 379 Consente di regolare la retroilluminazione per ridurre il consumo di energia. Regolazione accensione [MENU] [ENTER] [ENTER] [ENTER] [ENTER] Regola l’opzione Tempo di accensione dello schermo. *Attenzione: Impostare Tempo di accensione su un valore più alto per evitare il rischio di sovratensione.
  • Seite 380 La password predefinita dello schermo è "0000". Nota • Reimpostazione della password per la funzione lock. Premere MUTE On. La password verrà reimpostata su ‘0000’. Per reimpostare la password, è necessario il telecomando. © 1995~2008 SAMSUNG. ALL Rights Reserved...
  • Seite 381: Risoluzione Del Problem

    Istruzioni di sicurezza Introduzione Collegamenti Uso del software Regolazione del monitor Risoluzione del problemi La forma e il colore del prodotto possono variare in base al modello, e le specifiche del prodotto sono soggette Verifica funzione test a modifiche senza preavviso allo scopo di migliorarne le prestazioni. automatico Lista di controllo Risoluzione del problemi...
  • Seite 382 Non utilizzare benzene, solventi o altre sostanze infiammabili, né panni umidi. • Al fine di evitare il danneggiamento dello schermo, si consiglia di utilizzare il detergente di Samsung. Manutenzione dello schermo piatto . Pulire delicatamente lo schermo con un panno soffice (in cotone). •...
  • Seite 383 risolvere da soli il problema. Se si necessita di assistenza tecnica, chiamare il numero di telefono fornito sul tagliando di garanzia, il numero di telefono della sezione Informazioni o contattare il proprio rivenditore. Problemi relativi all’installazione (PC Mode) Nota • Segue un elenco dei problemi legati all’installazione del monitor e le rispettive soluzioni. Problemi Soluzioni Verificare che il cavo del segnale che collega il monitor al...
  • Seite 384 L’indicatore di alimentazione Il monitor sta salvando le modifiche effettuate alle impostazioni lampeggia ed è verde. nella memoria OSD. Lo schermo è vuoto e la luce Il monitor sta utilizzando il sistema di gestione del risparmio dell’indicatore di alimentazione è energetico.
  • Seite 385 Scollegare il cavo di alimentazione, quindi pulire lo schermo con un esterno del monitor e il panno soffice utilizzando una soluzione detergente o semplice acqua. cinescopio? Non lasciare residui di detergente o non graffiare il rivestimento. Non far entrare acqua nel monitor. © 1995~2008 SAMSUNG. ALL Right Reserved...
  • Seite 386: Specifiche

    Modalità di timing predefinite Generale Informazioni Generale Appendice Generale Modello SMT-4011 Pannello LCD Dimensioni 40,0 pollici - diagonale (101,6 cm) Area di visualizzazione 885,168 mm (H) x 497,664 mm (V) Passo Pixel 0,648 mm (H) x 0,648 mm (V) Sincronizzazione...
  • Seite 387: Modalità Di Timing Predefinite

    Questo monitor è conforme con gli standard EPA ENERGY STAR ENERGY2000 quando viene utilizzato con un computer dotato della funzione DPM VESA. ® In qualità di partner di ENERGY STAR , SAMSUNG ha determinato che ® questo prodotto soddisfa le linee guida ENERGY STAR per l'efficienza elettrica.
  • Seite 388 Come per la lampada fluorescente, lo schermo deve ripetere la stessa immagine molte volte al secondo per visualizzarla all'utente. La frequenza di questa ripetizione è chiamata Frequenza verticale o Frequenza di aggiornamento. Unità: Hz © 1995~2008 SAMSUNG. ALL Right Reserved...
  • Seite 389: Informazioni

    Istruzioni di sicurezza Introduzione Collegamenti Uso del software Regolazione del monitor Risoluzione del problemi La forma e il colore del prodotto possono variare in base al modello, e le specifiche del prodotto sono soggette Specifiche a modifiche senza preavviso allo scopo di migliorarne le prestazioni. Informazioni Per una migliore Informazioni...
  • Seite 390 Spegnimento, salvaschermo o risparmio energetico Spegnere il prodotto per 4 ore dopo 20 ore di utilizzo Spegnere il prodotto per 2 ore dopo 12 ore di utilizzo Impostare lo spegnimento automatico dello schermo utilizzando Combinazioni risparmio energia nella finestra Proprietà - Schermo del PC. Utilizzare un salvaschermo, se possibile - Si consiglia di utilizzare un salvaschermo monocromatico o un'immagine in movimento.
  • Seite 391 Ogni 30 minuti, modificare i caratteri con il movimento. Visualizzare periodicamente sull'intera area un'immagine in movimento insieme al logo. - Ciclo: visualizzare un'immagine in movimento insieme al logo per 60 secondi ogni 4 ore di utilizzo. Il modo migliore per proteggere lo schermo dalla ritenzione delle immagini è quello di spegnerlo quando non è...
  • Seite 392 . Time Interval (Intervallo): 1 ~ 10 ore (consigliato: 1) . Time Period (Periodo): 10 ~ 50 secondi (consigliato: 50) Nota • (Si prega di controllare la sezione “Funzione OSD” nel Manuale dell'utente sul CD. Su alcuni modelli questa funzione non è disponibile.) © 1995~2008 SAMSUNG. ALL Right Reserved...
  • Seite 393: Appendice

    Informazioni Appendice Appendice Contatti SAMSUNG NEL MONDO Contatti SAMSUNG NEL MONDO Termini Corretto smaltimento Autorità Nota • Se avete commenti o domande sui prodotti Samsung, contattate il Servizio Clienti Samsung North America U.S.A 1-800-SAMSUNG(726-7864) http://www.samsung.com/us CANADA 1-800-SAMSUNG(726-7864) http://www.samsung.com/ca 01-800-SAMSUNG(726-7864) http://www.samsung.com/mx...
  • Seite 394 DENMARK 70 70 19 70 http://www.samsung.com/dk FINLAND 030-6227 515 http://www.samsung.com/fi 3260 SAMSUNG(726-7864) FRANCE http://www.samsung.com/fr 08 25 08 65 65 (€ 0,15/min) GERMANY 01805-121213 (€ 0,14/Min) http://www.samsung.de HUNGARY 06-80-SAMSUNG(726-7864) http://www.samsung.com/hu ITALIA 800-SAMSUNG(726-7864) http://www.samsung.com/it LUXEMBURG 0035 (0)2 261 03 710 http://www.samsung.com/be NETHERLANDS 0900 20 200 88 (€...
  • Seite 395: Termini

    0800-329-999 http://www.samsung.com/tw TAIWAN VIETNAM 1 800 588 889 http://www.samsung.com/vn Middle East & Africa SOUTH AFRICA 0860-SAMSUNG(726-7864 ) http://www.samsung.com/za TURKEY 444 77 11 http://www.samsung.com.tr 800-SAMSUNG (726-7864) U.A.E http://www.samsung.com/mea 8000-4726 Termini Segnale Sinc I segnali Sinc (sincronizzati) si riferiscono ai segnali standard richiesti per visualizzare i colori desiderati sul monitor.
  • Seite 396: Corretto Smaltimento

    Il logo " Samsung " sono marchi di fabbrica registrati di Samsung Electronics Co., Ltd.; " Microsoft ", " Windows " e " Windows NT " sono marchi registrati di Microsoft Corporation; " VESA ", " DPM " e " DDC " sono marchi ®...
  • Seite 398 (DPM)
  • Seite 401 TFT-LCD (10cm , LCD " " 1:10 http://www.sec.co.kr/monitor > > FAQs > & ) > " "...
  • Seite 403 , A/V...
  • Seite 404 (101.6 cm ) - 1360 X 768...
  • Seite 405 (+,-)
  • Seite 406 © 1995~2008 SAMSUNG. ALL Rights Reserved...
  • Seite 407 ..................1 ......................1 ......................1 ......................2 ....................... 4 ......................... 5 ......................12 ....................12 ....................13 ....................20 Machanical Layout ....................26 ..................26 .................. 27 MDC ......................33 ................... 52 ......................... 52 ................53 [PC / BNC /DVI] ..........
  • Seite 408 ..................... 62 ........................................................................................................................................................................................... 69 ....................69 ................... 69 …………………..........70 ......................73 ……………………................. 73 ..................73 ................... 73 ......................74...
  • Seite 409: Machanical Layout

    Machanical Layout • (Floor standing type) • LCD Display 사용 설명서 MDC Software D-Sub(15 Pin)
  • Seite 410 (AAA X 2) BNC to RCA MENU...
  • Seite 411 ENTER SOURCE [PC] [BNC] [DVI] [AV] [S-Video] [Component] >> (PIP) >> • / S- • AV / S- • / S- / S- • PC / BNC / DVI • PC / DVI • •...
  • Seite 412 POWER S/W ON [ | ] / OFF [O] POWER IN RS232C OUT/IN (RS232C MDC(Multiple Display Control) DVI / PC IN [DVI(HDCP)] (PC DVI-D to DVI-D - DVI DVI / PC IN [RGB] (PC D-Sub(15 pin D-Sub) - PC DVI / PC IN [PC/DVI/BNC AUDIO IN] (PC/DVI/BNC COMPONENT AUDIO IN [L-AUDIO-R] ( BNC/COMPONENT OUT [R/P...
  • Seite 413 11) AV OUT [VIDEO] ( 12) AV IN [VIDEO] ( 13) AV OUT [S-VIDEO] (S- ): S- 14) AV IN [S-VIDEO] (S- 15) EXT SPEAKER(8 )[- - L - +, - - R - +] ( 16) AUDIO OUT [L-AUDIO-R] ( PC, DVI, BNC •...
  • Seite 414 STOP PLAY/PAUSE ON / OFF MAGICNET MagicNet LOCK LOCK MagicNet MagicNet • • DEL: • SYMBOL: .(., O, _, -, :, /) • ENTER: +100 -/-- , "+100" , "2" "1" MUTE MUTE , - VOL + TTX/MIX...
  • Seite 415 MENU ENTER P.MODE / S- : P.MODE PC/DVI/BNC : M/B (MagicBright ) MagicBright , PC 13) AUTO PRE-CH CH/P SOURCE INFO EXIT S.MODE 21) STILL 22) FM RADIO PC, DVI 23) P.SIZE DUAL/MTS DUAL-...
  • Seite 416 DUAL STEREO/MONO, DUAL l / DUAL ll,MONO/NICAM MONO/NICAM STEREO MTS- MTS (Multichannel Television Stereo) MTS/S_Mode MONO MONO MONO STEREO STEREO MONO MONO SOURCE SWAP SIZE STOP PLAY / PAUSE © 1995~2008 SAMSUNG. ALL Right Reserved...
  • Seite 423 • (cover-protector) KIT( . (M4 L15)
  • Seite 424 (cover-protector) KIT( . (M4 L15) . (M4 L15) • DVD, VCR...
  • Seite 425 220V 110V D-Sub( 2-1) D-Sub D-Sub 2-2) DVI( DVI(HDCP) BNC( 2-3) D-Sub BNC/COMPONENT IN - R, G, B, H, V • DVI...
  • Seite 426 • DVI DVI IN • DVD • SOURCE " " • DVI IN DVD, VCR, AV IN [VIDEO] AV IN [S-VIDEO] S-VHS ./td> VCR, (L, R) AV AUDIO IN [L-AUDIO-R] 'SOURCE' • S-VHS...
  • Seite 427 COMPONENT AUDIO IN [L-AUDIO-R] BNC/COMPONENT IN - P , Y, P port 'SOURCE' • AV AUDIO IN [L-AUDIO-R] AV IN [VIDEO] 'SOURCE' •...
  • Seite 428 • BNC / COMPONENT IN - P , Y, P , Y, P COMPONENT AUDIO IN [L-AUDIO-R] 'SOURCE' • •...
  • Seite 429 AUX L, R AUDIO OUT [L-AUDIO-R] © 1995~2008 SAMSUNG. ALL Right Reserved...
  • Seite 430 (MDC: Multiple Display Control) RS-232C (Serial port) (Serial port) RS-232C > > Multiple Display Control...
  • Seite 431: Mdc

    Remocon Safety Lock Port Selection 2. LCD COM1 5. Select All, Clear All < > , MDC...
  • Seite 432 1. Multiple Display Control COM1 COM1 Port Selection Menu COM1 COM4 Power Control Power Control...
  • Seite 433 Power Status ( 2) Input Source ( 3) Image Size 4) On Timer Status ( 5) Off Timer Status ( 2. Select All , Check 1) Power On/Off...
  • Seite 434 On/Off 2) Volume ( Select All Mute On/Off Mute On/Off Input Source Select All , Check • TV • PC...
  • Seite 435: Pc, Bnc, Dvi

    1) PC Display 2) BNC Display 3) DVI Display 4) TV Display 5) AV Display 6) S-Video Display S-Video 7) Component Display Component 8) MagicNet - MagicNet MagicNet 9) Channel TV Source Input Source Image Size PC, BNC, DVI Image Size Image Size...
  • Seite 436 Image Size 2) Image Size 3) Input Source PC, BNC, DVI Image Size PC, BNC, DVI - Image Size PC, BNC, DVI Image Size 6) AV, S-Video, Component Image Size MagicNet MagicNet Image Size TV, AV, S-Video, Component, DVI(HDCP) Image Size Image Size...
  • Seite 437 Image Size 1) Video Source TV, AV, S-Video, Component Image Size Select All , Check TV, AV, S-Video, Component, DVI(HDCP) Image Size < > Component DVI(HDCP) 720p 1080i Auto Wide, Zoom1, Zoom2 MagicNet MagicNet Time...
  • Seite 438 1) Current Time 2) On Time Setup AM/PM, 3) Off Time Setup AM/PM 4) On Timer , On Timer 5) Off Timer , Off Timer MagicNet MagicNet On Time Setup Source On Time Setup Source MagicNe MagicNe (PIP) PIP Size Select All , Check...
  • Seite 439 1) PIP Size PIP Size 2) OFF Display 3) Large Display Size Large 4) Small Display Size Small 5) Double1 Display Double 1 6) Double2 Display Double 2 7) Double3 (Picture By Picture) Display Double 3 Component MagicNet MagicNet (PIP) PIP Source •...
  • Seite 440: Dvi

    • PIP S-Video PIP Source 1) PIP Source PIP Source 2) PC Display PIP Source 3) BNC Display PIP Source 4) DVI Display PIP Source 5) TV...
  • Seite 441 Display PIP Source 6) AV Display PIP Source 7) S-Video Display PIP Source S-Video 8) Component Display PIP Source Component 8) Channel - PIP Source Channel < > Main Screen Input Source PIP Source MagicNet MagicNet TV Source PIP Source Setting Picture Settings...
  • Seite 442 7) Color Tone Display ColorTone Factory Default MagicNet MagicNet Setting Picture PC Settings Picture Select All (50) CUSTOM 1) Picture PC - PC, BNC, DVI 2) Contrast 3) Brightness 4) Red 5) Green 6) Blue Factory Default MagicNet MagicNet...
  • Seite 443 Setting Audio Settings Audio Audio Select All (50) CUSTOM 1) Audio 2) Bass 3) Treble 4) Balance 5) SRS TSXT SRS TSXT 6) Sound Select Factory Default MagicNet MagicNet Setting Image Lock Settings Image lock...
  • Seite 444: Lamp Control

    Image Lock 1) Image Lock - PC, BNC 2) Coarse Coarse 3) Fine Fine 4) Position 5) Auto Adjustment MagicNet MagicNet Maintenance Lamp Control Maintenance Maintenance...
  • Seite 445 Maintenance Control 1) Maintenance Input Source Maintenance Control 2) Auto Lamp Control Display Manual Lamp Control Auto Lamp Control 3) Manual Lamp Control Display Auto Lamp Control Manual Lamp Control MagicNet MagicNet Maintenance Scroll Maintenance Maintenance...
  • Seite 446: Video Wall

    1) Screen Scroll Display "Interval" "Second" Screen Type Scroll, Pixel, Bar, Eraser MagicNet MagicNet Second Scroll Type 1, 2, 3, 4, 5 Pixel, Bar, Eraser Type 10, 20, 30, 40, 50 Maintenance Video Wall Maintenance Maintenance...
  • Seite 447 1) Video Wall , Video Wall 2) Screen Divider 3) On / Off...
  • Seite 448 - Video Wall On/Off 4) Format Full Natural MagicNet MagicNet Power Control info grid RS232C . (Com1 Set ID Set ID Set ID < > Set ID 0~16 MDC System (Power Control info grid) 4. On timer, Off timer - PC RS-232C <...
  • Seite 449: Multi Control

    [ PC / BNC /DVI] / S- / DVI- Multi Control PC / BNC / DVI [MENU] [ENTER] [ENTER] [ENTER] 1) PC 2) BNC 3) DVI 5) S- 'SOURCE' • DVD, VCR • BNC [MENU] [ENTER] [ENTER] [ENTER] [ENTER] - Off - On 'PIP' [MENU]...
  • Seite 450 [MENU] [ENTER] [ENTER] [ENTER] 'SWAP' [MENU] [ENTER] [ENTER] [ENTER] [ENTER] [MENU] [ENTER] [ENTER] [ENTER] [ENTER] [MENU] [ENTER] [ENTER] [ENTER] [ENTER] • : PIP [MENU] [ENTER] [ENTER] [ENTER] [ENTER] 1) PC 2) BNC 3) DVI 5) S- [ PC / BNC /DVI] PC / BNC / DVI MagicBright [MENU]...
  • Seite 451 [MENU] [ENTER] [ENTER] [ENTER] ] / [< / >] [ENTER] • MagicBright [MENU] [ENTER] [ENTER] [ENTER] PC, BNC [MENU] [ENTER] [ENTER] [ENTER] [< / >] [ENTER] PC, BNC • PC, BNC [MENU] [ENTER] [ENTER] [ENTER] [< / >] [ENTER] [MENU] [ENTER] [ENTER] [ENTER]...
  • Seite 452 PC, BNC [MENU] [ENTER] [ENTER] [ENTER] [ENTER] [MENU] [ENTER] [ENTER] [ENTER] [ENTER] [< / >] [ENTER] R Phase, G Phase, B Phase, [MENU] [ENTER] [ENTER] [ENTER] 1) 16:9 2) 4:3 [MENU] [ENTER] [ENTER] [ENTER] [ENTER] [ENTER] [< / >] [ENTER] AV, S- NTSC : PIP...
  • Seite 453 AV, S- NTSC [MENU] [ENTER] [ENTER] [ENTER] [MENU] [ENTER] [ENTER] [ENTER] 1)16:9 4)4:3 1080i 720p [MENU] [ENTER] [ENTER] [ENTER] [MENU] [ENTER] [ENTER] [ENTER] (24 frames) TV(30 frames) DVI-Video [MENU] [ENTER] [ENTER] [ENTER] [ENTER] [< / >] [ENTER] : PIP...
  • Seite 454 PC / BNC / DVI [MENU] [ENTER] [ENTER] [ENTER] 2) Music [MENU] [ENTER] [ENTER] [ENTER] [< / >] [ENTER] • [MENU] [ENTER] [ENTER] [ENTER] SRS TS XT [MENU] [ENTER] [ENTER] [ENTER] TruSurround 'SRS'...
  • Seite 455 [MENU] [ENTER] [ENTER] [ENTER] : PIP] [MENU] [ENTER] [ENTER] [ENTER] • [MENU] [ENTER] [ENTER] [ENTER] [< / >] [ENTER] [MENU] [ENTER] [ENTER] [ENTER] [< / >] [ENTER] [< / >] [ENTER] , 30, 60, 90, 120, 150, 180) [MENU] [ENTER] [ENTER] [ENTER] [<...
  • Seite 456 • MagicNet (Wake On LAN) Matrix Matrix Matrix Matrix [MENU] [ENTER] [ENTER] [ENTER] [ENTER] Matrix [MENU] [ENTER] [ENTER] [ENTER] [ENTER] [MENU] [ENTER] [ENTER] [ENTER] [ENTER] • • • 2 x 2 3 x 3 4 x 4 5 x 5 1 x 2 2 x 1 1 x 5...
  • Seite 457 1~10 [MENU] [ENTER] [ENTER] [ENTER] [ENTER] 1~5 ) : 1~5 : 10~50 [MENU] [ENTER] [ENTER] [ENTER] [ENTER] [MENU] [ENTER] [ENTER] [ENTER] 1024 x 768 @ 60Hz, 1280 x 768 @ 60Hz, 1360 x 768 @ 60Hz, 1366 x768 @ 60Hz PC, BNC 2) 1024 X 768 3) 1280 X 768...
  • Seite 458 1) ID [MENU] [ENTER] [ENTER] [ENTER] [0~9] 2) ID [MENU] [ENTER] [ENTER] [ENTER] [0~9] . ID PC / BNC / DVI Multi Control OSD LOCK (Safety Lock) LOCK • "0000" • Lock MUTE '0000' © 1995~2008 SAMSUNG. ALL Rights Reserved...
  • Seite 459 • Check Cooling System "Check Cooling System" 1360 x 768 85Hz...
  • Seite 460 > • • • • • • (" " 50 Hz ~ 85 Hz 60 Hz " " " " •...
  • Seite 461 • • " ." " ." "TEST GOOD" MENU...
  • Seite 462 • • + /- Windows XP: Windows ME/2000: Windows XP: BIOS SETUP (Windows/ Windows ME/2000: BIOS SETUP . (Windows/ /LCD , LCD © 1995~2008 SAMSUNG. ALL Right Reserved...
  • Seite 463 SMT-4011 BE40PS (101.6 cm) 885.168 mm (H) x 497.664 mm (V) 0.648 mm (H) x 0.648 mm (V) 30 ~ 81 kHz 56 ~ 75 Hz 16.7 M 1360 x 768 / 1366 x 768 @ 60 Hz 1366 x 768 @ 60 Hz...
  • Seite 464 (L) , 0.5 Vrms (-9 dB) (L) , 0.5 Vrms (-9 dB) 3.5 Ø , 0.5 Vrms (-9 dB) : 80 Hz ~ 15 kHz (at -3 dB) : 80 Hz ~ 20 kHz (at -3 dB) LCD Panel 1ppm( Pixel •...
  • Seite 465 48.363 60.004 65.000 VESA, 1024 x 768 56.476 70.069 75.000 VESA, 1024 x 768 60.023 75.029 78.750 VESA, 1024 x 768 68.677 85.997 94.500 VESA, 1360 x 768 47.712 60.000 85.500 Line Refresh Rate © 1995~2008 SAMSUNG. ALL Right Reserved...
  • Seite 466 • • • 1588-3366 • 02-541-3000 • 080-022-3000 • http://www.sec.co.kr/monitor • http://www.samsungsvc.co.kr . TFT-LCD...
  • Seite 467 : 1360 x 768 • • ) : 60HZ LCD Panel 1ppm( Pixel • LCD Panel Sub Pixel : 40, 46 : 3,133,440 " " TFT-LCD . 40, 46 : 1360 x 768@ 60Hz (Image Retention) . LCD (LC)
  • Seite 468 • : OSD Menu(OSD ) -> Set Up( ) -> Safety Screen( ) -> Screen Scroll(...
  • Seite 469 "OSD Function" : OSD Menu(OSD ) -> Set Up( ) -> Safety Screen( ) -> Eraser( : 1 ~ 10 : 1 ) : 10 ~ 50 : 50 ) • (CD "OSD Function" © 1995~2008 SAMSUNG. ALL Right Reserved...
  • Seite 470 SyncMaster • • • • www.sec.co.kr/monitor www.sec.co.kr/monitor • • • SyncMaster • • • • • (Dot Pitch)
  • Seite 471 (Plug & Play) VESA DDC 1360 x 768 1,360 Multiple Display Control (MDC) (MDC: Multiple Display Control) . PC RS-232C © 2008 Samsung SAMSUNG SyncMaster . Microsoft, Windows Windows NT Microsoft( ) . VESA, DPM Video Electronics Standard Association . ENERGY STAR (U.S.
  • Seite 474: Zasady Bezpiecze Stwa

    Zasady bezpiecze stwa Zasady obowi zuj ce w danym kraju Zasilanie Instalacja Czyszczenie Inne W zale no ci od modelu mog wyst powaü ró nice w kolorze i wygl dzie produktu. W celu zwi kszenia Wprowadzenie wydajno ci produktu dane techniczne mog ulegaü zmianom bez uprzedniego powiadomienia. Poá...
  • Seite 475 Nale y u ywaü wyá cznie wtyczki i gniazdka z odpowiednim uziemieniem. Niewáa ciwe uziemienie mo e spowodowaü pora enie pr dem lub uszkodzenie sprz tu.(Tylko sprz t klasy 1.) Umie ciü wtyczk przewodu zasilaj cego solidnie w gniazdku, aby si nie poluzowaáa.
  • Seite 476 przez 24 godziny na dob , np. w przypadku lotniska, stacji kolejowej itp., nale y skonsultowaü si z autoryzowanym punktem serwisowym. Konsultacja jest konieczna, gdy korzystanie z monitora w takich warunkach mo e spowodowaü jego powa ne uszkodzenie. Monitor powinien byü ulokowany w miejscu mo liwie suchym i czystym.
  • Seite 477 Nie stawiaü produktu w miejscach o sáabej wentylacji, na przykáad na póáce czy w szafce. Wzrost temperatury wewn trz urz dzenia grozi po arem. Monitor nale y stawiaü ostro nie. Mo e ulec uszkodzeniu. Nie nale y káa ü monitora ekranem w dóá. Mo e to uszkodziü...
  • Seite 478 Nale y u ywaü zalecanych detergentów i mi kkiej szmatki. Je li wtyk jest brudny lub zakurzony, nale y go dokáadnie wyczy ciü such szmatk . Brudny wtyk mo e spowodowaü pora enie pr dem lub po ar. Przed czyszczeniem monitora pami taü o wcze niejszym odá czeniu przewodu zasilaj cego.
  • Seite 479 W czasie wyáadowa atmosferycznych na zewn trz nale y wyá czyü zasilanie monitora lub nie korzystaü z niego przez jaki czas. W przeciwnym razie monitor mo e ulec uszkodzeniu, powoduj c pora enie pr dem lub po ar. Nie przesuwaj monitora, ci gn c za przewód lub kabel sygnaáowy. Mo e to spowodowaü...
  • Seite 480 (np. papieru, zapaáek). Grozi to pora eniem pr dem elektrycznym. Je li do produktu dostanie si obca substancja lub woda, nale y go wyá czyü, wyj ü wtyczk z gniazdka elektrycznego i skontaktowaü si z punktem Serwisem. Ogl danie tego samego ekranu przez dáu szy czas mo e sprawiü, e ekran b dzie zamazany lub widoczny b dzie trwaáy obraz.
  • Seite 481 Podczas przenoszenia monitora skorzystaü z pomocy drugiej osoby. Upadek mo e spowodowaü wadliwe dziaáanie lub fizyczne uszkodzenie monitora. Aby zapobiec ewentualnemu uszkodzeniu monitora, powinno si go stawiaü w miejscu niedost pnym dla dzieci. Nale y równie pami taü o tym, i upadek monitora mo e spowodowaü straty materialne, obra enia, a nawet mierü.
  • Seite 482 Jako u ytkownik Klient jest odpowiedzialny za zwrot zu ytych baterii lub akumulatorów do utylizacji. Klient mo e oddaü zu yte baterie lub akumulatory do najbli szego publicznego punktu utylizacji lub sklepu sprzedaj cego baterie lub akumulatory tego samego typu. © 1995~2008 Samsung Electronics Co., Ltd.
  • Seite 483 Spis tre ci Zasady bezpiecze stwa ..................1 ................1 Zasady obowi zuj ce w danym kraju ......................... 1 Zasilanie ......................2 Instalacja ........................4 Czyszczenie ......................... 5 Inne Wprowadzenie ....................... 12 ....................12 Zawarto ü opakowania ....................13 Monitor ....................
  • Seite 484 ....................... 71 ....................71 Aby poprawic obraz ........71 INFORMACJE O PRODUKCIE (brak efektu pozostawania obrazu) Dodatek ......................75 ............. 75 Skontaktuj si z firm SAMSUNG na caáym wiecie ....................... 77 Terminologia ....................78 Zasady usuwania ..................... 78 Osoba upowa niona...
  • Seite 485: Zasady Bezpiecze Stwa

    Zasady bezpiecze stwa Wprowadzenie Zawarto ü opakowania Monitor Elementy mechaniczne Poá czenia W zale no ci od modelu mog wyst powaü ró nice w kolorze i wygl dzie produktu. W celu zwi kszenia Korzystanie z wydajno ci produktu dane techniczne mog ulegaü zmianom bez uprzedniego powiadomienia. oprogramowania Dostosowywanie ustawie Wprowadzenie...
  • Seite 486 Pilot Baterie (AAA X 2) Za lepka Gniazdo adaptera BNC-RCA Podstawa tymczasowa Do nabycia osobno ZESTAW do monta u na cianie Zestaw gáo nikowy Podstawy Kabel DVI Kabel BNC Monitor Przód MENU Sáu y równie do zamykania menu OSD lub powrotu do poprzedniego menu. Przycisk góra-dóá...
  • Seite 487 menu. Sáu y równie do regulacji gáo no ci. ENTER Sáu y do wybierania menu OSD. SOURCE SOURCE Sáu y do przeá czania mi dzy trybami PC i Video. W zale no ci od typu transmisji w danym kraju, niektóre opcje mog byü niedost pne. [PC] [BNC] [DVI]...
  • Seite 488 POWER S/W ON [ | ] / OFF [O] Wá cza i wyá cza monitor. POWER IN (Kabel sygnalowy): Jeden koniec kabla zasilaj cego nale y podá czyü do gniazda monitora, a drugi do gniazda sieci elektrycznej. RS232C OUT/IN (PORT szeregowy RS232C): port programowy MDC (Multiple Display Control) PC IN(RGB) (Gniazdo sygna owe PC) : U ywaj c 15-pinowe D-Sub - tryb PC (Analog PC)
  • Seite 489 10) AV AUDIO IN [L-AUDIO-R](Gniazdo sygna owe audio MONITOR (wejúcie)) 11) AV OUT [VIDEO](Gniazdo sygna owe) : tryb AV (wyjúcie) 12) AV IN [VIDEO](Gniazdo sygna owe) (wejúcie) 13) AV OUT [S-VIDEO](Gniazdo sygna owe S- Video) : tryb S-Video (wyjúcie) 14) AV IN [S-VIDEO](Gniazdo sygna owe S-Video) (wejúcie) 15) EXT SPEAKER(8)[- - L - +, - - R - +] (Gniazdo mikrofonowe (8))
  • Seite 490 21. STILL 22. FM RADIO 23. P.SIZE DUAL/MTS SOURCE 28. SWAP SIZE STOP PLAY/PAUSE ON / OFF Przycisk ten sáu y do wá czania i wyá czania monitora. MAGICNET Przycisk szybkiego uruchamiania MagicNet - Ta funkcja nie jest dost pna na tym monitorze. Przycisk szybkiego uruchamiania MDC.
  • Seite 491 Kanaáy telewizyjne oferuj usáugi informacyjne w postaci teletekstu. [Funkcja TTX / MIX jest u ywana gáównie w Europie. ] MENU Sáu y równie do zamykania menu OSD lub powrotu do poprzedniego menu. ENTER Sáu y do wybierania menu OSD. P.MODE Dostosuj obraz monitora, wybieraj c jedno z ustawie fabrycznych (lub wybierz wáasne, niestandardowe ustawienia obrazu).
  • Seite 492 Obraz wy wietlany w oknie PIP pojawi si na gáównym ekranie, za obraz z gáównego ekranu pojawi si w oknie PIP. SIZE Umo liwia wybór ró nych rozmiarów obrazu. Przewijanie do tyáu (Rewind) STOP Stop PLAY / PAUSE Odtwarzanie / zatrzymanie (Play / Pause) Przewijanie do przodu (Fast forward) © 1995~2008 Samsung Electronics Co., Ltd.
  • Seite 493: Elementy Mechaniczne

    Elementy mechaniczne Górna kraw d monitora Podstawa Gáo nik Jak zainstalowaü wspornik VESA Monta wspornika na ciennego 1. Elementy mechaniczne 2. Górna kraw d monitora...
  • Seite 494 Nale y upewniü si , e instalacja wspornika VESA jest zgodna z mi dzynarodowymi standardami VESA. Informacje na temat zakupu i instalacji wspornika VESA: Prosimy o kontakt z lokalnym dystrybutorem firmy Samsung w celu záo enia zamówienia. Po záo eniu zamówienia odwiedz Pa stwa profesjonalni instalatorzy, którzy dokonaj monta u wspornika.
  • Seite 495 6. Monta wspornika na ciennego Aby zamontowaü wspornik na cienny, nale y skontaktowaü si z pracownikiem technicznym. Firma Samsung Electronics nie ponosi odpowiedzialno ci za szkody poniesione przez klienta w przypadku przeprowadzenia samodzielnego monta u. Produkt jest przeznaczony do monta u na cianach wykonanych z cementu. Produkt mo e odpa ü, je li zostanie zamontowany na tynku lub drewnie.
  • Seite 496 Dost pne s dwa zawiasy (lewy i prawy). Nale y u yü odpowiedniego. Przed rozpocz ciem wiercenia otworów w cianie nale y sprawdziü, czy odlegáo ü mi dzy dwoma otworami blokuj cymi znajduj cymi si z tyáu produktu jest prawidáowa. Je li odlegáo ü...
  • Seite 497 Wyjmij 4 ruby znajduj ce si z tyáu produktu. Wáó rub B w plastikowy wieszak (patrz rysunek poni ej). 1. Zamontuj produkt na wsporniku na ciennym i upewnij si , e jest on prawidáowo przymocowany do lewego i prawego wieszaka plastikowego.
  • Seite 498 1. Zamocuj produkt do wspornika na ciennego. Nale y pami taü, aby podczas regulowania k ta 2. Chwyü produkt w górnej, rodkowej cz ci i poci gnij do przodu nachylenia trzymaü produkt za jego górn , (w kierunku wskazywanym przez strzaák ), aby wyregulowaü k t rodkow cz ü, a nie za prawy czy lewy bok.
  • Seite 499: Monta Podstawy

    Monta podstawy Informacje Dodatek Uwaga • Nale y wykorzystaü wyá cznie dostarczone rubki. Ostrze enie Firma Samsung Electronics nie ponosi adnej odpowiedzialno ci za szkody powstaáe w wyniku zastosowania podstawy innej, ni zalecana. Monta Podstawa tymczasowa Lewa Prawa podstawa podstawa Ostrze enie Umie ciü...
  • Seite 500 Podstawa zaprojektowana jest do regulacji k ta ustawienia ekranu. Firma nie odpowiada za jakiekolwiek problemy spowodowane u ytkowaniem podstawy. Produktu nie wolno u ywaü jako podstawy pod inne przedmioty ni monitor. Monta podstawy (sprzedawanego oddzielnie) ‘Pokrywa ochronna sáu y do zabezpieczenia otworu w dolnej cz ci monitora, w którym umieszczana jest podstawa.
  • Seite 501 Podá czyü kabel audio monitora do portu audio z tyáu komputera. Wá czyü komputer i monitor. Uwaga • Kabel DVI lub BNC stanowi wyposaýenie dodatkowe. eby zakupiü elementy wyposa enia dodatkowego, nale y skontaktowaü si z Serwisemlokalnym firmy Samsung Electronics.
  • Seite 502 Podá czanie odtwarzacza DVD do zá cza cyfrowego Uwaga • Urz dzenia wej ciowe, np. odtwarzacz DVD, s podá czane do zá cza DVI IN monitora przy pomocy kabla DVI. • Nast pnie rozpocznij odtwarzanie páyty DVD. • Wybierz opcj Digital za pomoc przycisku SOURCE. Uwaga •...
  • Seite 503 Podá cz kable audio do gniazd COMPONENT AUDIO IN [L-AUDIO-R] monitora i gniazd AUDIO OUT odtwarzacza DVD. Podá cz kabel wideo do gniazd BNC/COMPONENT IN - pod czanie portu P monitora i gniazd , Y, P , Y, P odtwarzacza DVD. U ywaj c przycisku Source na przednim panelu monitora nale y wybraü...
  • Seite 504 Podá czanie przystawki internetowej DTV Uwaga • Sposób podá czenia standardowej przystawki internetowej zostaá przedstawiony poni ej. Podá cz kabel wideo do gniazd BNC/COMPONENT IN - pod czanie portu P , Y, P monitora i gniazd , Y, P odtwarzacza DVD. Podá...
  • Seite 505 Mo e to uszkodziü mocowanie gáo nika. Podá czanie do systemu audio Podá cz kable audio do gniazd AUX L, R systemu audio i gniazd MONITOR IN [L-AUDIO-R] monitora. © 1995~2008 Samsung Electronics Co., Ltd.
  • Seite 506 RS-232C. Dlatego, aby poá czyü porty szeregowe komputera i wy wietlacza nale y zastosowaü kabel szeregowy. Main Screen Aby uruchomiü program, kliknij Start > Program > Samsung > MDC System. Wybierz urz dzenie, aby sprawdziü jego ustawienie gáo no ci na suwaku.
  • Seite 507: Port Selection

    Ikony gáówne Przycisk wyboru Remocon Info Grid Safety Lock Wybór wy wietlacza Port Selection Narz dzia sterowania 1. Wá cz wy wietlacze za pomoc gáównych ikon. 2. Sáu y do wá czania lub wyá czania funkcji odbioru sygnaáu zdalnego sterowania przez wy wietlacz. 3.
  • Seite 508: Power Control

    1. Program Multiple Display Control jest oryginalnie ustawiony na COM1. 2. Je li u ywany jest jakikolwiek inny port ni COM1, mo na wybraü porty od COM1 do COM4 w menu Port Selection. 3. Je li nie zostanie wybrana dokáadna nazwa portu podá czonego do monitora kablem szeregowym, komunikacja nie b dzie dost pna.
  • Seite 509: Input

    Siatka informacyjna zawiera podstawowe informacje potrzebne do sterowania zasilaniem. (Power Status (Stan zasilania)) 2) Input 3) Image Size 4) On Timer 5) Off Timer 2. Aby wybraü wy wietlacz, kliknij przycisk Select All lub zaznacz odpowiednie pole wyboru. Power Control umo liwia regulacj niektórych funkcji wybranego wy wietlacza. 1) Power On/Off...
  • Seite 510: Input Source

    - Wá cza i wyá cza zasilanie wybranego wy wietlacza. 2) Volume - Steruje poziomem gáo no ci wybranego wy wietlacza. Odbiera poziom gáo no ci wy wietlacza i wy wietla j na suwaku. (Po anulowaniu wyboru lub klikni ciu Select All, zostaje przywrócona warto ü domy lna 10) (Mute On/Off) - Wá...
  • Seite 511 Siatka informacyjna zawiera podstawowe informacje potrzebne do sterowania sygnaáem wej ciowym. 1) PC - Sáu y do zmiany sygnaáu ródáowego wybranego wy wietlacza na PC. 2) BNC - Sáu y do zmiany sygnaáu ródáowego wybranego wy wietlacza na BNC. 3) DVI - Sáu y do zmiany sygnaáu ródáowego wybranego wy wietlacza na DVI.
  • Seite 512 Tabela informacyjna zawiera podstawowe informacje potrzebne do regulacji rozmiaru obrazu. (Power Status (Stan zasilania)) - Informuje o stanie zasilania bie cego wy wietlacza. 2) Image Size - Sáu y do wy wietlania informacji o rozmiarze bie cego obrazu wybranego monitora. 3) Input - Informuje o bie cym sygnale wej ciowym u ywanego wy wietlacza.
  • Seite 513 Tabela informacyjna zawiera podstawowe informacje potrzebne do regulacji rozmiaru obrazu. 1) Klikni cie karty Video Source ( ródáo wideo) umo liwia dostosowanie rozmiaru obrazu dla opcji TV, AV, S-Video i Komponent (Komponentowe). Aby wybraü obraz do regulacji, kliknij przycisk Zaznacz wszystko lub zaznacz odpowiednie pole wyboru. 2) W tabeli informacyjnej znajduj si tylko obrazy, których sygnaáem ródáowym jest TV, AV, S-VIDEO, Component, DVI(HDCP).
  • Seite 514 Siatka informacyjna zawiera podstawowe informacje potrzebne do regulacji godziny. 1) Current Time - Ustaw aktualn godzin dla wybranych wy wietlaczy (godzina w komputerze) - Aby zmieniü aktualn godzin , najpierw zmie godzin w komputerze. 2) On Time Setup Zdefiniuj ustawienia Hour (Godzina), Minute (Minuta), AM/PM (Przed/po poáudniu) opcji On Time Setup (Konfiguracja uruchamiania), Status (Stan), Source ( ródáo), Volume (Gáo no ü) dla wybranego ekranu.
  • Seite 515 Tabela informacyjna zawiera podstawowe informacje potrzebne do regulacji rozmiaru PIP. 1) PIP Size - Informuje o bie cym rozmiarze obrazu u ywanego wy wietlacza. 2) OFF - Sáu y do wyá czania funkcji PIP wybranego wy wietlacza. 3) Large - Sáu y do wá czania funkcji PIP wybranego wy wietlacza oraz zmiany rozmiaru okna na Large. 4) Small - Sáu y do wá...
  • Seite 516 • PIP S-Video Mode Tabela informacyjna zawiera podstawowe informacje potrzebne do regulacji ródáa PIP. 1) PIP Source - Regulacja ródáa PIP jest mo liwa po wá czeniu zasilania monitora. 2) PC - Sáu y do zmiany sygnaáu ródáowego PIP wybranego wy wietlacza na PC. 3) BNC - Sáu y do zmiany sygnaáu ródáowego PIP wybranego wy wietlacza na BNC.
  • Seite 517: Picture [Pc / Bnc /Dvi]

    6) AV - Sáu y do zmiany sygnaáu ródáowego PIP wybranego wy wietlacza na AV. 7) S-Video - Sáu y do zmiany sygnaáu ródáowego PIP wybranego wy wietlacza na S-Video. 8) Component - Sáu y do zmiany sygnaáu ródáowego PIP wybranego wy wietlacza na Component. 9) Channel –...
  • Seite 518 6) Tint - Reguluje odcie wybranego wy wietlacza. 7) Color Tone - Sáu y do regulacji odcienia kolorów wybranego monitora. ródáo sygnaáu wej ciowego programu MagicNet dost pne jest wyá cznie w modelach wyposa onych w oprogramowanie MagicNet. Z funkcji tej mo na korzystaü tylko w przypadku, gdy wá czone jest zasilanie wy wietlacza; brak wyboru parametrów powoduje wy wietlenia warto ci fabrycznych.
  • Seite 519 Settings Audio 1. Kliknij ikon Settings, aby wy wietliü ekran regulacji ustawie . Siatka informacyjna zawiera podstawowe informacje potrzebne do regulacji ustawie . Po wybraniu ka dej funkcji ustawiona dla niej warto ü jest wy wietlana na suwaku. Po wybraniu ka da funkcja pobiera warto ü dla zestawu i wy wietla j na suwaku.
  • Seite 520: Lamp Control

    Siatka informacyjna zawiera podstawowe informacje potrzebne do regulacji ustawie . 1) Image Lock - Dost pny tylko dla sygnaáów PC, BNC. 2) Coarse - Reguluje Coarse wybranego wy wietlacza. 3) Fine - Reguluje Fine wybranego wy wietlacza. 4) Position - Reguluje poáo enie wybranego wy wietlacza. 5) Auto Adjustment - Naci nij, aby automatycznie dostosowaü...
  • Seite 521 Pojawi si Info Grid (Siatka informacyjna) zawieraj ca kilka podstawowych danych. 1) Maintenance - Umo liwia u ycie funkcji Maintenance Control (Sterowanie obsáug ) dla wszystkich ródeá sygnaáu wej ciowego. 2) Auto Lamp Control - Automatycznie reguluje pod wietlenie wybranego monitora w okre lonym czasie. Opcja Manual Lamp Control (R czne sterowanie lamp ) automatycznie wyá...
  • Seite 522: Video Wall

    1) Screen Scroll - Eliminuje lady obrazu, które mog wyst piü, kiedy wybrany monitor pozostaje przez dáu szy czas w trybie Pause (Pauza). Mo na ustawiü timer od wie ania wybieraj c Interval wg godzin i Second wg sekund. Dla opcji Screen Type (Typ ekranu) mo na wybraü warto ci Scroll (Przewijanie), Pixel (Piksele), Bar (Pas) i Eraser (Wymazywanie).
  • Seite 523 Wybierz tryb z menu Screen divider (Podziaá ekranu). Wybierz wy wietlacz z listy. Poáo enie zostanie ustawione po naci ni ciu liczby w wybranym trybie. Program MDC dostarczony przez firm Samsung umo liwia obsáug do 4x4 wy wietlaczy LCD. 3) On / Off...
  • Seite 524: Rozwi Zywanie Problemów

    - Wá cza/wyá cza funkcj Video Wall ( ciana wideo) dla wybranego ekranu. 4) Format - Wybierz format, aby uzyskaü podzielony ekran. Full Natural Funkcja ta mo e nie dziaáaü w programie MagicNet. Funkcja Maintenance Control (Obsáuga) jest dost pna tylko dla monitorów z wá czonym zasilaniem. Rozwi zywanie problemów 1.
  • Seite 525 Zasady bezpiecze stwa Wprowadzenie Poá czenia Korzystanie z oprogramowania Dostosowywanie ustawie monitora W zale no ci od modelu mog wyst powaü ró nice w kolorze i wygl dzie produktu. W celu zwi kszenia wydajno ci produktu dane techniczne mog ulegaü zmianom bez uprzedniego powiadomienia. Input Picture Dostosowywanie ustawie monitora...
  • Seite 526 3) Swap [MENU] [ENTER] [ENTER] [ENTER] Przeá czanie zawarto ci okna PIP i gáównego obrazu. Obraz wy wietlany w oknie PIP pojawi si na gáównym ekranie, za obraz z gáównego ekranu pojawi si w oknie PIP. [ Bezpo rednim przyciskiem na pilocie jest przycisk 'SWAP'.] 4) Size [MENU] [ENTER]...
  • Seite 527 4) Custom Choü parametry s starannie dobrane przez in ynierów, ustawienia wst pne mog nie byü dostosowane do Twojego wzroku i preferencji. W takim przypadku wyreguluj Jasno ü i Kontrast za pomoc menu OSD. [Bezpo rednim przyciskiem na pilocie jest przycisk 'M/B'.] Custom [MENU] [ENTER]...
  • Seite 528 Auto Adjustment [MENU] [ENTER] [ENTER] Warto ci Fine (Dokáadnie), Coarse (Z grubsza) i poáo enie zostaj dostosowane automatycznie. (Opcja dost pna tylko w trybie PC/BNC). [Bezpo rednim przyciskiem na pilocie jest przycisk 'AUTO'.] Signal Balance U ywany do kompensacji sáabego sygnaáu RGB transmitowanego przez dáugi kabel sygnaáowy. (Opcja dost pna tylko w trybie PC/BNC).
  • Seite 529 3) Movie 4) Custom [Bezpo rednim przyciskiem na pilocie jest przycisk 'P.MODE'.] Custom [MENU] [ENTER] [ENTER] [ENTER] [< / >] [ENTER] Menu ekranowe sáu do regulacji kontrastu i jaskrawo ci odpowiednio do indywidualnych preferencji. 1) Contrast Nadaje obrazowi naturaln tonacj barw. 2) Brightness Regulacja jasno ci.
  • Seite 530 PIP Picture [MENU] [ENTER] [ENTER] [ENTER] [ENTER] [< / >] [ENTER] Istnieje mo liwo ü dostosowania ustawie obrazu PIP. 1) Contrast Reguluje kontrast okna obrazu PIP na ekranie. 2) Brightness Reguluje jasno ü okna obrazu PIP na ekranie. Dost pne tryby : PIP Sound Dost pne tryby PC / BNC / DVI...
  • Seite 531 SRS TS XT to opatentowana technologia firmy SRS, która umo liwia odtwarzanie 5.1-kanaáowego d wi ku przy u yciu dwóch gáo ników. Technologia Trusurround zapewnia przekonuj ce, wirtualne wra enie d wi ku przestrzennego przez dowolny zestaw dwóch gáo ników, w tym tak e przez gáo niki wbudowane w telewizorze. Jest w peáni zgodna ze wszystkimi formatami d wi ku wielokanaáowego.
  • Seite 532 Set, wy wietli si komunikat „ "Set the clock first. . Menu Transparency [MENU] [ENTER] [ENTER] [ENTER] Zmieniü przezroczysto ü táa OSD. 1) High 2) Medium 3) Low 4) Opaque Safety Lock PIN [MENU] [ENTER] [ENTER] [0~9] [0~9] [0~9] Hasáo mo na zmieniü. Energy Saving [MENU] [ENTER]...
  • Seite 533 Uwaga • Je eli uruchomiona jest funkcja Video Wall ( ciana wideo), funkcje PIP (Obraz w obrazie), Auto Adjustment (Automatyczny wybór ródáa), Image Lock (Blokada obrazu) oraz Size (Rozmiar) nie s dost pne. Wá czenie funkcji Video Wall ( ciana wideo) podczas dziaáania funkcji PIP (Obraz w obrazie) spowoduje jej wyá...
  • Seite 534 Uwaga: Nale y wybraü wy sz warto ü ustawienia Power On Time, aby nie dopu ciü do wyst pienia przepi cia. Reset Parametry kolorów zostaj zast pione przez warto ci fabryczne. 1) Image Reset [MENU] [ENTER] [ENTER] [ENTER] [< / >] [ENTER] (Opcja dost pna tylko w trybie PC/BNC).
  • Seite 535 Naci nij kolejno przyciski MUTE On. Zostanie przywrócone hasáo „0000 . W celu przywrócenia hasáa konieczne jest u ycie pilota zdalnego sterowania. © 1995~2008 Samsung Electronics Co., Ltd.
  • Seite 536: Sprawdzanie Funkcji Autotestu

    Zasady bezpiecze stwa Wprowadzenie Poá czenia Korzystanie z oprogramowania Dostosowywanie ustawie monitora W zale no ci od modelu mog wyst powaü ró nice w kolorze i wygl dzie produktu. W celu zwi kszenia wydajno ci produktu dane techniczne mog ulegaü zmianom bez uprzedniego powiadomienia. Rozwi zywanie problemów Sprawdzanie funkcji Rozwi zywanie problemów...
  • Seite 537 • Nie nale y równie u ywaü mokrej szmatki. • eby zapobiec uszkodzeniu ekranu zaleca si stosowanie rodków czyszcz cych firmy Samsung. Konserwacja ekranu panelu LCD Monitor nale y delikatnie czy ciü mi kk szmatk (z flaneli baweánianej). • Nigdy nie nale y stosowaü acetonu, benzenu czy rozcie czalnika.
  • Seite 538 Problemy z instalacj (PC) Uwaga • Problemy z instalacj monitora oraz ich rozwi zania. Problemy Rozwi zania Obraz monitora migocze. Sprawdziü, czy kabel sygnaáowy á cz cy monitor z komputerem zostaá podá czony pewnie i dokáadnie. (Patrz Podá czanie do komputera) Problemy z Obraz Uwaga...
  • Seite 539 Poruszyü mysz komputerow lub nacisn ü dowolny klawisz na zasilania wieci si na zielono lub klawiaturze. pulsuje co 0,5 lub co 1 sekund . Je li po naci ni ciu przycisku MENU na ekranie pojawi si Ekran jest pusty i pulsuje. komunikat „TEST GOOD , sprawd czy poá...
  • Seite 540 Odá cz kabel zasilaj cy i wyczy ü monitor mi kk szmatk , u ywaj c zewn trzn /Panel LCD? do tego samej wody lub rodka czyszcz cego. Nale y dobrze usun ü resztki detergentu i nie rysowaü obudowy. Nie dopuszczaü, aby woda dostaáa si do monitora. © 1995~2008 Samsung Electronics Co., Ltd.
  • Seite 541: Parametry

    PowerSaver Ogólne Fabrycznie ustawione tryby wy wietlania Ogólne Informacje Dodatek Nazwa modelu SMT-4011 Panel LCD Odcien koloru mozna zmienic. przek tna 40-calowa (101,6 cm) kolorów. Wielko ü obrazu 885,168 mm (H) x 497,664 mm (V) Rozstaw pikseli 0,648 mm (H) x 0,648 mm (V)
  • Seite 542: Fabrycznie Ustawione Tryby Wy Wietlania

    ENERGY2000, kiedy jest w u yciu z komputerem wyposa onym w VESA DPM. ® Jako uczestnik programu ENERGY STAR , firma SAMSUNG o wiadcza, ® e produkt ten speánia wymagania ENERGY STAR w zakresie wykorzystania energii. Fabrycznie ustawione tryby...
  • Seite 543 Podobnie jak lampa fluorescencyjna, ekran wielokrotnie wy wietla ten sam obraz w ci gu sekundy, aby powstaá obraz widzialny dla u ytkownika. Cz stotliwo ü tego powtórzenia jest nazywana cz stotliwo ci pionow lub cz stotliwo ci od wie ania. Jednostka: Hz © 1995~2008 SAMSUNG. ALL Right Reserved...
  • Seite 544: Informacje

    Zasady bezpiecze stwa Wprowadzenie Poá czenia Korzystanie z oprogramowania Dostosowywanie ustawie monitora W zale no ci od modelu mog wyst powaü ró nice w kolorze i wygl dzie produktu. W celu zwi kszenia wydajno ci produktu dane techniczne mog ulegaü zmianom bez uprzedniego powiadomienia. Rozwi zywanie problemów Parametry Informacje...
  • Seite 545 Wyá czenie, wygaszacz ekranu lub tryb oszcz dno ci energii Zasilanie nale y wyá czaü na 4 godziny po 20 godzinach u ytkowania Zasilanie nale y wyá czaü na 2 godziny po 12 godzinach u ytkowania Mo na ustawiü wyá czanie monitora za pomoc harmonogramu oszcz dzania energii we wáa ciwo ciach ekranu komputera.
  • Seite 546 Co 30 minut zalecane jest przesuwanie znaków Caáy wy wietlany obszar, á cznie z logo, nale y okresowo przesuwaü. - Zmiana cykliczna: Wy wietlanie ruchomych obrazów, razem z logo, przez 60 sekund po 4 godzinach u ytkowania. Najlepszym sposobem na ochron monitora przed wyst pieniem zjawiska utrwalenia obrazu jest wyá...
  • Seite 547 . Odst p czasowy: 10 ~ 50 sekund (zalecane: 50 ) Note • Prosimy zajrzeü do instrukcji obsáugi na dysku CD, w cz ci „Funkcja menu ekranowego ; w niektórych modelach funkcja ta nie jest dost pna. © 1995~2008 Samsung Electronics Co., Ltd.
  • Seite 548: Dodatek

    Skontaktuj si z firm SAMSUNG na caáym wiecie Uwaga Terminologia Zasady usuwania • Je eli masz jakie uwagi lub pytania w sprawie produktów marki Samsung, skontaktuj si z nasz infolini . Osoba upowa niona North America 1-800-SAMSUNG(726-7864) http://www.samsung.com/us U.S.A CANADA 1-800-SAMSUNG(726-7864) http://www.samsung.com/ca...
  • Seite 549 CZECH REPUBLIC DENMARK 70 70 19 70 http://www.samsung.com/dk FINLAND 030-6227 515 http://www.samsung.com/fi 3260 SAMSUNG(726-7864) FRANCE http://www.samsung.com/fr 08 25 08 65 65 (€ 0,15/min) GERMANY 01805-121213 (€ 0,14/Min) http://www.samsung.de HUNGARY 06-80-SAMSUNG(726-7864) http://www.samsung.com/hu ITALIA 800-SAMSUNG(726-7864) http://www.samsung.com/it LUXEMBURG 0035 (0)2 261 03 710 http://www.samsung.com/be...
  • Seite 550 0800-329-999 http://www.samsung.com/tw TAIWAN VIETNAM 1 800 588 889 http://www.samsung.com/vn Middle East & Africa SOUTH AFRICA 0860-SAMSUNG(726-7864 ) http://www.samsung.com/za TURKEY 444 77 11 http://www.samsung.com.tr 800-SAMSUNG (726-7864) U.A.E http://www.samsung.com/mea 8000-4726 Terminologia Sync Signal Ssynchronizacja (Sync.) oznacza standardowe sygnaáy, potrzebne do wy wietlenia okre lonych kolorów na monitorze.
  • Seite 551: Zasady Usuwania

    Powielanie w jakiejkolwiek formie bez pisemnej zgody Samsung Electronics Co., Ltd. jest surowo zabronione. Samsung Electronics Co., Ltd. nie ponosi odpowiedzialno ci za bá dy zawarte w niniejszej publikacji ani za przypadkowe lub po rednie szkody wynikáe z jej udost pnienia, dziaáania lub u ycia.
  • Seite 559 (101,6 ) - 1360 X 768...
  • Seite 561 © 1995~2008 SAMSUNG. ALL Rights Reserved...
  • Seite 562 ................1 ......................1 ......................... 1 ......................2 ........................4 ......................... 5 ......................12 ....................12 ....................13 ................... 20 ....................... 26 ................26 .................. 27 ......................33 ................... 53 ......................... 53 ................54 / BNC /DVI ..........57 [AV / S-Video / .
  • Seite 563 ................64 ....................64 ......................65 ....................... 65 ................................................69 ......................70 ..................70 ....................... 72 ..............72 ..72 ......................76 ..............76 SAMSUNG ....................... 78 ......................79...
  • Seite 564 • • РУКОВОДСТВО ПОЛЬЗОВАТЕЛЯ (15- D-SUB)
  • Seite 565 (OSD)
  • Seite 566 [PC] [BNC] [DVI] [AV] [S-Video] [Component] >> PIP. PIP, >> • AV / S-Video / • AV / S-Video • AV / S-Video / • PC / BNC / DVI • PC / DVI • • " s " " "...
  • Seite 567 MDC (Multiple Display Control) D-Sub - DVI-D - DVI-D - DVI ( BNC ( R, G, B, H, V Y, P...
  • Seite 568 DVI, BNC • Kensington lock - • •...
  • Seite 569 MagicNet. MDC. Power LOCK. MagicNet. • • DEL : • SYMBOL : Used to enter the symbols. • ENTER : 100. "+100", "2" "1". Displayed on the lower left corner of the screen. Mute - VOL + Mute...
  • Seite 570 (OSD) MagicBright Auto ( . (PC) AUTO. ( Standard Music Movie Speech Custom ) FM Radio In PC/DVI mode, sets only SOUND to FM Radio. In general Video SOURCE mode, sets to FM RADIO, turning off the screen. In areas where signal is weak, noise may occur while FM radio is broadcast.
  • Seite 571 /NICAM /NICAM DUAL /NICAM /NICAM Mono Mono Manual Change Stereo Mono Stereo Mono Mono PIP. PIP. Stop ( © 1995~2008 SAMSUNG. ALL Right Reserved...
  • Seite 572 VESA...
  • Seite 573 VESA VESA. VESA: Samsung. Samsung...
  • Seite 574 Samsung Electronics : 1, (11) (11)
  • Seite 576 -2 .
  • Seite 577 20 .
  • Seite 578 • Samsung Electronics "CAUTION". . (M4 x L15)
  • Seite 579 . (M4 x L15) . (M4 x L15) • DVD- " " " ".
  • Seite 580 D-sub 2-1) D-sub ( D-SUB 15- 2-2) DVI ( 2-3) BNC ( Audio (L) Audio (R) DVD- • Samsung...
  • Seite 581 Electronics. • DVD, DVI. • • • DVD. S-VHS BNC. Audio (L) ( ( )) Audio (R) ( ( )) (Source) DVD- • S-VHS...
  • Seite 582 (AUDIO OUTPUT) (VIDEO OUTPUT) DVD- (Source) DVD- DVD- • Component Component video DVD- (AUDIO OUTPUT) (Source)
  • Seite 583 • • , Y, P AUDIO OUT (Source) • Component video...
  • Seite 584 • AUX L, R © 1995~2008 SAMSUNG. ALL Right Reserved...
  • Seite 585 (Multiple Display Control; MDC) RS-232C. Start > Program > Samsung > MDC System.
  • Seite 586: Port Selection

    Remocon Safety Lock Port Selection COM1. Select All Clear All Display Selection ( < .> (Enable/Disable) MDC, Enable, Port Selection...
  • Seite 587: Power Control

    Multiple Display Control COM1. COM1, Port Selection COM1 ~ COM4. Power Control (Power Control), Power Control.
  • Seite 588 Power Control. Power Status ( 2) Input Source 3) Image Size 4) On Timer Status 5) Off Timer Status Select All Power Control...
  • Seite 589: Input Source

    1) Power On/Off (On/Off) 2) Volume Select All Mute On/Off MUTE, MUTE. (undo) Select All, Power Control Volume Mute ON). Input Source Input Source, (Input Source Control). Select All (" ") • TV Mode • PC Mode...
  • Seite 590 Input Source Control. 1) PC 2) BNC BNC. 3) DVI DVI. 4) TV 5) AV 6) S-Video S-Video. 7) Component Component. 8) MagicNet MagicNet MagicNet. 9) Channel Input Source ( Input Source Control - ON) Image Size PC, BNC, DVI Image Size ("...
  • Seite 591 Power Status ( 2) Image Size 3) Input PC, BNC, DVI. 5) PC Source - Image Size (" ") PC, BNC, DVI. Image Size Control (" ") PC, BNC, DVI. 6) Video Source Video Source MagicNet MagicNet. Image Size Control - ON) Image Size TV, AV, S-Video, Component, DVI(HDCP)
  • Seite 592 TV, AV, S-VIDEO, Component tab TV, AV, S-VIDEO, Component. Select All (" ") TV, AV, S-VIDEO, Component. Auto Wide, Zoom1, and Zoom2 Component DVI (HDCP) 720p 1080i. MagicNet MagicNet. Image Size Control - ON) Time Time, (Time Control).
  • Seite 593 Time Control. 1) Current Time 2) On Time Setup (AM)/ (PM)) (On Timer) 3) Off Time Setup (AM)/ (PM)) (Off Timer) MagicNet MagicNet. Time Control ON). At On Time Setup, TV Source functions only for TV Model. PIP Size PIP (" ") PIP.
  • Seite 594 PIP. 1) PIP Size 2) OFF 3) Large Large. 4) Small Small. 5) Double1 Double 1. 6) Double2 Double 2. 7) Double3 (Picture By Picture) Double 3. MagicNet MagicNet. PIP Source PIP (" ") PIP. • PIP TV Mode...
  • Seite 595 • PIP S-Video Mode PIP. 1) PIP Source 2) PC 3) BNC BNC. 4) DVI DVI. 5) TV...
  • Seite 596 6) AV 7) S-Video S-Video. 8) Component Component. 9) Channel MagicNet MagicNet. PIP Control ( PIP) ON ( ON ( Settings Picture Settings, (Settings Control). Settings Control. Select All (50). "CUSTOM" ( 1) Picture TV, AV, S-Video, Component, DVI(HDCP). 2) Contrast 3) Brightness 4) Sharpness...
  • Seite 597 5) Color 6) Tint 7) Color Tone MagicNet MagicNet. Settings Picture PC Settings, (Settings Control). Settings Control. Select All (50). "CUSTOM" (< >). 1) Picture PC PC, BNC, DVI. 2) Contrast 3) Brightness 4) Red 5) Green 6) Blue MagicNet MagicNet.
  • Seite 598 Settings Audio Settings, (Settings Control). Settings Control. Select All (50). "CUSTOM" (< >). 1) Audio Audio 2) Bass 3) Treble 4) Balance 5) SRS TSXT SRS TSXT. Main Sub. MagicNet MagicNet. Settings Image Lock Settings, (Settings Control).
  • Seite 599: Lamp Control

    Settings Control. 1) Image Lock PC, BNC. 2) Coarse Coarse 3) Fine Fine 4) Position 5) Auto Adjustment MagicNet MagicNet. Settings Control ON). Maintenance Lamp Control "Maintenance" Maintenance (...
  • Seite 600 ("Info Grid") 1) Maintenance (Maintenance Control) 2) Auto Lamp Control Manual Lamp Control Auto Lamp Control. 3) Manual Lamp Control Auto Lamp Control Manual Lamp Control. Maintenance Control ( ON ( MagicNet MagicNet. Maintenance Scroll "Maintenance" Maintenance (...
  • Seite 601 1) Safety Screen "Interval" "Second". Scroll ( ), Pixel ( ), Bar ( Eraser ( Screen Type ( MagicNet MagicNet. 1, 2, 3, 4, 5 10, 20, 30, 40, 50 Maintenance Control ( ON ( Maintenance Video Wall "Maintenance" Maintenance (...
  • Seite 602 1) Video Wall 2) Screen Divider Screen divider ( Display Selection ( MDC, Samsung,...
  • Seite 603 3) On / Off Video Wall ( 4) Format Full Natural MagicNet. Maintenance Control ( ON ( RS232C. ( Com1) 16. ( 0 - 16. (On Timer) (Off Timer), RS-232C < .>...
  • Seite 604 (ID1) (ID3): ID 1, ID3. Selected all:...
  • Seite 605 / BNC /DVI [AV / S-Video / . / DVI-Video PC / BNC / DVI S-Video DVI-Video [MENU] [ENTER] [ENTER] [ENTER] 2) BNC 3) DVI 4) AV 5) S-Video 'SOURCE' ] • DVD- • PIP, 1) PIP [MENU] [ENTER] [ENTER] [ENTER] [ENTER] PIP.
  • Seite 606 'SOURCE'] [MENU] [ENTER] [ENTER] [ENTER] PIP. 'SWAP'] [MENU] [ENTER] [ENTER] [ENTER] [ENTER] 'SIZE'] [MENU] [ENTER] [ENTER] [ENTER] [ENTER] PIP. [MENU] [ENTER] [ENTER] [ENTER] [ENTER] PIP ( • Size Transparency : PIP [MENU] [ENTER] [ENTER] [ENTER] [ENTER] 2) BNC 3) DVI 4) AV 5) S-Video / BNC /DVI...
  • Seite 607 (Brightness) (Contrast) 'M/B'.] [MENU] [ENTER] [ENTER] [ENTER] ] / [< / >] [ENTER] • Custom MagicBright Custom. [MENU] [ENTER] [ENTER] [ENTER] PC/BNC) [MENU] [ENTER] [ENTER] [ENTER] [< / >] [ENTER] PC/BNC) • Color Control Color Tone Custom. " ." ( ("...
  • Seite 608 [MENU] [ENTER] [ENTER] [ENTER] [< / >] [ENTER] (" ") [MENU] [ENTER] [ENTER] [ENTER] [< / >] / [ [ENTER] [MENU] [ENTER] [ENTER] AUTO. PC/BNC) 'AUTO' RGB, PC/BNC) [MENU] [ENTER] [ENTER] [ENTER] [ENTER] [MENU] [ENTER] [ENTER] [ENTER] [ENTER] [< / >] [ENTER] R Phase, G Phase, B Phase, [MENU]...
  • Seite 609 [AV / S-Video / . / DVI-Video PC / BNC / DVI S-Video DVI-Video [MENU] [ENTER] [ENTER] [ENTER] NTSC. : PIP 'P.MODE'] [AV / S-Video / . / DVI-Video [MENU] [ENTER] [ENTER] [ENTER] [< / >] [ENTER] S-Video. NTSC. [MENU] [ENTER] [ENTER] [ENTER]...
  • Seite 610 [MENU] [ENTER] [ENTER] [ENTER] " " [MENU] [ENTER] [ENTER] [ENTER] (Film Mode). (Film Mode) DVI-Video [MENU] [ENTER] [ENTER] [ENTER] [ENTER] [< / >] [ENTER] PIP. : PIP PC / BNC / DVI S-Video DVI-Video [MENU] [ENTER] [ENTER] [ENTER] Standard 2) Music Music Movie Speech...
  • Seite 611 ==> • Custom MagicBright Custom. [MENU] [ENTER] [ENTER] [ENTER] Reduces the differences in volume level among broadcasters. SRS TS XT [MENU] [ENTER] [ENTER] [ENTER] SRS TS XT SRS, 5.1- TruSurround 'SRS'.] [MENU] [ENTER] [ENTER] [ENTER] Main Sub. : PIP] PC / BNC / DVI S-Video DVI-Video [MENU]...
  • Seite 612 ] > [ENTER] > [ ] > [ENTER] > [0~9] > [0~9] > [0~9] Energy Saving [MENU] [ENTER] [ENTER] [ENTER] [MENU] MDC, Samsung, • Energy Saving Power On WOL (Wake On LAN) MagicNet Video Wall Video Wall, Video Wall. [MENU]...
  • Seite 613 [MENU] [ENTER] [ENTER] [ENTER] [ENTER] Full Natural [MENU] [ENTER] [ENTER] [ENTER] [ENTER] • Screen divider ( • Display Selection ( • 2 x 2 3 x 3 4 x 4 5 x 5 1 x 2 2 x 1 1 x 5 5 x 1 •...
  • Seite 614 , 1360 x 768 1366 x768 PC/BNC) 2) 1024 X 768 3) 1280 X 768 4) 1360 X 768 5) 1366 X 768 • 1024 x 768 1280 x 768 , 1360 x 768 1366 x768 [MENU] [ENTER] [ENTER] [ENTER] [<...
  • Seite 615 S-Video DVI-Video MagicNet. LOCK • Lock Lock password ( - "0000". • MUTE ‘0000 . © 1995~2008 SAMSUNG. ALL Rights Reserved...
  • Seite 616 • (" ") Check Cooling System "Check Cooling System", 1360 768.
  • Seite 617 • • • Samsung. • • •...
  • Seite 618 • " " (PC) • • LCD- " " " " " " . .) " " (Refer to the Brightness, Contrast) " "...
  • Seite 619 OSD " ". OSD. MENU "TEST GOOD", • " " " " • (+/-).
  • Seite 620 Windows XP: Windows ME/2000: Windows XP: --> --> BIOS (BIOS SETUP) Windows/Computer) Windows ME/2000: --> --> BIOS (BIOS SETUP) Windows/Computer) © 1995~2008 SAMSUNG. ALL Right Reserved...
  • Seite 621 SMT-4011 (101,6 cm) 885,168 ) x 497,664 0,648 ) x 0,648 30 ~ 81 56 ~ 75 16,7 M 1360 x 768 / 1366 x 768 @ 60 1366 x 768 @ 60 RGB, RGB, DVI ( ). 0,7 Vp-p ±10 %...
  • Seite 622 ~ 15 / : 80 ~ 20 Plug & Play Plug & Play (TFT-LCD), 1 ppm ( 3.133.440. • " " • VESA DPM EPA/ENERGY 2000 ® EPA ENERGY STAR ENERGY2000, VESA DPM. ® ENERGY STAR SAMSUNG ® ENERGY STAR...
  • Seite 623 VESA, 1024 x 768 48,363 60,004 65,000 VESA, 1024 x 768 56,476 70,069 75,000 VESA, 1024 x 768 60,023 75,029 78,750 VESA, 1024 x 768 68,677 85,997 94,500 VESA, 1360 x 768 47,712 60,000 85,500 © 1995~2008 SAMSUNG. ALL Right Reserved...
  • Seite 624 (TFT-LCD) • : 1360 x 768 • Vertical frequency 60 (TFT-LCD), 1 ppm ( • 3.133.440. " " ("auto adjustment function"). (FINE/COARSE ). “ ”...
  • Seite 625 • , . .
  • Seite 626 Screen Scroll ( Screen Scroll ( -> Set Up ( ) -> Safety Screen ( ) -> Screen Scroll ( : 1 - 10 : 1) : 1 - 5 : 5) • ( Screen Pixel ( Screen Pixel ( Set Up ( Safety Screen ( Pixel (...
  • Seite 627 • ( Screen Erasing ( Screen Erasing ( -> Set Up ( ) -> Safety Screen ( ) -> Eraser ( : 1 - 10 : 1) : 10 - 50 : 50) • ( © 1995~2008 SAMSUNG. ALL Right Reserved...
  • Seite 628 Appendix SAMSUNG Appendix SAMSUNG • Samsung, Samsung. North America 1-800-SAMSUNG(726-7864) http://www.samsung.com/us U.S.A CANADA 1-800-SAMSUNG(726-7864) http://www.samsung.com/ca MEXICO 01-800-SAMSUNG(726-7864) http://www.samsung.com/mx Latin America ARGENTINE 0800-333-3733 http://www.samsung.com/ar 0800-124-421 BRAZIL http://www.samsung.com/br 4004-0000 800-SAMSUNG(726-7864) http://www.samsung.com/cl CHILE COLOMBIA 01-8000112112 http://www.samsung.com.co COSTA RICA 0-800-507-7267 http://www.samsung.com/latin ECUADOR 1-800-10-7267 http://www.samsung.com/latin...
  • Seite 629 BELGIUM 844 000 844 http://www.samsung.com/cz CZECH REPUBLIC DENMARK 70 70 19 70 http://www.samsung.com/dk FINLAND 030-6227 515 http://www.samsung.com/fi 3260 SAMSUNG(726-7864) FRANCE http://www.samsung.com/fr 08 25 08 65 65 (€ 0,15/min) GERMANY 01805-121213 (€ 0,14/Min) http://www.samsung.de HUNGARY 06-80-SAMSUNG(726-7864) http://www.samsung.com/hu ITALIA 800-SAMSUNG(726-7864) http://www.samsung.com/it LUXEMBURG 0035 (0)2 261 03 710 http://www.samsung.com/be...
  • Seite 630 SINGAPORE THAILAND 1800-29-3232, 02-689-3232 http://www.samsung.com/th TAIWAN 0800-329-999 http://www.samsung.com/tw VIETNAM 1 800 588 889 http://www.samsung.com/vn Middle East & Africa 0860-SAMSUNG(726-7864 ) http://www.samsung.com/za SOUTH AFRICA TURKEY 444 77 11 http://www.samsung.com.tr 800-SAMSUNG (726-7864) U.A.E http://www.samsung.com/mea 8000-4726 " ". Plug & Play ( VESA DDC Plug &...
  • Seite 631 1360 X 768, 1360 (Multiple Display Control; MDC) RS-232C. Samsung Electronics Co., Ltd. Samsung Electronics Co., Ltd. Samsung Samsung Electronics Co., Ltd.; Microsoft ,, Windows Windows NT VESA , DPM ® ENERGY STAR ® (EPA). ENERGY STAR ® ENERGY STAR...
  • Seite 633 Instrucciones de seguridad Simbología Encendido Instalación Limpieza Otros Introducción El aspecto externo y el color del producto pueden variar dependiendo del modelo; las especificaciones del Conexiones producto se pueden cambiar sin previo aviso para la mejora del rendimiento. Uso del software Instrucciones de seguridad Ajuste del monitor Resolución de problemas...
  • Seite 634 Use solamente conectores y receptáculos apropiados para hacer la conexión a tierra. Una conexión a tierra inapropiada podría causar una descarga eléctrica o una avería en el equipo. (Sólo equipo de Clase l.) Apriete firmemente el enchufe del cable de alimentación de manera que no se afloje.
  • Seite 635 aeropuertos, estaciones, etc. El incumplimiento de estas indicaciones puede causar serios desperfectos en el monitor. Ponga el monitor en un lugar con poca humedad y un mínimo de polvo. Podría producirse un corto circuito o fuego en el interior del monitor. No deje caer el monitor cuando lo mueva.
  • Seite 636 Coloque el monitor cuidadosamente. Podría dañarse o romperse. No asiente el monitor sobre la pantalla. Se podría dañar la superficie TFT-LCD. La instalación de un soporte de pared debe hacerse por un instalador profesional calificado. La instalación por parte de personal incompetente puede dar lugar a lesiones.
  • Seite 637 Si el conector entre el enchufe y el pin está oxidado o sucio, límpielo apropiadamente con una tela seca. Un conector sucio puede causar una descarga eléctrica o fuego. No olvide desenchufar el cable de alimentación antes de limpiar el producto.
  • Seite 638 Mantenga la unidad apagada cuando haya truenos y relámpagos en el exterior, y no permita que el monitor deje de utilizarse durante un período de tiempo prolongado. El monitor puede funcionar incorrectamente, provocando una descarga eléctrica o un fuego. No intente mover el monitor tirando solamente del cable o del cable de señal.
  • Seite 639 Podría provocar un incendio o una descarga eléctrica. Si se introducen sustancias extrañas o se vierte agua en el aparato, apague éste, desenchúfelo y póngase en contacto con un centro de servicio técnico. Si el aparato muestra una imagen fija durante un largo período de tiempo, puede quedar una imagen residual o cierta indefinición.
  • Seite 640 Traslade el aparato entre dos o más personas. Una caída del aparato puede dañar éste o causar lesiones físicas. Coloque el aparato fuera del alcance de los niños ya que podrían estropearlo si se suben encima. La caída del aparato puede causar daños físicos o incluso la muerte. Si no va a utilizar el producto durante un período de tiempo prolongado, desenchufe el cable de alimentación.
  • Seite 641 El usuario puede devolver las baterías usadas o recargables al centro municipal de reciclaje más próximo o a un establecimiento que venda el mismo tipo de baterías o de baterías recargables. © 1995~2008 SAMSUNG. ALL Rights Reserved...
  • Seite 642 Contenido Instrucciones de seguridad ..................1 ......................1 Simbología ....................... 1 Encendido ......................2 Instalación ........................ 4 Limpieza ......................... 5 Otros Introducción ......................12 ..................... 12 Contenido del paquete ....................13 Su monitor ..................... 20 Disposición mecánica Conexiones ......................26 ..................
  • Seite 643 Modos de temporización predefinidos Information ....................... 73 ................ 73 Para Obtener una Mejor Presentación ........73 INFORMACIÓN de PRODUCTO (Libre de retención de imágenes) Apéndice ......................77 ..............77 Contacte con SAMSUNG WORLDWIDE ....................... 79 Téminos ....................80 Eliminación correcta ......................80 Autoridad...
  • Seite 644: Instrucciones De Seguridad

    Instrucciones de seguridad Introducción Contenido del paquete Su monitor Disposición mecánica Conexiones Uso del software El aspecto externo y el color del producto pueden variar dependiendo del modelo; las especificaciones del Ajuste del monitor producto se pueden cambiar sin previo aviso para la mejora del rendimiento. Resolución de problemas Especificaciones Introducción...
  • Seite 645 Otros Control remoto Baterías (AAA X 2) Cubierta-tapón Conector adaptador BNC Soporte temporal a RCA. Se vende por separado Kit de montaje en la pared Juego de altavoces Kit del soporte Cable DVI Cable BNC Su monitor Parte Delantera MENU Abre el menú...
  • Seite 646 Botón Izquierda-Derecha / Botón Volumen Mueve horizontalmente desde un elemento de menú a otro o ajusta los valores del menú seleccionados. También ajusta el volumen del audio. ENTER Botón Source (Fuente) Se usa para seleccionar el menú OSD. SOURCE Cambia desde modo de pantalla PC a modo de pantalla Video. Cambiar la fuente se permite solamente para los dispositivos externos que están conectados con el monitor en ese momento.
  • Seite 647 POWER SW ON [ | ] / OFF [O] (Botón de alimentación on/off ) Encendido y apagado del monitor. POWER IN (Toma de corriente) Cable de alimentación, Conexiónes en el monitor y enchufe de pared. RS232C OUT/IN (Puerto serie RS232C) Puerto de programa de MDC (Multiple Display Control, Control de dispositivos múltiples) DVI / PC IN [RGB] (Terminal de conexión de...
  • Seite 648 10) AV AUDIO IN [L-AUDIO-R](Terminal de conexión de audio compuesto) (entrada) 11) AV OUT [VIDEO] (Terminal de conexión de Vídeo) : Modo de AV (salida) 12) AV IN [VIDEO] (Terminal de conexión de Vídeo) (entrada) 13) AV OUT [S-VIDEO] (Terminal de conexión de S- Vídeo) : Modo de S-Vídeo (salida) 14) AV IN [S-VIDEO](Terminal de conexión de S- Vídeo) (entrada)
  • Seite 649 19. Arriba-abajo Izquierda-derecha S.MODE 21. STILL 22. FM RADIO 23. P.SIZE DUAL/MTS SOURCE SWAP SIZE STOP PLAY/PAUSE ON / OFF Enciende y apaga el monitor. MAGICNET Botón de Inicio rápido de Magicnet. - Esta función no está disponible para este monitor. Botón de Inicio rápido de MDC.
  • Seite 650 Los canales de TV proporcionan servicios informativos escritos vía teletexto. [TTX / MIX se utiliza principalmente en Europa. ] MENU Abre el OSD y activa un elemento del menú resaltado. ENTER Activa un elemento del menú resaltado. P.MODE Cuando se pulsa este botón, el modo actual se visualiza en la parte inferior central de la pantalla. AV / S-Video /Component Mode : P.MODE El monitor tiene cuatro configuraciones automáticas de imagen que vienen predefinidas desde fábrica.
  • Seite 651 La imagen de la ventana PIP aparecerá en la pantalla principal, y la imagen de la pantalla principal aparecerá en la ventana PIP. SIZE Drag Rebobinar STOP Parar PLAY / PAUSE Reproducir/Pausa Avance rápido © 1995~2008 SAMSUNG. ALL Right Reserved...
  • Seite 652: Disposición Mecánica

    Disposición mecánica Monitor Altavoz Cómo instalar el soporte VESA Instalación del soporte mural 1. Disposición mecánica 2. Monitor...
  • Seite 653 Cuando instale VESA, asegúrese de que cumpla con los estándares VESA internacionales. Información para adquirir e instalar el soporte VESA: Póngase en contacto con el distribuidor de Samsung más cercano para realizar el pedido. Una vez realizado el pedido, le visitarán técnicos especializados y le instalarán el soporte.
  • Seite 654: Instalación Del Soporte Mural

    6. Instalación del soporte mural Para la instalación del soporte mural, póngase en contacto con un técnico. Samsung Electronics no se hace responsable de los daños causados al producto o al usuario si la instalación la ha efectuado el usuario.
  • Seite 655 Hay dos bisagras(izquierda y derecha).Use la adecuada. Antes de practicar los orificios en la pared, compruebe si ladistancia entre los dos orificios de bloqueo de la parte pos-terior del producto es correcta. Si la distancia es demasiado corta o demasiado larga, aflo-je los 4 tornillos del soporte de pared para ajustarla.
  • Seite 656 Retire los 4 tornillos de la parte posterior del aparato. Inserte el tornillo Ben el colgador de plástico. 1. Monte el aparato en el soporte de pared y asegúrese de quequeda bien sujeto por los colgadores de plástico izquierdo yderecho. 2.
  • Seite 657 1. Acople el aparato al soporte de pared. Asegúrese de ajustar el aparato según el centro 2. Sostenga la parte superior del aparato por el centro y empújelo dela parte superior, y no según el lado derecho haciadelante (en la dirección de la flecha) para ajustar el ángulo. oizquierdo del aparato.
  • Seite 658: Conexiones

    Instalación del kit del soporte Apéndice Nota • Sólo se deben usar los pernos que se incluyen. Pozor Samsung Electronics no será responsable de los daños causados por la utilización de una base distinta de las especificadas. Instalación del Semi-soporte Soporte Soporte izquierdo...
  • Seite 659 Pozor Este soporte está diseñado específicamente para el ajuste del ángulo de la pantalla. La empresa no se hace responsable de problema alguno derivado del uso de este soporte. No utilice nunca este soporte para colocar otros objetos. Instalación del kit del soporte (Vendido por separado) Para proteger el orificio ubicado en la parte inferior del monitor, allí...
  • Seite 660 Conecte un cable aquí para recibir el sonido de la tarjeta de sonido de la computadora. Encienda la computadora y el monitor. Nota • El cable de DVI o de BNC es opcional. Consulte a un centro de servicio local de Samsung Electronics para comprar los elementos opcionales.
  • Seite 661 Conexión de un DVD digital Nota • Los dispositivos de entrada como el DVD digital están conectados al terminal de DVI IN del monitor mediante el cable DVI. • Después, inicie el DVD con un disco DVD insertado. • Seleccione Digital mediante el botón SOURCE. Nota •...
  • Seite 662 Conectar el cableado de audio necesario entre los conectores COMPONENT AUDIO IN [L-AUDIO-R] en el monitor y los conectores AUDIO OUT en el reproductor DVD. Conectar un cable de vídeo entre los conectores BNC/COMPONENT IN - conexión del puerto P , Y, P en el monitor y los conectores P , Y, P...
  • Seite 663 (Si no fuera así, consulte a la tienda de electrónica más cercana). Si la cámara de vídeo fuera estéreo, sería necesario conectar dos cables. Conexión de un decodificador de señal DTV Nota • Las conexiones habituales de un decodificador de señal se muestran a continuación. Conecte un cable de vídeo entre los conectores BNC / COMPONENT IN - conexión del puerto P , Y, P en el monitor y los conectores P...
  • Seite 664 Conexión a un equipo de audio Conecte un conjunto de cables de audio entre las tomas AUX L, R del AUDIO SYSTEM (SISTEMA DE AUDIO) y las tomas AUDIO OUT [L-AUDIO-R] (SALIDA AUDIO [I-AUDIO-D]) del monitor. © 1995~2008 SAMSUNG. ALL Right Reserved...
  • Seite 665: Pantalla Principal

    PC y una pantalla. Por tanto, es necesario conectar un cable serial entre el puerto serial del PC y el puerto serial de cada pantalla. Pantalla principal Haga clic en Start > Program > Samsung > MDC System para inicial el programa. Seleccione un juego para ver su volumen seleccionado con el control deslizante.
  • Seite 666 Iconos principales Botón Select (seleccionar) Info Grid (Cuadrícula de Remocon información) Safety Lock Selección de pantalla Port Selection Herramientas de control 1. Use los iconos principales para modificar en cada pantalla. 2. Permite que se active o se desactive la función de recepción de control remoto de la unidad de la pantalla. 3.
  • Seite 667 1. El Control de pantallas múltiples está configurado originalmente como COM1. 2. Si se utiliza cualquier puerto distinto de COM1, se puede seleccionar desde COM1 hasta COM4 en el menú de Selección de puertos. 3. Si el nombre de puerto exacto que está conectado al monitor usando un cable serial no está seleccionado, la comunicación no será...
  • Seite 668 Info Grid muestra información básica necesaria para gestionar Control de energía. (Power Status (Estado de energía)) 2) Input 3) Image Size 4) On Timer Status 5) Off Timer Status 2. Use el botón Select All (Seleccionar todo) o la casilla de verificación correspondiente para ajustar las propiedades de pantalla.
  • Seite 669 1) Power On/Off - Activa o desactiva la energía de la pantalla seleccionada. 2) Volume - Controla el nivel de volumen de la pantalla seleccionada. Está definido con el valor del volumen de la pantalla seleccionada a partir de los juegos y lo muestra en la barra de desplazamiento.
  • Seite 670 Info Grid muestra información básica necesaria para controlar la fuente de entrada. 1) PC - Cambia la fuente de entrada de la pantalla seleccionada a PC. 2) BNC - Cambia la fuente de entrada de la pantalla seleccionada a BNC. 3) DVI - Cambia la fuente de entrada de la pantalla seleccionada a DVI.
  • Seite 671 Info Grid (Cuadrícula de información) muestra cierta información básica necesaria para entender el control Tamaño de imagen. (Power Status (Estado de energía)) - Muestra el estado de energía de la pantalla seleccionada. 2) Image Size - Muestra el tamaño de imagen actual de la pantalla seleccionada. 3) Input - Muestra la fuente actual de entrada de la pantalla utilizada.
  • Seite 672 Info Grid (Cuadrícula de información) muestra cierta información básica necesaria para entender el control Tamaño de imagen. 1) Haga clic en la pestaña (Fuente de vídeo) para ajustar el tamaño de la imagen para TV, AV, S-vídeo, componentes. Haga clic en Select All (Seleccionar todo), o utilice la casilla de verificación, para seleccionar una pantalla con intención de controlarla.
  • Seite 673 Info Grid muestra información básica de Time (hora). 1) Current Time - Seleccione la hora actual para la pantalla seleccionada PC Time (hora del PC) - Para cambiar la hora actual, cambie primero PC Time (hora del PC). 2) On Time Setup - Define la hora, el minuto, y el valor de AM/PM para On Timer (Temporizador activado) de la pantalla seleccionada.
  • Seite 674 Info Grid (Cuadrícula de información) muestra cierta información básica necesaria para entender el control Tamaño PIP. 1) PIP Size - Muestra el Tamaño PIP actual de la pantalla utilizada. 2) OFF - Desactiva el modo PIP de la pantalla seleccionada. 3) Large - Activa el modo PIP de la pantalla seleccionada y cambia el tamaño a Large.
  • Seite 675 • PIP S-Video Mode Info Grid (Cuadrícula de información) muestra cierta información básica necesaria para entender el control Fuente PIP. 1) PIP Source - La Fuente PIP se puede controlar cuando se enciende el monitor. 2) PC - Cambia la Fuente PIP de la pantalla seleccionada a PC. 3) BNC - Cambia la Fuente PIP de la pantalla seleccionada a BNC.
  • Seite 676 - Cambia la Fuente PIP de la pantalla seleccionada a TV. 6) AV - Cambia la Fuente PIP de la pantalla seleccionada a AV. 7) S-Video - Cambia la Fuente PIP de la pantalla seleccionada a S-Video. 8) Component - Cambia la Fuente PIP de la pantalla seleccionada a Component. 9) Channel - La flecha del canal aparece cuando la opción PIP Source (Fuente PIP) es TV.
  • Seite 677 - Ajusta el matiz de la pantalla seleccionada. 7) Color Tone - Ajusta el tono de color para la pantalla seleccionada. La source d’entrée de MagicNet ne fonctionne que sur le modèle MagicNet. Cette fonction est disponible uniquement pour les affichages dont l’alimentation est active. Settings Picture PC 1.
  • Seite 678 Audio 1. Haga clic en Configuración , entre los iconos principales, y aparecerá la pantalla Control Brightness (Brillo). Info Grid muestra información básica necesaria para Settings Control. Cuando se selecciona cada función, el valor definido de la función seleccionada se muestra en la diapositiva. Cuando Select All (Seleccionar todo) está...
  • Seite 679 Info Grid muestra información básica necesaria para Settings Control. 1) Image Lock - Disponible sólo para PC, BNC. 2) Coarse - Ajusta la fase de la pantalla Coarse. 3) Fine - Ajusta la fase de la pantalla Fine. 4) Position - Ajusta la posición de la pantalla seleccionada.
  • Seite 680 Aparece una cuadrícula de información "Info Grid" mostrando varios elementos básicos de datos. 1) Maintenance - Permite la función Maintenance Control (Control de mantenimiento) para todas las fuentes de entrada. 2) Auto Lamp Control - Ajusta automáticamente la luz posterior de la pantalla seleccionada a una hora especificada. El Manual Lamp Control (Control de lámpara manual) se desactiva automáticamente cuando el ajuste se realiza con Auto Lamp Control (Control de lámpara automático).
  • Seite 681 1) Safety Screen - Elimina las imágenes residuales que pueden producirse cuando la pantalla seleccionada está en modo de pausa durante un período de tiempo prolongado. Puede usar el temporizador del ciclo de repeticiones seleccionando el periodo "Interval" por hora y las veces "Second" por segundo. Screen Type (Tipo de pantalla) se puede configurar como Scroll (Desplazamiento), Pixel (Píxel), Bar (Barra) o Eraser (Borrador).
  • Seite 682 Seleccione un modo en el Divisor de pantalla. Seleccione una pantalla en la Display Selection (Selección de pantalla). La ubicación se configurará pulsando un número en el modo seleccionado. El programa MDC suministrado por Samsung admite hasta 4x4 pantallas LCD. 3) On / Off...
  • Seite 683: Solución De Problemas

    - Enciende o apaga la función Video Wall (Vídeo mural) en la pantalla seleccionada. 4) Format - Se puede seleccionar el formato para ver una pantalla dividida. Full Natural La source d'entrée de MagicNet ne fonctionne que sur le modèle MagicNet. La función de Control del mantenimiento sólo está...
  • Seite 684 1. No hay selección: Muestra el valor predeterminado de fábrica. 2. Una pantalla seleccionada: Obtiene y muestra el valor de configuración para la pantalla seleccionada. 3. Seleccionada una pantalla (ID1 ) y se añade otra pantalla (ID3): el programa, que mostraba el valor de configuración de ID 1, obtiene y muestra el valor de ID3.
  • Seite 685: Ajuste Del Monitor

    Instrucciones de seguridad Introducción Conexiones Uso del software Ajuste del monitor Entrada El aspecto externo y el color del producto pueden variar dependiendo del modelo; las especificaciones del Picture producto se pueden cambiar sin previo aviso para la mejora del rendimiento. [PC / BNC /DVI Modo] Picture Ajuste del monitor...
  • Seite 686 [El botón directo en el mando a distancia es el botón 'SOURCE'.] 3) Fuente [MENU] [ENTER] [ENTER] [ENTER] Intercambio del Descripción de la imagen PIP y de la imagen principal. La imagen de la ventana PIP aparecerá en la pantalla principal, y la imagen de la pantalla principal aparecerá...
  • Seite 687 4) Personal Aunque los valores se han elegido con minuciosidad por nuestros ingenieros, los valores preconfigurados pueden no resultar cómodos a sus ojos dependiendo de su gusto. [El botón directo en el mando a distancia es el botón 'M/B'.] Personal [MENU] [ENTER] [ENTER]...
  • Seite 688 Ajuste automático [MENU] [ENTER] [ENTER] Los valores de fino, grueso y posición se ajustan automáticamente. (Disponible solamente en el modo PC/BNC) [El botón directo en el mando a distancia es el botón 'AUTO'.] Balance de la señal Se utiliza para recomponer la señal RGB débil que se ha transmitido a través de un cable largo de señal. (Disponible solamente en el modo PC/BNC) 1) Balance de la señal [MENU]...
  • Seite 689 establece su configuración de imagen personalizada. 1) Dinámico 2) Estándar 3) Películas 4) Personal [El botón directo en el mando a distancia es el botón 'P.MODE'.] Personal [MENU] [ENTER] [ENTER] [ENTER] [< / >] [ENTER] Puede usar los menús en pantalla para cambiar el contraste y la luminosidad según sus preferencias personales.
  • Seite 690: Sonido

    1) Des. 2) Act. Imagen PIP [MENU] [ENTER] [ENTER] [ENTER] [ENTER] [< / >] [ENTER] Puede ajustar los parámetros de la imagen PIP. 1) Contraste Ajusta el contraste de la ventana PIP en la pantalla. 2) Brillo Ajusta el brillo de la ventana PIP en la pantalla. Modos disponibles : PIP Sonido Modos disponibles...
  • Seite 691: Setup

    SRS TS XT [MENU] [ENTER] [ENTER] [ENTER] SRS TS XT es una tecnología SRS patentada que solventa el problema de reproducir contenido multicanal 5.1 en dos altavoces. TruSurround proporciona una sensación de sonido virtual convincente a través de cualquier sistema de reproducción con dos altavoces, incluso con los altavoces internos del televisor. Es totalmente compatible con todos los formatos multicanal.
  • Seite 692 Nota • Si no tiene configurado Reloj prog. y selecciona Sí en (Temporizador de encendido) Temp. de encen. o en (Temporizador de apagado) Temp. de apag., aparecerá el mensaje Reloj(Ajustar la hora)” Transpar. de menús [MENU] [ENTER] [ENTER] [ENTER] Cambia la opacidad del fondo del OSD. 1) Alto 2) Medio 3) Bajo...
  • Seite 693 Nota • Cuando Video Wall está en funcionamiento, las funciones PIP, Ajuste automático, Bloqueo de Imagen y Tamaño no están disponibles. Si se inicia Video Wall mientras PIP está en funcionamiento, la función PIP pasará a Des. Video Wall no funciona en el modo MagicNet. Pantalla de seguridad La función Safety Screen (Pantalla de seguridad) se utiliza para evitar que puedan aparecer restos de imágenes en la pantalla cuando se visualiza una imagen fija por un período prolongado.
  • Seite 694: Control Múltiple

    Ajuste de encendido [MENU] [ENTER] [ENTER] [ENTER] [ENTER] Ajusta el Power On time (Tiempo de encendido) de la pantalla. *Precaución : Ajuste el Power On time (Tiempo de encendido) para que sea más largo, a fin prevenir las sobrecargas de tensión. Restablecer Los parámetros de color se sustituyen con los valores predeterminados de fábrica.
  • Seite 695 Nota • Restablecimiento de la contraseña para lock (bloqueo) de la tecla de función. Pulse MUTE On. La contraseña se debe restablecer como ‘0000’. El mando a distancia es necesario para restablecer la contraseña. © 1995~2008 SAMSUNG. ALL Rights Reserved...
  • Seite 696: Resolución De Problemas

    Instrucciones de seguridad Introducción Conexiones Uso del software Ajuste del monitor Resolución de problemas El aspecto externo y el color del producto pueden variar dependiendo del modelo; las especificaciones del Comprobación de las producto se pueden cambiar sin previo aviso para la mejora del rendimiento. funciones de autoverificación Resolución de problemas...
  • Seite 697 No use benceno, disolvente u otras sustancias inflamables, o un paño mojado. • Se recomienda un producto de limpieza de Samsung para prevenir daños en la pantalla. Mantenimiento de la Pantalla de panel plano. Limpie con un paño blando (una bayeta de algodón) suavemente.
  • Seite 698 necesite ayuda, llame al número del teléfono de la tarjeta de garantía, el número de teléfono en la sección Información o consulte con su distribuidor. Problemas relacionados con la instalación (PC) Nota • Los problemas relacionados con la instalación del monitor y sus soluciones están en la lista. Problemas Soluciones Compruebe si el cable de señal entre el equipo y el monitor está...
  • Seite 699: Q & A

    El indicador de suministro de El monitor está guardando los cambios realizados en la configuración en la memoria de OSD. energía parpadea en verde. La pantalla está en blanco y la luz El monitor está usando su sistema de administración de del indicador de suministro de energía.
  • Seite 700 Desconecte el cordón de suministro de energía y luego limpie el de imagen/Panel LCD? monitor con una tela suave, usando una solución limpiadora o simplemente agua. No deje restos de detergente ni raye la caja. No permita que entre agua en el computador. © 1995~2008 SAMSUNG. ALL Right Reserved...
  • Seite 701: Especificaciones

    Modos de temporización predefinidos Generales Information Generales Apéndice Generales Nombre del Modelo SMT-4011 Panel LCD Tamaño 40 pulgadas de diagonal (101,6 cm) Area de Presentación 885,168 mm (H) x 497,664 mm (V) Distancia entre Pixels 0,648 mm (H) x 0,648 mm (V) Sincronización...
  • Seite 702: Modos De Temporización Predefinidos

    ENERGY2000 es usado con un computador que está equipado con VESA DPM. ® Como socio de NERGY STAR Partner, SAMSUNG ha determinado que ® este producto sigue las directrices de ENERGY STAR sobre eficiencia energética. Modos de temporización predefinidos Modos de temporización predefinidos...
  • Seite 703 A semejanza de una lámpara fluorescente, la pantalla tiene que repetir la misma imagen muchas veces por segundo para mostrar una imagen al usuario. La frecuencia de esta repetición es llamada Frecuencia V o Frecuencia de Escaneo. Unidad: Hz © 1995~2008 SAMSUNG. ALL Right Reserved...
  • Seite 704: Information

    Instrucciones de seguridad Introducción Conexiones Uso del software Ajuste del monitor Resolución de problemas El aspecto externo y el color del producto pueden variar dependiendo del modelo; las especificaciones del Especificaciones producto se pueden cambiar sin previo aviso para la mejora del rendimiento. Information Para Obtener una Mejor Information...
  • Seite 705 Apagar, salvapantallas o modo de ahorro de energía Apague el aparato durante 4 horas tras un periodo de uso de 20 horas. Apague el aparato durante 2 horas tras un periodo de uso de 12 horas. Configure el monitor para que se apague con el esquema de alimentación de las propiedades de la pantalla del PC.
  • Seite 706 Cada 30 minutos, cambie los caracteres con movimiento. La imagen en movimiento de toda el área junto con el logo periódicamente. - Ciclo: Imagen en movimiento de la pantalla junto con el logo durante 60 segundos después de 4 horas de uso. El mejor modo de impedir la retención de imagen en el monitor es apagar éste o configurar el PC o sistema para que se active un salvapantallas cuando el equipo no se utilice.
  • Seite 707 . Intervalo de tiempo: 1~10 horas (Recomendado: 1 ) . Periodo de tiempo: 10~50 segundos (Recomendado: 50 ) Nota • (Consulte la guía del usuario del CD en "Función OSD"; en algunos modelos no está disponible) © 1995~2008 SAMSUNG. ALL Right Reserved...
  • Seite 708: Apéndice

    Information Apéndice Apéndice Contacte con SAMSUNG WORLDWIDE Contacte con SAMSUNG WORLDWIDE Téminos Eliminación correcta Autoridad Nota • Si tiene alguna pregunta o comentario referente a nuestros productos, por favor contacte con nuestro Servicio de Atención al Cliente...
  • Seite 709 844 000 844 http://www.samsung.com/cz CZECH REPUBLIC 70 70 19 70 http://www.samsung.com/dk DENMARK FINLAND 030-6227 515 http://www.samsung.com/fi 3260 SAMSUNG(726-7864) FRANCE http://www.samsung.com/fr 08 25 08 65 65 (€ 0,15/min) GERMANY 01805-121213 (€ 0,14/Min) http://www.samsung.de HUNGARY 06-80-SAMSUNG(726-7864) http://www.samsung.com/hu 800-SAMSUNG(726-7864) http://www.samsung.com/it ITALIA LUXEMBURG 0035 (0)2 261 03 710 http://www.samsung.com/be...
  • Seite 710: Téminos

    1800-29-3232, 02-689-3232 http://www.samsung.com/th THAILAND TAIWAN 0800-329-999 http://www.samsung.com/tw VIETNAM 1 800 588 889 http://www.samsung.com/vn Middle East & Africa SOUTH AFRICA 0860-SAMSUNG(726-7864 ) http://www.samsung.com/za 444 77 11 http://www.samsung.com.tr TURKEY 800-SAMSUNG (726-7864) U.A.E http://www.samsung.com/mea 8000-4726 Téminos Señal de Sincronización (Sync.) Las señales de sync (sincronizado) son las señales estándar necesarias para mostrar los colores deseados en el monitor.
  • Seite 711: Eliminación Correcta

    El logotipo " Samsung " son marcas registradas de Samsung Electronics Co., Ltd.; " Microsoft ", " Windows " y " Windows NT " son marcas registradas de Microsoft Corporation; " VES A", " DPM " y " DDC " son marcas registradas de Video Electronics Standard Association;...
  • Seite 713: Güvenlik Talimatlarõ

    Güvenlik TalimatlarÕ øúaretleme AçÕk/KapalÕ durumu Kurulum Temizlik Di÷er Giriú Ürünün rengi ve görünümü modeline ba÷lÕ olarak farklÕlÕk gösterebilir ve performans geliútirmeleri nedeniyle Baðlantýlar ürün özellikleri önceden haber verilmeksizin de÷iútirilebilir. YazÕlÕmÕn KullanÕlmasÕ Güvenlik TalimatlarÕ Monitörün AyarlanmasÕ Sorun Giderme øúaretleme Özellikler Bilgiler Appendix Aúa÷Õdaki güvenlik talimatlarÕ...
  • Seite 714 YalnÕzca gerekti÷i gibi topraklanmÕú fiú ve prizleri kullanÕn. Topraklama iúleminin düzgün yapÕlmamasÕ elektrik çarpmasÕna veya cihazÕn bozulmasÕna neden olabilir.(Sadece SÕnÕf l CihazÕ.) Elektrik fiúini, gevúemeyecek úekilde sÕkÕca takÕn. Düzgün olmayan ba÷lantÕlar yangÕna neden olabilir. Fiúi ve kabloyu aúÕrÕ derecede bükmeyin ve üzerine a÷Õr nesneler koymayÕn;...
  • Seite 715 Bunun yapÕlmamasÕ, monitörünüzde ciddi hasara neden olabilir. Monitörünüzü az nemli ve az tozlu bir yere koyun. Monitörün içinde elektrik çarpmasÕ veya yangÕn oluúabilir. Monitörü taúÕrken yere sert bir úekilde bÕrakmayÕn. Bu hareket, ürüne veya size zarar verebilir. Monitör altlÕ÷ÕnÕ vitrine ya da rafa yerleútirirken, altlÕ÷Õn ucunun, vitrinden ya da raftan dÕúarÕ...
  • Seite 716 Monitörü yerine dikkatle koyun. Zarar görebilir veya kÕrÕlabilir. Monitörü yüz üstü koymayÕn. Ekran yüzeyi zarar görebilir. Monitörü taban deste÷i olmadan kullanmayÕn. Kötü havalandÕrma nedeniyle bozulabilir veya yangÕna neden olabilir. Monitör taban deste÷iyle kullanÕlmayacaksa, yeterli havalandÕrma sa÷lamak için gereken adÕmlarÕ uygulayÕn. Ürünü...
  • Seite 717 Prizle pin arasÕndaki konektör tozlu veya kirliyse kuru bir bezle iyice temizleyin. Kirli bir konektör elektrik çarpmasÕna veya yangÕna neden olabilir. Ürünü temizlemeden önce güç kablosunu çÕkarttÕ÷ÕnÕzdan emin olun. Aksi takdirde, bu durum elektrik çarpmasÕna veya yangÕna neden olabilir. Elektrik kablosunu prizden çÕkartÕn ve ürünü yumuúak, kuru bir bezle silin.
  • Seite 718 FÕrtÕnalÕ havalarda veya úimúek çaktÕ÷Õnda ya da uzun süreyle kullanÕlmayacaksa monitörün fiúini prizden çekin. Bu uyarÕlara uyulmamasÕ elektrik çarpmasÕna veya yangÕna yol açabilir. Monitörü elektrik kablosundan veya sinyal kablosundan çekerek hareket ettirmeye çalÕúmayÕn. Bu, kablonun hasar görmesine, elektrik çarpmasÕna veya yangÕna neden olabilir.
  • Seite 719 Monitörün havalandÕrma deliklerinden, kulaklÕk ya da AV ba÷lantÕ noktalarÕndan, bÕçak, tel, i÷ne gibi metal nesneler ya da ka÷Õt, kibrit gibi yanÕcÕ nesneler sokmayÕn. Bu, elektrik çarpmasÕna veya yangÕna neden olabilir. Ürünün içine yabancÕ madde kaçarsa ya da su dökülürse, cihazÕ kapatÕn, elektrik fiúini prizden çÕkartÕn ve servis merkeziyle görüúün.
  • Seite 720 Ürünün, ikiden daha fazla kiúiyle taúÕnmasÕ gerekmektedir. Ürünün yere düúürülmesi, bozulmasÕna ya da fiziksel olarak zarar görmesine neden olabilir. Üzerinden asÕlarak zarar verebileceklerinden ürünü çocuklarÕn ulaúamayaca÷Õ bir yere yerleútirin. Yere düúen ürün, fiziksel hasara hatta ölüme neden olabilir. Ürünü uzun bir süre kullanmayacaksÕnÕz elektrik kablosunu prizden çÕkartÕn.
  • Seite 721 Müúteri, kullanÕlmÕú ya da úarj edilebilir pili bulundu÷u yere yakÕn bir geri dönüúüm merkezine ya da benzer türde piller ya da úarj edilebilir piller satan bir ma÷azaya götürebilir. © 1995~2008 SAMSUNG. ALL Rights Reserved...
  • Seite 722 øçindekiler Güvenlik TalimatlarÕ ..................... 1 ....................1 øúaretleme ....................1 AçÕk/KapalÕ durumu ......................2 Kurulum ........................4 Temizlik ......................... 5 Di÷er Giriú ......................12 ....................12 Paket Ýçindekiler ....................13 Monitörünüz ....................20 Mekanik Düzen Baðlantýlar ......................26 ..................26 AltlÕk Kitinin TakÕlmasÕ...
  • Seite 723 ................68 Önceden AyarlÕ Zamanlama ModlarÕ Information ....................... 71 ................71 Daha øyi Görüntü Elde Etmek øçin ..........71 ÜRÜN BøLGøLERø (Görüntü Sabitlemesiz ) Appendix ......................75 ..............75 DünyanÕn her yerinden SAMSUNG’a ulaúÕn ....................... 77 Koúullar ......................78 Yetki Bildirimi...
  • Seite 724: Güvenlik Talimatlarõ

    Güvenlik TalimatlarÕ Giriú Paket Ýçindekiler Monitörünüz Mekanik Düzen Baðlantýlar Ürünün rengi ve görünümü modeline ba÷lÕ olarak farklÕlÕk gösterebilir ve performans geliútirmeleri nedeniyle YazÕlÕmÕn KullanÕlmasÕ ürün özellikleri önceden haber verilmeksizin de÷iútirilebilir. Monitörün AyarlanmasÕ Sorun Giderme Giriú Özellikler Bilgiler Paket Ýçindekiler Appendix •...
  • Seite 725 Uzaktan Kumanda Piller (AAA X 2) Delik kapa÷Õ BNC - RCA YarÕm AltlÕk Adaptör JakÕ AyrÕ satÕlÕr Duvara Takma Seti Hoparlör Seti AltlÕk Seti DVI Kablosu BNC Kablosu Monitörünüz Ön Taraf MENU Ekran menü sistemini açmak, menü ekranÕndan çÕkmak veya ekran ayar menüsünü kapatmak için bu dü÷meyi kullanÕn.
  • Seite 726 Bir menü ö÷esinden di÷erine yatay olarak hareket eder veya seçilen menü de÷erlerini ayarlar. AyrÕca ses düzeyini de ayarlar. ENTER OSD menüsünü seçmek için kullanÕlÕr. SOURCE PC modundan Video moduna geçirir. Kaynak de÷iútirme iúlemine, yalnÕzca monitöre ba÷lÕ harici aygÕtlar için izin veril. Ekran moduna geçirmek için: [PC] [BNC]...
  • Seite 727 POWER SW (Güç Aç/Kapat Dü÷mesi): Monitörü açar ve kapatÕr. POWER IN (Güç ba÷lantÕ noktasÕ): Elektrik kablosu, monitöre ve prize takÕlÕr. RS232C OUT/IN (RS232C Seri Ba÷lantÕ NoktasÕ)): MDC(Çoklu AygÕt Kontrolü) Program Ba÷lantÕ NoktasÕ DVI IN(HDCP) (PC Video Ba÷lantÕ Terminali) D-Sub Kablo kullanÕlarak (15 pin D-Sub) - PC mod (Analog PC) DVI / PC IN(HDCP) (PC Video Ba÷lantÕ...
  • Seite 728 10) AV AUDIO IN [L-AUDIO-R](Monitör Audio Ba÷lantÕ Terminali) (Giriú) 11) AV OUT [VIDEO](VIDEO Ba÷lantÕ Terminali) : AV modu (ÇÕkÕú) 12) AV IN [VIDEO](VIDEO Ba÷lantÕ Terminali) (Giriú) 13) AV OUT [S-VIDEO](S-Video Ba÷lantÕ Terminali) : S-Video modu (ÇÕkÕú) 14) AV IN [S-VIDEO](S-Video Ba÷lantÕ Terminali) (Giriú) 15) EXT SPEAKER(8 )[- - L - +, - - R - +] (HARøCø...
  • Seite 729 22. FM RADIO 23. P.SIZE DUAL/MTS SOURCE SWAP SIZE STOP PLAY/PAUSE ON / OFF Bu dü÷meyi monitörü açÕp kapatmak için kullanÕn. MAGICNET MagicNet HÕzlÕ Baúlatma Dü÷mesi. - Bu iúlev, bu monitörde kullanÕlamaz. MDC HÕzlÕ Baúlatma Dü÷mesi. LOCK Bu dü÷me, uzaktan ve monitör üzerindeki Güç ve LOCK dü÷meleri dÕúÕndaki tüm iúlev tuúlarÕnÕ etkinleútirir ya da kapatÕr.
  • Seite 730 TV kanallarÕ teleteks aracÕlÕ÷Õyla yazÕlÕ bilgi hizmeti sa÷lar. [TTX / MIX genellikle Avrupa da kullanÕlÕr. ] MENU Ekran menü sistemini açmak, menü ekranÕndan çÕkmak veya ekran ayar menüsünü kapatmak için bu dü÷meyi kullanÕn. ENTER Menü ekranÕndan çÕkar veya ekran ayar menüsünü kapatÕr. P.MODE Bu dü÷meye bastÕ÷ÕnÕzda, ekranÕn alt orta kÕsmÕnda geçerli mod görüntülenir.
  • Seite 731 PIP ve ana görüntünün içeriklerini de÷iútirir. PIP penceresindeki görüntü ana ekranda, ana ekrandaki görüntü PIP penceresinde görüntülenir. SIZE Resim Boyutu nu de÷iútirebilirsiniz. Geri sar STOP Stop (Durdur) PLAY / PAUSE Oynat / Duraklat HÕzlÕ ileri © 1995~2008 SAMSUNG. ALL Right Reserved...
  • Seite 732: Mekanik Düzen

    Mekanik Düzen Monitör KafasÕ AltlÕk Hoparlör VESA Braketinin TakÕlmasÕ Wall Bracket InstallationDuvar Braketi MontajÕ 1. Mekanik Düzen 2. Monitör KafasÕ...
  • Seite 733 5. VESA Braketinin TakÕlmasÕ VESA taktÕ÷ÕnÕzda, uluslararasÕ VESA standartlarÕna tam olarak uydu÷unuzdan emin olun. VESA Braketini SatÕn Alma ve Kurulum Bilgileri: Lütfen sipariú vermek için en yakÕn Samsung Distribütörüne u÷rayÕn. Sipariúiniz verildikten sonra kurulum uzmanlarÕ sizi ziyaret edecek ve braketinizi takacaktÕr.
  • Seite 734 6. Wall Bracket InstallationDuvar Braketi MontajÕ Duvar braketini takmak için bir teknisyenle görüúün. Samsung Electronics, montaj müúteri tarafÕndan yapÕldÕ÷Õnda ürüne ya da müúterilere gelecek zararlardan sorumlu de÷ildir. Bu ürün, çimento duvarlara monte edilmek içindir. Ürün, sÕva ya da ahúap üzerine monte edildi÷inde yerinde durmayabilir.
  • Seite 735 øki menteúe bulunmaktadÕr (sol ve sa÷). Do÷rusunu kullanÕn. DuvarÕ delmeden önce, ürünün arkasÕndaki iki kilitleme deli÷i arasÕndaki mesafenin do÷ru oldu÷unu kontrol edin. Bu mesafe, çok kÕsa ya da uzunsa, ayarlamak için duvar braketinin üzerindeki tüm ya da 4 vidayÕ gevúetin. A.
  • Seite 736 çÕkartÕn. VidayÕ B, plastik askÕya takÕn. 1. Ürünü duvar braketine takÕn ve sol ve sa÷ plastik askÕlara düzgün biçimde takÕldÕ÷Õndan emin olun. 2. Ürünü brakete takarken parmaklarÕnÕzÕ deliklere sÕkÕútÕrmamaya dikkat edin. 3. Duvar braketinin duvara sÕkÕca takÕlmÕú oldu÷undan emin olun. Aksi takdirde montaj sonrasÕnda ürün yerinde durmayabilir.
  • Seite 737 1. Ürünü, duvar braketine tutturun. AçÕyÕ ayarlarken ürünün sa÷ ya da sol tarafÕndan 2. Ürünün üst, orta kÕsmÕndan tutun ve ileriye do÷ru çekerek (ok de÷il, üst, orta kÕsmÕndan tutmaya dikkat edin. yönünde) açÕsÕnÕ ayarlayÕn. 3. Braket açÕsÕnÕ -2 ile 15 arasÕnda ayarlayabilirsiniz.
  • Seite 738: Baðlantýlar

    Özellikler Baðlantýlar Bilgiler AltlÕk Kitinin TakÕlmasÕ Appendix • YalnÕzca ürünle birlikte verilen cÕvatalar kullanÕlmalÕdÕr. Dikkat Samsung Electronics, belirtilen dÕúÕnda bir altlÕk kullanÕlmasÕndan kaynaklanacak hasarlardan sorumlu olmayacaktÕr. 1. YarÕm AltÕlÕ÷Õn TakÕlmasÕ Sol altlÕk Sa÷ altlÕk Dikkat "CAUTION" etiketini arkaya dönük olarak yerleútirin.
  • Seite 739 Bu stand, orijinal olarak ekran açÕsÕnÕn ayarlanmasÕ için tasarlanmÕútÕr. Bu standÕn herhangi bir kullanÕmÕndan kaynaklanabilecek sorunlardan firma sorumlu de÷ildir. Ürünü asla üzerine nesneler konan bir sehpa olarak kullanmayÕn. 2. AltlÕk Setinin (ayrÕca satÕlÕr) TakÕlmasÕ Monitörün altÕnda bulunan, altlÕ÷Õn takÕldÕ÷Õ deli÷i korumak için bir 'Kapak Koruyucu' kullanÕlÕr. Ürünle birlikte verilen YarÕm AltlÕk ya da altlÕk setini (ayrÕca satÕlÕr) takarken 'Kapak Koruyucu'yu çÕkartmayÕ...
  • Seite 740 BNC Kablosunu Monitörünüzün arkasÕndaki BNC/COMPONENT IN - R, G, B, H, V ba÷lantÕ noktasÕna ba÷layarak. Monitörünüzün güç kablosunu monitörün arkasÕndaki güç ba÷lantÕ noktasÕna takÕn. BilgisayarÕnÕzÕ ve monitörünüzü açÕn. • DVI kablosu ya da BNC kablosu iste÷e ba÷lÕdÕr. øste÷e ba÷lÕ ö÷eleri satÕn almak için bölgenizdeki Samsung Electronics servis merkezine baúvurun. Dijital DVD Ba÷lama...
  • Seite 741 • Dijital DVD'ler gibi giriú cihazlarÕ, DVI kablosu kullanÕlarak monitörün DVI IN terminaline ba÷lanÕr. • ArdÕndan DVD diski takÕlÕ halde DVD'yi çalÕútÕrÕn. • SOURCE dü÷mesini kullanarak Digital seçin. • Monitörde DVI IN giriú cihazlarÕnÕ dijital DVD'ye ba÷lamak için DVI ba÷lantÕ noktalarÕ vardÕr. VCR a Ba÷lama VCR'lar ya da Video Kameralar gibi AV giriú...
  • Seite 742 Monitörün COMPONENT AUDIO IN [L-AUDIO-R] ile DVD oynatÕcÕnÕn AUDIO OUT jaklarÕ arasÕna bir takÕm audio kablosu ba÷layÕn. Monitörün BNC/COMPONENT IN - P ba÷lantÕ noktasÕ ile DVD oynatÕcÕnÕn P , Y, P jaklarÕ , Y, P arasÕna bir Component kablosu ba÷layÕn. Monitörün ön tarafÕnda ya da uzaktan kumandada bulunan Kaynak dü÷mesini kullanarak DVD oynatÕcÕnÕn ba÷lÕ...
  • Seite 743 Video kameranÕz stereo ses veriyorsa, iki kablodan oluúan kablo takÕmlarÕnÕ ba÷lamanÕz gerekmektedir. DTV Set Üstü Kutusunu Ba÷lama • Tipik bir Set Üstü Kutusunun ba÷lantÕlarÕ aúa÷Õda gösterilmiútir. Monitörün BNC/COMPONENT IN - P , Y, P ba÷lantÕ noktasÕ ile Set Üstü Kutusunun P , Y, P jaklarÕ...
  • Seite 744 • SET hoparlörlere ba÷lÕyken hoparlörü tutarak SET'i hareket ettirmeyin. SET hoparlörünün ba÷lanmasÕ için kullanÕlan hoparlör deste÷i zarar görebilir. Ses Sistemine Ba÷lama AUDIO SøSTEMø üzerindeki AUX L, R jaklarÕyla Monitörün MONITOR IN [L-AUDIO-R] arasÕna bir takÕm audio kablosu takÕn. © 1995~2008 SAMSUNG. ALL Right Reserved...
  • Seite 745 BaúlangÕç - Ana Ekran ProgramÕ baúlatmak için Start > Program > Samsung > MDC System ö÷esini seçin. Seçilen setin ses yüksekli÷ini kaydÕrmalÕ kontrolde görmek için bir set seçin.
  • Seite 746 Ana Simgeler Seçme Dü÷mesi Remocon Bilgi Tablosu Safety Lock Ekran Seçimi Port Selection Kontrol AraçlarÕ 1. Herbir ekrana geçmek için ana simgeleri kullanÕn. 2. Ekran biriminin uzaktan kumanda sinyal alÕm iúlevini etkinleútirmenizi ya da devre dÕúÕ bÕrakmanÕzÕ sa÷lar. 3. Kilitleme øúlevini ayarlar. Lock function’Õ...
  • Seite 747 1. Çoklu Ekran Kontrolü ilk olarak COM1'e ayarlanmÕútÕr. 2. COM1 dÕúÕnda herhangi bir ba÷lantÕ noktasÕ kullanÕldÕ÷Õnda, Port Selection (Ba÷lantÕ NoktasÕ Seçimi) menüsünden COM1-COM4 arasÕ portlar seçilebilir. 3. Seri kablo kullanÕlarak monitöre ba÷lanan tam ba÷lantÕ noktasÕ adÕ seçilmezse, iletiúim sa÷lanamayacaktÕr. 4. Seçilen ba÷lantÕ noktasÕ programa kaydedilir ve bir sonraki programda da kullanÕlÕr. Power Control 1.
  • Seite 748: Input

    Bilgi Tablosu, Güç Kontrolü için gerekli bazÕ temel bilgileri gösterir. (Power Status(Güç Durumu)) 2) Input 3) Image Size 4) On Timer 5) Off Timer 2. Kontrol etmek istedi÷iniz ekranÕ seçmek için Select All (Tümünü Seç) dü÷mesini ya da Check Box (Kutuyu øúaretle) dü÷mesini kullanÕn.
  • Seite 749 1) Power On/Off - Seçilen ekranÕ açar ya da kapatÕr. 2) Volume - Seçilen ekranÕn ses seviyesini kontrol eder. Setlerde seçilen ekranÕn ses yüksekli÷i de÷erini alÕr ve kayar kontrolde gösterir. (Seçimi iptal ederseniz ya da Select All (Tümünü Seç) seçerseniz ayar, varsayÕlan de÷eri olan 10'a geri döner) Mute On/Off (Sessiz Aç/Kapat) - Seçilen ekranÕn Mute (Sessiz) iúlevini etkinleútirir/kapatÕr.
  • Seite 750 Bilgi Tablosu, Input Source (Giriú Kayna÷Õ) Kontrolü için gerekli bazÕ temel bilgileri gösterir. 1) PC - Seçilen ekranÕn Giriú Kayna÷ÕnÕ PC'ye de÷iútirir. 2) BNC - Seçilen ekranÕn Giriú Kayna÷ÕnÕ BNC'ye de÷iútirir. 3) DVI - Seçilen ekranÕn Giriú Kayna÷ÕnÕ DVI'ye de÷iútirir. 4) TV - Seçilen ekranÕn Giriú...
  • Seite 751 Bilgi Tablosu, Image Size (Görüntü Boyutu) için gerekli bazÕ temel bilgileri gösterir. (Power Status(Strömstatus)) - Geçerli ekranÕn açÕk veya kapalÕ oldu÷unu gösterir. 2) Image Size - KullanÕlan ekranÕn geçerli Image Size (Görüntü Boyutu) de÷erini gösterir. 3) Input - KullanÕlan ekranÕn geçerli Input Source (Giriú Kayna÷Õ) de÷erini gösterir. 4) Bilgi Tablosu, Input Source (Giriú...
  • Seite 752 Bilgi Tablosu, Image Size (Görüntü Boyutu) için gerekli bazÕ temel bilgileri gösterir. 1) TV, AV, S-Video, Component (Komponent) için Image Size (Görüntü Boyutu) de÷erini ayarlamak amacÕyla Video Source (Video Kayna÷Õ) sekmesini tÕklatÕn. Kontrol etmek istedi÷iniz ekranÕ seçmek için Select All (Tümünü Seç) dü÷mesini ya da Check Box (Kutuyu øúaretle) dü÷mesini kullanÕn.
  • Seite 753 Bilgi Tablosu, Time (Saat) Kontrolü için gerekli bazÕ temel bilgileri gösterir. 1) Current Time - Seçilen ekran için geçerli saati belirler (PC Saati). - Geçerli saati de÷iútirmek için önce PC Saatini de÷iútirin. 2) On Time Setup Seçilen ekranÕn Hour (Saat), Minute (Dakika), On Time Setup (AçÕlÕú Saati AyarÕ) AM/PM bilgisini, Status (Durum), Source (Kaynak), Volume (Ses seviyesi) de÷erini ayarlayÕn.
  • Seite 754 Bilgi Tablosu, PIP Size (PIP Boyutu) için gerekli bazÕ temel bilgileri gösterir. 1) PIP Size - KullanÕlan ekranÕn geçerli PIP Size (PIP Boyutu) de÷erini gösterir. 2) OFF - Seçilen ekranÕn PIP'ini kapatÕr. 3) Large - Seçilen ekranÕn PIP'ini açar ve boyutu Large (Büyük) de÷erine getirir. 4) Small - Seçilen ekranÕn PIP'ini açar ve boyutu Small (Küçük) de÷erine getirir.
  • Seite 755 • PIP S-Video Mode Bilgi Tablosu, PIP Source (PIP Kayna÷Õ) Kontrolü için gerekli bazÕ temel bilgileri gösterir. 1) PIP Source (PIP Kayna÷Õ) - PIP Source (PIP Kayna÷Õ), monitör açÕk haldeyken kontrol edilebilir. 2) PC - Seçilen ekranÕn PIP kayna÷ÕnÕ PC'ye de÷iútirir. 3) BNC - Seçilen ekranÕn PIP kayna÷ÕnÕ...
  • Seite 756: Picture [Pc / Bnc /Dvi Mode]

    6) AV - Seçilen ekranÕn PIP kayna÷ÕnÕ AV'ye de÷iútirir. 7) S-Video - Seçilen ekranÕn PIP kayna÷ÕnÕ S-Video'ya de÷iútirir. 8) Component - Seçilen ekranÕn PIP kayna÷ÕnÕ Component'e (Komponent) de÷iútirir. 9) Channel - PIP Source (PIP Kayna÷Õ) TV iken Kanal oku görüntülenir. Not: Ana EkranÕn giriú...
  • Seite 757 7) Color Tone - Seçilen ekranÕn Color Tone (Renk Tonu) de÷erini ayarlar. MagicNet Giriú kayna÷Õ yalnÕzca MagicNet modelinde çalÕúÕr. Bu özellik yalnÕzca güç durumu ON (AÇIK) olan ekranlarda kullanÕlabilir. Herhangi bir seçim yapÕlmazsa fabrika varsayÕlan de÷eri gösterilir. Settings Picture PC 1.
  • Seite 758 Audio 1. Ana simgelerden Settings'i (Ayarlar) tÕklattÕ÷ÕnÕzda Settings Control (Ayarlar Kontrolü) ekranÕ açÕlÕr. Bilgi Tablosu, Settings (Ayarlar) Kontrolü için gerekli bazÕ temel bilgileri gösterir. Her bir iúlev seçildi÷inde, seçilen iúlevin ayar de÷eri kayar kontrolde gösterilir. Select All (Tümünü Seç) seçildi÷inde, varsayÕlan de÷ere (50) geri dönülür. Bu ekranda herhangi bir de÷erin de÷iútirilmesi modu otomatik olarak "CUSTOM"...
  • Seite 759 Bilgi Tablosu, Settings (Ayarlar) Kontrolü için gerekli bazÕ temel bilgileri gösterir. 1) Image Lock - PC, BNC için kullanÕlabilir. 2) Coarse - Seçilen ekranÕn Coarse (øri) de÷erini ayarlar. 3) Fine - Seçilen ekranÕn Fine (ønce) de÷erini ayarlar. 4) Position - Seçilen ekranÕn Position (Konum) de÷erini ayarlar. 5) Auto Adjustment - Gelen PC sinyaline göre kendili÷inden ayarlar.
  • Seite 760 Bir çok temel veri ö÷esini gösteren "Bilgi Tablosu" görüntülenir. 1) Maintenance - Tüm giriú kaynaklarÕ için Maintenance Control (BakÕm Kontrolü) iúlevine izin verir. 2) Auto Lamp Control - Seçilen ekranÕn arka ÕúÕ÷ÕnÕ, belirtilen zamanda otomatik olarak ayarlar. Manual Lamp Control (Manuel Lamba Kontrolü), Auto Lamp Control'u (Otomatik Lamba Kontrolü) kullanarak ayarlama yaptÕ÷ÕnÕzda otomatik olarak kapanÕr.
  • Seite 761 1) Screen Scroll - Seçilen ekran uzun sure Pause (Duraklatma) modunda kaldÕ÷Õnda ortaya çÕkabilecek görüntü izlerini önler. "Interval" ayarÕnÕ saat ve "Second" ayarÕnÕ saniye cinsinden seçerek tekrarlama sürelerini ayarlayabilirsiniz. Screen Type (Ekran Türü) ile Scroll (KaydÕrma), Pixel (Piksel), Bar (Çubuk) veya Eraser (Silici) olarak ayarlanabilir. MagicNet Giriú...
  • Seite 762 - Ekran bölünebilir. Bölme sÕrasÕnda, farklÕ sayÕda ekran seçebilirsiniz. Ekran bölücüden bir mod seçin. Ekran Seçimi kÕsmÕndan bir ekran seçin. Yer, seçilen modda bir numaraya basÕlarak ayarlanacaktÕr. Samsung'un sa÷ladÕ÷Õ MDC programÕ en fazla 4x4 LCD EkranlarÕ destekler. 3) On / Off...
  • Seite 763: Sorun Giderme

    - Seçilen ekranÕn Video DuvarÕ iúlevini açar/kapatÕr. 4) Format - Biçim, bölünmüú ekran gösterecek úekilde seçilebilir. Full Natural MagicNet Giriú kayna÷Õ yalnÕzca MagicNet modelinde çalÕúÕr. Maintenance Control (BakÕm Kontrolü) yalnÕzca güç durumu ON (AÇIK) olan ekranlarda kullanÕlabilir. Sorun Giderme 1. Kontrol etmek istedi÷iniz ekran Power Control (Güç Kontrolü) Bilgi Tablosunda görünmüyor - RS232C ba÷lantÕsÕnÕ...
  • Seite 764 2. Bir ekran seçili: Seçilen ekranÕn ayar de÷erleri alÕnÕr ve görüntülenir. 3. Bir ekran seçili (ID1) ve baúka bir ekran ekleniyor (ID3): ID 1 ayar de÷erini gösteren program, ID3'ün de÷erlerini alÕr ve görüntüler. 4. Select All (Tümünü Seç) ile tüm setler seçili: Fabrika VarsayÕlan De÷erine geri döner.
  • Seite 765: Picture [Av / S-Video /Component / Dvi-Video Mode]

    Güvenlik TalimatlarÕ Giriú Baðlantýlar YazÕlÕmÕn KullanÕlmasÕ Monitörün AyarlanmasÕ Input Ürünün rengi ve görünümü modeline ba÷lÕ olarak farklÕlÕk gösterebilir ve performans geliútirmeleri nedeniyle Picture ürün özellikleri önceden haber verilmeksizin de÷iútirilebilir. [PC / BNC /DVI Mode] Picture Monitörün AyarlanmasÕ [AV / S-Video / Component / DVI-Video Input Mode]...
  • Seite 766 3) Swap [MENU] [ENTER] [ENTER] [ENTER] PIP ve ana görüntünün içeriklerini de÷iútirir. PIP penceresindeki görüntü ana ekranda, ana ekrandaki görüntü PIP penceresinde görüntülenir. [Uzaktan kumandadaki do÷rudan dü÷me 'SWAP' dü÷mesidir.] 4) Size [MENU] [ENTER] [ENTER] [ENTER] [ENTER] PIP penceresinin Boyutunu de÷iútirir. [Uzaktan kumandadaki do÷rudan dü÷me 'SIZE' dü÷mesidir.] 5) Position [MENU]...
  • Seite 767 ba÷lÕ olarak, gözleriniz için uygun olmayabilir. Bu durumda, OSD menüsünü kullanarak ParlaklÕk ve KontrastÕ ayarlayÕn. [Uzaktan kumandadaki do÷rudan dü÷me 'M/B' dü÷mesidir.] Custom [MENU] [ENTER] [ENTER] [ENTER] ] / [< / >] [ENTER] Kontrast ve parlaklÕ÷Õ kiúisel tercihlerinize göre de÷iútirmek için ekran menülerini kullanabilirsiniz. 1) Contrast Yeúil Rengi ayarla.
  • Seite 768 Auto Adjustment [MENU] [ENTER] [ENTER] Fine, Coarse ve Position de÷erleri otomatik olarak ayarlanÕr. Kontrol panelinde çözünürlü÷ü de÷iútirirseniz, AUTO iúlevi yürütülür. (YalnÕzca PC/BNC Modunda KullanÕlÕr) [Uzaktan kumandadaki do÷rudan dü÷me 'AUTO' dü÷mesidir.] Signal Balance Uzun sinyal kablosuyla iletilen zayÕf RGB sinyalini telafi etmek için kullanÕlÕr. (YalnÕzca PC/BNC Modunda KullanÕlÕr) 1) Signal Balance [MENU]...
  • Seite 769 1) Dynamic 2) Standard 3) Movie 4) Custom [Uzaktan kumandadaki do÷rudan dü÷me 'P.MODE' dü÷mesidir.] Custom [MENU] [ENTER] [ENTER] [ENTER] [< / >] [ENTER] Kontrast ve parlaklÕ÷Õ kiúisel tercihlerinize göre de÷iútirmek için ekran menülerini kullanabilirsiniz. 1) Contrast PIP penceresine do÷al bir ton ekler. 2) Brightness Yeúil Rengi ayarla.
  • Seite 770 PIP Picture [MENU] [ENTER] [ENTER] [ENTER] [ENTER] [< / >] [ENTER] PIP Ekran AyarlarÕnÕ ayarlayabilirsiniz. 1) Contrast Ekranda PIP penceresinin KontrastÕnÕ ayarlar. 2) Brightness Ekranda PIP penceresinin ParlaklÕ÷ÕnÕ ayarlar. KullanÕlabilir Modlar : PIP Sound KullanÕlabilir Modlar PC / BNC / DVI S-Video Component DVI-Video...
  • Seite 771 TruSurround, sanal surround ses deneyimini dahili televizyon hoparlörlerini de kapsayacak úekilde tüm iki hoparlörlü çalma sistemleri üzerinden sunar. Tüm çok kanallÕ biçimlerle tamamen uyumludur. 1) Off 2) On [Uzaktan kumandadaki do÷rudan dü÷me 'SRS' dü÷mesidir.] Sound Select [MENU] [ENTER] [ENTER] [ENTER] PIP açÕkken Ana veya Alt seçene÷ini belirtebilirsiniz.
  • Seite 772 Menu Transparency [MENU] [ENTER] [ENTER] [ENTER] Bilgisayarda çalÕúan yazÕlÕmlarÕ etkilemez. 1) High 2) Medium 3) Low 4) Opaque Safety Lock PIN [MENU] [ENTER] [ENTER] [0~9] [0~9] [0~9] ParolayÕ de÷iútirebilirsiniz. Energy Saving [MENU] [ENTER] [ENTER] [ENTER] [MENU] Bu özellik enerji tasarrufu için ünitenin güç tüketimini ayarlar. 1) On 2) Off •...
  • Seite 773 Safety Screen Safety Screen iúlevi, ekranda uzun süre sabit bir görüntü gösterildi÷inde meydana gelebilecek görüntü izlerini önlemek için kullanÕlmaktadÕr. - - Safety Screen iúlevi, belirli bir süre için ekrandaki görüntüyü kaydÕrÕr. - Bu iúlev, güç kapatÕldÕ÷Õnda kullanÕlamaz. 1) Safety Screen [MENU] [ENTER] [ENTER]...
  • Seite 774: Do÷Rudan Øúlevler

    • Lock iúlevini ayarlarken yalnÕzca uzaktan kumanda ve set üzerindeki Lock dü÷melerini kullanabilirsiniz. Monitör üzerinde önceden ayarlanmÕú password (parola) "0000"dÕr. • Lock iúlev tuúu için parolayÕ sÕfÕrlama. MUTE On dü÷mesine basÕn. Parola 0000 olarak sÕfÕrlanacaktÕr. ParolanÕn sÕfÕrlanmasÕ için uzak kontrol gereklidir. © 1995~2008 SAMSUNG. ALL Rights Reserved...
  • Seite 775: Sorun Giderme

    Güvenlik TalimatlarÕ Giriú Baðlantýlar YazÕlÕmÕn KullanÕlmasÕ Monitörün AyarlanmasÕ Sorun Giderme Ürünün rengi ve görünümü modeline ba÷lÕ olarak farklÕlÕk gösterebilir ve performans geliútirmeleri nedeniyle ürün özellikleri önceden haber verilmeksizin de÷iútirilebilir. Kendi Kendine Test Özelli÷i Kontrolü Sorun Giderme Denetim Listesi Soru ve YanÕt Kendi Kendine Test Özelli÷i Özellikler Kontrolü...
  • Seite 776 Güç kablosunun ba÷lantÕsÕnÕ çÕkardÕktan sonra yumuúak bir bezle temizleyin. • Benzin, tiner veya benzeri yanÕcÕ maddeler veya Õslak bez kullanmayÕn. • EkranÕn zarar görmesini engellemek için Samsung temizlik malzemesi kullanÕlmasÕnÕ öneririz. Düz Panelli Görüntü EkranÕ BakÕmÕ Yumuúak bir bezle (pamuklu) bastÕrmadan temizleyin. •...
  • Seite 777 • Monitör kurulumuyla ilgili sorunlar ve çözümleri aúa÷Õda listelenmiútir. Sorunlar Çözümleri Bilgisayar ve monitör arasÕndaki sinyal kablosunun sa÷lam bir Monitör ekranÕ titriyor úekilde ba÷lanmÕú ve sÕkÕútÕrÕlmÕú olup olmadÕ÷ÕnÕ kontrol edin. (Refer to Bilgisayara Ba÷lama konusuna bakÕn) Ekranla ilgili sorunlar • Monitör ekranÕyla ilgili sorunlar ve çözümleri aúa÷Õda listelenmiútir. Sorunlar Çözümleri Ekran boú...
  • Seite 778: Soru Ve Yanõt

    görüyorsanÕz, konektörün düzgün ba÷landÕ÷Õndan emin olmak üzere monitor ve bilgisayar arasÕndaki kabloyu denetleyin. Ekranla ilgili sorunlar • Ses sinyalleriyle ilgili sorunlar ve çözümleri aúa÷Õda listelenmiútir. Sorunlar Çözümleri Ses yok Ses kablosunun hem monitörünüzdeki ses giriúi ba÷lantÕ noktasÕna hem de ses kartÕnÕzdaki ses çÕkÕúÕ ba÷lantÕ noktasÕna sÕkÕca ba÷lÕ...
  • Seite 779 Dis kasayi/LCD panelini nasil Güç kablosunu çÕkarÕn ve sulandÕrÕlmÕú temizlik malzemesi veya temizleyebilirim? do÷rudan su kullanarak yumuúak bir bezle monitörü temizleyin. KasanÕn üzerinde deterjan veya kir kalmamasÕna dikkat edin. Monitörün içine su girmemesine özen gösterin. © 1995~2008 SAMSUNG. ALL Right Reserved...
  • Seite 780: Özellikler

    Özellikler Önceden AyarlÕ Zamanlama ModlarÕ Genel Bilgiler Genel Appendix Genel Model AdÕ SMT-4011 LCD Panel Boyut 40,0 inç (diyagonal) (101,6 cm) Görüntü alanÕ 885,168 mm (H) x 497,664 mm (V) Piksel AralÕ÷Õ 0,648 mm (H) x 0,648 mm (V) Senkronizasyon...
  • Seite 781 (Güç dü÷mesi) Bu monitör VESA DPM iúlevi olan bir bilgisayarla kullanÕlÕrsa EPA ® ENERGY STAR ve ENERGY2000 ile uyumludur. ® SAMSUNG ENERGY STAR iú orta÷Õ olarak, bu ürünün enerji verimlili÷i ® açÕsÕndan ENERGY STAR yönergelerine uygun oldu÷unu belirlemiútir. Önceden AyarlÕ Zamanlama ModlarÕ...
  • Seite 782 Yatay Frekans adÕ verilir. Birim: kHz Dikey Frekans Ekranda kullanÕcÕnÕn görebilece÷i bir görüntü oluúmasÕ için, floresan lambalara benzer úekilde, aynÕ görüntünün saniyede pek çok defa yinelenmesi gerekir. Bu yineleme sÕklÕ÷Õna Dikey Frekans veya Yenileme HÕzÕ denir. Birim: Hz © 1995~2008 SAMSUNG. ALL Right Reserved...
  • Seite 783: Information

    Güvenlik TalimatlarÕ Giriú Baðlantýlar YazÕlÕmÕn KullanÕlmasÕ Monitörün AyarlanmasÕ Sorun Giderme Ürünün rengi ve görünümü modeline ba÷lÕ olarak farklÕlÕk gösterebilir ve performans geliútirmeleri nedeniyle Özellikler ürün özellikleri önceden haber verilmeksizin de÷iútirilebilir. Bilgiler Daha øyi Görüntü Elde Information Etmek øçin ÜRÜN BøLGøLERø Daha øyi Görüntü...
  • Seite 784 Güç KapalÕ, Ekran Koruyucu ya da Enerji Tasarrufu Modu 20 saatlik kullanÕmÕn ardÕndan 4 saat gücü kapalÕ tutun 12 saatlik kullanÕmÕn ardÕndan 2 saat gücü kapalÕ tutun Monitörü PC Ekran Özellikleri Güç ùemasÕ ile kapanmaya ayarlayÕn. Mümkünse bir Ekran Koruyucu kullanÕn - Tek renkli bir ekran koruyucu ya da hareketli bir görüntü önerilir.
  • Seite 785 30 dakikada bir hareketli karakterleri de÷iútirin. Tüm alan periyodik olarak Logo ile birlikte hareketli görüntü görüntüler. - Döngü: 4 saatlik kullanÕmÕn ardÕndan 60 saniye boyunca Logo ile birlikte hareketli görüntü görüntüler. Monitörünüzü görüntü sabitlemesinden korumanÕn en iyi yolu, Gücü kapatmak ya da siz kullanmadÕ÷ÕnÕz zamanlarda PC'nizin veya Sisteminizin bir Ekran Koruyucu programÕ...
  • Seite 786 . Zaman AralÕ÷Õ : 1 ~ 10 saat ( Önerilen : 1 ) . Süre : 10 ~ 50 saniye ( Önerilen : 50 ) • (Lütfen CD KullanÕm KÕlavuzunun "OSD øúlevi"nde olmasÕna dikkat edin, bazÕ modellerde bulunmaz) © 1995~2008 SAMSUNG. ALL Right Reserved...
  • Seite 787: Appendix

    Ürünün rengi ve görünümü modeline ba÷lÕ olarak farklÕlÕk gösterebilir ve performans geliútirmeleri nedeniyle ürün özellikleri önceden haber verilmeksizin de÷iútirilebilir. Appendix DünyanÕn her yerinden SAMSUNG a ulaúÕn Güvenlik TalimatlarÕ • Samsung ürünleri ile ilgili sorularÕnÕz ya da yorumlarÕnÕz varsa lütfen SAMSUNG müúteri hizmetleri merkezi Giriú ile temasa geçin. Baðlantýlar YazÕlÕmÕn KullanÕlmasÕ...
  • Seite 788 844 000 844 http://www.samsung.com/cz CZECH REPUBLIC 70 70 19 70 http://www.samsung.com/dk DENMARK FINLAND 030-6227 515 http://www.samsung.com/fi 3260 SAMSUNG(726-7864) FRANCE http://www.samsung.com/fr 08 25 08 65 65 (€ 0,15/min) GERMANY 01805-121213 (€ 0,14/Min) http://www.samsung.de HUNGARY 06-80-SAMSUNG(726-7864) http://www.samsung.com/hu 800-SAMSUNG(726-7864) http://www.samsung.com/it ITALIA LUXEMBURG 0035 (0)2 261 03 710 http://www.samsung.com/be...
  • Seite 789: Koúullar

    1800-29-3232, 02-689-3232 http://www.samsung.com/th THAILAND TAIWAN 0800-329-999 http://www.samsung.com/tw 1 800 588 889 http://www.samsung.com/vn VIETNAM Middle East & Africa SOUTH AFRICA 0860-SAMSUNG(726-7864 ) http://www.samsung.com/za TURKEY 444 77 11 http://www.samsung.com.tr 800-SAMSUNG (726-7864) U.A.E http://www.samsung.com/mea 8000-4726 Koúullar Senk. Sinyali Senk. (Senkronize) Sinyaller, monitörde istenen renkleri görüntülemek için gereken standart sinyalleri belirtir.
  • Seite 790: Yetki Bildirimi

    çÕkan veya oluúan zararlardan sorumlu tutulamaz. Samsung , Samsung Electronics Co., Ltd. úirketinin kayÕtlÕ ticari markasÕdÕr; Microsoft , Windows ve Windows NT Microsoft Corporation úirketinin kayÕtlÕ ticari markalarÕdÕr; VESA , DPM ve DDC Video Electronics Standard ®...

Diese Anleitung auch für:

Smt-4011p

Inhaltsverzeichnis