Herunterladen Inhalt Inhalt Diese Seite drucken
Samsung SCC-B539X Benutzerhandbuch

Samsung SCC-B539X Benutzerhandbuch

Digitale dome-farbkamera
Vorschau ausblenden Andere Handbücher für SCC-B539X:
Inhaltsverzeichnis

Werbung

Verfügbare Sprachen
  • DE

Verfügbare Sprachen

  • DEUTSCH, seite 24
User's Guide
Vari-focal Anti-Vandal Dome Camera
SCC-B539X

Werbung

Inhaltsverzeichnis
loading

Inhaltszusammenfassung für Samsung SCC-B539X

  • Seite 1 User’s Guide Vari-focal Anti-Vandal Dome Camera SCC-B539X...
  • Seite 2: Safety Precautions

    Safety Precautions CAUTION RISK OF ELECTRIC SHOCK DO NOT OPEN CAUTION: TO REDUCE THE RISK OF ELECTRIC SHOCK, DO NOT REMOVE REAR COVER. NO USER SERVICEABLE PARTS INSIDE. REFER TO QUALIFIED SERVICE PERSONNEL. This symbol indicates high voltage Do not connect multiple cameras to a is present inside.
  • Seite 3: Fcc Statement

    Never disassemble or modify this product FCC Statement in any way. (SAMSUNG is not liable for problems caused by unauthorized This device complies with part 15 of the FCC modifications or attempted repair.) Rules. Operation is subject to the following two conditions: 10.
  • Seite 4: Important Safety Instructions

    Important Safety Instructions Read these instructions. 13. Unplug this apparatus. When a cart is used, use caution when moving the Keep these instructions. cart/apparatus combination to avoid Heed all warnings. injury from tip-over. Follow all instructions. 14. Refer all servicing to qualified service Do not use this apparatus near water.
  • Seite 5: Inhaltsverzeichnis

    Contents Overview ....................About this guide ................6 Product overview ................6 Main features .................6 Components ...................7 Checking components in the package ........7 Components of your camera ............8 Installation ..................Setting switches ................9 Setting function switches ............9 Connecting cables and changing the settings ......11 Installing camera .................12 Before installation ..............12 About the installation holes ............12...
  • Seite 6: Overview

    Overview About this guide Main features ❚ ❚ This user guide includes basic instructions for  Power: DC 12V/AC 24V  Special functions the product. It is recommended that all users  Line lock (LL) control read this guide before use. ...
  • Seite 7: Components

    Components ❚ Checking components in the package Please check your camera and accessories are included in the package. Those components are as shown below: Camera Test Monitor Cable User’s Guide Image Part name Standard Quantity Usage Attach each piece to screw connection Plastic anchor HUD 5 4 (EA)
  • Seite 8: Components Of Your Camera

    Components of your camera Your camera has the following components: 1. Dome cover: Covers the inner cover, lens, and main body to protect them. 2. Cover screw: Use it to assemble or disassemble both dome cover and case. 3. Inner cover: Covers the main body to protect it. 4.
  • Seite 9: Installation

    Installation Setting switches ❚ Setting function switches To set the available functions on your camera, adjust eight switches as shown below: 1. Switch 1 (LL): When this switch is set to OFF, the camera operates in the internal synchronization mode, while when it is set to ON, the camera operates in the line lock mode.
  • Seite 10 Set the LL switch to ON while the AC power 6. Switch 6 (FL): When this switch is set to is connected. If any picture roll happens, ON, the shutter speed is fixed to 1/100 sec you have to adjust the phase using the (for NTSC) or 1/120 sec (for PAL) to prevent phase-control buttons.
  • Seite 11: Connecting Cables And Changing The Settings

    Connecting cables and changing the settings ❚ Before installing your camera, you have to adjust the lens focus, zoom, and switch settings. To connect cables 1. Connect the BNC cable to the Video connector attached on your camera. 2. Connect the BNC cable to the Video Input on a monitor.
  • Seite 12: Installing Camera

    Installing camera ❚ Before installation Before installing your camera, you have to read the following cautions:  You have to check whether the location (ceiling or wall) can bear five times the weight of your camera.  Don’t let the cable to be caught in improper place or the electric line cover to be damaged. Otherwise it may cause a breakdown or fire.
  • Seite 13: Installing On A Pipe

    1. After connecting the power and video L-Wrench for waterproofing.) cables, throw them inside the pipeline To change the SAMSUNG logo position,  and screw the male thread pipe into move the location of the connection...
  • Seite 14 To install the camera side on a pipe 3. After pulling the power and video cables 1. Pull the power and video cables through through the connection pipe, screw the the pipe connection hole on the camera male thread pipe into the female pipe side thread in your camera tightly to fix the 1) Remove the side cover from the Case...
  • Seite 15: Installing The Camera On The Ceiling

    Installing the camera on the ceiling Before installation, you have to be familiar with the above cautions and fill in the holes that are not used for installation. To install your camera bottom on a pipe In case of wiring after penetrating 1.
  • Seite 16: Disassembling/Assembling The Main Body From The Case

    Disassembling/assembling the Main body from the Case The holes that are not used should be tightly sealed up using the screws provided for waterproofing. To detach the Main body from the Case, follow the instructions below: 1. 1. Remove the Dome cover first. 3.
  • Seite 17: Adjusting The Camera Direction

    Adjusting the camera direction ❚ Panning When the camera is fixed on the ceiling, you can adjust the camera viewing angle. You can rotate your camera leftward or rightward (Panning), and can change the slope of your camera upward or downward (Tilting).
  • Seite 18: Appendix A: Specifications For Ntsc Standard

    Backlight compensation (BLC) Controls Flickerless (FL) Switching between color and B&W modes (D/N) Auto white balancing (AWB) Digital noise reduction (DNR) Dynamic CCD defect compensation Operation temperature -10°C to +50°C Operation humidity Up to 90% Size 150(Ø) x 121(H)mm Weight SCC-B539X: 1.1kg...
  • Seite 19: Appendix B: Specifications For Pal Standard

    Backlight compensation (BLC) Controls Flickerless (FL) Switching between color and B&W modes (D/N) Auto white balancing (AWB) Digital noise reduction (DNR) Dynamic CCD defect compensation Operation temperature -10°C to +50°C Operation humidity Up to 90% Size 150(Ø) x 121(H)mm Weight SCC-B539X: 1.1kg...
  • Seite 21: Correct Disposal Of This Product

    Correct Disposal of This Product (Waste Electrical & Electronic Equipment) (Applicable in the European Union and other European countries with separate collection systems) This marking shown on the product or its literature, indicates that it should not be disposed with other household wastes at the end of its working life. To prevent possible harm to the environment or human health from uncontrolled waste disposal, please separate this from other types of wastes and recycle it responsibly to promote the sustainable reuse of material resources.
  • Seite 23 Benutzerh andbuch Digitale Dome-Farbkamera SCC-B539X...
  • Seite 24: Sicherheitsvorsichtsmaßnahmen

    Sicherheitsvorsichtsmaßnahmen WARNUNG GEFAHR EINES ELEKTROSCHOCKSNICHT ÖFFNEN WARNUNG: NICHT DIE RÜCKSEITIGE ABDECKUNG ÖFFNEN, UM DIE GEFAHR EINES ELEKTROSCHOCKS ZU SENKEN. KEINE VOM BENUTZER ZU WARTENDE TEILE INNEN. WENDEN SIE SICH AN QUALIFIZIERTES KUNDENDIENSTPERSONAL. Dieses Symbol weist auf hohe Schließen Sie nicht mehrere Kameras an einen einzelnen Adapter an.
  • Seite 25 Sie sich an den CCD-Bildsensor beschädigen kann. nächstgelegenen Kundendienst. Zerlegen oder modifizieren Sie dieses Produkt nie FCC-Angaben in irgendeiner Weise. (SAMSUNG haftet Dieses Gerät entspricht Abschnitt 15 nicht für Schäden, die durch unbefugte der FCC-Normen. Der Betrieb unterliegt Änderungen oder Reparaturversuche verursacht werden.)
  • Seite 26: Wichtige Sicherheitshinweise

    Wichtige Sicherheitshinweise Lesen Sie diese Anweisungen. 10. Schützen Sie das Netzkabel so, dass nicht darauf getreten wird, und dass Bewahren Sie sie auf. es insbesondere an den Steckern oder Beachten Sie alle Warnungen. passenden Steckdosen bzw. der Stelle, Befolgen Sie alle Anweisungen. an der das Kabel das Gerät verlässt, Verwenden Sie dieses Gerät nicht in der nicht abgeklemmt wird.
  • Seite 27 Inhaltsangabe Übersicht ..................... Über diese Anleitung ..............6 Produktübersicht ................6 Hauptfunktionen ................6 Teile 7 Prüfen Sie die Teile in der Verpackung ........7 Einzelteile Ihrer Kamera .............8 Installation ..................Einstellung der Schalter ...............9 Einstellung der Funktionsschalter ..........9 Kabelanschluss und Einstellungsänderungen ......11 Installation der Kamera ...............12 Vor der Installation ..............12 Über die Installations-Bohrlöcher ..........12...
  • Seite 28: Übersicht

    Übersicht Über diese Anleitung Hauptfunktionen ❚ ❚ Diese Bedienungsanleitung enthält  Energie: DC 12V/AC 24V grundlegende Anweisungen für das Gerät.  Sonderfunktionen Es wird empfohlen, dass alle Benutzer diese Line-Lock-Regelung (LL)  Anleitung vor Gebrauch lesen. Automatischer Weißabgleich  Diese Anleitungist wie folgt unterteilt: Horizontale/vertikale Spiegelung ...
  • Seite 29: Teile

    Teile ❚ Prüfen Sie die Teile in der Verpackung Überprüfen Sie bitte, ob Ihre Kamera und die Zubehörteile sich in der Verpackung befinden. Diese Teile sind wie folgt dargestellt: Kamera Test Monitorkabel Benutzerhandbuch Bild Name des Teils Standard Menge Verwendungszweck Befestigen Sie jedes Teil an den Kunststoffdübel HUD 5...
  • Seite 30: Einzelteile Ihrer Kamera

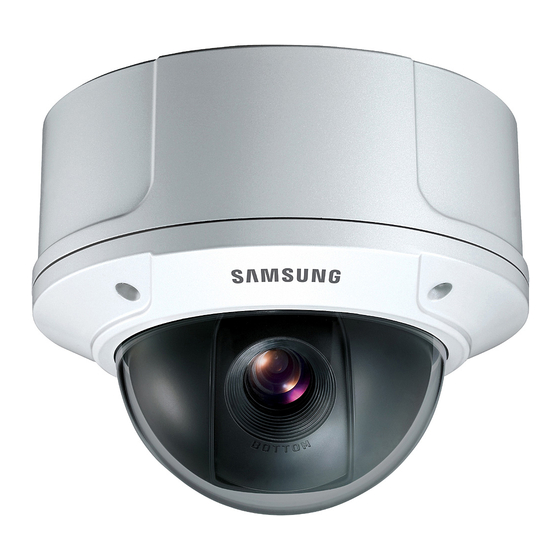
    Einzelteile Ihrer Kamera Ihre Kamera verfügt über folgende Einzelteile: 1. Kuppelabdeckung: Dient als Schutz für die Innenabdeckung, das Objektiv und das Hauptgehäuse. 2. Schraube der Abdeckung: Dient für die Montage oder Demontage von Kuppelabdeckung und Gehäuse. 3. Innenabdeckung: Dient als Schutz für das Hauptgehäuse.
  • Seite 31: Installation

    Installation Einstellung der Schalter ❚ Einstellung der Funktionsschalter Verstellen Sie die acht Schalter wie nachfolgend dargestellt, um die verfügbaren Funktionen an Ihrer Kamera einzustellen: 1. Schalter 1 (LL): Wenn dieser Schalter auf AUS gestellt wird, läuft die Kamera im internen Synchronisationsmodus, wenn er jedoch auf EIN gestellt wird, läuft sie im Line-Lock-Modus.
  • Seite 32 Stellen Sie den LL-Schalter auf EIN, während der Wechselstrom angeschlossen wird. Wenn das Bild kippt, müssen Sie die Phase mithilfe der Phasenreglertasten einstellen. Drücken Sie die Taste INC oder DEC, um die Phase um ein Grad zu erhöhen oder zu senken. 2.
  • Seite 33: Kabelanschluss Und Einstellungsänderungen

    Kabelanschluss und Einstellungsänderungen ❚ Vor der Installation Ihrer Kamera, müssen Sie das Fokusobjektiv, Zoom und die Schaltereinstellungen einstellen. Anschluss der Kabel: 1. Schließen Sie das BNC-Kabel an den Videoanschluss an, der sich an Ihrer Kamera befindet. 2. Schließen Sie das BNC- Kabel an den Video- Monitor Eingang am Monitor an.
  • Seite 34: Installation Der Kamera

    Installation der Kamera ❚ Vor der Installation Vor der Installation Ihrer Kamera müssen Sie folgende Vorsichtsmaßregeln lesen:  Sie müssen prüfen, ob der Standort (Decke oder Wand) das fünffache Gewicht Ihrer Kamera tragen kann.  Lassen Sie das Kabel sich nicht an einer ungeeigneten Position verhaken oder die Umhüllung der elektrischen Leitung beschädigen.
  • Seite 35: Installation An Einem Rohr

    Anschlussgummibandes wie unten wegen Wasserdichtheit vor der Montage dargestellt und drehen Sie es für die mit einem Teflonband umwickeln. Passen Montage, um die SAMSUNG Logo- Sie auf, dass das Verdrahtungskabel nicht Position zu ändern. (Das Rotationslimit ist im Anschlussbereich eingeklemmt wird.) 180 Grad.)
  • Seite 36: Installation Der Kameraseite Auf Einem Rohr

    Installation der Kameraseite auf 3. Schrauben Sie nach Anschluss der Netz- und Videokabel das Außengewinde des einem Rohr Rohres fest in das Innengewinde Ihrer 1. Ziehen Sie die Netz- und Videokabel Kamera, um das Hauptgehäusefest durch das Anschlussbohrloch des Rohrs anzubringen.
  • Seite 37: Installation Der Kamera An Der Decke

    Installation der Kamera an der Decke Sie müssen sich vor der Installation mit den oben aufgeführten Vorsichtsmaßnahmen vertraut machen und die Bohrlöcher abdichten, die für die Installation nicht gebraucht werden. Für die Installation Ihrer der Kamerarichtung.” Bei Verdrahtung nach Kameraunterseite auf einem Rohr 6.
  • Seite 38: Demontage/Montage Des Hauptgehäuses Vom Gehäuse

    Demontage/Montage des Hauptgehäuses vom Gehäuse Die Bohrlöcher, die nicht gebraucht werden, sollten fest mit den Schrauben abgedichtet werden, so dass sie wasserdicht sind. Befolgen Sie nachfolgende Anweisungen, um das Hauptgehäuse vom Gehäuse abzunehmen: 1. 1. Nehmen Sie zuerst die 3. Montieren Sie das Hauptgehäuse Kuppelabdeckung ab.
  • Seite 39: Einstellen Der Kamerarichtung

    Einstellen der Kamerarichtung ❚ Wenn die Kamera an der Decke befestigt ist, können Sie den Kamerabetrachtungswinkel einstellen. Sie können Ihre Kamera nach links oder rechts drehen (Schwenken) und Sie können Ihre Kamera nach oben oder unten neigen (Kippen). Schwenken Beim Schwenken ist das Rotationslimit Ihrer Kamera auf 355 Grad (100 Grad im Uhrzeigersinn und 255 Grad entgegen dem Uhrzeigersinn) eingestellt.
  • Seite 40: Anhang A: Spezifikationen Für Ntsc-Standard

    Horizontale Spiegelung (H-REV) Vertikale Spiegelung (V-REV) Gegenlicht-Kompensation (BLC) Regelungen Flackerfrei (FL) Umschalten zwischen Farb- und Schwarz-/Weißmodi (D/N) Automatischer Weißabgleich (AWB) Digitale Rauschminderung (DNR) Dynamische CCD Fehlerkompensation Betriebstemperatur -10°C bis +50°C Betriebsfeuchtigkeit bis zu 90% Größe 150(Ø) x 121(H) mm Gewicht SCC-B539X: 1,1kg...
  • Seite 41: Anhang B: Spezifikationen Für Pal-Standard

    Horizontale Spiegelung (H-REV) Vertikale Spiegelung (V-REV) Gegenlicht-Kompensation (BLC) Regelungen Flackerfrei (FL) Umschalten zwischen Farb- und Schwarz-/Weißmodi (D/N) Automatischer Weißabgleich (AWB) Digitale Rauschminderung (DNR) Dynamische CCD Fehlerkompensation Betriebstemperatur -10°C bis +50°C Betriebsfeuchtigkeit bis zu 90% Größe 150(Ø) x 121(H) mm Gewicht SCC-B539X: 1,1kg...
  • Seite 43: Korrekte Entsorgung Von Altgeräten

    Korrekte Entsorgung von Altgeräten (Elektroschrott) (In den Ländern der Europäischen Union und anderen europäischen Ländern mit einem separaten Sammelsystem) Die Kennzeichnung auf dem Produkt bzw. auf der dazugehörigen Dokumentation gibt an, dass es nach seiner Lebensdauer nicht zusammen mit dem normalen Haushaltsmüll entsorgt werden darf.
  • Seite 45 Guide de l’utilisateur Caméra Dôme Numérique Couleur SCC-B539X...
  • Seite 46: Précautions De Sécurité

    Précautions de sécurité ATTENTION RISQUE DE ECHOC ELECTRIQUE NE PAS OUVRIR ATTENTION : POUR REDUIRE LES RISQUES DE CHOCS ELECTRIQUES, NE PAS OUVRIR LE COUVERCLE ARRIERE. LES PIECES INTERIEURES NE SONT PAS ACCESSIBLES A L’UTILISATEUR. FAITES APPEL AU PERSONNEL DE MAINTENANCE QUALIFIE. Ce symbole indique la présence de Branchez correctement le cordon haute tension dans l’appareil.
  • Seite 47: Déclaration Fcc

    Ne jamais Evitez de pointer la caméra directement démonter ou modifier le produit de quelque vers des objets extrêmement brillants manière que ce soit. (SAMSUNG n’est comme le soleil, cela peut endommager le pas responsable des problèmes causés capteur d’image CCD.
  • Seite 48: Instructions Importantes Relatives À La Sécurité

    Instructions importantes relatives à la sécurité Veuillez lire ces instructions. 13. Débranchez cet appareil. Si vous utilisez un chariot, faîtes attention lorsque que Conservez ces instructions. vous déplacez l’appareil et le chariot Prêtez attention à tous les avertissements. pour éviter les blessures causées par un Veuillez suivre toutes les instructions.
  • Seite 49 Table des matières Synthèse ..................... A propos de ce guide ..............6 Synthèse du produit ..............6 Caractéristiques principales ..........6 Composants ...................7 Vérification des composants dans l’emballage ......7 Composants de votre caméra ............8 Installation ..................Réglage des interrupteurs ............9 Régler les interrupteurs de fonction ...........9 Connexion des câbles et modification des paramètres ..
  • Seite 50: Synthèse

    Synthèse A propos de ce guide Caractéristiques ❚ ❚ principales Ce guide utilisateur inclut les instructions de base relatives à ce produit. Nous  Alimentation : 12 V CC/ 24 V CA recommandons à tous les utilisateurs de lire  Fonctions spéciales ce guide avant d’utiliser l’appareil.
  • Seite 51: Composants

    Composants ❚ Vérification des composants dans l’emballage Veuillez vérifier que votre caméra et ses accessoires soient tous inclus dans l’emballage. Ces composants sont comme illustrés ci-dessous : Caméra : Câble du moniteur de test Guide de l’utilisateur Image Nom de la pièce Norme Quantité...
  • Seite 52: Composants De Votre Caméra

    Composants de votre caméra Votre caméra est composée des éléments suivants : 1. Couvercle du dôme : Recouvre le couvercle intérieur, l’optique et le corps principal pour les protéger. 2. Vis du couvercle : Utilisez cette vis pour assembler ou désassembler le couvercle du dôme et l’habitacle. 3.
  • Seite 53: Installation

    Installation Réglage des interrupteurs ❚ Régler les interrupteurs de fonction Pour régler les fonctions disponibles sur votre caméra, ajustez les huit interrupteurs comme indiqué ci-dessous : 1. Interrupteur 1 (LL): Si cet interrupteur est positionné sur OFF, la caméra fonctionne en mode de synchronisation interne, alors que si réglé...
  • Seite 54 Mettre l’interrupteur LL en positionON tandis que l’ ou 1/120 de seconde(pour le PAL) et ce, pour alimentation CA est connectée. Si vous constatez empêcher l’écran de trembler en raison de la une instabilité de l’image, vous pouvez ajuster la non conformité...
  • Seite 55: Connexion Des Câbles Et Modification Des Paramètres

    Connexion des câbles et modification des paramètres ❚ Avant d’installer votre caméra, vous devez ajuster la mise au point et le zoom de l’optique et modifier les paramètres. Connexion des câbles 1. Connectez le câble BNC au connecteur vidéo fixé à votre caméra.
  • Seite 56: Installation De La Caméra

    Installation de la caméra ❚ Avant l’installation Avant l’installation de votre caméra, veuillez lire les mises en garde suivantes :  Vous devez vérifier si le lieu d’installation (plafond ou mur) peut supporter le poids de cinq fois votre caméra. ...
  • Seite 57: Installation Sur Un Conduit

     Pour modifier le sens du logo du ruban en Téflon avant d’effectuer l’ SAMSUNG, déplacez l’emplacement assemblage pour garantir l’étanchéité. du ruban élastique comme indiqué ci- Veillez à ce que le fil de câblage ne se dessous et tournez pour l’assembler.
  • Seite 58 Installer le côté de la caméra sur un 2. Fixez le couvercle du coté que vous avez retiré au trou de la base et tournez dans conduit le sens des aiguilles d’une montre à l’aide 1. Insérez les câbles d’alimentation et les d’une pièce de monnaie ou d’un tourne- câbles vidéos dans le trou de connexion vis plat.
  • Seite 59: Installer La Caméra Au Plafond

    Installer la caméra au plafond Avant l’installation, vous devez vous familiariser avec les mises en garde ci-dessus et remplir les trous non utilisés pour l’installation. Installer la base de la caméra sur un En cas de câblage après avoir conduit percé...
  • Seite 60: Assembler/Désassembler Le Corps Principal De L'habitacle

    Assembler/désassembler le corps principal de l’habitacle Les trous non utilisés doivent être fermement scellés à l’aide des vis pour garantir l’étanchéité. Pour détacher le corps principal de l’habitacle, veuillez suivre les instructions ci-dessous : 1. 1. Retirez dans un premier temps le 3.
  • Seite 61: Ajuster La Direction De La Caméra

    Ajuster la direction de la caméra ❚ Une fois la caméra fixée au plafond, vous pouvez Panorama ajuster son angle de vue. Vous pouvez tourner votre caméra sur la gauche ou sur la droite (Panoramique) et remonter ou descendre son angle (basculement). Pour un panorama, la limite de rotation de la caméra est réglée à...
  • Seite 62: Appendice A : Caractéristiques Standard Ntsc Standard

    Appendice A : Caractéristiques standard NTSC Standard Fonctions Détails Type de produit Caméra dôme couleur CCTV Entrée alimentation 24V CA ± 10% (60Hz ± 0,3 Hz), 12V CC +10%/-5% Type de diffusion Système standard NTSC (525 lignes, 60 champs) Consommation électrique Approx.
  • Seite 63: Appendice B : Caractéristiques Pal Standard

    Appendice B : Caractéristiques PAL Standard Fonctions Détails Type de produit Caméra dôme couleur CCTV Entrée alimentation 24 V CA ± 10% (50Hz ± 0,3 Hz), 12 V CC +10%/-5% Type de diffusion Système standard PAL (625 lignes, 50 champs) Consommation électrique Approx.
  • Seite 65: Comment Éliminer Ce Produit

    Comment éliminer ce produit (déchets d’équipements électriques et électroniques) (Applicable dans les pays de l’Union Européen et aux autres pays européens disposant de systémes de collecte sélective) Ce symbole sur le produit ou sa documentation indique qu’il ne doit pas être éliminé...
  • Seite 67 Guía de Usuario Cámara digital color tipo domo SCC-B539X...
  • Seite 68: Precauciones De Seguridad

    Precauciones de seguridad PRECAUCIÓN NO ABRIR RIESGO DE SUFRIR UNA DESCARGA ELÉCTRICA PRECAUCIÓN: PARA REDUCIR EL RIESGO DE SUFRIR UNA DESCARGA ELÉCTRICA, NO EXTRAIGA LA CUBIERTA POSTERIOR. DENTRO NO HAY PIEZAS QUE PUEDAN SER REPARADAS POR EL USUARIO. REMITA EL APARATO A PERSONAL DE MANTENIMIENTO CUALIFICADO.
  • Seite 69 Declaración de la Comisión servicio técnico más cercano. Nunca intente desmontar o modificar este producto de Federal de Comunicaciones de ninguna manera. (SAMSUNG no se hace Estados Unidos de América (FCC) responsable de los problemas producidos por modificaciones no autorizadas o por Este aparato cumple con la parte 15 de la intentos de reparaciones.)
  • Seite 70: Instrucciones De Seguridad Importantes

    Instrucciones de seguridad importantes Lea estas instrucciones. 13. Desenchufe el aparato cuando no se vaya a utilizar. Cuando se utilice una carretilla, Consérvelas. tenga cuidado al mover la carretilla junto con Preste atención a todas las advertencias. el aparato con el fin de evitar heridas debido Siga todas las instrucciones.
  • Seite 71 Contenidos Vista preliminar ................Sobre esta guía ................6 Vista preliminar del producto ............6 Principales funciones ..............6 Componentes .................7 Comprobación de los componentes del paquete .......7 Componentes de la cámara ............8 Instalación ..................Ajuste de interruptores ..............9 Ajuste de interrupores de función ..........9 Conexión de cables y cambio de la configuración ....
  • Seite 72: Vista Preliminar

    Vista preliminar Sobre esta guía Principales funciones ❚ ❚ Esta guía de usuario incluye instrucciones  Corriente: 12 VCC/54 VCA  Funciones especiales básicas del aparato. Se recomienda que  Control del sincronismo de línea (LL) todos los usuarios lean esta guía antes de ...
  • Seite 73: Componentes

    Componentes ❚ Comprobación de los componentes del paquete Compruebe que su cámara y accesorios están incluidos en la caja. Los componentes son los siguientes: Cámara Cable para probar el monitor Guía de usuario Imagen Nombre de la pieza Estándar Cantidad Taco de fijación de Coloque cada pieza en los orificios de los HUD 5...
  • Seite 74: Componentes De La Cámara

    Componentes de la cámara La cámara tiene los siguientes componentes: 1. Cubierta tipo domo: Cubre la cubierta interior, la lente y el cuerpo principal, protegiéndolos. 2. Tornillo de la cubierta: Se utiliza para montar y desmontar tanto la cubierta tipo domo como la carcasa.
  • Seite 75: Instalación

    Instalación Ajuste de interruptores ❚ Ajuste de interrupores de función Para ajustar las funciones disponibles de su cámara, ajuste los ocho interruptores de la siguiente manera: 1. Interruptor 1 (LL): Cuando este interruptor está en la posición OFF (DESACTIVADO), la cámara funciona en el modo de sincronización interno, mientras que cuando está...
  • Seite 76 Ajuste el interruptor LL en la posición ON velocidad del obturador se ajusta a 1/100 (ACTIVADO) mientras la corriente CA está seg. (para NTSC) o 1/120 seg. c (para PAL) conectada. Si se produce algún movimiento para evitar que la pantalla parpadee debido de barrido en la imagen, tiene que ajustar a la discordancia entre la frecuenciade la fase mediante los botones de control...
  • Seite 77: Conexión De Cables Y Cambio De La Configuración

    Conexión de cables y cambio de la configuración ❚ Antes de instalar la cámara se ha de ajustar el foco de la lente, el zoom y se han de configurar los interruptores. Para conectar los cables: 1. Conecte el cable BNC al conector de video de la cámara.
  • Seite 78: Instalación De La Cámara

    Instalación de la cámara ❚ Antes de la instalación Antes de la instalación debe leer las siguientes advertencias:  Debe comprobar si la ubicación de la cámara (techo o pared) puede aguantar cinco veces el peso de la cámara.  Evite que el cable se quede atrapado en lugares inadecuados o que se dañe la cubierta de la línea eléctrica.
  • Seite 79: Instalación En Un Conducto

    2. Ajuste el ángulo de la cámara en busca - Para cambiar la posición del logotipo de de una orientación mejor. SAMSUNG, mueva la ubicación de la banda de goma, tal y como se muestra a continuación y gírela para montarla.
  • Seite 80 Instalar la parte lateral de la cámara La junta es necesaria para evitar que se filtre el agua.) en un conducto 1. Tire de los cables de vídeo y de corriente hacia el orificio de conexión del conducto en el lateral de la cámara 1) Quite la cubierta lateral de la Carcasa utilizando una moneda o un destornillador plano (-).
  • Seite 81: Instalar La Cámara En El Techo

    Instalar la cámara en el techo Antes de la instalación debe conocer las precauciones indicadas anteriormente y sellar los orificios que no se van a utilizar en la instalación. Instalar la parte inferior de la cámara la cámara en un conducto» en la página En caso de que haya que realizar en un conducto una instalación eléctrica después...
  • Seite 82: Montaje Y Desmontaje Del Cuerpo Principal De La Carcasa

    Montaje y desmontaje del cuerpo principal de la carcasa Los orificios que no se van a utilizar, deben sellarse firmemente utilizando los tornillos incluidos para evitar que se filtre el agua. Para separar el cuerpo principal de la carcasa, siga las siguientes instrucciones: 1.
  • Seite 83: Ajuste De La Dirección De La Cámara

    Ajuste de la dirección de la cámara ❚ Panorámica Cuando la cámara ya está colocada en el techo se puede ajustar el ángulo de visión de la cámara. La cámara se puede girar de izquiera a derecho o de derecha a izquierda (Panorámica) y se puede modificar la inclinación de la cámara hacia adelante y hacia atrás (Inclinación).
  • Seite 84: Apéndice A: Especificaciones Para El Estándar Ntsc

    Apéndice A: Especificaciones para el estándar NTSC Descripción Información Tipo de producto Cámara color tipo domo para circuito cerrado de televisión Alimentación 24 VCA ± 10% (60Hz ± 0,3 Hz), 12 VCC +10%/-5% Tipo de emisión Sistema NTSC estándar (525 Líneas, 60 Campos) Consumo de energía 1,7 W aprox.
  • Seite 85: Apéndice B: Especificaciones Para El Estándar Pal

    Cambio entre los modos a color y blanco y negro (D/N) Autobalance de blancos (AWB) Reducción digital de ruidos (DNR) Compensación de defectos dinámica CCD Temperatura de funcionamiento De -10°C hasta +50°C Humedad de almacenamiento Hasta un 90 % Tamaño 150 (Ø) x 121 (H) mm Peso SCC-B539X: 1,1kg...
  • Seite 87: Eliminación Correcta De Este Producto

    Eliminación correcta de este producto (material eléctrico y electrónico de descarte) (Aplicable en la Unión Europea y en países europeos con sistenmas de recogida selectiva de residuos) La presencia de esta marca en el producto o en el material informativo que lo acompaña, indica que al finalizar su vida útil no deberá...
  • Seite 89: Manuale Utente

    Manuale Utente Telecamera aDome Digitale a Colori SCC-B539X...
  • Seite 90: Precauzioni Di Sicurezza

    Precauzioni di sicurezza ATTENZIONE RISCHIO DISCOSSA ELETTRICA NON APRIRE ATTENZIONE: PER RIDURRE I RISCHI DI SCOSSA ELETTRICA, NON RIMUOVERE IL RIVESTIMENTO POSTERIORE. ALL’INTERNO NON VI SONO PARTI CHE L’UTENTE POSSA RIPARARE. RIVOLGERSI A PERSONALEQUALIFICATO. Questo simbolo indica la presenza Non collegare più di una telecamera allo di alto voltaggio all’interno dell’...
  • Seite 91: Dichiarazione Fcc

    Non smontare o Dichiarazione FCC riparare in alcun modo questo prodotto. (SAMSUNG non è responsabile per Questo apparecchio è conforme alla parte problemi causati da modifiche non 15 delle norme FCC. Il suo funzionamento è...
  • Seite 92: Istruzioni Di Sicurezza Importanti

    Istruzioni di Sicurezza Importanti Leggere queste istruzioni. 13. Scollegare questo apparecchio. Quando si utilizza un carrello, prestare attenzione Conservare queste istruzioni. quando si muove l’insieme carrello/ Rispettare tutti gli avvertimenti. apparecchio per evitare incidenti per il Seguire tutte le istruzioni. possibile rovesciamento.
  • Seite 93 Indice Introduzione ..................Riguardo a questo manuale ............6 Introduzione al prodotto ...............6 Caratteristiche principali ..............6 Componenti ..................7 Controllare i componenti nella confezione .........7 Componenti della telecamera ............8 Istallazione ..................Interruttori di impostazione ............9 Impostare le levette di funzione ..........9 Collegare i cavi e cambiare le impostazioni ......11 Istallare la telecamera ..............12 Prima dell’istallazione ...............12 Istallazione su una conduttura ..........13...
  • Seite 94: Introduzione

    Introduzione Riguardo a questo manuale Caratteristiche principali ❚ ❚ Questo manuale dell’utentecomprende  Alimentazione: DC 12V/AC 24V  Funzioni speciali istruzioni base sul prodotto. Si consiglia a tutti  Controllo line lock (LL) gli utenti di leggerlo prima dell’uso.  Bilanciamento del bianco automatico Il manuale èsuddiviso come segue: ...
  • Seite 95: Componenti

    Componenti ❚ Controllare i componenti nella confezione Controllare che la telecamera e gli accessori siano inclusi nella confezione. Tali componenti sono indicati qui sotto: Telecamera Cavo Test Monitor Manuale utente Immagine Nome pezzo Standard Quantità Collocare ciascun pezzo sui fori di Ancoraggio di HUD 5 4 (EA)
  • Seite 96: Componenti Della Telecamera

    Componenti della telecamera La telecamera si compone delle seguenti parti: 1. Involucr cupola: Copre l’involucro interno, la lente e il corpo principale per proteggerli. 2. Viti Involucro: Usate per montare o smontare l’ involucro a cupola e la cassa. 3. Involucro interno: Copre il corpo principale per proteggerlo.
  • Seite 97: Istallazione

    Istallazione Interruttori di impostazione ❚ Impostare le levette di funzione Per impostare le funzioni disponibili sulla telecamera, regolare le otto levette come indicato sotto: 1. Levetta 1 (LL): Quando questa levetta è posizionata su OFF, la telecamera funziona in modalità sincronizzazione interna, quando è...
  • Seite 98 Impostare la levetta LL su ON quando è collegata la corrente alternata. Se l’immagine traballa, si dovrà regolare la fase, utilizzando i pulsanti di controllo fase. Premere i pulsanti INC o DEC per aumentare o diminuire la fase di un grado. 2.
  • Seite 99: Collegare I Cavi E Cambiare Le Impostazioni

    Collegare i cavi e cambiare le impostazioni ❚ Prima di istallare la telecamera occorre regolare il fuoco dell’obiettivo, lo zoom e l’impostazione delle levette. Per collegare i cavi 1. Collegare il cavo BNC al connettore video della telecamera. 2. Collegare il cavo BNC all’ entrata video nel monitor.
  • Seite 100: Istallare La Telecamera

    Istallare la telecamera ❚ Prima dell’istallazione Prima d’istallare la telecamera, leggere le seguenti avvertenze:  Controllare che il luogo di ubicazione (soffitto o parete) possa sopportare cinque volte il peso della telecamera.  Evitare che il cavo si impigli in luoghi inadatti o che venga danneggiata la copertura dei cavi. Ciò può provocare guasti o incendi.
  • Seite 101: Istallazione Su Una Conduttura

    filettato maschio in quello  Per cambiare la posizione del logo femmina della telecamera per fissare SAMSUNG, spostare l’ubicazione della il Corpo principale. (In questo caso, fascia di gomma di collegamento come assicurarsi di sigillare con nastro adesivo indicato sotto e ruotare per montare.
  • Seite 102 Per istallare il lato della telecamera su una conduttura 3. Prima di collegare l’alimentazione e i cavi video attraverso la conduttura di 1. Tirare i cavi dell’alimentazione e video collegamento, avvitare saldamente il attraverso il foro di collegamento della tubo filettato maschio in quello femmina conduttura sul lato della telecamera della telecamera per fissare il Corpo 1) Rimuovere l’involucro dalla Cassa...
  • Seite 103: Istallare La Telecamera Sul Soffitto

    Istallare la telecamera sul soffitto Prima dell’istallazione occorre conoscere le avvertenze precedenti e riempire i fori che non vengono utilizzati per l’istallazione. Per istallare il fondo della telecamera su In caso di cablaggio dopo aver una conduttura praticato il foro nel luogo di 1.
  • Seite 104: Smontare/Montare Il Corpo Principale Dalla Cassa

    Smontare/montare il Corpo principale dalla Cassa I fori che non vengono utilizzati devono essere attentamente sigillati con le viti in dotazione per la tenuta all’acqua. Per staccare il Corpo principale dalla Cassa, seguire le istruzioni sottostanti: 1. Rimuovere l’involucro a cupola. 3.
  • Seite 105: Regolare La Direzione Della Telecamera

    Regolare la direzione della telecamera ❚ Quando la telecamera è fissata al soffitto, si Panning può regolare l’angolo visuale. Si può ruotare la telecamera verso sinistra o destra (Panning) e cambiare l’inclinazione verso l’alto e verso il basso (Tilting). Nel caso di panning, il limite di rotazione della telecamera è...
  • Seite 106: Appendice A: Specifiche Per Lo Standard Ntsc

    Appendice A: Specifiche per lo Standard NTSC Voce Particolari Tipo di prodotto Telecamera dome a colori a circuito chiuso Alimentazione AC 24V ± 10% (60Hz ± 0,3 Hz), DC 12V +10%/-5% Tipo di trasmissione Sistema standard NTSC (525 Linee, 60 Campi) Consumo energetico Circa 1,7W Dispositivo immagine...
  • Seite 107: Appendice B: Specifiche Per Lo Standard Pal

    Appendice B: Specifiche per lo Standard PAL Voce Particolari Tipo di prodotto Telecamera dome a colori a circuito chiuso Alimentazione AC 24V ± 10% (50Hz ± 0,3 Hz), DC 12V +10%/-5% Tipo di trasmissione Sistema Standard PAL (625 Linee, 50 Campi) Consumo energetico Circa 1,7W Dispositivo immagine...
  • Seite 109: Corretto Smaltimento Del Prodotto

    Corretto smaltimento del prodotto (rifiuti elettrici ed elettronici) (Applicabile in i paesi dell’Unione Europea e in quelli con sistema di raccolta differenziata) Il marchio riportato sul prodotto o sulla sua documentazione indica che il prodotto non deve essere smaltito con altri rifiuti domestici al termine del ciclo di vita. Per evitare eventuali danni all’ambiente o alla salute causati dall’inopportuno smaltimento dei rifiuti, si invita l’utente a separare questo prodotto da altri tipi di rifiuti e di riciclarlo in maniera responsabile per favorire il riutilizzo sostenibile...
  • Seite 110 Part No. AB68-00649D(01)

Diese Anleitung auch für:

Scc-b5392pScc-b5393p

Inhaltsverzeichnis