Herunterladen Inhalt Inhalt Diese Seite drucken
Samsung SCC-B5331 Benutzerhandbuch

Samsung SCC-B5331 Benutzerhandbuch

Digitale farbbild-kuppelkamera
Inhaltsverzeichnis

Werbung

Verfügbare Sprachen
  • DE

Verfügbare Sprachen

  • DEUTSCH, seite 71
DIGITAL COLOR DOME
imagine
Thank you for purchasing this Samsung product.
To receive more complete service,
please register your product at
www.samsungsecurity.com
CAMERA
user manual
the possibilities
SCC-B5331
SCC-B5331
SCC-B5333
SCC-B5333
SCC-B5335
SCC-B5335

Werbung

Inhaltsverzeichnis
loading

Inhaltszusammenfassung für Samsung SCC-B5331

  • Seite 1 SCC-B5331 SCC-B5331 SCC-B5333 SCC-B5333 SCC-B5335 SCC-B5335 DIGITAL COLOR DOME CAMERA user manual imagine the possibilities Thank you for purchasing this Samsung product. To receive more complete service, please register your product at www.samsungsecurity.com...
  • Seite 2: Safety Information

    Safety information CAUTION RISK OF ELECTRIC SHOCK. DO NOT OPEN CAUTION: TO REDUCE THE RISK OF ELECTRIC SHOCK, DO NOT REMOVE COVER (OR BACK) NO USER SERVICEABLE PARTS INSIDE. REFER SERVICING TO QUALIFIED SERVICE PERSONNEL. This symbol indicates that dangerous voltage consisting a risk of electric shock is present within this unit.
  • Seite 3 fi re or electric shock. If this product fails to operate normally, contact the nearest service center. Never disassemble or modify this product in any way. (SAMSUNG is not liable for problems caused by unauthorized modifi cations or attempted repair.) When cleaning, do not spray water directly onto parts of the product.
  • Seite 4 Safety information FCC Statement This device complies with part 15 of the FCC Rules. Operation is subject to the following two conditions : 1) This device may not cause harmful interference, and 2) This device must accept any interference received including interference that may cause undesired operation. Caution This equipment has been tested and found to comply with the limits for a Class A digital device, pursu- ant to part 15 of FCC Rules.
  • Seite 5: Important Safety Instructions

    Important Safety Instructions WARNING Read these instructions. Keep these instructions. Heed all warnings. Follow all instructions. Do not use this apparatus near water. Clean only with dry cloth. Do not block any ventilation openings. Install in accordance with the manufacturer’s instructions. Do not install near any heat sources such as radiators, heat registers, or other apparatus (including amplifi...
  • Seite 6: Inhaltsverzeichnis

    Contents Introduction Features Product & Accessories Part Names and Functions Installation Before installation Installation procedure Adjusting the camera direction How to use OSD Menu Main Menu Profi le Camera Setup Intelligence Privacy Zone Setup Other Set System Information Language Specifi cations Specifi...
  • Seite 7: Features

    Introduction FEATURES ❖ High Resolution • This camera has realized high resolution of 600 lines using the top-notch full digital image processing and special algorithm technologies. ❖ Intelligent Motion Detection & Tracking • This is an intelligent function that automatically detects a motion of an object. You can set a virtual fence so it displays an alert if an object passes / enters /exits the virtual fence or virtual area.
  • Seite 8: Product & Accessories

    Introduction signal. In installation or repair, this helps you control the communication controller (optional) without additional cabling. PRODUCT & ACCESSORIES ❖ Product & Accessories • Main Product Camera • Accessories Tab screw Test Monitor Cable User’s Manual  Note : The test monitor cable is used to test the camera by connecting to a portable display.
  • Seite 9: Part Names And Functions

    Introduction PART NAMES AND FUNCTIONS ❖ Components of your camera 1.Cover dome: Covers the lens and main body to protect them. 2.Main body: Includes a lens, a switch board, a PCB board, screws, and such. 3.Locker: Used to open or close the Cover dome.
  • Seite 10 Introduction ❖ Setting switches • SETUP Switch This switch is used to set the function or property. When this switch is pressed for at least 2 seconds, the MAIN MENU appears. (Left/Right) : By pressing this switch left or right, you can move left or right on the menu or change the displayed value.
  • Seite 11: Installation

    Installation BEFORE INSTALLATION Before installing your camera, you have to read the following cautions. • You have to check whether the location (ceiling or wall) can bear fi ve times the weight of your camera. • Don’t let the cable to be caught in improper place or the electric line cover to be damaged. Otherwise it may cause a breakdown or fi...
  • Seite 12 Installation ❶ Press the Locker button on the bottom of your camera and remove the Cover dome from the Main body using the other hand. The Main body and Inner cover will be exposed to you. ❷ To install and adjust your camera, you have to fi rst remove the Inner cover. To remove the Inner cover from the Main body, push a long thin screwdriver into the narrow spot of the Wing locker and press it outward to remove the cover.
  • Seite 13: Adjusting The Camera Direction

    Installation ADJUSTING THE CAMERA DIRECTION When the camera is fi xed on the ceiling, you can adjust the camera viewing angle. You can rotate your camera leftward or rightward (Panning), and can change the slope of your camera upward or downward (Tilting). In case of panning, the rotation limit of your camera is set to 355 degree (100 degree clockwise and 255 degree counterclockwise).
  • Seite 14: Using Icons In The Menu

    How to use OSD Menu USING ICONS IN THE MENU MAIN MENU • (EXIT) MAIN MENU Exits the menu setting. PROFILE Before you exits the menu setting, select SAVE to CAMERA SET INTELLIGENCE save your settings, or select QUIT to cancel. PRIVACY ZONE •...
  • Seite 15 How to use OSD Menu PROFILE PROFILE STANDARD BACKLIGHT DAY/NIGHT GAMING CUSTOM In the PROFILE menu, you can confi gure the following camera settings at once. CAMERA SET Menu STANDARD BACKLIGHT DAY/NIGHT GAMING Previous Sub-menus Menu IRIS LENS LEVEL BACKLIGHT BACKLIGHT MOTION (F.FAST)---...
  • Seite 16: Backlight

    How to use OSD Menu CAMERA SET Menu STANDARD BACKLIGHT DAY/NIGHT GAMING Previous Sub-menus Menu WHITE BAL DAY/NIGHT DAY/NIGHT MODE ATW2 ATW1 ATW1 ATW1 ATW1 BLUE NIGHT User setting User setting User setting BRIGHTNESS allowed allowed allowed MODE ATW2 ATW2 User setting User setting User setting...
  • Seite 17: Camera Setup

    How to use OSD Menu CAMERA SETUP Setup the general functions of zoom camera module. Use the switch to select a menu item. CAMERA SET ❖ CAMERA ID [OFF, ON] CAMERA ID IRIS CAMERA ID MOTION (F.FAST)--- ABCDEFGHIJKLMNOPQRSTUVWXYZ0 SHUTTER 123456789 :?-+*()/ SENS-UP AUTO X4 FLICKERLESS...
  • Seite 18 How to use OSD Menu appears. You can make the ELC (Electronic If you use an ordinary camera in a scene Light Control) function active or not.appropriate with an intensive backlight, the object will be screen. displayed dark on the monitor affected by the backlight.
  • Seite 19 How to use OSD Menu In USER mode, you can break down the level in If you monitor a fast moving object in a low contrast 16 steps from VERY LOW to VERY HIGH to your scene, select F.FAST while select S.SLOW for a preference.
  • Seite 20 How to use OSD Menu ❖ DAY/NIGHT [DAY,NIGHT,AUTO,EXT] AUTO BURST • DAY NIGHT BRIGHTNESS If set to DAY, it will be fi xed to DAY mode DWELL TIME regardless of the ambient conditions. NIGHT DAY BRIGHTNESS • NIGHT DWELL TIME MASK AREA If set to NIGHT, it will be fi...
  • Seite 21 How to use OSD Menu high spot light source at night. colors according to your settings. If you press the SETUP switch in item 1 or 2 of WHITE BAL the MASK AREA menu, you will see a menu DAY/NIGHT where you can specify an area to MASK.
  • Seite 22 How to use OSD Menu – R-GAIN/B-GAIN : Enables you to set the current WHITE BAL color temperature manually. DAY/NIGHT NIGHT – BRIGHTNESS : Select a brightness level in BRIGHTNESS MODE switching from setting in DAY mode to setting in [00]----I---- NIGHT mode.
  • Seite 23 How to use OSD Menu ❖ If more than one privacy zone is set and the PRIVACY DETAIL [0~3] – SET is set to ON, the PIP function will be deactivated. Controls the horizontal or vertical distinction. If the INTELLIGENCE function is set to FENCE mode, the –...
  • Seite 24: Intelligence

    How to use OSD Menu INTELLIGENCE • FENCE This is to detect if a moving object passes through the specifi ed LINE or AREA. INTELLIGENCE In a condition where a moving object is detected MOTION ADVANCED in an analysis of the previous and current frames MASK AREA 2 3 4 whose movement overlaps a certain area, the...
  • Seite 25 How to use OSD Menu ① If you press the SETUP switch with the LINE and size of the area. option set to ON, you can specify the position ② If you change the PIXEL LEVEL for setting and detection direction of the line. the position, specify the pixel that moves by a ②...
  • Seite 26: Privacy Zone Setup

    How to use OSD Menu - a second object screens the fi rst moving object PRIVACY ZONE SETUP ❖ MASK AREA [1~4] PRIVACY ZONE Specify a detection exception area to mask. Select a mask number and specify the size and position.
  • Seite 27 How to use OSD Menu ① By pressing the SETUP switch in Use the switch to select one from <POSITION>, you can move the overall PRIVACY 1 through 12. position of the privacy zone. Select one from PRIVACY 1~12 and press the ②...
  • Seite 28: Other Set

    How to use OSD Menu OTHER SET SYSTEM INFORMATION OTHER SET SYSTEM INFO FACTORY DEFAULTS TYPE 3_FIX_NOR_P OSD COLOR SERIAL NO. 000000000000000 CAMERA VER. 0.50_090101 ❖ FACTORY DEFAULTS You can check the system information such as SERIAL NO and CAMERA VER. All the settings will be restored to the factory default.
  • Seite 29 How to use OSD Menu ❖ Initial Confi guration Table • Camera Confi guration CAMERA ID IRIS VERY HIGH MOTION (F.FAST) SHUTTER SENS-UP AUTO x4 FLICKERLESS (OFF)--- DAY/NIGHT AUTO DIGITAL ZOOM DETAIL AGC COLOR SUP REVERSE POSI/NEGA V-SYNC English –...
  • Seite 30: Specifi Cations

    Specifi cations SPECIFICATIONS Items Sub-items SCC-B5331N/SCC-5333N/SCC-B5335N Camera Type CCTV Camera (WDR & DAY/NIGHT) Device 1/3” Super-HAD PS CCD Image Total 811 x 508 Pixels Effective 768 x 494 System Interlace/Progressive Scanning Line 525 lines Frame 30frame/1sec Scanning Internal Mode 15,734 Hz Horizontal Frequency Line-lock Mode...
  • Seite 31 Vertical 350 TV Lines Video Output VBS 1.0Vp-p, 75 Ω S/N Ratio S/N Ratio Approx. 52dB SCC-B5331 : f=3.8mm F 2.0 Lens Lens Drive Type SCC-B5333 : f=3.0mm F2.0 SCC-B5335 : f=8.0mm F2.0 0 ~ 340°(220° in CW(Clockwise) direction, Range 120°...
  • Seite 32 Specifi cations Items Sub-items SCC-B5331P/SCC-B5333P/SCC-B5335P Camera Type CCTV Camera (WDR & DAY/NIGHT) Device 1/3” Super-HAD PS CCD Image Total 795 x 596 Pixels Effective 752 x 582 System Interlace/Progressive Scanning Line 625 lines Frame 25frame/1sec Scanning Internal Mode 15,625 Hz Horizontal Frequency Line-lock Mode...
  • Seite 33 Vertical 350 TV Lines Video Output VBS 1.0Vp-p, 75 Ω S/N Ratio S/N Ratio Approx. 52dB SCC-B5331 : f=3.8mm F 2.0 Lens Lens Drive Type SCC-B5333 : f=3.0mm F2.0 SCC-B5335 : f=8.0mm F2.0 0 ~ 340°(220° in CW(Clockwise) direction, Range 120°...
  • Seite 35 SCC-B5331 SCC-B5333 SCC-B5335 CAMERA DÔME NUMERI Q UE COULEUR Guide de l’utilisateur imaginez les possibilités Merci d’avoir acheté ce produit Samsung. Pour obtenir une service plus complet, veuillez enregistrer votre produit sur le site www.samsungsecurity.com...
  • Seite 36: Directives De Sécurité

    Directives de sécurité ATTENTION RISQUE DE ECHOC ELECTRIQUE NE PAS OUVRIR ATTENTION: POUR REDUIRE LES RISQUES DE CHOCS ELECTRIQUES, NE RETIREZ PAS LE COUVERCLE (OU LA PARTIE ARRIERE) LES PIECES INTERIEURES NE SONT PAS ACCESSIBLES A L’UTILISATEUR. FAITES APPEL AU PERSONNEL DE MAINTENANCE QUALIFIE.
  • Seite 37 Si l’appareil ne fonctionne pas normalement, contacter le centre de service le plus proche. Ne jamais démonter ou modifi er de quelle que façon que ce soit ce produit. (SAMSUNG n’est pas responsable des anomalies provoquées par des modifi cations ou tentatives de réparation non autorisées.) Lors du nettoyage, ne pas vaporiser d’eau directement sur les composants du produit.
  • Seite 38 Directives de sécurité Placer le produit dans un endroit protégé des rayons du soleil et des sources de chaleur. Cela peut provoquer un incendie. Installer dans un endroit bien ventilé. Éviter de diriger la caméra en direction d’objets extrêmement brillants, tel que le soleil, pour ne pas endommager le capteur d’image CCD.
  • Seite 39: Consignes De Sécurité Importantes

    Consignes de sécurité importantes Veuillez lire ces instructions. Conservez ces instructions. Prêtez attention à tous les avertissements. Veuillez suivre toutes les instructions. N’utilisez pas cet appareil à proximité de l’eau. Nettoyez-le avec un tissu sec. N’obstruez pas les ouvertures de ventilation. Procédez à l’installation conformément aux instructions du fabricant.
  • Seite 40 Contenu Introduction Caractéristiques Produit et Accessoires Noms et fonctions des pièces Installation Avant l’installation Méthode d’installation Réglage de la direction de la caméra Comment utiliser le menu des écrans Menu principal Profi l Confi guration de la caméra Intelligence 25sss Confi...
  • Seite 41: Caractéristiques

    Introduction CARACTÉRISTIQUES ❖ Haute résolution • La résolutionélevée de cette caméra (600 lignes) est obtenue à l’aide du traitement d’images numérique complet à la fi ne pointe de la technologie et des technologies d’algorithme spéciaux. ❖ Détection et traçage intelligents de mouvements •...
  • Seite 42: Produit Et Accessoires

    Introduction PRODUIT ET ACCESSOIRES ❖ Produit et Accessoires • Partie principale du produit Caméra • Accessoires Vis de montage Câble de l’écran de contrôle Guide de l’utilisateur  Remarque : Le câble de l’écran de contrôle est utilisé pour contrôler la caméra en branchant un écran portatif. Utiliser le câble de type –...
  • Seite 43: Noms Et Fonctions Des Pièces

    Introduction NOMS ET FONCTIONS DES PIÈCES 1. Couvercle en forme de dôme : Il recouvre la lentille et le corps principal de façon à les ❖ Composants de votre caméra protéger. 2. Corps principal : Il comprend un objectif, un panneau de commande, un circuit imprimé, des vis, etc.
  • Seite 44 Introduction ❖ Réglage des interrupteurs • Commutateur de réglage (Setup) Ce sélecteur sert à défi nir la fonction ou la propriété. Si vous appuyez sur ce sélecteur pendant 2 secondes au moins, le MENU PRINCIPAL apparaît. (gauche/droit) : En déplaçant ce commutateur vers la gauche ou la droite, vous pouvez vous déplacer vers la gauche ou la droite sur le menu ou changer la valeur affi...
  • Seite 45: Installation

    Installation AVANT L’INSTALLATION Avant d’installer votre caméra, lire les consignes suivantes. • Vérifi er que l’emplacement (plafond ou mur) peut supporter cinq fois le poids de la caméra. • Ne pas coincer le câble ou endommager la gaine du cordon d’alimentation, cela pourrait provoquer une panne ou déclencher un incendie.
  • Seite 46 Installation ❶ Appuyer sur la languette de blocage au bas de la caméra et retirer le couvercle en forme de dôme du corps principal à l’aide de votre autre main. Le corps principal et le couvercle interne est alors dégagé. ❷...
  • Seite 47: Réglage De La Direction De La Caméra

    Installation RÉGLAGE DE LA DIRECTION DE LA CAMÉRA Lorsque la caméra est fi xée au plafond, vous pouvez régler l’angle de prise de vues. La caméra peut pivoter vers la gauche et vers la droite (mouvement panoramique), et peut s’incliner vers l’avant et vers l’arrière (inclinaison). En cas de mouvement panoramique, la limite de rotation de la caméra est fi...
  • Seite 48: Comment Utiliser Le Menu Des Écrans

    Comment uti l i s er l e menu des écrans UTILISATION DES ICÔNES DANS LE MENU MENU PRINCIPAL • (QUITTER) MENU PRINCIPAL Pour quitter la confi guration du menu. PROFIL REG CAMERA Avant de quitter la confi guration du menu, INTELLIGENCE sélectionnez SAUVER pour enregistrer vos paramètres ZONE PRIVEE...
  • Seite 49 Comment uti l i s er l e menu des écrans PROFIL PROFIL STANDARD RETROECL JOUR/NUIT PERSONNALISE Dans le menu PROFIL, vous pouvez défi nir simultanément les paramètres suivants de la caméra. Menu REG CAMERA STANDARD RETROECL JOUR/NUIT Menu Sous-menus précédent IRIS OBJECTIF...
  • Seite 50 Comment uti l i s er l e menu des écrans Menu REG CAMERA STANDARD RETROECL JOUR/NUIT Menu Sous-menus précédent S.PORTEUSE JOUR JOUR/NUIT JOUR JOUR/NUIT JOUR BLANCS JOUR MODE ROUGE BLEU NUIT Confi guration Confi guration Confi guration LUMINENCE par l’utilisateur MOYEN par l’utilisateur MOYEN...
  • Seite 51: Confi Guration De La Caméra

    Comment uti l i s er l e menu des écrans CONFIGURATION DE LA CAMÉRA Confi gurez les fonctions de base du module de la caméra avec zoom. Utilisez le sélecteur pour sélectionner un REG CAMERA ID DE CAMERA article de menu. IRIS ❖...
  • Seite 52 Comment uti l i s er l e menu des écrans ① Si vous appuyez sur le sélecteur SETUP alors ❖ que le sous-menu ELC est sélectionné, l’écran [OFF, TRES BAS, BAS, MOYEN, HAUT, TRES correspondant apparaîtra. Vous pouvez activer ou HAUT, UTIL, FIXE] désactiver la fonction ELC (Contrôle électronique Vous utiliserez le menu AGC (Auto Gain...
  • Seite 53 Comment uti l i s er l e menu des écrans Si vous surveillez un objet en mouvement AGC FIXE rapide dans une scène à faible contraste, NIVEAU [01] vous sélectionnerez T.VITE, tandis que vous sélectionnerez T.LENT pour un objet qui se déplace très peu dans les mêmes conditions de lumière.
  • Seite 54 Comment uti l i s er l e menu des écrans L’obturateur électronique haute vitesse automatique la netteté de l’image; elle peut également être fonctionne comme l’obturateur électronique haute utilisée comme mode FIXE. vitesse fi xe dans une scène à contraste élevé, mais ...
  • Seite 55 Comment uti l i s er l e menu des écrans Contrôle activement la compensation de le sous-menu AUTO est sélectionné, vous voyez gamme en régulant le contraste de luminance l’écran approprié. ambiant dans une certaine unité de pixel afi n de déterminer la visibilité...
  • Seite 56: Bal Blancs

    Comment uti l i s er l e menu des écrans L’option HEURE RET PROG de NUIT JOUR Ceci autorise le changement automatique entre défi nit la durée de maintien en mode couleur. les modes JOUR et NUIT à l’aide de l’interface Le menu ZONE MASQUAGE permet d’éviter avec le détecteur externe le basculement involontaire sur un autre mode...
  • Seite 57 Comment uti l i s er l e menu des écrans blancs fonctionne toujours de la façon dont elle à 10 000 K. a été réglée en mode JOUR; se elle n’est pas • BM (Commande de balance des blancs réglée à...
  • Seite 58 Comment uti l i s er l e menu des écrans  Remarque : ZOOM NUM L’utilisation du c.c. de 12 V réglera V-SYNC à INT, ce qui – RAPPORT [X1.0] ne peut pas être changé. < POSITION > ❖ AGC SUP COULEUR [BAS , MOYEN, HAUT] Règle le schéma de couleur en fonction de la...
  • Seite 59: Intelligence

    Comment uti l i s er l e menu des écrans ❖ POSI/NEGA [+, -] INTELLIGENCE Sort tel quel ou reproduit le signal de luminance vidéo. INTELLIGENCE MOUVE ❖ [OFF, ON] AVANCE ZONE MASQUAGE 2 3 4 Affi che une sous-image et l’image principale AFFICHAGE sur le même écran à...
  • Seite 60 Comment uti l i s er l e menu des écrans • BARRIERE - Pour défi nir la ligne Ceci permet de détecter si un objet en LIGNE mouvement passe par la LIGNE ou la ZONE NIVEAU PIXEL spécifi ée. <POINT>...
  • Seite 61 Comment uti l i s er l e menu des écrans Les fonctions BARRIERE, PIP, SIN et ZOOM NUM (si le - Pour défi nir la zone facteur zoom numérique est réglé à une valeur ZONE supérieure à 1x) ne peuvent pas être utilisées NIVEAU PIXEL simultanément.
  • Seite 62: Confi Guration De La Zone Privée

    Comment uti l i s er l e menu des écrans CONFIGURATION DE LA ZONE PRIVÉE ZONE MASQUAGE <TAILLE> ZONE PRIVEE <POSITION> REG Z. PRIVEE STYLE MOSAIQ1 ❖ AFFICHAGE [ON, OFF] Tandis que l’option AFFICHAGE est réglée à ON, La fonction ZONE PRIVEE protège votre vie privée un mouvement ou une fonction réglée à...
  • Seite 63 Comment uti l i s er l e menu des écrans - Pour défi nir la position Utilisez le sélecteur pour sélectionner un chiffre de 1 à 12 dans ZONE PRIVEE. Vous pouvez déplacer la position de l’ensemble de la zone. Sélectionnez un chiffre de 1 à...
  • Seite 64: Autre Réglage

    Comment uti l i s er l e menu des écrans AUTRE RÉGLAGE RENSEIGNEMENTS SUR LE SYSTÈME AUTRE REG INFO SYSTEME REINIT REGLAGE USINE TYPE 3_FIX_NOR_P COULR OSD N&B NO SERIE 000000000000000 CAMERA VER. 0.50_090101 ❖ REINIT REGLAGE USINE Vous pouvez consulter les informations système Tous les réglages par défaut effectués à...
  • Seite 65 Comment uti l i s er l e menu des écrans ❖ Table de confi guration initiale • Confi guration de la caméra ID DE CAMERA IRIS TRES HAUT MOUVE (T.VITE) MOYEN OBTURATEUR AUGMENTER SENS. AUTO x4 ANTI-BATTEMENT (OFF) MOYEN JOUR/NUIT AUTO ZOOM NUM...
  • Seite 66: Caractéristiques Techniques

    Caractéristiques techniques CARACTÉRISTIQUES TECHNIQUES Articles Sous-articles SCC-B5331N/SCC-5333N/SCC-B5335N Type de caméra Caméra CCTV (WDR et JOUR/NUIT) Appareil Super-HAD PS CCD 1/3 po Image Total 811 x 508 Pixels Réels 768 x 494 Système Entrelacement/Progressif Ligne de 525 lignes balayage Trame 30 trames/seconde Mode interne 15 734 Hz Balayage...
  • Seite 67 Sortie vidéo VBS 1.0Vp-p, 75 Ω Rapport signal sur bruit Rapport signal sur bruit Environ 52 dB SCC-B5331 : f=3.8mm F 2.0 Objectif Type lecteur d’objectif SCC-B5333 : f=3.0mm F2.0 SCC-B5335 : f=8.0mm F2.0 0 ~ 340°(120° dans le sens des aiguilles d’une montre),...
  • Seite 68 Caractéristiques techniques Articles Sous-articles SCC-B5331P/SCC-5333P/SCC-B5335P Type de caméra Caméra CCTV (WDR et JOUR/NUIT) Appareil Super-HAD PS CCD 1/3 po Image Total 795 x 596 Pixels Réels 752 x 582 Système Entrelacement/Progressif Ligne de 625 lignes balayage Trame 25 trames/seconde Mode interne 15 625 Hz Balayage Fréquence...
  • Seite 69 Sortie vidéo VBS 1.0Vp-p, 75 Ω Rapport signal sur bruit Rapport signal sur bruit Environ 52 dB SCC-B5331 : f=3.8mm F 2.0 Objectif Type lecteur d’objectif SCC-B5333 : f=3.0mm F2.0 SCC-B5335 : f=8.0mm F2.0 0 ~ 340°(120° dans le sens des aiguilles d’une montre),...
  • Seite 71: Sie Die Möglichkeiten

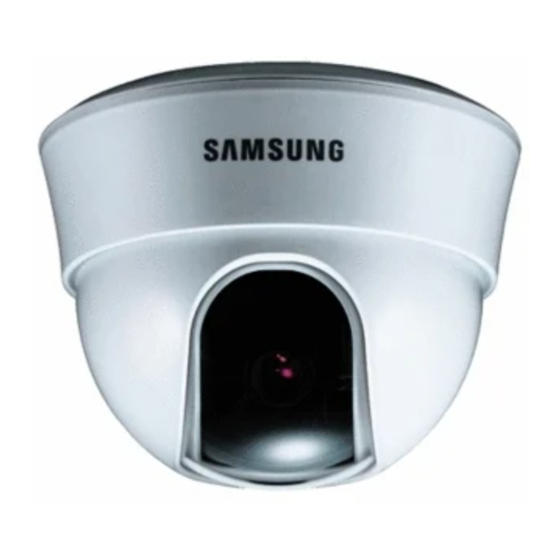
    SCC-B5331 SCC-B5333 SCC-B5335 DIGITALE FARBBILD- KUPPELKAMERA Benutzerhandbuch Erleben Sie die Möglichkeiten Danke, dass Sie sich für dieses Produkt von Samsung entschieden haben. Um den vollständigen Service zu erhalten, registrieren Sie Ihr Produkt unter www.samsungsecurity.com...
  • Seite 72: Sicherheitsinformationen

    Sicherheitsinformationen VORSICHT GEFAHR EINES ELEKTROSCHOCKSNICHT ÖFFNEN VORSICHT: NICHT DIE RÜCKSEITIGE ABDECKUNG ÖFFNEN, ABDECKUNG (ODER RÜCKSEITE) NICHT ABNEHMEN. KEINE VOM BENUTZER ZU WARTENDE TEILE INNEN. WENDEN SIE SICH AN QUALIFIZIERTESKUNDENDIENSTPERSONAL Dieses Symbol zeigt an, dass bei diesem Gerät gefährliche Spannung Elektroschock zur Folge haben kann.
  • Seite 73 Wenn dieses Produkt nicht einwandfrei funktioniert, wenden Sie sich an den nächstgelegenen Kundendienst. Zerlegen oder modifi zieren Sie dieses Produkt nie in irgendeiner Weise. (SAMSUNG haftet nicht für Schäden, die durch unbefugte Änderungen oder Reparaturversuche verursacht werden.) Spritzen Sie während der Reinigung kein Wasser direkt auf die Produktteile. Dies führt sonst zu Brand oder Elektroschock.
  • Seite 74 Sicherheitsinformationen VORSICHT Lassen Sie keine Gegenstände auf das Produkt fallen oder setzen Sie es keinen starken Stößen aus. Halten Sie sich fern von Standorten die übermäßiger Erschütterung oder magnetischer Beeinfl ussung ausgesetzt sind. Installieren Sie das Gerät nicht an einem Standort, der hohen Temperaturen (über 50°C), niedrigen Temperaturen (unter -10°C) oder hoher Feuchtigkeit ausgesetzt ist.
  • Seite 75: Wichtige Sicherheitshinweise

    Wichtige Sicherheitshinweise Lesen Sie diese Anweisungen. Bewahren Sie sie auf. Beachten Sie alle Warnungen. Befolgen Sie alle Anweisungen. Verwenden Sie dieses Gerät nicht in der Nähe von Wasser. Reinigen Sie es nur mit einem trockenen Lappen. Blockieren Sie keine Belüftungsöffnungen. Installieren Sie es gemäß den Herstelleranweisungen. Installieren Sie das Gerät nicht in der Nähe von Wärmequellen wie beispielsweise von Radiatoren, Heizkörpern oder anderen Geräten (einschließlich Verstärkern), die Wärme erzeugen.
  • Seite 76 Inhalt Einführung Funktionen Produkt & Zubehör Teilenamen und Funktionen Installation Vor der Installation Installationsvorgang Einstellen der Kamerarichtung Das Bildschirmmenü verwenden Die menüpunkte verwenden Hauptmenü Profi l Kamera einrichten Intelligenz Einstellung privatbereich Weitere einstellungen Systeminformationen Sprache Angaben Angaben 6 – DIGITALE FARBBILD-KUPPELKAMERA...
  • Seite 77: Funktionen

    Einführung FUNKTIONEN ❖ Hohe Aufl ösung • DieseKamera hat eine hohe Aufl ösung von 600 Zeilen mit erstklassiger vollständiger digitaler Bildverarbeitung und spezieller Algorithmustechnologie. ❖ Intelligente Bewegungsentdeckung & Nachverfolgung • Das ist eine intelligente Funktion, die automatisch die Bewegung eines Objekts erkennt. Sie können eine virtuelle Begrenzung festlegen, so dass ein Alarm angezeigt wird, sobald ein Objekt die virtuelle Begrenzung oder den virtuellen Bereich passiert/betritt/verlässt.
  • Seite 78: Produkt & Zubehör

    Einführung ❖ Bildschirmmenü • Mit dem Bildschirmmenü können der Status der Kamera überprüft und die Funktionen interaktiv konfi guriert werden. ❖ Koaxialkabelkommunikation • Bei dieser Fernbedienfunktion überschneidet sich das Koaxialkabel (für den Transfer des Videosignals) mit dem Kontrollsignal. Während der Installation oder einer Reparatur hilft Ihnen dies dabei, den Communication Controller (optional) zu steuern, ohne zusätzliche Kabel anschließen zu müssen.
  • Seite 79: Einzelteile Ihrer Kamera

    Einführung Einzelteile Ihrer Kamera 1.Kuppelabdeckung: Dient als Schutz für das Objektiv und das Hauptgehäuse. 2.Hauptgehäuse: Beinhaltet ein Objektiv, eine Schalttafel, eine Leiterplatte, Schrauben und dergleichen. 3Verriegelung: Dient zum Öffnen oder Schließen der Kuppelabdeckung. Drücken Sie die Verriegelung, um die Kuppelabdeckung zu öffnen.
  • Seite 80: Schalter Einstellung

    Einführung ❖ Einstellung der Funktionsschalter • Schalter Einstellung Mit diesem Schalter wird die Funktion oder Eigenschaft eingestellt. Wenn dieser Schalter mindestens 2 Sekunden lang gedrückt wird, erscheint das HAUPTMENÜ. (Links/Rechts) : Durch Drücken dieses Schalters nach links oder rechts, gelangen Sie am Menü nach links oder rechts oder Sie können auch den angezeigten Wert ändern.
  • Seite 81: Installation

    Installation Vor der Installation Vor der Installation Ihrer Kamera müssen Sie folgende Vorsichtsmaßregeln lesen: Sie müssen prüfen, ob der Standort (Decke oder Wand) das fünffache Gewicht Ihrer Kamera tragen kann. Lassen Sie das Kabel sich nicht an einer ungeeigneten Position verhaken oder die Umhüllung der elektrischen Leitung beschädigen.
  • Seite 82 Installation ❶ Drücken Sie die Taste Verriegelung an der Unterseite Ihrer Kamera und nehmen Sie die Kuppelabdeckung vom Hauptgehäuse mithilfe der anderen Hand ab. Das Hauptgehäuse und die innenliegende Abdeckung werden in Ihre Richtung freigelegt. ❷ Sie müssen zuerst die innenliegende Abdeckung abnehmen, um Ihre Kamera zu installieren und einzustellen.
  • Seite 83: Einstellen Der Kamerarichtung

    Installation EINSTELLEN DER KAMERARICHTUNG Wenn die Kamera an der Decke befestigt ist, können Sie den Kamerabetrachtungswinkel einstellen. Sie können Ihre Kamera nach links oder rechts drehen (Schwenken) und Sie können Ihre Kamera nach oben oder unten neigen (Kippen). Beim Schwenken ist das Rotationslimit Ihrer Kamera auf 355 Grad (100 Grad im Uhrzeigersinn und 255 Grad entgegen dem Uhrzeigersinn) eingestellt.
  • Seite 84: Das Bildschirmmenü Verwenden

    Das Bildschirmmenü verwenden DIE MENÜPUNKTE VERWENDEN HAUPTMENÜ • (BEENDEN) HAUPTMENÜ Die Menüeinstellung wird beenden. PROFIL Wählen SICHERN, bevor Sie die Menüeinstellung KAMERA PROG INTELLIGENZ verlassen, um Ihre Einstellungen zu speichern, oder PRIVATZONE wählen Sie VERL, um abzubrechen. WEITERE PROG SYSTEMINFO •...
  • Seite 85: Profi L

    Das Bildschirmmenü verwenden PROFIL PROFIL STANDARD GGLICHT TAG/NACHT SPIELB. ANPASS Im Menü PROFIL können Sie die folgenden Kameraeinstellungen konfi gurieren. Menü KAMERA PROG STANDARD GGLICHT TAG/NACHT SPIELB. Vorheriges Untermenüs Menü BLENDE OBJEKTIV PEGEL GGLICHT AKTIVITAET (S.SCHN)--- (S.SCHN)--- NORM (S.SCHN)--- LANGS MITT MITT MITT...
  • Seite 86 Das Bildschirmmenü verwenden Menü KAMERA PROG STANDARD GGLICHT TAG/NACHT SPIELB. Vorheriges Untermenüs Menü WEISSABGL TAG/NACHT TAG/NACHT MODUS ATW2 ATW1 ATW1 ATW1 ATW1 BLAU NACHT Benutzereinstellung Benutzereinstellung Benutzereinstellung HELLIGKEIT MITT MITT erlaubt erlaubt erlaubt MODUS ATW2 ATW2 Benutzereinstellung Benutzereinstellung Benutzereinstellung erlaubt erlaubt erlaubt Benutzereinstellung...
  • Seite 87: Kamera Einrichten

    Das Bildschirmmenü verwenden KAMERA EINRICHTEN Richten Sie die wichtigsten Funktionen des Kamerazooms ein. Verwenden Sie den Schalter um einen KAMERA PROG Menüpunkt zu wählen. KAMERA ID ❖ KAMERA ID [AUS, EIN] BLENDE AKTIVITAET (S.SCHN)--- MITT KAMERA ID VRSCHL EMPF-PLUS AUTO X4 ABCDEFGHIJKLMNOPQRSTUVWXYZ0 FLIMMERFREI 123456789 :?-+*()/...
  • Seite 88 Das Bildschirmmenü verwenden ❖ • ELC (Elektronische Lichtsteuerung) [AUS, SEHR NIEDRIG, WENIG, MITT, HOCH, ① Wenn Sie den Schalter SETUP betätigen, SEHR HOCH, BENUTZER, FIX]  während das Untermenü ELC ausgewählt ist, Das Menü AGC (Auto Gain Control/Automatischer so erscheint der entsprechende Bildschirm. Verstärkungsregler) wird verwendet, um den AGC- Sie können die Funktion ELC (Elektronische Pegel der Kamera einzustellen.
  • Seite 89 Das Bildschirmmenü verwenden Wenn Sie ein sich schnell bewegendes Objekt in einer AGC FIX kontrastschwachen Umgebung anvisieren, wählen Sie PEGEL [01] S.SCHN. Wählen Sie S.LANGS für ein Objekt, das sich bei den gleichen Lichtverhältnissen kaum bewegt.  Beachten Sie : Wenn das Menü...
  • Seite 90: Flimmerfrei

    Das Bildschirmmenü verwenden Wenn das Menü VRSCHL auf den fi xen elektronischen sich die Blende in einer kontrastschwachen Szene, – Verschlussmodus eingestellt wurde, ist das Menü EMPF wie im Modus ELC, vollständig öffnet. Wenn der PLUS nicht verfügbar. Hintergrund heller wird, wechselt der Modus zum festgelegten elektronischen Schnellverschluss.
  • Seite 91 Das Bildschirmmenü verwenden optimale Deutlichkeit zu ermitteln. AUTO Wählen zwischen AUS, WENIG, MITT und FARBTRAGER TAG NACHT HOCH. Durch die Einstellung HOCH wird die HELLIGKEIT MITT Ausgleichsstufe erhöht. SCHWELLZEIT NACHT TAG ❖ TAG/NACHT [TAG,NACHT,AUTO,EXT] HELLIGKEIT MITT SCHWELLZEIT • MASK.BER. Bei Einstellung auf TAG wird der Modus TAG festgelegt, unabhängig von den Umgebungsbedingungen.
  • Seite 92 Das Bildschirmmenü verwenden Die HELLIGKEIT bei TAG NACHT legt die MASK.BER. Helligkeitsstufe von Farbe bis hin zu schwarzweiß fest, wobei zusätzlich zwischen WENIG, MITT <GROESSE> <POSITION> und HOCH gewählt werden kann. Bei der Einstellung von HOCH bis WENIG ändert sich der Bildschirm in den Schwarzweiß-Modus.
  • Seite 93 Das Bildschirmmenü verwenden WEISSABGL WEISSABGL TAG/NACHT TAG/NACHT NACHT MODUS HELLIGKEIT MITT [00]----I---- MODUS BLAU [00]----I---- [00]----I---- R-VERST [0248] BLAU [00]----I---- B-VERST [0247] R-VERST [0248] B-VERST [0247]  Beachten Sie :  Beachten Sie : Sie können die Werte von R-VERST und B-VERST nur im –...
  • Seite 94: Digitalzoom

    Das Bildschirmmenü verwenden • 5600K : Die Farbtemperatur wird auf 5600K während das Bild entsprechend des eingestellten eingestellt. Verhältnisses vergrößert ist, so können Sie einen unsichtbaren Bereich des aktuellen Bildschirms sehen, – ROT : Zur Einstellung der Intensität der roten Farbe. indem Sie den Schalter betätigen.
  • Seite 95: Intelligenz

    Das Bildschirmmenü verwenden ❖ POSI/NEGA [+, -] INTELLIGENZ Der Ausgang erfolgt oder das AKTIVITAET ERWEITERT Videohelligkeitssignal wird widergespiegelt. MASK.BER. 2 3 4 ❖ DISPLAY [AUS, EIN] EMPF Zeigt das Hintergrundbild gemeinsam mit dem AUFLOESUNG Hauptbild auf dem selben Bildschirm an, unter Verwendung der Funktion Bild im Bild (Picture In Picture).
  • Seite 96 Das Bildschirmmenü verwenden sich bewegendes Objekt die festgelegte LINIE LINIE oder den festgelegten BEREICH durchquert. PIXELANZ Wenn ein sich bewegendes Objekt in der Analyse <PKT> des vorherigen und aktuellen Bildes erkannt RICHTUNG wird, und dessen Bewegung einen bestimmten Bereich überschreitet, so zeigt das System „WEIT“...
  • Seite 97 Das Bildschirmmenü verwenden PRIVAT 12 nicht zur Verfügung. Punkten basiert, erscheint auf dem Bildschirm. Die Funktionen von ZAUN, PIP, DIS und DIGITAL ZOOM - Einstellung des Bereichs (wenn der Faktor des digitalen Zooms auf mehr als 1x gestellt ist) können nicht gleichzeitig verwendet werden. BEREICH In der von BEREICH und LINIE festgelegten Abgrenzung –...
  • Seite 98: Einstellung Privatbereich

    Das Bildschirmmenü verwenden EINSTELLUNG PRIVATBEREICH MASK.BER. <GROESSE> PRIVATZONE <POSITION> PRIVAT FESTL STIL MOSAIK1 ❖ DISPLAY [EIN, AUS] Wenn die Option DISPLAY auf EIN gestellt ist, Die Funktion PRIVAT schützt Ihre Privatzone, indem so wird eine Bewegung oder eine eingestellte der von Ihnen festgelegte Privatbereich während der ERWEITERTE Funktion auf dem Bildschirm Überwachung verdeckt wird.
  • Seite 99: Weitere Einstellungen

    Das Bildschirmmenü verwenden - Einstellung der Position Verwenden Sie den Schalter um eine PRIVATZONE zwischen 1 und 12 auszuwählen. Sie können die Position des allgemeinen Bereichs bewegen. Wählen Sie eine der PRIVATZONE zwischen 1 und 12 aus und betätigen Sie den Schalter SETUP, ①...
  • Seite 100: Systeminformationen

    Das Bildschirmmenü verwenden ❖ WERKSEINST. SPRACHE Alle Einstellungen werden auf die Werkseinstellungen zurückgesetzt. SPRACHE Jedoch werden die Einstellungen zu PROTOKOLL, BAUDRATE, ADRESSE und ENGLISH FRANÇAIS SPRACHE nicht zurückgesetzt. DEUTSCH ESPAÑOL ❖ OSD-FARB [S/W, R/G/B] ITALIANO Die Farbe der Bildschirmanzeige kann auf FARBE oder S/W gestellt werden.
  • Seite 101 ❖ Tabelle für Anfangskonfi guration • Kamerakonfi guration KAMERA ID BLENDE SEHR HOCH AKTIVITAET (S.SCHN) MITT VRSCHL EMPF-PLUS AUTO x4 FLIMMERFREI (AUS) MITT TAG/NACHT AUTO DIGITAL ZOOM DETAIL AGC UNTD FARBÜBERL MITT RÜCKW POSI/NEGA V-SYNC Deutsch –...
  • Seite 102: Angaben

    Angaben ANGABEN Menüpunkte Untermenüpunkte SCC-B5331N/SCC-B5333N/SCC-B5335N Kameratyp CCTV-Kamera Gerät 1/3” Super-HAD IT CCD Bild Gesamt 811 x 508 Pixel Effektiv 768 x 494 System Interlace Abtastzeile 525 Zeilen Frame 30 Frames/1 Sekunde Bildzerlegung Internal Mode 15,734 Hz Horizontale Frequenz Line-lock Mode 15,750 Hz Internal Mode 59,94 Hz...
  • Seite 103 Angaben Menüpunkte Untermenüpunkte SCC-B5331N/SCC-B5333N/SCC-B5335N Aus/Ein (Max. Stufeneinstellung) Line Lock Aus/Ein (Phasensteuerung) Kamera ID Aus/Ein (Max. 54ea/2Linien) Weissabgleich ATW1/ATW2/AWC/3200K/5600K Digitale Rauschunterdrückung Aus/Ein (Anwendbar 3D + 2D) (DNR) Digitale Bildstabilisierung (DIS) Aus/Ein Intelligent Video FIX/BEW, Zaun Etc. Funktion: Detail, Rückw (H/V), Posi/Nega Horizontal 600 TV Reihen Aufl...
  • Seite 104 Angaben Menüpunkte Untermenüpunkte SCC-B5331P/SCC-B5333P/SCC-B5335P Kameratyp CCTV-Kamera Gerät 1/3” Super-HAD IT CCD Bild Gesamt 795 x 596 Pixel Effektiv 752 x 582 System Interlace Abtastzeile 625 Zeilen Frame 25 Frames/1 Sekunde Bildzerlegung Internal Mode 15,625 Hz Horizontale Frequenz Line-lock Mode 15,625 Hz Internal Mode 50 Hz Vertikale...
  • Seite 105 Angaben Menüpunkte Untermenüpunkte SCC-B5331P/SCC-B5333P/SCC-B5335P Line Lock Aus/Ein (Phasensteuerung) Kamera ID Aus/Ein (Max. 54ea/2Linien) Weissabgleich ATW1/ATW2/AWC/3200K/5600K Digitale Rauschunterdrückung Aus/Ein (Anwendbar 3D + 2D) (DNR) Digitale Bildstabilisierung (DIS) Aus/Ein Intelligent Video FIX/BEW, Zaun Etc. Funktion Detail, Rückw (H/V), Posi/Nega Horizontal 600 TV Reihen Aufl...
  • Seite 106: Korrekte Entsorgung Von Altgeräten (Elektroschrott)

    Korrekte Entsorgung von Altgeräten (Elektroschrott) (In den Ländern der Europäischen Union und anderen europäischen Ländern mit einem separaten Sammelsystem) Die Kennzeichnung auf dem Produkt, Zubehörteilen bzw. auf der dazugehörigen Dokumentation gibt an, dass das Produkt und Zubehörteile (z. B. Ladegerät, Kopfhörer, USB-Kabel) nach ihrer Lebensdauer nicht zusammen mit dem normalen Haushaltsmüll entsorgt werden dürfen.
  • Seite 107 SCC-B5331 SCC-B5333 SCC-B5335 CÁMARA DOMO DIGITAL A COLOR Manual del usuario imagine las posibilidades Gracias por adquirir este producto Samsung. Para recibir un servicio más completo, registre su producto en www.samsungsecurity.com...
  • Seite 108: Información De Seguridad

    Información de seguridad PRECAUCIÓN NO ABRIR RIESGO DE SUFRIR UNA DESCARGA ELÉCTRICA PRECAUCIÓN: PARA REDUCIR EL RIESGO DE SUFRIR UNA DESCARGA ELÉCTRICA, NO EXTRAIGA LA CUBIERTA POSTERIOR. DENTRO NO HAY PIEZAS QUE PUEDAN SER REPARADAS POR EL USUARIO. REMITA EL APARATO A PERSONAL DE MANTENIMIENTO CUALIFICADO.
  • Seite 109 Si este producto deja de funcionar con normalidad, póngase en contacto con el servicio técnico más cercano. Nunca intente desmontar o modifi car este producto de ninguna manera. (SAMSUNG no se hace responsable de los problemas producidos por modifi caciones no autorizadas o por intentos de reparaciones.) Al limpiar el producto, no rocíe sus piezas directamente con agua.
  • Seite 110 Información de seguridad PRECAUCIÓN No deje objetos sobre el producto ni aplique una fuerte presión sobre él. Manténgalo lejos de lugares sujetos a demasiadas vibraciones o a interferencias magnéticas. No lo instale en lugares con temperaturas elevadas (más de 50°C), temperaturas bajas(menos de -10°C) o humedad elevada.
  • Seite 111 instrucciones de seguridad importantes Lea estas instrucciones. Consérvelas. Preste atención a todas las advertencias. Siga todas las instrucciones. No utilice este aparato cerca del agua. Límpielo únicamente con un paño seco. No obstruya ninguna abertura de ventilación. Instale el aparato siguiendo las instrucciones del fabricante.
  • Seite 112 Índice general Introducción Características Producto Y Accesorios Piezas y funciones Instalación Antes de la instalación Procedimiento de instalación Ajuste de la dirección de la cámara Cómo utilizar el menú OSD Utilización de los iconos del menú Menú principal Profi le Confi...
  • Seite 113: Características

    Introducción CARACTERÍSTICAS ❖ Alta resolución • Esta cámara ha hecho realidad la alta resolución de 600 líneas utilizando el procesamiento de la imagen digital de primera calidad y tecnologías de algoritmos especiales. ❖ Detección y seguimiento inteligente de movimiento • Se trata de una función inteligente que detecta automáticamente el movimiento de un objeto.
  • Seite 114: Producto Y Accesorios

    Introducción ❖ Comunicación por cable coaxial • Se trata de una función de control demoro que solapa el cable coaxial (para una transferencia de señal de vídeo) con la señal de control. Durante la instalación o en reparaciones, ayuda a controlar el controlador de comunicación (opcional) sin cableado adicional.
  • Seite 115: Nombre De Los Componentes Y Funciones

    Introducción NOMBRE DE LOS COMPONENTES Y FUNCIONES 1. Cubierta tipo domo: Cubre la lente yel cuerpo principal, ❖ Componentes de la cámara protegiéndolos. 2. Cuerpo principal: Incluye una lenta, un cuadro de control, una placa PCI, tornillos y similares. 3. Cierre: Utilizado para abrir o cerrar la cubierta tipo domo.
  • Seite 116 Introducción ❖ Ajuste de los conmutadores • Conmutador de confi guración Este interruptor se utiliza para defi nir la función o la propiedad. Cuando se pulsa este interruptor durante al menos 2 segundos, aparece el MENU PRI. (izquierda/derecha) : Pulsando este conmutador hacia la izquierda o derecha, se desplazará a la izquierda o derecha por el menú...
  • Seite 117: Instalación

    Instalación ANTES DE LA INSTALACIÓN Antes de la instalación debe leer las siguientes advertencias. • Debe comprobar si la ubicación de la cámara (techo o pared) puede aguantar cinco veces el peso de la cámara. • Evite que el cable se quede atrapado en lugares inadecuados o que se dañe la cubierta de la línea eléctrica.
  • Seite 118: Ajuste De La Dirección De La Cámara

    Instalación ❶ Pulse el botón Cierre que se encuentra en la parte inferior de la cámara y retire la Cubierta tipo domo del Cuerpo principal ayudándose con la otra mano. Podrá ver el Cuerpo principal y la Cubierta interior. ❷ Para instalar y ajustar la cámara, primero ha de quitar la Cubierta interior. Para quitar la Cubierta interior del Cuerpo principal, coloque un destornillador largo y fi...
  • Seite 119 Instalación ADJUSTING THE CAMERA DIRECTION Cuando la cámara ya está colocada en el techo se puede ajustar el ángulo de visión de la cámara. La cámara se puede girar de izquiera a derecho o de derecha a izquierda (Panorámica) y se puede modifi car la inclinación de la cámara hacia adelante y hacia atrás (Inclinación).
  • Seite 120: Cómo Utilizar El Menú Osd

    Cómo utilizar el menú OSD UTILIZACIÓN DE LOS ICONOS MENÚ PRINCIPAL DEL MENÚ MENU PRI. • (SALIR) PERFIL AJ CAMARA Sale del ajuste del menú. INTEL. Antes de salir del ajuste del menú, seleccione ZONA PRIV GRAB para guardar los ajustes o seleccione SAL. OTRO AJ INF.
  • Seite 121: Profi Le

    Cómo utilizar el menú OSD PROFILE PERFIL ESTAND LUZ FONDO DIA/NOCHE JUEGOS PERS. En el menú PERFIL, puede confi gurar al mismo tiempo los siguientes ajustes de cámara. Menú de AJ CAMARA ESTAND LUZ FONDO DIA/NOCHE JUEGOS Menú Submenús anterior IRIS LENT NIVEL...
  • Seite 122 Cómo utilizar el menú OSD Menú de AJ CAMARA ESTAND LUZ FONDO DIA/NOCHE JUEGOS Menú Submenús anterior BAL. BL DIA/NOCHE DIA/NOCHE MODO ATW2 ATW1 ATW1 ATW1 ATW1 AZUL NOCHE Ajuste de usuario Ajuste de usuario Ajuste de usuario BRILLO permitido permitido permitido MODO...
  • Seite 123: Confi Guración De La Cámara

    Cómo utilizar el menú OSD CONFIGURACIÓN DE LA CÁMARA Confi gure las funciones generales del módulo de cámara de zoom. Utilice el interruptor para seleccionar una AJ CAMARA opción de menú. ID CAMARA IRIS (AV RAP)--- ❖ ID CAMARA [NO, SÍ] OBT.
  • Seite 124 Cómo utilizar el menú OSD ❖ • ELC (Control electrónico de luz) [NO, MUY BAJA, BJ, INT, ALTO, MUY ALTA, ① Si pulsa el interruptor SETUP con un USU., FIJA] submenú de ALC seleccionado, aparecerá la pantalla apropiada. El menú AGC (Control automático de ganancia) se utiliza para defi...
  • Seite 125 Cómo utilizar el menú OSD escena de bajo contraste, seleccione AV RAP AGC FIJO mientras selecciona S.LENTO para un objeto que NIVEL [01] apenas se mueva con las mismas condiciones de luz.  Nota : – Si el menú DIA/NOCHE de AJ CAMARA se defi ne en AUTO, se desactivará...
  • Seite 126 Cómo utilizar el menú OSD  Nota : totalmente el iris en una escena de bajo contraste como en modo ELC. Cuando vuelve a recuperar el Si el menú OBT. se defi ne en el modo de obturador – brillo, cambiará al modo de obturador electrónico electrónico fi...
  • Seite 127 Cómo utilizar el menú OSD ❖ DIA/NOCHE [DIA,NOCHE,AUTO,EXT] AUTO CONT. • DIA NOCHE BRILLO Si se defi ne en DIA, se fi jará en modo DIA TIEMPO PERM independientemente de las condiciones ambientales. NOCHE DIA BRILLO • NOCHE TIEMPO PERM AREA MASC Si se defi...
  • Seite 128 Cómo utilizar el menú OSD El menú AREA MASC se utiliza para evitar • un cambio de modo no intencionado o la En modo DIA, puede defi nir los valores de color imposibilidad de determinar el cambio debido a de ROJ y AZUL. La pantalla mostrará los colores la existencia de una fuente de luz puntual alta por según los ajustes realizados.
  • Seite 129: Zoom Digital

    Cómo utilizar el menú OSD • 5600K : defi ne la temperatura del color en 5600K BAL. BL – ROJ : ajusta la intensidad del color rojo. DIA/NOCHE NOCHE BRILLO – AZUL : ajusta la intensidad del color azul. MODO [00]----I---- –...
  • Seite 130 Cómo utilizar el menú OSD  ❖ Nota : POSI/NEGA [+, -] Si el factor de zoom digital se defi ne en un valor mayor que 1x, – Genera la salida tal como es o refl eja la señal de se desactivará...
  • Seite 131: Inteligencia

    Cómo utilizar el menú OSD INTELIGENCIA • CERCA Esto es para detectar si un objeto en movimiento pasa a través de la LIN. o AREA especifi cada. INTEL. En una situación en la que se detecte un objeto AVANZADO en movimiento en un análisis de fotogramas AREA MASC 2 3 4 anteriores y actuales cuyo movimiento se solape...
  • Seite 132 Cómo utilizar el menú OSD - Cómo defi nir la línea - Cómo defi nir el área LINEA AREA NIVEL PIXEL NIVEL PIXEL <TAM> <PUNTO> <UBIC.> DIRECC. ① Si pulsa el interruptor SETUP con la opción ① Si pulsa el interruptor SETUP con la opción LINEA defi...
  • Seite 133 Cómo utilizar el menú OSD Las funciones de CERCA, PIP, DIS y ZOOM DIGITAL (si el AREA MASC factor de zoom digital se defi ne en un valor mayor que 1x) no se pueden utilizar simultáneamente. <TAM> <UBIC.> En los límites del AREA y LIN., puede producirse un error –...
  • Seite 134: Confi Guración De La Zona Privada

    Cómo utilizar el menú OSD CONFIGURACIÓN DE LA ZONA Utilice el interruptor para seleccionar entre PRIV. 1 a 12. PRIVADA Seleccione uno entre PRIV. 1~12 y pulse el interruptor SETUP para confi rmar el ajuste. Puede especifi car un ZONA PRIV píxel que se mueva conforme cambie el NIVEL PIXEL para ajustar la posición.
  • Seite 135: Otros Ajustes

    Cómo utilizar el menú OSD - Cómo defi nir el punto OTROS AJUSTES Puede defi nir la posición de los 4 puntos. OTRO AJ ① Si pulsa el interruptor SETUP en <PUNTO>, ESTAND. FABRICA verá los puntos disponibles en la ZONA PRIV. COLOR OSD Cada vez que pulse el interruptor SETUP, se moverán los puntos disponibles.
  • Seite 136: Información Del Sistema

    Cómo utilizar el menú OSD ❖ INFORMACIÓN DEL SISTEMA Tabla de confi guración inicial • Confi guración de cámara INF. SIST TIPO 3_FIX_NOR_P ID CAMARA NO. SERIE 000000000000000 CAMERA VER. 0.50_090101 IRIS MUY ALTA (AV RAP) OBT. Puede comprobar información del sistema como NO.
  • Seite 137: Especifi Caciones

    Especifi caciones ESPECIFICACIONES Opciones Subopciones SCC-B5331N/SCC-B5333N/SCC-B5335N Tipo de cámara Cámara CCTV Dispositivo Super HAD IT CCD de 1/3 pulg. Imagen Totales 811 x 508 Píxeles Efectivos 768 x 494 Sistema Interlazado Exploración de 525 líneas línea Fotograma 30 fotogramas/1seg. Modo interno 15.734 Hz Exploración Frecuencia...
  • Seite 138 Salida de vídeo VBS 1.0Vp-p, 75 Ω Índice S/N Índice S/N Aprox. 52 dB SCC-B5331 : f=3.8mm F 2.0 Objetivo Tipo de control de lente SCC-B5333 : f=3.0mm F2.0 SCC-B5335 : f=8.0mm F2.0 0 ~ 340°(120° en dirección CW (sentido de agujas del reloj), Rango 220°...
  • Seite 139 Especifi caciones Opciones Subopciones SCC-B5331P/SCC-B5333P/SCC-B5335P Tipo de cámara Cámara CCTV Dispositivo Super HAD IT CCD de 1/3 pulg. Imagen Totales 795 x 596 Píxeles Efectivos 752 x 582 Sistema Interlazado Exploración de 625 líneas línea Fotograma 25 fotogramas/1seg Modo interno 15.625 Hz Exploración Frecuencia...
  • Seite 140 Salida de vídeo VBS 1.0Vp-p, 75 Ω Índice S/N Índice S/N Aprox. 52 dB SCC-B5331 : f=3.8mm F 2.0 Objetivo Tipo de control de lente SCC-B5333 : f=3.0mm F2.0 SCC-B5335 : f=8.0mm F2.0 0 ~ 340°(120° en dirección CW (sentido de agujas del reloj), Rango 240°...
  • Seite 141: Eliminación Correcta De Este Producto

    Eliminación correcta de este producto (Residuos de aparatos eléctricos y electrónicos) (Aplicable en la Unión Europea y en países europeos con sistemas de recogida selectiva de residuos) La presencia de este símbolo en el producto, accesorios o material informativo que lo acompañan, indica que al finalizar su vida útil ni el producto ni sus accesorios electrónicos (como el cargador, cascos, cable USB) deberán eliminarse junto con otros residuos domésticos.
  • Seite 142 SCC-B5331 SCC-B5333 SCC-B5335 VIDEOCAMERA DOME DIGITALE A COLORI Guida Utente immagina le possibilità Grazie per avere acquistato questo prodotto Samsung. Per ricevere un servizio più completo, registrare il prodotto all’indirizzo www.samsungsecurity.com...
  • Seite 143: Informazioni Sulla Sicurezza

    Informazioni Sulla Sicurezza ATTENZIONE RISCHIO DI SCOSSA ELETTRICA NON APRIRE ATTENZIONE: PER RIDURRE IL RISCHI DI SCOSSA ELETTRICA, NON RIMUOVERE IL COPERCHIO (O IL PANNELLO POSTERIORE). ALL’INTERNO NON VI SONO PARTI CHE L’UTENTE POSSA RIPARARE. RIVOLGERSI A PERSONALE QUALIFICATO. Questo simbolo indica la presenza di una tensione pericolosa all’interno del dispositivo, che può...
  • Seite 144 Se il prodotto non funzionasse in modo normale, mettersi in contatto con il centro di assistenza più vicino. Non smontare o riparare in alcun modo questo prodotto. (SAMSUNG non è responsabile per problemi causati da modifi che non autorizzate o tentativi di riparazione) Quando si pulisce, non spruzzare acqua direttamente sulle parti del prodotto.
  • Seite 145 Informazioni Sulla Sicurezza ATTENZIONE Non far cadere oggetti sul prodotto ed evitare colpi forti. Mantenere lontano da luoghi sottoposti ad eccessive vibrazioni o ad interferenze magnetiche. Non istallare in luoghi sottoposti ad alte temperature (più di 50°C), basse temperature temperature (meno di -10°C), o grande umidità. Ciò può causare incendi o scosse elettriche. Se si desidera modifi...
  • Seite 146: Importanti Istruzioni Per La Sicurezza

    Importanti Istruzioni per la Sicurezza Leggere queste istruzioni. Conservare queste istruzioni. Rispettare tutti gli avvertimenti. Seguire tutte le istruzioni. Non utilizzare questo apparecchio vicino all’acqua. Pulire solo con un panno asciutto. Non bloccare nessuna apertura di ventilazione. Istallare seguendo le istruzioni del fabbricante. Non istallare vicino a fonti di calore quali caloriferi, stufe o altri prodotti (compresi gli amplifi...
  • Seite 147 Sommario Introduzione Caratteristiche Prodotto & Accessori Nomi e funzioni delle parti Installazione Prima dell’istallazione Procedura d’istallazione Regolare la direzione della telecamera Come utilizzare il menu OSD Utilizzo delle icone nel menu Menu principale Profi lo Impostazione videocamera Intelligenza Impostazione zona privata Altra impostazione Informazioni di sistema Lingua...
  • Seite 148: Caratteristiche

    Introduzione CARATTERISTICHE ❖ Alta risoluzione • Questa telecamera dispone di una risoluzione pari a 600 linee, utilizzando una nuova tecnologia applicata al processing dell’immagine completamente digitale e una speciale tecnologia algoritmica. ❖ Rilevazione e tracciamento intelligenti del movimento • Si tratta di una funzione intelligente in grado di rilevare automaticamente il movimento di un oggetto. È possibile impostare una barriera virtuale in modo che venga visualizzato un allarme se un oggetto passa/entra/esce dalla barriera o dall’area virtuale.
  • Seite 149: Prodotto & Accessori

    Introduzione ❖ Comunicazione via cavo coassiale • Si tratta di una funzione di controllo remota che sovrappone il cavo coassiale (per il trasferimento del segnale video) al segnale di controllo. In caso di installazione o riparazione aiuta a verifi care il controller di comunicazione (opzionale) senza dover aggiungere cavi.
  • Seite 150: Componenti Della Telecamera

    Introduzione Componenti della telecamera ❖ La telecamera si compone delle seguenti parti: 1.Involucro a cupola: Copre l’obiettivo e il corpo principale per proteggerli. 2.Corpo principale: Comprende un obiettivo, una centralina, una centralina PCB, viti, eccetera. 3.Chiusura: Utilizzata per aprire o chiudere l’involucro a cupola.
  • Seite 151 Introduzione ❖ Selettori di impostazione • Tasto impostazione Questo interruttore si usa per impostare una funzione o una proprietà. Se si preme questo interruttore per almeno 2 secondi, viene visualizzato il MENU PRINCIPALE. ([Sinistra/Destra) : Premendo il tasto destra o sinistra, è possibile muoversi a destra o a sinistra nel menu o cambiare il valore visualizzato.
  • Seite 152: Installazione

    Installazione Istallare la telecamera Prima d’istallare la telecamera, leggere le seguenti avvertenze: Controllare che il luogo di ubicazione (soffi tto o parete) possa sopportare cinque volte il peso della telecamera. Evitare che il cavo si impigli o che venga danneggiata la copertura dei cavi elettrici. Ciò può provocare guasti o incendi.
  • Seite 153 Installazione ❶ Premere il pulsante Chiusura sul fondo della telecamera e rimuovere l’involucro a cupola dal Corpo principale, utilizzando l’altra mano. Il Corpo principale e l’Involucro interno saranno quindi visibili. ❷ Per istallare e regolare la telecamera, rimuovere l’Involucro interno. Per rimuovere l’involucro interno dal Copro principale, inserire un cacciavite lungo e sottile nella Chiusura aletta e premere verso l’esterno per rimuovere l’involucro.
  • Seite 154: Regolare La Direzione Della Telecamera

    Installazione Regolare la direzione della telecamera Quando la telecamera è fi ssata al soffi tto, si può regolare l’angolo visuale della telecamera. Si può ruotare la telecamera verso sinistra o destra (Panning) e cambiare l’inclinazione verso l’alto e verso il basso (Tilting). Nel caso di panning, il limite di rotazione della telecamera è...
  • Seite 155: Come Utilizzare Il Menu Osd

    Come utilizzare il menu OSD UTILIZZO DELLE ICONE NEL MENU MENU PRINCIPALE • (ESCI) MENU PRINCIPALE Permette di uscire dall’impostazione del menu. PROFILO Prima di uscire dall’impostazione del menu, PROG CAMERA INTELLIGENZA selezionare SALVA per salvare le impostazioni o ZONA PRIVACY ABBANDONA per annullarle.
  • Seite 156 Come utilizzare il menu OSD PROFILO PROFILO STANDARD CONTROLUCE GIORNO/NOTTE GIOCO PERS. Nel menu PROFILO, è possibile confi gurare subito le seguenti impostazioni della videocamera. Menu PROG CAMERA STANDARD CONTROLUCE GIORNO/NOTTE GIOCO Menu Sottomenu precedente IRIS OBBIETTIVO OBIET. DC OBIET. DC OBIET.
  • Seite 157 Come utilizzare il menu OSD Menu PROG CAMERA STANDARD CONTROLUCE GIORNO/NOTTE GIOCO Menu Sottomenu precedente BIL BIANCO GIORNO GIORNO/NOTTE GIORNO GIORNO/NOTTE GIORNO GIORNO MODO ATW2 ATW1 ATW1 ATW1 ATW1 ROSSO NOTTE Possibile Possibile Possibile LUMINOSITÀ impostazione utente impostazione utente impostazione utente MODO ATW2 ATW2...
  • Seite 158: Impostazione Videocamera

    Come utilizzare il menu OSD IMPOSTAZIONE VIDEOCAMERA Impostare le funzioni generali del modulo zoom della videocamera. Usare l’interruttore per selezionare una PROG CAMERA voce di menu. ID VIDEOCAMERA ❖ ID VIDEOCAMERA [OFF, ON] IRIS ATTIVITÀ (M.VELOC)--- ID VIDEOCAMERA OTTURATORE ALTA SENS. AUTO X4 ABCDEFGHIJKLMNOPQRSTUVWXYZ0 SENZA SFARF.
  • Seite 159 Come utilizzare il menu OSD ① Se si preme l’interruttore SETUP quando è ❖ AGC [OFF, MOLTO BASSO, BASSO, MID, ALTO, selezionato un sottomenu basato su ELC, MOLTO ALTO, UTIL, FIX] viene visualizzata la relativa schermata. Il menu AGC (Controllo Automatico del Guadagno) viene usato per impostare il livello AGC della videocamera.
  • Seite 160 Come utilizzare il menu OSD Nel modo UTIL è possibile scomporre il livello in Per il livello AGC è possibile scegliere tra M.LENTO, 16 passi da MOLTO BASSO a MOLTO ALTO a LENTO, NORMA, VELOC e M.VELOC. seconda delle preferenze. Se si controlla un oggetto in movimento veloce in una scena a basso contrasto, selezionare M.VELOC;...
  • Seite 161 Come utilizzare il menu OSD  Nota : L’otturatore elettronico ad alta velocità automatico funziona come l’otturatore ad alta velocità Se il menu OTTURATORE è impostato sul modo – fi sso in una scena ad alto contrasto, ma mette otturatore elettronico fi sso, il menu ALTA SENS. non è disponibile.
  • Seite 162 Come utilizzare il menu OSD ❖ GIORNO/NOTTE [GIORNO,NOTTE,AUTO,EST] AUTO BURST • GIORNO GIORNO NOTTE Se si effettua l’impostazione su GIORNO, viene LUMINOSITÀ TEMPO DI SCAN fi ssato sul modo GIORNO indipendentemente NOTTE GIORNO dalle condizioni ambientali. LUMINOSITÀ TEMPO DI SCAN •...
  • Seite 163: Bil Bianco

    Come utilizzare il menu OSD impedire la commutazione involontaria da un • GIORNO modo all’altro oppure l’incapacità di determinare Nel modo GIORNO è possibile impostare i valori il momento della commutazione a causa di dei colori di ROSSO e BLU. La schermata viene un’intensa sorgente luminosa di notte.
  • Seite 164: Zoom Digitale

    Come utilizzare il menu OSD • 5600K : Impostare la temperatura del colore su 5600K BIL BIANCO – ROSSO : Regola l’intensità del colore rosso. GIORNO/NOTTE NOTTE LUMINOSITÀ – BLU : Regola l’intensità del colore blu. MODO ROSSO [00]----I---- – GUAD.
  • Seite 165 Come utilizzare il menu OSD  ❖ Nota : POSI/NEGA [+, -] Se la percentuale dello zoom digitale impostata è maggiore di – Emissione così com’è o rifl essione del segnale 1x, la funzione BARRIERA viene disattivata. della luminosità del video. La funzione ZOOM DIGITALE ingrandisce gli stessi pixel, con un possibile deterioramento della qualità.
  • Seite 166: Intelligenza

    Come utilizzare il menu OSD INTELLIGENZA • BARRIERA Serve per rilevare se un oggetto in movimento passa attraverso la LINEA o la ZONA specifi cate. INTELLIGENZA Nella condizione in cui un oggetto in movimento ATTIVITÀ AVANZATE viene rilevato in un’analisi dei fotogrammi AREA MASCHERA 2 3 4 precedenti e correnti, il cui movimento si...
  • Seite 167 Come utilizzare il menu OSD - Come impostare la linea schermo viene visualizzata la direzione del rilevamento basata sui due punti defi niti. LINEA - Come impostare la zona LIVELLO PIXEL <PUNTO> ZONA DIREZIONE LIVELLO PIXEL <DIMENSIONE> <POSIZIONE> ① Se si preme l’interruttore SETUP quando l’opzione LINEA è...
  • Seite 168 Come utilizzare il menu OSD  Nota : AREA MASCHERA Se si imposta LINEA di BARRIERA su ON, PRIVACY 12 – non sarà disponibile. <DIMENSIONE> <POSIZIONE> Le funzioni di BARRIERA, PIP, DIS e ZOOM DIGITALE (se la percentuale dello zoom digitale impostata è maggiore di 1x) non possono essere usate contemporaneamente.
  • Seite 169: Impostazione Zona Privata

    Come utilizzare il menu OSD IMPOSTAZIONE ZONA PRIVATA Usare l’interruttore per selezionare una PRIVACY tra 1 e 12. Selezionare una PRIVACY tra 1 e 12 e premere ZONA PRIVACY l’interruttore SETUP per confermare l’impostazione. È possibile specifi care il pixel da spostare mentre si cambia LIVELLO PIXEL per impostare la posizione.
  • Seite 170: Altra Impostazione

    Come utilizzare il menu OSD ❖ - Come impostare la posizione IMPOST. PREDEF. È possibile spostare la posizione dell’intera zona. Vengono ripristinate tutte le impostazioni predefi nite. ① Premendo l’interruttore SETUP in Tuttavia le impostazioni PROTOCOLLO, <POSIZIONE>, è possibile spostare l’intera VELOCITÁ, INDIRIZZO e LINGUA non vengono posizione della zona privacy.
  • Seite 171: Lingua

    Come utilizzare il menu OSD ❖ LINGUA Tabella di confi gurazione iniziale • Confi gurazione videocamera LINGUA ID VIDEOCAMERA ENGLISH FRANÇAIS IRIS DEUTSCH ESPAÑOL MOLTO ALTO ITALIANO ATTIVITÀ (M.VELOC) OTTURATORE La videocamera supporta 5 lingue diverse. ALTA SENS. AUTO x4 Selezionare una lingua preferita.
  • Seite 172: Specifi Che

    Specifi che SPECIFICHE Voci Sottovoci SCC-B5331N/SCC-B5333N/SCC-B5335N Tipo di videocamera Videocamera CCTV Dispositivo CCD Super-HAD IT da 1/3” Immagine Totali 811 x 508 Pixel Effettivi 768 x 494 Sistema Interlacciato Linee di 525 linee scansione Fotogramma 30 fotogr./sec Modo interno 15734 Hz Scansione Frequenza Modo di...
  • Seite 173 Uscita video VBS 1.0Vp-p, 75 Ω Rapporto S/N Rapporto S/N Circa 52 dB SCC-B5331 : f=3.8mm F 2.0 Obiettivo Tipo di unità dell’obiettivo SCC-B5333 : f=3.0mm F2.0 SCC-B5335 : f=8.0mm F2.0 Raggio: da 0 a 340° (220 gradi in senso orario e 120...
  • Seite 174 Specifi che Voci Sottovoci SCC-B5331P/SCC-B5333P/SCC-B5335P Tipo di videocamera Videocamera CCTV Dispositivo CCD Super-HAD IT da 1/3” Immagine Totali 795 x 596 Pixel Effettivi 752 x 582 Sistema Interlacciato Linee di 625 linee scansione Fotogramma 25 fotogr./sec Modo interno 15625 Hz Scansione Frequenza Modo di...
  • Seite 175 Uscita video VBS 1.0Vp-p, 75 Ω Rapporto S/N Rapporto S/N Circa 52 dB SCC-B5331 : f=3.8mm F 2.0 Obiettivo Tipo di unità dell’obiettivo SCC-B5333 : f=3.0mm F2.0 SCC-B5335 : f=8.0mm F2.0 Raggio: da 0 a 340° (220 gradi in senso orario e 120...
  • Seite 176: Corretto Smaltimento Del Prodotto

    Corretto smaltimento del prodotto (rifiuti elettrici ed elettronici) (Applicabile nell’Unione Europea e in altri paesi europei con sistema di raccolta differenziata) Il marchio riportato sul prodotto, sugli accessori o sulla documentazione indica che il prodotto e i relativi accessori elettronici (quali caricabatterie, cuffia e cavo USB) non devono essere smaltiti con altri rifiuti domestici al termine del ciclo di vita.

Inhaltsverzeichnis