Herunterladen Inhalt Inhalt Diese Seite drucken
Samsung SCC-B5367 Benutzerhandbuch

Samsung SCC-B5367 Benutzerhandbuch

Digitale farbbild-kuppelkamera
Vorschau ausblenden Andere Handbücher für SCC-B5367:
Inhaltsverzeichnis

Werbung

Verfügbare Sprachen
  • DE

Verfügbare Sprachen

  • DEUTSCH, seite 73
All manuals and user guides at all-guides.com
DIGITAL COLOR DOME
imagine
Thank you for purchasing this Samsung product.
To receive more complete service,
please register your product at
www.samsungsecurity.com
CAMERA
user manual
the possibilities
SCC-B5367
SCC-B5369

Werbung

Inhaltsverzeichnis
loading

Inhaltszusammenfassung für Samsung SCC-B5367

  • Seite 1 All manuals and user guides at all-guides.com SCC-B5367 SCC-B5369 DIGITAL COLOR DOME CAMERA user manual imagine the possibilities Thank you for purchasing this Samsung product. To receive more complete service, please register your product at www.samsungsecurity.com...
  • Seite 2: Safety Information

    All manuals and user guides at all-guides.com Safety information CAUTION RISK OF ELECTRIC SHOCK. DO NOT OPEN CAUTION: TO REDUCE THE RISK OF ELECTRIC SHOCK, DO NOT REMOVE COVER (OR BACK) NO USER SERVICEABLE PARTS INSIDE. REFER SERVICING TO QUALIFIED SERVICE PERSONNEL. This symbol indicates that dangerous voltage consisting a risk of electric shock is present within this unit.
  • Seite 3 fi re or electric shock. If this product fails to operate normally, contact the nearest service center. Never disassemble or modify this product in any way. (SAMSUNG is not liable for problems caused by unauthorized modifi cations or attempted repair.) When cleaning, do not spray water directly onto parts of the product.
  • Seite 4 All manuals and user guides at all-guides.com Safety information WARNING Read these instructions. Keep these instructions. Heed all warnings. Follow all instructions. Do not use this apparatus near water. Clean only with dry cloth. Do not block any ventilation openings. Install in accordance with the manufacturer’s instructions. Do not install near any heat sources such as radiators, heat registers, or other apparatus (including amplifi...
  • Seite 5: Inhaltsverzeichnis

    All manuals and user guides at all-guides.com Contents Introduction Features Product & Accessories Part Names and Functions Installation Before installation Installation procedure Adjusting the camera direction How to use OSD Menu Using Icons in the Menu Main Menu Profi le Camera Setup Intelligence Privacy Zone Setup...
  • Seite 6: Features

    All manuals and user guides at all-guides.com Introduction FEATURES ❖ High Resolution • This camera has realized high resolution of 600 lines using the top-notch full digital image processing and special algorithm technologies. ❖ VPS(Virtual Progressive Scan) • This is an advanced technology that reproduces a sharp progressive image. This is appropriate to high quality recording and fi...
  • Seite 7: Osd(On Screen Display) Menu

    All manuals and user guides at all-guides.com Introduction ❖ Output Signal Setting • You can set the following Video output signals: Image reversion (Horizontal, Vertical, or both), Privacy, Horizontal/Vertical profi ling, and digital zooming. ❖ OSD(On Screen Display) Menu • OSD menu is provided to display the status of camera and to confi...
  • Seite 8: Part Names And Functions

    All manuals and user guides at all-guides.com Introduction PART NAMES AND FUNCTIONS ❖ Components of your camera 테스트 모니터 출력 Test moniter output 렌즈 Lens 전원 커넥터 Power connector 비디오 커넥터 Video connector 8 – DIGITAL COLOR DOME CAMERA...
  • Seite 9 All manuals and user guides at all-guides.com Introduction Name Brief description Cover dome Covers the inner cover, lens, and main body to protect them. Inner cover Covers the main body to protect it. Push a long thin screwdriver into its narrow spot and press it outward when you want to Wing locker remove the inner cover.
  • Seite 10: Setting Switches

    All manuals and user guides at all-guides.com Introduction ❖ Setting switches • SETUP Switch This switch is used to set the function or property. When this switch is pressed for at least 2 seconds, the MAIN MENU appears. (Left/Right) : By pressing this switch left or right, you can move left or right on the menu or change the displayed value.
  • Seite 11: Installation

    All manuals and user guides at all-guides.com Installation BEFORE INSTALLATION Before installing your camera, you have to read the following cautions. • You have to check whether the location (ceiling or wall) can bear fi ve times the weight of your camera. •...
  • Seite 12 All manuals and user guides at all-guides.com Installation ❶ Press the Locker button on the bottom of your camera and remove the Cover dome from the Main body using the other hand. The Main body and Inner cover will be exposed to you. ❷...
  • Seite 13: Adjusting The Camera Direction

    All manuals and user guides at all-guides.com Installation ADJUSTING THE CAMERA DIRECTION When the camera is fi xed on the ceiling, you can adjust the camera viewing angle. You can rotate your camera leftward or rightward (Panning), and can change the slope of your camera upward or downward (Tilting). In case of panning, the rotation limit of your camera is set to 355 degree (100 degree clockwise and 255 degree counterclockwise).
  • Seite 14: How To Use Osd Menu

    All manuals and user guides at all-guides.com How to use OSD Menu USING ICONS IN THE MENU MAIN MENU • (EXIT) MAIN MENU Exits the menu setting. PROFILE Before you exits the menu setting, select SAVE to CAMERA SET INTELLIGENCE save your settings, or select QUIT to cancel.
  • Seite 15 All manuals and user guides at all-guides.com How to use OSD Menu PROFILE PROFILE STANDARD BACKLIGHT DAY/NIGHT GAMING CUSTOM In the PROFILE menu, you can confi gure the following camera settings at once. CAMERA SET Menu STANDARD BACKLIGHT DAY/NIGHT GAMING Previous Sub-menus Menu...
  • Seite 16: Backlight

    All manuals and user guides at all-guides.com How to use OSD Menu CAMERA SET Menu STANDARD BACKLIGHT DAY/NIGHT GAMING Previous Sub-menus Menu DAY/NIGHT AUTO AUTO AUTO NIGHT BURST WHITE BAL DAY/NIGHT DAY/NIGHT MODE ATW2 ATW1 ATW1 ATW1 ATW1 BLUE NIGHT User setting User setting User setting...
  • Seite 17: Camera Setup

    All manuals and user guides at all-guides.com How to use OSD Menu CAMERA SETUP Setup the general functions of zoom camera module. Use the switch to select a menu item. CAMERA SET ❖ CAMERA ID [OFF, ON] CAMERA ID CAMERA ID IRIS MOTION (F.FAST)---...
  • Seite 18 All manuals and user guides at all-guides.com How to use OSD Menu • ALC (Automatic Light Control) If you use an ordinary camera in a scene with an intensive backlight, the object will be ① If you press the SETUP switch with an ALC- displayed dark on the monitor affected by the based sub menu selected, you will see the backlight.
  • Seite 19 All manuals and user guides at all-guides.com How to use OSD Menu ❖ AGC FIX [OFF, VERY LOW, LOW, MID, HIGH, VERY LEVEL [01] HIGH, USER, FIX] The AGC (Auto Gain Control) menu is used to set the AGC level of the camera. When the AGC is active, the camera automatically increases the sensitivity by amplifying the Video signal when the strength of the signal falls below the normal...
  • Seite 20 All manuals and user guides at all-guides.com How to use OSD Menu   Note : Note : If the DAY/NIGHT menu of the CAMERA SET is set to – If the SENS-UP function is set to AUTO, only items of –...
  • Seite 21 All manuals and user guides at all-guides.com How to use OSD Menu ❖ FLICKERLESS [OFF, ON] If you press the SETUP switch with a NIGHT sub menu selected, you will see a menu where you can If set to ON, the shutter speed will be fi xed to set Burst to OFF/ON.
  • Seite 22: White Bal

    All manuals and user guides at all-guides.com How to use OSD Menu HIGH. As you adjust it from HIGH to LOW, the The MASK is only for determining the mode screen switches to black and white mode under switching, and any excessive bright area at night the darker situation.
  • Seite 23 All manuals and user guides at all-guides.com How to use OSD Menu • NIGHT the ambient conditions. The color temperature ranges from approx. 2500K to 9300K. Use the NIGHT mode if you want to set the white balance differently according to the ambient •...
  • Seite 24: Digitalzoom

    All manuals and user guides at all-guides.com How to use OSD Menu changed. DIGITAL ZOOM RATIO [X1.0] ❖ AGC COLOR SUP [LOW , MID, HIGH] < LOCATION > Adjust the color scheme according to the AGC value. ❖ REVERSE [OFF, H, V, H/V] Mirrors video signals horizontally, vertically, or both.
  • Seite 25: Intelligence

    All manuals and user guides at all-guides.com How to use OSD Menu INTELLIGENCE • FENCE This is to detect if a moving object passes through the specifi ed LINE or AREA. INTELLIGENCE In a condition where a moving object is detected MOTION ADVANCED in an analysis of the previous and current frames...
  • Seite 26 All manuals and user guides at all-guides.com How to use OSD Menu ① If you press the SETUP switch with the LINE ② If you change the PIXEL LEVEL for setting option set to ON, you can specify the position the position, specify the pixel that moves by a and detection direction of the line.
  • Seite 27: Privacy Zone Setup

    All manuals and user guides at all-guides.com How to use OSD Menu ❖ MASK AREA [1~4] PRIVACY ZONE SETUP Specify a detection exception area to mask. Select a mask number and specify the size and PRIVACY ZONE position. MASK AREA PRIVACY SET <SIZE>...
  • Seite 28 All manuals and user guides at all-guides.com How to use OSD Menu ① By pressing the SETUP switch in Use the switch to select one from <POSITION>, you can move the overall PRIVACY 1 through 12. position of the privacy zone. Select one from PRIVACY 1~12 and press the ②...
  • Seite 29: Other Set

    All manuals and user guides at all-guides.com How to use OSD Menu OTHER SET SYSTEM INFORMATION OTHER SET SYSTEM INFO FACTORY DEFAULTS TYPE 3_VAR_WDR_N OSD COLOR SERIAL NO. 000000000000000 CAMERA VER. 0.50_090101 ❖ FACTORY DEFAULTS You can check the system information such as SERIAL NO and CAMERA VER.
  • Seite 30 All manuals and user guides at all-guides.com How to use OSD Menu ❖ Initial Confi guration Table • Camera Confi guration CAMERA ID IRIS VERY HIGH MOTION (F.FAST) SHUTTER SENS-UP AUTO x4 FLICKERLESS (OFF) DAY/NIGHT AUTO DIGITAL ZOOM DETAIL AGC COLOR SUP REVERSE POSI/NEGA V-SYNC...
  • Seite 31: Specifi Cations

    All manuals and user guides at all-guides.com Specifi cations SPECIFICATIONS Items Sub-items SCC-B5367N/SCC-5369N Camera Type CCTV Camera (WDR & DAY/NIGHT) Device 1/3” Super-HAD PS CCD Image Total 811 x 508 Pixels Effective 768 x 494 System Interlace/Progressive Scanning Line 525 lines Frame 30frame/1sec Scanning...
  • Seite 32 Auto Iris (DC) Lens Lens Drive Type SCC-B5367 : focal length = 2.5 to 6.0mm / Aperture ratio = F 1.2 SCC-B5369 : focal length = 2.8 to 11.0mm / Aperture ratio = F 1.2 0 ~ 355°(100° in CW(Clockwise) direction, Range 255°...
  • Seite 33 All manuals and user guides at all-guides.com Specifi cations Items Sub-items SCC-B5367P/SCC-5369P Camera Type CCTV Camera (WDR & DAY/NIGHT) Device 1/3” Super-HAD PS CCD Image Total 795 x 596 Pixels Effective 752 x 582 System Interlace/Progressive Scanning Line 625 lines Frame 25frame/1sec Scanning...
  • Seite 34 Auto Iris (DC) Lens Lens Drive Type SCC-B5367 : focal length = 2.5 to 6.0mm / Aperture ratio = F 1.2 SCC-B5369 : focal length = 2.8 to 11.0mm / Aperture ratio = F 1.2 0 ~ 355°(100° in CW(Clockwise) direction, Range 255°...
  • Seite 35: Correct Disposal Of This Product

    All manuals and user guides at all-guides.com Correct Disposal of This Product (Waste Electrical & Electronic Equipment) (Applicable in the European Union and other European countries with separate collection systems) This marking on the product, accessories or literature indicates that the product and its electronic accessories (e.g.
  • Seite 36 All manuals and user guides at all-guides.com SCC-B5367 SCC-B5369 CAMERA DÔME NUMERIQUE COULEUR Manuel d’utilisation Imaginez les possibilités Nous vous remercions d’avoir choisi ce produit Samsung. Pour bénéfi cier d’un service plus complet, veuillez enregistrer votre produit sur le site www.samsungsecurity.com...
  • Seite 37: Informations Relatives À La Sécurité

    All manuals and user guides at all-guides.com Informations relatives à la sécurité ATTENTION RISQUE DE ECHOC ELECTRIQUE NEPAS OUVRIR ATTENTION: POUR REDUIRE LES RISQUES DE CHOCS ELECTRIQUES, NE RETIREZ PAS LE COUVERCLE (OU LA PARTIE ARRIERE) LES PIECES INTERIEURES NE SONT PAS ACCESSIBLES A L’UTILISATEUR. FAITES APPEL AU PERSONNEL DE MAINTENANCE QUALIFIE.
  • Seite 38 Si ce produit ne fonctionne pas normalement, contactez le centre de maintenance le plus proche. Ne jamais démonter ou modifi er le produit de quelque manière que ce soit. (SAMSUNG n’est pas responsable des problèmes causés par des modifi cations ou des tentatives de réparation non autorisées.)
  • Seite 39 All manuals and user guides at all-guides.com Informations relatives à la sécurité MISE EN GARDE Ne pas faire tomber des objets sur le produit ou lui faire subir des chocs. Eloignez le produit des emplacements soumis aux vibrations ou interférences magnétiques excessives. Ne pas installer le produit à...
  • Seite 40: Consignes De Sécurité Importantes

    All manuals and user guides at all-guides.com Consignes de sécurité importantes Veuillez lire ces instructions. Conservez ces instructions. Prêtez attention à tous les avertissements. Veuillez suivre toutes les instructions. N’utilisez pas cet appareil à proximité de l’eau. Nettoyez-le avec un tissu sec. N’obstruez pas les ouvertures de ventilation.
  • Seite 41 All manuals and user guides at all-guides.com Table des matières Introduction Caractéristiques Produit et accessoires Nom des pièces et fonctions Installation Avant l’installation Procédure d’installation Ajuster la direction de la caméra Utilisation du menu OSD Utilisation des icones du Menu Menu principal Profi...
  • Seite 42: Caractéristiques

    All manuals and user guides at all-guides.com Introduction CARACTÉRISTIQUES ❖ Haute résolution • cette caméra permet d’obtenir une haute résolution de 600 lignes à l’aide de ce qui se fait de mieux en matière de traitement entièrement numérique de l’image et des technologies algorithmiques spéciales. ❖...
  • Seite 43: Produit Et Accessoires

    All manuals and user guides at all-guides.com Introduction ❖ Réglage du Signal de sortie • Vous pouvez régler les signaux de sortie vidéo suivants : Inversion de l’image (Horizontale, verticale, ou les deux à la fois), Privée, profi l horizontal/vertical, et zoom numérique. ❖...
  • Seite 44: Nom Des Pièces Et Fonctions

    All manuals and user guides at all-guides.com Introduction NOM DES PIÈCES ET FONCTIONS ❖ Composants de votre caméra 테스트 모니터 출력 Sortie moniteur de test 렌즈 Optique Connecteur 전원 커넥터 d’alimentation 비디오 커넥터 Connecteur vidéo Français –...
  • Seite 45 All manuals and user guides at all-guides.com Introduction N° Brève description Couvercle du dôme Recouvre le couvercle intérieur, l’optique et le corps principal pour les protéger. Couvercle intérieur Recouvre le corps principal pour le protéger. Insérez un long et fi n tourne-vis dans la fente et appuyez si vous désirez retirer le couvercle Verrouilleur de l’aile intérieur.
  • Seite 46 All manuals and user guides at all-guides.com Introduction ❖ Réglage des interrupteurs • Commutateur Réglage Ce sélecteur est utilisé pour le réglage de fonction ou de propriété. Lorsque vous appuyez sur ce sélecteur pendant plusieurs secondes, le MENU PRINCIPAL apparaît. (Gauche/Droite) : En déplaçant ce commutateur à...
  • Seite 47: Installation

    All manuals and user guides at all-guides.com Installation AVANT L’INSTALLATION Avant l’installation de votre caméra, veuillez lire les mises en garde suivantes. • Vous devez vérifi er si le lieu d’installation (plafond ou mur) peut supporter le poids de cinq fois votre caméra. •...
  • Seite 48 All manuals and user guides at all-guides.com Installation ❶ Appuyez sur le bouton de Verrouillage situé sur le bas de votre caméra et retirez le couvercle du dôme du corps principal avec l’autre main. Le corps principal et le couvercle intérieur se présenteront à vous. ❷...
  • Seite 49: Ajuster La Direction De La Caméra

    All manuals and user guides at all-guides.com Installation AJUSTER LA DIRECTION DE LA CAMÉRA Une fois la caméra fi xée au plafond, vous pouvez ajuster son angle de vue. Vous pouvez tourner votre caméra sur la gauche ou sur la droite (Panoramique) et remonter ou descendre son angle (basculement). Pour un panorama, la limite de rotation de la caméra est réglée à...
  • Seite 50: Utilisation Du Menu Osd

    All manuals and user guides at all-guides.com Utilisation du menu OSD UTILISATION DES ICONES DU MENU MENU PRINCIPAL • (QUITTER) MENU PRINCIPAL Quitte le réglage de menu. PROFIL Avant de quitter le réglage de menu, sélectionnez REG CAMERA INTELLIGENCE SAUVER pour sauvegarder vos réglages ou ZONE PRIVEE QUITTER pour annuler.
  • Seite 51 All manuals and user guides at all-guides.com Utilisation du menu OSD PROFIL PROFIL STANDARD RETROECL JOUR/NUIT PERSONNALISE Dans le menu PROFIL, vous pouvez confi gurer immédiatement les réglages de la caméra. Menu REG CAMERA STANDARD RETROECL JOUR/NUIT Menu Sous-menus précédent IRIS OBJECTIF NIVEAU...
  • Seite 52 All manuals and user guides at all-guides.com Utilisation du menu OSD Menu REG CAMERA STANDARD RETROECL JOUR/NUIT Menu Sous-menus précédent AUGMENTER AUTO X4 AUTOx2 AUTO X4 AUTO X4 AUTO X4 SENS. MOYEN MOYEN MOYEN MOYEN MOYEN JOUR/NUIT AUTO AUTO JOUR AUTO JOUR NUIT...
  • Seite 53: Confi Guration Camera

    All manuals and user guides at all-guides.com Utilisation du menu OSD CONFIGURATION CAMERA Confi gurez les fonctions générales du module de zoom de la caméra. Utilisez le sélecteur pour sélectionner un REG CAMERA élément de menu. ID DE CAMERA ❖ ID DE CAMERA [OFF, ON] IRIS...
  • Seite 54 All manuals and user guides at all-guides.com Utilisation du menu OSD ❖ IRIS [ALC] Le menu IRIS permet de régler l’intensité des NIVEAU [00]----I---- RETROECL CJOUR rayons de lumière touchant la caméra. ZONE UTIL • ALC (Contrôle automatique de niveau) <TAILLE>...
  • Seite 55 All manuals and user guides at all-guides.com Utilisation du menu OSD amplifi ant le signal vidéo dès que la force du signal chute au-deçà de la valeur normale valeur. OBJECTIF Si le mode OFF ou FIXE est sélectionné dans NIVEAU [ 00]----I---- le menu AUGMENTER SENS., vous pourrez RETROECL...
  • Seite 56 All manuals and user guides at all-guides.com Utilisation du menu OSD ❖ Si vous appuyez sur le sélecteur SETUP en ayant [OFF,BAS,MOYEN,HAUT, UTIL(1~16)] sélectionné le sous-menu FIXE, vous affi cherez Vous pouvez confi gurer les réglages liés à l’écran approprié. l’option DNR (Réduction du bruit numérique).
  • Seite 57 All manuals and user guides at all-guides.com Utilisation du menu OSD  Remarque : AUGMENTER SENS. ne pourra pas être spécifi é sur FIXE. Si la fonction AUGMENTER SENS. est réglée sur AUTO, – ❖ ANTI-BATTEMENT [OFF, ON] seuls les éléments OFF et AUTO seront disponibles dans le menu OBTURATEUR.
  • Seite 58 All manuals and user guides at all-guides.com Utilisation du menu OSD ❖ JOUR/NUIT [JOUR,NUIT,AUTO,EXT] AUTO S.PORTEUSE • JOUR JOUR NUIT Lorsque l’option JOUR est spécifi ée, le mode est LUMINENCE MOYEN HEURE RET PROG fi xé sur JOUR indépendamment des conditions NUIT JOUR d’ambiance.
  • Seite 59: Bal Blancs

    All manuals and user guides at all-guides.com Utilisation du menu OSD ❖ ou l’incapacité à déterminer un tel basculement en BAL BLANCS [JOUR / NUIT] présence d’une source lumineuse intense de nuit. Pour régler le schéma des couleurs, utilisez la Si vous appuyez sur le sélecteur SETUP en fonction BAL BLANCS.
  • Seite 60 All manuals and user guides at all-guides.com Utilisation du menu OSD En mode NUIT, vous pouvez régler les valeurs Bal blancs auto s’exécutera une seule fois. des options ROUGE, BLEU et LUMINENCE. • 3200K : Réglez l’échelle des gris sur 3200K L’écran s’affi...
  • Seite 61 All manuals and user guides at all-guides.com Utilisation du menu OSD ❖ - POSITION : Si vous appuyez sur le sélecteur SETUP INVERSE [OFF, H, V, H/V] lorsque l’image est agrandie selon le réglage du format Met en miroir les signaux vidéo horizontalement, d’agrandissement spécifi...
  • Seite 62: Intelligence

    All manuals and user guides at all-guides.com Utilisation du menu OSD INTELLIGENCE • BARRIERE Ceci permet de détecter si un objet mobile traverse la LIGNE ou la ZONE spécifi ées. INTELLIGENCE Dans le cas où un objet mobile est détecté dans MOUVE AVANCE une analyse des cadres précédent et actuel dont...
  • Seite 63 All manuals and user guides at all-guides.com Utilisation du menu OSD - Défi nition de la zone LIGNE NIVEAU PIXEL <POINT> ZONE DIRECTION NIVEAU PIXEL <TAILLE> <POSITION> ① Si vous appuyez sur le sélecteur SETUP lorsque l’option LIGNE est réglée sur ON, ①...
  • Seite 64 All manuals and user guides at all-guides.com Utilisation du menu OSD Si vous réglez LIGNE dans BARRIERE sur ON, l’option – ZONE MASQUAGE ZONE PRIVEE 12 sera indisponible. Les fonctions BARRIERE, PIP, SIN et ZOOM NUM (facteur <TAILLE> de zoom numérique réglé sur un rapport supérieur à 1x) <POSITION>...
  • Seite 65: Confi G Zone Privee

    All manuals and user guides at all-guides.com Utilisation du menu OSD CONFIG ZONE PRIVEE Servez-vous du sélecteur pour sélectionner un réglage compris entre Z. PRIVEE1 et Z. PRIVEE12. ZONE PRIVEE Sélectionnez un réglage compris entre Z. PRIVEE1 et Z. PRIVEE12 et appuyez sur le sélecteur SETUP pour confi...
  • Seite 66: Autre Reg

    All manuals and user guides at all-guides.com Utilisation du menu OSD - Défi nition de la position AUTRE REG Vous pouvez déplacer la position de la zone globale. AUTRE REG ① En appuyant sur le sélecteur SETUP dans REINIT REGLAGE USINE COULR OSD N&B <POSITION>, vous déplacez la position...
  • Seite 67: Informations Systeme

    All manuals and user guides at all-guides.com Utilisation du menu OSD ❖ INFORMATIONS SYSTEME Tableau de confi guration initiale • Confi guration caméra INFO SYSTEME TYPE 3_VAR_WDR_N ID DE CAMERA NO SERIE 000000000000000 CAMERA VER. 0.50_090101 IRIS TRES HAUT MOUVE (T.VITE) MOYEN OBTURATEUR...
  • Seite 68: Caractéristiques Techniques

    All manuals and user guides at all-guides.com Caractéristiques techniques CARACTÉRISTIQUES TECHNIQUES Eléments Sous-éléments SCC-B5367N/SCC-5369N Type de caméra caméra CCTV (WDR et JOUR/NUIT) Périphérique Capteur d’images CCD 1/3” SUPER HAD PS Image Total 811 x 508 Pixels Effectifs 768 x 494 Système Entrelacé/Progressif Ligne d’analyse...
  • Seite 69 Objectif Type lecteur objectif SCC-B5367 : longueur focale = 2,5 à 6,0 mm / ouverture relative = F 1.2 SCC-B5369 : longueur focale = 2,8 à 11,0 mm / ouverture relative = F 1.2 0 ~ 355°(100° dans le sens des aiguilles d’une montre),...
  • Seite 70 All manuals and user guides at all-guides.com Caractéristiques techniques Eléments Sous-éléments SCC-B5367P/SCC-5369P Type de caméra caméra CCTV (WDR et JOUR/NUIT) Périphérique Capteur d’images CCD 1/3” SUPER HAD PS Image Total 795 x 596 Pixels Effectifs 752 x 582 Système Entrelacé/Progressif Ligne d’analyse 625 lines Cadre...
  • Seite 71 Objectif Type lecteur objectif SCC-B5367 : longueur focale = 2,5 à 6,0 mm / ouverture relative = F 1.2 SCC-B5369 : longueur focale = 2,8 à 11,0 mm / ouverture relative = F 1.2 0 ~ 355°(100° dans le sens des aiguilles d’une montre),...
  • Seite 72: Les Bons Gestes De Mise Au Rebut De Ce Produit (Déchets D'équipements Électriques Et Électroniques)

    All manuals and user guides at all-guides.com Les bons gestes de mise au rebut de ce produit (Déchets d’équipements électriques et électroniques) (Applicable dans les pays de l’Union Européenne et dans d’autres pays européens pratiquant le tri sélectif) Ce symbole sur le produit, ses accessoires ou sa documentation indique que ni le produit, ni ses accessoires électroniques usagés (chargeur, casque audio, câble USB, etc.) ne peuvent être jetés avec les autres déchets ménagers.
  • Seite 73: Sie Die Möglichkeiten

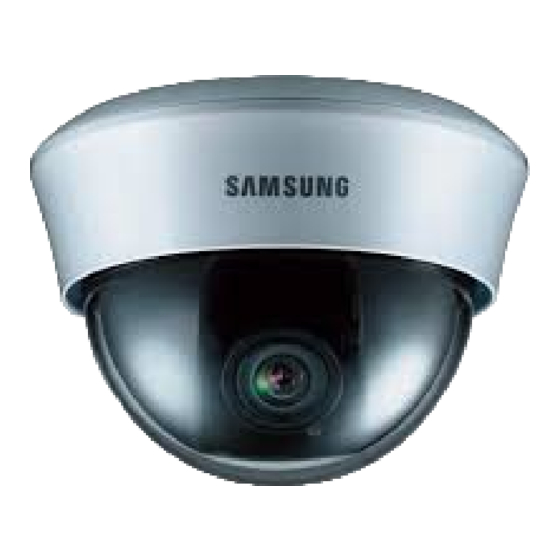
    All manuals and user guides at all-guides.com SCC-B5367 SCC-B5369 DIGITALE FARBBILD- KUPPELKAMERA Benutzerhandbuch Erleben Sie die Möglichkeiten Danke, dass Sie sich für dieses Produkt von Samsung entschieden haben. Um den vollständigen Service zu erhalten, registrieren Sie Ihr Produkt unter www.samsungsecurity.com...
  • Seite 74: Sicherheitsinformationen

    All manuals and user guides at all-guides.com Sicherheitsinformationen VORSICHT GEFAHR EINES ELEKTROSCHOCKSNICHT ÖFFNEN VORSICHT: NICHT DIE RÜCKSEITIGE ABDECKUNG ÖFFNEN, ABDECKUNG (ODER RÜCKSEITE) NICHT ABNEHMEN. KEINE VOM BENUTZER ZU WARTENDE TEILE INNEN. WENDEN SIE SICH AN QUALIFIZIERTESKUNDENDIENSTPERSONAL Dieses Symbol zeigt an, dass bei diesem Gerät gefährliche Spannung Elektroschock zur Folge haben kann.
  • Seite 75 Wenn dieses Produkt nicht einwandfrei funktioniert, wenden Sie sich an den nächstgelegenen Kundendienst. Zerlegen oder modifi zieren Sie dieses Produkt nie in irgendeiner Weise. (SAMSUNG haftet nicht für Schäden, die durch unbefugte Änderungen oder Reparaturversuche verursacht werden.) Spritzen Sie während der Reinigung kein Wasser direkt auf die Produktteile. Dies führt sonst zu Brand oder Elektroschock.
  • Seite 76 All manuals and user guides at all-guides.com Sicherheitsinformationen VORSICHT Lassen Sie keine Gegenstände auf das Produkt fallen oder setzen Sie es keinen starken Stößen aus. Halten Sie sich fern von Standorten die übermäßiger Erschütterung oder magnetischer Beeinfl ussung ausgesetzt sind. Installieren Sie das Gerät nicht an einem Standort, der hohen Temperaturen (über 50°C), niedrigen Temperaturen (unter -10°C) oder hoher Feuchtigkeit ausgesetzt ist.
  • Seite 77: Wichtige Sicherheitshinweise

    All manuals and user guides at all-guides.com Wichtige Sicherheitshinweise Lesen Sie diese Anweisungen. Bewahren Sie sie auf. Beachten Sie alle Warnungen. Befolgen Sie alle Anweisungen. Verwenden Sie dieses Gerät nicht in der Nähe von Wasser. Reinigen Sie es nur mit einem trockenen Lappen. Blockieren Sie keine Belüftungsöffnungen.
  • Seite 78 All manuals and user guides at all-guides.com Inhalt Einführung Funktionen Produkt & Zubehör Teilenamen und Funktionen Installation Vor der Installation Installationsvorgang Einstellen der Kamerarichtung Das Bildschirmmenü verwenden Die menüpunkte verwenden Hauptmenü Profi l Kamera einrichten Intelligenz Einstellung privatbereich Weitere einstellungen Systeminformationen Sprache Angaben...
  • Seite 79: Funktionen

    All manuals and user guides at all-guides.com Einführung FUNKTIONEN ❖ Hohe Aufl ösung • DieseKamera hat eine hohe Aufl ösung von 600 Zeilen mit erstklassiger vollständiger digitaler Bildverarbeitung und spezieller Algorithmustechnologie. ❖ VPS (Virtuelles Vollbildverfahren) • Diese moderne Technologie erzeugt ein scharfes Bild. Sie eignet sich für die Aufnahme in hoher Qualität und den Datenverkehr über das Internet.
  • Seite 80: Produkt & Zubehör

    All manuals and user guides at all-guides.com Einführung ❖ Ausgabe Signaleinstellung • Siekönnen folgende Video-Ausgangssignale festsetzen: Bildumkehr (horizontal, vertikal oder beide), Privat, horizontale/vertikale Profi ldarstellung und digitales Vergrößern. ❖ Bildschirmmenü • Mit dem Bildschirmmenü können der Status der Kamera überprüft und die Funktionen interaktiv konfi guriert werden. ❖...
  • Seite 81: Teilenamen Und Funktionen

    All manuals and user guides at all-guides.com Einführung TEILENAMEN UND FUNKTIONEN ❖ Einzelteile Ihrer Kamera 테스트 모니터 출력 Test monitor-ausgang 렌즈 Objektiv 전원 커넥터 Netzbuchse 비디오 커넥터 Videobuchse Deutsch –...
  • Seite 82 All manuals and user guides at all-guides.com Einführung Name Kurzbeschreibung Kuppelabdeckung Dient als Schutz für die innenliegende Abdeckung, das Objektiv und das Hauptgehäuse. Innenliegende Abdeckung Schutzabdeckung für das Hauptgehäuse. Drücken Sie einen langen, dünnen Schraubendreher in die enge Stelle und drücken Sie sie Flügelverriegelung nach außen, wenn Sie die innenliegende Abdeckung entfernen möchten.
  • Seite 83: Schalter Einstellung

    All manuals and user guides at all-guides.com Einführung ❖ Einstellung der Funktionsschalter • Schalter Einstellung Mit diesem Schalter wird die Funktion oder Eigenschaft eingestellt. Wenn dieser Schalter mindestens 2 Sekunden lang gedrückt wird, erscheint das HAUPTMENÜ. (Links/Rechts) : Durch Drücken dieses Schalters nach links oder rechts, gelangen Sie am Menü nach links oder rechts oder Sie können auch den angezeigten Wert ändern.
  • Seite 84: Installation

    All manuals and user guides at all-guides.com Installation VOR DER INSTALLATION Vor der Installation Ihrer Kamera müssen Sie folgende Vorsichtsmaßregeln lesen. • Sie müssen prüfen, ob der Standort (Decke oder Wand) das fünffache Gewicht Ihrer Kamera tragen kann. • Lassen Sie das Kabel sich nicht an einer ungeeigneten Position verhaken oder die Umhüllung der elektrischen Leitung beschädigen.
  • Seite 85 All manuals and user guides at all-guides.com Installation ❶ Drücken Sie die Taste Verriegelung an der Unterseite Ihrer Kamera und nehmen Sie die Kuppelabdeckung vom Hauptgehäuse mithilfe der anderen Hand ab. Das Hauptgehäuse und die innenliegende Abdeckung werden in Ihre Richtung freigelegt. ❷...
  • Seite 86: Einstellen Der Kamerarichtung

    All manuals and user guides at all-guides.com Installation EINSTELLEN DER KAMERARICHTUNG Wenn die Kamera an der Decke befestigt ist, können Sie den Kamerabetrachtungswinkel einstellen. Sie können Ihre Kamera nach links oder rechts drehen (Schwenken) und Sie können Ihre Kamera nach oben oder unten neigen (Kippen).
  • Seite 87: Das Bildschirmmenü Verwenden

    All manuals and user guides at all-guides.com Das Bildschirmmenü verwenden DIE MENÜPUNKTE VERWENDEN HAUPTMENÜ • (BEENDEN) HAUPTMENÜ Die Menüeinstellung wird beenden. PROFIL KAMERA PROG Wählen SICHERN, bevor Sie die Menüeinstellung INTELLIGENZ verlassen, um Ihre Einstellungen zu speichern, oder PRIVATZONE wählen Sie VERL, um abzubrechen. WEITERE PROG SYSTEMINFO •...
  • Seite 88: Profi L

    All manuals and user guides at all-guides.com Das Bildschirmmenü verwenden PROFIL PROFIL STANDARD GGLICHT TAG/NACHT SPIELB. ANPASS Im Menü PROFIL können Sie die folgenden Kameraeinstellungen konfi gurieren. Menü KAMERA PROG STANDARD GGLICHT TAG/NACHT SPIELB. Vorheriges Untermenüs Menü BLENDE OBJEKTIV PEGEL GGLICHT Benutzereinstellung Benutzereinstellung...
  • Seite 89 All manuals and user guides at all-guides.com Das Bildschirmmenü verwenden Menü KAMERA PROG STANDARD GGLICHT TAG/NACHT SPIELB. Vorheriges Untermenüs Menü MITT MITT MITT MITT MITT AUTO AUTO AUTO TAG/ NACHT NACHT FARBTRAGER WEISSABGL TAG/NACHT TAG/NACHT MODUS ATW2 ATW1 ATW1 ATW1 ATW1 BLAU NACHT...
  • Seite 90: Kamera Einrichten

    All manuals and user guides at all-guides.com Das Bildschirmmenü verwenden KAMERA EINRICHTEN Richten Sie die wichtigsten Funktionen des Kamerazooms ein. KAMERA PROG Verwenden Sie den Schalter um einen KAMERA ID Menüpunkt zu wählen. ❖ KAMERA ID [AUS, EIN] BLENDE AKTIVITAET (S.SCHN)--- MITT KAMERA ID VRSCHL...
  • Seite 91 All manuals and user guides at all-guides.com Das Bildschirmmenü verwenden ❖ BLENDE [ALC] Mit dem Menü BLENDE können Sie die Intensität PEGEL [00]----I---- GGLICHT des Strahlungseingangs der Kamera einstellen. BEREICH BENUTZER <GROESSE> • ALC (Automatische Lichtsteuerung) <POSITION> ① Wenn Sie den Schalter SETUP betätigen, während ein Untermenü...
  • Seite 92 All manuals and user guides at all-guides.com Das Bildschirmmenü verwenden Aufnahmeempfi ndlichkeit, indem das Videosignal verstärkt wird, wenn die Stärke des Signals sich OBJEKTIV unterhalb des normalen Wertes befi ndet. PEGEL [ 00]----I---- GGLICHT Wenn der Modus AUS oder FIX im Menü STUFE MITT EMPF-PLUS ausgewählt ist, können Sie den AGC-...
  • Seite 93 All manuals and user guides at all-guides.com Das Bildschirmmenü verwenden ❖ Wenn Sie den Schalter SETUP betätigen, während [AUS,WENIG,MITT,HOCH, BENUTZER(1~16)] das Untermenü FIX ausgewählt ist, so erscheint Sie können die Einstellungen für DNR (Digitale der entsprechende Bildschirm. Rauschunterdrückung) konfi gurieren. Im Modus FIX wird ein festgelegter Wert des AGC Reduziert Störgeräusche auf dem Bildschirm.
  • Seite 94: Flimmerfrei

    All manuals and user guides at all-guides.com Das Bildschirmmenü verwenden Menü EMPF-PLUS entweder auf AUS oder AUTO gestellt Kamera, die mit einem DC- oder VIDEO-Objektiv werden. ausgestattet ist. Wenn die Funktion GGLICHT auf WDR gestellt ist, kann gas –  Menü...
  • Seite 95 All manuals and user guides at all-guides.com Das Bildschirmmenü verwenden ❖ TAG/NACHT [TAG,NACHT,AUTO,EXT] AUTO FARBTRAGER • TAG NACHT Bei Einstellung auf TAG wird der Modus TAG festgelegt, HELLIGKEIT MITT SCHWELLZEIT unabhängig von den Umgebungsbedingungen. NACHT TAG HELLIGKEIT MITT • NACHT SCHWELLZEIT MASK.BER.
  • Seite 96 All manuals and user guides at all-guides.com Das Bildschirmmenü verwenden ❖ Das Menü MASK.BER. wird verwendet, um einen WEISSABGL [TAG/NACHT] versehentlichen Moduswechsel oder die Unfähigkeit Wenn Sie die Farbzusammensetzung anpassen eines Wechsels aufgrund einer stark fokussierten möchten, verwenden Sie die Funktion Lichtquelle bei Nacht zu verhindern.
  • Seite 97: Digitalzoom

    All manuals and user guides at all-guides.com Das Bildschirmmenü verwenden entsprechend der Helligkeit zwischen den Modi Wenn sie den Schalter SETUP bei der TAG/NACHT. entsprechenden Menüauswahl betätigen, wird der Im Modus NACHT können Sie die Werte automatische Weißabgleich einmal ausgeführt. ROT, BLAU und HELLIGKEIT einstellen.
  • Seite 98 All manuals and user guides at all-guides.com Das Bildschirmmenü verwenden für die Synchronisation. DIGITAL ZOOM Sie können die LL-PHASE einstellen. VERH [X1.0] < POSITION >  Beachten Sie : Die Verwendung von DC 12V wird V-SYNC auf INT – festlegen und kann nicht geändert werden. ❖...
  • Seite 99: Intelligenz

    All manuals and user guides at all-guides.com Das Bildschirmmenü verwenden ❖ [AUS, EIN] • ERKENN Erkennt ein sich bewegendes Objekt. Die digitale Bildstabilisierung wird den Bewegungsausgleich einstellen.  Beachten Sie :  Beachten Sie : Wenn ERKENN eingestellt ist, können Funktionen wie FIX/BEW –...
  • Seite 100 All manuals and user guides at all-guides.com Das Bildschirmmenü verwenden ③ Unter <PKT> können Sie die erste Position der ZAUN Linie festlegen, indem Sie den Schalter SETUP LINIE einmal betätigen und eine zweite Position, BEREICH indem Sie den Schalter erneut betätigen. Verwenden Sie den Schalter um die Position festzulegen.
  • Seite 101 All manuals and user guides at all-guides.com Das Bildschirmmenü verwenden ③ Betätigen Sie unter <GROESSE> den Schalter ❖ MASK.BER. [1~4] Legen Sie eine Ausnahme des SETUP und verwenden Sie den Schalter um die Größe einzustellen. Erkennungsbereichs in der Maske fest. Wählen Sie eine Maskennummer und legen Sie Betätigen Sie den Schalter SETUP erneut, um die Größeneinstellung abzuschließen.
  • Seite 102: Einstellung Privatbereich

    All manuals and user guides at all-guides.com Das Bildschirmmenü verwenden EINSTELLUNG PRIVATBEREICH Wählen Sie eine der PRIVATZONE zwischen 1 und 12 aus und betätigen Sie den Schalter SETUP, um Ihre Einstellung zu betätigen. Sie können ein PRIVATZONE sich bewegendes Pixel festlegen, indem Sie die PIXELANZ ändern, um die Position einzustellen.
  • Seite 103: Weitere Einstellungen

    All manuals and user guides at all-guides.com Das Bildschirmmenü verwenden ① Wenn Sie den Schalter SETUP unter <POS.> WEITERE EINSTELLUNGEN betätigen, können Sie die allgemeine Position der Privatzone bewegen. WEITERE PROG WERKSEINST. ② Verwenden Sie den Schalter OSD-FARB die Position zu bewegen und betätigen Sie den Schalter SETUP, um Ihre Auswahl zu bestätigen.
  • Seite 104: Systeminformationen

    All manuals and user guides at all-guides.com Das Bildschirmmenü verwenden ❖ SYSTEMINFORMATIONEN Tabelle für Anfangskonfi guration SYSTEMINFO • Kamerakonfi guration 3_VAR_WDR_N KAMERA ID S/N: 000000000000000 KAMERA VERSION 0.50_090101 BLENDE SEHR HOCH AKTIVITAET (S.SCHN) MITT Sie können die Systeminformationen wie z. S/N: und VRSCHL KAMERA VERSION überprüfen.
  • Seite 105: Angaben

    All manuals and user guides at all-guides.com Angaben ANGABEN Menüpunkte Untermenüpunkte SCC-B5367N/SCC-5369N Kameratyp CCTV-Kamera (WDR & TAG/NACHT) Gerät 1/3” Super-HAD PS CCD Bild Gesamt 811 x 508 Pixel Effektiv 768 x 494 System Interlace/Progressiv Abtastzeile 525 Zeilen Frame 30 Frames/1 Sekunde Bildzerlegung Internal Mode 15,734 Hz...
  • Seite 106 Ca. 52 dB Verhältnis Automatische Blendenregelung (DC) Objektiv Blendenansteuersignal SCC-B5367: Brennweite = 2,5 bis 6,0 mm / Blendenverhältnis = F 1,2 SCC-B5369: Brennweite = 2.8 bis 11.0mm / Blendenverhältnis = F 1,2 0 - 355° (100° im Uhrzeigersinn, SCHWENKEN Bereich 255°...
  • Seite 107 All manuals and user guides at all-guides.com Angaben Menüpunkte Untermenüpunkte SCC-B5367P/SCC-5369P Kameratyp CCTV-Kamera (WDR & TAG/NACHT) Gerät 1/3” Super-HAD PS CCD Bild Gesamt 795 x 596 Pixel Effektiv 752 x 582 System Interlace/Progressiv Abtastzeile 625 Zeilen Frame 25 Frames/1 Sekunde Bildzerlegung Internal Mode 15,625 Hz...
  • Seite 108 Ca. 52dB Verhältnis Automatische Blendenregelung (DC) Objektiv Blendenansteuersignal SCC-B5367: Brennweite = 2,5 bis 6,0 mm / Blendenverhältnis = F 1,2 SCC-B5369: Brennweite = 2.8 bis 11.0mm / Blendenverhältnis = F 1,2 0 - 355° (100° im Uhrzeigersinn, SCHWENKEN Bereich 255° gegen den Uhrzeigersinn)
  • Seite 109: Korrekte Entsorgung Von Altgeräten (Elektroschrott)

    All manuals and user guides at all-guides.com Korrekte Entsorgung von Altgeräten (Elektroschrott) (In den Ländern der Europäischen Union und anderen europäischen Ländern mit einem separaten Sammelsystem) Die Kennzeichnung auf dem Produkt, Zubehörteilen bzw. auf der dazugehörigen Dokumentation gibt an, dass das Produkt und Zubehörteile (z.
  • Seite 110 All manuals and user guides at all-guides.com SCC-B5367 SCC-B5369 CÁMARA DOMO DIGITAL A COLOR Manual del usuario imagine las posibilidades Gracias por adquirir este producto Samsung. Para recibir un servicio más completo, registre su producto en www.samsungsecurity.com...
  • Seite 111: Información De Seguridad

    All manuals and user guides at all-guides.com Información de seguridad PRECAUCIÓN NO ABRIR RIESGO DE SUFRIR UNA DESCARGA ELÉCTRICA PRECAUCIÓN: PARA REDUCIR EL RIESGO DE SUFRIR UNA DESCARGA ELÉCTRICA, NO EXTRAIGA LA CUBIERTA POSTERIOR. DENTRO NO HAY PIEZAS QUE PUEDAN SER REPARADAS POR EL USUARIO. REMITA EL APARATO A PERSONAL DE MANTENIMIENTO CUALIFICADO.
  • Seite 112 Si este producto deja de funcionar con normalidad, póngase en contacto con el servicio técnico más cercano. Nunca intente desmontar o modifi car este producto de ninguna manera. (SAMSUNG no se hace responsable de los problemas producidos por modifi caciones no autorizadas o por intentos de reparaciones.) Al limpiar el producto, no rocíe sus piezas directamente con agua.
  • Seite 113 All manuals and user guides at all-guides.com Información de seguridad PRECAUCIÓN No deje objetos sobre el producto ni aplique una fuerte presión sobre él. Manténgalo lejos de lugares sujetos a demasiadas vibraciones o a interferencias magnéticas. No lo instale en lugares con temperaturas elevadas (más de 50°C), temperaturas bajas(menos de -10°C) o humedad elevada.
  • Seite 114 All manuals and user guides at all-guides.com instrucciones de seguridad importantes Lea estas instrucciones. Consérvelas. Preste atención a todas las advertencias. Siga todas las instrucciones. No utilice este aparato cerca del agua. Límpielo únicamente con un paño seco. No obstruya ninguna abertura de ventilación. Instale el aparato siguiendo las instrucciones del fabricante.
  • Seite 115 All manuals and user guides at all-guides.com Índice general Introducción Características Producto y accesorios Piezas y funciones Instalación Antes de la instalación Procedimiento de instalación Ajuste de la dirección de la cámara Cómo utilizar el menú OSD Utilización de los iconos del Menú Menú...
  • Seite 116: Características

    All manuals and user guides at all-guides.com Introducción CARACTERÍSTICAS ❖ Alta resolución • Esta cámara ha hecho realidad la alta resolución de 600 líneas utilizando el procesamiento de la imagen digital de primera calidad y tecnologías de algoritmos especiales. ❖ VPS (Barrido progresivo virtual) •...
  • Seite 117: Producto Y Accesorios

    All manuals and user guides at all-guides.com Introducción ❖ Confi guración de señal de salida • Puede confi gurar las siguientes señales de salida de Vídeo: Giro de la imagen (horizontal, vertical, o ambas), Privacidad, Ajuste horizontal/vertical, y zoom digital. ❖...
  • Seite 118: Piezas Y Funciones

    All manuals and user guides at all-guides.com Introducción PIEZAS Y FUNCIONES ❖ Componentes de la cámara 테스트 모니터 출력 Salida para probar el monitor 렌즈 Lente 전원 커넥터 Cable de alimentación 비디오 커넥터 Conector de vídeo Español –...
  • Seite 119 All manuals and user guides at all-guides.com Introducción Núm. Nombre Breve descripción Cubierta tipo domo Cubre la cubierta interior, la lente y el cuerpo principal, protegiéndolos. Cubierta interior Cubre el cuerpo principal y lo protege. Coloque un destornillador largo y fi no en este punto ancho y presiónelo hacia afuera cuando Cierre del bastidor desee sacar la cubierta interior.
  • Seite 120 All manuals and user guides at all-guides.com Introducción ❖ Ajuste de los conmutadores • Conmutador de confi guración Este interruptor se utiliza para defi nir la función o la propiedad. Cuando se pulsa este interruptor durante al menos 2 segundos, aparece el MENU PRI. (izquierda/derecha) : Pulsando este conmutador hacia la izquierda o derecha, se desplazará...
  • Seite 121: Instalación

    All manuals and user guides at all-guides.com Instalación ANTES DE LA INSTALACIÓN Antes de la instalación debe leer las siguientes advertencias. • Debe comprobar si la ubicación de la cámara (techo o pared) puede aguantar cinco veces el peso de la cámara.
  • Seite 122 All manuals and user guides at all-guides.com Instalación ❶ Pulse el botón Cierre que se encuentra en la parte inferior de la cámara y retire la Cubierta tipo domo del Cuerpo principal ayudándose con la otra mano. Podrá ver el Cuerpo principal y la Cubierta interior. ❷...
  • Seite 123: Ajuste De La Dirección De La Cámara

    All manuals and user guides at all-guides.com Instalación AJUSTE DE LA DIRECCIÓN DE LA CÁMARA Cuando la cámara ya está colocada en el techo se puede ajustar el ángulo de visión de la cámara. La cámara se puede girar de izquiera a derecho o de derecha a izquierda (Panorámica) y se puede modifi car la inclinación de la cámara hacia adelante y hacia atrás (Inclinación).
  • Seite 124: Cómo Utilizar El Menú Osd

    All manuals and user guides at all-guides.com Cómo utilizar el menú OSD UTILIZACIÓN DE LOS ICONOS MENÚ PRINCIPAL DEL MENÚ MENU PRI. • (SALIR) PERFIL AJ CAMARA Sale del ajuste del menú. INTEL. Antes de salir del ajuste del menú, seleccione ZONA PRIV GRAB para guardar los ajustes o seleccione SAL.
  • Seite 125: Profi Le

    All manuals and user guides at all-guides.com Cómo utilizar el menú OSD PROFILE PERFIL ESTAND LUZ FONDO DIA/NOCHE JUEGOS PERS. En el menú PERFIL, puede confi gurar al mismo tiempo los siguientes ajustes de cámara. Menú de AJ CAMARA ESTAND LUZ FONDO DIA/NOCHE JUEGOS...
  • Seite 126 All manuals and user guides at all-guides.com Cómo utilizar el menú OSD Menú de AJ CAMARA ESTAND LUZ FONDO DIA/NOCHE JUEGOS Menú Submenús anterior DIA/NOCHE AUTO AUTO AUTO NOCHE CONT. SÍ BAL. BL DIA/NOCHE DIA/NOCHE MODO ATW2 ATW1 ATW1 ATW1 ATW1 AZUL NOCHE...
  • Seite 127: Confi Guración De La Cámara

    All manuals and user guides at all-guides.com Cómo utilizar el menú OSD CONFIGURACIÓN DE LA CÁMARA Confi gure las funciones generales del módulo de cámara de zoom. Utilice el interruptor para seleccionar una AJ CAMARA opción de menú. ID CAMARA IRIS (AV RAP)--- ❖...
  • Seite 128 All manuals and user guides at all-guides.com Cómo utilizar el menú OSD ❖ IRIS [ALC] El menú IRIS se utiliza para ajustar la intensidad NIVEL [00]----I---- LUZ FONDO de la radiación entrante a la cámara. AREA USU. <TAM> • ALC (Control automático de luz) <UBIC.>...
  • Seite 129 All manuals and user guides at all-guides.com Cómo utilizar el menú OSD amplifi cando la señal de vídeo cuando la potencia de la señal cae por debajo del valor normal. LENT NIVEL [ 00]----I---- Si se selecciona NO o FIJA en el menú AMP LUZ FONDO SENS, puede especifi...
  • Seite 130 All manuals and user guides at all-guides.com Cómo utilizar el menú OSD Debido a que se utiliza un valor fi jo para la Esto resulta especialmente de utilidad en una ganancia de AGC en modo FIJA, puede pantalla seriamente distorsionada. seleccionar uno de los 16 niveles de detalle desde Puede defi...
  • Seite 131 All manuals and user guides at all-guides.com Cómo utilizar el menú OSD  Si la función SIN PARP. se defi ne en SÍ, se desactivará el menú Nota : – OBT. Si la opción OBT. se defi ne en modo AUTO o FIJA, no –...
  • Seite 132 All manuals and user guides at all-guides.com Cómo utilizar el menú OSD blanco y negro. Si CONT. se defi ne en NO, la señal negro. de cont. no se generará. BRILLO de NOCHE DÍA defi ne el grado de brillo Puede defi...
  • Seite 133 All manuals and user guides at all-guides.com Cómo utilizar el menú OSD • Si el modo NOCHE se defi ne en NO, el balance de blanco siempre funcionará como se defi ne en Esto permite el cambio automático entre el modo el modo DIA;...
  • Seite 134: Zoom Digital

    All manuals and user guides at all-guides.com Cómo utilizar el menú OSD • ATW2: La temperatura del color varía de ZOOM DIGITAL 2.000K a 10.000K aproximadamente. REL. [X1.0] • AWC (Control automático de balance de blanco): < UBIC. > Si pulsa el interruptor SETUP en la posición apropiada del elemento, se ejecutará...
  • Seite 135: Inteligencia

    All manuals and user guides at all-guides.com Cómo utilizar el menú OSD  Nota : Puede ajustar la FASE-LL. Si defi ne DIS en SÍ, el área de compensación se ampliará –  Nota : de la forma defi nida en el factor de zoom digital. El uso de CC de 12V fi...
  • Seite 136 All manuals and user guides at all-guides.com Cómo utilizar el menú OSD ❖ AVANZADO [NO, FIJO/MOVIL, CERCA] LINEA Detecta el movimiento de un objeto y muestra la NIVEL PIXEL imagen de cualquier objeto en movimiento antes <PUNTO> DIRECC. de trazar la ruta de movimiento. •...
  • Seite 137 All manuals and user guides at all-guides.com Cómo utilizar el menú OSD Las funciones de CERCA, PIP, DIS y ZOOM DIGITAL (si el - Cómo defi nir el área factor de zoom digital se defi ne en un valor mayor que 1x) AREA no se pueden utilizar simultáneamente.
  • Seite 138: Confi Guración De La Zona Privada

    All manuals and user guides at all-guides.com Cómo utilizar el menú OSD CONFIGURACIÓN DE LA ZONA AREA MASC PRIVADA <TAM> <UBIC.> ZONA PRIV AJ PRIV SÍ MOSAIC1 ❖ PANT. [SÍ, NO] Con la opción PANT. defi nida en SÍ, aparecerá en pantalla un movimiento o una función AVANZADO defi...
  • Seite 139 All manuals and user guides at all-guides.com Cómo utilizar el menú OSD ① Pulsando el interruptor SETUP en Utilice el interruptor para seleccionar <POSICION >, puede mover la posición entre PRIV. 1 a 12. general de la zona privada. Seleccione uno entre PRIV. 1~12 y pulse el interruptor ②...
  • Seite 140: Otros Ajustes

    All manuals and user guides at all-guides.com Cómo utilizar el menú OSD OTROS AJUSTES INFORMACIÓN DEL SISTEMA OTRO AJ INF. SIST ESTAND. FABRICA TIPO 3_VAR_WDR_N COLOR OSD NO. SERIE 000000000000000 CAMERA VER. 0.50_090101 Puede comprobar información del sistema como ❖ ESTAND.
  • Seite 141 All manuals and user guides at all-guides.com Cómo utilizar el menú OSD ❖ Tabla de confi guración inicial • Confi guración de cámara ID CAMARA IRIS MUY ALTA (AV RAP) OBT. AMP SENS AUTO x4 SIN PARP. (NO) DIA/NOCHE AUTO ZOOM DIGITAL DET.
  • Seite 142: Especifi Caciones

    All manuals and user guides at all-guides.com Especifi caciones ESPECIFICACIONES Opciones Subopciones SCC-B5367N/SCC-5369N Tipo de cámara Cámara CCTV (WDR y DÍA/NOCHE) Dispositivo Super HAD PS CCD de 1/3 pulg. Imagen Totales 811 x 508 Píxeles Efectivos 768 x 494 Sistema Interlazado/Progresivo Exploración de 525 líneas...
  • Seite 143 Objetivo Tipo de control de lente SCC-B5367: longitud focal = 2,5 a 6,0mm / Índice de apertura = F 1.2 SCC-B5369: longitud focal = 2,8 a 11,0mm / Índice de apertura = F 1.2 0 ~ 355°(100° en dirección CW (sentido de agujas del reloj), Rango 255°...
  • Seite 144 All manuals and user guides at all-guides.com Especifi caciones Opciones Subopciones SCC-B5367P/SCC-5369P Tipo de cámara Cámara CCTV (WDR y DÍA/NOCHE) Dispositivo Super HAD PS CCD de 1/3 pulg. Imagen Totales 795 x 596 Píxeles Efectivos 752 x 582 Sistema Interlazado/Progresivo Exploración de 625 líneas línea...
  • Seite 145 Objetivo Tipo de control de lente SCC-B5367: longitud focal = 2,5 a 6,0mm / Índice de apertura = F 1.2 SCC-B5369: longitud focal = 2,8 a 11,0mm / Índice de apertura = F 1.2 0 ~ 355°(100° en dirección CW (sentido de agujas del reloj), Rango 255°...
  • Seite 146: Eliminación Correcta De Este Producto

    All manuals and user guides at all-guides.com Eliminación correcta de este producto (Residuos de aparatos eléctricos y electrónicos) (Aplicable en la Unión Europea y en países europeos con sistemas de recogida selectiva de residuos) La presencia de este símbolo en el producto, accesorios o material informativo que lo acompañan, indica que al finalizar su vida útil ni el producto ni sus accesorios electrónicos (como el cargador, cascos, cable USB) deberán eliminarse junto con otros residuos domésticos.
  • Seite 147 All manuals and user guides at all-guides.com SCC-B5367 SCC-B5369 VIDEOCAMERA DOME DIGITALE A COLORI Guida Utente immagina le possibilità Grazie per avere acquistato questo prodotto Samsung. Per ricevere un servizio più completo, registrare il prodotto all’indirizzo www.samsungsecurity.com...
  • Seite 148: Informazioni Sulla Sicurezza

    All manuals and user guides at all-guides.com Informazioni Sulla Sicurezza ATTENZIONE RISCHIO DI SCOSSA ELETTRICA NON APRIRE ATTENZIONE: PER RIDURRE IL RISCHI DI SCOSSA ELETTRICA, NON RIMUOVERE IL COPERCHIO (O IL PANNELLO POSTERIORE). ALL’INTERNO NON VI SONO PARTI CHE L’UTENTE POSSA RIPARARE. RIVOLGERSI A PERSONALE QUALIFICATO.
  • Seite 149 Se il prodotto non funzionasse in modo normale, mettersi in contatto con il centro di assistenza più vicino. Non smontare o riparare in alcun modo questo prodotto. (SAMSUNG non è responsabile per problemi causati da modifi che non autorizzate o tentativi di riparazione) Quando si pulisce, non spruzzare acqua direttamente sulle parti del prodotto.
  • Seite 150 All manuals and user guides at all-guides.com Informazioni Sulla Sicurezza ATTENZIONE Non far cadere oggetti sul prodotto ed evitare colpi forti. Mantenere lontano da luoghi sottoposti ad eccessive vibrazioni o ad interferenze magnetiche. Non istallare in luoghi sottoposti ad alte temperature (più di 50°C), basse temperature temperature (meno di -10°C), o grande umidità.
  • Seite 151: Importanti Istruzioni Per La Sicurezza

    All manuals and user guides at all-guides.com Importanti Istruzioni per la Sicurezza Leggere queste istruzioni. Conservare queste istruzioni. Rispettare tutti gli avvertimenti. Seguire tutte le istruzioni. Non utilizzare questo apparecchio vicino all’acqua. Pulire solo con un panno asciutto. Non bloccare nessuna apertura di ventilazione. Istallare seguendo le istruzioni del fabbricante. Non istallare vicino a fonti di calore quali caloriferi, stufe o altri prodotti (compresi gli amplifi...
  • Seite 152 All manuals and user guides at all-guides.com Sommario Introduzione Caratteristiche Prodotto & Accessori Nomi e funzioni delle parti Installazione Prima dell’istallazione Procedura d’istallazione Regolare la direzione della telecamera Come utilizzare il menu OSD Utilizzo delle icone nel menu Menu principale Profi...
  • Seite 153: Caratteristiche

    All manuals and user guides at all-guides.com Introduzione CARATTERISTICHE ❖ Alta risoluzione • Questa telecamera dispone di una risoluzione pari a 600 linee, utilizzando una nuova tecnologia applicata al processing dell’immagine completamente digitale e una speciale tecnologia algoritmica. ❖ VPS(Scansione Progressiva Virtuale) •...
  • Seite 154: Prodotto & Accessori

    All manuals and user guides at all-guides.com Introduzione ❖ Impostazionesegnale di uscita • È possibile impostare il segnale d’ uscita Video nei seguenti modi: Ritorno dell’immagine (Orizzontale, Verticale o entrambe), Privacy, Profi lo Orizzontale/Verticale e zoom digitale. ❖ Menu OSD (On Screen Display) •...
  • Seite 155: Nomi E Funzioni Delle Parti

    All manuals and user guides at all-guides.com Introduzione NOMI E FUNZIONI DELLE PARTI ❖ Componenti della telecamera 테스트 모니터 출력 Test di uscita monitor 렌즈 Obiettivo Connettore 전원 커넥터 alimentazione 비디오 커넥터 Connettore Video Italiano –...
  • Seite 156 All manuals and user guides at all-guides.com Introduzione Nome Breve descrizione Involucro a cupola Copre l’involucro interno, la lente e il corpo principale per proteggerli. Involucro interno Copre il corpo principale per proteggerlo. Inserire un cacciavite sottile e lungo in questo stretto punto e premere verso l’esterno per Chiusura aletta estrarre l’involucro interno.
  • Seite 157 All manuals and user guides at all-guides.com Introduzione ❖ Selettori di impostazione • Tasto impostazione Questo interruttore si usa per impostare una funzione o una proprietà. Se si preme questo interruttore per almeno 2 secondi, viene visualizzato il MENU PRINCIPALE. ([Sinistra/Destra) : Premendo il tasto destra o sinistra, è...
  • Seite 158: Installazione

    All manuals and user guides at all-guides.com Installazione PRIMA DELL’ISTALLAZIONE Prima d’istallare la telecamera, leggere le seguenti avvertenze. • Controllare che il luogo di ubicazione (soffi tto o parete) possa sopportare cinque volte il peso della telecamera. • Evitare che il cavo si impigli o che venga danneggiata la copertura dei cavi elettrici. Ciò può provocare guasti o incendi.
  • Seite 159 All manuals and user guides at all-guides.com Installazione ❶ Premere il pulsante Chiusura sul fondo della telecamera e rimuovere l’involucro a cupola dal Corpo principale, utilizzando l’altra mano. Il Corpo principale e l’Involucro interno saranno quindi visibili. ❷ Per istallare e regolare la telecamera, rimuovere l’Involucro interno. Per rimuovere l’involucro interno dal Copro principale, inserire un cacciavite lungo e sottile nella Chiusura aletta e premere verso l’esterno per rimuovere l’involucro.
  • Seite 160: Regolare La Direzione Della Telecamera

    All manuals and user guides at all-guides.com Installazione REGOLARE LA DIREZIONE DELLA TELECAMERA Quando la telecamera è fi ssata al soffi tto, si può regolare l’angolo visuale della telecamera. Si può ruotare la telecamera verso sinistra o destra (Panning) e cambiare l’inclinazione verso l’alto e verso il basso (Tilting). Nel caso di panning, il limite di rotazione della telecamera è...
  • Seite 161: Come Utilizzare Il Menu Osd

    All manuals and user guides at all-guides.com Come utilizzare il menu OSD UTILIZZO DELLE ICONE NEL MENU MENU PRINCIPALE • (ESCI) MENU PRINCIPALE Permette di uscire dall’impostazione del menu. PROFILO Prima di uscire dall’impostazione del menu, PROG CAMERA INTELLIGENZA selezionare SALVA per salvare le impostazioni o ZONA PRIVACY ABBANDONA per annullarle.
  • Seite 162: Profi Lo

    All manuals and user guides at all-guides.com Come utilizzare il menu OSD PROFILO PROFILO STANDARD CONTROLUCE GIORNO/NOTTE GIOCO PERS. Nel menu PROFILO, è possibile confi gurare subito le seguenti impostazioni della videocamera. Menu PROG CAMERA STANDARD CONTROLUCE GIORNO/NOTTE GIOCO Menu Sottomenu precedente IRIS...
  • Seite 163 All manuals and user guides at all-guides.com Come utilizzare il menu OSD Menu PROG CAMERA STANDARD CONTROLUCE GIORNO/NOTTE GIOCO Menu Sottomenu precedente GIORNO/ AUTO AUTO GIORNO AUTO GIORNO NOTTE NOTTE BURST BIL BIANCO GIORNO GIORNO/NOTTE GIORNO GIORNO/NOTTE GIORNO GIORNO MODO ATW2 ATW1 ATW1...
  • Seite 164: Impostazione Videocamera

    All manuals and user guides at all-guides.com Come utilizzare il menu OSD IMPOSTAZIONE VIDEOCAMERA Impostare le funzioni generali del modulo zoom della videocamera. Usare l’interruttore per selezionare una PROG CAMERA voce di menu. ID VIDEOCAMERA ❖ ID VIDEOCAMERA [OFF, ON] IRIS ATTIVITÀ...
  • Seite 165 All manuals and user guides at all-guides.com Come utilizzare il menu OSD ❖ IRIS [ALC] Il menu IRIS viene usato per regolare l’intensità LIVELLO [00]----I---- CONTROLUCE della radiazione che entra nella videocamera. ZONA UTIL • ALC (Controllo Automatico dell’Illuminazione) <DIMENSIONE> <POSIZIONE>...
  • Seite 166 All manuals and user guides at all-guides.com Come utilizzare il menu OSD segnale scende al di sotto del normale valore. Se nel menu ALTA SENS. viene selezionato il modo OBBIETTIVO OBIET. DC OFF o FIX, è possibile specifi care il livello AGC. LIVELLO [ 00]----I---- CONTROLUCE...
  • Seite 167 All manuals and user guides at all-guides.com Come utilizzare il menu OSD Dato che un valore fi sso del guadagno AGC viene Riduce i disturbi sulla schermata. usato nel modo FIX, è possibile selezionare uno Questo risulta particolarmente utile se la schermata dei 16 livelli dettagliati, da MOLTO BASSO a è...
  • Seite 168 All manuals and user guides at all-guides.com Come utilizzare il menu OSD  ❖ Nota : SENZA SFARF. [OFF, ON] Se la funzione ALTA SENS. viene impostata su AUTO, nel – Se si effettua l’impostazione su ON, la velocità di scatto viene menu OTTURATORE sono disponibili solo le voci OFF e fi...
  • Seite 169 All manuals and user guides at all-guides.com Come utilizzare il menu OSD condizioni ambientali. È possibile impostare l’opzione BURST su Se si preme l’interruttore SETUP quando è selezionato OFF/ON, o scegliere di emettere il segnale Burst un sottomenu NOTTE, viene visualizzato un menu in nel modo NOTTE.
  • Seite 170 All manuals and user guides at all-guides.com Come utilizzare il menu OSD AREA MASCHERA BIL BIANCO GIORNO/NOTTE GIORNO <DIMENSIONE> MODO <POSIZIONE> ROSSO [00]----I---- [00]----I---- GUAD. R [0248] GUAD. B [0247] È possibile specifi care contemporaneamente  Nota : MASCHERA 1 e 2. La MASCHERA serve solo a È...
  • Seite 171: Bil Bianco

    All manuals and user guides at all-guides.com Come utilizzare il menu OSD • 5600K : Impostare la temperatura del colore su 5600K BIL BIANCO – ROSSO : Regola l’intensità del colore rosso. GIORNO/NOTTE NOTTE LUMINOSITÀ – BLU : Regola l’intensità del colore blu. MODO ROSSO [00]----I----...
  • Seite 172: Intelligenza

    All manuals and user guides at all-guides.com Come utilizzare il menu OSD  ❖ Nota : [OFF, ON] Se la percentuale dello zoom digitale impostata è maggiore di – Visualizza un’immagine secondaria insieme 1x, la funzione BARRIERA viene disattivata. all’immagine principale sulla stessa schermata La funzione ZOOM DIGITALE ingrandisce gli stessi pixel, con un usando la funzione Immagine nell’Immagine.
  • Seite 173 All manuals and user guides at all-guides.com Come utilizzare il menu OSD È possibile impostare il rilevamento e il tracciamento BARRIERA del movimento nel menu INTELLIGENZA. LINEA ZONA ❖ ATTIVITÀ [OFF,TRACCIAT.,RILEVAZ ] • TRACCIAT. Rileva e traccia un oggetto in movimento. •...
  • Seite 174 All manuals and user guides at all-guides.com Come utilizzare il menu OSD ③ In <PUNTO> è possibile specifi care la prima ③ In <DIMENSIONE>, premere l’interruttore SETUP e usare l’interruttore posizione della linea premendo una volta l’interruttore SETUP e la seconda premendo regolare la dimensione.
  • Seite 175: Impostazione Zona Privata

    All manuals and user guides at all-guides.com Come utilizzare il menu OSD ❖ AREA MASCHERA [1~4] IMPOSTAZIONE ZONA PRIVATA Specifi care una zona di rilevazione eccezionale da mascherare. ZONA PRIVACY Selezionare un numero maschera e specifi care la dimensione e la posizione. AREA MASCHERA PRIVACY IMP.
  • Seite 176 All manuals and user guides at all-guides.com Come utilizzare il menu OSD ① Premendo l’interruttore SETUP in Selezionare una PRIVACY tra 1 e 12 e premere l’interruttore SETUP per confermare l’impostazione. <POSIZIONE>, è possibile spostare l’intera È possibile specifi care il pixel da spostare mentre si posizione della zona privacy.
  • Seite 177: Altra Impostazione

    All manuals and user guides at all-guides.com Come utilizzare il menu OSD ALTRA IMPOSTAZIONE INFORMAZIONI DI SISTEMA ALTRA PROG INFO SISTEMA IMPOST. PREDEF. TIPO 3_VAR_WDR_N COLORE OSD N. SERIE 000000000000000 VERS. CAMERA 0.50_090101 È possibile controllare le informazioni di sistema ❖...
  • Seite 178 All manuals and user guides at all-guides.com Come utilizzare il menu OSD ❖ Tabella di confi gurazione iniziale • Confi gurazione videocamera ID VIDEOCAMERA IRIS MOLTO ALTO ATTIVITÀ (M.VELOC) OTTURATORE ALTA SENS. AUTO x4 SENZA SFARF. (OFF) GIORNO/NOTTE AUTO ZOOM DIGITALE DETTAGLIO SOP COLORE AGC INVERSO...
  • Seite 179: Specifi Che

    All manuals and user guides at all-guides.com Specifi che SPECIFICHE Voci Sottovoci SCC-B5367N/SCC-5369N Tipo di videocamera Videocamera CCTV (WDR & GIORNO/NOTTE) Dispositivo CCD Super-HAD PS da 1/3” Immagine Totali 811 x 508 Pixel Effettivi 768 x 494 Sistema Interlacciato/progressivo Linee di 525 linee scansione Fotogramma...
  • Seite 180 Circa 52 dB Diaframma automatico (DC) Obiettivo Tipo di unità dell’obiettivo SCC-B5367: lunghezza focale = 2,5 - 6,0 mm / apertura diaframma = F 1,2 SCC-B5369: lunghezza focale = 2,8 - 11,0 mm / apertura diaframma = F 1,2 PAN (Panoramica) Campo 0 ~ 355°...
  • Seite 181 All manuals and user guides at all-guides.com Specifi che Voci Sottovoci SCC-B5367P/SCC-5369P Tipo di videocamera Videocamera CCTV (WDR & GIORNO/NOTTE) Dispositivo CCD Super-HAD PS da 1/3” Immagine Totali 795 x 596 Pixel Effettivi 752 x 582 Sistema Interlacciato/progressivo Linee di 625 linee scansione Fotogramma...
  • Seite 182 Circa 52 dB Diaframma automatico (DC) Obiettivo Tipo di unità dell’obiettivo SCC-B5367: lunghezza focale = 2,5 - 6,0 mm / apertura diaframma = F 1,2 SCC-B5369: lunghezza focale = 2,8 - 11,0 mm / apertura diaframma = F 1,2 PAN (Panoramica) Campo 0 ~ 355°...
  • Seite 183: Corretto Smaltimento Del Prodotto

    All manuals and user guides at all-guides.com Corretto smaltimento del prodotto (rifiuti elettrici ed elettronici) (Applicabile nell’Unione Europea e in altri paesi europei con sistema di raccolta differenziata) Il marchio riportato sul prodotto, sugli accessori o sulla documentazione indica che il prodotto e i relativi accessori elettronici (quali caricabatterie, cuffia e cavo USB) non devono essere smaltiti con altri rifiuti domestici al termine del ciclo di vita.

Diese Anleitung auch für:

Scc-b5369

Inhaltsverzeichnis