Herunterladen Inhalt Inhalt Diese Seite drucken
Num'axes Canicom Soft Gebrauchsanleitung

Num'axes Canicom Soft Gebrauchsanleitung

Empfänger-halsband
Inhaltsverzeichnis

Werbung

Verfügbare Sprachen
  • DE

Verfügbare Sprachen

  • DEUTSCH, seite 37
CANICOM
Guide d'utilisation
User's guide
Manual de instrucciones
Gebrauchsanleitung
Manuale d'uso
Soft
Fr
3
Gb 15
Es 26
De 37
It
49

Werbung

Inhaltsverzeichnis
loading

Inhaltszusammenfassung für Num'axes Canicom Soft

  • Seite 1 CANICOM Soft Guide d’utilisation User’s guide Gb 15 Manual de instrucciones Es 26 Gebrauchsanleitung De 37 Manuale d’uso...
  • Seite 2 / declares that le collier d’éducation / the training collar CANICOM Soft satisfait à toutes les dispositions de la Directive R&TTE N° 1999/5/CE du 07/04/99 du Conseil Européen complies to all dispositions of the European Council R&TTE Directives below N° 1999/5/EC et est conforme aux normes suivantes / and complies with standards below: ETSI EN 300 220-2 V2.4.1...
  • Seite 3 Avant d’utiliser l’ensemble de dressage CANICOM Soft, lisez attentivement les explications de ce guide que vous conserverez pour toute référence ultérieure. Avant la mise en place du collier CANICOM Soft, il est recommandé de faire examiner votre chien par un vétérinaire afin de vérifier qu’il n’y a pas de contre-indications.
  • Seite 4 Fr - 4 Composition et présentation du produit   Composition - un collier équipé d’une sangle - une pile lithium 3 Volts CR2450 pour le collier - une télécommande équipée d’une pile lithium 3 Volts CR2032 - une dragonne - ce guide d’utilisation ...
  • Seite 5: Première Mise En Service

    Fr - 5 Première mise en service    Mise en place de la pile dans le collier - Ôtez la trappe à pile à l’aide d’une pièce de monnaie. - Insérez la pile 3 V Lithium CR2450 en respectant la polarité (le signe « + » de la pile doit être visible). - Un bip sonore (son grave) est émis, indiquant une mise en place correcte de la pile.
  • Seite 6 Fr - 6 Pour préserver la pile, il est recommandé de mettre hors service le collier dès que vous ne l’utilisez plus. Fig. 4 Mise en/hors service du collier avec la télécommande Mettre en contact ces 2 zones pendant 1 seconde ...
  • Seite 7: Utilisation De La Télécommande

    Fr - 7 Utilisation de la télécommande   La télécommande est conçue pour piloter un collier.  Touche : avertissement sonore L’appui sur la touche bip sonore vous permet de commander à distance un avertissement sonore sur le collier. Il n’y a pas de limitation de temps pour cette fonction : des bips sonores sont émis par le collier tant que vous appuyez sur cette touche.
  • Seite 8: U Sure/Remplacement De La Pile De La Télécommande

    Fr - 8 Pendant toute la durée de l’appui sur cette touche, le témoin lumineux central de la télécommande s’allume. Il est possible d’utiliser la vibration longue de plusieurs façons en fonction de la méthode de dressage que vous utilisez. Elle peut : - servir à...
  • Seite 9: Usure/Remplacement De La Pile Du Collier

    Fr - 9 Usure/remplacement de la pile du collier   Pour contrôler l’état de la pile, observez le voyant lumineux de mise en/hors service situé en façade du collier : - La pile est en bon état : clignotement lent vert. - La pile est faible : clignotement rapide rouge.
  • Seite 10: Ajustement Du Collier

    Fr - 10 - Les performances des piles se dégradent légèrement sous des températures inférieures à 0°C. Gardez si possible votre télécommande au chaud (par exemple dans une poche intérieure) avant de l’utiliser. Ajustement du collier   - Si la sangle est trop lâche, le collier ne fonctionnera pas correctement. De plus, il risque de bouger et les frottements répétés peuvent irriter la peau de votre chien.
  • Seite 11: Entretien

    Fr - 11 - Nous déconseillons le port d’une médaille, d’un collier métallique ou de tout autre collier quand votre chien porte son collier d’éducation. - Evitez d’approcher la télécommande trop près d’objets sensibles aux champs magnétiques : celle-ci intègre un aimant permanent qui risquerait de les endommager de façon irréversible. - Prenez soin de ne pas stocker ou ranger l’appareil dans des endroits exposés à...
  • Seite 12: Caractéristiques Techniques

    Fr - 12 NE RETOURNEZ PAS VOTRE PRODUIT A VOTRE DISTRIBUTEUR. Retournez-le à l’adresse suivante : NUM’AXES ZAC des Aulnaies - 745 rue de la Bergeresse - CS 30157 45161 OLIVET CEDEX - FRANCE Pour toutes réparations, le service après-vente NUM’AXES a impérativement besoin : - de votre produit complet - de la preuve d’achat (facture ou ticket de caisse) Si vous omettez l’un de ces éléments, le service après-vente NUM’AXES vous facturera la réparation.
  • Seite 13: Conditions De Garantie

    Fr - 13 Garantie   NUM’AXES garantit le produit contre les défauts de fabrication pendant les 2 années qui suivent l’acquisition. Les frais de transport aller et retour du produit sont à la charge exclusive de l’acheteur. Conditions de garantie  ...
  • Seite 14: Collecte Et Recyclage De Votre Appareil En Fin De Vie

    Fr - 14 Collecte et recyclage de votre appareil en fin de vie   Le pictogramme apposé sur votre produit signifie que l’équipement ne peut être mêlé aux ordures ménagères. Il doit être remis à un point de collecte approprié pour le traitement, la valorisation et le recyclage des déchets électroniques ou rapporté...
  • Seite 15 Gb - 15 User's guide WARNING Any person with individual device for cardiac assistance (pacemaker, defibrillator) must take precautions when they use. This device emits some static magnetic fields (a magnet is located in the remote control). Frequency= 869 Mhz, at = 25 mW The device complies with the European Standards.
  • Seite 16 Gb - 16 Contents and presentation   Contents of the product - receiver collar fitted with a strap - 3-V CR2450 lithium battery for the collar - remote control fitted with a 3-V CR2032 lithium battery - carry strap - this user’s guide ...
  • Seite 17: First Use From New

    Gb - 17 First use from new    Fitting the battery in the receiver collar - Use a coin to remove the battery cover. - Insert the battery (3-V Lithium CR2450) paying attention to follow polarity indicated on the housing. - A beep sound (low pitch) is emitted, indicating the correct installation of the battery.
  • Seite 18 Each remote control has its own individual radio operator code. The coding of the remote control with the receiver collar enables the two units to work together. IMPORTANT: before beginning the coding, make sure no other person is using his CANICOM Soft. Soft or other products from the NUM'AXES range close by: your receiver collar could accidentally record the code of his remote control.
  • Seite 19: How To Use The Remote Control

    Gb - 19 2 Collar in position “deactivated” (indicator light off): move the remote control towards the collar so that the round mark on the remote control comes into contact with the white mark on the collar, hold for 6 seconds.
  • Seite 20: C Hecking/Replacing Battery Of Remote Control

    Gb - 20 - send a vibration to your dog when it is disobedient, - draw its attention… It’s very important to always use the vibration in the same way in order not to disturb your dog.  V V V button: long vibrations If you press the V V V button, the receiver collar will emit a long vibration.
  • Seite 21: Getting The Best Results

    Gb - 21 To check the condition of the battery, observe the indicator light located on the front of the receiver collar: - battery sufficiently charged: flashes slow green. - weak battery: flashes quickly red. Replace the old battery with a new one (3-V Lithium CR2450) (See § First use from new – Fitting the battery in the receiver collar) then check the receiver collar operates correctly.
  • Seite 22: Fitting The Collar

    Gb - 22 Fitting the collar   - If the strap is too loose, the collar is likely to move and repeated friction can irritate the skin of your dog. Furthermore, it will not function correctly. - If the collar is too tight, the dog will have breathing difficulties. The strap is properly adjusted when you can insert two fingers between the strap and your dog’s neck.
  • Seite 23: Maintenance

    Gb - 23 - It is necessary to replace the battery every two years, even if the unit has not been used for long periods. - Never leave discharged batteries in the unit (remote control and collar): they could damage your product.
  • Seite 24: Technical Specifications

    Gb - 24 Technical specifications   Remote control Receiver collar Power 1 3-V CR2032 lithium battery 1 3-V CR2450 lithium battery Battery life In stand-by: approx. 6 months In stand-by: approx. 7 months Continuous use: approx. 1 1/2 month Continuous use: approx. 2 months Range Approximately 200 m Tightness...
  • Seite 25: Register Your Product

    Gb - 25 5 NUM’AXES reserves the right to modify the characteristics of its products with a view to making technical improvements or to complying with new regulations. 6 The information contained in this guide may be subject to amendment without prior notice. 7 Photos and drawings are not contractual.
  • Seite 26 Antes de colocar a su perro el CANICOM Soft, se recomienda que sea examinado por un veterinario con el fin de cerciorarse de que el animal esté en condiciones de llevar el collar.
  • Seite 27 Es - 27 Composición y presentación   Composición - 1 collar equipado con una correa - 1 pila de litio 3 V CR2450 - 1 mando equipado con una pila de litio 3 V CR2032 - 1 correa de seguridad - este manual de instrucciones ...
  • Seite 28: Primera Puesta En Servicio

    Es - 28 Primera puesta en servicio    Colocar la pila en el collar - Utilice una moneda para girar la tapa de la pila. - Introduzca la pila (3 V de litio CR2450) respetando la orientación indicada sobre la pila. - Se emite una señal sonora que indica la colocación correcta de la pila.
  • Seite 29 Es - 29 Si no utiliza el collar durante cierto tiempo, es conveniente ponerlo fuera de servicio para preservar la duración de la pila. Fig. 4 Puesta en/fuera de servicio del collar con un mando a distancia Poner en contacto estas 2 zonas durante 1 segundo ...
  • Seite 30: Utilización Del Mando A Distancia

    Es - 30 Utilización del mando a distancia   El mando a distancia ha sido diseñado para controlar un collar de adiestramiento.  Tecla : aviso sonoro La presión sobre el pulsador permite emitir a distancia un aviso previo sonoro al collar. No hay limitación de tiempo en esta función: las señales sonoras continuarán mientras que mantenga pulsado el botón.
  • Seite 31: D Esgaste/Sustitución De La Pila Del Mando A Distancia

    Es - 31 Es posible utilizar la vibración larga de varias maneras según el tipo de adiestramiento que esté realizando. Puede: - avisar el perro de su error, - llamar su atención a distancia… Es muy importante utilizar siempre la misma forma de adiestrar con el fin de no molestar a su perro. D esgaste/sustitución de la pila del mando a distancia  ...
  • Seite 32: Para Obtener Los Mejores Resultados

    Es - 32 Verificación de su collar de adiestramiento   En cualquier momento puede comprobar que funciona correctamente de la siguiente manera: - Ponga en servicio “encendido” el mando y el collar receptor. - Pruebe las distintas funciones del collar: - pulse la tecla : el collar debe emitir señales sonoras.
  • Seite 33: Iniciación Al Collar De Adiestramiento

    Es - 33 Iniciación al collar de adiestramiento   - El período de iniciación puede empezar con cachorros de 6 meses, que ya hayan recibido una educación básica con los rudimentos del adiestramiento: “sentado”, “quieto” o por lo menos, algún rapapolvo… - No ponga el collar a un perro con mala salud (con problemas cardíacos, epilepsia, u otros) o que tenga trastornos de comportamiento.
  • Seite 34: En Caso De Malfuncionamiento

    Es - 34 - Se recomienda cambiar la junta del collar una vez al año para preservar su estanqueidad. - La correa puede ser lavada en la mano con agua jabonosa. En caso de malfuncionamiento   Antes de atribuir un fallo al aparato es preciso consultar este manual para comprobar que el problema no sea debido a una pila agotada o a errores de uso.
  • Seite 35: Condiciones De Garantía

    Es - 35 Garantía   NUM’AXES garantiza el producto contra los defectos de fabricación durante los 2 años consecutivos a su adquisición. Los gastos del transporte ida/vuelta del producto corren exclusivamente a cargo del comprador. Condiciones de garantía   1 La garantía será válida únicamente presentando a NUM’AXES la fecha de compra (factura o ticket de compra) sin tachaduras.
  • Seite 36: Reciclaje De Aparatos Electrónicos Al Final De Su Vida

    Es - 36 Reciclaje de aparatos electrónicos al final de su vida   que aparece en su producto, significa que el equipo no puede mezclarse con basuras El pictograma domésticas. Debe ser entregado en un punto de recogida adecuado para el tratamiento, la valorización y el reciclaje de las basuras electrónicas o bien devolverlo a su distribuidor.
  • Seite 37 Dieses Gerät entspricht den europäischen Normen. Wir danken Ihnen, dass Sie sich für ein Gerät aus der NUM’AXES Produktreihe entschieden haben. Sie sollten vor dem Gebrauch von CANICOM Soft die Anweisungen dieser Anleitung sorgfältig durchlesen und diese zur Konsultation bei später auftretenden Fragen aufbewahren.
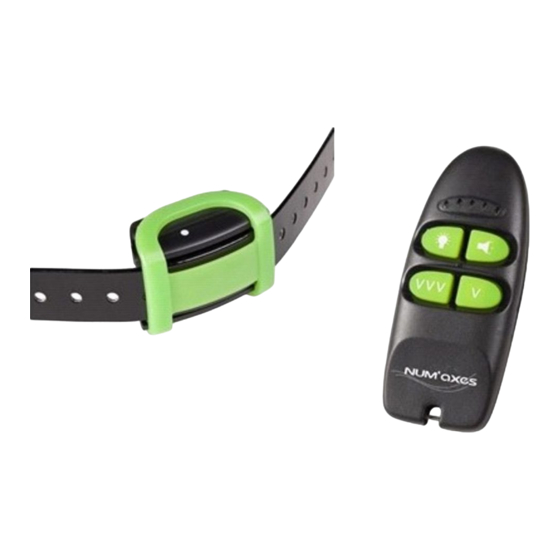
  • Seite 38 D - 38 Lieferumfang und Vorstellung   Lieferumfang - Ein Halsband mit einem Gurt - Eine 3 V Lithium-Batterie CR2450 für das Halsband - Einer Handsender mit einer 3 V Lithium-Batterie CR2032 - Ein Trageguet - Diese Gebrauchsanleitung  Vorstellung Abb.
  • Seite 39 D - 39 Erste Inbetriebnahme    Legen Sie die Batterie in dem Empfänger-Halsband ein - Lösen Sie die Batterieklappe mit einer Münze zurück. - Legen Sie die Batterie (Typ 3 V-Lithium CR2450) gemäß der neben dem Batteriefach aufgezeigten Polarität ein. - Es ertönt ein Piepton, der auf die richtige Installation der Batterie hinweist.
  • Seite 40 D - 40  Ein- und Ausschalten des Empfänger-Halsbandes Es befindet sich einen Magnet im Handsender, mit welchem Sie das Halsband ein-/ausschalten können. - Zum Einschalten: Halten Sie die runde Markierung des Magnets auf der linken Seite des Handsenders an die weiße Markierung des Halsbandes eine Sekunde lang aneinander (siehe Abb. 4). Die Anzeige am Halsband leuchtet auf, und blinkt grün: das Halsband ist nun eingeschaltet.
  • Seite 41: B Edienung Des Handsenders

    D - 41 VERFAHREN ZUR FREQUENZABSTIMMUNG: 1 Um die Frequenzabstimmung durchzuführen, soll der Handsender betriebsbereit sein (Die Batterie befindet sich im Gehäuse). 2 Das Empfänger-Halsband ist außer Betrieb (ausgeschaltet, die Anzeige ist aus): Halten Sie die runde Markierung des Handsenders an die weiße Markierung des Halsbandes 6 Sekunden lang aneinander (siehe Abb.
  • Seite 42 D - 42  V-Taste: kurze Vibration Beim Drücken der V-Taste lösen Sie aus der Entfernung Vibrationen am Halsband aus (3 nahe aufeinanderfolgende Vibrationen). Beim Drücken dieser Taste leuchtet die LED-Anzeige des Handsenders auf. Vibrationen benutzen Sie verschiedener Art, je nach der Erziehungs-Methode. Entweder: - Zur Warnung des Hundes vor dem Irrtum, - Die Aufmerksamkeit des Hundes aus der Entfernung anzuziehen, - Zum Kommando „Schau mich an“...
  • Seite 43: Z Ustand/Auswechseln Der Batterie Des Handsenders

    D - 43 Z ustand/Auswechseln der Batterie des Handsenders     Wenn nach einer Auslösung alle 5 LED-Anzeige gleichzeitig 3 Mal schnell blinken, deutet dies auf eine schwache Batterie des Handsenders hin. Wechseln Sie die Batterie frühzeitig aus. Mit einer schwachen Batterie vermindert sich die Leistung (die Funkreichweite) des Handsenders. So gehen Sie vor: - Lösen Sie die Batterieklappe auf der Rückseite des Handsenders mit einer Münze und nehmen Sie den Batteriedeckel ab.
  • Seite 44: Justierung Des Halsbandes

    D - 44 - Drücken Sie auf die V V V-Taste: das Halsband vibriert solange Sie auf dieser Taste drücken (maximal jedoch 8 Sekunden). - Drücken Sie auf die V-Taste: eine Reihe von 3 nachfolgenden Vibrationen wird am Halsband ausgelöst. So erzielen Sie die besten Ergebnisse  ...
  • Seite 45: Vorsichtsmaßnahmen

    D - 45 - Arbeiten Sie nicht mit diesem Halsband, wenn Ihr Tier krank (Herzprobleme, Epilepsie usw. …) oder aber stark verhaltensgestört ist. - Eine gewisse Gewöhnung an das Hundhalsband ist immer erforderlich: Legen Sie Ihrem Hund das Halsband zunächst einige Zeit an, ohne von seinen Funktionen Gebrauch zu machen. Noch besser: Lernen Sie Ihrem Hund, dass das Halsband etwas schönes ist.
  • Seite 46: Was Tun, Wenn Ihr Gerät Nicht Funktioniert

    D - 46 - Lassen Sie niemals die verbrauchte Batterie im Handsender oder im Halsband, sie könnte auslaufen und Ihr beschädigen. - Sie sollten das Gerät von Kindern fernhalten. Verwenden Sie es nicht als Spielzeug für Ihre Kinder oder Sie selbst. Pflege  ...
  • Seite 47: Technische Merkmale

    D - 47 Technische Merkmale   Handsender Empfänger-Halsband Spannungsversorgung 1 Batterie Lithium 3 V CR2032 1 Batterie Lithium 3 V CR2450 Durchschnittliche Im Standby-Zustand: ca. 6 Monate Im Standby-Zustand: ca. 7 Monate Batterieleistung Bei durchschnittlicher Nutzung: ca. Bei durchschnittlicher Nutzung: 1 1/2 Monate ca.
  • Seite 48: Registrieren Ihres Produktes

    D - 48 5. NUM’AXES behält sich das Recht vor, die Eigenschaften seiner Produkte zur technischer Verbesserung bzw. zur Einhaltung von neuen Vorschriften zu verändern. 6. Die in dieser Gebrauchsanleitung angegebenen Informationen können ohne Voranmeldung geändert werden. 7. Die Photos und Zeichnungen können von den Produkten abweichen. Registrieren Ihres Produktes  ...
  • Seite 49 Prima di utilizzare CANICOM Soft, leggete attentamente le istruzioni d’uso di questo manuale per conoscere tutte le prestazioni del prodotto e ottenere i migliori risultati. Prima dell’utilizzo del collare CANICOM Soft, si raccomanda di far visitare il vostro cane da un veterinario per verificare che non sussistano controindicazioni.
  • Seite 50 It - 50 Composizione e presentazione   Composizione - collare con cinghia - pila litio 3 Volts CR2450 per il collare - telecomando equipaggiato con pila litio 3 Volts CR2032 - collarino porta telecomando - manuale istruzioni  Presentazione Fig.
  • Seite 51: Primo Utilizzo

    It - 51 Primo utilizzo    Inserimento della pila nel collare - Svitare il coperchio. - Inserite la pila al litio 3 V CR2450 rispettando la polarità indicata nel vano pila. - Un segnale sonoro di tonalità grave indicherà che la pila è stata inserita correttamente. Nel caso cui non udiate alcun segnale sonoro dopo avere inserito la pila, toglietela immediatamente e verificare che la polarità...
  • Seite 52 It - 52 Fig. 4 Punti di contatto per accensione / spegnimento / codifica del collare con il telecomando Per accendere e spegnere il collare mettere a contatto queste 2 zone per circa un secondo  Codifica del telecomando con il collare Ciascun telecomando ha un proprio codice radio.
  • Seite 53: Utilizzo Del Telecomando

    It - 53 Utilizzo del telecomando   Il telecomando è predisposto per gestire un solo collare.  Tasto : avvertimento sonoro Premendo il tasto del telecomando, potrete inviare a distanza un avvertimento sonoro sul collare. Il segnale sonoro viene emesso ogni volta che premete questo tasto. La durata del suono è in funzione del tempo in cui mantenete premuto il tasto.
  • Seite 54 It - 54  Tasto V V V : vibrazione lunga Premendo il tasto V V V (vibrazione lunga) potete far emettere delle vibrazioni al collare. La durata equivale al tempo in cui viene mantenuto premuto il pulsante (per un massimo di 8 secondi). Premendo questo tasto, il LED indicatore centrale del telecomando si accende.
  • Seite 55: Verifica Del Corretto Funzionamento

    It - 55 Verifica e sostituzione pila collare   Per verificare lo stato della pila, osservate il LED indicatore con il collare acceso: - con la pila in buono stato, il LED verde lampeggia ogni secondo - con la pila quasi scarica, il LED si colora di rosso e lampeggia rapidamente. Dovete quindi sostituire la pila (pila litio CR2450 da 3V - cf.
  • Seite 56: Posizionamento Del Collare

    It - 56 Posizionamento del collare   - Il collare devono essere posizionati sotto il collo del cane. - La cinghia deve essere stretta in modo da assicurare il contatto con la pelle del cane. - La corretta posizione del collare indossato dal cane, è con la spia luminosa rivolta verso il muso. Si consiglia di non lasciare il collare per piú...
  • Seite 57: Manutenzione

    It - 57 - Abbiate cura di tenere sempre l’apparecchio in un luogo idoneo. Non lasciatelo vicino a fonti di calore, esposto al sole o a temperature troppo fredde per un periodo di tempo prolungato. - Si raccomanda di utilizzare pile dello stesso modello e della stessa marca, come quella che trovate installata nel prodotto.
  • Seite 58: Caratteristiche Tecniche

    It - 58 Caratteristiche tecniche   Telecomando Collare Alimentazione 1 pila litio da 3 V tipo CR2032 1 pila litio da 3 V tipo CR2450 Autonomia In funzione stand-by: circa 6 mesi In funzione stand-by: circa 7 mesi Utilizzo intensivo: circa 45 giorni Utilizzo intensivo: circa 2 mesi Portata radio circa 200 m...
  • Seite 59: Registrazione Del Prodotto

    It - 59 Registrazione del prodotto   Il prodotto può essere registrato sul nostro sitio web www.numaxes.com. Accessori   Sono disponibili presso il vostro rivenditore di fiducia accessori e parti di ricambio (cinghia collare, pile ...). Raccolta e riciclaggio del vostro vecchio apparecchio  ...
  • Seite 60 info@numaxes.com export@numaxes.com www.numaxes.com...

Inhaltsverzeichnis