Cameo CLPFLAT1UVIR Bedienungsanleitung
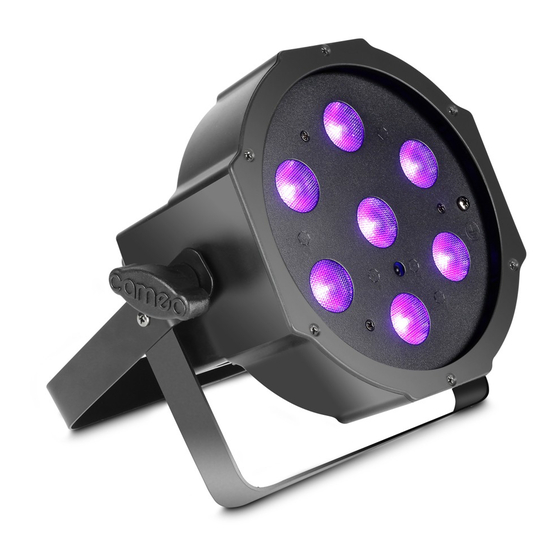
7 x 3 w high power flat uv led par light in black housing
with ir-remote control capability

Verwandte Anleitungen für Cameo CLPFLAT1UVIR


Inhaltszusammenfassung für Cameo CLPFLAT1UVIR
- Seite 1 USER´S MANUAL BEDIENUNGSANLEITUNG MANUEL D`UTILISATION MANUAL DE USUARIO INSTRUKCJA OBSŁUGI MANUALE D‘ USO LED UV FLAT PAR 7 X 3 W HIGH POWER FLAT UV LED PAR LIGHT IN BLACK HOUSING WITH IR-REMOTE CONTROL CAPABILITY CLPFLAT1UVIR / CLPFLAT1UVIRWH...
-
Seite 2: Preventive Measures
Questo dispositivo è stato sviluppato e prodotto in conformità con elevati standard qualitativi che ne garantiscono il regolare funzionamento per molti anni. Leggete attentamente questo manuale d‘uso per utilizzare al meglio il vostro nuovo prodotto Cameo Light. Per maggiori informazioni su Cameo Light consultare la nostra pagina Web WWW.CAMEOLIGHT.COM. -
Seite 3: Sicherheitshinweise
25. Do not step on the power cord. Make certain that the power cable does not become kinked, especially at the mains outlet and/or power adapter and the equipment connector. 26. When connecting the equipment, make certain that the power cord or power adapter is always freely accessible. Always disconnect the equip- ment from the power supply if the equipment is not in use or if you want to clean the equipment. -
Seite 4: Bei Geräten Mit Netzanschluss
12. Sorgen Sie dafür, dass kein Tropf- oder Spritzwasser in das Gerät eindringen kann. Stellen Sie keine mit Flüssigkeit gefüllten Behältnisse wie Vasen oder Trinkgefäße auf das Gerät. 13. Sorgen Sie dafür, dass keine Gegenstände in das Gerät fallen können. 14. -
Seite 5: Mesures Préventives
VORSICHT! WICHTIGE HINWEISE IN BEZUG AUF LICHT-PRODUKTE! 1. Das Produkt ist für den professionellen Einsatz im Bereich der Veranstaltungstechnik entwickelt worden und ist nicht für die Raumbeleuchtung in Haushalten geeignet. 2. Blicken Sie niemals, auch nicht kurzzeitig, direkt in den Lichtstrahl. 3. -
Seite 6: Medidas De Seguridad
35. Si vous désirez alimenter plusieurs projecteurs simultanément, les conducteurs du câble secteur doivent posséder une section minimale de 1,5 mm². Dans l’Union Européenne, les câbles électriques doivent être de type H05VV-F ou équivalent. Adam Hall propose des câbles secteur adaptés. De tels câbles permettent d’alimenter plusieurs appareils par renvoi secteur de l’un à... -
Seite 7: Środki Ostrożności
PARA LOS EQUIPOS CON TOMA ELÉCTRICA: 22. ADVERTENCIA: Si el cable eléctrico está provisto de un contacto de protección, debe conectarse a una toma eléctrica con conexión a tierra. No desactivar nunca esta conexión de protección a tierra del cable eléctrico. 23. - Seite 8 5. Używać urządzenia wyłącznie w sposób zgodny z jego przeznaczeniem. 6. Stosować wyłącznie stabilne i pasujące statywy, ew. elementy mocujące (w przypadku instalacji stałych). Należy zadbać o prawidłową instalację uchwytów ściennych i ich odpowiednie zabezpieczenie. Zapewnić bezpieczną instalację urządzenia i upewnić się, że urządzenie nie spadnie. 7.
-
Seite 9: Misure Precauzionali
Ostrzeżenie! Ten symbol ostrzega przed gorącymi powierzchniami. Podczas użytkowania niektóre elementy mogą się nagrzać. Urządzenie można dotykać lub transportować dopiero po jego ostygnięciu (po odczekaniu co najmniej 10 minut). UWAGA! WYSOKI POZIOM GŁOŚNOŚCI PRODUKTÓW AUDIO! To urządzenie przewidziane jest do zastosowań profesjonalnych. Komercyjne stosowanie tego urządzenia podlega obowiązującym w danym kraju przepisom i wytycznym dotyczącym zapobiegania wypadkom. - Seite 10 29. Per staccare completamente il dispositivo dalla rete elettrica, rimuovere il cavo di rete o l‘adattatore di rete dalla presa. 30. Per staccare un dispositivo provvisto di presa Volex, è prima necessario sbloccare la relativa spina Volex del dispositivo stesso. Tirando il cavo di rete, però, il dispositivo potrebbe spostarsi e cadere, provocando danni alle persone o di altro genere.
-
Seite 11: Operation
(optional), operating voltage 100 V-240 V AC, Power Consumption 16 W OPERATION The Cameo FLAT1 UV IR is a DMX 512 controllable spotlight and can be operated as standalone device, in Master/Slave mode. The integrated IR sensor enables controlling via an optional IR remote control. - Seite 12 (opcional), alimentación eléctrica de 100-240 VAC, consumo de 16 W. El FLAT1 UV IR de Cameo es un foco que se controla por DMX512 y que también puede utilizarse en los modos autónomo y maestro/esclavo. El sensor de infrarrojos integrado permite controlar el foco mediante un mando a distancia por infrarrojos opcional.
- Seite 13 CONNECTIONS, CONTROLS AND INDICATORS / ANSCHLÜSSE, BEDIEN- UND ANZEIGEELEMENTE / CONNECTEURS, CONTRÔLES ET INDICATEURS / CONEXIONES, CONTROLES E INDICADORES / PRZYŁĄCZA, ELEMENTY OBSŁUGI I WSKAŹNIKI POWER IN/ FUSE IEC power socket with fuse holder. Operating voltage 100 - 240 V AC / 50 - 60 Hz. Connection via the included IEC power cord. F3AL / 250 V fuse (5 x 20 mm).
- Seite 14 Presa XLR femmina a 3 poli per l’inoltro del segnale di controllo DMX. POWER OUT IEC mains output socket. Used to supply power to additional CAMEO spotlights. Make sure that the total current consumption in amperes (A) of all connected devices does not exceed the specified value on the device.
- Seite 15 MODE wybór funkcji Standalone, trybów DMX i adresu DMX oraz trybu pracy Slave. ENTER umożliwia zmianę wartości i potwierdzanie zmian wartości. Użyć przyciskówUP i DOWN, aby np. ustawić jasność, prędkość efektu stroboskopowego lub zmienić adres DMX. MODE consente di selezionare la funzione standalone, la modalità DMX, l’indirizzo DMX e la modalità slave. ENTER permette di modificare un valore e di confermarne le modifiche.
- Seite 16 und drücken auf ENTER. Das Display beginnt zu blinken und Sie können mit Hilfe der Taster UP und DOWN den Modus 1-Kanal, 2-Kanal, oder 3-Kanal auswählen. Bestätigen Sie die Eingabe durch Drücken auf ENTER. DMX-Tabellen mit den Kanalbelegungen finden Sie in dieser Anleitung unter DMX-STEUERUNG.
- Seite 17 AJUSTE DE LA DIRECCIÓN INICIAL DMX Para configurar la dirección inicial DMX, pulse varias veces el botón MODE hasta que en pantalla se muestre «Axxx»; a continuación, pulse ENTER. La pantalla empezará a parpadear y podrá entonces seleccionar la dirección inicial DMX, de A001 a A512, mediante los botones UP y DOWN. Confirme con el botón ENTER.
- Seite 18 NOTA Pochi secondi dopo il corretto collegamento alla rete elettrica, il faro è pronto per l’uso e passa alla modalità di funzionamento selezionata in precedenza. FUNZIONAMENTO STANDALONE Per effettuare l’impostazione desiderata della luminosità e dello stroboscopio, premere MODE fino a quando sul display non appare “CUxx”, quindi premere due volte su ENTER.
- Seite 19 4 levels of brightness can be activated by pressing the respective UV button repeatedly, whereby at Level 1 the LEDs are switched off. All other buttons on this remote control have no function for the Cameo CLPFLAT1UVIR model. Richten Sie die Infrarot-Fernbedienung in Sichtverbindung direkt auf den auf der Vorderseite des Strahlers verbauten Infrarot-Sensor. Die maximale Reichweite beträgt ca.
- Seite 20 Al pulsar repetidamente el botón UV, irá variando su intensidad en 4 niveles, correspondiendo el nivel 1 a los LED apagados. Los demás botones de este mando a distancia no tienen ninguna función en el modelo CLPFLAT1UVIR de Cameo. Pilot na podczerwień skierować bezpośrednio w stronę czujnika podczerwieni znajdującego się na przednim panelu reflektora. Maksymalny zasięg wynosi ok.
- Seite 21 DMX CONTROL / DMX STEUERUNG / PILOTAGE DMX / CONTROL DMX / STEROWANIE DMX / CONTROLLO DMX 1-Channel Mode Function Values Dimmer 0% to 100% 2-Channel Mode Function Values Dimmer 0% to 100% Strobe open Strobe Strobe slow -> fast <1Hz - 20Hz 3-Channel Mode Function Values...
- Seite 22 DMX TECHNOLOGY / DMX-TECHNIK / TECHNIQUE DMX / TECNOLOGÍA DMX / TECHNIKA DMX / TECNOLOGIA DMX DMX-512 DMX (Digital Multiplex) is the designation for a universal transmission protocol for communications between corresponding devices and controllers. A DMX controller sends DMX data to the connected DMX device(s).
-
Seite 23: Dmx-Verbindung
DMX-512 DMX (Digital Multiplex) ist die Bezeichnung für ein universelles Übertragungsprotokoll für die Kommunikation zwischen entsprechenden Geräten und Controllern. Ein DMX-Controller sendet DMX-Daten an das/die angeschlossene(n) DMX-Gerät(e). Die DMX-Datenübertragung erfolgt stets als serieller Datenstrom, der über die an jedem DMX-fähigen Gerät vorhandenen DMX IN- und DMX OUT- Anschlüsse (XLR-Steckverbinder) von einem angeschlossenen Gerät an das nächste weitergeleitet wird, wobei die maximale Anzahl der Geräte 32 nicht überschreiten darf. -
Seite 24: Protocole Dmx
DMX-512 Le terme DMX (Digital Multiplex) désigne un protocole de transport universel permettant la communication entre des appareils et des contrôleurs à ce format. Un contrôleur DMX envoie des données DMX aux appareils DMX qui lui sont connectés. Les données DMX sont transportées sous forme d'un flux série, renvoyé... - Seite 25 DMX512 DMX (Digital Multiplex) es el nombre de un protocolo universal utilizado como medio de comunicación entre dispositivos y controladores. El controlador DMX envía datos DMX a los equipos DMX conectados. Los datos DMX se envían como datos serie que se transmiten de equipo a equipo a través de los conectores XLR «DMX IN»...
- Seite 26 DMX-512 DMX (Digital Multiplex) to nazwa uniwersalnego protokołu transmisji do komunikacji między odpowiednimi urządzeniami a kontrolerami. Kontroler DMX wysyła dane DMX do podłączonych urządzeń DMX. Transmisja danych DMX następuje zawsze w formie szeregowego strumienia danych, który jest przekazywany z jednego urządzenia do następnego przez znajdujące się w każdym urządzeniu obsługującym standard DMX złącza „DMX IN”...
-
Seite 27: Collegamento Dmx
DMX512 DMX (Digital Multiplex) è la sigla di un protocollo di trasmissione universale per la comunicazione tra dispositivi e controller. Un controller DMX invia dati DMX ai dispositivi DMX collegati. I dati DMX vengono sempre trasmessi come flusso di dati seriale, che viene inoltrato da un dispositivo collegato al successivo attraverso le connessioni (connettori XLR) DMX IN e DMX OUT presenti per ogni dispositivo DMX compatibile, per un massimo di 32 dispositivi. - Seite 28 SPECIFICATIONS / TECHNISCHE DATEN / CARACTÉRISTIQUES TECHNIQUES / CARACTERÍSTICAS TÉCNICAS / PRZYŁĄCZA, WYMIARY I MONTAŻ / DATI TECNICI Model Name: CLPFLAT1UVIR / CLPFLAT1UVIRWH Product Type: LED PAR can Type: flat can Colour Spectrum: UV (396 nm) Number of LEDs: LED Type: Beam Angle: 40°...
- Seite 29 Gewicht: 1,2kg Weitere Eigenschaften: geräuschlos durch Konvektionskühlung, Netzkabel und Doppelbügel inklusive, IR-Fernbedienung optional (CLPFLAT1REMOTE) Référence Modèle : CLPFLAT1UVIR / CLPFLAT1UVIRWH Type de Produit : Projecteur PAR Can à LED Type : Flat Can (profondeur réduite) Spectre de Couleurs : UV (396 nm)
- Seite 30 Peso: 1,2 kg Otras características: Silencioso gracias a la refrigeración por convección, cable eléctrico y soporte doble incluidos, mando a distancia por infrarrojos opcional (CLPFLAT1REMOTE) Oznaczenie modelu: CLPFLAT1UVIR / CLPFLAT1UVIRWH Rodzaj produktu: reflektor LED Par Typ: reflektor płaski Spektrum kolorów:...
- Seite 31 Indicatori: Display LED a 4 digiti Tensione di esercizio: 100 - 240 V AC, 50/60 Hz Potenza assorbita: 16 W Collegamento alimentazione elettrica: Presa IEC ingresso ed uscita Fusibile: F3AL/250 V (5x20 mm) Temperatura di esercizio: 0 °C - 40 °C Umidità...
-
Seite 32: Herstellergarantie & Haftungsbeschränkung
MANUFACTURER´S DECLARATIONS / HERSTELLERERKLÄRUNGEN / DECLARATIONS / DECLARACIÓN DEL FABRICANTE / DEKLARACJE PRODUCENTA / DICHIARAZIONI DEL PRODUTTORE MANUFACTURER‘S WARRANTY & LIMITATIONS OF LIABILITY You can find our current warranty conditions and limitations of liability at: http://www.adamhall.com/media/shop/downloads/documents/manufactur- ersdeclarations.pdf. To request warranty service for a product, please contact Adam Hall GmbH, Daimler Straße 9, 61267 Neu Anspach / Email: Info@adamhall.com / +49 (0)6081 / 9419-0. -
Seite 33: Corretto Smaltimento Del Prodotto
GWARANCJA PRODUCENTA I OGRANICZENIE ODPOWIEDZIALNOŚCI Nasze aktualne warunki gwarancji i informacje dotyczące ograniczenia odpowiedzialności znajdą Państwo na stronie: http://www.adamhall.com/me- dia/shop/downloads/documents/manufacturersdeclarations.pdf. W razie konieczności skorzystania z serwisu proszę skontaktować się z firmą Adam Hall GmbH, Daimlerstraße 9, 61267 Neu Anspach / e-mail Info@adamhall.com / +49 (0)6081 / 9419-0. W celu uzyskania aktualnej wersji deklaracji zgodności proszę... - Seite 36 WWW.CAMEOLIGHT.COM Adam Hall GmbH | Daimlerstrasse 9 | 61267 Neu-Anspach | Germany Tel. +49(0)6081/9419-0 | Fax +49(0)6081/9419-1000 web : www.adamhall.com | e-mail : mail@adamhall.com REV: 01...