Retevis Ailunce HD2 Bedienungsanleitung
Vorschau ausblenden
Andere Handbücher für Ailunce HD2:
- Bedienungsanleitung (78 Seiten) ,
- Bedienungsanleitung
Inhaltsverzeichnis
Quicklinks
Inhaltsverzeichnis

Verwandte Anleitungen für Retevis Ailunce HD2


Inhaltszusammenfassung für Retevis Ailunce HD2
- Seite 1 User’s Manual...
-
Seite 3: Inhaltsverzeichnis
Address: Uetzenacker 29,38176 wendeburg *Please download the complete electronic manual from http://www.retevis.com *Bitte laden Sie das vollständige elektronische Handbuch von http://www.retevis.com herunter. *Veuillez télécharger le manuel électronique complet sur http://www.retevis.com. *Si prega di scaricare il manuale elettronico completo da http://www.retevis.com. -
Seite 4: Safety And Overview
Safety and Overview We are grateful that you choose our Retevis/Ailunce digital radio. We believe this easy-to-use transceiver will provide dependable and reliable communicate to people operating at peak efficiency. The transceivers incorporate the latest in advanced technology. As a result, we feel strongly that you will be pleased with the quality and features... -
Seite 5: Unpacking And Checking Equipment
High: 5W TX power Transmitter Middle : 4W Low: 1W Extra power: 0.5W ±2.5ppm Frequency Stability Modulation Limits ±5.0KHz@25KHz(25Khz) ±2.5KHz@12.5KHz(12.5Khz) Adjacent Channel Power ≤70dB(25Khz)≤60dB(12.5Khz) Signal-to-Noise Ratio 25Khz: 45dBm;12.5Khz: 40dBm 4FSK digital modulation 12.5KHz(Data)7K60FXD 12.5KHz(Data+Voice)7K60FXE Audio Distortion ≤5% Bit Error Rate ≤3% * The ranges may differ, depending on the transceiver version, and specifc regulator requirements. -
Seite 6: Getting Acquainted
◆ Please only use the original factory battery pack and charger. They are available from your local agent. ◆ If you are unsure about non-original factory battery packs and accessories, please do not use them. Use of non-original items may cause damage to the radio and can cause accidents. -
Seite 7: Basic Operation
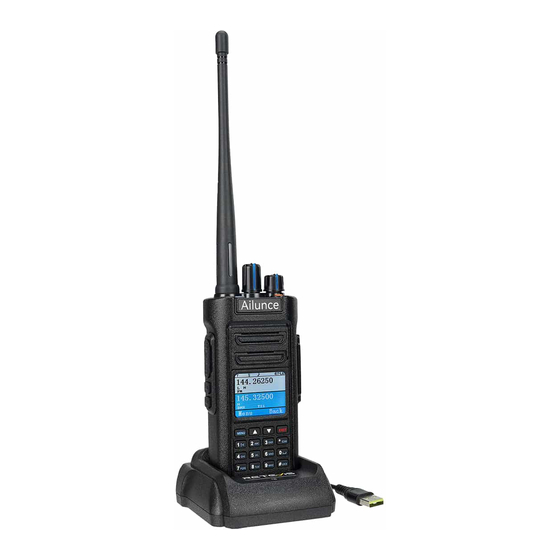
LCD Display meaning LCD Display Icon Indicates received signal strength; Keyboard Lock. Battery Save. FM Radio is on. Voice announcement and Key tone on. Displays remaining battery percentage level Display power level. Means current channel is wide bandwidth. Means current channel set with CTCSS tone. Shift Up Plus or Minus. -
Seite 8: Radio Menu Setting- Main Set
Radio Menu Setting- Main Set Menu Definition 0~9 levels (In analog mode, when the Squelch level is set high, the background hiss noise will be Squelch muted. However, only the stronger signals will be heard. If the Squelch level is set low, this will allow lower strength signals to be heard, but the radio will now be more prone to hearing the background hiss noise from time to time.) Power saving ratio (It indicates the battery saving rate, the highest rate is 1�4. -
Seite 9: Channel Settings(Band A Set And Band B Set
Channel settings(Band A Set and Band B Set) Zone Choose the working zone. Switch GPS on or off. (Only GPS version). RxGPSInfo Confirm to receive the GPS information. TxGPSInfo Confirm to transmit the GPS information. Step Frequency step choose for current channel. Power Select power level for current channel. -
Seite 10: Detailed Functional Operations
FM radio 32 FM Radio channels can be stored through computer program software; 1)Press the [MENU] key to turn off the radio, or turn on the radio, press [EXIT] to exit. 2)Long press the Exit button to switch between the VFO channel and MR storage channel in radio mode;... -
Seite 11: Frequency Scan And Channel Scan Operation
The transmission frequency of the radio is 439.2000-8.0000 MHz, which is 431.20000 MHz; 4)Choose a same color code with the repeater color code on the radio Band A or B set. 5)Choose DMR mode “repeater” for a repeater channel. 6)Choose a communication contact for this repeater channel; 7)After completing the above operations, go back to the standby interface. -
Seite 12: Promiscuous Feature
Upload the contacts CSV sheet to the radio via the CPS. 8.Promiscuous Feature When operating on a on digital channel, the channel needs to match the same contact and color code. But on HD2, it has contact and color code feature that allows reception of different contacts and color codes. 1)the 24th menu [Promiscuous] of Band A/B Set. -
Seite 13: Update Firmware Upgrade Operation
①Press and hold the on/off button for 5 seconds will enter into pairing mode, and you will hear a “di” sound. ②Confirm “BTRebind” the first time you connect the Bluetooth earpiece. ③Waiting for several seconds, the radio Bluetooth will be connected to the Bluetooth earpiece. -
Seite 14: Weather Channel Receiving Operation (Only Use In American)
3)Connect the programming cable to the computer, and then choose the correct device com port, Click Connect, then Update. it will display the upgrading progress bar. 4)After 1 min, it will finish the upgrade operation. It will display “Upgrade Successfully”. 12.Weather channel receiving operation (only use in American) There are ten weather channels for monitoring the National Oceanographic and Atmospheric Administration (NOAA) weather broadcasts. -
Seite 15: Troubleshooting
Frequency(MHz) Channel No. 162.550Mhz NOAA-1 162.400Mhz NOAA-2 162.475Mhz NOAA-3 162.425Mhz NOAA-4 162.450Mhz NOAA-5 162.500Mhz NOAA-6 162.525Mhz NOAA-7 161.650Mhz NOAA-8 161.750Mhz NOAA-9 161.775Mhz NOAA-10 162.000Mhz NOAA-11 Troubleshooting No power •Battery power may have run out, please change battery or recharge it. •Battery may not be properly installed, please take it off and re-install. -
Seite 16: Safety Warning
—Consult the dealer or an experienced radio/TV technician for help. CE Requirement (Simple EU declaration of conformity) Shenzhen Retevis Technology Co., Ltd. declares that the radio equipment type is in compliance with the essential requirements and other relevant provisions of RED Directive 2014/53/EU and the ROHS Directive 2011/65/EU and the WEEE Directive 2012/19/EU;... - Seite 17 permit before use. Disposal The crossed-out wheeled-bin symbol on your product, literature, or packaging reminds you that all electrical and electronic products, batteries, or accumulators must be taken to designated collection locations at the end of their working life. Do not dispose of these products as unsorted municipal waste. Dispose of them according to the laws and rules in your area.
- Seite 18 • Do not carry the radio in a chest pocket or near the implantation site, and carry or use the radio on the opposite side of the body from the implantable device to minimize the potential for interference. Hearing Aids: Some digital wireless radios may interfere with some hearing aids. In the event of such interference, you may want to consult your hearing aid manufacturer to discuss alternatives.
- Seite 19 and battery in fresh water, then dry them. •Since batteries are sensitive to high temperatures when storing them, keep them in a cool and dry place. The recommended temperature should be between +10 ℃and +25℃and never exceed +30℃. Batteries should therefore not be stored next to radiators or boilers nor in direct sunlight. Extremes of humidity (below 35% and above 95% relative humidity for sustained periods should be avoided since they are detrimental to both batteries and packing.
- Seite 20 Grundbetrieb Wenn Sie den Lautstärkeregler des Radios im Uhrzeigersinn drehen, ertönt ein „Klick“-Geräusch, ein Nachrichtenton und auf dem Bildschirm wird „Willkommen“ angezeigt, während die LED-Anzeige aufleuchtet. Drehen Sie den Lautstärkeregler im Uhrzeigersinn, um die Lautstärke zu erhöhen, oder gegen den Uhrzeigersinn, um sie zu verringern. Notiz: Wenn Sie die Sprachübertragung und die Tastentonfunktion ausschalten, ist beim Einschalten des Radios kein Ton zu hören.
-
Seite 21: Radio-Menü-Einstellung - Haupteinstellung
Radio-Menü-Einstellung – Haupteinstellung Speisekarte Definition Squelch 0~9 Stufen (Wie üblich, wenn Sie einen hohen Squelch-Pegel einstellen, kann er Rauschen unterdrücken, aber gleichzeitig wird das Signal abgeschwächt. Sie können den Pegel entsprechend der Umgebung einstellen. Wenn das Signal stark ist, machen Für einen klareren Hörgenuss können Sie einen hohen Pegel einstellen. -
Seite 22: Kanaleinstellungen (Band A Eingestellt Und Band B Eingestellt)
Kanaleinstellungen (Band A eingestellt und Band B eingestellt) Zone Wählen Sie den Arbeitsbereich. GPS ein- oder ausschalten. (Nur GPS-Version). RxGPSInfo Bestätigen Sie, ob Sie die GPS-Informationen erhalten. TxGPSInfo Bestätigen Sie, ob die GPS-Informationen übertragen werden. Step Wählen Sie den Frequenzschritt für den aktuellen Kanal. Power Wählen Sie die Leistungsstufe für den aktuellen Kanal. -
Seite 23: Detaillierte Funktionsabläufe
4) Schalten Sie den Kanalknopf um, um den nächsten Kontakt zu bearbeiten. 5) In der Kanalbandeinstellung können Sie einen der Kontakte als Ihren Kommunikationskon- takt auswählen. Radio-ID Es können 32 Funk-IDs eingestellt werden. Bearbeiten Sie 32 IDs und wählen Sie dann eine Nutzungs-ID für einen digitalen Kanal aus. - Seite 24 Repeaters übereinstimmt. 2)Zum Beispiel ist 439,2000 MHz die Sendefrequenz des Repeaters, es wird die Empfangsfrequenz des Radios sein; 3) Geben Sie Band A oder B ein, um die Richtung der Frequenzdifferenz festzulegen, verschieben Sie nach oben, wählen Sie „Minus“ und verschieben Sie Freq. Bearbeiten Sie 08,0000.
- Seite 25 Kanalsuche 1) Der Prioritätskanal kann im CPS wie oben gezeigt eingestellt werden. 2) Wenn Sie die Kanalsuche ausführen und eine Zielzone auswählen, werden alle Kanäle in dieser Zone durchsucht. Wenn Sie „ALLE Kanäle“ wählen, werden alle Kanäle durchsucht, die Sie für das Radio programmiert haben. 6.Notfallalarmbetrieb Wählen Sie im CPS Fernalarm oder lokalen Alarm.
- Seite 26 8.Promiscuous-Funktion Bei der Arbeit an einem digitalen Kanal muss derselbe Kontakt- und Farbcode übereinstim- men. Aber auf HD2 gibt es Kontakt- und Farbcode-Mix-Match. 1)das 24. Menü [Promiscuous] des Band A/B-Sets. Das bedeutet, dass alle verschiedenen Kontaktanrufe im digitalen Kanal empfangen werden. 2) Das 25.
- Seite 27 Firmware aktualisieren, überprüfen Sie bitte noch einmal, ob das Radio GPS- oder Nicht-GPS-fähig ist, und verwenden Sie die richtige Firmware. Upgrade-Vorgang: 1)Rufen Sie den DFU-Modus auf: Drücken Sie gleichzeitig PTT und SK1 und schalten Sie dann das Funkgerät ein. Die LED leuchtet rot wie unten. 2)Öffnen Sie die Firmware-Software.
- Seite 28 4)Nach 1 Minute ist der Upgrade-Vorgang abgeschlossen. Es wird „Upgrade erfolgreich durchgeführt“ angezeigt. 12. DTMF Betrieb Während Sie die PTT-Taste gedrückt halten, drücken Sie jede entsprechende Taste, um den DTMF-Code zu senden: Number 【0-9】 = DTMF dial number 0-9. 【Menu】 key=A 【Up】...
- Seite 29 Opérations Basique Dans le sens des aiguilles d'une montre, pour allumer le bouton de volume de la radio, il y aura un son de « clic », un message sonore et l'écran affichera la bienvenue, tandis que le voyant LED s'allumera. Dans le sens des aiguilles d'une montre, appuyez sur le bouton de volume pour augmenter le volume ou dans le sens inverse des aiguilles d'une montre pour le diminuer.
- Seite 30 Réglage du menu radio -Set principal NON. Menu Définition Squelch Niveaux 0 ~ 9 (comme d'habitude, lorsque vous réglez un niveau de Squelch élevé, cela peut supprimer le bruit, mais en même temps cela affaiblira le signal. Vous pouvez régler le niveau en fonction de l'environnement.
-
Seite 31: Autres Fonctions
Paramètres des canaux (Set bande A et Set bande B) Choisissez la zone de travail . Zone Activez ou désactivez le GPS. (Uniquement version GPS) . RxGPSInfo Confirmez si vous recevez les informations GPS . Confirmez si vous transmettez les informations GPS . TxGPSInfo Step Pas de fréquence pour choisir le canal actuel . - Seite 32 5)Dans le réglage de la bande de canaux, vous pouvez choisir l'un des contacts comme contact de communication. Identification radio Il peut définir 32 identifiants radio. Modifiez 32 identifiants, puis choisissez un identifiant d'utilisation pour une chaîne numérique. radio FM 32 chaînes de radio FM peuvent être stockées via un logiciel informatique ;...
- Seite 33 même tonalité CTCSS avec le répéteur sur la radio ; 5)Après avoir terminé les opérations ci-dessus, l'interface de veille de la radio affichera 439,2000 MHz ; 6)Il affichera 431,20000 MHz et le CTCSS lors de la transmission. 4. Créez un canal répéteur numérique 1)En mode VFO, entrez une fréquence de réception qui est la même que la fréquence de transmission du répéteur ;...
- Seite 34 7.Opération Importer 500 000 DMR contacts Le HD2 prend en charge le téléchargement de 500 000 contacts DMR dans la radio. Téléchargez les contacts numériques depuis le site Web d' A ilunce https://www.ailunce.com/Re- sourceCenter/ Téléchargez la feuille CSV des contacts sur la radio via le CPS . 8.Caractéristique de Promiscuous Lorsque vous travaillez sur un canal numérique, il doit correspondre au même contact et au même code couleur.
- Seite 35 3)Bande A/B Régler le 28ème menu : Contacts GPS. choisissez un contact de groupe prioritaire ou un contact privé, les deux sont OK. 4)Tous les réglages sont terminés. L'étape suivante consiste à sortir jusqu'à ce que l'icône GPS soit activée. 5)Vérifiez les informations GPS de la radio locale dans le 9 e menu principal.
- Seite 36 3)Connectez le câble de programmation à l'ordinateur, puis choisissez le bon port COM de l'appareil, cliquez sur Connecter, puis sur Mettre à jour. il affichera la barre de progression de la mise à niveau.
- Seite 37 4)Après 1 minute, l'opération de mise à niveau sera terminée. La « mise à niveau sera réussie ». 12. Fonctionnement DTMF Tout en appuyant longuement sur la touche PTT, appuyez sur chaque touche correspondante pour envoyer le code DTMF : Number 【0-9】...
- Seite 38 Di base Operazioni In senso orario per accendere la manopola del volume della radio, si sentirà un "clic", un suono di messaggio e sullo schermo verrà visualizzato il messaggio di benvenuto, mentre l'indicatore LED si accende. Ruotare la manopola del volume in senso orario per aumentare il volume o in senso antiorario per abbassarlo.
- Seite 39 Impostazione del menu radio: impostazione principale NO. Menù Définition 0~9 livelli (come al solito, quando si imposta un livello di squelch alto, è possibile sopprimere il rumore, ma Squelch allo stesso tempo indebolire il segnale. È possibile impostare il livello in base all'ambiente. Quando il segnale è...
-
Seite 40: Altre Funzioni
Impostazioni canale(Imposta banda A and Imposta banda B) Zona Scegli la zona di lavoro . Attiva o disattiva il GPS. (Solo versione GPS) . Zone Conferma se ricevi le informazioni GPS . RxGPSInfo Confermare se trasmettere le informazioni GPS . TxGPSInfo Scelta del passo di frequenza per il canale corrente . - Seite 41 comunicazione. Identificazione radiofonica È possibile impostare 32 ID radio. Modifica 32 ID, quindi scegli un ID di utilizzo per un canale digitale. FM Radio È possibile memorizzare 32 canali radio FM tramite il software del computer; 1)Premere il tasto [MENU] per spegnere la radio, oppure accendere la radio e premere [EXIT] per uscire.
- Seite 42 5)Dopo aver completato le operazioni di cui sopra, l'interfaccia di standby della radio visualizzerà 439.2000Mhz; 6)Verrà visualizzato 431.20000Mhz e il CTCSS durante la trasmissione. 4. Creare un canale ripetitore digitale 1)In modalità VFO, immettere una frequenza di ricezione uguale alla frequenza di trasmissione del ripetitore;...
- Seite 43 7.Operazione di importazione di 500.000 contatti DMR L'HD2 supporta il caricamento di 500.000 contatti DMR nella radio. Scarica i contatti digitali dal sito Ailunce https://www.ailunce.com/ResourceCenter/ Carica il foglio CSV dei contatti sulla radio tramite il CPS . 8.Caratteristica promiscua Quando si lavora su un canale digitale, è necessario che corrisponda allo stesso contatto e allo stesso codice colore.
- Seite 44 6)Quando parli con altri HD1 o HD2, questi trasmetteranno le loro informazioni GPS insieme ai dati vocali, quindi visualizzeranno le loro informazioni GPS dopo il segnale vocale. 10.Utilizzo del Bluetooth 1)Attiva innanzitutto la funzione Bluetooth. Il 5 ° menu del set principale. 2)Associa l'auricolare Bluetooth.
- Seite 45 3)Collegare il cavo di programmazione al computer, quindi scegliere la porta com del dispositivo corretta, fare clic su Connetti, quindi su Aggiorna. verrà visualizzata la barra di avanzamento dell'aggiornamento. 4)Dopo 1 minuto, l'operazione di aggiornamento terminerà. Verrà eseguito l'aggiornamento con successo. 12.
-
Seite 46: Risoluzione Dei Problemi
Risoluzione dei problemi Senza energia •La carica della batteria potrebbe essere esaurita, aggiornare la batteria o ricaricarla. •La batteria potrebbe non essere installata correttamente, rimuoverla e reinstallarla. La batteria dura poco dopo la ricarica •La durata della batteria è terminata, sostituire la batteria con una nuova. Non puoi parlare con gli altri membri •Verificare che la trasmissione rientri nel raggio operativo effettivo. -
Seite 47: Operaciones Básicas
Operaciones básicas En el sentido de las agujas del reloj para encender la perilla de volumen de la radio, se escuchará un sonido de "clic", un sonido de mensaje y la pantalla mostrará "Bienvenido", mientras el indicador LED se enciende. Gire la perilla de volumen en el sentido de las agujas del reloj para subir el volumen o en el sentido contrario a las agujas del reloj para bajarlo. - Seite 48 Configuración del menú- configuración principal Menú Definition 0~9 levels (As usual, when you set a high squelch level, it can suppress noise, but at the same time it Squelch will weaken the signal. You can set the level according to the environment. When the signal is strong, to make listening clearer you can set a high level.
-
Seite 49: Otras Funciones
Configuración de canal(Configuración de banda A y configura- ción de banda B) Zona Elija la zona de trabajo. Activa o desactiva el GPS. (Solo versión GPS). Confirme si recibe la información del GPS. RxGPSInfo TxGPSInfo Confirme si transmite la información del GPS. Paso Elija el paso de frecuencia para el canal actual. - Seite 50 4)Cambie la perilla de canal para editar el siguiente contacto. 5)En la configuración de banda de canal, puede elegir uno de los contactos como su contacto de comunicación. Radio ID Se pueden configurar 32 ID de radio. Edite 32 ID y luego elija una ID de uso para un canal digital.
- Seite 51 elija "Minus" y Shift Freq edite 08.0000. La frecuencia de transmisión de la radio es 439.2000-8.0000 MHz, que es 431.20000 MHz.; 4)El repetidor generalmente tiene configuraciones de subtono. Configure el mismo tono CTCSS con el repetidor en la radio; 5)Después de completar las operaciones anteriores, la interfaz de espera de la radio mostrará 439,2000 Mhz;...
- Seite 52 predeterminada de alarma de emergencia. Presione brevemente para iniciar la función de emergencia, presione nuevamente para detener la alarma. 7.Operación de importación de 500.000 contactos DMR El HD2 admite cargar 500.000 contactos DMR en la radio. Descarga los contactos digitales del sitio web de Ailunce:...
- Seite 53 9.Función GPS La función GPS solo funciona en canales digitales.. 1)Básico en un canal DMR, Menú-Banda A/B configurada-GPS: ON/OFF. Enciende el GPS. 2) Vuelva a activar “RxGPSInfo” y “TXGPSInfo”. 3)Banda A/B Configurar menú 28: Contactos GPS. elija uno Contactos del grupo prioritario o contacto privado ambos ok.
- Seite 54 3)Conecte el cable de programación a la computadora y luego elija el puerto de comunicación del dispositivo correcto. Haga clic en Conectar y luego en Actualizar. mostrará la barra de progreso de actualización.
-
Seite 55: Solución De Problemas
4) Después de 1 minuto, terminará la operación de actualización. Aparecerá "Upgrade Successfully". 12. Operación DTMF Mientras mantiene presionado el PTT, presione cada tecla correspondiente para enviar el código DTMF: Number 【0-9】 = DTMF dial number 0-9. 【Menu】 key=A 【Up】 key=B 【Down】key=C 【Exit】... -
Seite 56: Основные Операции
Основные операции По часовой стрелке включите ручку громкости радиоприемника, раздастся звук "щелчок", прозвучит сообщение, на экране появится приветствие, а светодиодный индикатор загорится. По часовой стрелке регулятор громкости увеличивает громкость, против часовой - уменьшает. Примечание: Если отключить функцию голосовой трансляции и звукового сигнала, то при... - Seite 57 Настройка меню радиостанции - основной набор НЕТ. Меню Определение Squelch 0~9 уровней (Как обычно, если установить высокий уровень шумоподавителя, он может подавить шум, но в то же время ослабит сигнал. Вы можете установить уровень в зависимости от окружающей обстановки. Если сигнал сильный, для более четкого восприятия можно установить высокий уровень.
-
Seite 58: Другие Функции
Выберите, проверять или нет пропущенный звонок. Miss Call Set Выберите, будет ли светодиод ярким при получении. Rx Info Bright Set Тон цифрового звукового сигнала передачи DMR TX Beep Аналоговый звуковой сигнал передачи FM TX Beep Переключение в ночной режим Night Mode Noise Tail Устранение... - Seite 59 Контакт: приоритетный контакт Он может сохранить 5000 приоритетных контактов на радио. 1)Войдите в меню [Контакты]. 2)Отредактируйте идентификатор, выберите тип контакта: групповой, частный или Все. 3)Назовите контакт. Длительное нажатие кнопки[*SCAN] для переключения между ABC, abc, 123. 4)Переключите ручку канала для редактирования следующего контакта. 5)В...
- Seite 60 качестве нового канала. 3.Создать аналоговый ретрансляционный канал 1)В режиме VFO введите частоту приема, совпадающую с частотой передачи ретранслятора; 2)Например, 439.2000MHz - это частота передачи ретранслятора, это будет частота приема радиостанции; 3)Введите Band A или B, чтобы установить направление разницы частот, Shift Up выберите...
- Seite 61 Сканирование каналов 1)Приоритетный канал может быть установлен в CPS, как показано на рисунке выше. 2)При сканировании каналов, если выбрать зону назначения, будут сканироваться все каналы в этой зоне, если выбрать "ВСЕ КАНАЛЫ", будут сканироваться все каналы, которые вы запрограммировали для радио. 6.Работа...
- Seite 62 2)В меню 25th [RxALLCC] установлен диапазон A/B, это означает, что он будет принимать все различные цветовые коды в цифровом канале. 3)Таким образом, если включить [Promiscuous] [RxALLCC] для цифрового канала, он будет принимать сигналы от других цифровых каналов с разными контактами и цветовым кодом.
- Seite 63 прошивку. Операция обновления: 1)Войдите в режим DFU: Нажмите вместе кнопки PTT и SK1, а затем включите радиостанцию. Индикатор загорится красным цветом, как показано ниже. 2)Откройте программное обеспечение прошивки. 3)Подключите кабель программирования к компьютеру, затем выберите нужный com-порт устройства, нажмите Connect, затем Update. на экране появится индикатор выполнения...
-
Seite 64: Устранение Неполадок
4)Через 1 минуту операция обновления будет завершена. Появится сообщение "Upgrade Successfully". 12. Операции DTMF Нажимая и удерживая кнопку PTT, нажмите каждую соответствующую клавишу, чтобы отправить код DTMF: Number 【0-9】 = DTMF dial number 0-9. 【Menu】 key=A 【Up】 key=B 【Down】key=C 【Exit】 key=D 【*】key=E 【#Lock】key=F Устранение... -
Seite 65: Guarantee
Guarantee Model Number: Serial Number: Purchasing Date: Dealer: Telephone: User’s Name: Telephone: Country: Address: Post Code: Email: Remarks: 1.This guarantee card should be kept by the user, no replacement if lost. 2.Most new products carry a two-year manufacturer’s warranty from the date of purchase. Further details, pls read http://www.re- tevis.com/after-sale/ 3.The user can get warranty and after-sales service as below: ·Contact the seller where you buy. - Seite 68 Shenzhen Retevis Technology Co.,Ltd. 7/F, 13-C, Zhonghaixin Science&Technology Park, No.12 Ganli 6th Road, Jihua Street, Longgang District, Shenzhen, China Web:www.ailunce.com E-mail:hams@ailunce.com Facebook:facebook.com/ailunce À DÉPOSER À DÉPOSER Cet appareil, EN MAGASIN EN DÉCHÈTERIE EMBALLAGES A ses accessoires, SEPARER ET A cordons et...
- Seite 69 说明书要求: 尺寸:90*130mm 样式:装订 纸张:封皮铜版纸 内容双胶纸 此页无需印刷...