Litecraft BeamX.7 Bedienungsanleitung
Inhaltsverzeichnis
Verfügbare Sprachen
Verfügbare Sprachen
Inhaltsverzeichnis

Verwandte Anleitungen für Litecraft BeamX.7


Inhaltszusammenfassung für Litecraft BeamX.7
- Seite 1 Bedienungsanleitung User Manual...
-
Seite 2: Inhaltsverzeichnis
WIRELESS DMX-BETRIEB DISPLAY-MODUS DMX-MODUS PHOTOMETRISCHE DATEN TECHNISCHE SPEZIFIKATIONEN Thank you for purchasing this LITECRAFT product. For your own safety, please read the instruction manual carefully before turn on the product for the first time. CONTENT SAFETY NOTES DESIGNATED USE INSTALLATION... -
Seite 3: Sicherheitshinweise
SICHERHEITSHINWEISE Jede Person, die mit der Installation, dem Einsatz oder dem Service des Gerätes betraut ist, muss: • qualifiziert sein • den Anweisungen dieser Bedienungsanleitung folgen. • ACHTUNG! Seien Sie vorsichtig beim Einsatz des Gerätes. Sie riskieren einen elektrischen Schlag durch Hochspannung wenn Sie die Kabeladern berühren! Das Gerät hat unser Haus in herstellergeprüftem Zustand verlassen. -
Seite 4: Bestimmungsgemäße Verwendung
BESTIMMUNGSGEMÄßE VERWENDUNG Bei diesem Produkt handelt es sich um einen Scheinwerfer, der ausschließlich für den professionellen Einsatz auf Bühnen, in Diskotheken, in Theatern, etc. bestimmt ist. Dieses Produkt ist für den Anschluss bis max. 230 V Wechselspannung zugelassen und wurde zur Verwendung im Innenbereich konzipiert. Vermeiden Sie Erschütterungen und jegliche Art von äußeren Einwirkungen bei der Installation oder dem •... -
Seite 5: Montage
MONTAGE Bei der Montage des Scheinwerfers sind spezifische Bestimmungen wie die DGUV V17/18 (vormals BGV C1) • oder auch länderspezifische Baurichtlinien zu beachten. Die Montage darf nur durch qualifizierte Personen erfolgen! • Die Aufhängevorrichtung des Scheinwerfers muss so gebaut und bemessen sein, dass sie eine Stunde lang •... -
Seite 6: Elektrischer Anschluss
ELEKTRISCHER ANSCHLUSS Der Anschluss an die Spannungsversorgung darf ausschließlich nur durch qualifiziertes Personal vorgenommen • werden. Schließen Sie das Gerät an die Spannungsversorgung an. Vergewissern Sie sich das die Leistungsangaben • übereinstimmen. Der Schutzleiter muss unbedingt in der gesamten Installation angeschlossen sein! •... -
Seite 7: Bedienung
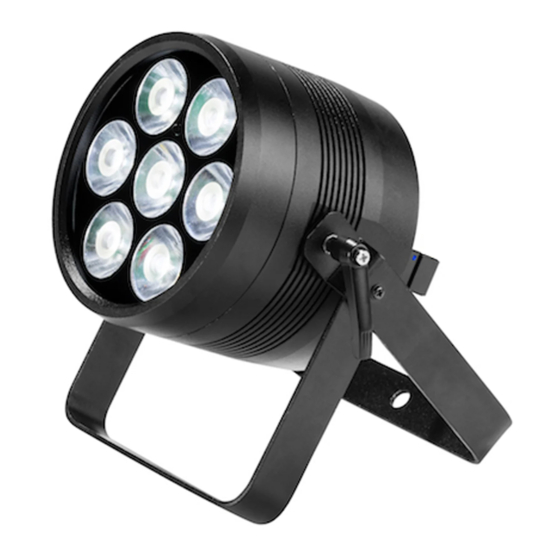
BEDIENUNG Dieses Gerät besitzt verschiedene DMX- und Stand-Alone-Modi. Im DMX-Modus können mehrere Geräte • miteinander verbunden und von einem Kontroller gesteuert werden. Das Gerät übernimmt die Einstellungen des DMX-Kontrollers, sobald die entsprechende DMX-Startadresse eingestellt wurde. Slave Modus: • Verbinden Sie den DMX-Ausgang des Master Gerätes (XLR female) mit dem DMX-Eingang des Slave Gerätes (XLR male). - Seite 8 Bügel IR-Sensor C. Feststellschraube D. CRMX-Anschluss DMX-Eingang 5 pol DMX-Ausgang 5 pol G. Öse für Sicherheitsfangseil H. Menu-Taste Up-Taste Netz-Eingang Down-Taste Netz-Ausgang M. Enter-Taste N. LC-Display...
-
Seite 9: Wireless Dmx-Betrieb
WIRELESS DMX-BETRIEB Das Gerät verfügt über einen Anschluss für ein optionales LumenRadio CRMX Wireless DMX-Modul. Das Modul arbeitet mit CRMX Sendern von LumenRadio und ist kompatibel zu Wireless Solutions Sendern der Baureihe G3 und G4. Für den CRMX-Betrieb muss das LumenRadio CRMX Wireless DMX-Modul in die rückseitige USB-Buchse eingesteckt und das Gerät in einen der fünf DMX-Modi gebracht werden. -
Seite 10: Display-Modus
DISPLAY-MODUS Display Funktion DEF. SET DEF. SET Rücksetzen aller Parameter auf <***> Werkseinstellungen *** = <NO> <YES> DMX Addr DMX Addr Anzeige der DMX-Adresse <***> (2 Ch = <001-511>) *** = DMX-Adresse (3 Ch = <001-510>) (4 Ch = <001-509>) (5 Ch = <001-508>) (10 Ch = <001-503>) (Standard Einstellung = 1) - Seite 11 ColProgr ColProgr 31 vorprogrammierte Programme <**> wählbar ** = (Deaktivierung aller Programme über <00-31> Menüpunkt Master/Slave!) Speed Geschwindigkeit in 30 Schritten für das <**> eingestellte Programm wählbar ** = <00-30> WhiteBal WhiteBal Einstellung des Weißabgleich <Red> (Standard Einstellung = <***> R = 255, G = 255, B = 255) *** = 125-255 <Green>...
-
Seite 12: Dmx-Modus
DMX-MODUS Modus Display Funktion 2 Kanal < 2 Ch> K1 = Farbmakro Modus 000-255 stufenloser RGB Farbmix K2 = Master Dimmer 000-255 stufenlose Helligkeit 3 Kanal < 3 Ch> K1 = Dimmer Rot Modus 000-255 stufenlose Helligkeit Rot K2 = Dimmer Grün 000-255 stufenlose Helligkeit Grün K3 = Dimmer Blau 000-255 stufenlose Helligkeit Blau... - Seite 13 000-020 Modus lt. Display Einstellung 021-049 OFF = Dimmer linear 050-099 1 = Dimmer verzögert 1 100-149 2 = Dimmer verzögert 2 150-199 3 = Dimmer verzögert 3 200-255 4 = Dimmer verzögert 4 K10= Master Dimmer 000-255 stufenlose Helligkeit...
-
Seite 14: Photometrische Daten
PHOTOMETRISCHE DATEN 4.690 Lux 670 Lux 230 Lux Grün 11.050 Lux 1.860 Lux 273 Lux Blau 450 Lux 70 Lux 22 Lux Weiß 10.190 Lux 1.450 Lux 518 Lux RGBW 24.580 Lux 3.710 Lux 1.374 Lux TECHNISCHE SPEZIFIKATIONEN Netzspannung: 100-260 V 50-60 Hz •...