Herunterladen Diese Seite drucken

Werbung

Verfügbare Sprachen

Verfügbare Sprachen

EN
DE
CS
Built-in Oven / User Manual
Einbau-Backofen / Bedienungsanleitung
Vestavná trouba / Návod k obsluze
BBIM12302XE
385443493_1/ EN/ DE/ CS/ R.AB/ 01/11/23 01:25
7768282919

Werbung

loading

Inhaltszusammenfassung für Beko BBIM12302XE

  • Seite 1 Built-in Oven / User Manual Einbau-Backofen / Bedienungsanleitung Vestavná trouba / Návod k obsluze BBIM12302XE 385443493_1/ EN/ DE/ CS/ R.AB/ 01/11/23 01:25 7768282919...
  • Seite 2 Welcome! Dear Customer, Thank you for choosing the Beko product. We want your product, manufactured with high quality and technology, to offer you the best efficiency. Therefore, carefully read this manual and any other documentation provided before using the product.
  • Seite 3 6.1.1 Pastries and oven food....24 Table of Contents 6.1.2 Meat, Fish and Poultry ....27 1 Safety Instructions......6.1.3 Grill ..........28 Intended Use........6.1.4 Test foods........28 Child, Vulnerable Person and Pet 7 Maintenance and Cleaning... 30 Safety ..........General Cleaning Information ..
  • Seite 4 1 Safety Instructions • This section includes the Intended Use safety instructions necessary • This product is designed to be to prevent the risk of personal used at home. It is not suitable injury or material damage. for commercial use. •...
  • Seite 5 • Children should not play with • Before discarding worn out the product. Cleaning and user and useless products: maintenance should not be 1. Unplug the power plug and performed by children unless remove it from the socket. there is someone overseeing 2.
  • Seite 6 • Unplug the product or switch • Do not use an extension cord off the fuse before repair, or multi-plug to operate your maintenance and cleaning. product. • Plug the product into an outlet • Contact the authorized service that meets the voltage and fre- centre or importer to use the quency values specified on the approved adapter in cases...
  • Seite 7 • Never put the product plug into ial or thick cardboard and tape a broken, loose, or out-of- it tightly. Secure the moving socket plug. Make sure the parts of the product firmly to plug is fully inserted into the prevent damage.
  • Seite 8 • To avoid overheating, product • Do not use the product if the installation should not be car- front door glass is removed or ried out behind decorative cov- cracked. Otherwise there is a ers. risk of injury and environ- •...
  • Seite 9 • Do not place flammable / ex- since it can ignite when it plosive materials near the comes into contact with hot product, as the surfaces will be surfaces. hot while it is operating. • Food residues in the cooking •...
  • Seite 10 greaseproof paper that hang the food oil and other compon- from accessories or contain- ents that drip onto the oven ers. Do not use greaseproof bottom can create heavy paper at oven temperatures smoke and lead to flames. higher than the maximum us- •...
  • Seite 11 2 Environmental Instructions 2.1 Waste Directive aging waste with the household or other wastes, take it to the packaging material 2.1.1 Compliance with the WEEE Dir- collection points designated by the local ective and Disposing of the authorities. Waste Product 2.3 Recommendations for Energy This product complies with EU WEEE Dir- Saving...
  • Seite 12 3 Your product 3.1 Product Introduction 1 Control panel 2 Lamp 3 Wire shelves 4 Fan motor (behind the steel plate) 5 Door 6 Handle 7 Lower heater (under the steel plate) 8 Shelf positions 9 Upper heater 10 Ventilation holes 3.2 Product Control Panel Introduc- Varies depending on the model.
  • Seite 13 3.2.1 Control Panel 1 Function selection knob 2 Timer 3 Temperature knob If there are knob(s) controlling your Timer product, in some models this/these knob(s) may be so that they come out when pushed (buried knobs). For settings to be made with these knobs, first push the relevant knob in and pull out the knob.
  • Seite 14 order of the operating modes shown here may differ from the arrangement on your product. Function Temperature Function description Description and use symbol range (°C) Oven lamp No heater works in the oven. Only the oven lamp lights up. The oven is not heated. Only the fan (on the back wall) oper- ates.
  • Seite 15 On models without wire shelves : Pastry tray It is used for pastries such as cookies and Placing the wire grill on the cooking biscuits. shelves On models with wire shelves : It is crucial to place the wire grill on the wire side shelves properly.
  • Seite 16 Placing the tray on the cooking shelves On models with wire shelves : On models with wire shelves : It is also crucial to place the trays on the wire side shelves properly. While placing the tray on the desired shelf, its side de- signed for holding must be on the front.
  • Seite 17 the pins on the front and back of the tele- scopic rails, rest against the edges of the grill and the tray (shown in the figure). EN / 17...
  • Seite 18 3.6 Technical Specifications General specifications Product external dimensions (height/width/depth) (mm) 595 /594 /567 Oven installation dimensions (height / width / depth) 590-600 /560 /min. 550 (mm) Voltage/Frequency 220-240 V ~; 50 Hz Cable type and section used/suitable for use in the min.
  • Seite 19 4 First Use Before you start using your product, it is re- If the first timer is not set, “12:00” commended to do the following stated in symbol continue to flash the following sections respectively. and your oven will not start. For your oven to function, you must 4.1 First Timer Setting confirm the time of day by setting...
  • Seite 20 NOTICE: During the first use, smoke and odour may come up for several hours. This is normal and you just need good ventila- tion to remove it. Avoid directly inhaling the smoke and odours that form. 5 Using the Oven •...
  • Seite 21 Turning on the oven Cooking by setting the cooking time: When you select a operating function you You can have the oven turn off automatic- want to cook with the function selection ally at the end of the time by selecting the knob and set a certain temperature with the temperature and operating function spe- temperature knob, the oven starts operat-...
  • Seite 22 5. After the set cooking time is completed, Deactivating the key lock on the display, "End" appears, the 1. Touch the key until the symbol disap- symbol flashes and the timer beeps. pears from the display. 6. The warning sounds for two minutes. ð...
  • Seite 23 Turning off the alarm 2. Set the desired brightness with the keys. (d-01-d-02-d-03) 1. At the end of the alarm period, the warn- ing sounds for two minutes. Touch any key to stop the audible warning. ð The warning stops and the time of day appears on the display.
  • Seite 24 6 General Information About Baking You can find tips on preparing and cooking • For good baking performance, place your your food in this section. food on the recommended correct shelf. Do not change the shelf position during Plus, this section describes some of the baking.
  • Seite 25 • If the cake is moist, use a small amount • If the pastry is getting cooked slowly, of liquid or reduce the temperature by make sure that the thickness of the 10°C. pastry you have prepared does not over- •...
  • Seite 26 Food Accessory to be Operating func- Shelf position Temperature (°C) Baking time used tion (min) (approx.) Whole bread Standard tray * Fan Heating 30 … 40 Glass / metal rectangular con- Top and bottom Lasagne 2 or 3 30 … 40 tainer on wire grill heating Round black...
  • Seite 27 Food Accessory to be Shelf position Temperature (°C) Baking time (min) used (approx.) Small cakes Standard tray * 30 … 40 Cookie Standard tray * 30 … 40 Pastry Standard tray * 40 … 50 Standard tray * 30 … 40 * These accessories may not be included with your product.
  • Seite 28 Preheating is recommended for all food. *These accessories may not be included with your product. **These accessories are not included with your product. They are commercially available accessories. The key points of the grill 6.1.3 Grill • Prepare foods of similar thickness and Red meat, fish and poultry meat quickly weight as much as possible for the grill.
  • Seite 29 Cooking table for test meals Suggestions for baking with a single tray Food Accessory to be Operating func- Shelf position Temperature (°C) Baking time used tion (min) (approx.) Shortbread (sweet Top and bottom Standard tray * 20 … 30 cookie) heating On models with wire shelves :3...
  • Seite 30 Grill Food Accessory to be Shelf position Temperature (°C) Baking time (min) used (approx.) Meatball (veal) - 12 Wire grill 20 … 30 amount Toast bread Wire grill 1 … 4 It is recommended to preheat for 5 minutes for all grilled food. Turn pieces of food after 1/2 of the total grilling time.
  • Seite 31 • The oven must cool down before clean- Plastic parts and painted surfaces ing the cooking area. Cleaning on hot sur- • Clean plastic parts and painted surfaces faces shall create both fire hazard and using dishwashing detergent, warm wa- damage the enamel surface.
  • Seite 32 If your product is a wire shelf model, re- move the wire shelves before cleaning the side walls. Then complete the cleaning as described in the "General Cleaning Informa- tion" section according to the side wall sur- face type. To remove the side wire shelves: 1.
  • Seite 33 6. (C) type hinge is available in soft open- ing/closing door types. 7.6 Cleaning the Oven Door You can remove your oven door and door glasses to clean them. How to remove the doors and windows is explained in the sec- tions "Removing the oven door”...
  • Seite 34 crucial to place the lower corners of the innermost glass (1) to meet the lower plastic slots. 7. Push the plastic component towards the frame until a "click” sound is heard. 7.8 Cleaning the Oven Lamp In the event that the glass door of the oven lamp in the cooking area becomes dirty;...
  • Seite 35 3. If your oven lamp is type (A) shown in the figure below, rotate the oven lamp as shown in the figure and replace it 3. Lift the lamp's protective glass cover with a new one. If it is type (B) model, with a screwdriver.
  • Seite 36 • (If there is timer on your appliance) Keys on the control panel do not work. >>> If your product has a key lock, the key lock may be enabled, disable the key lock. Oven light is not on. • Oven lamp may be faulty. >>> Replace oven's lamp.
  • Seite 38 Wilkommen! Sehr geehrter Kunde, sehr geehrte Kundin, Vielen Dank, dass Sie sich für das Beko Produkt entschieden haben. Wir stellen Ihnen die- ses Produkt vor, das mit hoher Qualität und Technologie hergestellt wurde, um Ihnen die beste Effizienz zu bieten. Lesen Sie dieses Handbuch und alle anderen mitgelieferten Do- kumentationen sorgfältig durch, bevor Sie das Produkt verwenden.
  • Seite 39 Allgemeine Warnhinweise zum Inhaltsverzeichnis Backen im Ofen......1 Sicherheitshinweise ..... 40 6.1.1 Backwaren und andere Ofenge- Verwendungszweck ...... 40 richte ........... Besondere Sicherheitshinweise 6.1.2 Fleisch, Fisch und Geflügel..66 rund um Kinder, schutzbedürftige 6.1.3 Grillen .......... 67 Menschen und Haustiere....6.1.4 Testspeisen ........
  • Seite 40 1 Sicherheitshinweise • Dieser Abschnitt enthält die Si- • Nehmen Sie keine technischen cherheitshinweise, die erfor- Veränderungen am Produkt derlich sind, um die Gefahr von vor. Personen- oder Sachschäden Verwendungszweck zu vermeiden. • Bei Weitergabe des Produkts • Dieses Produkt wurde für die an eine andere Person zum Verwendung zu Hause entwi- persönlichen Gebrauch oder...
  • Seite 41 Besondere Sicher- • Kinder sollten stets beaufsich- tigt werden, damit sie nicht mit heitshinweise rund um dem Gerät spielen. Kinder, schutzbedürfti- • Elektrogeräte können immer ge Menschen und eine Gefahr für Kinder und Haustiere Haustiere darstellen. Kinder • Das Gerät darf nur dann von und Haustiere dürfen nicht mit Kindern ab 8 Jahren und von dem Gerät spielen, nicht dar-...
  • Seite 42 2. Schneiden Sie das Netzkabel der den elektrotechnischen ab und ziehen Sie es mit dem Vorgaben entspricht und natür- Stecker aus dem Gerät. lich gut erreichbar sein sollte. 3. Treffen Sie Vorkehrungen, • Ziehen Sie den Netzstecker um zu verhindern, dass Kin- oder schalten Sie die Siche- der das Produkt betreten.
  • Seite 43 Rückseite des Geräts nicht be- geraten. Halten Sie Mehrfach- rühren. Andernfalls könnte es steckdosen und tragbare beschädigt werden. Stromquellen vom Gerät fern. • Achten Sie darauf, dass Ver- • Falls das Netzkabel beschä- sorgungskabel nicht in der digt wird, muss es vom Her- Ofentür eingeklemmt werden, steller, dem autorisierten Kun- verlegen Sie Kabel nicht über...
  • Seite 44 kann). Es besteht sonst die Ge- • Überprüfen Sie das Produkt vor fahr eines Kurzschlusses und der Installation auf eventuelle eines Stromschlags. Transportschäden. Wenden • Berühren Sie den Netzstecker Sie sich bei Schäden an den niemals mit feuchten oder gar Importeur oder das autorisierte nassen Händen! Servicezentrum.
  • Seite 45 • Halten Sie die Umgebung aller • Verwenden Sie das Produkt Lüftungskanäle des Produkts nicht, wenn es während des offen. Gebrauchs kaputt oder be- • Um eine Überhitzung zu ver- schädigt wird. Trennen Sie das meiden, sollte die Installation Gerät vollständig von der des Produkts nicht hinter deko- Stromversorgung.
  • Seite 46 sich verklemmen. Fassen Sie Verwendung von Zu- die Tür beim Öffnen oder behör Schließen nicht am Teil mit • Achten Sie darauf, Grill und den Scharnieren. Bleche richtig auf den Rost zu stellen. Mehr dazu finden Sie Warnhinweise zu im Abschnitt „Zubehör ver- hohen Temperaturen wenden“.
  • Seite 47 • Erhitzen Sie geschlossene Do- male Verwendungstemperatur. sen und Gläser nicht im Back- Legen Sie den Ofenboden nie- ofen. Der Druck, der sich in der mals mit Backpapier aus! Dose/dem Glas aufbauen wür- • Legen Sie es während des Vor- de, könnte sie zum Platzen heizens nicht auf das Zubehör.
  • Seite 48 boden tropfen, starken Rauch 1.10 Sicherheitshinweise erzeugen und zu Flammen füh- zum Reinigen und ren. Pflegen • Halten Sie die Ofentür beim • Warten Sie, bis das Produkt ab- Grillen geschlossen. Heiße gekühlt ist, bevor Sie es reini- Oberflächen verursachen Ver- gen.
  • Seite 49 aus dem Altgerät entnommen werden kön- Ort der Abgabe ist auch der private Haus- nen. Der Endnutzer ist zudem selbst dafür halt, wenn das neue Elektro- oder Elektro- verantwortlich, personenbezogene Daten nikgerät dorthin geliefert wird; in diesem auf dem Altgerät zu löschen. Fall ist die Abholung des Altgerätes für den Endnutzer kostenlos.
  • Seite 50 Die folgenden Vorschläge sollen Ihnen hel- • Versuchen Sie, möglichst mehrere Ge- fen, Ihr Gerät besonders wirtschaftlich und richte auf einmal im Ofen zuzubereiten. energiesparend zu benutzen. Sie können zwei Töpfe gleichzeitig auf • Tauen Sie gefrorene Speisen vor dem Ba- den Rost stellen.
  • Seite 51 
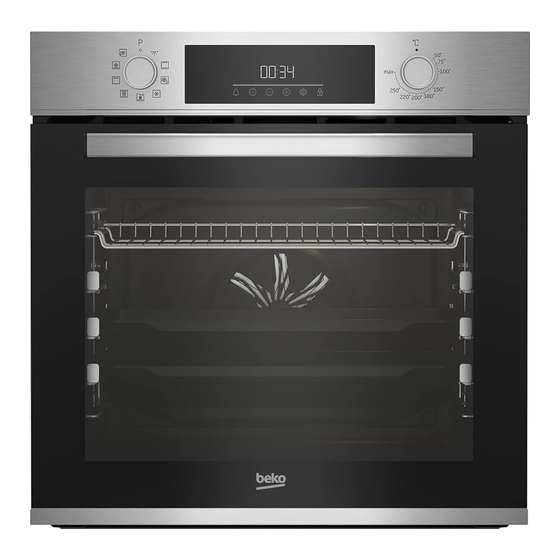
3 Ihr neues Gerät 3.1 Produkteinführung 1 Bedienfeld 2 Lampe 3 Drahtregale 4 Lüftermotor (hinter Stahlplatte) 5 Durch 6 Handhabung 7 Untere Heizung (unter der Stahlplat- 8 Regal-Positionen 9 Obere Heizung 10 Belüftungsöffnungen 3.2 Bedienfeld und Bedienung Variiert je nach Modell. Ihr Produkt ist möglicher- weise nicht mit einer Lampe ausgestattet, oder In diesem Abschnitt erfahren Sie, welche der Typ und die Position der Lampe weichen von...
  • Seite 52 3.2.1 Bedienfeld 1 Funktionsauswahl-Knopf 2 Timer 3 Temperaturauswahl-Knopf Wenn Ihr Produkt mit einem oder mehreren Temperatur im Inneren des Ofens unter die Knöpfen ausgestattet ist, kann es sein, eingestellte Temperatur fällt, erscheint wie- dass diese bei einigen Modellen so ange- der das Temperatur symbol.
  • Seite 53 3.3 Ofenfunktionen zur jeweiligen Funktion. Die Reihenfolge der hier gezeigten Funktionen muss nicht zwin- Die Funktionstabelle zeigt Ihnen die unter- gend mit der Reihenfolge an Ihrem Gerät schiedlichen Funktionen Ihres Ofens, zu- übereinstimmen. sätzlich Minimal- und Maximaltemperatur Funkti- Funktionsbechrei- Temperatur- onssym- Beschreibung und Verwendung bung...
  • Seite 54 Bei Modellen mit Drahtfachböden : Standard-Tablett Für Gebäck, Gefrorenes und zum Braten oder Backen großer Teile. Bei Modellen ohne Drahtregale : Gebäck-Tablett Für Gebäck wie Kekse oder Plätzchen. Drahtgrill auf die Garroste stellen Bei Modellen mit Drahtfachböden : Draht-Grill Es ist wichtig, den Drahtgrill richtig auf die Zum Braten/Backen unterschiedlicher Spei- Seitengestelle zu stellen.
  • Seite 55 Stopperfunktion des Drahtgrills Damit der Drahtgrill nicht aus dem Rost kippt, gibt es eine Stopperfunktion. Mit die- ser Funktion können Sie Ihr Essen einfach und sicher entnehmen. Beim Abnehmen des Drahtgitters können Sie es bis zum An- schlag nach vorne ziehen. Sie müssen die- sen Punkt überfahren, um ihn vollständig zu entfernen.
  • Seite 56 Richtige Platzierung des Drahtgitters und der Ablage auf den Teleskopschienen - Bei Modellen mit Drahtfachböden und Tele- skopmodellen Dank Teleskopschienen lassen sich Ta- bletts oder der Drahtgrill einfach montieren und demontieren. Bei der Verwendung von Blechen und Drahtgrills mit der Teleskop- schiene ist darauf zu achten, dass die Stifte an Vorder- und Rückseite der Teleskop- schienen an den Kanten des Grills und des...
  • Seite 57 3.6 Technische Spezifikationen Allgemeine Spezifikationen Produkt-Außenabmessungen (Höhe/Breite/Tiefe) (mm) 595 /594 /567 Einbaumaße des Ofens (Höhe/Breite/Tiefe) (mm) 590-600 /560 /min. 550 Spannung / Frequenz 220-240 V ~; 50 Hz Verwendeter/geeigneter Kabeltyp und -querschnitt geeig- Min. H05VV-FG 3 x 1,5 mm2 net für die Verwendung im Produkt Gesamte Leistungsaufnahme (kW) Ofentyp Multifunktionsofen...
  • Seite 58 4 Erste Verwendung Bevor Sie Ihr Produkt verwenden, wird emp- Wenn das erste Mal nicht einge- fohlen, die in den folgenden Abschnitten stellt ist, blinken die Symbole aufgeführten Schritte durchzuführen. "12:00" und weiterhin und Ihr Ofen startet nicht. Damit Ihr Ofen 4.1 Erste Timer-Einstellung funktioniert, müssen Sie die Tages- zeit bestätigen, indem Sie die Ta-...
  • Seite 59 Vor Einsatz des Zubehörs: HINWEIS: Bei der ersten Anwendung kann es über mehrere Stunden zu Rauch- und Reinigen Sie die Zubehörteile (im Garraum Geruchsentwicklung kommen. Dies ist nor- geliefert) mit Wasser, etwas Geschirrspül- mal, und Sie brauchen nur eine gute Belüf- mittel und einem weichen Schwamm.
  • Seite 60 2. Stellen Sie die Temperatur, mit der Sie Taste zum Verringern kochen möchten, mit dem Temperatur- Erhöhen-Taste knopf ein. Taste Einstellungen Taste für Tastensperre ð Ihr Ofen wird sofort mit der gewählten Anzeige-Symbole Funktion und Temperatur in Betrieb ge- : Backzeit-Symbol nommen und das Symbol erscheint auf dem Bildschirm.
  • Seite 61 1. Berühren Sie die Taste , bis das Symbol auf dem Bildschirm erscheint. Die Kochzeit erhöht sich in den ers- ten 15 Minuten um 1 Minute, nach ð Das Symbol wird auf dem Display an- 15 Minuten um 5 Minuten. gezeigt und der 3-2-1-Countdown be- 4.
  • Seite 62 1. Berühren Sie die Taste bis das Sym- auf der Anzeige erscheint. 2. Stellen Sie die gewünschte Ebene mit den Tasten ein. (b-01-b-02-b-03) 2. Stellen Sie die Weckzeit mit den Tasten ein. 3. Berühren Sie die Taste zur Bestäti- gung oder warten Sie, ohne eine Taste zu berühren.
  • Seite 63 4. Berühren Sie die Tasten / , um die Minuten einzustellen. 3. Berühren Sie die Taste oder das Minutenfeld zu aktivieren. 5. Bestätigen Sie durch Berühren der Taste oder ð Die Tageszeit wird eingestellt und das Symbol verschwindet auf dem Bild- schirm.
  • Seite 64 • Sofern Vorheizen in der Zubereitungsta- • Wenn Kuchen beim Anschneiden innen belle empfohlen wird, sollten Sie sich dar- noch feucht ist, verwenden Sie etwas we- an halten. niger Flüssigkeit oder vermindern die • Wenn Sie Kochgeschirr auf dem Draht- Temperatur um 10 °C.
  • Seite 65 Lebensmittel Zu verwenden- Funktion der Be- Position des Re- Temperatur (°C) Backzeit (Min.) des Zubehör dienung gals (ca.) Bei Modellen mit Drahtfachböden : Kleine Kuchen Standard-Tablett * Heißluft 25 … 35 Bei Modellen oh- ne Drahtregale : 2 Runde Kuchen- form, 26 cm Biskuitkuchen Durchmesser mit...
  • Seite 66 Vorschläge für das Kochen mit zwei Tabletten Lebensmittel Zu verwenden- Funktion der Be- Position des Re- Temperatur (°C) Backzeit (Min.) des Zubehör dienung gals (ca.) Bei Modellen mit Bei Modellen mit 2-Standard-Ta- Drahtfachböden Drahtfachböden : blett * :150 25 … 40 Kleine Kuchen Heißluft 2 - 4...
  • Seite 67 • Nach Ablauf der Garzeit lassen Sie das • Der Fisch sollte auf der mittleren oder Fleisch noch etwa 10 Minuten im Ofen. niedrigen Ebene in einer hitzebeständi- So verteilt sich der Fleischsaft besser im gen Platte gegart werden. Fleisch, läuft auch beim späteren Schnei- •...
  • Seite 68 wand des Ofens. Dort entsteht die größte • Die in der Tabelle angegebenen Garzeiten Hitze, daher können stark fetthaltige können anhand der Menge und Dicke des Speisen Feuer fangen. Grillgutes etwas variieren. • Schieben Sie den Rost oder den Rost mit •...
  • Seite 69 Küchentisch für Testessen Vorschläge für das Backen mit einem einzigen Tablett Lebensmittel Zu verwenden- Funktion der Be- Position des Re- Temperatur (°C) Backzeit (Min.) des Zubehör dienung gals (ca.) Mürbegebäck (sü- Standard-Tablett * Ober-/Unterhitze 20 … 30 ßer Keks) Bei Modellen mit Drahtfachböden Mürbegebäck (sü- Standard-Tablett * Heißluft...
  • Seite 70 Grillen Lebensmittel Zu verwendendes Position des Regals Temperatur (°C) Backzeit (Min.) (ca.) Zubehör Fleischkloß (Kalb- Draht-Grill 20 … 30 fleisch) - 12 Menge Toastbrot Draht-Grill 1 … 4 Es wird empfohlen, für alle gegrillten Speisen 5 Minuten vorzuwärmen. Wenden Sie Lebensmittelstücke nach 1/2 der gesamten Grillzeit. 7 Wartung und Reinigung •...
  • Seite 71 Oberflächen • Falls nach dem Reinigen Rückstände ver- bleiben sollten, wischen Sie diese mit kal- • Reinigen Sie die Emailoberflächen nach tem Wasser ab, anschließend trocknen jedem Gebrauch mit Spülmittel, warmem Sie mit einem sauberen trockenen Mikro- Wasser und einem weichen Tuch oder fasertuch nach.
  • Seite 72 7.3 Bedienfeld reinigen 1. Entfernen Sie die Vorderseite des Draht- regals, indem Sie es an der Seitenwand • Wischen Sie die Panele und die Knöpfe in die entgegengesetzte Richtung zie- mit einem feuchten, weichen Tuch ab hen. und trocknen Sie sie mit einem trockenen 2.
  • Seite 73 Wischen Sie diese Beckenrinne nach Ge- brauch mit einem feuchten Tuch und trock- nen Sie ihn anschließend ab. 7.6 Reinigung der Ofentür 3. Stellen Sie den Backofen auf die Be- Sie können die Ofentür und das Türglas ent- triebsart leichte Dampfreinigung und be- fernen, um sie zu reinigen.
  • Seite 74 Um die Tür wieder anzubringen, müssen die Verfahren, die beim Entfernen der Tür angewendet wur- den, jeweils vom Ende bis zum An- fang wiederholt werden. Achten Sie beim Einbau der Tür darauf, dass die Clips an der Scharnierbuchse 5. Das Scharnier des Typs (B) ist für sanft geschlossen sind.
  • Seite 75 Ofenbeleuchtung austauschen Allgemeine Warnungen • Um die Gefahr eines Stromschlags zu vermeiden, sollten Sie vor dem Auswech- seln der Backofenlampe das Gerät aus- schalten und warten, bis der Backofen abgekühlt ist. Heiße Oberflächen verursa- chen Verbrennungen! • Dieser Ofen wird mit einer Glühlampe mit weniger als 40 W, einer Höhe von weniger Innerste Glasscheibe 2* Innenglas (möglicher-...
  • Seite 76 3. Wenn Ihre Ofenbeleuchtung dem Typ A in der nachstehenden Abbildung ent- spricht, drehen Sie das Leuchtmittel wie in der Abbildung gezeigt heraus, setzen Sie dann ein neues Leuchtmittel ein. Wenn es sich um ein Modell vom Typ (B) handelt, ziehen Sie es wie in der Ab- bildung gezeigt heraus und ersetzen Sie es durch ein neues.
  • Seite 77 Beim Garen treten Wassertröpfchen auf rungskasten. Tauschen Sie bei Bedarf die Sicherungen aus oder aktivieren Sie diese • Der beim Garen erzeugte Dampf konden- wieder. siert, wenn er mit kalten Oberflächen au- ßerhalb des Produkts in Berührung (Bei Modellen mit Timer) Die Timer-Anzei- kommt, und kann Wassertröpfchen bil- ge blinkt oder das Timer-Symbol bleibt of- den.
  • Seite 78 Vítejte! Vážení zákazníci, Děkujeme, že jste si vybrali tento Beko produkt. Doufáme, že Vám tento produkt, který byl navržen s využitím vysoké kvality a technologie, pomůže dosáhnout nejlepších výsledků. Proto si před použitím produktu pečlivě přečtěte tento návod k použití a jakékoli doplňující...
  • Seite 79 Obsah 7 Údržba a čištění......106 Obecné informace o čištění ..106 1 Bezpečnostní instrukce ....80 Příslušenství pro čištění ....108 Zamýšlené použití ......80 Čištění ovládacího panelu ..... 108 Bezpečnost dětí, zranitelných Čištění vnitřku trouby (oblast osob a domácích mazlíčků... vaření)..........
  • Seite 80 1 Bezpečnostní instrukce • Tato část obsahuje Zamýšlené použití bezpečnostní pokyny nezbytné • Tento výrobek je určen k k zamezení rizika újmy na domácímu použití. Není určený zdraví nebo věcných škod. pro komerční využití. • Pokud je produkt předán • Nepoužívejte výrobek v někomu jinému k osobnímu zahradách, na balkonech nebo použití...
  • Seite 81 zkušenosti, pokud jsou pod ně sedaly děti. Mohlo by dojít k dozorem nebo jsou proškoleni převrácení trouby nebo o bezpečném používání a poškození závěsů dveří. rizicích produktu. • Před vyřazením • Děti by si s výrobkem neměly opotřebovaných a hrát. Čištění a údržba by nepoužitelných výrobků: neměla být prováděna dětmi, 1.
  • Seite 82 předpisy mechanismus izolace kabelu roztavit a (pojistka, spínač, spínací způsobit požár následkem skříňka atd.) oddělující zkratu. všechny póly od sítě. • Používejte pouze originální • Před opravou, údržbou a kabely. Nepoužívejte čištěním odpojte výrobek ze přestřižené nebo poškozené sítě nebo vypněte pojistku. kabely.
  • Seite 83 elektrické sítě, aby se zabránilo • Při přepravě nebo přemístění nebezpečí úrazu elektrickým výrobku nepoužívejte dvířka a/ proudem. Odpojte výrobek nebo rukojeť. nebo vypněte pojistku v • Na spotřebič neodkládejte pojistkové skříňce. žádné předměty. Spotřebič přenášejte ve svislé poloze. Pokud je váš výrobek vybaven •...
  • Seite 84 • K zakrytí interiéru • Pokud nebudete výrobek delší instalovaného nábytku dobu používat, odpojte jej ze nepoužívejte žádné zásuvky nebo vypněte proud z tepelněizolační materiály. pojistkové skříňky. • V prostoru, kde je výrobek • Nepoužívejte výrobek, pokud nainstalován, se nesmí se během používání...
  • Seite 85 Upozornění na • Po úplném zasunutí příslušenství do pečícího teplotu prostoru zavřete dvířka trouby, • VAROVÁNÍ: Když se výrobek jinak může dojít k nárazu do používá, výrobek a jeho skla dvířek a jeho poškození. přístupné části jsou horké. Je třeba dávat pozor, abyste se Bezpečnost při nedotkli výrobku ani topných vaření...
  • Seite 86 Při používání mastného kapaliny kapající na podnos pergamenového papíru nebo způsobit kouření nebo podobných materiálů dbejte dokonce vznítit plameny. následujících opatření: • Při otevření víka výrobku se • Vložte pečící papír do nádoby vytváří proud vzduchu. Papír nebo na příslušenství trouby odolný...
  • Seite 87 • Nikdy nemyjte výrobek • K čištění skla předních dvířek stříkáním nebo poléváním trouby nepoužívejte drsné vodou na něj! Hrozí nebezpečí abrazivní čistící prostředky, úrazu elektrickým proudem! kovové škrabky, drátěnou vlnu • K čištění výrobku nepoužívejte ani bělící materiály. Tyto parní...
  • Seite 88 provozní funkci Ekonomický ohřev ventilátorem”, tato teplota se může lišit od teploty zobrazené na displeji. 3 Váš výrobek 3.1 Představení výrobku 1 Ovládací panel 2 Žárovka 3 Drátěné police 4 Motor ventilátoru (za ocelovým plechem) 5 Dveře 6 Rukojeť 7 Spodní ohřívač (pod ocelovou 8 Poloha police deskou) 9 Horní...
  • Seite 89 3.2.1 Ovládací panel 1 Knoflík volby funkcí 2 Časovač 3 Knoflík volby teploty Pokud je váš výrobek ovládán pomocí Časovač knoflíků, u některých modelů mohou být tyto knoflíky zasunuty, pokud na ně zatlačíte, vysunou se. Chcete-li provést nastavení pomocí těchto knoflíků, nejprve zatlačte příslušný...
  • Seite 90 lze pro tyto funkce nastavit. Zde zobrazené pořadí provozních režimů se může lišit od uspořádání na vašem výrobku. Symbol Teplotní Popis funkce Popis a použití funkce rozsah (°C) V troubě nefunguje žádné topné těleso. Rozsvítí se jen Světlo trouby kontrolka trouby. Trouba není...
  • Seite 91 U modelů Modely bez drátěných polic : Plech na pečivo Používá se na sladkosti, jako jsou cookies a Umístění drátěného grilu na polici pro sušenky. přípravu jídla U modelů s drátěnými policemi : Je důležité správně umístit drátěný gril na drátěné...
  • Seite 92 část na přední straně. Pro lepší vaření musí U modelů s drátěnými policemi : být plech zajištěn na dorazové zásuvce na drátěné polici. Nesmí přecházet přes doraz a dotýkat se zadní stěny trouby. U modelů Modely bez drátěných polic : U modelů...
  • Seite 93 aby kolíky na přední a zadní straně teleskopických kolejnic dosedaly na okraje grilu a plechu (zobrazeno na obrázku). CS / 93...
  • Seite 94 3.6 Technické specifikace Obecné specifikace Vnější rozměry produktu (výška/šířka/hloubka) (mm) 595 /594 /567 Instalační rozměry trouby (výška/šířka/hloubka) (mm) 590-600 /560 /min. 550 Napětí/Frekvence 220-240 V ~; 50 Hz Použitý typ a průřez kabelu/vhodný pro použití ve min. H05VV-FG 3 x 1,5 mm2 výrobku Celková...
  • Seite 95 4 První použití Než začnete výrobek používat, Pokud není nastaven první časovač, doporučujeme provést následující kroky "12:00" a symbol budou nadále uvedené v následujících částech. blikat a trouba se nespustí. Aby vaše trouba fungovala, musíte 4.1 První nastavení časovače potvrdit denní čas nastavením denního času nebo dotykem Před použitím trouby vždy nastavte tlačítka...
  • Seite 96 OZNÁMENÍ: Při prvním použití může po několik hodin z trouby vycházet kouř a zápach. To je normální a k jeho odstranění postačí dobré větrání. Vyvarujte se přímého vdechování kouře a zápachu, který se tvoří. 5 Použití trouby • Pokud bylo provedeno jakékoli nastavení 5.1 Všeobecné...
  • Seite 97 Zapnutí trouby 2. Dotkněte se tlačítka , dokud se na displeji nezobrazí symbol pro dobu Když knoflíkem pro výběr funkcí vyberete vaření. provozní funkci, kterou chcete vařit, a knoflíkem pro výběr teploty nastavíte určitou teplotu, trouba začne pracovat. Vypnutí trouby Troubu můžete vypnout otočením knoflíku pro výběr funkcí...
  • Seite 98 Používá se pro účely výstrahy. Budík Pokud po skončení zvukové můžete například použít tehdy, když v výstrahy stisknete libovolné určitou dobu chcete obrátit jídlo v troubě. tlačítko, trouba začne opět Jakmile nastavený čas vyprší, časovač pracovat. Chcete-li zabránit vydá zvukové upozornění. opětovnému spuštění...
  • Seite 99 Úprava hlasitosti 3. Dotkněte se tlačítka pro potvrzení nebo počkejte, aniž byste se dotkli 1. Klepněte na tlačítko , dokud se na jakéhokoli tlačítka. Nastavení jasu se po obrazovce nezobrazí symbol chvíli aktivuje. Změna denní doby Na troubě můžete změnit čas dne, který jste předtím nastavili: 1.
  • Seite 100 • Intenzivní pára vznikající při pečení může • Všechny ingredience používané při vlivem rozdílu teplot vytvářet výrobě pečiva by měly být čerstvé a měly kondenzované kapky vody na vnitřní a by mít pokojovou teplotu. vnější straně trouby a na horní části •...
  • Seite 101 • Pečte pečivo v poloze a teplotě, které jsou uvedené v tabulce vaření. Pokud není spodní vrstva dostatečně upečená, položte váš výrobek na spodní polici a pokračujte v pečení. Varný stůl na pečivo a jídlo v troubě Doporučení pro pečení na jednom plechu Potraviny Příslušenství...
  • Seite 102 Potraviny Příslušenství k Provozní funkce Poloha police Teplota (°C) Čas pečení použití (min.) (přibližně) Kulatá černá kovová forma, Horní a spodní Jablečný koláč 50 … 70 průměr 20 cm na ohřev drátěném grilu ** Kulatá černá kovová forma, Ohřev Jablečný koláč 50 …...
  • Seite 103 Potraviny Příslušenství k Poloha police Teplota (°C) Čas pečení (min.) použití (přibližně) Koláčky Standardní plech * 30 … 40 Koláčky Standardní plech * 30 … 40 Pečivo Standardní plech * 40 … 50 Brioška Standardní plech * 30 … 40 * Toto příslušenství...
  • Seite 104 Potraviny Příslušenství k Provozní funkce Poloha police Teplota (°C) Čas pečení použití (min.) (přibližně) 25 minuty 250/ Krůta (5,5 kg) Standardní plech * Funkce „3D“ max, po 180 … 150 … 210 Drátěný gril * Horní a spodní Jeden plech Ryby 20 …...
  • Seite 105 Potraviny Příslušenství k Poloha police Teplota (°C) Čas pečení (min.) použití (přibližně) Gratinovaná zelenina Drátěný gril 4 - 5 20 … 30 Toastovaný chléb Drátěný gril 1 … 4 U všech grilovaných jídel se doporučuje předehřát troubu na 5 minut. Po 1/2 celkového času grilování...
  • Seite 106 Doporučení pro přípravu jídel s dvěma plechy Potraviny Příslušenství k Provozní funkce Poloha police Teplota (°C) Čas pečení použití (min.) (přibližně) 2-Standardní plech * Křehké pečivo Ohřev 2 - 4 15 … 25 (sladké pečivo) ventilátorem 4-Plech na pečivo U modelů s U modelů...
  • Seite 107 Inox - nerezové povrchy • Díky své porézní struktuře katalytické povrchy absorbují olej a po nasycení • K čištění nerezových povrchů a rukojetí povrchu olejem se začnou lesknout, v nepoužívejte čisticí prostředky obsahující tomto případě je doporučeno díly kyseliny nebo chlór. vyměnit.
  • Seite 108 7.2 Příslušenství pro čištění 2. Zatáhněte drátěnou polici směrem k sobě, abyste ji zcela odstranili. Nevkládejte příslušenství výrobku do myčky nádobí, pokud není v návodu k použití uvedeno jinak. 7.3 Čištění ovládacího panelu • Při čištění panelů s knoflíkovým ovládáním otřete panel a knoflíky vlhkým měkkým hadříkem a osušte je suchým hadříkem.
  • Seite 109 Okamžitě otevřete dvířka a otřete vnitřek vodního kamene, které se mohou vytvořit trouby vlhkou houbou nebo hadříkem. Při na skle trouby, otřete octem a opláchněte otevření dveří se uvolní pára. To může sklo. představovat riziko popálení. Při otevírání K čištění dvířek a skla trouby dveří...
  • Seite 110 8. Vytáhněte odstraněné dveře směrem 3. Jak je znázorněno na obrázku, jemně nahoru, aby se uvolnily z pravého a nadzvedněte nejvnitřnější sklo (1) levého závěsu, a vyjměte je. směrem k "A" a poté jej vyjměte tahem směrem k "B". Při opětovném připevnění dveří je třeba zopakovat postupy použité...
  • Seite 111 7.8 Čištění světla trouby V případě, že se zašpiní skleněná dvířka světla trouby ve varném prostoru, očistěte je pomocí prostředku na mytí nádobí, teplé vody a měkkého hadříku nebo houbičky a osušte suchým hadříkem. V případě poruchy lampy v troubě můžete lampu v troubě...
  • Seite 112 4. Pokud je vaše světlo v troubě typu (A) zobrazené na obrázku níže, otočte žárovku podle obrázku a vyměňte ji za novou. Pokud se jedná o model typu (B), vytáhněte jej, jak je znázorněno na obrázku, a nahraďte jej novým. 5.
  • Seite 113 CS / 113...
  • Seite 114 CS / 114...