Walimex Pro Light Shooter 360 TTL Gebrauchsanleitung

Verwandte Anleitungen für Walimex Pro Light Shooter 360 TTL


Inhaltszusammenfassung für Walimex Pro Light Shooter 360 TTL
- Seite 1 Light Shooter 360 TTL WALSER GmbH & Co. KG Gewerbering 26 86666 Burgheim Tel: +49 8432 9489-0 Fax: +49 8432 9489-8333 Germany www.walimexpro.de Made in China Fabricado en China Fabbricato in China Gebrauchsanleitung Instruction Manual...
-
Seite 2: Inhaltsverzeichnis
Gebrauchsanleitung Instruction Manual 1. So verstehen Sie diese Gebrauchsanleitung richtig............5 1. Understanding these instructions for use correctly ............35 1.1 Kennzeichnungen am Gerät ..................... 5 1.1 Markings on the device ..................... 35 1.2 Kennzeichnungen in dieser Gebrauchsanleitung ............. 5 1.2 Identifications in these instructions for use ............... -
Seite 3: So Verstehen Sie Diese Gebrauchsanleitung Richtig
1. So verstehen Sie diese Gebrauchsanleitung richtig Gebrauchsanleitung 1.1 Kennzeichnungen am Gerät Dieses Zeichen bedeutet, dass Ihr Gerät die Sicher- Wir danken Ihnen für Ihr Vertrauen und wünschen Ihnen viel Freude und heitsanforderungen aller anwendbaren EU-Richtlinien Erfolg mit Ihrem neuen Gerät. erfüllt. -
Seite 4: Wichtige Sicherheitsinformation
2. Wichtige Sicherheitsinformation WARNUNG WARNUNG Erstickungsgefahr durch Kleinteile Stromschlaggefahr und Brandgefahr durch Kurzschluss oder Halten Sie das Gerät und die Verpackung von Kindern und Haustieren fern. Fehlfunktion Ein Kurzschluss kann u. a. durch defekte Kabel oder durch Feuchtigkeit oder WARNUNG Nässe verursacht werden. -
Seite 5: Gerät Auspacken Und Prüfen
3. Gerät auspacken und prüfen WARNUNG 1. Packen Sie den Lieferumfang vorsichtig aus. Vorsichtsmaßnahmen bei der Verwendung mit dem Power Porta/Akku 2. Prüfen Sie, ob der Lieferumfang vollständig vorhanden ist: Diese können auslaufen oder explodieren, wenn sie unsachgemäß gehandhabt • Blitzgerät Light Shooter 360 werden. -
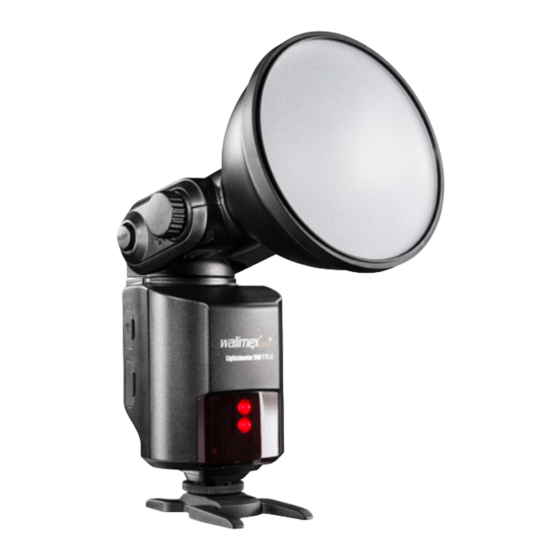
Seite 6: Übersicht Über Bestandteile Und Bedienelemente
4. Übersicht über Bestandteile und Bedienelemente Anschluss für Zubehörteile Blitzröhre Blitzröhrenfassung Funktionstaste 2 Funktionstaste 3 Funktionstaste 1 Funktionstaste 4 Modus Wirelessfunktionstaste Ein-/Aus-Schalter Testtaste / Bereitschafts- anzeige Feststellschraube Dreheinstellregler, Set-Taste Druckknopf für Einstellung Neigungswinkel Slave 1/ AF Autofokus / Modus Slave 2 MF Manueller Fokus USB-Anschluss für Remotecontroller... -
Seite 7: Installationen Vor Inbetriebnahme
5.2 Installieren des Standardreflektors / Zubehörs 1. Drehen Sie die Feststellschraube entgegen des Uhrzeigersinns, Funktübertragung bis sie lose ist. Optische Übertragung 2. Setzen Sie den Reflektor in den Anschluss für Zubehörteile ein. 3. Drehen Sie die Feststellschraube im Uhrzeigersinn, um den Reflektor Blitz Modus festzuschrauben. -
Seite 8: Befestigen Des Off-Camera Adapters
6.2.2 Einstellen der Blitzbelichtungsreihenautomatik (FEB / Flash Exposure 6.1 Ein- und Ausschalten des Geräts Bracketing) - Nur im Modus E-TTL, nur für Light Shooter 360 TTL/C - Mit dem EIN-/AUS-Schalter können Sie das Blitzgerät ein- bzw. ausschalten. Sie haben die Möglichkeit, automatisch drei Fotos nacheinander zu machen. - Seite 9 Bild schießen. • FEB kann mit FEC (6.2.1) und FEL (siehe 6.2.3) verwendet werden. • Nur Light Shooter 360 TTL/C: Die Reihenfolge der korrekt-, über-, und • Drücken Sie die Funktionstaste 4, bis im Display das Symbol < > erscheint.
-
Seite 10: Manuelles Blitzen Im Modus M
1/4+0.3 Blitzlichtleistung einstellen. ←Zahlenanzeige beim Erhöhen der Blitzlichtleistung Canon (Light Shooter 360 TTL/C): • Drücken Sie die Taste MODE, bis im Display das Symbol < M > erscheint. • Drücken Sie die MODE-Taste, bis das Wort <MULTI> im Display erscheint. - Seite 11 闪光模式—— RPT: 频闪闪光 使用频闪闪光,可以发出一系列快速的闪光。它可以在一张照片上拍摄移动物体的多个图像。 Nikon (Light Shooter 360 TTL/N): Maximale Gesamtzahl der Stroboskop-Blitze: 您可以设置闪光频率(每秒的闪光次数,以Hz表示)、闪光次数和闪光输出。 Ausgangs- leistung des Blitzlichts • Drücken Sie die MODE-Taste, bis <RPT> im Display erscheint. 按<MODE>闪光模式选择按 转动调节旋钮设置闪光输出功 设置闪光频率和闪光次数。 1/16 • Wählen Sie mit dem Dreheinstellregler die Gesamtzahl der Blitze.
-
Seite 12: Drahtloses Blitzen (Master/Slave)
• Drücken Sie die Wirelessfunktionstaste. Kompatibilität: • Im Display erscheint ein Blitzsymbol oder das Wort RPT. Die Displayfarbe Light Shooter 360 TTL/C (Canon): Speedlite 580EX-RT, 600EX-RT, Kameras wechselt auf Grün. Der Blitz befindet sich im Master-Modus. 7D, 60D, 600D • Drücken Sie die Wirelessfunktionstaste erneut. -
Seite 13: Vollautomatisches Blitzen Im Modus Ttl Light Shooter 360 Ttl/C Canon
Kanal für die Kommunikation der Blitze nutzen. Der Kanal muss bei Master und Slave identisch sein. 单元。因此,在 Light Shooter 360 TTL/C Canon: • Setzen Sie den Master Blitz auf Modus <ETTL>. Für das Shooting wird der 按功能按钮 4 <... - Seite 14 6.6.3 Vollautomatisches Auslösen im Modus E-TTL mit zwei Blitzeinheiten 6.6.4 Vollautomatisches Auslösen im Modus E-TTL mit drei Blitzeinheiten (nur Light Shooter 360 TTL/C Canon) mit Einstellen der Blitzleistungs- (nur Light Shooter 360 TTL/C Canon) mit Einstellen der Blitzleistungs- verhältnisse verhältnisse Sie können eine dritte Gruppe in die Gruppen A und B integrieren.
-
Seite 15: Funk-Fernauslösung (Keine Ttl Funktion)
6.7 Funk-Fernauslösung (Keine TTL Funktion) Als Mastereinheit können Sie folgende Geräte ansteuern: Light Shooter 360TTL/C, Light Shooter 360TTL/N, etc. Sie können Ihren Blitz über Funk steuern. Dazu ist dieser mit einer entsprechenden Schnittstelle Als Slaveeinheit kann der Blitz von folgenden Geräten angesprochen werden: ausgestattet. -
Seite 16: Signalton
7. Probleme beheben Anzeige Funktion Einstellung Einstellung/Beschreibung Problem Mögliche Ursache Abhilfe Gerät ist kurzzeitig Starten Sie das Gerät neu. Sollte überlastet das Problem nicht gelöst sein, senden Sie dieses zum Hersteller. Überhitzung Schalten Sie den Blitz aus und warten Sie 10 Min. Ausgangsspannung ist Senden Sie das Gerät zum zu hoch... -
Seite 17: Gerät Instand Halten
Drehwinkel vertikal -15 – 90 Grad Drehwinkel horizontal 0-270 Grad Bringen Sie das Gerät niemals mit Feuchtigkeit oder Wasser in Berührung. walimex pro Power Porta/ Spannungsversorgung HINWEIS walimex pro Powerblock Plus Verwenden Sie ausschließlich die in der nachfolgenden Tabelle angegebe- Max.