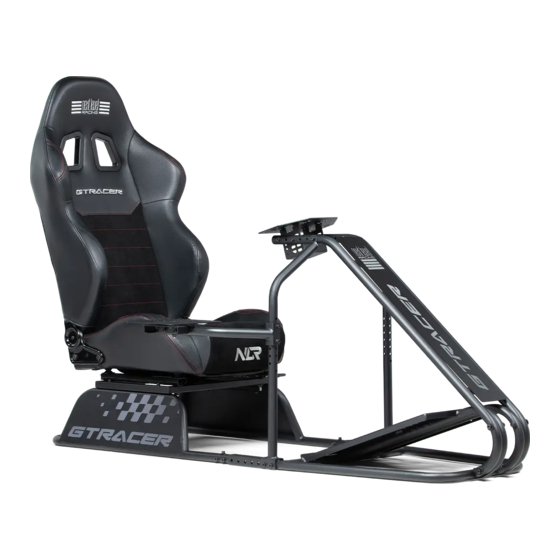
Inhaltszusammenfassung für Next Level Racing GTRACER
Seite 1
T A K E R A C I N G T O T H E N E X T L E V E L Video Instruction: bit.ly/nlrbuild INSTRUCTION MANUAL...
Seite 2
We know you’re eager to start racing! Take your time with the instructions and follow this guide to assemble your product. You’ll be setting yourself up for success by following the instruction booklet to fully optimize your product. ASSEMBLY VIDEO bit.ly/nlrbuild @next_level_racing @nextlevelracingOfficial @nextlvlracing Next Level Racing FOLLOW support@nextlevelracing.com...
Seite 3
Video Instruction: bit.ly/nlrbuild T A K E R A C I N G T O T H E N E X T L E V E L N E X T L E V E L R A C I N G . C O M...
Seite 4
support@nextlevelracing.com PRE-RACE CHECKS WARNING & ASSEMBLY TIPS • Please do not use power tools for assembly as over tightening can damage your frame. • Do not force parts together. • Avoid cross threading threaded items. • If in doubt consult the installation video (see QR code below or contact us at support@nextlevelracing.com) •...
Seite 5
Video Instruction: bit.ly/nlrbuild IN THE *NOT TO SCALE NOTE: Some Items Come with Rust Resistant Coating 1 x REAR FRAME 1 x PEDAL FRAME 1 x CENTRE WHEEL SUPPORT 1 x ENGRAVED ACRYLIC PANEL 2 x SIDE WHEEL SUPPORT 1 x WHEEL PLATE 1 x SHIFTER ARM 1 x SHIFTER PLATE 1 x SEAT BACKREST (PRE-INSTALLED...
Seite 6
support@nextlevelracing.com 10 x M6 16mm SOCKETHEAD BOLTS 6 x M6 20mm SOCKETHEAD BOLTS 6 x M8 20mm SOCKETHEAD BOLTS 1 x M6 40mm PRESS FIT BOLT 1 x M5 12mm SCREW 2 x M8 16mm SOCKETHEAD BOLTS 1 x PLASTIC RECLINER COVER 1 x M8 ALLEN KEY 1 x M8 14mm WRENCH 1 x M6 EXTENDED ALLEN KEY...
Seite 9
Video Instruction: bit.ly/nlrbuild PARTS: • • 1 x Pedal Frame • • 1 x Rear Frame • • 4 x M6 35mm Sockethead Bolts • • 4 x M6 Flange Nuts Repeat on Other • • 4 x M6 Washers Side A) Align the Pedal Frame with the Rear Frame.
Seite 10
support@nextlevelracing.com PARTS: SIDE WHEEL SUPPORT ADJUSTMENT • • NIL A) Suggested Side Wheel Support position for users 120cm - 160cm tall. B) Suggested Side Wheel Support position for users 160cm+ tall. PARTS: • • 2 x Side Wheel Supports (L&R) •...
Seite 11
Video Instruction: bit.ly/nlrbuild PARTS: • • 1 x Wheel Plate • • 4 x M6 40mm Sockethead Bolts • • 4 x M6 Flange Nuts • • 4 x M6 Washers A) Align the Wheel Plate with the Wheel Deck and adjust to desired position. B) Bolt through and secure with 2 x M6 Bolts, Washers and Flange Nuts on each side.
Seite 12
support@nextlevelracing.com PARTS: • • 1 x M6 40mm Press Fit Bolt • • 1 x M6 Flange Nut Side View Bolt through and secure Shifter Plate to Shifter Arm with 1 x M6 Press Fit Bolt and Flange Nut. PARTS: •...
Seite 13
Video Instruction: bit.ly/nlrbuild PARTS: SEAT INSTALLATION • • Seat Backrest (Pre-installed Recliners) Repeat on Other Side Loosen the pre-installed 2 x M8 Dome Shaped Bolts and Washers on the Seat Backrest. Repeat on the other side. PARTS: • • Seat (Pre-Installed Frame) Uninstall 4 x M8 pre-installed Dome Shaped Bolts and Washers from the Seat.
Seite 14
support@nextlevelracing.com PARTS: • • 1 x Plastic Recliner Cover • • 1 x M5 12mm Screw A) Align Plastic Recliner Cover with Recliner System. B) Lift the handle and secure Plastic Recliner Cover to Seat Recliner with 1 x M5 Screw. PARTS: •...
Seite 15
Video Instruction: bit.ly/nlrbuild PARTS: • • 1 x Buttkicker Mount • • 2 x M8 16mm Sockethead Bolts • • 2 x M8 Washers A) Align the Buttkicker Mount with the Nut Inserts on the underside of the Seat Frame. B) Bolt through and secure with 2 x M8 Bolts and Washers.
Seite 16
support@nextlevelracing.com PARTS: ACRYLIC PANEL INSTALLATION • • 2 x Double Sided Adhesive Strips • • 1 x Engraved Acrylic Panel A) Use two strips of double-sided adhesive and stick them to the front of Centre Wheel Support. B) Attach the Engraved Acrylic Panel to the Adhesive Strips on Centre Wheel Support. PARTS: WHEELPLATE ADJUSTMENT •...
Seite 17
Video Instruction: bit.ly/nlrbuild WARNING Please do not use power tools for assembly as over tightening can damage your frame. Do not force parts together. Avoid cross threading threaded items. If in doubt consult the installation video (see QR code below or contact us at support@nextlevelracing.com). Take extra care handling the Engraved Acrylic Panel when unboxing.
Seite 18
support@nextlevelracing.com NOTES If you require further support with your product please contact our friendly team at: support@nextlevelracing.com...
Seite 19
Video Instruction: bit.ly/nlrbuild GT Racer Manuel d’instructions Nous savons que vous êtes impatient de commencer la course ! Prenez votre temps avec les instructions et suivez ce guide pour assembler votre produit. Vous vous préparerez au succès en suivant le livret d’instructions pour optimiser pleinement votre produit. VÉRIFICATIONS AVANT LA COURSE AVERTISSEMENT •...
Seite 20
support@nextlevelracing.com GT Racer- instructiehandleiding We weten dat je staat te popelen om te gaan racen! Neem de tijd met de instructies en volg deze handleiding om uw product in elkaar te zetten. U bereidt uzelf voor op succes door het instructieboekje te volgen om uw product volledig te optimaliseren.
Seite 21
Video Instruction: bit.ly/nlrbuild Manuale di istruzioni GT Racer. Sappiamo che non vedi l’ora di iniziare a correre! Prenditi il tuo tempo con le istruzioni e segui questa guida per assemblare il tuo prodotto. Ti preparerai al successo seguendo il libretto di istruzioni per ottimizzare completamente il tuo prodotto.
Seite 22
support@nextlevelracing.com Manual de instrucciones del GT Racer. ¡Sabemos que estás ansioso por empezar a competir! Tómese su tiempo con las instrucciones y siga esta guía para ensamblar su producto. Se estará preparando para el éxito siguiendo el folleto de instrucciones para optimizar completamente su producto. COMPROBACIONES PREVIAS A LA CARRERA ADVERTENCIA •...
Seite 23
Video Instruction: bit.ly/nlrbuild GT Racer Bedienungsanleitung Wir wissen, dass Sie es kaum erwarten können, mit dem Rennen zu beginnen! Nehmen Sie sich Zeit für die Anweisungen und befolgen Sie diese Anleitung, um Ihr Produkt zusammenzubauen. Sie sind auf Erfolgskurs, wenn Sie die Anleitung befolgen, um Ihr Produkt vollständig zu optimieren. KONTROLLEN VOR DEM RENNEN WARNUNG •...
Seite 25
Video Instruction: bit.ly/nlrbuild Manual de Instruções GT Racer Sabemos que você está ansioso para começar a correr! Não se apresse com as instruções e siga este guia para montar seu produto. Você estará se preparando para o sucesso seguindo o livreto de instruções para otimizar totalmente o seu produto.
Seite 26
support@nextlevelracing.com GT Racer Инструкция по эксплуатации Мы знаем, что вы хотите начать гонку! Не торопитесь с инструкциями и следуйте этому руководству, чтобы собрать свой продукт. Вы настроите себя на успех, следуя буклету с инструкциями, чтобы полностью оптимизировать свой продукт. ПРЕДГОНОЧНЫЕ ПРОВЕРКИ ПРЕДУПРЕЖДЕНИЕ...
Seite 27
Video Instruction: bit.ly/nlrbuild GT Racer Kullanım Kılavuzu Yarışmaya başlamak için can attığınızı biliyoruz! Talimatlarla zaman ayırın ve ürününüzü monte etmek için bu kılavuzu izleyin. Ürününüzü tamamen optimize etmek için talimat kitapçığını takip ederek kendinizi başarıya hazırlayacaksınız. YARIŞ ÖNCESİ KONTROLLER UYARI •...
Seite 28
support@nextlevelracing.com Návod k použití GT Racer Víme, že toužíte začít závodit! Udělejte si čas s pokyny a podle tohoto průvodce sestavte svůj produkt. Postupem podle návodu k plné optimalizaci vašeho produktu se připravíte na úspěch. PŘED ZÁVODNÍ KONTROLY VAROVÁNÍ • K montáži nepoužívejte elektrické nářadí, protože přílišné utažení může poškodit rám. •...
Seite 29
Video Instruction: bit.ly/nlrbuild Instrukcja obsługi GT Racer Wiemy, że nie możesz się doczekać, aby rozpocząć wyścigi! Nie spiesz się z instrukcjami i postępuj zgodnie z tym przewodnikiem, aby złożyć swój produkt. Ustawisz się na sukces, postępując zgodnie z instrukcją, aby w pełni zoptymalizować swój produkt. KONTROLE PRZED WYŚCIGIEM OSTRZEŻENIE •...
Seite 30
support@nextlevelracing.com تعليماتGT Racer .نحن نعلم أنك حريص عىل بدء السباق! خذ وقتك مع التعليمات و اتبع هذا الدليل لتجميع منتجك. ستقوم بإعداد نفسك للنجاح باتباع كتيب التعليمات لتحس� ي ن منتجك بالكامل فحوصات ما قبل السباق تحذير • .يرجى عدم استخدام اإل أ د و ات الكهربائية للتجميع حيث أن ا إل إ ف ر اط � ن ي إحكام الربط يمكن أن يؤدي إىل تلف ا إل إ طار الخاص بك •...