Helios MiniVent M1/100 F Montage- Und Betriebsvorschrift
Vorschau ausblenden
Andere Handbücher für MiniVent M1/100 F:
- Montage- und betriebsvorschrift (20 Seiten) ,
- Montage- und betriebsvorschrift (56 Seiten)
Inhaltsverzeichnis
Verfügbare Sprachen
Verfügbare Sprachen
Quicklinks
Helios Ventilatoren
MONTAGE- UND BETRIEBSVORSCHRIFT
INSTALLATION AND OPERATING INSTRUCTIONS
NOTICE DE MONTAGE ET D'UTILISATION
Kleinlüfter - Mini fan - Mini ventilateur
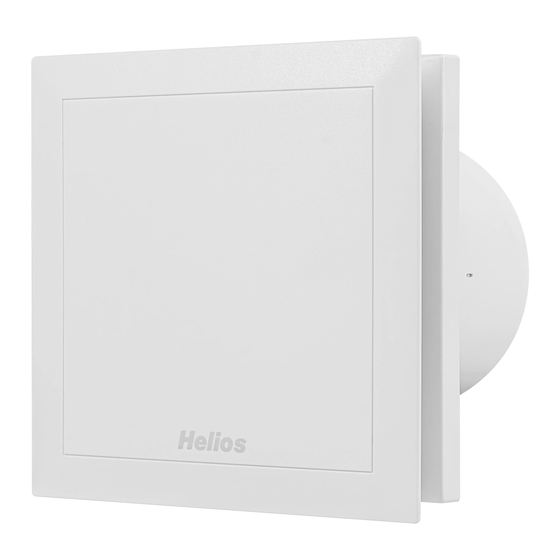
Helios MiniVent
M1/100 F
M1/120 F
- mit Feuchteverlaufssteuerung und zwei Drehzahlstufen
- with automatic humidity control
- avec hygrostat électronique et deux vitesses
NR. 19053.003
NO. 19053.003
N° 19053.003
IP 45
D
UK
F
Kapitel
Inhaltsverzeichnis

Verwandte Anleitungen für Helios MiniVent M1/100 F


Inhaltszusammenfassung für Helios MiniVent M1/100 F
- Seite 1 Helios Ventilatoren MONTAGE- UND BETRIEBSVORSCHRIFT NR. 19053.003 INSTALLATION AND OPERATING INSTRUCTIONS NO. 19053.003 NOTICE DE MONTAGE ET D’UTILISATION N° 19053.003 IP 45 Kleinlüfter - Mini fan - Mini ventilateur Helios MiniVent M1/100 F M1/120 F - mit Feuchteverlaufssteuerung und zwei Drehzahlstufen - with automatic humidity control - avec hygrostat électronique et deux vitesses...
-
Seite 2: Inhaltsverzeichnis
Montage- und Betriebsvorschrift MiniVent M1/100 F und M1/120 F DEUTSCH Helios Ventilatoren MONTAGE- UND BETRIEBSVORSCHRIFT NR. 19053.003 Inhaltsverzeichnis KAPITEL 1. ALLGEMEINE MONTAGE- UND BETRIEBSHINWEISE ........Seite 1 Wichtige Informationen . -
Seite 3: Kapitel 1. Allgemeine Montage- Und Betriebshinweise
Wenn die nachfolgenden Ausführungen nicht beachtet werden, entfällt unsere Gewährleistung. Gleiches gilt für Haf- tungsansprüche an den Hersteller. Der Gebrauch von Zubehörteilen, die nicht von Helios empfohlen oder angeboten werden, ist nicht statthaft. Eventuell auftretende Schäden unterliegen nicht der Gewährleistung. Wenn sich Feuchtigkeit im Klemmenkasten befindet ist die Tülle nicht fachgerecht ausgeführt. -
Seite 4: Leistungsdaten
Montage- und Betriebsvorschrift MiniVent M1/100 F und M1/120 F Einsatz und Betrieb nur entsprechend dieser Montage- und Betriebsvorschrift. Ein bestimmungsfremder Ein- WICHTIG satz ist nicht zulässig! Leistungsdaten Zum Erreichen der vorgesehenen Leistung ist ein ordnungsgemäßer Einbau, korrekt ausgeführte Abluftführung und ausreichende Zuluftversorgung sicherzustellen. -
Seite 5: Kapitel 2. Lieferumfang Und Einbau
Montage- und Betriebsvorschrift MiniVent M1/100 F und M1/120 F Lieferumfang / Verpackungseinheit KAPITEL 2 Entnehmen Sie die Liefereinheit erst unmittelbar vor dem Einbau aus dem Karton, um mögliche Beschädigungen und Verschmutzungen beim Transport sowie auf der Baustelle zu vermeiden. LIEFERUMFANG UND EINBAU MiniVent M1/1.. -
Seite 6: Bohrlöcher
Montage- und Betriebsvorschrift MiniVent M1/100 F und M1/120 F Bohrlöcher: Gehäuse ansetzen Löcher markieren und abbohren. Mit mind. zwei Befestigungsschrauben und Dübeln montieren. Bei Aufputzleitungsverlegung, muss die seitliche Aussparung für den Kabeleintritt (Abb. 5, Pos Œ ) im Gehäuse ausgebrochen werden! -
Seite 7: Anschluss Der Zuleitung
Montage- und Betriebsvorschrift MiniVent M1/100 F und M1/120 F Anschluss der Zuleitung 1. Es ist eine Mantel-Leitung bzw. im Feuchtraum eine NYM Leitung einzusetzen. 2. Leitungsaustritt aus der Wand mindestens 180 mm (Abb. 3). 3. Tülle mit rundem Werkzeug vorstechen oder mit der Zuleitung direkt durchstechen (Abb.5, Pos 3). -
Seite 8: Montageflansch Mf 100 (Zubehör)
Montage- und Betriebsvorschrift MiniVent M1/100 F und M1/120 F Montageflansch MF 100 (Zubehör) Bei beengten Platzverhältnissen in Decken, in dünnen Wänden sowie in engen Schächten. MF 100 winkelgerecht an die Wand oder die Decke dübeln (beliebige Anzahl übereinander möglich). Anschließend Ventilator mittels beigefüg- ten Schrauben an MF 100 befestigen (Abb. -
Seite 9: Kapitel 5. Reinigung Und Wartung
Montage- und Betriebsvorschrift MiniVent M1/100 F und M1/120 F Reinigung KAPITEL 5 - Vor der Reinigung sicherstellen, dass das Gerät allpolig vom Netz getrennt ist! - Gegen Wiedereinschalten sichern! REINIGUNG UND - Gerät nur mit feuchtem Tuch reinigen WARTUNG - Das Gerät ist wartungsfrei. - Seite 10 Montage- und Betriebsvorschrift MiniVent M1/100 F und M1/120 F Nach dem Abschalten der Klemme 1, läuft der Ventilator weiter und geht nach Ablauf der eingestellten Zeit automatisch aus.Werkseinstellung ca. 6 Minuten. Der Betrieb mit Zeitfunktion, ist der Feuchtesteuerung, übergeordnet. oder KAPITEL 7 3.
-
Seite 11: Kapitel 7. Schaltplan-Übersicht
Montage- und Betriebsvorschrift MiniVent M1/100 F und M1/120 F SCHALTPLAN-ÜBERSICHT Internes Funktionsprinzip / Jumperstellung M1/... F SS-948 SS-940 M1/100 F/120 F Feuchte Funktions- Eingang r.F. Anschluss Kunde, Standard Entfeuchtungsbetrieb Manueller-Eingang M1/... F SS-919 Jumper 1 A / B Kl.1= Kl.1= r.F. - Seite 32 HELIOS Ventilateurs · Le Carré des Aviateurs · 157 av. Charles Floquet · 93155 Le Blanc Mesnil Cedex CH HELIOS Ventilatoren AG · Steinackerstraße 36 · 8902 Urdorf / Zürich GB HELIOS Ventilation Systems Ltd. · 5 Crown Gate · Wyncolls Road · Severalls Industrial Park · Colchester · Essex · CO4 9HZ...