Herunterladen Diese Seite drucken
Vorschau ausblenden Andere Handbücher für HELION 2 XP:

Werbung

Verfügbare Sprachen
  • DE

Verfügbare Sprachen

  • DEUTSCH, seite 29
HELION XP
2
Thermal Imaging Scopes
Operating Instructions
English | Français | Deutsch | Español | Italiano | Русский

Werbung

loading

Inhaltszusammenfassung für Pulsar HELION 2 XP

  • Seite 1 HELION XP Thermal Imaging Scopes Operating Instructions English | Français | Deutsch | Español | Italiano | Русский...
  • Seite 2 ÐÓÑÑÊÈÉ Тепловизор Helion 2 135-160 Para obtener información detallada acerca del dispositivo, descargue el manual de usuario al completo: www.pulsar-vision.com/products/thermal-imaging-scopes Attenzione! I monocoli termici Helion 2 necessitano una licenza se esportati al di fuori del proprio paese. Compatibilità elettromagnetica Questo prodotto è conforme alla norma europea EN 55032:2015, Classe A.
  • Seite 3 MODEL HELION 2 XP50  SKU  77402  MICROBOLOMETER  Type  uncooled Resolution, pixels 640х480 Frame rate, Hz 50  Pixel size, microns 17  OPTICAL SPECIFICATIONS Magnification ratio, x 2.5  Smooth digital zoom, x 2.5 - 20  Digital zoom  x2/ x4/ x8  Lens  F50 mm, F/1.2  Field of view angle (horizontal), deg 12.4 ...
  • Seite 4 BATTERY PACK: This product is subject to change in line with improvements to its design. The latest edition of this user manual is available online at www.pulsar-vision.com Quick-release Li-Ion battery packs IPS7/IPS14 Operating time in Wi-Fi mode up to 20 hours* Operation on АА...
  • Seite 5 Charging: DESCRIPTION OF CONTROLS Lift the lever (C) of the charging base. Remove the protective cover from the Battery Pack. BUTTON OPERATING MODE FIRST SHORT OTHER SHORT LONG PRESS Install the Battery Pack into the charging base as shown in Pic.3; PRESS PRESSES click the lever (C).
  • Seite 6 INSTALLATION: The display will show the battery icon with charge level as a percentage. Remove the protective cover from the Battery Pack. If the device operates on external power supply but the IPS7 battery is Lift the lever (13). not connected, the icon is shown.
  • Seite 7 Mode М (manual). Close the lens cover, turn the device on with a Basic mode – it allows you to select one of the three modes short press of the ON button (11). Having finished calibration, open as the basic one for the user mode. the lens cover.
  • Seite 8 Menu contents and description Note: Quick activation of the operating modes is Wi-Fi possible by using the UP button. Short press of the Wi-Fi ON/OFF UP button activates the switching of the operating modes. Turn Wi-Fi on with a short press of the M (9) button. Off...
  • Seite 9 In automatic mode the need for calibration is Select the correct values for the year, month and based on software algorithm. Calibration starts date with a short press of the UP/ DOWN buttons. automatically. Switch between digits with a short press of the M The user determines for himself the need for button.
  • Seite 10 Remote control (bought separately) Restore default settings Before operating the remote control (RC), Enter the Reset submenu with a short press of the Reset M (9) button. Remote remember to activate it as follows: Control With a short press of the UP/ DOWN buttons Press the M button, countdown starts (30 sec), select “Yes”...
  • Seite 11 With a short press of the UP/ DOWN buttons 12:30AM move the marker to align it with a defective pixel. Switch the direction of the marker from horizontal to vertical and vice versa with a short press of the M button. (1) Colour palette Align the defective pixel with the fixed cross in the (shown only if the “Black Hot”...
  • Seite 12 Activate the Wi-Fi module in the main menu. Activate the menu by Photo mode. Photography long pressing the M button (9). Wi-Fi operation is shown in the status Switch to the Photo mode with a long press of the button. bar as follows: Take a picture with a short press of the REC button.
  • Seite 13 (GPRS/3G/4G) on your phone to download update; To activate the display, press briefly the ON button. - if your Pulsar device is not connected to your phone but it’s already in When holding down the ON button, the display shows the “My Devices”...
  • Seite 14 Connection modes: TECHNICAL INSPECTION Memory card (external memory). In this mode the device is detected by the computer as a flash card. This mode is designed for Check: work with the files saved in device's memory. The device's functions External view (there should be no cracks on the housing). are not available in this mode;...
  • Seite 15 Problem Check Corrective action The image is blurry, Calibration is required. Carry out calibration according with vertical stripes to Section “SENSOR CALIBRATION”. and uneven background. The image is too Brightness or contrast level Adjust brightness/contrast with is too low. dark. the UP/DOWN buttons.
  • Seite 16 SPÉCIFICATIONS MODÈLE HELION 2 XP50  77402  MICRO-BOLOMÈTRE Type Non refroidi Résolution, pixels 640х480 Fréquence de rafraîchissement des images, Hz 50  Taille de pixel, micron 17  CARACTÉRISTIQUES OPTIQUES Amplification optique (zoom) x 2,5  Zoom numérique lisse, coefficient 2,5 - 20  Zoom numérique x2/ x4/ x8 ...
  • Seite 17 Ce produit peut être modifié en fonction des améliorations apportées à sa conception. BLOC BATTERIE La dernière édition de ce manuel d'utilisation est disponible sur www.pulsar-vision.com Blocs batteries Li-Ion se détachant rapidement IPS7/IPS14 Autonomie en mode Wi-Fi jusqu'à 20 heures* Fonctionnement sur batteries АА**...
  • Seite 18 Charge: DESCRIPTION DES COMMANDES Soulevez le levier (C) du chargeur. BOUTON PREMIER APPUI AUTRES APPUIS COURTS APPUI LONG (MODE OPÉRATOIRE Enlevez le couvercle de protection sur le bloc batterie. COURT ACTUEL Installez le bloc batterie dans le chargeur comme montré dans l'image L'appareil est Alimentation Calibrez le capteur...
  • Seite 19 INSTALLATION: L'appareil se commute alors sur l'alimentation extérieure, et le bloc batterie IPS7 commencera à se charger lentement. Enlevez le couvercle de protection sur le bloc batterie. L'écran affichera l'icône batterie indiquant le niveau de charge Soulevez le levier (13). en pourcentage.
  • Seite 20 Mode М (manuel) Fermez le couvercle de lentille, allumez la lunette Mode de base – vous permet de sélectionner l'un des en appuyant rapidement sur le bouton ON (11). À la fin de la trois modes comme base pour le mode d'utilisation. calibration, ouvrez le couvercle de lentille.
  • Seite 21 Contenus du menu et description de nombre de détails peut s'accompagner d'une légère granulation de l'image. Wi-Fi Wi-Fi ON/OFF (marche/arrêt) MODE «UTILIZATION» – Vous permet de configurer et de sauvegarder des paramètres de luminosité et de contraste personnalisés, ainsi que Allumez le Wi-Fi en appuyant rapidement sur le Off...
  • Seite 22 Commutez entre les chiffres en appuyant Automatique En mode automatique, la nécessité rapidement sur le bouton M. d'une calibration est basée sur l'algorithme logiciel. Sauvegardez la date sélectionnée et quittez le La calibration démarre automatiquement. sous-menu par un appui long sur le bouton M. Semi-automatique L'utilisateur détermine lui- même la nécessité...
  • Seite 23 Rétablissement des réglages par défaut Confirmez la sélection par un appui long sur le Lancez le sous-menu Reset (réinitialisation) en bouton M. Configuration appuyant rapidement sur le bouton М. par défaut En appuyant rapidement sur les boutons UP/ Activateur de télécommande (acheté séparément) DOWN, sélectionnez «Oui»...
  • Seite 24 BARRE D'ÉTAT Sélectionnez l'icône en appuyant rapidement sur le bouton M. Un marqueur (H) apparaît à gauche de La barre d'état se trouve en bas de l'affichage et elle donne des l'affichage. informations sur l'état opératoire de la lunette, incluant : À...
  • Seite 25 Faites une pause et reprenez l'enregistrement vidéo en appuyant FONCTION WI-FI rapidement sur le bouton REC. Arrêtez l'enregistrement vidéo par un appui long du bouton REC. Votre Helion 2 comporte en option une connexion sans fil (Wi-Fi) qui le Les fichiers vidéo sont sauvegardés dans la carte mémoire après connecte à...
  • Seite 26 (GPRS / 3G / 4G) sur ton téléphone pour télécharger la mise à jour; - si votre appareil Pulsar n'est pas connecté à votre téléphone mais qu'il FONCTION PiP (image dans image) est déjà dans la section «Mes appareils", vous pouvez utiliser le Wi-Fi pour télécharger la mise à...
  • Seite 27 Sélectionnez le mode de connexion à l'aide des boutons UP/ DOWN. Contrôleur (18): Duplique les fonctions du Confirmez la sélection en appuyant rapidement sur le bouton М. bouton М (9) lorsqu'il est appuyé ; duplique les fonctions des boutons UP Modes de connexion : (10)/DOWN (8) en les faisant tourner Carte-memoire (mémoire extérieure) Dans ce mode, la lunette est...
  • Seite 28 Problème Vérification Mesure corrective Problème Vérification Mesure corrective L'imageur thermique Le bloc batterie est Rechargez la batterie. Si vous utilisez la En raison des variations de la conductivité thermique, les objets ne s'allume pas. déchargé. lunette à une (environnement, fond) observés se réchauffent plus rapidement à température des températures au-dessus de zéro, ce qui permet un contraste La lunette ne...
  • Seite 29 MODELL HELION 2 XP50  LAGEREINHEIT-NR. (SKU) 77402  MIKROBOLOMETER ungekühlt Auflösung, Pixel 640х480 Bildwechselfrequenz, Hz 50  Pixelgröße, Mikrometer 17  OPTISCHE KENNDATEN Vergrößerung, x 2,5  Gleichmäßiger Digitalzoom, x 2,5 - 20  Digitalzoom x2/ x4/ x8  Objektiv F50 mm, F/1,2  Sichtfeldwinkel (horizontal), Grad 12,4  Dioptrienausgleich des Okulars, Dioptrien ±5 Entdeckungsbereich (Objekt - Tiertyp “Hirsch”), m...
  • Seite 30 
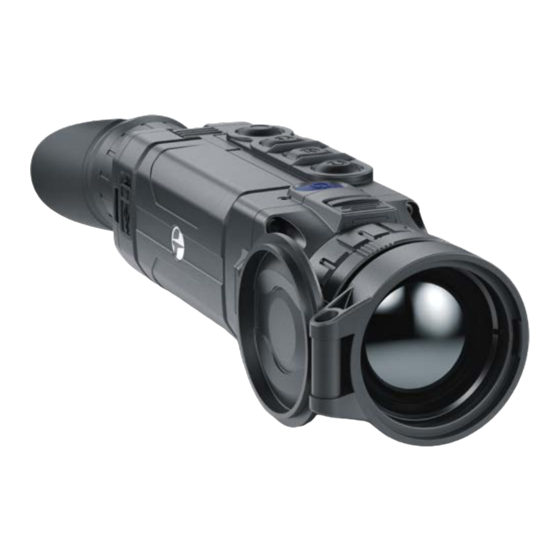
Dieses Produkt unterliegt Änderungen im Einklang mit Verbesserungen BATTERY PACK: an seinem Design. Die neueste Ausgabe dieses Benutzerhandbuchs finden Sie online unter Schnell auswechselbare Li-Ion Blöcke IPS7/IPS14 www.pulsar-vision.com Betrieb in Wi-Fi Modus bis 20 Stunden* Betrieb von Batterien АА** BESCHREIBUNG Aufladen von IPS7/IPS14 oder per USB Wärmebildgeräte HELION 2 funktionieren auf Grundlage des infraroten...
  • Seite 31 Aufladung: FUNKTIONEN DER BEDIENELEMENTE Heben Sie den Griffhebel (C) des Ladegerätes auf. Nehmen Sie den Schutzdeckel von der Akkumulatorenbatterie ab. TASTE BETRIEBSMODUS ERSTES KURZES WEITERE KURZE DAUERHAFTES BETÄTIGEN BETÄTIGEN BETÄTIGEN Setzen Sie die Akkumulatorenbatterie in das Ladegerät ein, wie in Das Gerät ist Einschalten des Kalibrierung des...
  • Seite 32 INSTALLIEREN: Schließen Sie die Stromversorgungsquelle an die USB Buchse (4) (Abb.1 im Vorsatz ) des Gerätes an. Nehmen Sie den Schutzdeckel von der Akkumulatorenbatterie ab. Das Gerät schaltet sich an den Betrieb von der externen Heben Sie den Griffhebel (13) auf. Stromversorgung um, dabei wird die Batterie IPS7 schrittweise Setzen Sie die Batterie in den entsprechenden Steckplatz im aufgeladen.
  • Seite 33 KALIBRIEREN DES SENSORS Kontrast – drücken Sie die Tasten UP/DOWN, um den Das Kalibrieren ermöglicht den Wärmegrad des Mikrobolometers Kontrastwert des Displays von 0 bis 20 zu ändern. auszugleichen und Fehler der Abbildung (wie senkrechte Linien oder Digitaler Zoom – drücken Sie die Tasten UP/ DOWN, um den Schattenbilder u.ä.) zu beheben.
  • Seite 34 GESAMTBILD VOM MENÜ: Drücken und halten Sie die Taste Menu, um das Menü aufzurufen. Register 1 Register 2 Wählen Sie die Option „Modus“ . Kurzes Drücken auf die Taste Menu öffnet das Menu Wi-Fi activation Menu General settings Menü. Wählen Sie mit den Tasten UP / DOWN eine der unten beschriebenen Einstellungen aus.
  • Seite 35 D i e s e r M e n ü p u n k t e r m ö g l i c h t f o l g e n d e Black Hot – Schwarz-heisse Palette (niedriger Temperatur entspricht Einstellungen durchzuführen: weisse Farbe, und hoher Temperatur entspricht schwarze Farbe);...
  • Seite 36 In diesem Menüpunkt können Sie die Anmerkung: Beim Werksreset zu Speicherkarte des Gerätes formatieren (alle Werkseinstellungen von Datum, Uhrzeit, Dateien von der Speicherkarte löschen). Nutzerpixelkarte, Verbindung mit Fernbedienungspult werden nicht gelöscht. Forma- Wählen Sie das Untermenü, indem Sie die tieren Taste M kurz drücken.
  • Seite 37 Beachtung! Taste M (9) für Aktivieren des Hauptmenüs Das Display des Wärmebildgerätes kann 1-2 Pixel aufweisen, die als Off dauerhaft betätigen. helle weiße oder farbige (blaue, rote) Punkte dargestellt sind, die nicht Mit Tasten UP/DOWN das Untermenü aufrufen. Mikrofon gelöscht werden können und kein Defekt darstellen. Kurz die Taste М...
  • Seite 38 (7) Ladezustand der Akkumulatorenbatterie Auf dem Display links wird das Piktogramm abgebildet. (wenn das Gerät von der Akkumulatorenbatterie gespeist wird) or “>100” bedeutet, dass Sie mehr als 100 Bilder aufnehmen können. Anzeige von der externen Stromspeisung Wenn die Anzahl der verfügbaren Bilder kleiner als 100 ist, wird die (wenn das Gerät von der externen Stromspeisung gespeist wird) tatsächliche Anzahl verfügbarer Bilder (z.
  • Seite 39 Bringen Sie den unteren unbeweglichen Strich unter das Zielobjekt, Anschluß-Status Indikation an der Statuszeile mittels Tasten UP/DOWN bewegen Sie den oberen Strich relativ dem Wi-Fi ausgeschaltet unteren unbeweglichen Strich, bis das Objekt zwischen den beiden Wi-Fi vom Benutzer aktiviert, Strichen liegt. Während der Schiebung wird die Entfernung bis zum es erfolgt Einschaltvorgang von Objekt umgerechnet.
  • Seite 40 E s e r f o l g t k e i n A u f l a d e n d e r i m G e r ä t e i n g e b a u t e n - Wenn Ihr Pulsar-Gerät mit dem Telefon verbunden ist, aktivieren Sie die Akkumulatorenbatterie.
  • Seite 41 Bedienelemente von dem Fernbedienungspult: FEHLERBESEITIGUNG Taste ON (15): wiederholt die Funktionen der Taste ON (11). In der Tabelle ist die Liste der möglichen Probleme angeführt, die beim Taste (16): aktivieret den diskreten digitalen Zoom. Funktion PiP. Betrieb entstehen können. Prüfen Sie das Gerät und beseitigen Sie die Taste (17): wiederholt die Funktionen der Taste REC (7).
  • Seite 42 PROBLEM MÖGLICHE URSACHE BESEITIGUNG Farbstreifen Das Gerät war unter Sobald der Einfluss der erscheinen auf dem Ruhespannung während des Ruhespannung beendet ist, Display oder das Bild Betriebs. kann das Gerät sich neu verschwindet. automatisch starten. Alternativ schalten Sie bitte das Gerät aus und starten es neu.
  • Seite 43 ESPECIFICACIONES MODELO HELION 2 XP50  77402  MICROBOLÓMETRO Tipo no refrigerado Resolución, píxeles 640х480 Tasa de actualización de fotogramas, Hz 50  Tamaño de píxel, micrometro 17  CARACTERÍSTICAS ÓPTICAS Aumento, x 2,5  Zoom digital suave, x 2,5 - 20  Zoom digital x2/ x4/ x8  Lente F50 mm, F/1,2 ...
  • Seite 44 Este producto está sujeto a cambmacOS acorde con las mejoras de su diseño. Encontrará la última edición de este manual de usuario en Internet en: PAQUETE DE PILAS: www.pulsar-vision.com Paquete de pilas IPS7/IPS14 de litio-ión de desenganche rápido Tiempo de funcionamiento en modo Wi-Fi de hasta 16 horas* DESCRIPCIÓN...
  • Seite 45 Carga: DESCRIPCIÓN DE LOS CONTROLES Levante la palanca (C) del cargador. Retire la cubierta protectora del paquete de pilas. BOTÓN MODO PRIMERA SIGUIENTES PULSACIONES PULSACIÓN DE FUNCIONAMIENTO PULSACIÓN BREVE BREVES PROLONGADA Instale el paquete de pilas en el cargador com se muestra en la fig. 2. ACTUAL Encaje la palanca con un clic (C).
  • Seite 46 INSTALACIÓN: ALIMENTACIÓN EXTERNA Retire la cubierta protectora del paquete de pilas. Levante la palanca (13). El dispositivo puede alimentarse con una alimentación eléctrica externa Instale la pila en la ranura prevista del alojamiento del dispositivo de como un cargador (5 V). manera que el elemento F (Fig.
  • Seite 47 CALIBRACIÓN DEL SENSOR Para alternan entre las funciones siguientes, pulse sucesivamente el La calibración permite la nivelación de la temperatura ambiente del botón M. microbolómetro y elimina los fallos de imagen (como imagen congelada, Brillo : pulse los botones UP/ DOWN para cambiar el brillo de la líneas verticales, etc.).
  • Seite 48 Luminosidad contraste de los objetos, más notable será el efecto. de gráfico Pulsar brevemente el botόn М para entrar en el Esta opción está activada por defecto, pero puede submenú. desactivarse en el menú principal. Seleccione el nivel de la luminosidad de gráfico Activar / Desactivar Image Detail Boost.
  • Seite 49 Black Hot (Negro cálido) – Las gamas de negro cálido (el blanco Establecer Esta opción de menú le permite establecer el nivel corresponde a la temperatura baja, el negro, a la temperatura alta); nivel de acceso requerido de la aplicación Stream Vision Red Hot (Rojo cálido);...
  • Seite 50 Modo de funcionamiento del grabador: vídeo Seleccione el formato de medida que desee pulsando brevemente los botones UP/ DOWN; Modo de operación: bosque vuelva a pulsar M. Modo de calibración: automático Saldrá del menú automáticamente. Idioma: inglés Esta opción de menú le permite formatear su Wi-Fi –...
  • Seite 51 M. submenú. ¡Atención! La pantalla del dispositivo térmico puede tener de 1 a 2 Pulsar brevemente el botόn и para entrar en el píxeles representados como puntos de color blanco brillante o de color submenú. (azul, rojo) que no pueden eliminarse y que no son un defecto.
  • Seite 52 Al iniciar la grabación de vídeo, el icono desaparece y aparece en BARRA DE ESTADO su lugar el icono REC y el temporizador de grabación en el formato La barra de estado está ubicada en la parte inferior de la pantalla y MM:SS (minutos : segundos): muestra información del estado de funcionamiento real del dispositivo Realice una pausa y reanude la grabación de vídeo pulsando...
  • Seite 53 IMPORTANTE! Para reproducir archivos de video grabados por dispositivos Helion 2 TELÉMETRO ESTADIAMÉTRICO en computadoras basados en macOS, recomendamos que use un reproductor de video VLC o Elmedia. Los enlaces de descarga se Los dispositivos térmicos están equipados con un telémetro muestran en los códigos QR: estadiamétrico que permite al usuario estimar la distancia aproximada hasta un objeto de tamaño conocido.
  • Seite 54 - si su dispositivo Pulsar no está conectado a su móvil pero ya está en Para activar la pantalla, presione brevemente el botón ON. la sección "Mis dispositivos", puede usar Wi-Fi para descargar la Al mantener presionado el botón ON, la pantalla actualización.
  • Seite 55 MANDO A DISTANCIA INALÁMBRICO (se adquiere por separado) SOLUCIÓN DE PROBLEMAS La siguiente tabla enumera algunos de los problemas potenciales que El mando a distancia inalámbrico (RC) duplica la función de encendido, pueden producirse al utilizar el dispositivo. Si se produce un problema zoom digital, iniciar/detener vídeo y navegación del menú.
  • Seite 56 NOTAS Problema Comprobar Medida correctora El dispositivo no Si el control remoto no está Activar el control remoto según puede encenderse activado. las instrucciones. con el control remoto Si la pila está baja. Instalar una pila nueva inalámbrico. CR2032. Aparecen rayas de El dispositivo ha acumulado Tan pronto como finaliza el color en la pantalla o...
  • Seite 57 SPECIFICHE MODELLO HELION 2 XP50  77402  MICROBOLOMETRO Tipo non raffreddato Risoluzione, pixel 640х480 Frequenza dei fotogrammi, Hz 50  Dimensione pixel, micron 17  CARATTERISTICHE OTTICHE Ingrandimento, x 2,5  Zoom digitale graduale, x 2,5 - 20  Zoom digitale x2/ x4/ x8  Lente obbiettivo F50 mm, F/1,2 ...
  • Seite 58 Il presente prodotto è soggetto a modifiche volte a migliorarne il design. GRUPPO BATTERIA: La versione più aggiornata del presente manuale d'uso è disponibile online all'indirizzo www.pulsar-vision.com Gruppi batteria Li-Ion a sgancio rapido IPS7/IPS14 Tempo di utilizzo in modalità Wi-Fi fino a 20 ore* Funzionamento con batterie АА**...
  • Seite 59 Ricarica: DESCRIZIONE DEI COMANDI Sollevare la leva (C) del caricabatterie. Rimuovere il coperchio protettivo dal gruppo batteria. (MODALITÀ DI PRIMA PRESSIONE ALTRE PRESSIONI BREVI PRESSIONE TASTO FUNZIONAMENTO BREVE PROLUNGATA Installare il gruppo batteria all'interno del caricabatterie, come CORRENTE mostrato in figura e premere sulla leva (C) fino allo scatto (Fig. 3). Dispositivo Accensione Calibrazione sensore...
  • Seite 60 INSTALLAZIONE: Collegare la fonte di alimentazione esterna alla porta USB (4) del dispositivo (fig. 1). Rimuovere il coperchio protettivo dal gruppo batteria. Il dispositivo inizia a funzionare con la fonte di alimentazione esterna Sollevare la leva (13). e il gruppo batteria IPS7 inizia lentamente a ricaricarsi. Installare la batteria nell'apposito vano sull'alloggiamento del Sul display compare l'icona della batteria con il livello di carica in...
  • Seite 61 Modalità base – consente di selezionare una delle tre Modalità М (manuale). Chiudere il coperchio della lente, accendere modalità come base per la modalità utente. il dispositivo esercitando una pressione breve sul tasto ON (11). Una Note. Le impostazioni di contrasto e luminosità del display sono volta completata la calibrazione, aprire il coperchio della lente.
  • Seite 62 Contenuto menu e descrizione L'aumentare dello zoom può essere accompagnato della sconsiderevole granularità dell'immagine. Wi-Fi Connessione wi-fi accesa / spenta MODO “USER” – Permette di configurare e salvare le impostazioni personalizzate di Attivare la connessione Wi-Fi con una Off luminosità e contrasto, nonché una delle tre pressione breve sul tasto M (9).
  • Seite 63 Salvare la scelta effettuata e uscire dal sottomenu Automatica. In modalità automatica l'esigenza di esercitando una pressione prolungata sul tasto calibrazione si basa su un algoritmo del software. La calibrazione inizia automaticamente. Semiautomatica. È l'utente a stabilire autonomamente l'esigenza di calibrazione sulla Impostazione della data base dell'effettivo stato dell'immagine.
  • Seite 64 Con una pressione breve sui tasti UP/ DOWN, La selezione della lente viene utilizzata in selezionare “Sì” per formattare la scheda di occasione della sostituzione delle lenti degli Lens selection memoria o “No” per tornare al sottomenu. obiettivi. (Selezione della Confermare la scelta esercitando una pressione lente) La selezione del tipo di lente è...
  • Seite 65 Attivare/disattivare il microfono con una Attenzione! Il display del dispositivo potrebbe avere 1-2 pixel pressione breve sul tasto M. rappresentati da punti bianchi o colorati (blu, rossi) che non possono essere eliminati e non sono un difetto. Con il microfono attivato, avrai una traccia audio nel tuo video.
  • Seite 66 (5) Stato della connessione Wi-Fi Nell'angolo a sinistra in alto del display è visibile l'icona di una (6) Ore macchina fotografica (7) Livello di carica della batteria (se il dispositivo è alimentato dal gruppo “>100” significa che puoi scattare più di 100 foto. Se il numero di batteria) oppure immagini disponibili è...
  • Seite 67 Per selezionare l'unità di misura (metri o iarde), passare alla rispettiva Indicazione barra di stato Stato connessione opzione di menu. Funzione Wi-Fi spenta Prima di essere visualizzato sul display, il valore di una distanza Funzione Wi-Fi attivata dall'utente, misurata viene arrotondato per eccesso fino a 5 m per valori più alti e la funzione Wi-Fi nel dispositivo è...
  • Seite 68 Quando la USB viene scollegata dal dispositivo in modalità Alimentazione, il dispositivo continua a funzionare con il gruppo - se il tuo dispositivo Pulsar non è collegato al telefono ma è già nella batteria, se disponibile, e dispone di una carica sufficiente.
  • Seite 69 Problema Controllo Azione correttiva L'immagine è troppo Il livello di luminosità o di Regolare la luminosità / il VERIFICA TECNICA scura. contrasto contrasto usando i tasti UP / Controllare: è troppo basso. DOWN. Aspetto esterno (l'alloggiamento non deve presentare fessure). Scarsa qualità...
  • Seite 70 МОДЕЛЬ HELION 2 XP50  77402  МИКРОБОЛОМЕТР Тип неохлаждаемый Разрешение, пикселей 640х480 Частота обновления кадров, Гц 50  Размер пикселя, микрон 17  ОПТИЧЕСКИЕ ХАРАКТЕРИСТИКИ Увеличение, крат 2,5  Плавный цифровой зум, крат 2,5 - 20  Цифровой зум x2/ x4/ x8  Объектив F50 мм, F/1,2  Угол...
  • Seite 71 Для улучшения потребительских свойств изделия в его конструкцию могут BATTERY PACK вноситься усовершенствования. Актуальную версию инструкции по эксплуатации Вы можете найти на сайте Быстросменные Li-Ion блоки питания IPS7/IPS14 www.pulsar-vision.com Время работы в режиме Wi-Fi до 20 ч* Работа от батарей АА** ОПИСАНИЕ Возможность зарядки IPS7/IPS14 от USB Тепловизионные...
  • Seite 72 Зарядка: РАБОТА КНОПОК Поднимите рычаг (С) зарядного устройства. КНОПКА СОСТОЯНИЕ ПЕРВОЕ КОРОТКОЕ СЛЕДУЮЩИЕ КОРОТКИЕ ДЛИТЕЛЬНОЕ Снимите защитную крышку с аккумуляторной батареи. ПРИБОРА НАЖАТИЕ НАЖАТИЯ НАЖАТИЕ Установите аккумуляторную батарею в зарядное устройство как ON (11) Прибор Включение Выключение Калибровка показано на рис.3, защелкните рычаг (С). выключен...
  • Seite 73 УСТАНОВКА: ВНЕШНЕЕ ПИТАНИЕ Снимите защитную крышку с аккумуляторной батареи. Поднимите рычаг (13). Внешнее питание осуществляется от внешнего источника питания Установите батарею в предназначенный для нее слот на корпусе типа Power Bank (5V). прибора таким образом, чтобы элемент F (см. рис. 2 на форзаце) Подключите...
  • Seite 74 КАЛИБРОВКА СЕНСОРА Контраст – нажатием кнопок UP / DOWN изменяйте значение К а л и б р о в к а п оз вол я ет в ы р о в н я т ь те м п е р ат ур н ы й ф о н контраста...
  • Seite 75 ОБЩИЙ ВИД МЕНЮ: Кнопками Up / Down выберите один из режимов, описанных ниже. Вкладка 1 Вкладка 2 Кратко нажмите Menu для подтверждения Wi-Fi activation Menu Menu General settings выбора. РЕЖИМ «СКАЛЫ». Оптимален при наблюдении объектов после солнечного дня или в городских условиях. РЕЖИМ...
  • Seite 76 монохром; Rainbow – Радуга; Ultramarine – Уровень “Гость”. Пользователь из Stream Ультрамарин; Violet – Фиолетовый; Sepia – V i s i o n и м е е т в о з м о ж н о с т ь т о л ь к о Сепия.
  • Seite 77 Данный пункт позволяет осуществить формати- В н и м а н и е : п р и в о з в р а т е к з а в о д с к и м рование Flash-карты (карты памяти) прибора н...
  • Seite 78 Внимание! На дисплее тепловизора допускается 1-2 пикселя в виде Нажмите и удерживайте кнопку M (9) для Off ярких белых или цветных (синих, красных) точек, которые не входа в основное меню. удаляются и дефектом не являются. Кнопками UP (10) / DOWN (8) выберите Микрофон...
  • Seite 79 (7) Уровень разряда аккумуляторной батареи (если прибор Примечания: питается от аккумуляторной батареи) или Индикатор питания от - во время записи видео возможен вход в меню и работа в меню внешнего источника питания (если прибор питается от прибора; внешнего источника питания) - записанные...
  • Seite 80 После ввода пароля на внешнем устройстве (подробнее об установке пароля - в подразделе "Настройка Wi-Fi" раздела ФУНКЦИЯ DISPLAY OFF "Функции основного меню" инструкции) и установки связи пиктограмма в строке статуса прибора меняется на Данная функция отключает передачу изображения на дисплей, до минимума...
  • Seite 81 загрузить обновление; функции включения прибора, цифрового зума, старта/остановки видеозаписи (фотосъемки), а также позволяет производить - если ваше устройство Pulsar не подключено к вашему телефону, навигацию по меню. но оно уже находится в разделе «Мои устройства», вы можете Органы управления пульта: использовать...
  • Seite 82 Хлопчатобумажной салфеткой очистите наружные поверхности неисправность возможная причина исправление металлических и пластмассовых деталей от пыли и грязи. Изображение Установлен низкий уровень Отрегулируйте яркость или слишком темное. яркости или контраста. контраст. Допускается применение силиконовой смазки. Низкое качество Указанные проблемы могут возникать при наблюдении в Очистите...
  • Seite 84 @PulsarNightVision @pulsar.vision Pulsar Night Vision...

Diese Anleitung auch für:

Helion 2 xp50