Herunterladen Inhalt Inhalt Diese Seite drucken
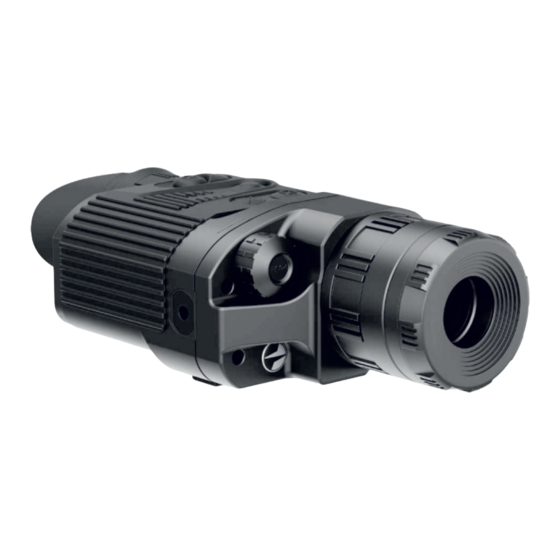
Pulsar Quantum Lite XQ23V Anleitung
Vorschau ausblenden Andere Handbücher für Quantum Lite XQ23V:

Werbung

Verfügbare Sprachen
  • DE

Verfügbare Sprachen

  • DEUTSCH, seite 17

Werbung

Inhaltsverzeichnis
loading

Inhaltszusammenfassung für Pulsar Quantum Lite XQ23V

  • Seite 2 Attention! Export of models 77337/77338 with a refresh rate of 50 Hz may have export limitations depending on the laws in your region. Attention! L'exportation des modèles 77337/77338 avec une fréquence de renouvellement d'images de 50 Hz peut avoir des restrictions à...
  • Seite 3: Specifications

    Microbolometer: The design and software of this product are subject to change for development purposes. uncooled uncooled Type The latest edition of this user manual is available at www.pulsar-nv.com Resolution, pixels 384x288 384x288 Frame rate, Hz Pixel size, µm Optical characteristics:...
  • Seite 4: Components And Control Elements

    Functions of the controls Controls Operating mode 1st short press Subsequent short Long press Rotation COMPONENTS AND CONTROL ELEMENTS name press(es) Button Scope is off Turn the scope on Display off Turn the — Controller scope off Button “RF” Display on Scope is on Turn the display off Button “MODE”...
  • Seite 5: Installation Of Batteries

    Status bar The power supply may have marking The status bar in the lower part of the display shows information as follows: Connection of an external power supply (icon on the status bar) automatically cuts off power supply from batteries. Operating mode: City, Forest, Identification.
  • Seite 6 Automatic calibration mode Locate the lower fixed cursor under the observed object and, while rotating the controller (1), move the upper With the automatic calibration mode the thermal imager calibrates by horizontal cursor relative to the lower fixed cursor until the itself according to the software algorythm.
  • Seite 7 After exiting the menu, the color mode selected by user becomes a default Defective pixel repair mode and it is saved upon turning the unit off. When pressing the “MODE” When operating a thermal imager, defective (dead) pixels (bright or (3) button for two seconds, color mode will switch to standard mode dark dots with constant brightness) may appear on the detector, which “White Hot”.
  • Seite 8: Care And Maintenance

    To exit the submenu, keep the controller pressed for two seconds or attached. wait 10 seconds to exit automatically. Using the DNV Pulsar Battery Double Pack (#79176) you can significantly extend the self-contained operating time of your monocular. Digital zoom To activate digital zoom, press briefly button “Mode”...
  • Seite 9 At low operating temperatures objects under observation (background) normally cool down to roughly equal temperatures which leads to lower temperature contrast, and to image quality (precision) degradation. This is normal for thermal imaging devices. Click on the link to read frequently questions on thermal vision http://www.pulsar-nv.com/support/faq/...
  • Seite 10: Contenu De L'emballage

    La conception et le logiciel de ce produit peuvent être modifiés en vue du Microbolomètre: développement. Type non refroidi non refroidi La dernière édition de ce manuel d'utilisation est disponible sur www.pulsar-nv.com 384x288 384x288 La résolution, pixel Taux de rafraîchissement, Hz Taille de pixel, µm Caractéristiques optiques:...
  • Seite 11 Fonctions de organs de commande: ELEMENTS DU VISEUR ET ORGANES DE COMMANDE Organ de Mode de 1ere pression Pressions rapides Pression Rotation commande: fonctionnement rapide suivantes longue Bouton L'appareil est eteint Mise en marche de Arrêt de l'écran Arrêt de —...
  • Seite 12 La barre d'etat Attention! Dans la cheville de contact de l'alimentation raccordée au Dans la barre d'état dans la partie inférieure de l'écran s'affichent les viseur le contact central doit être “+”. informations suivantes: Le marquage possible sur la cheville de contact ou sur la source Mode d'opération: “Ville”, “Forêt”, “Reconnaissance”...
  • Seite 13 Pour l'étalonnage appuyez sur le bouton CAL (4). L'image Essayez d'obtenir la qualité optimale de l'image, tout en tournant le s'immobilisera pour 1-2 secondes. Ensuite ouvrez le couvercle de galet de focalisation de l'objectif (7). l'objectif. L'étalonnage donc est effectué. Une fois l'appareil effectué, indépendamment de la distance et Dans le cas de l'apparition des artefacts (image figée, bandes verticals d'autres conditions, il n'est plus nécessaire de tourner le galet...
  • Seite 14 Modes de couleur Choix du standard de signal vidéo/débranchement de sortie vidéo Cette option du menu permet à l'utilisateur de changer le mode standard Appuyez sur le régulateur (1) et le tenez appuyé pendant deux ("Chaleur blanche/White Hot") dans l'un des multiples modes couleur. secondes pour accéder au menu.
  • Seite 15 Moyennant la rotation du régulateur déplacez la croix d'une façon pour Validez le choix par un appui rapide sur le régulateur. que le centre de la croix coïncide avec le pixel défectueux (le pixel L'icône de l'unité de mesure s'affiche à côté des lectures de défectueux doit s'éteindre).
  • Seite 16 La batterie externe DNV Pulsar Battery Double Pack (#79176) vous tension de sortie. externe. (si nécessaire).
  • Seite 17: Technische Daten

    MODELL Änderung des Designs und Software zwecks höherer Gebrauchseigenschaften vorbehalten. Microbolometer: Aktuelle Version der Betriebsanleitung finden Sie auf der Webseite ungekühlt ungekühlt Type www.pulsar-nv.com Auflösung, Pixel 384x288 384x288 Bildwechselfrequenz, Hz Pixelgröße, µm BESCHREIBUNG Optische Kenndaten: Wärmebildgeräte Quantum funktionieren auf Grundlage des Vergrößerung, x...
  • Seite 18: Bestandteile Und Steuerorgane Des Gerätes

    Funktionieren der Bedienungselemente Bedienungs Betriebsmodus Kurzes Eintasten Langes Drehen Nächstes Eintasten BESTANDTEILE UND STEUERORGANE DES GERÄTES element Eintasten Taste ON Gerät ist Einschalten des Abschalten des Displays Einschalten — eingeschaltet Gerätes (Display off) Kontroller Gerätes Gerät ist Abschalten des Einschalten des Displays Taste “RF”...
  • Seite 19: Einlegen Der Batterien

    Statuszeile Achtung! Im ans Gerät anzuschließenden Anschlußstecker muss der zentrale Kontakt “+” sein. An der Statuszeile unten auf dem Display wird folgende Information abgebildet: Mögliche Markierung am Stecker oder der Stromquelle ist Betriebsmodus: Stadt, Wald, Identifizierung Beim Anschluss einer äußeren Stromquelle (es erscheint ein Kalibrierungsmodus: manueller, automatischer, halbautomatischer Piktogramm , die Speisung wird von den Batterien abgeschaltet.
  • Seite 20 Um den Sensor zu kalibrieren, drücken Sie die Taste CAL (5). Das Bild Wählen Sie ein unbewegliches warmes Beobachtungsobjekt, das erstarrt für eine oder zwei Sekunden. Danach ist der 100 Meter entfernt ist. Objektivschutzdeckel zu öffnen. Das Kalibrieren verlief erfolgreich. Das Fokussierungsrad (9) drehend, erreichen Sie ein möglichst Falls Fehler auf dem Display erscheinen (erstarrtes Bild, senkrechte scharfes Bild.
  • Seite 21 Wählen Sie den Menüpunkt Mode, indem der Kontroller gedreht wird. Drücken Sie den Kontroller. MENÜ Drehen Sie den Kontroller, wählen Sie das Piktogramm Das Menü enthält die folgende Punkte: (Betriebsmodus “Stadt”) oder (Betriebsmodus “Wald”) oder Farbmodi (Betriebsmodus “Identifikation”). Betriebsmodus Drücken Sie den Kontroller, um die Auswahl zu bestätigen. Kalibrierungsmodus Das Piktogramm vom gewählten Betriebsmodus wird an der Einstellung des Videoausgangs...
  • Seite 22 Der Kontroller (1) ist zwei Sekunden lang gedrückt zu halten, um ins Um das Menü zu verlassen, halten Sie den Kontroller zwei Sekunden Menü zu übergehen. lang gedrückt oder warten Sie 10 Sekunden ab, damit es Den Kontroller drehend, wählen Sie das Programm .
  • Seite 23: Wartung Und Lagerung

    Linien werden. anzubringen. entsprechend durch. verzerrt und der Hintergrund Mit der Batterie DNV Pulsar Battery Double Pack (#79176) können Sie ist ungleichmäßig. die Betriebszeit Ihres Gerätes wesentlich verlängern. Das Bild ist zu dunkel. Drehen Sie den Kontroller, bis...
  • Seite 24: Características Técnicas

    MODELO XQ23V XQ30V El diseño y el software de este producto están sujetos a modificaciones con fines de desarrollo. Microbolómetro Encontrará la última edición de este manual de usuario en: www.pulsar-nv.com Tipo no refrigerado no refrigerado Resolución, pixel 384x288 384x288 Frecuencia de cuadro, Hz DESCRIPCIÓN...
  • Seite 25 Funcionamiento de los órganos de control ELEMENTOS DEL VISOR Y ÓRGANOS DE MANDO Órgano de Régimen de La primera Siguientes La presión Rotación control trabajo presión breve presiónes breves larga Visor apagado Encender el visor Apagar la pantalla Apagar el Botón “ON”...
  • Seite 26: Instalación De Las Baterías

    La barra de estado ¡Atención! En el enchufe de alimentación que se conecta al En la barra de estado, situada en la parte baja de la pantalla, se muestra dispositivo, el contacto central debe ser “+”. la siguiente información: Una marcación posible en el enchufe o en la fuente de alimentación R e g í...
  • Seite 27 Pulse el botón CAL (4) para calibrar. La imagen se hiela durante 1-2 Después de este ajuste, independientemente de la distancia y de segundos. Luego abra la tapa del objetivo. La calibración está las otras condiciones, no hay necesidad de girar el anillo del ajuste terminada.
  • Seite 28 Al salir de menú, el modo de color seleccionado por el usuario se convierte Pulse el regulador para pasar al ajuste del valor de hora. Ajuste en el modo por defecto y este modo se guarda al apagar el visor. Al pulsar girando el regulador.
  • Seite 29 O bien espere unos 10 segundos – la salida se realizará cuerpo están destinados para la instalación del instrumento al automáticamente. soporte y para la unión de la correa. La bateria DNV Pulsar Battery Double Pack (#79176) le permitirá prolongar considerablemente tiempo de funcionamiento autónomo de su monocular.
  • Seite 30: Solución De Problemas

    POSIBLE CAUSA REPARACIÓN Haga clic en el enlace con preguntas más frecuentes de visión térmica - El instrumento Las baterías están colocadas Coloque las baterías en http://www.pulsar-nv.com/es/support/faq/ no se enciende. incorrectamente. correspondencia con la marcación. Están oxidados los contactos Limpie el contenedor de en el contenedor de las las baterías, limpie los...
  • Seite 31: Specifiche Tecniche

    L'edizione più recente del presente manuale d'uso è disponibile all'indirizzo Risoluzione, pixel 384x288 384x288 www.pulsar-nv.com Frequenza di rinnovo di immagine, Hz Dimensione dei pixel, µm DESCRIZIONE Le caratteristiche ottiche: I termovisori della serie Quantum basati sulla matrice infrarossa (di...
  • Seite 32 Funzioni dei comandi Comando Modo di operazione 1a breve Successive brevi Lunga Rotazione COMPONENTI ED ELEMENTI DI CONTROLLO pressione pressioni pressione Cannocchiale spento Spegnimento Spegnimento display Accensione Pulsante — Controller (pulsante di controllo) dispositivo (Display off) dispositivo “ON” Pulsante “RF” Cannocchiale acceso Spegnimento display Accensione display...
  • Seite 33: Inserimento Delle Batterie

    Barra di stato Attenzione! Notare che il pin centrale dell'alimentatore che si collega Lo stato della barra nella parte inferiore del display mostra: alla presa “Power” del termovisore deve avere il segno “+”. Tre modalità di funzionamento: città, bosco, identificazione. L'alimentatore potrebbe avere il simbolo Tre possibilita' di calibratura: manuale, semiautomatica e La connessione di un alimentatore esterno (apparirà...
  • Seite 34 Calibratura semiautomatica Telemetro I visori termici dispongono di un telemetro stadiametric che permette Accendere l'unità e aprire il copriobiettivo. all'utente di calcolare la distanza approssimativa di un oggetto di Tenere premuto il controller (1) per due secondi per entrare nel menu. dimensioni note.
  • Seite 35 Modalita' colore Attivazione/disattivazione dell'uscita video Questa opzione consente all'utente di scegliere tra la modalita' standard Premere e tenere premuto il controller (1) per due secondi per (“White Hot”) e una tra le diverse modalita' di colore. entrare nel menu. Ruotare il controller e selezionare l'opzione .
  • Seite 36: Manutenzione E Conservazione

    Ruotare il controller e selezionare l'opzione . Premere il controller. Con la DNV Pulsar Battery Double Pack (#79176) è possibile Ruotare il controller e selezionare “M” (metri) o “Y” (iarde). estendere significativamente la durata della batteria del vostro Confermare premendo brevemente il controller.
  • Seite 37 Clicca sul link per leggere le domande piu' sul visore termico La tabella sotto si elenca eventuali guasti durante l'uso del visore. Si http://www.pulsar-nv.com/support/faq/ raccomanda di seguire esattamente la procedura di controllo e dieliminazine come per tabella indicata. Le verifiche indicate nella tabella sono obbligatorie ai fini di rivelare le cause dei guasti durante l'uso dello strumento;...
  • Seite 38: Комплект Поставки

    Для улучшения потребительских свойств изделия в его конструкцию и программное Микроболометр: обеспечение могут вноситься усовершенствования. неохлаждаемый неохлаждаемый Тип Актуальную версию инструкции по эксплуатации Вы можете найти на сайте www.pulsar-nv.com Разрешение, пикселей 384x288 384x288 Частота обновления кадров, Гц Размер пикселя, микрон ОПИСАНИЕ...
  • Seite 39 Работа органов управления тепловизора Орган Режим работы Первое короткое Следующие короткие Длительное Вращение ЭЛЕМЕНТЫ ПРИБОРА И ОРГАНЫ УПРАВЛЕНИЯ управления нажатие нажатия нажатие Прибор выключен Включение прибора Отключение дисплея Выключение — Контроллер (Display off) прибора Кнопка “RF” Включение дисплея Прибор включен Отключение...
  • Seite 40: Установка Батарей

    Строка статуса При подключении внешнего источника питания на информационной панели появится пиктограмма , питание от батарей отключится. В строке статуса, расположенной в нижней части дисплея Во время работы от внешнего источника питания зарядка аккумуляторов не отображается следующая информация: осуществляется! Режим работы: “Город”, ”Лес”, ”Распознавание”. Рекомендуем...
  • Seite 41 Полуавтоматический режим калибровки После данной настройки, независимо от дистанции и других условий, вращать кольцо диоптрийной подстройки не Включите прибор, откройте крышку объектива. требуется. Настраивайте изображение только кольцом Нажмите контроллер (1) в течение двух секунд для входа в меню. фокусировки объектива. Вращением...
  • Seite 42 Цветовые режимы В ы б о р с т а н д а рт а в и д е ос и г н а л а / от к л юч е н и е видеовыхода В данном пункте меню пользователь может изменить стандартный режим...
  • Seite 43 Вращением контроллера перемещайте крест таким образом, Подтвердите выбор коротким нажатием контроллера. чтобы совместить центр креста с дефектным пикселем Пиктограмма единицы измерения отображается вместе с (дефектный пиксель должен погаснуть). цифрами измеренной дистанции. Для выхода из подменю нажмите и удерживайте контроллер в Кратковременное...
  • Seite 44: Уход И Хранение

    контакты попала хими- предназначены для установки прибора на штатив и для чески активная жидкость. присоединения ремешка. Установите новые C помощью аккумуляторной батареи DNV Pulsar Battery Double Одна или несколько батареи. Pack (#79176) вы можете значительно продлить время батарей полностью разрядились или вышли...

Diese Anleitung auch für:

Quantum lite xq30v

Inhaltsverzeichnis