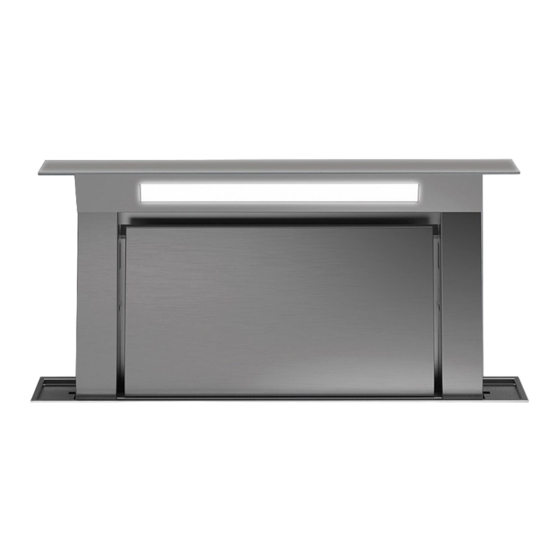
FALMEC Down draft 120 Gebrauchsanweisung
Vorschau ausblenden
Andere Handbücher für Down draft 120:
- Gebrauchsanweisung (85 Seiten) ,
- Gebrauchsanweisung (89 Seiten)
Inhaltsverzeichnis
Verfügbare Sprachen
Verfügbare Sprachen
Quicklinks
Inhaltsverzeichnis

Verwandte Anleitungen für FALMEC Down draft 120


Inhaltszusammenfassung für FALMEC Down draft 120
- Seite 2 Down draft 90 Down draft 120 LIBRETTO ISTRUZIONI INSTRUCTIONS BOOKLET GEBRAUCHSANWEISUNG MODE D'EMPLOI video d'installazione MANUAL DE INSTRUCCIONES ИНСТРУКЦИИ INSTRUKCJA OBSŁUGI HANDLEIDING MANUAL DE INSTRUÇÕES installation video BRUGSANIVSNINGER INSTRUKTIONSBOK OHJEKIRJA BRUKSANVISNING...
- Seite 3 Down draft 120 46 kg 1098 1026 1081 1081 Down draft 90 37 kg 390,5...
- Seite 4 Down draft 90 - 120 Down draft 90 - 120 IT - Motore remoto. UK - Remote motor. DE - Getrennt montierter Motor. FR - Moteur monté séparément. ES - Motor externo. RU - Удаленный двигатель. PL - Silnik zewnętrzny. NL - Motor op afstand.
- Seite 5 IT - Installazione con motore posteriore NL - Installatie met motor achteraan UK - Installation with back motor PT - Instalação com motor posterior DE - Installation mit rückseitigem Motor DK - Installation med bagmotor FR - Installation avec moteur à l'arrière SE - Installation med bakre motor ES - Instalación con motor parte trasera FI - Asennus takamoottorin kanssa...
- Seite 7 IT - Misure foro per incasso (1), issaggio al piano d'appoggio (2) UK - Recess hole dimensions (1), ixing to the supporting surface (2) DE - Abmessungen der Öfnung für den Einbau (1), Befestigung auf der Aulageläche (2) FR - Dimensions du trou pour l'encastrement (1), ixation sur le plan d'appui (2) ES - Medidas oriicio para encajar (1), ijación en el plano de apoyo (2)
- Seite 8 IT - Collegamento elettrico provvisorio (3); NL - Tijdelijke elektrische aansluiting (3); apertura della cappa per installazione (4)(5). opening van de kap voor de installatie (4)(5). UK - Temporary electrical connection (3); PT - Ligação elétrica provisória (3); opening the hood for installation (4)(5). abertura da capa para instalação (4)(5).
- Seite 9 KACL.784 IT - Conigurazione con motore frontale: Togliere il coperchio di chiusura (6); togliere le parti metalliche latera- li (7); issare il motore KACL784 (8). UK - Coniguration with front motor: Remove the cover (6); remove the metal side panels (7); ix motor KACL784 (8).
- Seite 10 KACL.784 IT - Conigurazione con motore posteriore: Togliere il coperchio di chiusura (9); togliere le parti metalliche latera- li (10); issare il motore KACL784 (11). UK - Coniguration with back motor: Remove the cover (9); remove the metal side panels (10); ix motor KACL784 (11).
- Seite 11 IT - Installazione iltro carbone-zeolite (opzionale) (12). PL - Instalacja iltra węglowo-zeolitowego (opcjonalna) (12). Motore frontale (13) motore posteriore (14). Silnik przedni (13) silnik tylny (14). UK - Installing the carbon-zeolite ilter (optional) (12). NL - Installatie zeoliet-/koolstoilter (optie) (12). Front motor (13) back motor (14).
- Seite 13 IT - Sostituire "inlet" originale (15), con stafa di issaggio motore sulla cappa (16); issare il motore alla cappa se l'uscita aria è frontale (17). Vedere (18) - (19) per altre direzioni. UK - Replace the original “inlet” (15) with the bracket ixing the motor to the hood (16); secure the motor to the hood if the air exhaust is on the front (17).
- Seite 14 IT - KACL.798 Spostamento laterale dell'uscita aria UK - KACL.798 Side movement of the air exhaust DE - KACL.798 Seitliche Verschiebung des Luftauslasses FR - KACL.798 Déplacement latéral de la sortie d'air ES - KACL.798 Desplazamiento lateral de la salida del aire RU - KACL.798 Боковое...
- Seite 15 KACL.798 IT - Conigurazione con motore posteriore UK - Coniguration with back motor DE - Koniguration mit rückseitigem Motor FR - Coniguration avec moteur à l'arrière ES - Coniguración con motor parte trasera RU - Конфигурация с задним двигателем PL - Koniguracja z silnikiem tylnym NL - Coniguratie met motor achteraan PT - Coniguração com motor posterior DK - Koniguration med bagmotor...
- Seite 16 Tuyaux rectangulaires (23) ; tuyaux ronds (24). Rechthoekige leidingen (23); ronde leidingen (24). NO - Konigurering med jernmotor: PT - Coniguração com motor remoto: Rektangulære rør (23), runde rør (24). Tubos retangulares (23); tubos redondos (24). Motor ONLY FALMEC MOTORS! Motor ONLY FALMEC MOTORS!
- Seite 17 IT - Collegamento elettrico: motore a bordo (25); motore remoto (26). UK - Electrical connection: onboard motor (25); remote motor (26). DE - Elektrischer Anschluss: Eingebauter Motor (25); getrennt montierter Motor (26). FR - Branchement électrique : moteur à bord (25) ; moteur monté séparément (26);...
- Seite 19 IT - Stafe di issaggio al TOP (27). Fissaggio unita di controllo alla cappa (28). Avvertenza anti schiacciamento mani (29). UK - Brackets ixing to the TOP (27). Fixing the control unit to the hood (28). Hand anti-crushing warning (29). DE - Befestigungsbügel am TOP (27).
- Seite 31 ANWEISUNGEN FÜR DIE SICHERHEIT Falls das Gerät verkauft oder an eine andere Person übergeben wird, muss sichergestellt werden, dass auch die Gebrauchsanweisung übergeben wird, damit der neue Besitzer informiert werden kann, wie UND WARNHINWEISE die Abzugshaube funktioniert und welche diesbezüglichen Warnhinweise zu beachten sind. Nach der Installation der Edelstahlhaube muss als Erstes deren Reinigung erfolgen, um die Rückstände der Schutzklebefolie und eventuelle Flecken von Öl oder Fett zu entfernen, die die Oberläche der Die Installation muss von kompetenten und qualiizierten Installateuren unter Be-...
- Seite 32 ELEKTRISCHER ANSCHLUSS BETRIEB (Dieser Abschnitt ist ausschließlich qualiiziertem Personal vorbehalten) WANN MUSS DIE ABZUGSHAUBE EINGESCHALTET WERDEN? Die Abzugshaube mindestens eine Minute vor Beginn des Kochvorgangs einschalten. Dadurch wird Vor sämtlichen Eingrifen an der Abzugshaube muss das Gerät vom Stromnetz ge- ein Luftstrom erzeugt, der den Rauch und die Dämpfe zur Absaugläche hin befördert.
- Seite 33 GEBRAUCH DER FERNBEDIENUNG ÄNDERUNG DES CODES DER FERNBEDIENUNG Wenn nur eine Fernbedienung vorhanden ist, direkt zu Punkt 2 weitergehen. VORSICHT!: Bei mehreren Fernbedienungen im selben Raum, kann mit der folgenden Methode ein neuer Code Die Abzugshaube nicht in der Nähe von elektromagnetischen Quellen (z.B. Mikro- erstellt werden.
-
Seite 34: Wartung
WARTUNG KOHLE-ZEO-FILTER Unter normalen Benutzungsbedingungen wird empfohlen, den Filter alle 18 Monate zu regenerieren und ihn alle drei Jahre zu ersetzen. Zum Regenerieren des Filters wie folgt vorgehen: Vor jedem Reinigungs- oder Wartungseingrif das Gerät durch Ziehen des Netzste- - Den Filter gemäß der Beschreibung in der Anleitung ausbauen. ckers oder Betätigung des Hauptschalters vom Stromnetz trennen. - Seite 83 NOTE - NOTES...
- Seite 85 NOTE - NOTES...
- Seite 86 NOTE - NOTES...