1 INTRODUCTIE & VERKLARING VAN CONFORMITEIT De Alecto DVM-150 is een draadloze beeld babyfoon. De set is niet waterbestendig, de ouder-uit en de baby-unit dus tegen vocht beschermen. Naar keuze kunt u continu kijken en luisteren of kunt u de...
2 FUNCTIEOVERZICHT 2.1 BABY-UNIT: Achter het donkere plastic zitten de Infra- rood LED’s voor het nachtzicht) cameralens controlelampje, is ge- doofd als de baby-unit is uitgeschakeld, knippert als de baby-unit op zoek is naar de ouder-unit, is constant opgelicht als de baby-unit contact heeft met de ouder-unit start/stoptoets voor de...
Seite 5
lampje LINK: verbindingslampje, • licht continu op: de verbinding tussen ouder-unit en baby-unit is OK • knippert: de ouder-unit is op zoek naar de baby-unit lampje : licht op als de voedingsadapter is aangesloten en als de accu wordt opgeladen; let op, dooft niet als de accu vol is achterzijde: uitklapbare tafelstandaard lampje...
Seite 6
3 INSTALLEREN 3.1 BABY-UNIT: Voeding: Sluit volgens neven- staande afbeelding de meegeleverde 6V voedings- adapters met het dunne plugje aan de onderzijde van de baby-unit aan Gebruik alleen de meegeleverde voedingsadapter met modelnummer S005BNV0600060. >1m (3ft) Houd een afstand tus- sen de baby-unit en de baby aan van minimaal 1 meter...
Plaatsingstips: • In geval van gebruik als babyfoon: plaats de baby-unit op een minimale afstand van ruim een meter van uw baby en zorg dat het adaptersnoer veilig weggewerkt wordt. • Voor een optimaal bereik heeft het de voorkeur de baby-unit zo hoog mogelijk op te stellen, vrij van grote metalen oppervlakken.
Opladen: Zodra u de ouder-unit op de voedingsadapter heeft aangesloten en deze adapter in een 230V stopcontact heeft gestoken, wordt de batterij opgeladen. • Laad voor het eerste gebruik de batterij gedurende minimaal 15 uur op, ook al geeft de indicatie aan dat de batterij vol is.
Seite 9
21°C weergave van de temperatuur in de babykamer (‘21°C’ is een voorbeeld) licht op als het temperatuuralarm is ingeschakeld volume staat op 0 (luidspreker uitgeschakeld) visuele geluidsindicatie: het aantal oplichtende vlakjes geeft een indicatie van het geluidsvolume uit de babykamer licht op als de zoom-modus ingeschakeld is hier wordt aangegeven naar welke camera u kijkt;...
4 GEBRUIKEN 4.1 BABY-UNIT (CAMERA): In/uitschakelen: • Schuif aan de rechterzijkant de schakelaar naar boven om de baby-unit in te schakelen. • Schuif deze schakelaar naar beneden om de baby-unit uit te schakelen. Het groene indicatielampje op de baby-unit knippert als de baby-unit verbinding zoek met de ouder-unit en licht continu op als de verbinding tot stand is gekomen.
4.2 OUDER-UNIT (MONITOR): Toets POWER: Als de ouder/unit uit is, knop POWER kort indrukken om de ouderunit in te schakelen (let op, pas na enkele seconden schakelt de ouder daadwerkelijk in). Als de ouder-unit aan is, knop POWER 2 seconden inge- drukt houden om uit te schakelen.
Toets VIEW: Als er maar 1 baby-unit is aangemeld, dan heeft toets VIEW alleen de functie om het menu te sluiten als u deze heeft openstaan. In het geval er meerdere camera’s aan de ouder-unit zijn aangemeld, dan kunt u met toets VIEW de volgende kijk-modussen selecteren die rechtsboven als volgt weer- gegeven worden: : het beeld van camera-1 wordt getoond...
4.3 MENU GESTUURDE FUNCTIES: Algemeen: • U opent het menu door op toets MENU te drukken. • selecteert u het gewenste menu, druk dan op toets SELECT. • selecteert u de gewenste keuze, druk dan op toets SELECT. • Druk aan het einde op toets SELECT om de instel- lingen op te slaan en op toets VIEW om het menu te sluiten (of wacht totdat na ongeveer 15 seconden de ouder-unit het menu zelf afsluit).
Werking: Als de baby rustig slaapt en geen geluid maakt, dan scha- kelt de ouder-unit het beeld en geluid uit. Zodra de ouder-unit weer geluid hoort, en het nivo van dit geluid overschrijdt het nivo dat u heeft ingesteld, dan wordt het beeld en geluid weer ingeschakeld.
Seite 15
In- / uitschakelen temperatuuralarm: Druk op toets MENU en blader met de toetsen naar de optie . Druk op toets SELECT en gebruik de toetsen om de optie te selecteren. Druk op toets SELECT en gebruik de toetsen om het alarm in te schakelen (kies optie ON) of uit te schakelen (kies optie OFF).
Slaapliedjes en natuurlijke geluiden: Bij de ouder-unit kunt u instellen dat er bij de baby-unit slaapliedjes of natuurlijke geluiden worden afgespeeld. Ook kunt u instellen hoe lang de slaapliedjes of geluiden moeten klinken. Let op, er zijn aparte stappen voor het instellen van de speelduur en voor welk liedje of geluid er afgespeeld moet worden.
Extra camera’s aan- en afmelden: Op de ouder-unit kunt u tot 4 camera’s aansluiten. Losse camera’s zijn verkrijgbaar via de leverancier van de DVM-150 of via internet www.alectobaby.nl Nieuwe camera aanmelden: Neem de nieuwe camera uit de verpakking, sluit de meegeleverde voedingsadapter aan en doe deze in een 230V stopcontact.
Zie paragraaf ‘VIEW’ in hoofdstuk 4.2 hoe u de verschillen- de beelden op het scherm kunt krijgen. Camera afmelden. Als volgt kunt u camera’s afmelden: Druk op toets de ouder-unit op toets MENU en blader met de toetsen naar de optie Druk op toets SELECT en gebruik de toetsen om de optie te selecteren.
5 TIPS EN WAARSCHUWINGEN 5.1 ALGEMEEN: • Gebruik de babyfoon alleen als hulpmiddel en nooit als vervanger voor een volwassen en menselijke baby- oppas. • Lees de gebruiksaanwijzing goed door en volg alle aanwijzingen op. • Plaats of gebruik de baby-unit(s) of de ouder-unit nooit in een natte of vochtige ruimte of omgeving.
5.4 AFLUISTEREN/AFTAPPEN: • Het afluisteren/aftappen van deze beeldbabyfoon- signalen is vrijwel onmogelijk. Niet alleen dient men zich in het bereik van de beeldbabyfoon te bevinden, men heeft hier ook kostbare apparatuur voor nodig. 5.5 ONDERHOUD: • Reinig de beeldbabyfoon uitsluitend met een vochtige doek;...
Schakel de ouder-unit en de baby-unit weer in. • Als u hierna nog steeds geen beeld of geluid heeft, neem dan contact op met de servicedienst van Alecto via internet www.alecto.nl Beeld met lage intensiteit: –...
7 GARANTIE Op de Alecto DVM-150 heeft u een garantie van 24 maanden na aankoopdatum (accu’s en batterijen: 12 maanden). Wij garanderen gedurende die periode de kosteloze herstelling van defecten ontstaan door materiaal- en constructiefouten. Een en ander ter uiteindelijke beoordeling van de importeur.
Seite 24
TABLE DES MATIÈRES INTRODUCTION & DÉCLARATION DE CONFORMITÉ ......25 APERÇU DES FONCTIONNALITÉS UNITÉ BÉBÉ ..............26 UNITÉ PARENTS ............26 INSTALLATION UNITÉ BÉBÉ ..............28 UNITÉ PARENTS ............29 ICÔNES DANS LA PARTIE SUPÉRIEURE DE L’AFFICHAGE ............30 UTILISATION UNITÉ BÉBÉ (CAMÉRA) Pour allumer / éteindre..........32 Volume .................32 Vision de nuit automatique ..........32 UNITÉ...
Numéro de modèle de la caméra supplémentaire : DVM-150C. DÉCLARATION DE CONFORMITÉ Le soussigné, Commaxx, déclare que l’équipement radioé- lectrique du type Alecto DVM-150 est conforme à la directive 2014/53/UE. Le texte complet de la déclaration UE de conformité est disponible à l’adresse internet suivante : https://commaxx-certificates.com/doc/dvm-150_doc.pdf...
2 APERÇU DES FONCTIONNALITÉS 2.1 UNITÉ BÉBÉ : les LED infrarouges pour la vision nocturne sont si- tuées derrière le plastique sombre objectif de la caméra voyant lumineux, qui s’éteint lorsque l’unité bébé est désactivée, qui clignote lorsque l’unité bébé recherche l’unité parents, qui reste allumé...
Seite 27
lumière LINK : indicateur de connexion, • allumé en permanence : la connexion entre l’unité parents et l’unité bébé est correcte • clignote : l’unité parents recherche l’unité bébé voyant : s’allume lorsque l’adaptateur secteur est connecté et que la batterie est en cours de chargement; attention, il ne s’éteint pas quand la batterie est pleine arrière : support de table pliable lumière...
Seite 28
3 INSTALLATION 3.1 UNITÉ BÉBÉ : Alimentation : Selon l’illustration ci-dessous, connec- tez l’adaptateur secteur 6 V fourni (avec la fiche fine) au bas de l’unité bébé Utilisez uniquement les adaptateurs d’alimentation fournis avec le numéro de modèle S005BNV0600060. >1m (3ft) Maintenez une distance d’au moins 1 mètre entre l’unité...
Conseils pour emplacement : • Pour une utilisation comme moniteur pour bébé: placez l’unité bébé au moins à un mètre de votre bébé et assurez-vous en toute sécurité d’être loin du câble adaptateur. • Pour une portée optimale, il est conseillé de mettre en place l’unité...
Assurez-vous que le câble de l’adaptateur ne présente aucun risque de trébuchement ou de chute. Attachez les câbles trop longs avec du ruban adhésif ou des attaches de câble spécialement conçus à cet effet. Recharger : La batterie commence à se charger dès que vous branchez l’unité...
Seite 31
indique que l’éclairage nocturne infrarouge de la caméra est activé (s’allume automatiquement lorsqu’il commence à faire sombre près de la caméra) s’allume lorsque vous parlez au bébé 21°C affichage de la température dans la chambre du bébé (‘21 °C’ est un exemple) s’allume lorsque l’alerte de température est activée volume réglé...
4 UTILISATION 4.1 UNITÉ BÉBÉ (CAMÉRA) : Pour allumer / éteindre : • Sur le côté droit de l’unité, faites glisser l’interrupteur vers le haut pour allumer l’unité bébé. • Faites glisser cet interrupteur vers le bas pour éteindre l’unité bébé. Le voyant vert de l’unité...
4.2 UNITÉ PARENTS (MONITEUR) : Bouton POWER : Lorsque l’unité parents est éteinte, appuyez brièvement sur le bouton POWER pour allumer l’unité parents (attention, ce n’est qu’après plusieurs secondes que l’unité parents s’allumera). Lorsque l’unité parents est allumée, maintenez enfoncé le bouton POWER pendant 2 secondes pour l’éteindre.
Bouton VIEW : Lorsque 1 seule unité bébé est enregistrée, le bouton VIEW sert uniquement à fermer le menu lorsque celui-ci est ouvert. Lorsque plusieurs caméras sont enregistrées sur l’unité parents, vous pouvez appuyer sur le bouton VIEW pour sélectionner les modes de visualisation suivants, comme indiqué...
4.3 FONCTIONS DISPONIBLES PAR LE MENU : Général : • Vous ouvrez le menu en appuyant sur le bouton MENU. • Utilisez pour sélectionner le menu souhaité, puis appuyez sur le bouton SELECT. • Utilisez pour sélectionner l’option désirée, puis appuyez sur le bouton SELECT.
Fonctionnement : Lorsque le bébé dort tranquillement sans faire de bruit, l’unité parents désactive l’affichage et le son. Dès que l’unité parents commence à recevoir des sons et que le volume de ce son dépasse le niveau de sensibilité défini, l’affichage et le son sont réactivés. Appuyez brièvement sur le bouton VIEW pour regarder et écouter entre les deux.
Seite 37
Pour allumer / éteindre l’alerte de température : Appuyez sur le bouton MENU et utilisez le bouton pour défiler jusqu’à l’option . Appuyez sur le bouton SELECT et utilisez le bouton pour sélectionner l’option Appuyez sur le bouton SELECT et utilisez le bouton pour activer l’alerte (choisissez l’option ON) ou pour la désactiver (choisissez l’option OFF). Une flèche noire indique le réglage actuel.
Berceuses et sons naturels : L’unité parents peut être utilisée pour jouer des berceuses ou des sons naturels via l’unité bébé. Vous pouvez égale- ment définir pendant combien de temps ces berceuses ou ces sons naturels doivent être joués. Attention, des étapes distinctes doivent être suivies pour régler la durée de lecture et pour choisir la chanson ou le son à...
Pour enregistrer et supprimer des caméras supplé- mentaires : Vous pouvez connecter jusqu’à 4 caméras à l’unité parents. Des caméras séparées sont disponibles via le fournisseur du DVM-150 ou via Internet www.alectobaby.nl Enregistrer une nouvelle caméra : Retirez la nouvelle caméra de son emballage, connec- tez l’adaptateur secteur fourni et insérez-la dans une...
Maintenant, utilisez le trombone plié pour appuyer sur le petit trou au bas de la caméra (à côté du mot PAIR). Il existe un petit bouton-poussoir à l’inté- rieur de ce trou. Maintenez ce bouton enfoncé avec le trombone jusqu’à ce que le voyant d’alimentation de la caméra supplémentaire se mette à...
5 CONSEILS ET AVERTISSEMENTS 5.1 GÉNÉRAL : • Utiliser le moniteur bébé est une aide supplémentaire mais ne remplace en aucun cas un adulte ou un baby- sitter humain. • Lisez attentivement le manuel de l’utilisateur et suivez toutes les indications. •...
5.4 ESPIONNAGE/ECOUTE ELECTRONIQUE : • L’espionnage/écoute électronique des signaux provenant de ce moniteur vidéo pour bébé est presque impossible. Non seulement il faut être dans la portée du moniteur vidéo pour bébé mais en plus il faut disposer d’un équipement très couteux. 5.5 ENTRETIEN : •...
À présent, remettez en marche l’unité parent et l’unité bébé. • Si vous continuez à ne pas avoir d’image ni de son, veuillez contacter le service client d’Alecto via le via internet www.alecto.nl Affichage à faible intensité : –...
Efficiency at low 10% load : - No load Power consumption : 0.05 W 7 GARANTIE Votre réveil Alecto DVM-150 jouit d’une garantie de 24 mois (piles: 12 mois) à compter du jour d’achat. Pendant cette période, nous effectuons les réparations ou remédions axu défauts de fabrication. Cela est soumis à l’approbation de l’importateur.
Seite 48
Service Help WWW.ALECTO.NL SERVICE@ALECTO.NL Commaxx B.V. Wiebachstraat 37 6466 NG, Kerkrade The Netherlands Service WWW.ALECTO.NL SERVICE@ALECTO.NL Help Commaxx B.V., Wiebachstraat 37, The Netherlands 6466 NG Kerkrade, v1.4...
Seite 49
BEDIENUNGSANLEITUNG USER’S MANUAL DVM-150...
(Bild + Ton), wenn das Baby Geräusche macht, und ausgeschaltet wird, wenn das Baby ruhig schläft. Das DVM-150 kann mit bis zu 4 Kameras erweitert werden. Nach der Registrierung weiterer Kameras können Sie die Bilder jeder einzelnen Kamera anzeigen, die Kamerabilder automatisch nacheinander anzeigen (scannen) oder alle Kamerabilder gleichzeitig anzeigen (aufteilen).
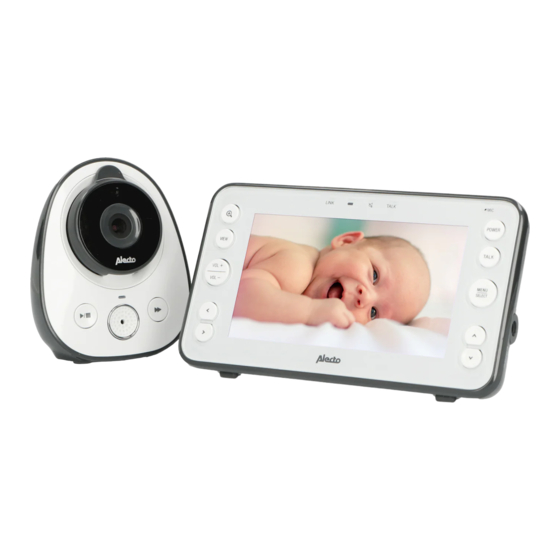
2 FUNKTIONSÜBERSICHT 2.1 BABYEINHEIT: Hinter der dunklen Kunst- stoffabdeckung befinden sich die Infrarot-LEDs für Nachtsicht Kameraobjektiv Die Kontrollleuchte, die bei deaktivierter Babyeinheit ausgeschal- tet ist, blinkt, wenn die Babyeinheit nach der Elterneinheit sucht und leuchtet kontinuierlich, wenn die Babyeinheit mit der Elterneinheit kommu- niziert.
Seite 53
LINK Leuchte: Verbindungsanzeige, • leuchtet durchgehend: Die Verbindung zwischen der Elterneinheit und der Babyeinheit ist in Ordnung • blinkt: Die Elterneinheit sucht nach der Babyeinheit Leuchte: leuchtet auf, wenn das Netzteil ange- schlossen ist und der Akku aufgeladen wird; Achtung, schaltet sich nicht aus, wenn der Akku voll ist Rückseite: klappbarer Tischständer Leuchte: Leuchtet auf, wenn der Lautsprecher aus-...
Seite 54
3 INSTALLATION 3.1 BABYEINHEIT: Stromversorgung: Schließen Sie laut Abbildung unten das mitgelieferte 6V-Netzteil (mit dem dünnen Stecker) an der Unterseite der Babyeinheit an. Verwenden Sie nur die mitgelieferten Netzteile mit Modellnummer S005BNV0600060. >1m (3ft) Halten Sie einen Ab- stand von mindestens 1 Meter zwischen der Babyeinheit und dem Baby ein...
Tipps für die Aufstellung: • Verwendung als Babyphon: stellen Sie die Baby-Einheit mindestens einen Meter von Ihrem Baby entfernt auf und stellen Sie sicher, dass das Netzteilkabel ordentlich verstaut ist. • Für eine optimale Reichweite wird empfohlen, die Baby-Einheit möglichst hoch und außer Reichweite von großen Metalloberflächen zu installieren.
Aufladen: Der Akku wird aufgeladen, sobald Sie die Elterneinheit am Netzteil anschließen und es an einer 230 V Steckdose einstecken. • Vor Erstinbetriebnahme laden Sie den Akku mindestens 15 Stunden lang auf, auch wenn das Gerät anzeigt, dass der Akku vollständig aufgeladen ist. •...
Seite 57
21°C Anzeige der Temperatur im Kinderzimmer (‘21 ° C’ ist ein Beispiel) leuchtet auf, wenn der Temperaturalarm aktiviert ist Lautstärke auf 0 eingestellt (Lautsprecher ausgeschaltet) visuelle Tonanzeige: Die Anzahl der beleuchteten Balken zeigt die Lautstärke im Kinderzimmer an. leuchtet auf, wenn der Zoom-Modus aktiviert ist zeigt an, welche Kamera Sie gerade betrachten;...
4 VERWENDUNG 4.1 BABYEINHEIT (KAMERA): Ein-/Ausschalten: • Schieben Sie den Schalter auf der rechten Seite des Geräts nach oben, um die Babyeinheit einzuschalten. • Schieben Sie diesen Schalter nach unten, um die Babyeinheit auszuschalten. Die grüne Anzeige an der Babyeinheit blinkt, während die Babyeinheit nach der Elterneinheit sucht, und bleibt beleuch- tet, wenn die Verbindung hergestellt ist.
4.2 ELTERNEINHEIT (MONITOR): NETZ-Schalter: Wenn die Elterneinheit ausgeschaltet ist, drücken Sie kurz die Taste POWER, um die Elterneinheit einzuschalten (Achtung, erst nach einigen Sekunden schaltet sich die Elterneinheit tatsächlich ein). Wenn die Elterneinheit eingeschaltet ist, halten Sie die POWER -Taste für 2 Sekunden gedrückt, um sie auszu- schalten.
VIEW-Taste: Wenn nur 1 Babyeinheit registriert ist, wird die Taste VIEW nur zum Schließen des Menüs verwendet, wenn das Menü geöffnet wird. Wenn mehrere Kameras an der Elterneinheit registriert sind, können Sie die Taste VIEW drücken, um die folgenden Anzeigemodi auszuwählen, wie im oberen rechten Teil des Displays angezeigt: : Das Bild der Kamera-1 wird angezeigt : Das Bild der Kamera-2 wird angezeigt...
4.3 MENÜGESTEUERTE FUNKTIONEN: Allgemein: • Sie öffnen das Menü, indem Sie die Taste MENU drücken. • Wählen Sie mit oder das gewünschte Menü und drücken Sie dann die Taste SELECT. • Wählen Sie mit oder die gewünschte Option und drücken Sie die Taste SELECT. • Drücken Sie schließlich die Taste SELECT, um Ihre Ein- stellung zu speichern, und drücken Sie die Taste VIEW, um das Menü...
die Anzeige und der Ton sind immer aktiviert Drücken Sie die Taste SELECT, um Ihre Einstellung zu speichern, und drücken Sie die Taste VIEW, um das Menü zu schließen. Bedienung: Wenn das Baby ruhig und leise schläft, deaktiviert die Elter- neinheit die Anzeige und den Ton.
Seite 63
Obergrenze an). Drücken Sie die Taste SELECT, um Ihre Einstellung zu speichern, und drücken Sie die Taste VIEW, um das Menü zu schließen. Den Temperaturalarm ein-/ausschalten: Drücken Sie die Taste MENU und scrollen Sie mit der oder -Taste zur Option. Drücken Sie die Taste SELECT und wählen Sie mit der oder -Taste die Option...
der Taste oder die gewünschte Anzeige ein (ein schwarzer Pfeil zeigt die aktuelle Einstellung an). Drücken Sie die Taste SELECT, um Ihre Einstellung zu speichern, und drücken Sie die Taste VIEW, um das Menü zu schließen. Schlaflieder und Naturgeräusche: Auf der Elterneinheit können Sie Schlaflieder oder Naturge- räusche über die Babyeinheit abspielen.
Weitere Kameras an- und abmelden: Sie können bis zu 4 Kameras an die Elterneinheit anschließen. Separate Kameras können über den Lieferanten des DVM-150 oder über das Internet erworben werden. Eine neue Kamera registrieren: Nehmen Sie die neue Kamera aus der Verpackung, schließen Sie das mitgelieferte Netzteil an und stecken...
Drücken Sie die Taste SELECT und im Display erscheint ein Sanduhrsymbol. Drücken Sie nun mit der gebogenen Büroklammer auf das kleine Loch in der Unterseite der Kamera (neben dem Wort PAIR). In diesem Loch befindet sich ein kleiner Druckknopf. Halten Sie diese Taste mit der Büroklammer gedrückt, bis die Betriebsanzeige der zusätzlichen Kamera nach etwa 5 Sekunden schnell zu blinken beginnt.
5 TIPPS UND WARNHINWEISE 5.1 ALLGEMEIN: • Verwenden Sie das Babyphon nur als zusätzliche Hilfe und niemals als Ersatz für einen Erwachsenen oder einen Babysitter. • Lesen Sie gründlich die Bedienungsanleitung und befolgen Sie alle Anweisungen. • Stellen Sie die Baby- oder Eltern-Einheit niemals in einem nassen oder feuchten Raum oder einer feuchten Umgebung auf.
5.4 MITHÖREN/ABHÖREN: • Mithören/Abhören der Signale von diesem Babyphon ist nahezu unmöglich. Man muss sich nicht nur in Reich- weite des Babyphons aufhalten, sondern benötigt auch sehr kostspielige Geräte. 5.5 WARTUNG: • Reinigen Sie das Babyphon nur mit einem feuchten Tuch;...
Einheiten wieder ein. • Sollten Sie immer noch keine Bilder oder Töne empfan- gen, wenden Sie sich bitte an den Kundenservice von Alecto unter der im Internet www.alecto.nl Display mit niedriger Intensität: – Die Elterneinheit wird vom integrierten Akku Batterie mit Strom versorgt.
6 TECHNISCHE DATEN Reichweite: bis zu 50 m im Innenbereich bis zu 300 m im Freien Stromversorgung der Elterneinheit: 3,7 V Li-Ion Akkupack, 950 mAh Modell SCD530-1 5VDC 1000mA Netzteil (incl.) Modell: S005BNV0500100 Stromversorgung der Babyeinheit: 6VDC 600mA Netzteil (incl.) Modell: S005BNV0600060.
7 GARANTIE Sie erhalten für Alecto DVM-150 eine Garantie von 24 Monaten ab Kaufdatum (batterien: 12 Monate). Wähend dieses Zeitraums garantieren wir die kostenlose Reparatur von Schäden, die durch Material- und Verarbeitungsfehlern verursacht werden. Sie unterliegen alle der abschließenden Bewertung des Importeurs.
Seite 72
TABLE OF CONTENTS INTRODUCTION & DECLARATION OF CONFORMITY ...... 25 FUNCTION OVERVIEW BABY UNIT ............... 26 PARENT UNIT ............26 INSTALLATION BABY UNIT ............... 28 PARENT UNIT ............29 ICONS IN THE UPPER PART OF THE DISPLAY ..30 BABY UNIT (CAMERA) To switch on/off ............
(image + sound) when the baby is making noise and switch off when the baby is sleeping quietly. The DVM-150 can be expanded with up to 4 cameras. After registering additional cameras, you may view the images of each individual camera, view the camera images one after the other automatically (scan) or view all camera images simultaneously (split).
2 FUNCTION OVERVIEW 2.1 BABY UNIT: the infra-red LEDs for night-vision are located behind the dark plastic camera lens indicator light, switched off when the baby unit is disabled, flashes when the baby unit is search- ing for the parent unit, lit continuously when the baby unit is in contact with the parent unit start/stop button for the lullabies...
Seite 75
LINK light: connection indicator, • lit continuously: the connection between the parent unit and baby unit is OK • flashing: the parent unit is searching for the baby unit light: illuminates when the power adaptor is con- nected and the battery is being recharged; attention, doesn’t switch off when the battery is full rear: foldable table stand light: Illuminates when the speaker is switched off 10.
3 INSTALLATION 3.1 BABY UNIT: Power: According to the image below, connect the supplied 6V power adaptor (with the thin plug) to the bottom of the baby unit Only use the supplied power adaptors with mod- number S005BNV0600060. >1m (3ft) Maintain a distance between the baby unit and the baby of at least...
Tips for placement: • For use as a baby monitor: place the baby unit at least one meter away from your baby and make sure to safely tuck away the adapter cable. • For optimal range, it is advisable to set up the baby unit as high as possible, free from large metal surfac- •...
To recharge: The battery starts charging as soon as you connect the parent unit to the power adaptor and insert this adaptor into a 230V wall socket. • Before the first use, charge the battery use for at least 15 hours, even when the unit indicates that the battery is fully charged. •...
Seite 79
21°C display of the temperature in the baby room (‘21°C’ is an example) illuminates when the temperature alert is enabled volume set to 0 (speaker switched off) visual sound indication: the number of lit bars indicates the sound volume from the baby room illuminates when the zoom mode is enabled this indicates which camera you’re viewing;...
4 USE 4.1 BABY UNIT (CAMERA): To switch on/off: • At the right side of the unit, slide the switch up- wards to turn on the baby unit. • Slide this switch downwards to turn off the baby unit. The green indicator on the baby unit flashes while the baby unit is searching for the parent unit and remains lit when the connection is made.
4.2 PARENT UNIT (MONITOR): POWER button: When the parent unit is switched off, briefly press the POWER button to switch the parent unit on (attention, only after several seconds the parent unit will actually switch on). When the parent unit is switched on, press and hold the POWER button for 2 seconds to switch off. VOL+ / VOL- buttons: Use the VOL+ and VOL- buttons to set the volume of the parent unit.
VIEW button: When only 1 baby unit is registered, the VIEW button is only used for closing the menu when the menu is opened. When multiple cameras are registered to the parent unit, you may press the VIEW button to select the following view modes, as indicated in the upper right part of the display: : the image of camera-1 is shown : the image of camera-2 is shown...
4.3 MENU-OPERATED FUNCTIONES: General: • You open the menu by pressing the MENU button. • to select the desired menu and then press the SELECT button. • to select the desired option and then press the SELECT button. • Finally press the SELECT button to save your setting and press the VIEW button to close the menu (or wait until the parent unit closes the menu automatically after approximately 15 seconds).
Operation: When the baby is sleeping quietly without making any noise, the parent unit disables the display and sound. As soon as the parent unit starts to receive sounds, and the loudness of this sound exceeds the set sensitivity level, the display and sound are enabled again.
Seite 85
To switch the temperature alert on/off: Press the MENU button and use the button to scroll to the option. Press the SELECT button and use the button to select the option. Press the SELECT button and use the button to enable the alert (choose option ON) or to disable it (choose option OFF).
Lullabies and natural sounds: The parent unit can be used to play lullabies or natural sounds through the baby unit. You can also set for how long these lullabies or natural sounds must be played. Attention, separate steps must be followed for setting the playback duration and for setting which song or sound must be played.
To register and de-register additional cameras: You may connect up to 4 cameras to the parent unit. Separate cameras are available via the supplier of the DVM-150 or via internet www.alectobaby.nl To register a new camera: Remove the new camera from its packaging, connect the supplied power adaptor and insert it into a 230V wall socket.
See paragraph ‘VIEW’ in chapter 4.2 on how to view the different images in the display. To de-register a camera: You may de-register cameras as follows: Press the MENU button on the parent unit and use the button to select the option. Press the SELECT button on the parent unit and use button to select the option.
5 TIPS AND WARNINGS 5.1 GENERAL: • Only use the baby monitor is an additional aid and never as a replacement for an adult or human babysitter. • Thoroughly read the user’s manual and follow all indications. • Never place the baby unit or parent unit in wet or humid room or environment.
5.4 EAVESDROPPING/WIRETAPPING: • Eavesdropping/wiretapping of the signals from this baby video monitor is nearly impossible. Not only must one be within range of the baby video monitor, one also needs some very costly equipment. 5.5 MAINTENANCE: • Only clean the baby monitor with a moist cloth; never use chemical cleaners.
Now, switch the parent unit and baby unit back on. • If you still receive no images or sound, please contact the customer service of Alecto via internet www.alecto.nl Display at low intensity: – The parent unit is powered by the built-in battery and to save battery energy the display intensity is lowered to 10% after 10 minutes.
7 WARRANTY For the Alecto DVM-150 you have a warranty of 24 months from the date of purchase (batteries: 12 months). During this period, we guarantee the free repair of defects caused by material and workmanship errors. All this subjected to the final assessment of the importer.
Seite 96
Service Help WWW.ALECTO.NL SERVICE@ALECTO.NL Commaxx B.V. Wiebachstraat 37 6466 NG, Kerkrade The Netherlands Service WWW.ALECTO.NL SERVICE@ALECTO.NL Help Commaxx B.V., Wiebachstraat 37, The Netherlands 6466 NG Kerkrade, v1.4...
Seite 97
MANUAL DEL USUARIO MANUALE DELL’UTENTE DVM-150...
Seite 98
ÍNDICE INTRODUCCIÓN Y DECLARACIÓN DE CONFORMIDAD .....3 DESCRIPCIÓN DE FUNCIONES UNIDAD DEL BEBÉ.............4 UNIDAD PARENTAL ............4 INSTALACIÓN UNIDAD DEL BEBÉ.............6 UNIDAD PARENTAL ............7 ICONOS DE LA PARTE SUPERIOR DE LA PANTALLA ............8 UNIDAD DEL BEBÉ (CÁMARA) Conexión / Desconexión ..........10 Volumen ...............10 Visión nocturna automática .........10 UNIDAD PARENTAL (MONITOR)
+ sonido) cuando el bebé haga ruidos y se desconecte cuando el bebé esté durmiendo tranquilamente. El DVM-150 se puede ampliar con hasta 4 cámaras. Después de registrar las cámaras adicionales, puede ver las imágenes de cada cámara individual, ver las imágenes de la cámara una después de otra de manera automática...
2 DESCRIPCIÓN DE FUNCIONES 2.1 UNIDAD DEL BEBÉ: Los LED de infrarrojos para la visión nocturna están ubicados detrás del plástico oscuro lente de la cámara Testigo indicador, desco- nectado cuando la unidad está desactivada, parpa- dea cuando la unidad del bebé...
Seite 101
Luz de LINK: indicador de conexión, • Iluminado de manera fija: la conexión entre la unidad parental y la unidad del bebé es correcta • Parpadeo: la unidad parental está buscando la unidad del bebé. Luz de : ilumina cuando el adaptador de corrien- te está...
3 INSTALACIÓN 3.1 UNIDAD DEL BEBÉ: Consumo: Según la imagen siguiente, conecte el adaptador de corriente de 6 V de suministro (con el en- chufe fino) a la parte inferior de la unidad del bebé. Utilice únicamente los adaptadores de corriente suministrados con el número de modelo S005BNV0600060.
Consejos para la sustitución: • Para uso como un monitor del bebé: coloque la unidad del bebé, al menos, a un metro de distancia de su bebé y asegúrese de ocultar el cable del adaptador. • Para un óptimo alcance, es aconsejable configurar la unidad del bebé...
Para recargar: La batería comienza a cargarse tan pronto como conecte la unidad parental al adaptador de corriente e introduzca este adaptador en una toma de corriente de 230 V. • Antes del primer uso, cargue la batería durante, al menos, 15 horas, incluso cuando la unidad indica que la batería está...
Seite 105
21°C pantalla de la temperatura en la habitación del bebé (‘21°C’ es un ejemplo) se ilumina cuando se activa la alerta de temperatura volumen ajustado a (altavoces desactivados) indicación visual del sonido: el número de barras iluminadas indica el volumen del sonido de la habitación del bebé...
4 USO 4.1 UNIDAD DEL BEBÉ (CÁMARA): Conexión / Desconexión: • En el lado derecho de la unidad, deslice el interruptor hacia arriba para conectar la unidad del bebé. • Deslice este interruptor hacia abajo para desconectar la unidad del bebé. El indicador verde de la unidad del bebé...
4.2 UNIDAD PARENTAL (MONITOR): Botón de POWER: Cuando la unidad se desconecta, pulse brevemente el bo- tón de POWER para conectar la unidad parental (atención: solo transcurridos varios segundos se conectará realmente la unidad parental). Cuando la unidad parental esté conectada, mantenga pulsado durante 2 segundos el botón de POWER para desconectar.
Botón VIEW: Cuando solo hay registrada una unidad de bebé, el botón VIEW solo se usa para cerrar el menú cuando este está abierto. Cuando hay múltiples cámaras registradas en la unidad parental, puede pulsarse el botón VIEW para seleccionar los modos de vista, según lo indicado en la parte superior derecha de la pantalla.
4.3 FUNCIONES OPERADAS DESDE EL MENÚ: Generalidades: • Abra el menú pulsando el botón MENU. • para seleccionar el menú deseado y, luego pulse el botón SELECT (Seleccionar). • para seleccionar la opción deseada y, luego pulse el botón SELECT (Seleccionar). •...
Funcionamiento: Cuando el bebé esté durmiendo tranquilamente sin hacer ningún ruido, la unidad parental desactiva la pantalla y el sonido. Tan pronto como la unidad comience a recibir sonidos, y la intensidad de este sonido supere el nivel de sensibilidad ajustado, la pantalla y el sonido se activan de nuevo.
Seite 111
Activar/Desactivar la alerta de la temperatura: Pulse el botón MENU y use el botón para despla- zarse a la opción . Pulse el botón SELECT y use el botón para seleccionar la opción Pulse el botón SELECT y use el botón para activar la alerta (escoja la opción ON) o para desacti- varla (escoja la opción OFF).
Nanas y sonidos naturales: La unidad parental se puede usar para reproducir nanas o sonidos naturales a través de la unidad del bebé. Puede también ajustar durante cuánto tiempo se deben reproducir estas nanas o sonidos naturales. Atención, para el ajuste de la duración de la reproducción y el ajuste para qué...
Para registrar y anular cámaras adicionales: Puede conectar hasta 4 cámaras a la unidad parental. Se pueden obtener cámaras independientes a través del proveedor del DVM-150 o vía Internet www.alectobaby.nl Para registrar una nueva cámara: Extraiga la nueva cámara de su embalaje, conecte el adaptador de alimentación e inserte en una toma de...
Después de varios segundos aparece en la pantalla de la unidad parental la imagen de la nueva cámara. Véase el párrafo ‘VIEW’ en el capítulo 4.2 sobre cómo ver las diferentes imágenes en la pantalla. Para anular una nueva cámara: Puede anular las cámaras conforme a lo siguiente: Pulse el botón MENU en la unidad parental y use el botón...
5 CONSEJOS Y ADVERTENCIAS 5.1 GENERALIDADES: • Use solo el monitor del bebé como una ayuda adicional y nunca como una sustitución de un adulto o una persona. • Lea completamente el manual de usuario y siga todas las indicaciones. •...
5.4 INTERCEPCIONES/ESCUCHAS: • Intercepciones/escuchas de señales de este monitor vídeo del bebé es casi imposible. No solo debe estar en el rango del monitor de vídeo del bebé, uno también necesita un equipo muy costoso. 5.5 MANTENIMIENTO: • Limpie solo el monitor del bebé con un paño húmedo; no use nunca agentes químicos.
Ahora, conecte la unidad parental y la unidad del bebé de nuevo. • Si no recibe imágenes ni sonido, póngase en contacto con el Servicio de Atención al Cliente de Alecto vía Internet www.alecto.nl Pantalla con intensidad baja: –...
6 ESPECIFICACIONES Alcance: hasta 50 metros en interiores hasta 300 metros en espacio abierto Alimentación de unidad parental: 3,7 V batería de ion-litio, 950 mAh modelo SCD530-1 5 V CC 1000 mA adaptador de alimentación (incl.) modelo: S005BNV0500100 Alimentación unidad del bebé: 6 V CC 600 mA adaptador de alimentación (incl.)
7 GARANTÍA Para el Alecto DVM-150 otorgamos al consumidor una garantía de 24 meses desde la fecha de compra. Durante este periodo, garantizamos una reparación de defectos, sin cargo alguno, provocados por el material o errores de la manufacturación. Todo esto sujeto a la valoración final del importador.
Seite 120
INDICE INTRODUZIONE E DICHIARAZIONE DI CONFORMITA’ .......25 FUNZIONE PANORAMICA UNITA’ BAMBINO ............26 UNITA’ PRINCIPALE ............26 INSTALLAZIONE UNITA’ BAMBINO ............28 UNITA’ PRINCIPALE ............29 ICONE NELLA PARTE SUPERIORE DEL DISPLAY ..30 UNITA’ BAMBINO (TELECAMERA) Per accendere/spegnere ..........32 Volume .................32 Visione notturna automatica ........32 UNITA’...
(immagine + audio) quando il bambino fa rumore e spenta quando il bambino dorme tranquillo. Il DVM-150 può essere esteso fino a 4 telecamere. Dopo aver registrato ulteriori telecamere, potresti vedere le immagini di ogni telecamera individuale, visualizzare le immagini della teleamera una dopo l’altra automaticamente...
2 FUNZIONE PANORAMICA 2.1 UNITA’ BAMBINO: I LED a infrarossi per la visione notturna sono po- sizionati dietro la plastica scura Obiettivo telecamera Spia, spegnimento quando l’unità bambino è disabilitata, lampeggia quando l’unità bambino sta cercando l’unità prin- cipale, si accende conti- nuamente quando l’unità...
Seite 123
LINK luce: indicatore di connessione, • Accendere continuamente: la connessione tra l’unità principale e l’unità bambino è OK • Lampeggia: Questo accade mentre l’unità principale cerca l’unità bambino. luce: illumina quando l’adattatore di corrente è colle- gato e la batteria è ricaricata; attenzione, non si spegne quando la batteria è...
3 INSTALLAZIONE 3.1 UNITA’ BAMBINO: Alimentazione: Secondo l’immagine in basso, collegare l’a- dattatore da 6V forntio (con la spina sottile) al pulsante dell’unità bambino Usa solo gli adattatori elettrici forniti con il numero di modello S005BNV0600060. >1m (3ft) Mantenere una distanza tra l’unità...
Consigli per il posizionamento: • Per usarle come monitor: posizionare l’unità bambino almeno un metro lontano dal tuo bambino e assicurarsi che sia lontano dal cavo dell’adattatore. • Per un intervallo ottimo, è consigliabile configurare l’unità bambino il più alto possibile, libera dalle grandi superfici metalliche.
Per ricaricare: La batteria inizia a caricarsi non appena colleghi l’unità principale all’alimentatore: e inserisci quest’alimentatore: in una presa a muro da 230V. • Prima del primo utilizzo, caricare la batteria d’uso per al- meno 15 ore, anche quando l’unità indica che la batteria è...
Seite 127
21°C Displaydella temperatura nella stanza del bambino (‘21°C’ è un esempio) si illumina quando è abilitata l’avviso di temperatura Volume impostato su 0 (altoparlante spento) indicatore suono visivo: il numero di barre accese indica il volume del suono dalla stanza del bambino si illumina quando è...
4 USO 4.1 UNITA’ BAMBINO (TELECAMERA): Per accendere/spegnere: • A destra dell’unità, scorrere l’interruttore verso l’alto per accendere l’unità bambino. • Fai scorrere l’interruttore verso il basso per spegnere l’unità bambino. La spia verde sull’unità bambino lampeggia mentre l’unità bambino è in cerca dell’unità principale e resta accesa quando è...
4.2 UNITA’ PRINCIPALE (MONITOR) Pulsante POWER: Quando l’unità principale è spenta, premere brevemente il pulsante POWER per accendere l’unità principale: (attenzione, solo dopo divers secondi l’unità principale si accenderà davvero). Quando l’unità principale è accesa,premere e tenere premu- to il pulsante POWER per 2 secondi per spegnere. Pulsante VOL+ / VOL-: Usare i pulsanti VOL+ e VOL- per impostare il volume dell’unità...
Pulsante VIEW: Quando è registrata solo 1 unità bambino, il pulsante VIEW è usata per chiudere il menu quando il menu è aperto. Quando telecamere multiple sono registrate per l’unità principale, puoi premere il pulsante VIEW per selezionare le seguenti modalità di visualizzazione, come indicato nell’an- golo in alto a destra del display.
4.3 MENU-FUNZIONI OPERATIVE: Generale: • Apri il menu premendo il pulsante MENU. • per selezionare il menu desiderato e poi premere il pulsante SELECT. • per selezionare l’opzione desiderata e poi premere il pulsante SELECT. • Premere finalmente il pulsante SELECT per salvare le tue impostazioni e premere il pulsante VIEW per chiu- dere il menu (o attendere fino a che l’unità...
Funzionamento: Quando il bambino sta dormendo tranquillo senza emettere alcun rumore, l’unità principale disabilita il display e l’audio. Non appena l’unità principale inizia a ricevere i suoni e la forza del suono supera il livello di sensibilità impostato, il display e il suono sono attivati di nuovo. Premere brevemente il pulsante VIEW per guardare e ascoltare nel frattempo.
Seite 133
Accensione/spegnimento allerta temperatura: Premere il pulsante MENU e usare il pulsante scorrere l’opzione . Premere il pulsante SELECT e usare il pulsante per scorrere l’opzione Premere il pulsante SELECT e usare il pulsante o il pulsante per attivare l’avviso (scegliere l’opzione ON) o per disabilitarlo (scegliere l’opzione OFF).
Ninne nanne e suoni naturali: L’unità principale può essere usata per riprodurre ninne nan- ne o suoni naturali attraverso l’unità bambino. Puoi anche impostare per quanto tempo queste ninne nanne o suoni naturali devono essere riprodotti. Attenzione, devono essere seguiti step separat per imposta- re la durata della riproduzione e per l’impostazione di quale canzone o suono deve essere riprodotto.
Registrare e deregistrareulteriori telecamere: Puoi collegare fino a 4 telecamere all’unità principale. Le telecamere separate sono disponibili attraversoil fornitore del DVM-150, o via internet www. alectobaby.nl Registrare una nuova telecamera: Rimuovere la nuova telecamera dall’imballaggio, colle- gare l’adattatore elettrico fornito, inserirlo in una presa a...
Vedere il paragrafo ‘VIEW’ nel capitolo 4.2 su come visualiz- zarele diverse immagini sul display. Per cancellare una telecamera: Puoi cancellare le telecamere come segue: Premere il pulsante MENU sull’unità principale usare il pulsante o il pulsante per selezionare l’opzione Premere il pulsante SELECT sull’unità...
5 CONSIGLI E AVVERTIMENTI 5.1 GENERALE: • Usare solo il monitor bambino è un aiuto ulteriore e mai come una sostituzione di un adulto o babysitter umano. • Leggere attentamente il manuale dell’utente e seguire tutte le istruzioni. • Non posizionare l’unità bambino o l’unità principale o la stanza umida o ambiente.
5.4 ORIGGLIARE/INTERCETTARE: • Origliare/intercettare i segnali da questo video baby monitor è quasi impossibile. Non solo deve essere uno all’interno del raggio del video baby monitor, deve essere anche uno che ha un’attrezzatura molto costosa. 5.5 MANUTENZIONE: • Pulire solo l baby monitor solo con un panno umido; non usare mai detergenti chimici.
Ora, riaccendere l’unità principale e l’unità bambino. • Se ancora non ricevi alcun immagine o suono, contattare l’assistenza clienti di Alecto via internet www.alecto.nl Display a una bassa intensità: – L’unità principale è alimentata dalla batteria incor- porata e per risparmiare la batteria l’intensità...
6 SPECIFICHE Intervallo: Fino a 50 metri in interni Fino a 300 metri all’esterno Alimentazione unità principale: Batteria agli ioni di litio a 3.7V, 950mAh Modello SCD530-1 Alimentatore 5VDC 1000mA (incl.) Modello: S005BNV0500100 Alimentazione unità bambino: Alimentatore 6VDC 600mA (incl.) Modello: S005BNV0600060.
Seite 141
Information Power Adapter BU: Manufacturers name and address : Vtech Telecommunications LTD, 23/F., Tai Ping Industrical Centre, Block 1, 57 Ting Kok Road, Tai Po, Hong Kong. Model Identifier : S005BNV0600060 Input voltage : 100-240VAC Input AC frequency : 50/60 Hz Output voltage : 6.0V DC Output current : 0.6 A Output Power : 3.6 W...
7 GARANZIA Per Alecto DVM-150 hai una garanzia di 24 mesi dalla data di acquisto. Durante questo periodo, garantiamo una riparazione gratuita dei difetti causati dal materiale e da errori di manodopera. Tutto ciò è soggetto alla valutazione finale dell’importatore.
Seite 144
Service Help WWW.ALECTO.NL SERVICE@ALECTO.NL Commaxx B.V. Wiebachstraat 37 6466 NG, Kerkrade The Netherlands Service WWW.ALECTO.NL SERVICE@ALECTO.NL Help v1.4 Commaxx B.V., Wiebachstraat 37, The Netherlands 6466 NG Kerkrade,...