DF-models SkyWatcher LARK 4K Anleitung
Inhaltsverzeichnis
Verfügbare Sprachen
Verfügbare Sprachen
Quicklinks
Konformitätserklärung gemäß Richtlinie Radio Equipment Directive (RED)
2014/53/EU
Declaration of Conformity in accordance with the Radio Equipment Directive (RED) 2014/53/EU
Déclaration de conformitè CE (RED) 2014/53/EU
Hiermit wird erklärt, dass das Produkt:
I hereby declare that the product:
dèclarons sous notre seule responsabilitè que le produit:
Artikelnummer:
Product number:
9320 (EAN: 4250684193208)
Numèro d'article:
H4817
Bei bestimmungsgemäßer Verwendung den grundlegenden Anforderungen nach Artikel 3 und den
übrigen einschlägigen Bestimmungen der Richtlinie (RED) 2014/53/EU entspricht.
Complies with the essential requirements and the other relevant provisions of the Directive (RED)
2014/53/EU, when used for it intended purpose.
Est conforme aux exigences des directives et ordonnances suivantes (RED) 2014/53/EU.
In Übereinstimmung mit den folgenden harmonisierten Normen gefertigt:
Manufactured in accordance with the following harmonised standards:
Et a ètè fabriquè conformèment aux norms harmonisèes suviantes:
EN 62479:2010
Draft EN 301 489-1 V2.2.0 (2017-03)
Final Draft EN 301 489-3 V2.1.1 (2017-3)
EN 61000-6-3:2007 + A1:2011 +AC:2012
EN 61000-6-1:2007
EN 300 440 V2.1.1 (2017-03)
Directive TSD 2009/48/EC Safety of Toys:
EN71:Part 1:2014, clauses 1-7
EN71:Part 2:2011+A1:2014
EN71Part 3:2013+A2:2017
EN 62115 ELECTRONIC TOYS SAFETY + A2 + A11 + A12- PARTIAL
EN 62115:2005 + A2: 2011 + A11: 2012 + A12: 2015 "Electric toys – Safety"
Hersteller / verantwortliche Person:
drive & fly models, Jürgen Kamm
Manufacturer / responsible Person:
Drahthammer Str. 22
Fabricant / personne responsable:
92224 Amberg, Germany
Jürgen Kamm
Geschäftsführer / managing director / directeur général
Ort/ Datum:
place of issue/ date:
Amberg (Germany), 01.09.2019
Lieu de dèlivrance/ Date:
EIRP Power (Max.): 2460MHz-2472MHz | 4.38dBm (2.74mW)
The source-based time-averaging power which is below the max permitted sending level of 20 mW,
and then the EUT is not needed to conduct SAR measurement.
Frequenzbereich: 2460-2472 MHz
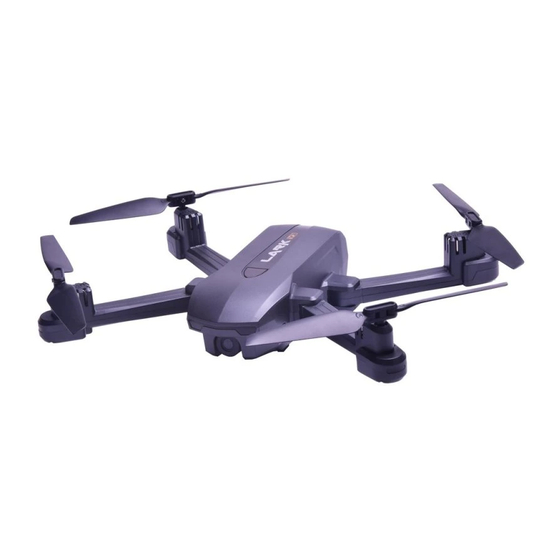
SkyWatcher LARK 4K
LARK 4K
N°9320
Anleitung / Manual
7/8
Impressum
Diese Bedienungsanleitung ist eine Publikation der Firma df models, Drahthammer Strasse 22, D-92224 Amberg.
Alle Rechte einschließlich Übersetzung vorbehalten. Reproduktionen jeder Art, z. B. Fotokopie, Mikroverfilmung,
oder die Erfassung in elektronischen Datenverarbeitungsanlagen, bedürfen der schriftlichen Genehmigung des
Herausgebers. Nachdruck, auch auszugsweise, verboten. Diese Bedienungsanleitung entspricht dem technischen
Stand bei Drucklegung. Änderung in Technik und Ausstattung vorbehalten.
© Copyright 2018 by df models
Inhaltsverzeichnis

Verwandte Anleitungen für DF-models SkyWatcher LARK 4K


Inhaltszusammenfassung für DF-models SkyWatcher LARK 4K
- Seite 1 Declaration of Conformity in accordance with the Radio Equipment Directive (RED) 2014/53/EU Déclaration de conformitè CE (RED) 2014/53/EU Hiermit wird erklärt, dass das Produkt: N°9320 I hereby declare that the product: SkyWatcher LARK 4K dèclarons sous notre seule responsabilitè que le produit: Artikelnummer: Anleitung / Manual Product number: 9320 (EAN: 4250684193208) Numèro d‘article:...
-
Seite 2: Sicherheitshinweise
Anleitungs-Videos Fliegen Sie nicht: - in Menschenansammlungen Auf unserem Youtube-Channel finden Sie hilfreiche Videos zum Modell. - auf Personen oder Tiere zu Bitte nutzen Sie die Möglichkeit und sehen sich die Videos zur Inbetrieb- - bei schlechter Sicht nahme und Handhabung Ihres neuen LARK 4K GPS vor Ihrem Erstflug an. - in der Nähe von Hochspannungsleitungen, Funkmasten oder bei Gewitter - bei Regen oder in feuchter Umgebung https://www.youtube.com/playlist?list=PL11VRu9667Oor4v1bGTAzprNTJI99r2n3... -
Seite 3: Spezifikation
Fliegen Sie immer auf einem weiten, menschenleeren Gelände um kritische Situationen zu Normal Modus GPS Modus vermeiden. 360° Turn Arround Sollten Sie Fragen zu Ihrem df-Models Produkt haben wenden Sie sich an unser Service Department, hier erhalten Sie unter info@df-models.com schnell Antworten auf Ihre Anfragen. Speed Auto Return Select... -
Seite 4: Laden Des Flugakkus
Akku wie abgebildet in den Copter einsetzen. Wird das Modell nicht benutzt, muss der Akku immer aus dem Modell entnommen werden! 4xAAA Batterien (nicht enthalten) Laden des Flugakkus Nur Batterien verwenden, keine Akkus! Niemals alte und neue Batterien mischen! 1. Verbinden Sie das Netzteil mit dem Ladegerät und stecken Sie dieses 1. -
Seite 5: Einschalten/ Binden
3. Sobald alle LEDs nicht mehr blinken hat der Copter ein GPS Signal Einschalten/ Binden und ist flugbereit (Punkt 5. Magnetkompass-Kalibrieren muss vor dem Erstflug durchgeführt werden!) 4. Vor dem ersten Flug sowie nach einem Crash oder Motorwechsel ist eine Magnetkompass-Kalibrierung nötig! Wird diese nicht durchge- führt kommt es zu Fehlfunktionen! Magnetkompass-Kalibrieren: (a) Drücken und halten Sie die Taste “Normal-Modus”. - Seite 6 (b) Heben Sie den Copter auf ca. 30 cm Höhe und drehen diesen langsam 6. GPS - Satellitensuche im Uhrzeigersinn. Drehen Sie den Copter so lange, bis die grünen LEDs Der Copter benötigt für einen erfolgreichen Flug im GPS Modus ausrei- langsam blinken.
-
Seite 7: Steuerung Des Modells
8. Landen Steuerung des Modells Methode 1: Drücken Sie den Stop/ Landeknopf des Controllers für ca. 2 Sekunden. Solange der linke Hebel nach oben gedrückt wird, steigt das Der Copter beginnt selbstständig mit der Landung. Hat der Copter auf Modell. Lassen Sie diesen los hält das Modell die vorgegebene dem Boden aufgesetzt drücken Sie den linken Hebel so lange nach unten, bis die Motoren aufhören zu laufen. -
Seite 8: Indoor Flug Ohne Gps
Indoor Flug ohne GPS Features 1. Schalten Sie die Fernsteuerung ein, die LED leuchtet rot und der Controller piept zwei Mal. Akku in den Copter einlegen und den Ein-/ Ausschalter für ca. 3 Sekunden drücken. Die LEDs des Copter blinken nun langsam. - Seite 9 4. Bindung: 360° Turn Arround: Eine Bindung ist nach einem Fernsteuerungsgwechsel nötig. Sie können das Modell in einen 360° Rundumflug schalten. Drücken Drücken Sie den Bindungs-Knopf des Controllers und schalten gleichzeitig Sie dazu die GPS-Mode Taste (7) für ca. 3 Sekunden. Der Controller den Sender ein.
- Seite 10 Auto-Return-Home: Fliegen Sie im Freien nur mit einem ausreichend starken GPS Signal. Wollen Sie, dass der Copter zu seinem Startpunkt zurückkehrt und landet, In der App werden die Anzahl der verfügbaren Satelliten angezeigt. haben Sie zwei Möglichkeiten. Es sollten min. 6 Satelliten angezeigt werden um ein sicheres Fliegen zu gewährleisten.
-
Seite 11: Copter Neu Kalibrieren
Umschaltung Mode 1 - Mode 2 Copter neu kalibrieren Das Modell wird im Mode 1 (steigen/ sinken (Pitch) auf dem linken Steuer- Sollte Ihr Modell unstabil fliegen oder immer abdriften usw. empfehlen knüppel) ausgeliefert. Es kann jedoch auch auf Mode 2 umgeschalten wir eine Kalibrierung des Modells vorzunehmen. -
Seite 12: Kamera Schwenken
SD Karte Kamera schwenken Die Kamera kann bis zu 90 ° per Fernsteuerung geschwenkt werden. Setzen Sie die SD Karte (nicht im Lieferumfang) in den Kartenschacht des Modells ein (Unterseite des Copters). Auf richtige Platzierung achten! Fotos und Videos werden auf der SD Karte gespeichert und können dann am Computer bearbeitet, gespeichert und angesehen werden. -
Seite 13: Rotorblätter Wechseln
Smartphonehalter Rotorblätter wechseln Lösen Sie die beiden Schrauben des Rotorblattes. Nehmen Sie das Rotorblatt ab und stecken ein neues auf. Achten Sie darauf, dass das richtige Blatt verwendet wird. Diese sind mit A oder B markiert, eine dazugehörige Markierung finden Sie auch auf dem jeweiligem Motor. Schrauben Sie das Rotorblatt wieder fest (Schrauben nicht überdrehen). - Seite 14 -Models, Drahthammerstrasse 22, 92224 Amberg, Deutschland Elektroaltgeräteverordnung Elektroartikel gehören nicht in den Hausmüll. Sie können Ihre alten, gebrauchten Elektroartikel unentgeltlich bei den öffentlichen Sammelstellen Ihrer Gemeinde abgeben. Gemäß der EAR Verordnung ist DF-Models registrierter Hersteller mit der WEEE-REG.-Nr DE30915550...
-
Seite 15: App Funktionen
APP Funktionen LARK2 Pro * Copter mit Fernsteuerung binden. * Öffnen Sie die WLAN Einstellungen Ihres Smartphones oder Tablett Für einige Funktionen des Modells benötigen Sie eine APP. und stellen eine Verbindung mit den Copter her. Diese ist kostenlos, werbe- und vierenfrei! Scannen Sie den passenden Passwort: 1234567890 (kann geändert werden) QR Code oder suchen manuell nach der App LARK2 Pro und * Öffnen Sie die APP Lark2 Pro... - Seite 16 5. Einstellungen 11. 360° Turn Arround Diverse Einstellungen der Kamera und des Copters möglich. Start der 360° Turn-Arround-Funktion via App. Siehe auch Seite 15. 6. Foto Abstand und Höhe können per App eingestellt werden. Löst die Aufnahme eines Fotos aus. 7.
- Seite 17 14. Waypoint Flug 5. Einstellungen Im aktiven GPS Modus sowie einer WiFi Verbindung zwischen Copter / Diverse Einstellungen der Kamera und des Copters möglich. Smartphone können Sie in der APP die Waypoint Funktion aufrufen. In einem festen Radius können auf der sich öffnenden Umge- bungskarte Punkte gesetzt werden, die der Copter dann abfliegt.
- Seite 18 Ersatzteilübersicht Best.Nr. Bezeichnung 9321 Ersatzakku 9322 Ersatzrotorblätter (4) 9323 Ersatzmotor Typ A 9324 Ersatzmotor Typ B 9325 Rotorblattaufnahme 9326 Flugregler rot 9327 Flugregler grün 9328 Empfängereinheit 9329 GPS Modul Hier können Sie iverse Kameraeinstellungen vornehmen. 9330 Geomagnetic Modul Das Passwort kann ebenfalls geändert werden. 9331 4K FPV-WiFi Kamera 9332...
- Seite 19 Declaration of Conformity in accordance with the Radio Equipment Directive (RED) 2014/53/EU Déclaration de conformitè CE (RED) 2014/53/EU N°9320 Hiermit wird erklärt, dass das Produkt: I hereby declare that the product: SkyWatcher LARK 4K dèclarons sous notre seule responsabilitè que le produit: Manual Artikelnummer: Product number: 9320 (EAN: 4250684193208) Numèro d‘article:...
- Seite 35 Drone/Camera settings...