Speed Monitor
Inhaltsverzeichnis
-
-
-
-
-
-
-
-
-
-
-
-
-
-
-
-
-
-
-
-
-
-
-
-
-
-
-
-
-
-
-
-
-
-
-
-
-
-
-
-
-
-
-
-
-
-
-
-
-
-
-
-
-
-
-
-
-
-
-
-
-
-
-
-
-
-
-
-
-
-
-
-
-
-
-
-
-
-
-
-
-
-
-
-
-
-
-
-
-
-
-
-
-
-
-
-
-
-
-
-
-
-
-
-
-
-
-
-
-
-
-
-
-
-
-
-
-
-
-
-
-
-
-
-
-
-
-
-
-
-
-
-
-
-
-
-
-
-
-
-
-
-
-
Function of this Document
77
-
-
-
-
-
-
-
Qualified Safety Personnel
79
-
Applications of the Device
79
-
-
Safety Notes on the Sensors Connected
80
-
General Safety Notes and Protective Measures
80
-
Environmental Protection
81
-
-
Separation of Materials
81
-
Tab. 1: Overview on Disposal by Components
81
-
-
-
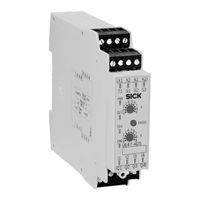
Fig. 1: Overview MOC3SA
83
-
Controls and Status Indicators
84
-
Tab. 2: Status Indicators MOC3SA
84
-
Fig. 2: Controls and Status Indicators MOC3SA
84
-
-
Tab. 3: Terminal Assignment MOC3SA
85
-
-
Operating Modes, General
86
-
Tab. 4: Operating Modes
86
-
Fig. 3: General Behaviour of the Switching Outputs Q1 to Q4
86
-
Operating Mode Group a
87
-
Tab. 5: Safety Figures that Can be Achieved with Different Encoders
87
-
Fig. 4: Sensor Signals in Operating Mode A-1/A-2
87
-
Fig. 5: Measuring Tolerance in Operating Modes A-1/A-2
87
-
Operating Mode Group B
88
-
Fig. 6: Sensor Signals in Operating Mode B-1
88
-
Fig. 7: Measuring Tolerance in Operating Mode B-2
88
-
Operating Mode Group C
89
-
Tab. 6: State Diagram: Possible State Transitions, Operating Modes C-1/C-2
89
-
Fig. 8: Sensor Signals in Operating Mode C-1
89
-
Fig. 9: Signal Diagram for State Transitions, Operating Modes C-1/C-2
90
-
Operating Mode Group D
92
-
Tab. 7: State Diagram: Possible State Transitions, Operating Modes D-1/D-2
92
-
Fig. 10: Sensor Signals in Operating Mode D-1
92
-
Fig. 11: Signal Diagram for State Transitions, Operating Modes D-1/D-2
93
-
Setting the Speed Limit F
95
-
-
-
Safety Outputs (Q1 to Q4)
95
-
Tab. 8: Setting the Speed Limit F
95
-
Application Diagnostic Outputs (X1, X2)
96
-
Tab. 9: States Application Diagnostic Output X2
96
-
Fig. 12: Signals Application Diagnostic Output X1
96
-
-
Device Behaviour and Reset
98
-
Automatic Reset and Enable
98
-
Fig. 13: Signal Diagram for Automatic Reset
98
-
Manual Reset and Enable
99
-
Fig. 14: Signal Diagram for Manual Reset
99
-
External Device Monitoring (EDM)
100
-
Limit Frequency F Max
100
-
-
Fig. 15: Effect of the Hysteresis on the Safe Outputs
101
-
-
Vibration at Standstill
103
-
Cable Break Detection
103
-
Tab. 10: "Vibration at Standstill" State
103
-
-
Mounting of the MOC3SA Speed Monitor
104
-
Fig. 16: Hanging the Module Onto the Mounting Rail
104
-
Dismantling the MOC3SA Speed Monitor
105
-
Replacement of the MOC3SA Speed Monitor
105
-
Fig. 17: Removing the Removable Terminals
105
-
Fig. 18: Removing the Module from the Mounting Rail
105
-
Electrical Installation
106
-
-
Tests before the Initial Commissioning
108
-
Initial Commissioning
108
-
Regular Inspection of the Protective Device by Qualified Safety Personnel
109
-
-
-
Accepting the System Configuration
110
-
-
In the Event of Faults or Errors
111
-
Safe State in Case of an Error
111
-
-
Error Indications and Diagnostics
112
-
Tab. 11: Error Indications and Diagnostics
112
-
Tab. 12: Error Types and Error Causes
113
-
-
Examples MOC3SA Speed Monitor with Safety Relay
114
-
Guard Unlocking with Standstill Detection
114
-
Fig. 19: Guard Unlocking with Standstill Detection and Drive Inhibit
114
-
Maintenance Operation with Reduced Speed
115
-
Fig. 20: Monitoring of Safely Reduced Speed for Operation During Set-Up
115
-
Monitoring of Three Axes with Reduced Speed
116
-
Fig. 21: Monitoring of Safely Reduced Speed for Setting up Several Cascaded Axes
116
-
Standstill Detection with Three Axes and Door Enable
117
-
Fig. 22: Standstill Detection and Door Enable with Several Cascaded Axes with Drive Inhibit
117
-
Examples MOC3SA Speed Monitor with UE410-MU
118
-
Guard Unlocking with Standstill Detection
118
-
Access Monitoring Using Light Curtain with Standstill Detection
119
-
-
-
10.1 Calculating the Resolution Z and the Speed Limit F
125
-
-
Determining the Resolution and the Speed Limit F Based on a Table of Values
126
-
Tab. 13: Table of Values for Determining the Resolution and Speed Limit
127
-
10.3 Determine the Resolution Z and the Speed Limit F
128
-
-
Technical Specifications
132
-
-
Tab. 14: Data Sheet MOC3SA
132
-
11.2 Dimensional Drawings
138
-
-
12.1 Ordering Information for the MOC3SA Speed Monitor
139
-
12.2 Accessories for the MOC3SA Speed Monitor
139
-
Tab. 15: Ordering Information for MOC3SA
139
-
Tab. 16: Accessories for MOC3SA
139
-
-
13.1 EU Declaration of Conformity
140
-
13.2 Checklist for the Manufacturer
142
-
-
List of Illustrations
143
-
-
A Propos de Ce Manuel
147
-
-
À Qui Cette Notice S'adresse-T-Elle
147
-
Étendue des Informations Fournies
147
-
Disponibilité des Fonctions
147
-
Abréviations/Sigles Utilisés
148
-
Notation et Symboles Utilisés Dans Ce Document
148
-
-
-
Domaine D'utilisation de L'appareil
149
-
Conformité D'utilisation
150
-
Consignes de Sécurité Concernant les Capteurs Raccordés
150
-
Consignes de Sécurité et Mesures de Protection D'ordre Général
150
-
Pour le Respect de L'environnement
151
-
-
-
Description du Produit
152
-
-
Touches de Commande et Affichage
154
-
Affectation des Bornes
155
-
Modes de Fonctionnement
156
-
Modes de Fonctionnement - Généralités
156
-
Groupe a de Modes de Fonctionnement
158
-
Groupe B de Modes de Fonctionnement
159
-
Groupe C de Modes de Fonctionnement
160
-
Groupe D de Modes de Fonctionnement
163
-
Réglage de la Limite de Régime de Rotation F
166
-
-
-
Sorties de Sécurité (Q1 à Q4)
167
-
Sorties D'état (X1, X2)
168
-
-
Comportement de L'appareil et Réarmement
170
-
Réarmement Automatique et Validation
170
-
Réarmement Manuel et Validation
171
-
Contrôle des Contacteurs Commandés (EDM)
172
-
Fréquence Limite F Max
172
-
-
Temps de Mise à Disposition
174
-
-
Détection de Rupture de Câble
175
-
-
Montage du Speed Monitor MOC3SA
176
-
Démontage du Speed Monitor MOC3SA
177
-
Échange du Speed Monitor MOC3SA
177
-
Installation Électrique
178
-
-
Tests et Essais Préalables à la Première Mise en Service
180
-
Première Mise en Service
180
-
Un Personnel Qualifié Doit Effectuer un Test Régulier de L'équipement de Protection
181
-
-
-
Préliminaires à la Configuration du Système
182
-
-
Comportement en cas de Défaillance
183
-
État de Sécurité en cas de Défaillance
183
-
-
Signalisation des Défauts et Diagnostic
184
-
Exemples D'application
186
-
Exemples Speed Monitor MOC3SA Avec Relais de Sécurité
186
-
Déverrouillage de la Porte de Protection Avec Détection D'arrêt
186
-
Mode Entretien Avec Vitesse Réduite
187
-
Surveillance de Trois Arbres à Vitesse Réduite
188
-
Détection de L'arrêt pour Trois Arbres et Libération de la Porte
189
-
Exemples Speed Monitor MOC3SA Avec UE410-MU
190
-
Déverrouillage de la Porte de Protection Avec Détection D'arrêt
190
-
Surveillance D'accès Avec Barrage Immatériel de Sécurité à la Détection de L'arrêt
191
-
Coupure D'entraînements
192
-
-
Calcul de la Résolution Z et de la Limite de Régime de Rotation F
197
-
-
Détermination de la Résolution et du Régime de Rotation Limite F
198
-
À Partir D'un Tableau de Valeurs
198
-
Détermination de la Résolution Z et du Régime de Rotation Limite F
200
-
À Partir D'un Diagramme
200
-
Caractéristiques Techniques
204
-
-
-
-
12.1 Références du Speed Monitor MOC3SA
211
-
12.2 Accessoires du Speed Monitor MOC3SA
211
-
-
13.1 Déclaration UE de Conformité
212
-
13.2 Liste de Vérifications à L'attention du Fabricant
214
-
13.3 Répertoire des Tableaux
215
-
13.4 Répertoire des Figures
215
