Herunterladen Inhalt Inhalt Diese Seite drucken
Inhaltsverzeichnis

Werbung

Verfügbare Sprachen
  • DE

Verfügbare Sprachen

  • DEUTSCH, seite 46
WINDLIGHT CURVE DC
CEILING FAN SUMMER-WINTER FUNCTION
VENTILADOR DE TECHO FUNCIÓN VERANO-INVIERNO
USER MANUAL

Werbung

Inhaltsverzeichnis
loading

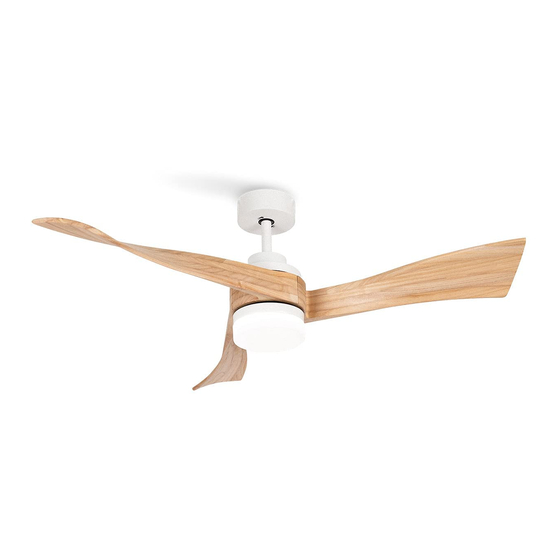
Inhaltszusammenfassung für Create WINDLIGHT CURVE DC

  • Seite 1 WINDLIGHT CURVE DC CEILING FAN SUMMER-WINTER FUNCTION VENTILADOR DE TECHO FUNCIÓN VERANO-INVIERNO USER MANUAL...
  • Seite 4: Inhaltsverzeichnis

    WINDLIGHT CURVE DC I N DE X ENGLISH ESPAÑOL Parts list Lista de piezas Safety instructions Instrucciones de seguridad Installation instructions Instrucciones de instalación Installation preparation Preparación de la instalación Downrod installation Preparación de la ubicación del ventilador Fixing the mounting bracket Instalación del soporte de montaje...
  • Seite 5: Inde X

    WINDLIGHT CURVE DC INDE X ITALIANO DEUTSCH Lista de peças Teileliste Istruzioni di installazione Sicherheitsanweisungen Istruzioni di sicurezza Installationsanweisungen Préparation de l’installation Vorbereitung der Installation Installazione della barra di sospensione Aufhängungsstange einbauen Installazione del supporto di montaggio Anbringen der Montagehalterung Collegamento della barra di sospensione all’alloggia-...
  • Seite 6: English

    EN G L I S H Thank you for choosing our ceiling fan. Before using the appliance, and to ensure the best use, carefully read these instructions. The safety precautions enclosed herein reduce the risk of death, injury and electrical shock when correctly adhered to.
  • Seite 7: Safety Instructions

    SAFETY INSTRUCTIONS When using any electrical appliance, basic safety precautions should always be observed. • Read this entire manual carefully before beginning installation. Save this instructions. • Use only original replacement parts. • To reduce the risk of personal injury, attach the fan directly to the support structure of the building according to these instructions, and use only the hardware supplied.
  • Seite 8: Downrod Installation

    DOW NROD INSTALL ATI ON • Choose the suspension bar that best suits your situation. • Remove the bar bolt, removing the pin, and pass the canopy (roof trim) and the engine can- opy through the suspension bar. Next, route the fan motor cables through the inside of the suspension bar.
  • Seite 9: Assembling And Hanging The Fan

    AS SE M B LI NG AND H ANGI NG TH E FAN Electrical wiring Canopy Hanging ball slot Decorative cover Cotter pin Bolt Adapter Fixing screw Cotter pin • If you wish to extend the hanging length of your fan, you must remove the hanging ball from the downrod provided to use with an extended downrod (included).
  • Seite 10: Remote Control Connection

    RE MO TE CO NTROL CONNECTIO N • Make the connection between the receiver cables and the fan motor cables following the color indications. Make sure the connection is tight. Ground wire Ground Neutral N wire Light L Remote control DC motor L receiver Input N...
  • Seite 11: Canopy Assembly

    CANO PY AS SE M B LY • Raise the canopy to hanging bracket, aligning loosened screws in hanging bracket with slotted holes in the canopy. • Twist the canopy to lock. Re-insert the screws and secure all the screws with a screw- driver.
  • Seite 12: Connections Panel Assembly

    CONNECTI ONS PANE L AS SE M B LY • Attach the connections plate up to the bottom of the fan by inserting the set screw heads into the key hole slots. Rotate them to place and tighten them to secure the plate. Lamp panel Lamp...
  • Seite 13: Ceiling Fan Without Led Light

    CEILING FAN WITHOUT LED LIGHT DECO R ATI V E COV E R AS SE M B LY • Once the connections plate has been assembled and secured, screw the decorative cover back to the connections plate using the central screw. CH ECK TH E I NSTALL ATIO N •...
  • Seite 14: Lista De Piezas

    E S PA ÑO L Gracias por elegir nuestro ventilador de techo. Antes de utilizar este electrodoméstico y para asegurar su mejor uso, por favor, lea detenidamente las instrucciones. Las medidas de seguridad aquí indicadas reducen el riesgo de incendio, descarga eléctrica y lesiones cuando se siguen correctamente.
  • Seite 15: Instrucciones De Seguridad

    INSTRUCCIONES DE SEGURIDAD Al utilizar cualquier aparato eléctrico, deben observarse siempre las siguientes precaucio- nes básicas de seguridad. • Lea este manual con detenimiento antes de empezar la instalación. Guarde estas ins- trucciones. • Para reducir el riesgo de sufrir cualquier daño personal, acople el ventilador directamen- te a la estructura de soporte del edificio siguiendo estas instrucciones y utilice única- mente el material proporcionado.
  • Seite 16: Preparación De La Instalación

    PRE PAR ACI ÓN DE L A INSTAL ACIÓ N • Para evitar daños personales y heridas, asegúrese de que el lugar donde va a colgar el ventilador permite que las as- pas estén a una distancia igual o superi- or a 2,3 m del suelo y 76 cm de la pared u 76 cm desde obstáculo más cercano.
  • Seite 17: Montaje Y Colgado Del Ventilador

    Techo de madera Techo de hormigón Fije el soporte de montaje con los tornillos Practique orificios con una broca de 8 mm, y las arandelas para madera en las uniones de acuerdo con la longitud de los tornillos del techo. de expansión.
  • Seite 18: Conexión Del Mando A Distancia

    Consejo: Para facilitar la introducción de los cables en la barra, coloque un poco de cinta aislante alrededor de los cables. Esto le ayudará a mantenerlos juntos mientras los inserta en la barra. • Afloje los tornillos de fijación y la arandela de la parte superior de la carcasa del motor. Retire los pasadores de la barra (si no lo ha hecho aún).
  • Seite 19: Montaje Del Florón

    M ONTA J E DE L FLORÓ N • Levante el florón hasta el soporte de montaje y alinee los tornillos aflojados en el soporte de montaje con los orificios del florón. • Gire el florón para ajustarlo. Reinserte los tornillos y fíjelos con un destornillador. •...
  • Seite 20: Montaje Del Panel De Conexiones

    M O NTA J E DE L PANE L DE CO NE XI ONE S • Enganche la placa a la parte inferior del ventilador insertando las cabezas de los tornil- los en los orificios destinados a ello. Enrosque los tornillos y después asegúrelos. Panel de conexiones Tornillos del panel...
  • Seite 21: Ventilador De Techo Sin Luz Led

    VENTILADOR DE TECHO SIN LUZ LED MO NTA J E DE L A TAPA DECO R ATI VA • Una vez se ha montado y asegurado la placa de conexiones, vuelva a atornillar la tapa decorativa a la placa de conexiones con el tornillo central. CO M PRO BAR L A I NSTAL ACIÓ...
  • Seite 22: Português

    P O RT U GU Ê S Obrigado por escolher o nosso ventilador de teto. Antes de utilizar o dispositivo e para asse- gurar uma boa utilização do mesmo, leia cuidadosamente estas instruções. Seguir estas precauções de segurança corretamente reduz o risco de morte, ferimentos ou choque elétrico.
  • Seite 23: Instruções De Segurança

    INSTRUÇÕES DE SEGURANÇA Ao utilizar qualquer aparelho elétrico, dever-se-ão ter sempre em conta as seguintes precauções básicas de segurança. • Leia este manual com atenção antes de começar a instalação. Guarde estas instruções. • Para reduzir o risco de sofrer qualquer dano pessoal, acople o ventilador diretamente à estrutura de suporte do edifício seguindo estas instruções e utilize apenas o material pro- porcionado.
  • Seite 24: Preparação Da Instalação

    P RE PAR AÇÃO DA INSTAL AÇÃO • Para evitar danos pessoais e ferimentos, assegure-se de que o lugar onde vai pen- durar o ventilador permite que as pás es- tejam a uma distância igual ou superior a 2,3 m do solo e a 50 cm da parede ou 76 cm da obstáculo mais próximo.
  • Seite 25: Fixação Do Suporte De Montagem

    F IX AÇÃO DO S UP ORTE DE M O NTAGE M • A caixa de tomada e a viga devem estar bem montadas e ser capazes de suportar de forma fiável, pelo menos, o peso do ventilador. Teto de madeira Teto de betão Fixe de forma segura o suporte de mon- Faça orifícios com uma broca de 8 mm, de...
  • Seite 26: Ligação Do Comando À Distância

    • Insira o pino de bloqueio na extremidade da barra de suspensão e eleve a bola. • Assegure-se de que o pino de bloqueio está alinhado com as ranhuras do interior da bola e fixe o parafuso de fixação. • Conselho: Para facilitar a introdução dos cabos na barra, coloque um pouco de fita isolan- te à...
  • Seite 27: Montagem Do Canopla

    MO NTAG E M DO CANO PL A • Levante a canopla até ao suporte de montagem e alinhe os parafusos soltos no suporte de montagem com os orifícios do florão. • Vire a canopla para ajustar. Reinsira os parafusos e fixe-os com uma chave de fendas. •...
  • Seite 28: Montagem Do Patch Panel

    M O NTAG E M DO PATCH PANE L • Prenda a placa na parte inferior do ventilador inserindo as cabeças dos parafusos nos orifícios designados. Aperte os parafusos e prenda-os. Painel de remendo Parafusos do painel VENTILADOR DE TETO COM LUZ LED M ONTAG E M DO PAI NE L LE D E TE L A DECOR ATI VA •...
  • Seite 29: Ventilador De Teto Sem Luz Led

    VENTILADOR DE TETO SEM LUZ LED M O NTAG E M DA TAMPA DECO R ATIVA • Após a montagem e fixação da placa de conexão, aparafuse a tampa decorativa de volta na placa de conexão com o parafuso central. V E RIF I QU E A I NSTAL AÇÃO •...
  • Seite 30: Français

    F R A N Ç A I S Nous vous remercions d’avoir choisi notre ventilateur de plafond. Avant d’utiliser cet appareil élec- troménager et pour garantir une utilisation optimale, lire attentivement les instructions. Les mesures de sécurité visées ici réduisent le risque d’incendie, d’électrocution et de bles- sures lorsqu’elles sont correctement suivies.
  • Seite 31: Consignes De Sécurité

    CONSIGNES DE SÉCURITÉ Lors de l’utilisation de tout appareil électrique, il convient toujours de suivre les précautions suivantes en matière de sécurité. • Lisez attentivement ce manuel avant de commencer l’installation. Conservez ce manuel. • Afin d’éviter tout risque de blessure, montez directement le ventilateur sur le support situé au plafond en suivant ces instructions et utilisez uniquement le matériel fourni.
  • Seite 32: Préparation De L'installation

    PRÉ PAR ATI ON DE L’I NSTAL L ATIO N • Afin d’éviter tout risque de blessures, assurez-vous que le lieu dans lequel vous allez installer le ventilateur a les dimensions suffisantes pour permettre une distance égale ou supérieure à 2,3 76 cm entre m entre le sol et les pales et de 76 cm les pales et...
  • Seite 33: Installation Du Support

    INSTAL L ATI ON DU SU PP O RT • La boîte de sortie et la poutre doivent être solidement installées et doivent pouvoir sup- porter de manière fiable au moins le poids du ventilateur. Plafonds en béton / plâtre Plafonds en bois Percez des trous avec un foret de 8 mm, en Fixez solidement le support de montage...
  • Seite 34: Connexion De La Télécommande

    • Placez la goupille butoir à l’extrémité de la tige et faites monter la boule. • Assurez-vous que la goupille butoir est correctement alignée sur les rainures de l’in- térieur de la boule et serrez la vis de fixation. Conseil : pour faciliter l’introduction des câbles dans la tige, placez un peu de ruban isolant autour des câbles.
  • Seite 35: Montage Du Canopée

    MO NTAG E DU CANOPÉ E • Soulevez le canopée jusqu’au support et faites correspondre l’endroit des vis du sup- port avec les orifices du canopée. • Faites tourner le fleuron pour le placer correctement. Remettez les vis et vissez avec un tournevis.
  • Seite 36: Montage Du Panneau De Brassage

    M O NTAG E DU PANNEAU DE B R AS SAGE • Accrochez la plaque au bas du ventilateur en insérant les têtes de vis dans les trous désignés. Visser les vis, puis les fixer. Panneau de raccordement Vis de panneau VENTILATEUR DE PLAFOND AVEC LUMIÈRE LED MO NTAG E DU PANNEAU L E D E T DE L’ÉCR AN DÉCOR ATI F...
  • Seite 37: Ventilateur De Plafond Sans Lumière Led

    VENTILATEUR DE PLAFOND SANS LUMIÈRE LED AS SE M B L AG E DU COUVE RCLE DÉCO R ATI F • Une fois la plaque de connexion montée et fixée, revissez le couvercle décoratif sur la plaque de connexion avec la vis centrale. V É...
  • Seite 38: Italiano

    I TA L I A N O Grazie per aver scelto il nostro ventilatore da soffitto. Prima di utilizzare questo elettrodo- mestico e al fine di garantirne il miglior uso, leggere attentamente le istruzioni. Se seguite in modo corretto, le misure di sicurezza qui indicate riducono il rischio di incendio, scarica elettrica e lesioni.
  • Seite 39: Istruzioni Di Installazione

    ISTRUZIONI DI SICUREZZA Quando si utilizza qualunque apparecchio elettrico è necessario osservare sempre le se- guenti precauzioni fondamentali di sicurezza. • Leggere attentamente questo manuale prima di cominciare l’installazione. Conservare queste istruzioni. • Per ridurre il rischio di danni personali, attaccare il ventilatore direttamente alla struttura di supporto dell’edificio seguendo queste istruzioni e usare esclusivamente il materiale in dotazione.
  • Seite 40: Préparation De L'installation

    PRÉ PAR ATI ON DE L’I NSTALL ATI ON • Per evitare danni personali e ferite, assi- curarsi che il luogo in cui si appenderà il ventilatore consenta alle pale di essere a una distanza uguale o superiore a 2,3 m da terra e 76 cm dalla parete o dall’os- 76 cm dalla tacolo più...
  • Seite 41: Installazione Del Supporto Di Montaggio

    INSTAL L A Z I ONE DE L SUPP O RTO DI MO NTAG G IO • Il supporto metallico e la trave devono essere installati in modo sicuro e in grado di sopportare il peso del ventilatore. Soffitti in legno Soffitti in cemento/intonaco Fissare saldamente la staffa di montaggio Realizzare i fori con una punta da 8 mm, a...
  • Seite 42: Connessione Al Telecomando

    • Inserire il componente di fissaggio nell’estremità dell’asta di sospensione ed elevare la sfera. • Assicurarsi che il componente di fissaggio sia allineato con le fessure all’interno della sfera e stringere la vite di fissaggio. Suggerimento: per facilitare l’introduzione dei cavi nell’asta, applicare del nastro isolante intorno ai cavi.
  • Seite 43: Montaggio Della Calotta

    MO NTAG G I O DE LL A CALO T TA • Sollevare la coppa superiore fino al supporto di montaggio e allineare le viti allentate nel supporto di montaggio con i fori della coppa superiore. • Ruotare la coppa superiore per regolarla. Reinserire le viti e fissarle con il cacciavite. •...
  • Seite 44: Montaggio Del Pannello Patch

    M O NTAG G I O DE L PANNE LLO PATCH • Agganciare la piastra alla parte inferiore della ventola inserendo le teste delle viti nei fori designati. Avvitare le viti, quindi fissarle. Pannello patch Viti del pannello VENTILATORE DA SOFFITTO CON LUCE LED M ONTAG G IO DE L PANNE LLO LE D E DE LLO SCH E RMO DECO R ATI VO •...
  • Seite 45: Ventilatore Da Soffitto Senza Luce Led

    VENTILATORE DA SOFFITTO SENZA LUCE LED AS SE M B L AG G I O DE LL A CO PE RTUR A DECOR ATI VA • Dopo che la piastra di collegamento è stata montata e fissata, riavvitare il coperchio decorativo sulla piastra di collegamento con la vite centrale.
  • Seite 46: Teileliste

    D E U TS C H Vielen Dank, dass Sie sich für unseren Deckenventilator entschieden haben. Bevor Sie dieses elek- trische Haushaltsgerät verwenden und um die optimale Bedienung sicherzustellen, lesen Sie bitte diese Anleitung aufmerksam durch. Die hier angegebenen Sicherheitsvorkehrungen verringern bei ordnungsgemäßer Einhaltung das Brandrisiko, das Risiko von elektrischen Entladungen und von Verletzungen.
  • Seite 47: Sicherheitsanweisungen

    SICHERHEITSANWEISUNGEN Bei der Verwendung eines beliebigen Elektrogeräts sind stets die folgenden grundlegenden Sicherheitsvorkehrungen zu befolgen. • Lesen Sie vor der Montage diese Anleitung aufmerksam durch. Bewahren Sie diese An- leitung auf. • Befestigen Sie den Ventilator zur Senkung des Risikos von Personenschäden direkt an der tragenden Gebäudestruktur.
  • Seite 48: Vorbereitung Der Installation

    VORB E RE I TU NG DE R I NSTALL ATI ON • Vergewissern Sie sich zur Verhütung von Personenschäden und Verletzun- gen, dass die Flügel am Aufhängungsort mindestens 2,30 m vom Boden und 76 cm von der nächsten Wand oder dem 76 cm zur nächsten Hindernis entfernt sind.
  • Seite 49: Anbringen Der Montagehalterung

    ANB RING E N DE R M ONTAGE H ALTE RUNG • Der Ausgangskasten und der Balken müssen sicher installiert sein und mindestens das Gewicht des Ventilators zuverlässig tragen können. Beton-/Gipsdecken Holzdecken Bohren Sie Löcher mit einem 8-mm-Bohrer Befestigen Sie die Montagehalterung sich- entsprechend der Länge der Spreizschrau- er mit Holzschrauben und Unterlegschei- ben.
  • Seite 50: Verbindung Über Fernbedienung

    • Stecken Sie den Anschlagstift in das Ende der Aufhängungsstange und schieben Sie Kugel hinauf. • Vergewissern Sie sich, dass der Anschlagstift an den Schlitzen in der Kugel ausgerichtet ist und ziehen Sie die Befestigungsschraube an. Tipp: Wickeln Sie ein wenig Isolierband um die Kabel, damit sie sich leichter in die Stange einführen lassen.
  • Seite 51: Anbringen Der Rosette

    ANB RING E N DE R ROSE T TE • Schieben Sie die Rosette bis zur Montagehalterung hinauf und richten Sie die gelösten Schrauben an der Montagehalterung an den Bohröffnungen der Rosette aus. • Drehen Sie die Rosette zum Justieren. Setzen Sie die Schrauben wieder ein und ziehen Sie sie mit einem Schraubenzieher fest.
  • Seite 52: Montage Des Patchpanels

    MO NTAG E DE S PATCH PANE L S • Haken Sie die Platte an der Unterseite des Lüfters ein, indem Sie die Schraubenköpfe in die dafür vorgesehenen Löcher einsetzen. Schrauben einschrauben und festziehen. Patchfeld Plattenschrauben DECKENVENTILATOR MIT LED-LICHT M O NTAG E DE S LE D-PANE L S UND DE S DE KOR ATIV E N B I LDSCHIRM S •...
  • Seite 53: Deckenventilator Ohne Led-Licht

    DECKENVENTILATOR OHNE LED-LICHT ZU SAM ME NBAU DE R DE KO R ATIV E N AB DECKUNG • Nachdem die Verbindungsplatte montiert und gesichert wurde, schrauben Sie die de- korative Abdeckung mit der Mittelschraube wieder auf die Verbindungsplatte. Ü B E RP RÜ F E N SI E DIE INSTAL L ATIO N •...
  • Seite 54: Nederlands

    N E D E R L A N D S Bedankt voor het kiezen van onze plafondventilator. Lees de instructies aandachtig door voor- dat u dit apparaat gebruikt en om er zeker van te zijn dat u het optimaal gebruikt. De hier vermelde veiligheidsmaatregelen verminderen het risico op brand, elektrische schok- ken en letsel als ze correct worden opgevolgd.
  • Seite 55: Veiligheidsinstructies

    VEILIGHEIDSINSTRUCTIES Bij het gebruik van een elektrisch apparaat moeten de volgende fundamentele veiligheids- maatregelen altijd in acht worden genomen. • Lees deze handleiding zorgvuldig door voordat u met de installatie begint. Bewaar deze instructies. • Om het risico van persoonlijk letsel te verminderen, bevestigt u de ventilator rechtstreeks op de ondersteunende structuur van het gebouw volgens deze instructies en gebruikt u alleen het meegeleverde materiaal.
  • Seite 56: Installatie Voorbereiding

    I NSTAL L ATI E VOORB E RE IDING • Om persoonlijk letsel en letsel te voorkomen, moet u ervoor zorgen dat de plaats waar de ventilator moet worden opgehangen de bladen op een afstand van 2,3 m of meer van de grond en 76 cm 76 cm van de van de dichtstbijzijnde muur of obstakel dichtstbijzi-...
  • Seite 57: Montagebeugel Installatie

    MO NTAG E B E U G E L INSTALL ATI E • De afvoerkast en -balk moeten stevig zijn geïnstalleerd en in staat zijn om ten minste het gewicht van de ventilator betrouwbaar te dragen. Betonnen / gipsplafonds Houten daken Bevestig de montagebeugel stevig met Boor gaten met een 8 mm boor, afhankelijk houtschroeven en ringen aan de balken.
  • Seite 58: Afstandsbediening Verbinding

    • Steek de borgpen in het uiteinde van de ophangstang en breng de bal omhoog. • Zorg ervoor dat de borgpen is uitgelijnd met de groeven in de kogel en draai de stelschroef vast. Advies: Om het gemakkelijker te maken om de draden in de staaf te voeren, wikkelt u wat elektrische tape om de draden.
  • Seite 59: Montage Van De Rozet

    M O NTAG E VAN DE ROZE T • Breng de rozet omhoog tot aan de montagebeugel en lijn de losgedraaide schroeven in de montagebeugel uit met de gaten in de rozet. • Draai de vin om aan te passen. Plaats de schroeven terug en zet ze vast met een schroe- vendraaier.
  • Seite 60: Montage Van Het Patchpaneel

    MO NTAG E VAN H E T PATCH PANE E L • Haak de plaat aan de onderkant van de ventilator door de schroefkoppen in de daarvoor bestemde gaten te steken. Draai de schroeven vast en zet ze vast. Patchpaneel Paneel schroeven PLAFONDVENTILATOR MET LED-LICHT M O NTAG E VAN HE T L E D PANE E L E N HE T DECOR ATI E VE SCHE RM...
  • Seite 61: Plafondventilator Zonder Led-Licht

    PLAFONDVENTILATOR ZONDER LED-LICHT DE DECOR ATIE VE HO E S MO NTE RE N • Nadat de aansluitplaat is gemonteerd en vastgezet, schroeft u de decoratieve af- dekking met de middelste schroef weer op de aansluitplaat. CONTROL E E R DE INSTALL ATIE •...
  • Seite 62: Polski

    P O LS K I Dziękujemy za wybranie naszego wentylatora sufitowego. Przed rozpoczęciem korzystania z tego urządzenia i aby zapewnić jego najlepsze wykorzystanie, należy uważnie przeczytać ins- trukcję. Wymienione tutaj środki bezpieczeństwa zmniejszają ryzyko pożaru, porażenia prądem ele- ktrycznym i obrażeń, jeśli są właściwie przestrzegane. Instrukcję należy przechowywać w be- zpiecznym miejscu do wykorzystania w przyszłości, jak również...
  • Seite 63: Instrukcje Bezpieczeństwa

    INSTRUKCJE BEZPIECZEŃSTWA Podczas korzystania z dowolnego urządzenia elektrycznego należy zawsze przestrzegać na- stępujących podstawowych środków ostrożności. • Prosimy o uważne przeczytanie niniejszej instrukcji przed rozpoczęciem instalacji. Zacho- waj te instrukcje. • Aby zmniejszyć ryzyko obrażeń ciała, należy przymocować wentylator bezpośrednio do konstrukcji nośnej budynku zgodnie z niniejszymi instrukcjami i używać...
  • Seite 64: Przygotowanie Do Instalacji

    PRZ YG O TOWANI E DO INSTAL ACJI • Aby uniknąć obrażeń ciała i obrażeń ciała, upewnij się, że miejsce, w którym ma być zawieszony wentylator, pozwala na umieszczenie łopatek w odległości równej lub większej niż 2,3 m od ziemi 76 cm od i 76 cm od najbliższej ściany lub przesz- najbliższej...
  • Seite 65: Montaż Wspornika Montażowego

    M ONTA Ż WSP ORNI K A M ONTA Ż OW EGO • Skrzynka wylotowa i belka muszą być solidnie zainstalowane i zdolne do pewnego utrzymania co najmniej ciężaru wentylatora. Stropy betonowe / gipsowe Drewniane dachy Wywiercić otwory wiertłem 8 mm zgodnie z Mocno przymocuj wspornik montażowy za długością...
  • Seite 66: Połączenie Zdalnego Sterowania

    Rada: Aby ułatwić wprowadzanie przewodów do pręta, owiń je taśmą izolacyjną. Pomoże ci to utrzymać je razem podczas wkładania ich do paska. • Poluzuj wkręty ustalające i podkładkę na górze obudowy silnika. Usuń szpilki z paska (jeśli jeszcze tego nie zrobiłeś). Przełóż rozetę przez pręt. •...
  • Seite 67: Montaż Rozety

    M ONTA Ż ROZ E T Y • Podnieś rozetę do wspornika montażowego i wyrównaj poluzowane śruby wspornika mon- tażowego z otworami w rozecie. • Obróć płetwę, aby wyregulować. Ponownie włóż śruby i zamocuj je śrubokrętem. • Po przymocowaniu wspornika montażowego do skrzynki przyłączeniowej można przystąpić do zawieszenia wentylatora.
  • Seite 68: Montaż Panelu Krosowego

    M ONTA Ż PANE LU KROSOW EGO • Zawiesić płytę na spodzie wentylatora, wkładając łby śrub w wyznaczone otwory. Wkręć śruby, a następnie zabezpiecz je. Panel krosowy Śruby do paneli WENTYLATOR SUFITOWY Z OŚWIETLENIEM LED M ONTA Ż PANE LU LE D I E KR ANU DE KOR ACYJ NEGO •...
  • Seite 69: Wentylator Sufitowy Bez Światła Led

    WENTYLATOR SUFITOWY BEZ ŚWIATŁA LED M ONTA Ż OZ DOB NE J OSŁONY • Po zamontowaniu i zabezpieczeniu płytki przyłączeniowej przykręcić pokrywę dekora- cyjną z powrotem do płytki łączącej za pomocą środkowej śruby. SP R AW DŹ I NSTAL ACJ Ę •...
  • Seite 72 Made in P.R.C.

Inhaltsverzeichnis