Seite 1
ENGLISH Please read instructions thoroughly before operation and retain it for future reference. The image shown above may differ from the actual product appearance. ENGLISH 782, 781, 760, 761, 782A, 502, 501, 560, 561, 502A_V1.4...
1.2 FRONT PANEL 1) LED Indication The following LEDs will be on when: HDD: HDD is reading or recording HDD Full: HDD is full. ALARM: Once the alarm is triggered TIMER: When timer recording is turned on PLAY: Under playing status REC: Under recording status 2) MENU Press “MENU”...
Seite 4
Press “ ” button to show the 4 channel display modes. Press “-” button to change the setting in the menu. 8) SEQ /+ Press “SEQ” button to activate the call monitor function, and press again to quit. Press ”+” button to change the setting in the menu. or POWER Press this button long enough to turn on/off your DVR.
1.3 REAR PANEL ‧ MODEL 1 MONIT O R CA LL LOOP INP UT LOOP INP UT LOOP INP UT LOOP INP UT LINK ACT . EXT ERNAL I/O DC 19V ‧ MODEL 2 MONIT OR CA LL LOO P INP UT LOOP INP UT...
Seite 6
1) 75Ω / HI-IMPEDANCE When using LOOP function, please switch to HI-IMPEDANCE. Otherwise, please switch to 75Ω. 19) LOOP / INPUT (For channel 1~4) LOOP: Video output connector. INPUT: Connect to video sources, such as cameras. Note: If you want to playback the video with audio, please connect an audio camera to the correct channel. Model 1, 2 &...
2 GETTING STARTED 2.1 GETTING STARTED Connect all the devices to construct a surveillance system. Install HDD: The HDD must be installed before the DVR is turned on. Please refer to Appendix #1 for HDD installation instructions. Connect cameras, monitors and external devices. Please refer to the section “1.3 REAR PANEL” for connection, and Appendix#2 for pin configurations of the external I/O port.
3. BASIC OPERATION 3.1 RECORDING This device offers three recording modes: manual record, event record and timer record. If the power is off accidentally, the recorded video data will not be lost and is safely stored in the HDD. The device will return to the original recording status after the power is on again.
Press one of the number buttons from 1-4 to show the selected channel in the full screen. ‧ Slow Playback Model 1, 2 & 5: Press “SLOW” button to get 1/4X speed playback and press twice to get 1/8X speed playback. Model 3 &...
◎ HDD Installation for Model 2, 3 and 4 Loosen the screws on the upper cover and open the upper cover of the DVR. 步驟2: 5) Screw out the HDD bracket. 6) Get suitable brand HDD and set the HDD mode (Master or Single). 7) Screw HDD onto the HDD bracket, two screws for each side.
1.3 背板說明 ‧ MODEL 1 MONIT O R CA LL LOOP INP UT LOOP INP UT LOOP INP UT LOOP INP UT LINK ACT . EXT ERNAL I/O DC 19V ‧ MODEL 2 MONIT OR CA LL LOO P INP UT LOOP INP UT LO OP...
Seite 16
1) 75Ω / HI-IMPEDANCE 當使用回路功能時,請切換至 HI-IMPEDANCE。否則切換至至 75Ω。 LOOP / INPUT (1~4 路) LOOP (影像迴路輸出 1–4 路):影像輸出。 INPUT (影像輸入 1–4 路):連接影像來源,如攝影機。 註:如果您想要未來回放的影片是有收錄聲音,請將支援麥克風功能的攝影機接到正確頻道。 Model 1、Model 2 與 Model 5:請將支援麥克風功能功能的攝影機接到 DVR 背板的 INPUT1 與/或 INPUT2。 Model 3 與 Model 4:請將支援聲音功能的攝影機接到 DVR 背板的 INPUT1。 MONITOR 連接主畫面輸出螢幕。...
リアパネル ‧ MODEL 1 MONIT O R CA LL LOOP INP UT LOOP INP UT LOOP INP UT LOOP INP UT LINK ACT . EXT ERNAL I/O DC 19V ‧ MODEL 2 MONIT OR CA LL LOO P INP UT LOOP INP UT LO OP...
Seite 31
FRANCAIS Pour des instructions détaillées, référez-vous au manuel utilisateur. Lisez toutes les instructions avant toute manipulation et les conservez pour toute référence ultérieure. L’ image montrée ci-dessus peut être différente de l’apparence du produit actuel. FRANCAIS 782, 781, 760 / 502, 501, 560_V0.98...
Seite 32
TABLE DES MATIÈRES 1. FONCTIONS ..........................1 1.1 CONTENU DE L’EMBALLAGE..........................1 1.2 FACE AVANT ................................2 1.3 FACE ARRIERE................................4 2. PREPARATION ..........................6 2.1 PREPARATION ................................6 2.2 REGLAGE TEMPS SYSTEME ..........................6 3. FONCTIONS DE BASE ......................7 3.1 ENREGISTREMENT ..............................7 3.2 RELECTURE ................................7 APPENDICE 1 –...
1.2 FACE AVANT 60) VOYANTS LUMINEUX (LED) HDD : le DD est en lecture ou en enregistrement HDD Full : le DD est plein. ALARM : une fois l’alarme est déclenchée TIMER : lorsque l’enregistrement programme est activé PLAY : état de lecture REC : état d’enregistrement 61) “MENU”...
Seite 34
72) “HAUT / PAUSE , BAS / STOP, GAUCHE / REMBOBINAGE RAPIDE ,DROITE / AVANCE RAPIDE“ Appuyer sur la touche “▲▼◄►“ pour déplacer le curseur vers le Haut / Bas / Gauche / Droite. En mode Relecture, appuyer sur la touche “ pour faire une pause de lecture.
1.3 FACE ARRIERE ‧ Modèle 1 MONIT O R CA LL LOOP INP UT LOOP INP UT LOOP INP UT LOOP INP UT LINK ACT . EXT ERNAL I/O DC 19V ‧ Modèle 2 MONIT OR CA LL LOO P INP UT LOOP INP UT...
Seite 36
15) 75Ω / HI-IMPEDANCE En utilisant la fonction Loop, commutez vers HI. Quand vous n’utilisez pas la fonction Loop, commutez vers 75Ω. 78) LOOP / INPUT (CANAL 1 - 4) LOOP: Sortie Vidéo. INPUT: pour se connecter à des sources vidéo (par ex. des caméras). 79) MONITOR (MONITEUR) Pour se connecter au moniteur principal.
2. PREPARATION 2.1 PREPARATION Raccordez de tous les périphériques pour construire une surveillance. 13. Installez le DD: Le DD doit être installé avant d’allumer le DVR. 14. Raccordez les cameras. 15. Raccordez les moniteurs. 16. Raccordez les périphériques externes. 17. Raccordez le cordon AC d’alimentation à l’adaptateur et branchez le au secteur. Le “...
3. FONCTIONS DE BASE 3.1 ENREGISTREMENT Le DVR offre trois modes d'enregistrement : enregistrement manuel, enregistrement événement, et enregistrement programmé. En cas de coupure accidentelle d’alimentation, les fichiers vidéo enregistrés restent stockés dans le DD. Le DVR revient à son état original d'enregistrement lorsque le courant est rétabli. ‧...
‧ RELECTURE AU RALENTI: Modèle 1 et Modèle 2: appuyer sur la touche “SLOW” pour avoir 1/4X de la vitesse de relecture et appuyer sur la touche deux fois pour avoir 1/8X de la vitesse. Modèle 3: appuyer sur la touche “SLOW” pour avoir 1/2X de la vitesse. ‧...
◎ Modèle le 2 & 3 : Suivez attentivement les étapes pour assurer une installation correcte. *** Note: placez le DD en "Mode Maître" ou "Mode Seul”. *** Enlevez le couvercle du DVR et dévissez le support. 步驟13: 16) Vissez le DD au support DD. (Se référer aux Fig.1 & 2) 17) Raccordez le DD au câble d’alimentation et au BUS IDE (bien s’assurer d’aligner avec précision le DD aux PINs de connexion).
Seite 41
DEUTSCH Bitte entnehmen Sie detaillierte Instruktionen der Bedienungsanleitung. Bitte lesen Sie die Instruktionen sorgfältig vor Inbetriebnahme und verwahren sie zum Nachschlagen. Die obig gezeigten Abbildungen können vom tatsächlichen Produktaussehen abweichen. The image shown above may differ from the actual product appearance. DEUTSCH 782, 781, 760, 502, 501, 560_V0.98...
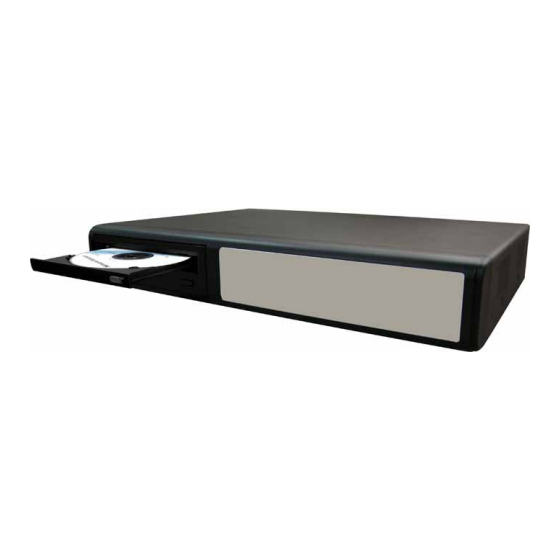
1.2 FRONTPLATTE 89) LED ANZEIGEN HDD: HDD liest oder nimmt auf HDD Full: HDD ist voll ALARM: Bei Alarmauslösung TIMER: Wenn die Timeraufnahme aktiviert ist PLAY: Im Wiedergabemodus REC: Im Aufnahmemodus 90) MENU Drücken Sie den “MENU”-Knopf, um ins Hauptmenü zu gelangen. 91) ENTER / SET Drücken Sie den “ENTER”-Knopf zur Bestätigung.
Seite 44
101) HOCH / PAUSE , RUNTER / STOP, LINKS / SCHNELL-RÜCKLAUF, RECHTS / SCHNELL-VORLAUF Drücke zu Bewegen des Cursors hoch / runter / links / rechts. Im Wiedergabemodus, drücke “ ”-Knopf zum Pausieren der Wiedergabe Im Wiedergabemodus, drücke “ ”-Knopf zum Stop der Wiedergabe Im Wiedergabemodus, drücke “...
1.3 RÜCKWAND ‧ Modell 1 MONIT O R CA LL LOOP INP UT LOOP INP UT LOOP INP UT LOOP INP UT LINK ACT . EXT ERNAL I/O DC 19V ‧ Modell 2 MONIT OR CA LL LOO P INP UT LOOP INP UT LO OP...
Seite 46
16) 75Ω / HI-IMPEDANCE Schalten Sie bitte bei Benutzung der SCHLEIF-Funktion auf HI-IMPEDANCE. Wenn Sie die Schleif –Funktion nicht nutzen, schalten Sie bitte auf 75Ω. 17) INPUT (VIDEOEINGANG, KANAL 1 - 4): Verbinde mit Videoquellen, z.B. Kameras. LOOP (SCHLEIF, KANAL 1 - 4): Videoausgang. 18) MONITOR Anschluss von Hauptmonitor.
2 ERSTE SCHRITTE 2.1 ERSTE SCHRITTE Schließen Sie alle Geräte an, damit der DVR bereit zur Überwachung ist. 18. Installation der HDD: Die HDD muss installiert werden, bevor der DVR eingeschaltet wird. Siehe Anhang #1 bzgl. HDD- Installationsanweisungen. 19. Schließe Kameras, Monitore und externe Geräte an. Siehe “Abschnitt 1.3 Rückwand” bzgl. der Anschlüsse. Siehe Anhang #2 bzgl.
3. GRUNDFUNKTIONEN 3.1 AUFNAHME Der DVR bietet drei Aufnahmemodi: manuelle Aufnahme, Ereignis-Aufnahme und Timer-Aufnahme. Wenn der Strom versehentlich abgestellt wird, werden aufgenommene Videodateien auf den HDDs gespeichert. Der DVR wird zum ursprünglichen Aufnahmestatus zurückkehren, wenn wieder Strom zur Verfügung steht. ‧...
‧ LANGSAME WIEDERGABE Modell 1 und 2: Drücken Sie “SLOW” für Wiedergabegeschwindigkeit 1/4X und drücken Sie doppelt für Wiedergabegeschwindigkeit 1/8X. Modell 3: Drücken Sie “SLOW” für Wiedergabegeschwindigkeit 1/2X. ‧ Audio SLOW ZOOM Drücken Sie oder um einen Audiokanal aus den folgenden Optionen auszuwählen: AUDIO AUDIO 1 (L) –...
4) Schließen Sie die HDD an den Stromanschluß und IDE-BUS an (stellen Sie sicher, dass die HDD präzise zum Pin-Anschluss ausgerichtet ist). Und schließen Sie dann die obere Abdeckung des DVR und ziehen alle Schrauben fest, die Sie in Schritt 1 gelöst haben. ◎...
Seite 51
ESPAÑOL Para una información más detallada, consulte el manual de usuario. Lea las instrucciones atentamente antes de realizar cualquier operación y conserve este documento para futuras consultas. ESPAÑOL 782, 781, 760, 502, 501, 560_V0.98...
Seite 52
ÍNDICE 1 FUNCIONES ............................1 1.1. CONTENIDO DEL PAQUETE..........................1 1.2 PANEL FRONTAL..............................2 1.3 PANEL TRASERO ..............................4 2 INICIO..............................6 2.1 INICIO..................................6 2.2 CONFIGURACIÓN DE FECHA/HORA........................6 3. FUNCIONAMIENTO BÁSICO......................7 3.1 GRABACIÓN ................................7 3.2 REPRODUCCIÓN ..............................7 APÉNDICE 1 INSTALACIÓN DEL DISCO DURO................... 8 APÉNDICE 2 CONFIGURACIÓN DE PINES...................
1.2 PANEL FRONTAL 116) DIODOS LED HDD: El Disco Duro se encuentra leyendo o grabando HDD Fulll: El Disco Duro está complete ALARM: Disparo de la alarma TIMER: Activación de la grabación por temporizador PLAY: Reproduciendo REC: Grabando 117) MENU Pulse el botón “MENU”...
Seite 54
128) ARRIBA / PAUSA , ABAJO / PARADA, IZQUIERDA / REBOBINAR, DERECHA / AVANCE Pulse para desplazar el cursor hacia arriba / abajo / izquierda / derecha. En el modo de reproducción, pulse el botón “ ” para pausar la reproducción. En el modo de reproducción, pulse el botón “...
1.3 PANEL TRASERO ‧ Modelo 1 MONIT O R CA LL LOOP INP UT LOOP INP UT LOOP INP UT LOOP INP UT LINK ACT . EXT ERNAL I/O DC 19V ‧ Modelo 2 MONIT OR CA LL LOO P INP UT LOOP INP UT...
Seite 56
20) 75Ω / HI-IMPEDANCE Cuando se utilice la función de Bucle, seleccione HI-IMPEDANCE. En caso contrario, seleccione 75Ω. 21) INPUT (ENTRADA DE VÍDEO, CANALES 1 - 4): Conecte una fuente de vídeo, como puede ser una cámara. BUCLE (CANALES 1 - 4): salida de Vídeo. 22) MONITOR Conecte el monitor Principal.
2 INICIO 2.1 INICIO Conecte todos los dispositivos necesarios para formar el sistema de vigilancia. 21. Instale el Disco Duro: El Disco Duro se ha de instalar antes de encender el DVR. Consulte las instrucciones de instalación del Disco Duro en el apéndice 1.
3. FUNCIONAMIENTO BÁSICO 3.1 GRABACIÓN El DVR dispone de tres modos de grabación: manual, por eventos, y por temporizador. Si se desconectara el DVR por accidente, los ficheros de vídeo grabados se almacenarían en el Disco Duro. El DVR volverá a su estado de funcionamiento anterior tras su reactivación.
‧ REPRODUCCIÓN LENTA Modelo 1 y 2: Pulse el botón “SLOW” para conseguir una velocidad de reproduccion de 1/4X y púlselo dos veces para obtener una velocidad de 1/8X. Modelo 3: Pulse el botón “SLOW” para conseguir una velocidad de 1/4X. ‧...
8) Conecte el Disco Duro al conector de alimentación y al BUS IDE (asegúrese de alinear correctamente el Disco Duro al conector de pines). Finalmente, cierre la tapa superior del DVR y atornille los tornillos aflojados en el paso 1. ◎...
Seite 61
PORTUGUÊS Para instruções detalhadas, consulte o manual do utilizador. Leia cuidadosamente as instruções antes da utilização e guarde-as para referência futura. The image shown above may differ from the actual product appearance. PORTUGUÊS 782, 781, 760, 502, 501, 560_V0.98...
Seite 62
ÍNDICE 1 FUNÇÕES ............................. 1 1.1. CONTEÚDO DA EMBALAGEM..........................1 1.2 PAINEL FRONTAL..............................2 1.3 PAINEL TRASERO ..............................4 2 INICIAÇÃO ............................6 2.1 INICIAÇÃO ................................6 2.2 AJUSTE DA HORA DE SISTEMA..........................6 3. OPERAÇÕES BÁSICAS........................7 3.1 GRAVAÇÃO................................7 3.2 REPRODUÇÃO ................................7 APÊNDICE 1 INSTALAÇÃO DO HDD..................... 8 APÊNDICE 2 CONFIGURAÇÃO DOS PINOS ..................
1.2 PAINEL FRONTAL 143) LED’s HDD: Em leitura/gravação no HDD HDD Fulll: O HDD está cheio ALARM: Quando o alarme é accionado TIMER:Quando a gravação temporizada está activa PLAY: Quando em reprodução REC: Quando em gravação 144) MENU Pressione “MENU” para aceder ao menu principal. 145) ENTER / SET Pressione “ENTER”...
Seite 64
155) UP / PAUSE, DOWN / STOP, LEFT / REWIND, RIGHT / FORWARD, Pressione para mover o cursor para cima / baixo / esquerda / direita. Quando em modo de reprodução, pressione “ ” para pausar a reprodução. Quando em modo de reprodução, pressione “ ” para parar a reprodução. Quando em modo de reprodução, pressione “...
1.3 PAINEL TRASERO ‧ Modelo 1 MONIT O R CA LL LOOP INP UT LOOP INP UT LOOP INP UT LOOP INP UT LINK ACT . EXT ERNAL I/O DC 19V ‧ Modelo 2 MONIT OR CA LL LOO P INP UT LOOP INP UT...
Seite 66
24) 75Ω / HI-IMPEDANCE Quando a função Loop estiver em funcionamento, altere para HI-IMPEDANCE. Quando não, altere para 75Ω. 25) INPUT (ENTRADA DE VÍDEO, CANAL 1 - 4): Ligação a fontes de vídeo, tais como câmaras. LOOP (CANAL 1 - 4): Saída de vídeo. 26) MONITOR Ligação ao monitor principal.
2 INICIAÇÃO 2.1 INICIAÇÃO Ligue todos os dispositivos para obter o sistema de vigilância. 24. Instale o HDD: O HDD deve estar instalado antes de ligar o DVR. Consulte o Apêndice 1 para instruções de instalação do HDD. 25. Ligue as câmaras, os monitores, os dispositivos externos. Consulte a “Secção 1.3 Painel Traseiro” para informações relativas às ligações.
3. OPERAÇÕES BÁSICAS 3.1 GRAVAÇÃO O DVR disponibiliza 3 modos de gravação: manual, num acontecimento e temporizada. Se a energia for cortada acidentalmente, os ficheiros gravados continuarão no HDD e o DVR regressará ao seu estado original de gravação quando a energia for restaurada. ‧...
‧ SLOW PLAYBACK Modelos 1 e 2: Pressione “SLOW” para reduzir a velocidade de reprodução para 1/4, e pressione duas vezes para 1/8. Modelo 3: Pressione “SLOW” para reduzir a velocidade de reprodução para 1/4. ‧ Audio SLOW ZOOM Pressione para seleccionar qualquer um dos canais de áudio, de entre as seguintes opções: AUDIO AUDIO 1 (L) –...
12) Ligue o HDD à fonte de alimentação e ao BUS IDE (certificando-se que o alinhamento do HDD com os connectores é preciso). Feche a tampa superior do DVR e coloque novamente os parafusos mencionados no passo 1. ◎ Modelo 2 & 3 Siga cuidadosamente estes passos para uma instalação adequada.
Seite 71
ITALIANO Per le istruzioni dettagliate, vedere il manuale dell'utente. Leggere completamente le istruzioni prima di utilizzare l'apparecchio e conservarle sempre a portata di mano per futuro riferimento. L'immagine mostrata sopra potrebbe differire dall'aspetto effettivo del prodotto. ITALIANO 782, 781, 760, 502, 501, 560_V0.98...
Seite 72
SOMMARIO 1 FUNZIONI.............................. 1 1.1. CONTENUTO DELLA CONFEZIONE ........................1 1.2 PANNELLO ANTERIORE ............................2 1.3 PANNELLO POSTERIORE ............................4 2 INFORMAZIONI PRELIMINARI ......................6 2.1 INFORMAZIONI PRELIMINARI..........................6 2.2 CONFIGURAZIONE ORA DI SISTEMA ........................6 3. FUNZIONAMENTO DI BASE....................... 7 3.1 REGISTRAZIONE ..............................7 3.2 RIPRODUZIONE ..............................7 APPENDICE 1 INSTALLAZIONE DEL DISCO HDD ................
1.2 PANNELLO ANTERIORE 170) LUCE DEL LED HDD: HDD rappresenta lettura o registrazione HDD Fulll: l'HDD è pieno. ALARM: attivo quando si attiva l'allarme TIMER:quando è attiva la registrazione con timer PLAY: nello stato di riproduzione REC: nello stato di registrazione 171) MENU Premere il pulsante “MENU”...
Seite 74
182) SU / PAUSA , GIU / STOP, SINISTRA / RIAVVOLGIMENTO RAPIDO, DESTRA / AVANZAMENTO VELOCE Premere per muovere il cursore su / giù / sinistra / destra. Nella modalità di riproduzione, premere il pulsante “ ” per mettere in pausa la riproduzione. Nella modalità...
1.3 PANNELLO POSTERIORE ‧ Modello 1 MONIT O R CA LL LOOP INP UT LOOP INP UT LOOP INP UT LOOP INP UT LINK ACT . EXT ERNAL I/O DC 19V ‧ Modello 2 MONIT OR CA LL LOO P INP UT LOOP INP UT...
Seite 76
28) 75Ω / HI-IMPEDANCE Quando si utilizza la funzione Circuito (loop), passare a HI-IMPEDANCE. Quando non si utilizza la funzione circuito, passare a 75Ω. 29) INPUT (1 - 4 CANALI): Collegare le sorgenti video, come ad esempio le videocamera. LOOP (1 - 4 CANALI): uscita video. 30) MONITOR Collegare il monitor principale.
2 INFORMAZIONI PRELIMINARI 2.1 INFORMAZIONI PRELIMINARI Collegare tutti i dispositivi per implementare una sorveglianza. 27. Installare l'HDD: L'HDD deve essere installato prima che il DVR sia acceso. Vedere l'Appendice 1 per le istruzioni su come installare l'HDD. 28. Collegare le videocamera, i monitor, i dispositivi esterni. Vedere la “Sezione 1.3 Pannello posteriore per il collegamento.
3. FUNZIONAMENTO DI BASE 3.1 REGISTRAZIONE Il DVR offre tre modalità di registrazione: registrazione manuale, evento e timer. Se viene spenta accidentalmente l'alimentazione, i file video registrati vengono archiviati sull'HDD. Il DVR torna allo stato di registrazione originale una volta che l'alimentazione è...
‧ RALLENTATORE Modelli 1 e 2: Premere il pulsante “SLOW” per ottenere una velocità di riproduzione pari a 1/4X e premere due volte per una velocità 1/8X. Modello 3: Premere il pulsante “SLOW” per ottenere una velocità di 1/4X. ‧ Audio SLOW ZOOM Premere...
16) Collegare l'HDD al connettore di alimentazione e al BUS IDE (assicurarsi di allineare con precisione l'HDD secondo la piedinatura). Chiudere quindi il coperchio superiore del DVR e avvitare tutte le viti svitate al passo 1. ◎ Modello 2 & 3 Seguire con attenzione le fasi della procedura indicata per la corretta installazione.