Herunterladen Inhalt Inhalt Diese Seite drucken
Scheppach RoboCut L500 Bedienungs- Und Sicherheitshinweise

Scheppach RoboCut L500 Bedienungs- Und Sicherheitshinweise

Rasenmähroboter
Inhaltsverzeichnis

Werbung

Verfügbare Sprachen
  • DE

Verfügbare Sprachen

  • DEUTSCH, seite 1
RASENMÄHROBOTER RoboCut L500
DE
RASENMÄHROBOTER RoboCut L500
Bedienungs- und Sicherheitshinweise
Originalbedienungsanleitung
GB
ROBOT MOWER RoboCut L500
Operating and Safety Instructions
Translation of original instruction manual
FR
ROBOT TONDEUSE RoboCut L500
Consignes d'utilisation et de sécurité
Traduction des instructions d'origine
IT
ROBOT TOSAERBA RoboCut L500
Avvertenze sul funzionamento e la sicurezza
La traduzione dal manuale di istruzioni originale
NL
ROBOTMAAIER RoboCut L500
Gebruiks- en veiligheidsvoorschriften
Vertaling van de originele gebruikshandleiding
ES
ROBOT CORTACÉSPED RoboCut L500
Instrucciones de servicio y seguridad
Traducción del manual de instrucciones original
PT
ROBÔ CORTA-RELVA RoboCut L500
Indicações de operação e segurança
Tradução do manual de operação original
DE
GB
FR
IT
NL
ES
PT

Werbung

Inhaltsverzeichnis
loading

Inhaltszusammenfassung für Scheppach RoboCut L500

  • Seite 1 RASENMÄHROBOTER RoboCut L500 Bedienungs- und Sicherheitshinweise Gebruiks- en veiligheidsvoorschriften Vertaling van de originele gebruikshandleiding Originalbedienungsanleitung ROBOT CORTACÉSPED RoboCut L500 ROBOT MOWER RoboCut L500 Instrucciones de servicio y seguridad Operating and Safety Instructions Traducción del manual de instrucciones original Translation of original instruction manual ROBÔ...
  • Seite 2 Klappen Sie vor dem Lesen die Seite mit den Abbildungen aus und machen Sie sich anschließend mit allen Funktionen des Gerätes vertraut. Before reading, unfold the page with the illustrations and then familiarise yourself with all the functions of the unit. Avant de lire, dépliez la page des illustrations et familiarisez-vous ensuite avec toutes les fonctions de l’appareil.
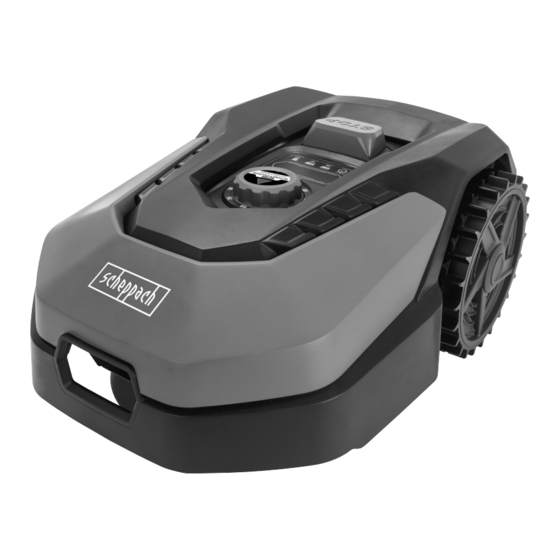
  • Seite 3 GERÄTEBESCHREIBUNG/DESCRIPTION OF THE DEVICE...
  • Seite 4 Ladestation/Base Ladestation Base...
  • Seite 5 Falsch! Richtig! Wrong! Correct! Max. Steigung von 35% Max. slope of 35% 100 cm Länge / Length...
  • Seite 6 Grünes Licht blinkt Grünes Licht an Green light flashing Green light on Rotes Licht blinkt Red light flashing Bluetooth Zeiteinstellung Time setting WiFi Passworteinstellung Ladezustand Password setting Power Bestätigung Ein-/Aus Confirm Turn on/off Zurück zur Ladestation Mähstart Back to station Start working...
  • Seite 9: Inhaltsverzeichnis

    Inhaltsverzeichnis: Seite: Einleitung ................... 4 Produktbeschreibung ..............4 Lieferumfang ................4 Bestimmungsgemäße Verwendung .......... 4 Sicherheitshinweise..............5 Technische Daten ..............8 Auspacken ................. 8 Aufbau / Vor Inbetriebnahme ............ 9 In Betrieb nehmen / Einstellungen ..........12 Reinigung .................. 15 Transport ...................
  • Seite 10: Erklärung Der Symbole Auf Dem Produkt

    Erklärung der Symbole auf dem Produkt Die Verwendung von Symbolen in diesem Handbuch soll Ihre Aufmerksamkeit auf mögliche Risiken lenken. Die Sicherheitssymbole und Erklärungen, die diese begleiten, müssen genau verstanden werden. Die Warnungen selbst beseitigen keine Risiken und können korrekte Maßnahmen zum Verhüten von Unfällen nicht ersetzen. Vor Inbetriebnahme Bedienungsanleitung und Sicherheitshinweise lesen und beachten! Warnung! Schalten Sie das Produkt aus, bevor Sie es anheben, oder daran arbeiten.
  • Seite 11: Einleitung

    1. Einleitung Wir übernehmen keine Haftung für Unfälle oder Schäden, die durch Nichtbeachten dieser Anleitung Hersteller: und den Sicherheitshinweisen entstehen. 2. Produktbeschreibung Scheppach GmbH Günzburger Straße 69 D-89335 Ichenhausen 1. Mähroboter 2. Drehknopf Schnitthöhenverstellung Verehrter Kunde 3. Display mit Bedienpanel Wir wünschen Ihnen viel Freude und Erfolg beim Ar-...
  • Seite 12: Sicherheitshinweise

    Die Maschine darf nur mit Originalteilen und Original- • Bei Nutzung des Produkts im öffentlichen Bereich zubehör des Herstellers betrieben werden. müssen Warnschilder um den Arbeitsbereich an- Die Sicherheits-, Arbeits- und Wartungsvorschriften gebracht werden. Diese Schilder müssen mit fol- des Herstellers sowie die in den Technischen Daten gendem Text versehen sein: angegebenen Abmessungen müssen eingehalten „Warnung! Mähroboter! Halten Sie Abstand...
  • Seite 13 Roboter anzuhalten und das Netzkabel aus der Steckdose zu ziehen. Stellen Sie sicher, dass die Verbindung zwischen • Scheppach übernimmt keine Garantie für die voll- dem Ladegerät und dem Akkupack den richtigen ständige Kompatibilität zwischen dem Produkt und Modellen entspricht. Eine längere Lebensdauer anderen kabellosen Systemen wie Fernbedienun- und eine bessere Leistung können erzielt wer-...
  • Seite 14 m WARNUNG: • Halten Sie das Ladegerät sauber. Durch Ver- Lithium-Ionen-Akkus können explodieren oder Feu- schmutzung besteht die Gefahr eines elektrischen er verursachen, wenn sie demontiert, kurzgeschlos- Schlages. sen oder Wasser, Feuer oder hohen Temperaturen • Überprüfen Sie vor jeder Benutzung Ladegerät, ausgesetzt werden.
  • Seite 15: Technische Daten

    6. Technische Daten m WICHTIG: Das Ladegerät ist ausschließlich zum Laden des Mähroboter Produkttyps RoboCut L500 geeignet. Spannung 20 V Geräusch & Vibration Leerlaufdrehzahl n 2800 min m Warnung: Lärm kann gravierende Auswirkungen Schnittbreite 18 cm auf Ihre Gesundheit haben. Übersteigt der Maschi- Schnitthöhe...
  • Seite 16: Aufbau / Vor Inbetriebnahme

    8. Aufbau / Vor Inbetriebnahme 8.2 Begrenzungsdraht (11) an Ladestation (10) anschließen m ACHTUNG! Vor der Inbetriebnahme das Produkt unbedingt m HINWEIS: komplett montieren! Der Begrenzungsdraht (11) muss vor der Ladestati- on (10) mindestens einen Meter lang, gerade, ohne m ACHTUNG! Ecken und Hindernisse verlegt sein.
  • Seite 17: Begrenzungsdraht (11) Vergraben

    m ACHTUNG: 8.3.1.1 Begrenzungsdraht (11) vergraben Der Mäher darf nicht auf Kies/Steinen in Betrieb • Wenn Sie den Begrenzungsdraht (11) eingraben, genommen werden. machen Sie, mit Hilfe eines Spatens o. ä., eine schmale Nut in die Grasnabe. Anschließend legen m HINWEIS: Sie den Draht in die Nut und überdecken diesen Definieren Sie und erstellen Sie eine Skizze des Ar- mit Erde.
  • Seite 18 8.4.1 Beschreibung der LED-Status (Abb. 17) • Legen Sie den Begrenzungsdraht (11) im Abstand von 30 cm bzw. 8 cm (siehe Punkt 8.3.1) um das Hindernis. LED- Bedeutung Maßnahme • Verlegen Sie das Kabel entlang der „Zuleitung“ zu- Status rück zur Außenkante. leuchtet keine Strom- Vergewissern Sie sich,...
  • Seite 19: In Betrieb Nehmen / Einstellungen

    Gehen Sie wie oben beschrieben vor und starten den Ein Aufdruck der Typenbezeichnung auf dem An- Mäher (siehe Punkt 9) mit der „START“-Taste. schlusskabel ist Vorschrift. Im Problemfall können Sie den Mäher mit der Stopp- Taste (4) am Produkt stoppen. 9.1.
  • Seite 20: Einstellungen

    m ACHTUNG • Nach dem Bestätigen der vierten Ziffer mit der „OK- Wird der PIN-Code 10-mal falsch eingegeben, er- Taste“ ist der neue PIN-Code gespeichert. Auf dem scheint auf dem Display „LOCK“. Das Gerät ist nun Display erscheint der Schriftzug „IdLE“. für 10 Minuten gesperrt, ehe Sie den PIN-Code er- neut eingeben können.
  • Seite 21: Registrierung

    01/2023 S.Nr.: 0169-01001 S/N: Scheppach GmbH - Günzburger Straße 69 - 89335 Ichenhausen - Germany SN:2201168000XX00000001 Der Mähroboter RoboCut L500 APP kann per App bedient werden. Die App ist in den jeweiligen App- 9.4.2 Kommunikation/Datenübertragung Stores für Android und iOS erhältlich.
  • Seite 22: Mähzonen Einstellen

    9.4.3.2 Mähzonen einstellen Um Beschädigungen zu verhindern, ist es zu vermei- In dieser Funktion können Sie manuell zwei ver- den, dass der Mähroboter (1) aus größeren Höhen zu schiedene Mähzonen in % einrichten. Standardmä- Boden stürzt. ßig ist die Funktion auf „AutoMultizone“ eingestellt. Sollte dies doch geschehen, ist er unverzüglich an Hier beginnt der Mäher undefiniert nach jedem La- eine Fachwerkstatt zur Überprüfung zu geben.
  • Seite 23: Akku Ein-/Ausbauen (Abb. 26/27)

    Es müssen immer alle Messer (7) gleichzeitig ge- Die Software für die USB-Übermittelung kann auf tauscht werden. Der Austausch einzelner Messer (7) unserer Homepage www.scheppach.com herunter- ist nicht erlaubt. geladen werden. Sind die Kreuzschlitzschrauben (8) beschädigt oder lassen sich nicht mehr festziehen, sind diese eben- 13.3.1 Softwareupdate via USB...
  • Seite 24: Entsorgung Und Wiederverwertung

    Artikelnummer(n) für Verschleißteile: • Im Falle der Anlieferung eines neuen Elektrogerä- Pos. 7 Messer 7913001601 tes durch den Hersteller an einen privaten Haus- Pos. 8 Schrauben 3913001001 halt, kann dieser die unentgeltliche Abholung des Pos. 11 Begrenzungsdraht 7913001702 Elektroaltgerätes, auf Nachfrage vom Endnutzer, Pos.
  • Seite 25: Störungsabhilfe / Fehlercodes

    • Diese Aussagen sind nur gültig für Akkus und Bat- terien, die in den Ländern der Europäischen Union verkauft werden und die der Europäischen Richtli- nie 2006/66/EG unterliegen. In Ländern außerhalb der Europäischen Union können davon abweichen- de Bestimmungen für die Entsorgung von Akkus und Batterien gelten.
  • Seite 26 • Schalten Sie den Mäher aus. Bringen Sie den Mäher in einen Bereich, der frei von Hindernissen ist. Drücken Sie die „START“- und dann die „OK“-Taste. • Wenn die Fehlermeldung weiterhin angezeigt wird, schalten Sie das Produkt aus. Drehen Sie den Mäher auf den Kopf und prüfen Sie, wodurch die Räder Radmotor blockiert am Drehen gehindert werden.
  • Seite 27: Garantiebedingungen

    9. Andere Ansprüche, als die oben genannten, können nicht geltend gemacht werden. Die Garantiebedingungen gelten nur in der jeweils aktuellen Fassung zum Zeitpunkt der Reklamation und können ggf. unserer Homepage (www.scheppach.com) entnommen werden. Bei Übersetzungen ist stets die deutsche Fassung maßgeblich.
  • Seite 28 Explanation of the symbols on the product Symbols are used in this manual to draw your attention to potential hazards. The safety symbols and the accompanying explanations must be fully understood. The warnings themselves will not rectify a hazard and cannot replace proper ac- cident prevention measures.
  • Seite 29 Table of contents: Page: Introduction ................23 Description of the product ............23 Scope of delivery ............... 23 Proper use ................. 23 Safety information ..............24 Technical data ................26 Unpacking ................. 27 Assembly / Before commissioning ..........27 Starting up / adjustments ............30 Cleaning ..................
  • Seite 30: Introduction

    1. Introduction 2. Description of the product Manufacturer: 1. Robotic lawnmower 2. Cutting height adjustment knob Scheppach GmbH 3. Display with control panel Günzburger Straße 69 4. Stop button D-89335 Ichenhausen 5. Front axle 6. Blade plate Dear Customer 7. Blade We hope your new product brings you much enjoy- 8.
  • Seite 31: Safety Information

    Please note that our products were not designed • Children are not allowed in the working area dur- with the intention of use for commercial or industrial ing operation. purposes. We assume no guarantee if the product is • Children are forbidden to play with the product, used in commercial or industrial applications, or for both out of and in use.
  • Seite 32 • Scheppach does not guarantee full compatibility air temperature is between 18 °C and 25 °C. Do between the product and other wireless systems...
  • Seite 33: Technical Data

    • Keep the rechargeable battery clean and dry. • Furthermore, despite all precautions having been • The rechargeable battery performs best when op- met, some non-obvious residual risks may still re- erated at normal room temperature (20 °C ± 5 °C). main.
  • Seite 34: Unpacking

    This charging unit is suitable exclusively for charging Do not use a strimmer near the boundary wire (11). Take care when trimming edges near which the product type: RoboCut L500. the boundary wire (11) is located. Noise & vibration m Warning: Noise can have serious effects on your 8.1 Setting up / correct position of the charging...
  • Seite 35 8.2 Connect the boundary wire (11) to the charg- m NOTE: ing station (10) Define and make a sketch of the working area before starting to lay the boundary wire (11). m NOTE: The boundary wire (11) must be laid at least one me- m NOTE: tre long, straight, without corners and obstacles on The max.
  • Seite 36 8.3.1.2 Fasten the boundary wire (11) with the m NOTE wire pegs (12) When you have completely staked out the work- ing area, connect the boundary wire (11) to the m NOTE: charging station (10) as described in point 8.2. The distance between the wire pegs (12) must not exceed 80 cm (Fig.
  • Seite 37: Before Commissioning

    8.5. Before commissioning Damaged electrical connection cable • Set the cutting height to the maximum cutting height (60 mm) using the cutting height adjustment The insulation on electrical connection cables is of- knob (2) as shown in figure 18. ten damaged. •...
  • Seite 38 Switching the robotic lawnmower on: 9.2.1 Changing the PIN code (Fig. 21) • The robotic lawnmower can then be restarted as • Press and hold the “START” and “HOME” buttons described below. simultaneously for at least 3 seconds. • The symbol and “PIN”...
  • Seite 39: App Control

    01/2023 S.Nr.: 0169-01001 S/N: Scheppach GmbH - Günzburger Straße 69 - 89335 Ichenhausen - Germany SN:2201168000XX00000001 9.4 App control The RoboCut L500 APP robotic lawnmower can be operated via app. The app is available in the respec- 9.4.2 Communication / data transmission tive app stores for Android and iOS.
  • Seite 40: Cleaning

    9.4.3.1 Viewing and editing the mowing plan Clean the product at regular intervals using a damp With this function you can set when the robotic lawn- cloth and a little soft soap. Do not use any cleaning mower should start mowing and how long it should products or solvents;...
  • Seite 41: Software Update Via Usb

    The software can be installed via USB or the app. (7). The software for USB transmission can be download- ed from our homepage www.scheppach.com. m ATTENTION All blades (7) must always be changed at the same 13.3.1 Software update via USB time.
  • Seite 42: Disposal And Recycling

    Article number(s) for wear parts: Please contact the manufacturer’s customer ser- Item 7 Blade 7913001601 vice for this. Item 8 Screws 3913001001 • These statements only apply to devices installed Item 11 Boundary wire 7913001702 and sold in the countries of the European Union Item 12 Wire pegs 7913001701 and which are subject to the European Directive...
  • Seite 43: Troubleshooting / Fault Codes

    Removing the rechargeable battery before dis- posing of the device • The integrated rechargeable battery must be re- moved and disposed of separately in an environ- mentally friendly manner before disposing of the device. • Mask off the contacts and package the recharge- able battery such that it cannot move in the pack- aging.
  • Seite 44 • Switch the mower off. • Turn the mower upside down and check what is preventing the blades from turning. Cutter disc • Remove the objects and turn the mower over. blocked • Place the mower in an area with short grass. •...
  • Seite 45 Explication des symboles sur le produit L’utilisation de symboles dans ce manuel permet d’attirer votre attention sur les éventuels risques. Les symboles de sé- curité et les explications qui les accompagnent doivent être parfaitement compris. Les avertissements en eux-même ne permettent pas d‘éliminer les risques ni de remplacer les mesures adaptées pour la prévention des accidents.
  • Seite 46 Table des matières: Page: Introduction ................40 Description du produit ............... 40 Fournitures ................40 Utilisation conforme ..............40 Consignes de sécurité ............... 41 Caractéristiques techniques ............44 Déballage .................. 44 Structure/avant mise en service ..........44 Mise en service/réglages ............47 Nettoyage ..................
  • Seite 47: Introduction

    Fabricant : ticulières en vigueur dans votre pays, respecter éga- lement les règles techniques générales concernant Scheppach GmbH l’utilisation des machines similaires. Günzburger Straße 69 Nous déclinons toute responsabilité concernant les D-89335 Ichenhausen accidents ou dommages qui surviendraient en raison d’un non-respect de cette notice et des consignes de...
  • Seite 48: Consignes De Sécurité

    Consignes de sécurité de fonctionnement En outre, les prescriptions de prévention des acci- dents doivent être respectées de la manière la plus scrupuleuse possible. • Le produit ne doit être utilisé qu’avec l’équipe- Toutes les autres règles de médecine du travail et de ment recommandé...
  • Seite 49 à 40 °C. Ces instructions sont impor- tantes et permettent d’éviter d’endommager sé- • Scheppach ne donne aucune garantie sur la com- patibilité entre le produit et d’autres dispositifs sans rieusement la batterie.
  • Seite 50 m AVERTISSEMENT: • Avant chaque utilisation, vérifier le chargeur, le Les batteries Lithium-ion peuvent exploser ou pro- câble et le connecteur. Ne pas utiliser le char- voquer des incendies si elles sont démontées, geur si des dégâts sont constatés. Ne pas ouvrir court-circuitées ou exposées à...
  • Seite 51: Caractéristiques Techniques

    ! m ATTENTION ! m IMPORTANT : Si vous utilisez un scarificateur dans la zone de Le chargeur est uniquement conçu pour charger le travail, il est absolument nécessaire d’enterrer le produit RoboCut L500. câble périphérique (11). 44 | FR...
  • Seite 52 m ATTENTION ! • Insérez le câble périphérique dénudé (11) dans la N’utilisez pas de débroussailleuse à proximité du borne de câble rouge « OUT « située à l’arrière de câble périphérique (11). Soyez prudent lorsque la station de charge (10). Faites ensuite passer le vous débroussaillez les bordures à...
  • Seite 53 m REMARQUE : 8.3.1.2 Fixation du câble périphérique (11) avec La longueur maximale admissible du câble périphé- des broches pour câble (12) rique (11) est de 300 m. m REMARQUE : • L’écart entre le câble périphérique (11) et la bordure L’écart entre les broches pour câble (12) ne doit pas extérieure doit mesurer 30 cm (figure 6).
  • Seite 54: Avant La Mise En Service

    lumière Le robot 8.3.3 Délimitation de talus/pentes > 35 % (fig. 15) verte cli- charge. gnotante • La délimitation de talus/pentes > 35 % doit mesu- lumière Le câble Vérifiez que les rer, conformément à la figure 15, au moins 40 cm. rouge cli- périphérique deux extrémités du...
  • Seite 55 m REMARQUE 9.1. Mise en service rapide (fig. 19/20) Pour allonger sa durée de vie, le robot-tondeuse (1) Une fois l’installation du câble périphérique (11) termi- doit uniquement être utilisé par des températures ex- née, vous pouvez utiliser le robot-tondeuse (1). térieures de 5 - 40 °C.
  • Seite 56 m ATTENTION • Procédez comme indiqué ci-dessus pour les Si un mauvais code PIN est saisi 10 - fois de suite, le chiffres 2-4. message « LOCK « apparaît à l’écran. L’appareil est • Lorsque le quatrième chiffre a été confirmé avec le bloqué...
  • Seite 57: Fonctions De L'application

    01/2023 S.Nr.: 0169-01001 S/N: SN:2201168000XX00000001 Scheppach GmbH - Günzburger Straße 69 - 89335 Ichenhausen - Germany 9.4.2 Communication/transmission des données L’application communique avec le robot-tondeuse via Bluetooth ou Wi-Fi. m REMARQUE En raison de la transmission des données depuis l’application vers Internet, des frais pourront s’appli-...
  • Seite 58: Nettoyage

    11. Transport m ATTENTION La modification du plan de tonte, le démarrage de la tonte, la mise en marche et l’arrêt du mode • Appuyer sur la appuyez sur la touche (« POWER automatique, le renvoi du robot à la station de ON/OFF «) pour désactiver le robot-tondeuse (1).
  • Seite 59 ATTENTION Le logiciel pour le transfert via USB peut être télé- Vous devez toujours remplacer toutes les lames (7) chargé sur notre page d’accueil www.scheppach. simultanément. Le remplacement individuel de lames com. (7) n’est pas autorisé. 13.3.1 Mise à jour logicielle via USB Si les vis cruciformes (8) sont endommagées ou ne...
  • Seite 60: Élimination Et Recyclage

    Informations de service • Les appareils électriques et électroniques peuvent Notez que, pour ce produit, les composants suivants être gratuitement déposés : sont soumis à une usure naturelle ou due à l’utilisa- - Dans les points de collecte et d’élimination pu- tion et que les composants suivants sont nécessaires blics (dépôts municipaux p.
  • Seite 61: Dépannage/Codes D'erreur

    • Les piles et batteries peuvent être gratuitement dé- • Ces déclarations ne s’appliquent qu’aux piles et posées : batteries vendues dans les pays membres de - Dans les points de collecte et d’élimination pu- l’Union européenne et visées par la directive eu- blics (dépôts municipaux p.
  • Seite 62 • Désactivez la tondeuse. Mettez la tondeuse dans une zone dépourvue d’obstacle. Appuyez sur le bouton « START « puis sur la touche « OK «. Moteur de roue • Si le message d’erreur apparaît encore, désactivez le produit. Retournez la tondeuse et bloqué...
  • Seite 63 Spiegazione dei simboli sul prodotto L‘utilizzo di simboli in questo manuale serve ad attirare la vostra attenzione sui possibili rischi. I simboli di sicurezza e le spiegazioni che li accompagnano devono essere perfettamente compresi. Le avvertenze in quanto tali non eliminano i rischi e non possono sostituire le misure atte a prevenire gli infortuni.
  • Seite 64 Indice: Pagina: Introduzione ................58 Descrizione prodotto ..............58 Contenuto della fornitura ............58 Impiego conforme alla destinazione d‘uso ........ 58 Indicazioni di sicurezza ............. 59 Dati tecnici ................. 61 Disimballaggio ................62 Allestimento / Prima della messa in funzione ......62 Messa in funzione / Regolazione ..........
  • Seite 65: Introduzione

    Si declina ogni responsabilità in caso di incidenti o danni dovuti al mancato rispetto delle presenti istru- Produttore: zioni per l‘uso e delle indicazioni di sicurezza. 2. Descrizione prodotto Scheppach GmbH Günzburger Straße 69 89335 Ichenhausen, Germania 1. Robot tosaerba 2. Manopola di regolazione dell’altezza di taglio Egregio cliente, 3.
  • Seite 66: Indicazioni Di Sicurezza

    Occorre inoltre attenersi scrupolosamente alle nor- • Quando si utilizza il prodotto in aree pubbliche, è me antinfortunistiche in vigore. necessario collocare cartelli di avvertimento intor- Rispettare le altre norme generali concernenti la me- no all’area di lavoro. Questi cartelli devono riporta- dicina del lavoro e la tecnica di sicurezza.
  • Seite 67 5 °C o superiori a 40 °C. Queste istruzioni scollegare il cavo di rete dalla presa. sono importanti perché possono prevenire gravi • Scheppach non garantisce la piena compatibilità danni alla batteria. tra il prodotto e altri sistemi wireless come teleco-...
  • Seite 68: Dati Tecnici

    m ATTENZIONE! • Quando la batteria non è in uso, tenerla lontana da altri oggetti metallici come graffette, monete, Questo attrezzo elettrico genera un campo magneti- chiavi, chiodi, viti o altri piccoli oggetti metallici do- co durante l‘esercizio. Tale campo può danneggiare ve possono cortocircuitarsi tra loro o essere cor- impianti medici attivi o passivi in particolari condizio- tocircuitate da materiali conduttivi.
  • Seite 69: Disimballaggio

    IMPORTANTE: Se nell’area di lavoro si intende utilizzare uno scarificatore, è obbligatorio interrare il filo di de- Il caricatore è adatto solo per la ricarica del tipo di prodotto RoboCut L500. limitazione (11). Rumori e vibrazioni m ATTENZIONE! m Avviso: Il rumore può avere un grave impatto sulla Non utilizzare un decespugliatore in prossimi- salute.
  • Seite 70 m AVVERTENZA: • Per collegare la seconda estremità del filo di de- Non praticare ulteriori fori nella stazione di ricarica. limitazione (11), togliere circa 10 mm di isolamen- to dall’estremità e inserirla nel morsetto fermaca- m AVVERTENZA: vo nero “IN”. Non appoggiare i piedi sulla piastra della stazione di ricarica.
  • Seite 71 8.3.2 Tipi di posa del filo di delimitazione per • Quando si posa il filo di delimitazione (11), l’ango- lo negli angoli deve essere sempre >90° (vedere fi- ostacoli (isole) (Fig. 14) gura 8+9). • Il robot tosaerba (1) individua aree/passaggi con m AVVERTENZA: restringimenti / con una larghezza di ≥...
  • Seite 72: Prima Della Messa In Funzione

    8.4 Collegamento della stazione di ricarica (10) CONSIGLIO: (Fig. 16) Prima della prima messa in funzione: • Collegare la spina a 2 poli alla stazione di ricarica Posizionare il tosaerba, direttamente dietro la stazio- (10) come mostrato nella figura 16 e avvitarla. ne di ricarica (10), con un angolo di 90°...
  • Seite 73: Messa In Funzione Rapida (Fig. 19/20)

    • Danni all‘isolamento causati dalle operazioni di di- • Tenere premuto il tasto (“POWER ON/OFF”) fino stacco dalla presa a parete. all’accensione del robot tosaerba (1). • Cricche a causa dell‘invecchiamento dell‘isolamen- • Al primo utilizzo, inserire il codice PIN predefinito “0000”...
  • Seite 74 -Sul display si accendono il simbolo e un nume- 9.4 Controllo tramite App ro (ad es. 2020). Il robot tosaerba RoboCut L500 APP può essere ge- • Utilizzare i tasti “START”, “HOME” e “OK” per im- stito tramite App. L’applicazione è disponibile per An- postare l’anno, analogamente all’impostazione del...
  • Seite 75: Pulizia

    01/2023 0169-01001 manufactured: S.Nr.: S/N: Scheppach GmbH - Günzburger Straße 69 - 89335 Ichenhausen - Germany SN:2201168000XX00000001 go il filo di delimitazione e da inizia a tagliare da quel 9.4.2 Comunicazione/Trasmissione dati punto. L’App comunica con il robot tosaerba tramite Blueto- oth o WiFi.
  • Seite 76: Trasporto

    11. Trasporto In caso di domande indicare i seguenti dati: • Tipo di corrente del motore • Tenere premuto il tasto (“POWER ON/OFF”) fino • Dati della piastrina indicatrice della macchina all’accensione del robot tosaerba (1). Tasto (tasto “POWER ON/OFF”) per spegnere il robot tosaerba 13.1 Sostituzione delle lame (7) (Fig.
  • Seite 77: Smaltimento E Riciclaggio

    Si prega di smaltire gli imballaggi mite l’App. nel rispetto dell‘ambiente. Il software per la trasmissione USB può essere sca- ricato dalla nostra homepage www.scheppach.com. Avvertenze relative alla legge sui dispositivi elet- trici ed elettronici (ElektroG) 13.3.1 Aggiornamento del software tramite USB I rifiuti di apparecchiature elettriche ed elet- •...
  • Seite 78 - È possibile consegnare gratuitamente al produt- • Le batterie e gli accumulatori possono essere resti- tore, senza dovere acquistare prima un nuovo tuiti gratuitamente presso i seguenti centri: dispositivo da questi, fino a tre dispositivi elet- - Centri di raccolta e smaltimento di diritto pubblico tronici usati per ogni tipo di dispositivo con una (ad es.
  • Seite 79: Risoluzione Dei Problemi/Codici Di Errore

    15. Risoluzione dei problemi/codici di errore La seguente tabella indica dei sintomi di malfunzionamento e descrive come porvi rimedio qualora la macchina non fun- zionasse correttamente. Se non si riesce a localizzare e risolvere il problema, rivolgersi all‘officina del servizio assistenza. 15.1 Tabella dei guasti Guasto Possibile causa...
  • Seite 80 • Spegnere il tosaerba. • Spostare il tosaerba in un’area libera da ostacoli. Premere il tasto “START” e poi il tasto “OK”. • Se il messaggio di errore continua a essere visualizzato, spegnere il Il tosaerba è stato sollevato prodotto. Capovolgere il tosaerba e controllare che non vi sia qualche cosa che impedisce il movimento dell’asse anteriore.
  • Seite 81 Verklaring van de symbolen op het product Het gebruik van symbolen in deze handleiding is bedoeld om uw aandacht te vestigen op eventuele risico‘s. De veilig- heidssymbolen en de bijbehorende uitleg moeten goed worden begrepen. De waarschuwingen zelf voorkomen geen risico‘s en kunnen de juiste maatregelen betreffende ongevallenpreventie niet vervangen.
  • Seite 82 Inhoudsopgave: Pagina: Inleiding ..................76 Beschrijving van het product ............. 76 Inhoud van de levering .............. 76 Beoogd gebruik ................. 76 Veiligheidsvoorschriften ............77 Technische gegevens ..............80 Uitpakken................... 80 Montage / Voor ingebruikname ..........81 Inbedrijfstelling / Instellingen ............. 84 Reiniging..................
  • Seite 83: Inleiding

    Fabrikant: ten van uw land moet u de algemeen erkende tech- nische voorschriften in acht nemen voor de werking Scheppach GmbH van machines van hetzelfde type. Günzburger Straße 69 Wij kunnen niet aansprakelijk worden gesteld voor...
  • Seite 84: Veiligheidsvoorschriften

    Veiligheidsvoorschriften Bediening Andere algemene arbo-, gezondheids- en veiligheids- voorschriften moeten in acht worden genomen. De fabrikant is niet aansprakelijk voor wijzigingen die • Het product mag alleen worden gebruikt met de aan de machine worden aangebracht en de hieruit door de fabrikant aanbevolen onderdelen. Andere voortvloeiende schade.
  • Seite 85 5 °C stoppen en haal het netsnoer uit het stopcontact. of boven 40 °C. Deze aanwijzingen zijn belang- • Scheppach garandeert geen volledige compatibi- rijk, omdat dit ernstige schade aan de accu kan liteit tussen het product en andere draadloze sys- voorkomen.
  • Seite 86 m WAARSCHUWING: • Controleer voor elk gebruik de lader, de kabel en Lithium-ion accu’s kunnen exploderen of brand ver- de stekker. Gebruik de lader niet, als u schade oorzaken als ze worden gedemonteerd, kortgesloten vaststelt. Open de lader niet zelf en laat het alleen of blootgesteld aan water, vuur of hoge temperatu- door bevoegd en vakkundig personeel en alleen ren.
  • Seite 87: Technische Gegevens

    6. Technische gegevens m BELANGRIJK: De oplader is alleen geschikt voor het opladen van Robotmaaier het producttype RoboCut L500. Spanning 20 V Geluid & trillingen Stationair toerental n 2800 min m Waarschuwing: Lawaai kan ernstige gezond- Snijbreedte 18 cm heidsklachten tot gevolg hebben. Draag geschikte...
  • Seite 88: Montage / Voor Ingebruikname

    8. Montage / Voor ingebruikname 8.2 Begrenzingsdraad (11) aansluiten op laadsta- tion (10) m LET OP! Het product voor de ingebruikname absoluut m AANWIJZING: volledig monteren! De begrenzingsdraad (11) moet voor het laadstation (10) worden gelegd, ten minste één meter lang, recht, m LET OP! zonder hoeken en obstakels.
  • Seite 89 m LET OP: 8.3.1.1 Ingraven van de begrenzingsdraad (11) De maaier mag niet worden gebruikt op grind/ste- • Maak bij het ingraven van de begrenzingsdraad nen. (11) een smalle groef in de grasnaaf met behulp van een spade of iets dergelijks. Plaats vervolgens m AANWIJZING: de draad in de groef en dek deze af met aarde.
  • Seite 90: Voor De Ingebruikname

    8.4.1 Beschrijving van de LED-status (afb. 17) • Leg de kabel langs de “toevoerlijn” terug naar de buitenrand. m LET OP! LED-sta- Betekenis Maatregel De begrenzingsdraad (11) mag NIET kruisen. De maximale afstand tussen de begrenzings- brandt Geen Zorg ervoor dat het draden is 5 mm.
  • Seite 91: Inbedrijfstelling / Instellingen

    9.1. Snelle inbedrijfstelling (afb. 19/20) Ga te werk zoals hierboven beschreven en start de maaier (zie punt 9) met de toets “START”. Na het installeren van de begrenzingsdraad (11) kunt In geval van een probleem kunt u de maaier stoppen u de robotmaaier (1) gebruiken.
  • Seite 92 m LET OP 9.2.2 Datum/tijd instellen/wijzigen (afb. 22) Als de PIN-code 10 keer verkeerd wordt ingevoerd, verschijnt “LOCK” op het display. Het apparaat is nu mAANWIJZING 10 minuten vergrendeld voordat u de pincode op- Datum en tijd zijn noodzakelijke instellingen zodat de nieuw kunt invoeren.
  • Seite 93 8,0 kg . IPX5 manufactured: 01/2023 S.Nr.: 0169-01001 S/N: Scheppach GmbH - Günzburger Straße 69 - 89335 Ichenhausen - Germany SN:2201168000XX00000001 9.4.2 Communicatie/gegevensoverdracht De app communiceert met de robotmaaier via Blue- tooth of WiFi. mAANWIJZING Afhankelijk van uw contract met uw mobiele tele-...
  • Seite 94: Reiniging

    12. Opslag/wintertijd 9.4.3.2 Maaizones instellen Met deze functie kunt u handmatig twee verschillen- de maaizones in % instellen. Standaard is de functie U zult langer plezier hebben van uw maaier als u hem ingesteld op “AutoMultizone”. Hier begint de maaier laat overwinteren.
  • Seite 95: Service-Informatie

    (De laatste softwareversie De verpakkingsmaterialen zijn recy- vindt u op onze homepage.) clebaar. Verpakkingen milieuvrien- De software kan worden geïnstalleerd via USB of de delijk afvoeren. app. De software voor USB-transmissie kan worden ge- download van onze homepage www.scheppach.com. 88 | NL...
  • Seite 96 Aanwijzingen betreffende de wetgeving Afge- Aanwijzingen voor de wetgeving op batterijen dankte elektrische en elektronische apparatuur (het Duitse BattG) (AEEA) Oude batterijen en accu’s behoren niet bij Afgedankte elektrische en elektronische het huishoudelijke afval, maar moeten apparatuur behoort niet bij het huishoude- worden ingezameld resp.
  • Seite 97: Problemen Oplossen / Foutcodes

    15. Problemen oplossen / foutcodes De volgende tabel toont storingssymptomen en beschrijft hoe u deze op kunt lossen, als uw machine niet goed werkt. Als u het probleem hiermee niet kunt vinden en kan oplossen, neem dan contact op met uw service-werkplaats. 15.1 Storingstabel Storing Mogelijke oorzaak...
  • Seite 98 • Schakel de maaier uit. • Verplaats de maaier naar een plek die vrij is van obstakels. Druk op de toets “START” en vervolgens op de toets “OK”. De maaier werd • Als de foutmelding nog steeds wordt weergegeven, schakelt u het product uit. Draai opgetild de maaier ondersteboven en controleer of er iets is dat de beweging van de vooras verhindert.
  • Seite 99 Declaración de los símbolos en el producto Este manual utiliza símbolos para llamar su atención sobre los posibles riesgos. Los símbolos de seguridad y explica- ciones que acompañan a estos deben ser comprendidos perfectamente. Las propias advertencias no descartan ningún riesgo y no deben ser sustitutivas de unas medidas correctas para prevenir accidentes.
  • Seite 100 Índice de contenidos: Página: Introducción ................94 Descripción del producto ............94 Volumen de suministro .............. 94 Uso previsto ................94 Indicaciones de seguridad ............95 Datos técnicos ................97 Desembalaje ................98 Montaje / antes de la puesta en marcha ........98 Puesta en marcha / ajustes ............
  • Seite 101: Introducción

    Fabricante: cripciones especiales vigentes en su país, deberán observarse las normas técnicas generalmente reco- Scheppach GmbH nocidas para el funcionamiento de máquinas de es- Günzburger Straße 69 tructura similar. D-89335 Ichenhausen (Alemania) Declinamos cualquier responsabilidad de posibles accidentes o daños que puedan producirse por no...
  • Seite 102: Indicaciones De Seguridad

    Indicaciones de seguridad para el funcionamien- Asimismo, también deben cumplirse de manera es- tricta las normas vigentes en prevención de acciden- tes. También deben cumplirse las normas generales en • El producto solo debe utilizarse con el equipa- materia de sanidad laboral y de técnicas de seguri- miento recomendado por el fabricante.
  • Seite 103 útil y un mejor enchufe. rendimiento de la batería cuando esta se carga a • Scheppach no garantiza la plena compatibilidad una temperatura ambiente entre 18 °C y 25 °C. No entre el producto y otros sistemas inalámbricos co- cargue la batería a temperaturas ambiente por...
  • Seite 104: Datos Técnicos

    m ADVERTENCIA: • No utilice nunca el cargador en caso de que los Las baterías de iones de litio pueden explotar o pro- cables, la clavija de conexión o el propio producto vocar un incendio si se desmontan, se cortocircuitan presenten daños debidos a efectos externos.
  • Seite 105: Desembalaje

    ¡Antes de la puesta en marcha, es imprescindi- m IMPORTANTE: ble montar por completo el producto! El cargador solo es adecuado para cargar el tipo de producto RoboCut L500. m ¡ATENCIÓN! En caso de querer utilizar un escarificador en la Ruidos y vibraciones...
  • Seite 106 8.1 Colocación / posición correcta de la estación • Coloque el cable perimetral (11) como se descri- de carga (10) be en el punto 8.3 “Colocación del cable perime- tral (11)”. m ADVERTENCIA m NOTA: No fije la estación de carga (10), con la ayuda de El cable perimetral (11) debe colocarse al menos un martillo (no incluido en el volumen de sumi- 100 cm en línea recta delante de la estación de...
  • Seite 107 - no hay partes sobresalientes o puntiagudas en • Fije el cable perimetral (11) como mínimo cada 80 la superficie perimetral que puedan entrar en cm utilizando un clavo de alambre (12) (ilustración contacto con el cortacésped o sus cuchillas y 12).
  • Seite 108: Antes De La Puesta En Marcha

    parpa- El cable pe- Compruebe que los dos m INDICACIÓN dea de rimetral está extremos del cable peri- Cuando haya delimitado completamente la zona color dañado o mal metral estén conectados de trabajo, conecte el cable perimetral (11) a la es- rojo conectado.
  • Seite 109 Conexión eléctrica m INDICACIÓN El motor eléctrico instalado está conectado listo para La flecha del botón giratorio de regulación de altura utilizarse. La conexión cumple las pertinentes dispo- de corte (2) apunta a los números exteriores al mis- siciones VDE y DIN. mo.
  • Seite 110 m INDICACIÓN • El símbolo y un número (por ejemplo, 2020) se Una vez que la batería está completamente cargada, iluminan en la pantalla. el robot cortacésped vuelve a ponerse en marcha. • Utilice los botones “START”, “HOME” y “OK” para Alternativamente, el robot cortacésped puede per- ajustar el año, de forma análoga al ajuste del PIN.
  • Seite 111: Funciones De La Aplicación

    01/2023 S.Nr.: 0169-01001 S/N: Scheppach GmbH - Günzburger Straße 69 - 89335 Ichenhausen - Germany SN:2201168000XX00000001 9.4.2 Comunicación/transmisión de datos m ADVERTENCIA La aplicación se comunica con el robot cortacésped El uso de la aplicación se incluye bajo el término a través de Bluetooth o WiFi.
  • Seite 112: Limpieza

    9.4.3.2 Ajustar las zonas de corte Para evitar daños, evite que el robot cortacésped (1) En esta función, se pueden configurar manualmen- se caiga al suelo desde grandes alturas. te dos zonas de corte diferentes en %. Por defecto, Si esto ocurre, hay que llevar inmediatamente el ro- la función está...
  • Seite 113: Actualización De Software Mediante Usb

    (7). El software para la transmisión por USB puede des- Si los tornillos de cabeza ranurada en cruz (8) están cargarse en nuestra página web www.scheppach. dañados o ya no se pueden apretar, también deben com. sustituirse. 13.3.1 Actualización de software mediante USB Se incluyen tornillos nuevos con las cuchillas de re- •...
  • Seite 114: Eliminación Y Reciclaje

    Piezas de desgaste*: cuchilla (7), tornillos (8), cable - Puede entregar hasta tres aparatos eléctricos perimetral (11), clavos de alambre (12). usados por tipo de aparato, con una longitud máxima de canto de 25 centímetros, de forma * ¡No se incluyen obligatoriamente en el volumen de gratuita sin necesidad de adquirir previamente suministro! un aparato nuevo del fabricante o bien llevarlos...
  • Seite 115: Solución De Fallos / Códigos De Error

    Desmontaje de la batería antes de desechar el • Las baterías recargables y las pilas se pueden de- positar de forma gratuita en los siguientes puntos: aparato - Puntos públicos de eliminación o recogida (p. ej., • Antes de desechar el aparato, la batería integra- obras públicas municipales) da deberá...
  • Seite 116 • Cuando el cortacésped esté en la zona de trabajo, compruebe el indicador led de la esta- No hay señal ción de carga. Si se ilumina de color rojo, asegúrese de que los cables perimetrales estén de límite bien conectados a las pinzas de la estación de carga. Si el problema persiste, compruebe si se han cortado los cables perimetrales.
  • Seite 117 Explicação dos símbolos no produto A utilização de símbolos neste manual serve para chamar a sua atenção para potenciais riscos. Os símbolos de segu- rança e explicações associadas devem ser bem compreendidos. Os avisos em si não eliminam quaisquer riscos e não substituem medidas corretas para a prevenção de acidentes.
  • Seite 118 Conteúdo: Página: Introdução ................. 112 Descrição do produto ..............112 Âmbito de fornecimento ............112 Utilização correta ..............112 Indicações de segurança ............113 Dados técnicos ................115 Desembalar ................116 Montagem / Antes da colocação em funcionamento ....116 Colocar em funcionamento / ajustes .........
  • Seite 119: Introdução

    Fabricante: peciais do seu país, devem ser cumpridas as regras técnicas geralmente reconhecidas para a operação Scheppach GmbH de máquinas idênticas. Günzburger Straße 69 Não assumimos qualquer responsabilidade por aci- D-89335 Ichenhausen, Alemanha dentes ou danos que advenham do não cumprimento...
  • Seite 120: Indicações De Segurança

    Devem ser seguidas todas as restantes regras ge- • Em caso de utilização do produto numa área públi- rais relativas às áreas de medicina do trabalho e de ca, devem ser colocados sinais de aviso à volta da segurança. área de trabalho. Estes sinais deve ter o seguinte Qualquer alteração na máquina exclui o fabricante texto: de toda e qualquer responsabilidade por danos daí...
  • Seite 121 • A Scheppach não assume qualquer garantia pe- temperatura do ar se encontra entre 18 °C e 25 la compatibilidade total entre o produto e outros °C.
  • Seite 122: Dados Técnicos

    • Não desmantele, abra ou retalhe a bateria. • Nunca utilize o carregador, se o cabo, a ficha ou o • Não curto-circuite uma bateria. Não guarde bate- próprio produto estiverem danificados por influên- rias numa caixa ou gaveta na qual elas possam cias externas.
  • Seite 123: Desembalar

    IMPORTANTE: Se pretender utilizar um escarificador na área de trabalho, é obrigatório enterrar o arame de limi- O carregador é exclusivamente adequado ao carre- gamento do tipo de produto RoboCut L500. tação (11). Ruído e vibrações m ATENÇÃO! m Aviso: o ruído pode ter efeitos graves na sua saú- Não utilize um aparador nas proximidades do...
  • Seite 124 8.1 Instalação / posição correta da estação de • Insira o arame de delimitação (11) isolado na bra- carregamento (10) çadeira de cabo vermelha “OUT”, no lado traseiro da estação de carregamento (10). m ATENÇÃO De seguida, conduza o arame de delimitação (11) Fixe a estação de carregamento (10) com a aju- pela ranhura por baixo da estação de carregamen- da de um martelo (não incluído no âmbito de for-...
  • Seite 125 8.3.1.2 Fixar o arame de delimitação (11) com es- • A distância entre o arame de delimitação (11) e o bordo exterior deve ser de 30 cm (figura 6). tacas para arame (12) • Uma distância de 8 cm entre o arame de delimita- ção (11) é...
  • Seite 126: Antes Da Colocação Em Funcionamento

    8.3.3 Delimitação de escarpas/declives >35% (fig. 15) 8.4.1 Descrição do estado do LED (fig. 17) • A distância entre a delimitação e escarpas/decli- Estado Significado Medida ves >35% deve ser de pelo menos 40 cm, tal como do LED ilustrado na figura 15. Apagado Assegure-se de •...
  • Seite 127: Colocar Em Funcionamento / Ajustes

    Proceda tal como descrito acima e ligue o corta-relva É obrigatória uma impressão da designação do tipo (ver ponto 9) com o botão “START”. no cabo de ligação. Em caso de problemas, pode parar o corta-relva com o botão de paragem (4). 9.1.
  • Seite 128 m ATENÇÃO • Para os 2.º a 4.º algarismos, proceda tal como des- Se o código PIN for introduzido incorretamente 10 crito acima. vezes, surge “LOCK” no visor. O aparelho perma- • Após a confirmação do quarto algarismo com o nece bloqueado durante 10 minutos e só...
  • Seite 129 8,0 kg . IPX5 01/2023 0169-01001 manufactured: S.Nr.: S/N: Scheppach GmbH - Günzburger Straße 69 - 89335 Ichenhausen - Germany SN:2201168000XX00000001 9.4.2 Comunicação/transmissão de dados A aplicação comunica com o robô corta-relva atra- vés de Bluetooth ou WiFi. mNOTA Devido à transferência de dados da aplicação para a internet, poderão existir custos, dependendo do con-...
  • Seite 130: Limpeza

    11. Transporte m ATENÇÃO A alteração do plano de corte de relva, o início do corte de relva, a ligação e desconexão do mo- • Pressione o botão (botão “POWER ON/OFF”) do automático, o envio do robô corta-relva pa- para desligar o robô corta-relva (1). ra a estação de carregamento e a alteração da •...
  • Seite 131 Desligue o corta-relva antes de iniciar o trabalho. A versão mais recente do software encontra-se na • Para montar/desmontar a bateria, coloque o robô aplicação ou em www.scheppach.com. corta-relva (1) virado ao contrário numa bancada de trabalho. (Recomendamos uma base macia Informações de assistência...
  • Seite 132: Eliminação E Reciclagem

    Número(s) de artigo das peças de desgaste: • Em caso de fornecimento de um aparelho elétrico Pos. 7 Lâmina 7913001601 novo por parte do fabricante a um domicílio, este Pos. 8 Parafusos 3913001001 pode efetuar a recolha sem custos do aparelho Pos.
  • Seite 133: Resolução De Falhas / Códigos De Erro

    Desmontar a bateria antes da eliminação do apa- relho • Antes da eliminação do aparelho, a bateria inte- grada deve ser desmontada e eliminada separada- mente de modo ecológico. • Cole contactos abertos e embale a bateria de modo a que ela não se movimente dentro da embalagem. Respeite igualmente eventuais regulamentos na- cionais adicionais.
  • Seite 134 • Desligue o corta-relva. • Vire o corta-relva ao contrário e determine o que está a impedir as lâminas de girar. O disco de lâmi- • Remova os objetos e volte a virar o corta-relva. nas bloqueia • Coloque o corta-relva numa área com relva curta. •...
  • Seite 139: Eg-Konformitätserklärung

    RASENMÄHROBOTER RoboCut L500 mit Ladestation, Akku und Netzteil 16. Dichiarazione di conformità Article name: ROBOT MOWER RoboCut L500 with charging station, battery and power supply Nom d’article: ROBOT TONDEUSE RoboCut L500 avec station de recharge, batterie et unité 16. Conformiteitsverklaring d’alimentation électrique...
  • Seite 140 Stand der Informationen · Status of the information · État des informations · Versione delle informazioni · Stand van de informatie · Información disponible · Versão das informações Update: 12/2022 · Ident.-No.: 59130019944...

Inhaltsverzeichnis