Herunterladen Inhalt Inhalt Diese Seite drucken
Inhaltsverzeichnis

Werbung

Verfügbare Sprachen
  • DE

Verfügbare Sprachen

  • DEUTSCH, seite 1
VINOVILLA 17 DUO
VILHELMINE
Weinkühlschrank
Wine Cooler
Vinoteca
Cave à vin
Frigorifero per vino
10041821
www.klarstein.com

Werbung

Inhaltsverzeichnis
loading

Inhaltszusammenfassung für Klarstein VINOVILLA 17 DUO VILHELMINE

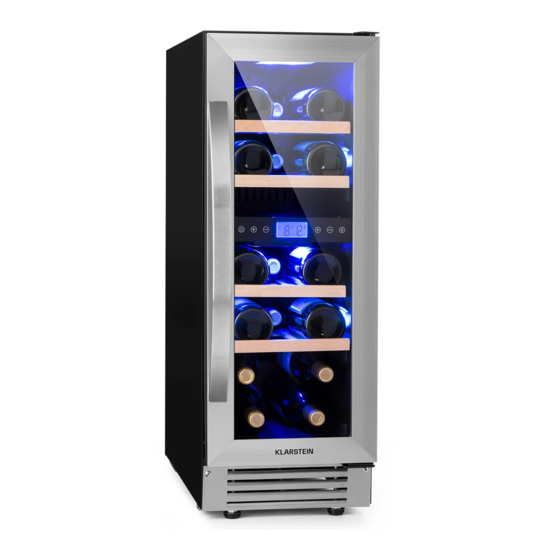
  • Seite 1 VINOVILLA 17 DUO VILHELMINE Weinkühlschrank Wine Cooler Vinoteca Cave à vin Frigorifero per vino 10041821 www.klarstein.com...
  • Seite 3: Inhaltsverzeichnis

    Sehr geehrter Kunde, wir gratulieren Ihnen zum Erwerb Ihres Gerätes. Lesen Sie die folgenden Hinweise sorgfältig durch und befolgen Sie diese, um möglichen Schäden vorzubeugen. Für Schäden, die durch Missachtung der Hinweise und unsachgemäßen Gebrauch entstehen, übernehmen wir keine Haftung. Scannen Sie den folgenden QR-Code, um Zugriff auf die aktuellste Bedienungsanleitung und weitere Informationen rund um das Produkt zu erhalten:...
  • Seite 4: Sicherheitshinweise

    SICHERHEITSHINWEISE • Dieses Gerät ist nicht dafür bestimmt, durch Personen (einschließlich Kinder) mit eingeschränkten physischen, sensorischen oder geistigen Fähigkeiten oder mangels Erfahrung und mangels Wissen benutzt zu werden, es sei denn, sie werden durch eine für ihre Sicherheit zuständige Person beaufsichtigt oder erhielten von ihr Anweisungen, wie das Gerät zu benutzen ist.
  • Seite 5 Um eine Kontamination von Getränken zu vermeiden, beachten Sie bitte die folgenden Anweisungen: • Ein längeres Öffnen der Tür kann zu einem deutlichen Temperaturanstieg in den Fächern des Gerätes führen. • Reinigen Sie regelmäßig Oberflächen, die mit Getränken in Berührung kommen können.
  • Seite 6 Besondere Hinweise zum korrekten Gebrauch • Dieses Gerät ist ausschließlich für die Lagerung von Wein bestimmt. • Dieses Gerät ist nicht für die Verwendung als Einbaugerät vorgesehen, außer es wird explizit in der Anleitung erwähnt. • Dieses Gerät ist nicht zum Einfrieren von Lebensmitteln geeignet. •...
  • Seite 7: Installation

    INSTALLATION Vor dem ersten Betrieb Lassen Sie das Gerät vor dem ersten Betrieb 24 Stunden lang stehen, damit sich das Kühlmittel verteilen kann. Lassen Sie die Tür in dieser Zeit offen, damit sich produktionsbedingter Geruch verflüchtigen kann. Hinweis: Alle Modelle ohne Frontbelüftung bzw. Belüftungsschlitze an der Front sind keine Einbaugeräte und müssen frei stehen.
  • Seite 8: Einbaumaße

    Hinweis zu Einbaugeräten • Alle Geräte mit Belüftungsschlitzen an der Front sind zum Einbau geeignet, dürfen aber nicht in komplett geschlossene Gehäuse eingebaut werden. • Einbaugeräte saugen Luft rechts am Lüftungsrahmen an (manche Modelle auch an der Rückseite) und lassen Sie über den Lüftungsrahmen vorne wieder heraus.
  • Seite 9: Geräteübersicht

    GERÄTEÜBERSICHT Gehäuse Unteres Scharnier Regal Tür Bedienfeld Griff Abdeckung Türdichtung Lüftungsschlitze Oberes Scharnier Einstellbare Füße...
  • Seite 10: Befestigung Des Türgriffs

    BEFESTIGUNG DES TÜRGRIFFS Der Griff wird in einer separaten Verpackung mit Schrauben zusammen im Karton geliefert. Legen Sie die beiden kleine Löcher auf der Innenseite des Türrahmens frei, indem Sie die Türdichtung etwas herausziehen. Richten Sie den Griff an den Löchern aus und setzen Sie die Schrauben von innen ein.
  • Seite 11: Türdrehung

    TÜRDREHUNG Der Weinkühler wird mit der Türöffnung von links nach rechts geliefert. Um die Öffnungsrichtung umzukehren: Öffnen Sie die Tür im 90-Grad-Winkel Ziehen Sie die Tür (5) langsam nach und halten Sie sie fest. Lösen Sie die außen (folgen Sie der Pfeilrichtung beiden Schrauben (1) aus dem rechten in der unteren Abbildung), um das unteren Scharnier.
  • Seite 12 Schrauben Sie das obere rechte Montieren Sie das obere linke Scharnier (4) und das rechte untere Scharnier (7) und das linke untere Scharnier (2) vom Schrank (6) ab und Scharnier (8) an der linken Seite des bewahren Sie die Scharniere gut auf, Gehäuses.
  • Seite 13: Bedienung

    BEDIENUNG Ein/Aus Halten Sie die Taste 3 Sekunden lang gedrückt, um das Gerät auszuschalten und in den Stand-by-Modus zu wechseln. Halten Sie die Taste erneut 3 Sekunden lang gedrückt, um zum normalen Betrieb zurückzukehren. Licht Drücken Sie die Taste, um die LED-Leuchten im Inneren ein- oder auszuschalten.
  • Seite 14: Fehlercodes

    Tastenkombinationen Kindersicherungs-Kombination Halten Sie zum Sperren des Bedienfelds beide Tasten gleichzeitig für 3 Sekunden gedrückt. Halten Sie zum Entsperren des Bedienfelds beide Tasten gleichzeitig für 3 Sekunden gedrückt. Hinweise zur Bedienung • Die voreingestellte Temperatur beträgt ist 12 °C und muss nach der Inbetriebnahme entsprechend dem Wein eingestellt werden.
  • Seite 15: Weinlagerung

    WEINLAGERUNG • Das Gerät ist mit mehreren Regalen ausgestattet, auf denen Sie ihren Wein verstauen können. • Die Vier hölzernen Regale haben eine Ladekapazität von 17 Weinflaschen (Standard Bordeaux-Flasche mit 750 ml). • Die Ladekapazität variiert je nach Art der Flaschenanordnung oder je nach Flaschengröße.
  • Seite 16: Reinigung Und Pflege

    REINIGUNG UND PFLEGE Reinigung des Gerätes • Schalten Sie das Gerät erst aus und ziehen Sie den Netzstecker aus der Steckdose. • Entfernen Sie den gesamten Inhalt. • Wischen Sie das Innere mit einem feuchten Tuch ab, das in lauwarmes Wasser mit etwas Spülmittel getaucht wurde.
  • Seite 17: Fehlerbehebung

    FEHLERBEHEBUNG Problem Mögliche Ursache und Lösungsansatz Das Gerät Es ist nicht eingesteckt. läuft nicht. Es ist ausgeschaltet. Die Sicherung ist raus oder kaputt. Das Gerät Überprüfen Sie die Temperatureinstellungen. ist nicht kalt Die Umgebung erfordert eine niedrigere Einstellung. genug. Die Tür wurde zu oft geöffnet. Die Tür ist nicht richtig zu.
  • Seite 18: Produktdatenblatt

    PRODUKTDATENBLATT Angaben nach Verordnung (EU) Nr. 2019/2016 Name oder Handelsmarke des Herstellers: Klarstein Adresse des Herstellers: Wallstraße 16, 10179 Berlin, Deutschland. Artikelnummer: 10041821 Art des Kühlgeräts: Geräuscharmes Gerät: nein Bauart: freistehend Weinlagerschrank: Anderes Kühlgerät: nein Allgemeine Produktparameter: Parameter Wert Parameter Wert Höhe...
  • Seite 19 Art der Lichtquelle Energieeffizienzklasse Mindestlaufzeit der vom Hersteller angebotenen Garantie: 24 Monate Weitere Angaben: Weblink zur Website des Herstellers, auf der die Informationen gemäß Nummer 4 Buchstabe a des Anhangs der Verordnung (EU) 2019/2019 der Kommission zu finden sind: www.klarstein.de...
  • Seite 20: Spezielle Entsorgungshinweise Für Verbraucher In Deutschland

    SPEZIELLE ENTSORGUNGSHINWEISE FÜR VERBRAUCHER IN DEUTSCHLAND Entsorgen Sie Ihre Altgeräte fachgerecht. Dadurch wird gewährleistet, dass die Altgeräte umweltgerecht verwertet und negative Auswirkungen auf die Umwelt und menschliche Gesundheit vermieden werden. Bei der Entsorgung sind folgende Regeln zu beachten: • Jeder Verbraucher ist gesetzlich verpflichtet, Elektro- und Elek- tronikaltgeräte (Altgeräte) sowie Batterien und Akkus getrennt vom Hausmüll zu entsorgen.
  • Seite 21 • Bei einem Vertrieb unter Verwendung von Fernkommunikationsmitteln ist die unentgeltliche Abholung am Ort der Abgabe auf Elektro- und Elektronikgeräte der Kategorien 1, 2 und 4 gemäß § 2 Abs. 1 ElektroG, nämlich „Wärmeüberträger“, „Bildschirmgeräte“ (Oberfläche von mehr als 100 cm²) oder „Großgeräte“...
  • Seite 22: Hinweise Zur Entsorgung

    HINWEISE ZUR ENTSORGUNG Wenn es in Ihrem Land eine gesetzliche Regelung zur Entsorgung von elektrischen und elektronischen Geräten gibt, weist dieses Symbol auf dem Produkt oder auf der Verpackung darauf hin, dass dieses Produkt nicht im Hausmüll entsorgt werden darf. Stattdessen muss es zu einer Sammelstelle für das Recycling von elektrischen und elektronischen Geräten gebracht werden.
  • Seite 23 Dear customer, Congratulations on the purchase of your device. Please read the following instructions carefully and follow them to prevent potential damage. We accept no liability for damage caused by disregarding the instructions or improper use. Please scan the QR code to access the latest operating instructions and for further information about the product.
  • Seite 24: Safety Instructions

    SAFETY INSTRUCTIONS • This appliance is not intended to be used by persons (including children) with reduced physical, sensory or mental capabilities, or lack of experience and knowledge, unless they have been given supervision or instruction concerning use of the appliance by a person responsible for their safety. •...
  • Seite 25 To avoid contamination of beverages, please follow the instructions below: • Opening the door for too long can cause a significant temperature rise in the compartments of the appliance. • Regularly clean surfaces that may come into contact with drinks. Clean the water drain regularly.
  • Seite 26 Special notes on correct use • This device is intended exclusively for the storage of wine. • This appliance is not intended for use as a built-in appliance unless explicitly stated in the instructions. • This appliance is not suitable for freezing food. •...
  • Seite 27: Installation

    INSTALLATION Before first use Let the unit stand for 24 hours before first use to allow the coolant to disperse. Leave the door open during this time to allow production-related odours to dissipate. Note: All models without front ventilation or ventilation slots on the front are not built-in appliances and must be free-standing.
  • Seite 28: Installation Dimensions

    Note on built-in appliances • All appliances with ventilation slots on the front are suitable for installation, but must not be installed in completely closed enclosures. • Built-in appliances draw air in on the right side of the ventilation frame (some models also on the back) and let it out again via the ventilation frame at the front.
  • Seite 29: Device Overview

    DEVICE OVERVIEW Housing Lower hinge Shelf Door Control panel Handle Cover Door seal Ventilation slots Upper hinge Adjustable feet...
  • Seite 30: Door Handle Attachment

    DOOR HANDLE ATTACHMENT The handle is delivered in separate packaging with screws together in the box. Expose the two small holes on the inside of the door frame by pulling out the door seal a little. Align the handle with the holes and insert the screws from the inside.
  • Seite 31: Door Rotation

    DOOR ROTATION The wine cooler is supplied with the door opening from left to right. To reverse the opening direction: Open the door at a 90 degree angle Slowly pull the door (5) outwards and hold it. Loosen the two screws (1) (follow the direction of the arrow in from the lower right hinge.
  • Seite 32 Unscrew the upper right hinge (4) Fit the upper left hinge (7) and the and the lower right hinge (2) from the lower left hinge (8) on the left side of cabinet (6) and store the hinges well, the enclosure. in case you want to open the door to the left again in the future.
  • Seite 33: Operation

    OPERATION On / Off Press and hold the button for 3 seconds to switch off the unit and go into stand-by mode. Press and hold the button again for 3 seconds to return to normal operation. Light Press the button to switch the LED lights inside on or off. In stand-by mode, the button has no function.
  • Seite 34: Button Combinations

    Button combinations Child safety combination To lock the control panel, press and hold both buttons simultaneously for 3 seconds. To unlock the control panel, press and hold both buttons simultaneously for 3 seconds. Notes on operation • The preset temperature is 12 °C and must be set according to the wine after commissioning.
  • Seite 35: Wine Storage

    WINE STORAGE • The unit is equipped with several shelves on which you can store your wine. • The four wooden shelves have a loading capacity of 17 wine bottles (standard Bordeaux bottle of 750 ml). • The loading capacity varies depending on the type of bottle arrangement or on the bottle size.
  • Seite 36: Cleaning And Care

    CLEANING AND CARE Cleaning the appliance • Switch off the appliance first and disconnect the power cord from the mains socket. • Remove all the contents. • Wipe the inside with a damp cloth dipped in lukewarm water with a little washing-up liquid.
  • Seite 37: Troubleshooting

    TROUBLESHOOTING Problem Possible cause and solution It is not plugged in. appliance is It is switched off. not working. The fuse is out or blown. Check the temperature settings. appliance The environment requires a lower setting. is not cold The door was opened too often. enough.
  • Seite 38: Product Data Sheet

    PRODUCT DATA SHEET Information according to Regulation (EU) No 2019/2016 Manufacturer's name or trade mark: Klarstein Manufacturer's address: Wallstraße 16, 10179 Berlin, Germany. Product code: 10041821 Type of cooling device: Low-noise device: Construction type: Free-standing Wine storage cabinet: Other cooling device:...
  • Seite 39 Minimum term of the warranty offered by the manufacturer: 24 months Further information: Web link to the website of the manufacturer where the information specified in point 4(a) of the Annex to Commission Regulation (EU) 2019/2019 can be found: www.klarstein.de...
  • Seite 40: Disposal Considerations

    DISPOSAL CONSIDERATIONS If there is a legal regulation in your country regarding the disposal of electrical and electronic equipment, this symbol on the product or on the packaging indicates that this product must not be disposed of with household waste. Instead, it must be taken to a collection point for the recycling of electrical and electronic equipment.
  • Seite 41 Cher client, chère cliente, Toutes nos félicitations pour l’acquisition de ce nouvel appareil. Lisez attentivement les indications suivantes et suivez-les pour éviter d'éventuels dommages. Nous ne saurions être tenus pour responsables des dommages dus au non-respect des consignes et à la mauvaise utilisation de l’appareil.
  • Seite 42: Consignes De Sécurité

    CONSIGNES DE SÉCURITÉ • Cet appareil n'est pas destiné à être utilisé par des personnes (y compris des enfants) ayant des capacités physiques, sensorielles ou mentales limitées ou dénuées d'expérience et de connaissances, sauf sous surveillance ou après avoir été formées par un responsable de leur sécurité aux instructions et à la façon d'utiliser l'appareil.
  • Seite 43 Pour éviter de contaminer les boissons, respectez les consignes suivantes : • L'ouverture prolongée de la porte peut entraîner une hausse significative de la température dans les compartiments de l'appareil. • Nettoyez régulièrement les surfaces pouvant entrer en contact avec les aliments.
  • Seite 44 Consignes particulières pour une utilisation correcte • Cet appareil est exclusivement destiné à la conservation du vin. • Cet appareil n'est pas destiné à être encastré, sauf si cela est explicitement mentionné dans les instructions. • Cet appareil n'est pas destiné à la congélation d'aliments. •...
  • Seite 45: Installation

    INSTALLATION Avant la première utilisation Avant d'utiliser l'appareil pour la première fois, laissez-le reposer pendant 24 heures afin que le liquide de refroidissement puisse se répartir. Pendant ce temps, laissez la porte ouverte pour que l'odeur de neuf puisse s'échapper. Remarque : Tous les modèles sans ventilation ou fentes de ventilation à...
  • Seite 46: Dimensions D'installation

    Remarques sur les appareils encastrés • Tous les appareils avec fentes d'aération à l'avant conviennent à l'installation encastrée mais ne doivent pas être installés dans des niches complètement fermées. • Les appareils intégrés aspirent de l'air à droite du cadre de ventilation (certains modèles également à...
  • Seite 47: Aperçu De L'appareil

    APERÇU DE L'APPAREIL Boîtier Charnière inférieure Clayette Porte Panneau de commande Poignée Couvercle Joint de porte Fentes de ventilation Charnière supérieure Pieds réglables...
  • Seite 48: Fixation De La Poignée De Porte

    FIXATION DE LA POIGNÉE DE PORTE La poignée est livrée dans un emballage séparé avec les vis ensemble dans le carton. Dégagez les deux petits trous à l'intérieur du cadre de la porte en tirant légèrement sur le joint de la porte. Alignez la poignée avec les trous et insérez les vis depuis l'intérieur.
  • Seite 49: Rotation De La Porte

    ROTATION DE LA PORTE Le refroidisseur de vin est livré avec l'ouverture de la porte de gauche à droite. Pour inverser le sens d'ouverture : Ouvrez la porte à un angle de 90° et Tirez lentement la porte (5) vers tenez-la.
  • Seite 50 Dévissez la charnière supérieure droite Montez la charnière supérieure (4) et la charnière inférieure droite (2) gauche (7) et la charnière inférieure de l'armoire (6) et conservez bien les gauche (8) sur le côté gauche du charnières, si vous souhaitez ouvrir boîtier.
  • Seite 51: Utilisation

    UTILISATION Marche/arrêt Maintenez la touche enfonée pendant 3 secondes pour éteindre l'appareil et passer en mode veille. Maintenez à nouveau la touche enfoncée pendant 3 secondes pour revenir à l'utilisation normale. Luminosité Appuyez sur le bouton pour allumer ou éteindre les lumières LED à l'intérieur.
  • Seite 52: Remarques Sur L'utilisation

    Combinaison de touches Combinaison de sécurité pour enfants Pour verrouiller le panneau de commande, maintenez les deux boutons enfoncés simultanément pendant 3 secondes. Pour déverrouiller le panneau de commande, maintenez les deux boutons enfoncés simultanément pendant 3 secondes. Remarques sur l'utilisation •...
  • Seite 53: Stockage Du Vin

    STOCKAGE DU VIN • L'appareil est équipé de plusieurs étagères sur lesquelles vous pouvez ranger votre vin. • Les quatre étagères en bois ont une capacité de 17 bouteilles de vin (bouteille de Bordeaux standard de 750 ml). • La capacité de charge varie en fonction du type de disposition des bouteilles ou de leur taille.
  • Seite 54: Nettoyage Et Entretien

    NETTOYAGE ET ENTRETIEN Nettoyage de l'appareil • Éteignez l'appareil et débranchez la fiche de la prise. • Retirez tout le contenu. • Essuyez l'intérieur avec un chiffon humide imbibé d'eau tiède avec un peu de liquide vaisselle. • Soyez attentif à la propreté du joint en caoutchouc sur la porte pour que l'appareil reste efficace.
  • Seite 55: Résolution Des Problèmes

    RÉSOLUTION DES PROBLÈMES Problème Cause possible et solution L'appareil ne Il n'est pas branché. fonctionne Il est éteint. pas. Le fusible est déclenché ou hors service. L'appareil n'est Contrôlez le réglage de la température. pas assez La température ambiante requiert un réglage plus froid. froid.
  • Seite 56: Fiche De Données Produit

    FICHE DE DONNÉES PRODUIT Informations selon le règlement (UE) n ° 2019/2016 Nom ou marque du fabricant : Klarstein Adresse du fabricant : Wallstraße 16, 10179 Berlin, Allemagne. Numéro d'article : 10041821 Type d'appareil réfrigérant : Appareil silencieux : Type de construction :...
  • Seite 57 Durée minimale de la garantie offerte par le fabricant : 24 mois Indications supplémentaires : Lien web vers le site Internet du fabricant sur lequel vous trouverez des informations au point 4.a. de l'annexe du règlement (UE) 2019/2019 de la Commission : www.klarstein.fr...
  • Seite 58: Informations Sur Le Recyclage

    INFORMATIONS SUR LE RECYCLAGE Si l'élimination des appareils électriques et électroniques est réglementée dans votre pays, ce symbole sur le produit ou sur l'emballage indique qu'il ne doit pas être mis au rebut avec les ordures ménagères. Vous devez l'acheminer vers un point de collecte pour le recyclage des appareils électriques et électroniques.
  • Seite 59 Estimado cliente: Le felicitamos por la adquisición de este producto. Lea atentamente el siguiente manual y siga cuidadosamente las instrucciones de uso con el fin de evitar posibles daños. La empresa no se responsabiliza de los daños ocasionados por un uso indebido del producto o por haber desatendido las indicaciones de seguridad.
  • Seite 60: Indicaciones De Seguridad

    INDICACIONES DE SEGURIDAD • Este aparato no está diseñado para ser manejado por personas (incluidos niños) con discapacidad física, sensorial o psíquica o con falta de experiencia y conocimientos, salvo bajo supervisión de una persona responsable o tras recibir instrucciones sobre cómo utilizar el aparato. •...
  • Seite 61 Para evitar la contaminación de las bebidas, siga las siguientes instrucciones: • Mantener la puerta abierta durante un período prolongado puede provocar un aumento significativo de la temperatura en los compartimentos del aparato. • Limpie regularmente las superficies que puedan estar en contacto con los alimentos.
  • Seite 62 Indicaciones específicas para un uso adecuado • Este aparato está destinado únicamente al almacenamiento de vino. • Este aparato no está destinado a ser utilizado como aparato empotrado a menos que se indique explícitamente en las instrucciones. • Este aparato no es adecuado para congelar alimentos. •...
  • Seite 63: Instalación

    INSTALACIÓN Antes del primer uso Deje reposar la unidad durante 24 horas antes de utilizarla por primera vez para que el refrigerante se disperse. Deje la puerta abierta durante este tiempo para que se disipe cualquier olor relacionado con la producción. Nota: todos los modelos sin ventilación frontal o respiraderos frontales son unidades independientes no empotrables.
  • Seite 64 Nota sobre los aparatos empotrados • Todos los dispositivos con ranuras de ventilación en la parte delantera son adecuados para su instalación, pero no deben instalarse en recintos completamente cerrados. • Los dispositivos incorporados aspiran el aire en el lado derecho del marco de ventilación (algunos modelos también en la parte trasera) y lo dejan salir de nuevo a través del marco de ventilación en la parte delantera.
  • Seite 65: Vista General Del Aparato

    VISTA GENERAL DEL APARATO Carcasa Bisagra inferior Balda Puerta Panel de control Tapa Junta de la puerta Ranuras de ventilación Bisagra superior Patas de altura regulable...
  • Seite 66: Fijación De La Manija De La Puerta

    FIJACIÓN DE LA MANIJA DE LA PUERTA El mango se entrega en un embalaje separado con los tornillos juntos en la caja. Exponga los dos pequeños agujeros en el interior del marco de la puerta tirando un poco de la junta de la puerta. Alinee el mango con los agujeros e inserte los tornillos desde el interior.
  • Seite 67: Rotación De La Puerta

    ROTACIÓN DE LA PUERTA La nevera para vinos se suministra con la puerta abierta de izquierda a derecha. Para invertir el sentido de apertura: Abra la puerta en un ángulo de 90 Tire lentamente de la puerta (5) hacia grados y sosténgala. Afloje los dos fuera (siga la dirección de la flecha en tornillos (1) de la bisagra inferior la ilustración siguiente) para liberar la...
  • Seite 68 Desenrosque la bisagra superior Coloque la bisagra superior izquierda derecha (4) y la bisagra inferior (7) y la bisagra inferior izquierda (8) en derecha (2) del armario (6) y guarde el lado izquierdo de la caja. bien las bisagras, por si en el futuro quiere volver a abrir la puerta hacia la Nota: Las bisagras (7 y 8) se izquierda.
  • Seite 69: Funcionamiento

    FUNCIONAMIENTO Encender/apagar Mantenga pulsado el botón durante 3 segundos para apagar la unidad y pasar al modo de espera. Mantenga pulsado el botón de nuevo durante 3 segundos para volver al funcionamiento normal. Pulse el botón para encender o apagar las luces LED del interior. En el modo de espera, el botón no tiene ninguna función.
  • Seite 70 Combinaciones de teclas Combinación de seguridad para niños Para bloquear el panel de control, mantenga pulsados ambos botones simultáneamente durante 3 segundos. Para desbloquear el panel de control, mantenga pulsados ambos botones simultáneamente durante 3 segundos. Notas sobre el funcionamiento •...
  • Seite 71: Almacenamiento De Vino

    ALMACENAMIENTO DE VINO • El mueble está equipado con varios estantes en los que puede guardar su vino. • Los cuatro estantes de madera tienen una capacidad de carga de 17 botellas de vino (botella bordelesa estándar de 750 ml). •...
  • Seite 72: Limpieza Y Cuidado

    LIMPIEZA Y CUIDADO Limpieza del aparato • Primero, apague el aparato y desconecte el enchufe de la toma de corriente. • Retire todo el contenido. • Limpie el interior con un paño húmedo mojado en agua tibia con un poco de detergente.
  • Seite 73: Reparación De Anomalías

    REPARACIÓN DE ANOMALÍAS Problema Posible causa y solución El aparato no No está enchufado. funciona. Está apagado. El fusible está apagado o fundido. La unidad Compruebe los ajustes de temperatura. no está lo El entorno requiere un ajuste más bajo. suficientemente La puerta se ha abierto con demasiada frecuencia.
  • Seite 74: Ficha Técnica Del Producto

    FICHA TÉCNICA DEL PRODUCTO Información de conformidad con el reglamento (UE) Núm. 2019/2016 Nombre o marca comercial del fabricante: Klarstein Dirección del fabricante: Wallstraße 16, 10179 Berlín, Alemania. Número de artículo: 10041821 Tipo de aparato de refrigeración: Aparato de bajo nivel de ruido: Tipo de instalación:...
  • Seite 75 Duración mínima de la garantía ofrecida por el fabricante: 24 meses Información adicional: Enlace al sitio web del fabricante, en el que se encuentra la información contemplada en el punto 4, letra a), del anexo del Reglamento (UE) 2019/2019 de la Comisión: www.klarstein.es...
  • Seite 76: Indicaciones Sobre La Retirada Del Aparato

    INDICACIONES SOBRE LA RETIRADA DEL APARATO Si en su país existe una disposición legal relativa a la eliminación de aparatos eléctricos y electrónicos, este símbolo estampado en el producto o en el embalaje advierte de que no debe eliminarse como residuo doméstico.
  • Seite 77 Gentile cliente, La ringraziamo per l'acquisto del dispositivo. La preghiamo di leggere attentamente le seguenti indicazioni e di seguirle per prevenire eventuali danni. Non ci assumiamo alcuna responsabilità per danni scaturiti da una mancata osservanza delle indicazioni relative alla sicurezza e da un uso improprio del dispositivo.
  • Seite 78: Avvertenze Di Sicurezza

    AVVERTENZE DI SICUREZZA • Questo dispositivo non è progettato per essere utilizzato da persone (inclusi bambini) con limitate facoltà fisiche, psichiche e sensoriali o esperienza e/o conoscenze insufficienti, a meno che siano supervisionate da una persona responsabile del loro controllo o abbiano ricevuto istruzioni sull'utilizzo corretto e sicuro del dispositivo.
  • Seite 79 Per evitare la contaminazione delle bevande, rispettare le seguenti indicazioni: • Se lo sportello resta aperto a lungo, si verifica un significativo aumento della temperatura nei vani del dispositivo. • Pulire regolarmente le superfici che potrebbero entrare in contatto con le bevande.
  • Seite 80 Note particolari sul corretto utilizzo • Questo dispositivo è progettato esclusivamente per la conservazione di vini. • Questo dispositivo non è adatto all'incasso, a meno che non sia espressamente indicato nel manuale. • Questo dispositivo non è adatto al congelamento di alimenti. •...
  • Seite 81: Installazione

    INSTALLAZIONE Prima di procedere all'utilizzo Lasciare in posizione il frigorifero per 24 ore prima di procedere all'utilizzo, in modo che il liquido refrigerante possa distribuirsi omogeneamente nel circuito. Durante questo periodo di tempo, lasciare lo sportello aperto, in modo da permettere all'odore legato al processo di produzione di scomparire.
  • Seite 82: Dimensioni Di Installazione

    Informazioni su dispositivi a incasso • Tutti i dispositivi con prese d'aria sul lato anteriore sono adatti all'incasso. Non possono però essere installati in alloggiamenti completamente chiusi. • I dispositivi da incasso aspirano aria sulla destra dal telaio di ventilazione (alcuni modelli anche sul lato posteriore) e la rilasciano nuovamente dal telaio di ventilazione anteriore.
  • Seite 83: Descrizione Del Dispositivo

    DESCRIZIONE DEL DISPOSITIVO Alloggiamento Cerniera inferiore Ripiano Sportello Pannello di controllo Impugnatura Coperchio Guarnizione dello sportello Fessure di ventilazione Cerniera superiore Piedi d'appoggio regolabili...
  • Seite 84: Installazione Della Maniglia

    INSTALLAZIONE DELLA MANIGLIA La maniglia è consegnata con le viti in un imballaggio separato contenuto nella scatola. Scoprire i due piccoli fori all'interno del telaio dello sportello tirando un poco fuori la guarnizione dello sportello. Allineare la maniglia con i fori e inserire le viti dall'interno.
  • Seite 85: Inversione Dello Sportello

    INVERSIONE DELLO SPORTELLO Il frigorifero per vini è fornito con uno sportello che si apre da sinistra a destra. Per invertire la direzione di apertura: Aprire lo sportello con un angolo di Tirare lentamente la porta (5) verso 90° e tenerlo in posizione. Allentare l'esterno (seguire la direzione della le due viti (1) della cerniera inferiore freccia nell'illustrazione qui sotto)
  • Seite 86 Svitare la cerniera superiore destra (4) Montare la cerniera superiore sinistra e la cerniera inferiore destra (2) dal (7) e la cerniera inferiore sinistra (8) sul frigo (6) e conservare bene le cerniere lato sinistro del dispositivo. qualora in futuro si voglia aprire di nuovo la porta verso sinistra.
  • Seite 87: Utilizzo

    UTILIZZO On/Off Tenere premuto il pulsante per 3 secondi per spegnere il dispositivo e passare alla modalità stand-by. Tenere premuto di nuovo il pulsante per 3 secondi per tornare al funzionamento normale. Luce Premere il pulsante per accendere o spegnere le luci LED all'interno. In modalità...
  • Seite 88: Avvertenze Sull'utilizzo

    Combinazioni dei tasti Combinazione per il blocco di sicurezza per bambini Per bloccare il pannello di controllo, tenere premuti entrambi i pulsanti contemporaneamente per 3 secondi. Per sbloccare il pannello di controllo, tenere premuti entrambi i pulsanti contemporaneamente per 3 secondi. Avvertenze sull'utilizzo •...
  • Seite 89: Conservazione Del Vino

    CONSERVAZIONE DEL VINO • Il dispositivo è dotato di diversi ripiani per la conservazione del vino. • I quattro ripiani in legno hanno una capacità di carico di 17 bottiglie di vino (bottiglia bordolese standard da 750 ml). • La capacità di carico varia a seconda della disposizione o delle dimensioni delle bottiglie.
  • Seite 90: Pulizia E Manutenzione

    PULIZIA E MANUTENZIONE Pulire il dispositivo • Spegnere il dispositivo e staccare la spina dalla presa. • Togliere tutto il contenuto. • Pulire l'interno con un panno inumidito con acqua calda e un po' di detersivo per piatti. • Assicurarsi che la guarnizione di gomma sia pulita, in modo da mantenere inalterate le prestazioni del dispositivo.
  • Seite 91: Risoluzione Dei Problemi

    RISOLUZIONE DEI PROBLEMI Problema Possibile causa e soluzioni Il dispositivo non La spina non è collegata. funziona. Il dispositivo è spento. Il fusibile è saltato o guasto. Il dispositivo Controllare la temperatura impostata. non è L'ambiente richiede un'impostazione più bassa. sufficientemente Lo sportello è...
  • Seite 92: Scheda Informativa Del Prodotto

    SCHEDA INFORMATIVA DEL PRODOTTO Informazioni secondo il regolamento (UE) N. 2019/2016 Nome o marchio commerciale del produttore: Klarstein Indirizzo del produttore: Wallstraße 16, 10179 Berlino, Germania. Numero articolo: 10041821 Tipo di dispositivo di refrigerazione: Dispositivo a bassa rumorosità: Struttura: posizionamento...
  • Seite 93 Tipo di sorgente luminosa Classe di efficienza energetica Durata minima della garanzia offerta dal produttore: 24 mesi Altri dati: Link al sito web del produttore dove sono disponibili le informazioni al numero 4, lettera A dell'allegato del Regolamento della Commissione (UE) 2019/2019: www.klarstein.de...
  • Seite 94: Avviso Di Smaltimento

    AVVISO DI SMALTIMENTO Se nel vostro Paese sono vigenti regolamenti legislativi relativi allo smaltimento di dispositivi elettrici ed elettronici, questo simbolo sul prodotto o sull'imballaggio indica che non è consentito smaltire questo prodotto insieme ai rifiuti domestici. Il dispositivo deve invece essere portato in un centro di raccolta per il riciclaggio di dispositivi elettrici ed elettronici.

Diese Anleitung auch für:

10041821

Inhaltsverzeichnis