EOS Invisio XL Montage- Und Gebrauchsanweisungen

Verwandte Anleitungen für EOS Invisio XL


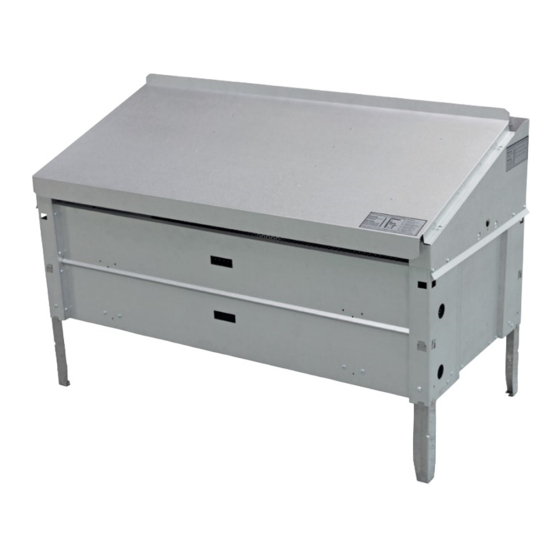
Inhaltszusammenfassung für EOS Invisio XL
- Seite 1 All manuals and user guides at all-guides.com Invisio XL Montage- und Gebrauchsanweisung Assembly and operating instruction Руководство по монтажу и эксплуатации MADE IN GERMANY Druck Nr. 29344491 / 19.15...
-
Seite 3: Inhaltsverzeichnis
All manuals and user guides at all-guides.com Deutsch Inhalt Bestimmungsgemäße Verwendung .....................4 Allgemeine Hinweise ..........................4 Wichtige Hinweise ............................5 Elektroanschluss ............................6 Verdrahtungsschema ..........................7 Montage .................................8 Technische Daten ..........................8 Mindestabstände ..........................8 Montage (Basismontage) ......................9-10 Montage des Aufgusstrichters ..................... 10 Montage (Abschluss) ........................11 Inbetriebnahme .......................... -
Seite 4: Bestimmungsgemäße Verwendung
All manuals and user guides at all-guides.com Sehr geehrte Kundin, sehr geehrter Kunde, Allgemeine Hinweise Sie haben ein hochwertiges technisches Gerät Beachten Sie, dass Sie ein optimales Saunaklima erworben, mit welchem Sie lange Jahre Freude nur dann erreichen, wenn die Kabine mit ihrer am Saunabaden haben werden. -
Seite 5: Wichtige Hinweise
All manuals and user guides at all-guides.com Wichtige Hinweise armen und unbehandeltem Material (z.B. Nordische Fichte) verwendet werden. Bei unsachgemäßer Montage be- • In der Saunakabine darf nur ein Sauna- • steht Brandgefahr! Lesen Sie bitte diese ofen mit der erforderlichen Heizleistung Montageanleitung sorgfältig durch. - Seite 6 All manuals and user guides at all-guides.com triebnahme, dass keine Gegenstände auf Kabinengröße im Verhältnis zur An- dem Saunaheizgerät abgelegt wurden. schlussleistung in kW entnehmen Sie der Tabelle. Achtung: Während des Betriebes • Bei der Montage des Saunaheizgerätes • auftretende hohe Temperaturen am Sau- ist darauf zu achten, dass der senkrechte naheizgerät können bei Berührung zu Ver- Abstand zwischen Oberkante Saunaheiz-...
-
Seite 7: Elektroanschluss
All manuals and user guides at all-guides.com schützt werden, z.B. durch Verlegung in Installa- Standöfen sind bauseitig gegen kippen zu • tionsrohren oder Anbringung von Holzabdeck- sichern. leisten. Das Saunaheizgerät darf bei Fernwirken* nur Achtung: Aufgusswasser immer nur in Verbindung mit einem geeigneten Abdeck- schutz oder S-Guard System verwendet werden über dem Bereich der Steine aufgiessen. -
Seite 8: Anschlußbeispiel Einer Saunaanlage
(LSG) den Steuergeräten Entlüftung Verpackung erforderlich ECON D1, D2, D3, D4 ECON H1, H2, H3, H4 Invisio XL 80 x 116 x 58 9 - 14 m³ 35 x 5 cm 24,5 kg 75 kg nein EMOTEC D EMOTEC H... -
Seite 9: Technische Daten
All manuals and user guides at all-guides.com Mindestabstände Technische Daten Spannung: 400 V AC 3N 50 Hz Die Mindesthöhe der Saunakabine muss innen 1,90 m betragen. Leistungsaufnahme: 9,0 kW Der waagerechte (seitliche) Abstand zwischen Höhe: 800 mm Ofen und Kabinenwand muss mindestens 7 cm Breite: 1160 mm, betragen Tiefe: 580 mm... -
Seite 10: Montage (Basismontage)
All manuals and user guides at all-guides.com 4. Ofen drehen (Anschlussseite des Aufguß- Montage trichters wechseln) 1. Abdeckung (Luftleithaube) demontieren • Lösen Sie die 8 Schrauben an den Seiten • Lösen Sie 4 Schrauben an der Stirnseite der Luftleithaube (siehe Abb. 3) des Ofens (siehe Abb. -
Seite 11: Montage (Abschluss)
All manuals and user guides at all-guides.com 5. Saunasteine einsetzen • Mitgelieferte Steine zunächst unter dem Aufgussrinne ießenden Wasser waschen. • Stellen Sie den Ofen an seine endgültige Position. • Verteilen Sie die Steine gleichmäßig im Steinkorb, so dass zwischen den Steinen Schrauben aureichend Abstände für die Luftzirkula- tion bleiben. - Seite 12 All manuals and user guides at all-guides.com Befestigungsscharuben 9. Fühler montieren • Entgegen den Angaben in der Anleitung Aufgusstrichter für das Steuergerät soll der Fühler wie auf Silikonschlauch der Abb. 1 (S. 8) angezeigt, mittig über dem Ofen an der Saunadecke 11,5 cm Wasserrohr von der Rückwand, mind.
-
Seite 13: Inbetriebnahme
All manuals and user guides at all-guides.com 11. Erstinbetriebnahme 13. Wartung 13.1 Heizstäbe wechseln (Abb. 9) • Brandgefahr! Kontrollieren Sie Vorbereitung immer vor der Inbetriebnahme, dass 1. Ofen spannungsfrei schalten keine brennbaren Gegenstände auf oder 2. Zutri zum Ofen verscha en am Saunaofen und Schutzgitter liegen. - Seite 14 All manuals and user guides at all-guides.com Achtung! Der Aufguss ndet verzögert statt. Gießen Sie die Kelle in den Einfülltrichter in der Kabine aus Durch den Silikon- Verbindungsschlauch wird das Wasser dann über die Saunasteine im Ofen geführt und durch die Aufgusswanne gleichmä- ßig über den Steinen verteilt.
-
Seite 15: Saunasteine
All manuals and user guides at all-guides.com Saunasteine Wartung und P ege Der Saunastein ist ein Naturprodukt. Über- Alle Saunaheizgeräte sind aus korrosionsarmen prüfen Sie die Saunasteine in regelmäßigen Materialen gefertigt. Damit Sie lange Freude Abständen. Die Saunasteine können insbeson- mit Ihrem Saunaheizgerät haben, sollten Sie dere durch scharfe Aufgusskonzentrate ange- das Gerät warten und p egen. - Seite 16 All manuals and user guides at all-guides.com Bei der Installation von Saunaheizgeräten auslösen, muss die elektrische Installation nochmals überprüft werden. ist die DIN VDE 0100 Teil 703 zu beachten! Diese Norm macht in Ihrer neuesten Ausgabe, Für den ordnungsgemäßen Anschluss der Heiz- gültig seit Februar 2006, unter Änderungen Ab- geräte ist der Elektroinstallateur verantwortlich satz 703.412.05 folgende Aussage;...
-
Seite 17: Recycling
Service-Abteilung einzuschicken. Senden Sie das Gerät stets mit diesem ausgefüllten Service Adresse Garantieschein ein. Eventuell entstehende Beförderungskosten für die EOS Saunatechnik GmbH Ein- und Rücksendung können von uns nicht über- Schneiderstriesch 1 nommen werden. 35759 Driedorf Außerhalb Deutschlands wenden Sie sich im Falle Germany eines Garantieanspruches bitte an Ihren Fachhänd-... -
Seite 18: Rücksende-Verfahren (Rma) - Hinweise Für Alle Rücksendungen
All manuals and user guides at all-guides.com Rücksende-Verfahren (RMA) – Hinweise für alle Rücksendungen! Sehr geehrte Kundin, sehr geehrter Kunde, wir wünschen Ihnen viel Freude mit den bestellten Artikeln. Für den Fall, dass Sie ausnahms- weise einmal nicht ganz zufrieden sein sollten, bitten wir Sie um genaue Beachtung der nach- stehenden Verfahrensabläufe.