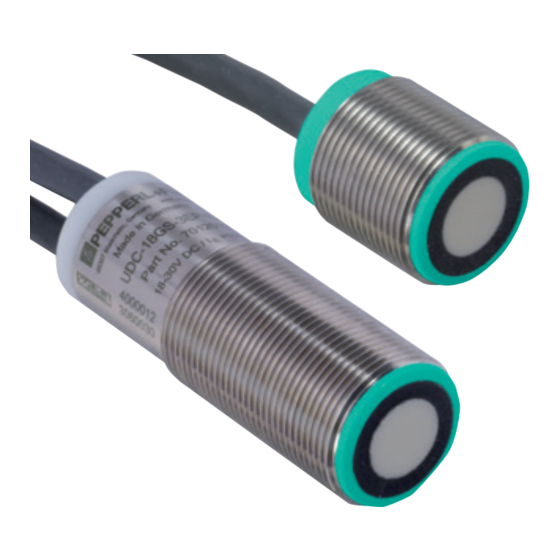
Pepperl+Fuchs UDC-18GS-Serie Inbetriebnahmeanleitung
Doppelbogensensoren
Quicklinks
Inbetriebnahmeanleitung für Doppelbogensensoren der Serie UDC-18GS-*
Commissioning instruction for double sheet sensor series UDC-18GS-*
2
L+
3
IN 1/TEACH
4
IN 2/FEEDBACK
1
SYNC
8
C/Q (OUT 1)
6
OUT 2
5
OUT 3
7
L-
Beschreibung der Sensorfunktion
Produktinformationen
Weitere Informationen zum Produkt wie Technische Daten, Maßzeichnungen etc. finden Sie auf der zugehörigen Produktseite des Sensors auf
www.pepperl-fuchs.de.
Einstellmöglichkeiten
Einige Einstellmöglichkeiten des Sensors sind werksseitig über die entsprechenden Sensoreingänge zugänglich und werden in dieser Inbetrieb-
nahmeanleitung erläutert.
Darüber hinaus verfügt der Sensor über eine IO-Link-Schnittstelle, über die viele weitere Einstellmöglichkeiten und Funktionalitäten zugänglich
sind. Diese werden im Handbuch des Sensors detailliert beschrieben. Für die Parametrierung über die IO-Link-Schnittstelle ist ein IO-Link Mas-
ter (z.B. IO-Link-Master02-USB) und dazugehörige Software (PACTware + DTM bzw. Geräte-IODD) erforderlich. Den Link zum Download der
Software finden Sie ebenso wie das Handbuch zum Download auf www.pepperl-fuchs.de auf der Produktseite des Sensors.
Betriebsweise
Der Sensor misst die durch das Material verursachte Dämpfung des Ultraschallsignals und leitet davon ab, ob sich kein, ein oder mehr als ein
Bogen in der Kontrolle befinden. Die Rückmeldung über den erkannten Zustand (= „Luft", „Einzelbogen" oder „Doppelbogen") erfolgt über die
IO-Link-Prozessdaten, sowie über die drei Schaltausgänge des Sensors. Welcher Ausgang welchen Zustand meldet, entnehmen Sie bitte den
technischen Daten.
Der Sensor bietet die Möglichkeit, eines von 3 zur Verfügung stehenden Schwellenwertesets über die beiden Sensoranschlüsse IN1 und IN2 zur
Auswertung auszuwählen.
Die folgende Tabelle zeigt die dafür nötige Ansteuerung:
Zustand IN1
Zustand IN2
Gewähltes Schwellenwerteset
LOW
LOW
1
LOW
HIGH
2
HIGH
LOW
3
Hinweis
•
Aufgrund diverser Einflussfaktoren wie z. B. verschiedene Materialeigenschaften, Umgebungsbedingungen, Montagetoleranzen etc. ist nur
eine qualitative Aussage zur Materialstärke möglich, die vom jeweiligen Schwellenwerteset abgedeckt werden kann. Detailliertere Erläute-
rung dazu finden Sie im Handbuch.
•
Werden IN1 und IN2 beide auf HIGH gelegt, ist die im Sensor integrierte Ausrichthilfe aktiviert (siehe unten).
Neben der Selektion der verschiedenen Schwellenwertesets über die Sensoranschlüsse IN1 und IN2 ist – nach vorheriger, entsprechender
Parametrierung über die IO-Link-Schnittstelle – auch eine Selektion über zwei Bits in den IO-Link-Prozessdaten möglich. Darüber hinaus kann
der Sensor alternativ auch in einem Teach-In-Betrieb verwendet werden. Nähere Hinweise zu diesen Betriebsmodi entnehmen Sie bitte dem
Handbuch.
Montage und Ausrichtung
Hinweis
Um die volle Performance des Sensors sicherzustellen, ist eine sehr exakte Montage und Ausrichtung von Sender und Empfänger des Sensors
zueinander erforderlich.
Ausrichtgenauigkeit
Die folgende Abbildung zeigt den maximal zulässigen Winkelversatz und Sensorversatz.
Winkelversatz
< +/- 1°
α
α
Sensorversatz
s < +/- 1 mm
Abstände und Mindestüberdeckungen
Beachten Sie auch die für eine zuverlässige Funktion erforderlichen Mindestabstände, Mindestmaterialbreiten und Mindestüberdeckungen, die
Sie nachfolgender Abbildung links entnehmen können.
Montage/Ausrichtung:
Montage/Ausrichtung:
(für sehr dicke Papiere)
Empfohlende Abstände
b
a = 5 ... 15 mm
b ≥ 10 mm
d = 40 ... 45 mm
.
Im Allgemeinen ist aufgrund des gepulsten Betriebs eine senkrechte Montage der Doppelbogenkontrolle über dem Material möglich, sofern die
Ansprechzeit des Geräts mindestens 6 ms beträgt. Je nach zu detektierendem Material kann es jedoch hilfreich oder sogar erforderlich sein,
den Sensor in einem bestimmten Winkel zur Material-Lotrechten auszurichten. Speziell bei dickeren Papieren und Pappen empfiehlt sich die
Schrägstellung mit einem Winkel von ß = ca. 20 ... 35° zur Material-Lotrechten (siehe Abbildung rechts).
www.pepperl-fuchs.com
Subject to modification • Pepperl+Fuchs
EDM 45-5673 • Release 12/2021
1
8
7
2
6
3
5
4
Adernfarben
1
WH
(weiß)
2
BN
(braun)
3
GN
(grün)
(gelb)
4
YE
5
GY
(grau)
6
PK
(pink)
7
BU
(blau)
8
RD
(rot)
Materialstärke
von „dünn" über „normal" bis „dick"
von „normal" bis „sehr dick"
von „sehr dünn" bis „normal"
β = 35˚
b
β
2
L+
3
IN 1/TEACH
4
IN 2/FEEDBACK
1
SYNC
8
C/Q (OUT 1)
6
OUT 2
5
OUT 3
7
L-
Description of sensor function
Product information
For further information of the product such as technical data, dimensional drawings etc. please see on the respective product page for the
sensor at www.pepperl-fuchs.de.
Adjustment options
Some adjustment options of the sensor are accessible ex-factory via the corresponding sensor inputs and are explained in these commissioning
instructions.
In addition, the sensor has an IO-Link interface via which many other adjustment options and functionalities can be accessed. These are descri-
bed in detail in the sensor manual. For parameterization via the IO-Link interface, an IO-Link master (e.g. IO-Link Master02-USB) and associated
software (PACTware + DTM or device IODD) are required. You will find the link to download the software as well as the manual for download on
www.pepperl-fuchs.de on the product page of the sensor.
Operating modes
The sensor measures the damping of the ultrasonic signal caused by the material and derives from this whether there is no sheet, one sheet or
more than one sheet in the control. Feedback on the detected state (= „air", „single sheet" or „double sheet") is provided via the IO-Link process
data, as well as via the three switching outputs of the sensor. Please refer to the technical data to find out which output signals which status.
The sensor offers the possibility to select one of 3 available threshold sets via the two sensor connections IN1 and IN2 for evaluation.
The following table shows the connection required for this:
State IN1
State IN2
Selected threshold set
LOW
LOW
1
LOW
HIGH
2
HIGH
LOW
3
Note
•
Due to various influencing factors such as different material properties, environmental conditions, mounting tolerances, etc., only a qualitati-
ve statement on the material thickness is possible, which can be covered by the respective threshold set. More detailed explanations can be
found in the manual.
•
If IN1 and IN2 are both set to HIGH, the integrated alignment aid in the sensor is activated (see below).
In addition to the selection of the various threshold value sets via the sensor connections IN1 and IN2, a selection via two bits in the IO-Link
process data is also possible - after prior, corresponding parameterization via the IO-Link interface. Furthermore, the sensor can alternatively
also be used in a teach-in mode. For more detailed information on these operating modes, please refer to the manual.
Mounting and alignment
Note
To ensure the full performance of the sensor, very precise mounting and alignment of the sensor's transmitter and receiver to each other is
required.
Alignment accuracies
The following figure displays the maximum permissible angular misalignment and sensor offset.
Angular misalignment
< +/- 1°
α
α
Sensor offset
s < +/- 1 mm
Distances and minimum overlapping
Also note the minimum clearances, minimum material widths and minimum overlaps required for reliable function, which you can find in the
following figure.
Mounting/Adjustment
Mounting/Adjustment
(for very thick papers)
Recommended distances
b
a = 5 ... 15 mm
b ≥ 10 mm
d = 40 ... 45 mm
.
In general, due to the pulsed operation, a perpendicular mounting of the double sheet detector on the material is possible, provided that the
response time of the device is at least 6 ms. However, depending on the material to be detected, it may be helpful or even necessary to align the
sensor at a certain angle to the material' s perpendicular. Especially for thicker papers and cardboards, the inclined position with an angle of
ß = approx. 20 ... 35° to the material' s perpendicular is recommended (see right figure).
1
8
7
2
6
3
5
4
Wire colors
1
WH
(white)
2
BN
(brown)
3
GN
(green)
(yellow)
4
YE
5
GY
(gray)
6
PK
(pink)
7
BU
(blue)
8
RD
(red)
Material thickness
from „thin" to „normal" to „thick"
from „normal" to „very thick"
from „very thin" to „normal"
β = 35˚
b
β

Verwandte Anleitungen für Pepperl+Fuchs UDC-18GS-Serie


Inhaltszusammenfassung für Pepperl+Fuchs UDC-18GS-Serie
- Seite 1 Schrägstellung mit einem Winkel von ß = ca. 20 ... 35° zur Material-Lotrechten (siehe Abbildung rechts). ß = approx. 20 ... 35° to the material‘ s perpendicular is recommended (see right figure). www.pepperl-fuchs.com Subject to modification • Pepperl+Fuchs EDM 45-5673 • Release 12/2021...
- Seite 2 Further technical details and explanations on synchronization can be found in the technical data in the data sheet or in the manual of the sensor. Weitere technische Details und Erläuterungen zur Synchronisation finden Sie in den Technischen Daten im Datenblatt bzw. im Handbuch des Sensors. www.pepperl-fuchs.com Subject to modification • Pepperl+Fuchs EDM 45-5673 • Release 12/2021...