Herunterladen Inhalt Inhalt Diese Seite drucken
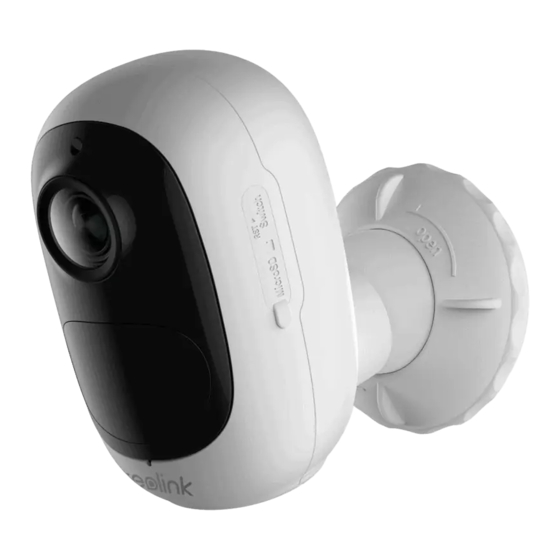
Reolink Argus 2E Bedienungsanleitung
Vorschau ausblenden Andere Handbücher für Argus 2E:

Werbung

Verfügbare Sprachen
  • DE

Verfügbare Sprachen

  • DEUTSCH, seite 10
Technical Support
If you need any technical help, please visit our official support site and contact our support
team before returning the products https://support.reolink.com
Technische Unterstützung
Wenn Sie Hilfe brauchen, kontaktieren Sie bitte Reolink Support Team zuerst, bevor Sie Ihre
Bestellung zurücksenden. Meiste Fragen oder Probleme können von unserem Online Support
Center beantwortet und gelöst werden https://support.reolink.com
Support technique
Si vous avez besoin d'aide, veuillez contacter Reolink avant de retourner votre produit. La
plupart des questions peuvent être répondues via notre centre de support en ligne à l'adresse
https://support.reolink.com
Supporto Tecnico
Se avete bisogno di aiuto, le chiediamo gentilmente di contattare Reolink prima di restituire il
prodotto.La maggior parte delle domande può essere risolta tramite il nostro centro di
assistenza online all'indirizzo https://support.reolink.com
Soporte Técnico
Si necesita ayuda, comuníquese con Reolink antes de devolver su producto. La mayoría de las
preguntas se pueden responder a través de nuestro centro de soporte en línea en
https://support.reolink.com
REOLINK INNOVATION LIMITED
FLAT/RM 705 7/F FA YUEN COMMERCIAL BUILDING 75-77 FA YUEN STREET MONG KOK KL
HONG KONG
Product Ident GmbH
EU
REP
Hoferstasse 9B, 71636 Ludwigsburg, Germany
prodsg@libelleconsulting.com
APEX CE SPECIALISTS LIMITED
UK
REP
89 Princess Street, Manchester, M1 4HT, UK
info@apex-ce.com
Aug 2021
QSG1_C
58.03.005.0004
Reolink Argus 2E
Operational Instruction
@ReolinkTech https://reolink.com
EN/DE/FR/IT/ES

Werbung

Inhaltsverzeichnis
loading

Inhaltszusammenfassung für Reolink Argus 2E

  • Seite 1 être répondues via notre centre de support en ligne à l'adresse https://support.reolink.com Supporto Tecnico Se avete bisogno di aiuto, le chiediamo gentilmente di contattare Reolink prima di restituire il Reolink Argus 2E prodotto.La maggior parte delle domande può essere risolta tramite il nostro centro di assistenza online all'indirizzo https://support.reolink.com...
  • Seite 2: Inhaltsverzeichnis

    Contents What’s in the Box What’s in the Box Camera Introduction Set up the Camera Charge the Battery Reolink Argus 2E Micro USB Cable Security Bracket Stand Bracket Install the Camera (With Strap) Notes on PIR Motion Sensor Safety Instructions of Battery Usage Troubleshooting Specifications...
  • Seite 3: Camera Introduction

    Camera Introduction Set up the Camera Download and launch the Reolink App or Client software and follow the onscreen instructions Micro USB Port to finish initial setup. Speaker • On Smartphone Infrared Lights Scan to download the Reolink App. Daylight Sensor...
  • Seite 4: Charge The Battery

    PIR motion sensor. • For effective detection, please install the camera angularly. Charge the battery with a Charge the battery with Reolink NOTE: If a moving object approaches the power adapter (not included). Solar Panel (Not included if you PIR sensor vertically, the camera may fail only purchase the camera).
  • Seite 5 Mount the Camera to the Wall It is suggested to use the security bracket to install the camera when mounting it outdoors. Screw the camera to Adjust the camera angle Secure the camera by the mount. to get the best field of turning the part on the view.
  • Seite 6: Notes On Pir Motion Sensor

    The PIR detection range can be customized to meet your specific needs. You can refer to the fasten the strap. It is the following table to set it up in Device Settings via Reolink App. most recommended installation method if you...
  • Seite 7: Safety Instructions Of Battery Usage

    1. Charge the rechargeable battery with a standard and high-quality DC 5V/9V battery charger or Reolink solar panel. Do not charge the battery with solar panels from any other brands. • Do not place the camera too close to a place with heavy traffic. Based on our numerous tests, the recommended distance between the camera 2.
  • Seite 8: Troubleshooting

    Weather Resistance: lighting. IP65 certified weatherproof If these won't work, please contact Reolink If your camera is not turning on, please Size: 96 x 61 x 58 mm If these won't work, please contact Reolink Support https://support.reolink.com...
  • Seite 9: Simplified Eu Declaration Of Conformity

    Conformity This product comes with a 2-year limited warranty that is valid only if purchased from Reolink declares that this device is in ISED Radiation Exposure Statement Reolink official stores or a Reolink authorized compliance with the essential requirements reseller.
  • Seite 10: Überblick

    Überblick Lieferumfang Lieferumfang Allgemeine Einführung Kamera-Einrichtung Laden des Akkus Reolink Argus 2E Micro Sicherheitshalterung Standhalterung Installation der Kamera USB-Ladekabel (Mit Klettverschluss) Hinweise zum PIR Bewegungssensor Wichtige Hinweise zur Verwendung der Batterie Fehlerbehebung Spezifikationen Konformitätserklärung Lochschablone Nadel zum Päckchen mit Schild...
  • Seite 11: Allgemeine Einführung

    Allgemeine Einführung Kamera-Einrichtung Laden Sie die Reolink App oder Client Software herunter und öffnen Sie sie, dann befolgen Sie Micro USB-Port die Anweisungen auf dem Bildschirm, um die Ersteinrichtung fertig zu machen. Lautsprecher • Smartphone Infrarot-LEDs Den Code scannen und App herunterladen.
  • Seite 12: Laden Des Akkus

    PIR-Bewegungssensors. • Bitte platzieren Sie die Kamera bei der Installation schräg, um eine bessere Laden Sie den Akku mit einem Laden Sie den Akku mit Reolink Solarpanel Leistung bei Bewegungserkennung zu Netzkabel (nicht im auf (nicht im Lieferumfang enthalten, gewährleisten.
  • Seite 13: Installation An Der Wand

    Installation an der Wand Es wird empfohlen, die Sicherheitshalterung zu verwenden, wenn Sie die Kamera im Ferien installieren möchten. Drehen Sie die Basis, um sie Stellen Sie den Winkel der Befestigen Sie die Kamera, von der Halterung zu Kamera ein, um das beste indem Sie diesen Teil an der entfernen.
  • Seite 14: Installation Der Kamera Mit Einem Klettband

    Der PIR-Erkennungsbereich kann nach Ihren individuellen Bedürfnissen angepasst werden. In der durch und befestigen Sie es. folgenden Tabelle können Sie Informationen zur Einstellung in der Schnittstelle Das ist die empfohlene „Geräteeinstellungen“ über die Reolink-App finden. Installationsmethode, wenn Sie die Kamera an einem Baum installieren möchten.
  • Seite 15: Wichtige Hinweise Zum Reduzieren Von Fehlalarmen

    1. Bitte laden Sie den Akku mit einem standardmäßigen und hochwertigen DC 5V oder 9V • Platzieren Sie die Kamera nicht zu nah an Orten mit starkem Verkehr. Ladegerät oder Reolink Solarpanel auf und laden Sie den Akku nicht mit einem Solarpanel von Basierend auf unseren zahlreichen Tests beträgt der empfohlene Abstand anderen Marken auf.
  • Seite 16: Spezifikationen

    Wenn dies nicht funktioniert, wenden Sie • Stellen Sie Ihr Passwort nur mit den auf der Ladegerät und hören Sie mit der Verwendung auf. sich bitte an den Reolink Support Tastatur verfügbaren Zeichen ein. https://support.reolink.com 7. Befolgen Sie immer die örtlichen Abfall- und Recyclinggesetze, wenn Sie die gebrauchte Batterie Wenn dies nicht funktioniert, wenden Sie sich entfernen.
  • Seite 17: Fcc-Konformitätserklärung

    Betriebsfrequenz: 2,4 GHz umweltverträglichen Recycling zuführen. stimmen Sie den Bestimmungen dieses Betriebstemperatur: Endbenutzer-Lizenzvertrags („EULA“) zwischen Vereinfachte -10°C bis 55°C (14°F bis 131°F) Ihnen und Reolink zu. Weitere Informationen: Garantiebestimmung EU-Konformitätserklärung Witterungsbeständigkeit: https://reolink.com/eula/. IP65-zertifiziert wetterfest 2-Jahre eingeschränkte Garantie ist für dieses Reolink erklärt, dass dieses Gerät den...
  • Seite 18: Contenu De La Boîte

    Contenu Contenu de la boîte Contenu de la boîte Introduction de caméra Configurer la caméra Charger la batterie Reolink Argus 2E Câble micro USB Support de sécurité Support de bureau Guides d'installation (avec sangle) Remarques sur le capteur de mouvement PIR Instructions de sécurité...
  • Seite 19: Haut-Parleur

    Introduction de caméra Configurer la caméra Téléchargez et lancez l'application Reolink ou le logiciel Client, puis suivez les instructions à l'écran Port d'alimentation Micro USB pour terminer la configuration initiale. Haut-parleur • Sur smartphone LED infrarouge Scannez pour télécharger l'application Reolink.
  • Seite 20: Charger La Batterie

    • Pour une détection de mouvements efficace, veuillez installer la caméra de Chargez la batterie avec un Chargez la batterie avec le manière angulaire. adaptateur secteur (non panneau solaire Reolink Hauteur inclus dans l’emballage). (nécessite un achat séparé). de montage: 2-3 Mètres...
  • Seite 21 Monter la caméra sur le mur Il est suggéré d'utiliser le support de sécurité pour installer la caméra lorsqu'elle est montée à l'extérieur. Vissez la caméra sur le Ajustez l'angle de la caméra Fixez la caméra en tournant support. pour obtenir le meilleur la partie sur le support champ de vision.
  • Seite 22 Les paramètres de détection PIR peuvent être personnalisés selon vos besoins spécifiques. serrez la sangle. C'est la Vous pouvez vous référer au tableau suivant pour les configurer dans Paramètres d’appareil méthode d'installation la sur l’application Reolink. plus recommandée si vous prévoyez d'installer la Distance de détection caméra sur l'arbre.
  • Seite 23 Instructions de sécurité sur l'utilisation de batterie Remarques importantes pour la Reolink Argus 2E n'est pas conçue pour le streaming en direct 24 heures sur 24, 7 jours sur 7. Elle est réduction de fausses alarmes conçue pour enregistrer des événements de mouvement et visualiser à distance la diffusion en direct uniquement lorsque vous en avez besoin.
  • Seite 24: Caracteristiques Techniques

    Si cela ne fonctionne pas, veuillez contacter le Température de fonctionnement: Si cela ne fonctionne pas, veuillez contacter soutien Reolink: https://support.reolink.com Si cela ne fonctionne pas, veuillez contacter le support Reolink à l'adresse: -10°C à 55°C (14°F à 131°F) le support Reolink à l'adresse https://support.reolink.com https://support.reolink.com Français...
  • Seite 25 Garantie limitée présent contrat de licence utilisateur final Ce produit est vendu avec une garantie limitée (“CLUF”) entre vous et Reolink. Pour en savoir Déclaration de conformité de 2 ans qui n'est valable que s'il est acheté plus: https://reolink.com/eula/.
  • Seite 26 Contenuti Cosa c’è nella Scatola Cosa c’è nella Scatola Presentazione della Telecamera Configurare la Telecamera Caricare la Batteria Reolink Argus 2E Cavo Braccio di Sicurezza Braccio a Tavolo Consigli sull’Installazione della Telecamera Micro USB (con Strappo) Consigli sul Sensore di Movimento PIR...
  • Seite 27 Presentazione della Telecamera Configurare la Telecamera Porta di Alimentazione Micro USB Scaricare ed avviare l’App o Client Reolink, e poi seguire le istruzioni per finire la configurazione iniziale. Altoparlante • Sullo Smartphone Luci a Infraross Scansionare per scaricare l’app Reolink.
  • Seite 28: Caricare La Batteria

    • Per un rilevamento di movimento Caricare la batteria con un’adattatore Caricare la batteria con il Pannello efficiente, installare la telecamera di alimentazione (di alimentazionenot Solare Reolink (Non è inclusa se si angolarmente. incluso nella confezione). compra solo la telecamera). Altezza di: 2-3 Mètres...
  • Seite 29 Reolink. Ruotare per separare le parti Perforare a seconda della dima per fori di dal braccio. montaggio e serrare la base del braccio a parete, poi attaccare altra parte di braccio alla base.
  • Seite 30 La gamma del rilevamento di sensore PIR può essere personalizzata per soddisfare le proprie fessure e allacciare la esigenze. Si può fare riferimento alla seguente tabella per configurarla nelle impostazioni del cinghia. È ideale per dispositivo tramite l’app Reolink. l'installazione sull'albero. Distanza di Rilevamento Sensibilità...
  • Seite 31: Uso Della Batteria In Maniera Sicura

    Uso della Batteria in Maniera Sicura Consigli Importanti per Ridurre Reolink Argus 2E non è progettata per funzionare 24/7 a piena capacità o per lo streaming dal i Falsi Allarmi vivo tutta la giornata. È progettata per registrare i movimenti e visualizzare da remoto lo streaming solo quando necessario.
  • Seite 32: Risoluzioni Dei Problemi

    Se non funziona, si prega di contattare caratteri sulla tastiera. Se non funziona ancora, bisogna contattare il Temperatura in operatività: l’assistenza Reolink: gruppo di assistenza Reolink: -10°C ai 55°C (14°F ai 131°F) https://support.reolink.com Se non funziona, si prega di contattare https://support.reolink.com Resistenza alle intemperie: l’assistenza Reolink...
  • Seite 33 2 anni, la quale si applica Conformità UE questo accordo di licenza per l’utente finale solo ai prodotti acquisiti sul negozio ufficiale (“EULA”) fra voi e Reolink. Scopri di più: Reolink dichiara che questo dispositivo è Reolink o dal rivenditore autorizzato da https://reolink.com/eula/.
  • Seite 34: Qué Hay En La Caja

    Contenido ¿Qué Hay en la Caja? ¿Qué Hay en la Caja? Introducción de Cámara Configure la Cámara Cargue la Batería Reolink Argus 2E Cable de Soporte de Seguridad Soporte para Mesa Instale la Cámara Micro USB (con Correa) Notas sobre el Sensor de Movimiento PIR Instrucciones de Seguridad para el Uso de Batería...
  • Seite 35 Introduction de caméra Configure la Cámara Descargue e inicie la aplicación de Reolink o el software de Client, y siga las instrucciones en Puerto de Alimentación Micro USB pantalla para finalizar la configuración inicial. Altavoz En Teléfono Inteligente Luces Infrarrojas Escanee para descargar la aplicación de Reolink.
  • Seite 36 Cargue la batería con un Cargar la batería con el Panel adaptador de corriente Solar Reolink (No se incluye si NOTA: Si un objeto en movimiento se (no incluido). sólo compra la cámara). Altura de Montaje:...
  • Seite 37 Reolink. Gire la base para separarla Taladre orificios de acuerdo con la plantilla de del soporte. montaje, atornille la base del soporte a la pared y luego coloque la otra parte del soporte en la base.
  • Seite 38 El rango de detección PIR se puede personalizar para satisfacer sus necesidades especficas. Puede abroche la correa. Es el consultar la siguiente tabla para configurarlo en Configuración de Dispositivo en Reolink APP. método de instalación más recomendado si planea instalar la cámara...
  • Seite 39 Notas Importantes para Reducir Falsas Alarmas Reolink Arugs 2E no está diseñada para funcionamiento de capacidad total 24/7 o transmisión en vivo durante todo el día. Está diseñada para grabar eventos de movimiento y ver transmisión en vivo de forma remota sólo cuando la necesita. Descubra consejos útiles sobre cómo extender la duración de la batera en esta publicación:...
  • Seite 40: Solución De Problemas

    General iluminación. caracteres disponibles en el teclado. Si no funcionan, comuníquese con Soporte Temperatura de Funcionamiento: de Reolink: https://support.reolink.com Si no funcionan, comuníquese con el soporte Si no funcionan, comunquese con el soporte -10°C a 55°C (14°F a 131°F) de Reolink https://support.reolink.com...
  • Seite 41 Reolink. Obtenga más información: Este producto viene con una garantía limitada Declaración de Conformidad https://reolink.com/eula/. de 2años que es válida solo si se compra en las de la UE Simplificada tiendasoficiales de Reolink o en un revendedor Español Español...

Inhaltsverzeichnis