Inhaltsverzeichnis
Werbung
Verfügbare Sprachen
Verfügbare Sprachen
Werbung
Inhaltsverzeichnis

Verwandte Anleitungen für Creality LD-002R


Inhaltszusammenfassung für Creality LD-002R
- Seite 1 3D Printer LD-002R User Manual...
- Seite 2 Dear customer, Thank you for purchasing our product. Please read the following instructions carefully before first use and keep this user manual for future reference. Pay particular attention to the safety instructions. If you have any questions or comments about the device, please contact the customer line.
- Seite 3 Notes 1. Do not use the printer any way other than described herein to avoid personal injury or properly damage. 2. Do not place the printer near any heat source or flammable or explosive objects. We suggest placing in a well-ventilated, low-dust environment. 3.
-
Seite 4: Package Content
Equipment parameters Model LD-002R Software language English Print method U disk X/Y-axis resolution 1440*2560 Z-axis precision 0,03-0,05mm (layer thickness) Print speed 6-18s (layer height) Special filaments Common rigid photosensitive resin, Standard resin, High elasticity, High hardness, High toughness, Dental model resin. - Seite 5 Tool list 1) U disk x1 2) 2#, 2.5#, 3# x1 3) Gloves x2 4) Brush x1 5) Plastic blade x1 6) Paper funnel x4 7) Release film x1 8) Mask x2 9) Metal blade x1 10) Power adapter x1 Assemble the 3D Printer 1) Machine Body 2) Plastic Cover...
-
Seite 6: Interface Information
Interface Information Tools 1) Home 2) Up 3) Down 4) Stop 5) Back NOTE: The UI information is only for reference, the actual UI may be different. System NOTE: The UI information is only for reference, the actual UI may be different. Print 1) Turn up 1) Delete... - Seite 7 Level Platform 1 1. First raise the platform, then loosen rubber screws on the left and right sides of the resin vat and take out the resin vat. 2. Tool > Manual > Home, and check whether the platform sticks into the printing screen.
- Seite 8 Load Resin Pour the UV photosensitive resin into the resin vat. The slot capacity is 140ml / 170ml / 225ml / 285 ml. TIPS: How to change resin: Takt out the resin vat slowly, pour out the remaining resin into the container, clean the resin vat, pour in new resin, and then install the resin vat to the machine.
- Seite 9 Release Film Instructions Installation steps: a) First, remove the 14 screws at the bottom of the tray and take out broken release film. b) Then place the release film between the two steel frames. c) Finally, put the assembled steel frame back into the tray and tighten 14 screws. d) The installed release film is as shown.
- Seite 10 10-20). 4) Click “Slice” -> waiting for slice to be finished -> save the sliced file (You are welcome to find more details of slicing tutorial on the official website www.creality.com). 2) Print 1) Generate G-code and save the g-code file to U disk.
-
Seite 11: Wiring Connection
3) Press “up” or “down” to select files. 4) Select the file to be printed and press “print”. 5) Printing. Clean the Resin Vat * If there is residue in resin vat before printing, please clean resin vat first. The cleaning time is generally set to 60 seconds and then shovel it off with a plastic blade. - Seite 12 Troubleshooting Start -> Print from storage card -> Y/N N –> File identified or not -> N -> U-disk -> 1. Wipe U disk. 2. Format U disk. 3. Replace U disk. Y -> Other files can be printed normally -> Slice -> 1. Move model position and slice again. 2.
-
Seite 13: Warranty Conditions
Warranty Conditions A new product purchased in the Alza.cz sales network is guaranteed for 2 years. If you need repair or other services during the warranty period, contact the product seller directly, you must provide the original proof of purchase with the date of purchase. The following are considered to be a conflict with the warranty conditions, for which the claimed claim may not be recognized: Using the product for any purpose other than that for which the product is intended... - Seite 14 Vážený zákazníku, děkujeme Vám za zakoupení našeho produktu. Prosíme, pečlivě si přečtěte následující instrukce před prvním použitím a uživatelský manuál si uschovejte pro pozdější užití. Zejména dbejte na bezpečnostní pokyny. Pokud máte jakékoliv dotazy či připomínky ohledně přístroje, prosíme, obraťte se na zákaznickou linku. www.alza.cz/kontakt ✉...
- Seite 15 Poznámky 1. Nepoužívejte tiskárnu jiným způsobem, než je zde popsáno, abyste předešli zranění osob nebo poškození produktu. 2. Neumísťujte tiskárnu do blízkosti zdrojů tepla nebo hořlavých nebo výbušných předmětů. Doporučujeme umístit do dobře větraného prostředí, kde se nepráší. 3. Nevystavujte tiskárnu prudkým vibracím nebo nestabilnímu povrchu, protože by to mohlo způsobit špatnou kvalitu tisku.
-
Seite 16: Obsah Balení
Parametry produktu Model LD-002R Jazyk angličtina Metoda tisku U disk Rozlišení osy X / Y 1440*2560 Přesnost osy Z 0,03-0,05mm (tloušťka vrstvy) Rychlost tisku 6-18s (výška vrstvy) Speciální filamenty Běžná tuhá fotocitlivá pryskyřice, standardní pryskyřice, vysoká pružnost, vysoká tvrdost, vysoká houževnatost, dentální... - Seite 17 Nářadí 1) U disk x1 2) 2#, 2.5#, 3# x1 3) Rukavice x2 4) Štětec x1 5) Plastová špachtle x1 6) Papírový trychtýř x4 7) Uvolňovací folie x1 8) Maska x2 9) Kovová špachtle x1 10) Napájecí adaptér x1 Montáž 3D tiskárny 1) Tělo zařízení...
- Seite 18 Informace o rozhraní Nářadí 1) Domů 2) Nahoru 3) Dolů 4) Stop 5) Zpět POZNÁMKA: Informace o uživatelském rozhraní slouží pouze pro informaci, skutečné uživatelské rozhraní se může lišit. Systém POZNÁMKA: Informace o uživatelském rozhraní slouží pouze pro informaci, skutečné uživatelské...
- Seite 19 Vyrovnání tiskové platformy – Bod 1 1. Nejprve zvedněte platformu, poté uvolněte gumové šrouby na levé a pravé straně kádě a káď vyjměte. 2. Nářadí> Manuál> Domů a zkontrolujte, zda se platforma drží na tiskové obrazovce. POZNÁMKA: Tisková platforma byla ve výrobě vyrovnána. Pokud ji potřebuje vyrovnat znovu z důvodu přepravy nebo jiných důvodů, upravte tiskovou platformu podle níže uvedených kroků.
- Seite 20 Vložení pryskyřice Nalijte UV fotocitlivou pryskyřici do kádě. Kapacita je 140 ml / 170 ml / 225 ml / 285 ml. TIPY: Jak vyměnit pryskyřici: Pomalu vytáhněte káď, vylijte zbývající pryskyřici do nádoby (misky), vyčistěte káď od pryskyřice, vlijte novou pryskyřici a poté znovu vložte káď do zařízení. POZOR: Pryskyřice může způsobit podráždění...
- Seite 21 Uvolňovací fólie Kroky k instalaci: a) Nejprve odstraňte 14 šroubů ve spodní části zásobníku a vytáhněte rozbitou uvolňovací fólii. b) Poté vložte novou uvolňovací fólii mezi dva ocelové rámy. c) Nakonec vložte smontovaný ocelový rám zpět do zásobníku a utáhněte 14 šroubů. d) Uvolňovací...
- Seite 22 (doporučujeme nastavit parametry spodní vrstvy na 10-20). 4) Klikněte na „Slice“ -> čekejte na dokončení řezu -> uložte hotový soubor (další podrobnosti o výukovém tutoriálu najdete na oficiálních stránkách www.creality.com). 2) Tisk 1) Vygenerujte G-kód a uložte soubor G-kódu na disk U.
- Seite 23 3) Stisknutím „nahoru“ nebo „dolů“ vyberte soubory. 4) Vyberte soubor, který chcete vytisknout, a stiskněte „tisk“. 5) Tisknutí... Jak čistit káď na pryskyřici * Pokud v kádi před tiskem zůstaly nějaké nečistoty, nejprve káď očistěte. Doba čištění je obvykle nastavena na 60 sekund a poté odstraňte zbylé nečistoty plastovou čepelí. Zapojení...
-
Seite 24: Řešení Problémů
Řešení problémů Start -> Tisk z paměťové karty -> Y/N N –> Soubor identifikován nebo ne -> N -> U-disk -> 1. Očistěte U disk. 2. Formátujte U disk. 3. Vyměňte U disk. Y -> Ostatní soubory lze normálně vytisknout -> Krájení -> 1. -
Seite 25: Záruční Podmínky
Záruční podmínky Na nový výrobek pořízený v prodejní síti Alza.cz je poskytnuta záruka 2 roky. Pokud potřebujete opravu nebo jiné služby během záruční doby, kontaktujte přímo prodejce výrobku, je nutné předložit originální doklad o zakoupení s původním datem zakoupení. Kopie dokladů o zakoupení výrobku, změněné, doplněné, bez původních údajů nebo jinak poškozené... - Seite 26 Tisztelt Ügyfelünk! Köszönjük, hogy megvásárolta termékünket. Kérjük, gondosan olvassa el az alábbi utasításokat az első használat előtt, és őrizze meg ezt a felhasználói kézikönyvet későbbi felhasználás céljából. Fordítson különös figyelmet a biztonsági előírásokra. Ha bármilyen kérdése vagy észrevétele van az eszközzel kapcsolatban, kérjük, lépjen kapcsolatba az ügyfélszolgálattal.
-
Seite 27: A Berendezés Leírása
Megjegyzések 1. A személyi sérülések és károk elkerülése érdekében a nyomtatót ne használja az itt leírtaktól eltérően. 2. Ne helyezze a nyomtatót hőforrás, gyúlékony vagy robbanásveszélyes tárgyak közelébe. Javasoljuk, hogy jól szellőztetett, kevés port tartalmazó környezetbe helyezze. 3. Ne tegye ki a nyomtatót erőteljes rázkódásnak vagy instabil környezetnek, mert ez rossz nyomtatási minőséget okozhat. -
Seite 28: Műszaki Jellemzők
Műszaki jellemzők Modell LD-002R Szoftver nyelve Angol Nyomtatási mód U lemez X/Y-tengely felbontás 1440*2560 Z-tengely pontosság 0,03 - 0,05 mm (rétegvastagság) Nyomtatási sebesség 6-18s (rétegmagasság) Speciális szálak Közönséges merev fényérzékeny gyanta, normál gyanta, nagy rugalmasság, nagy keménység, nagy tűrőképesség, fogászati modell gyanta. - Seite 29 Eszközlista 1) U lemez x1 2) 2#, 2,5 #, 3 # x1 3) kesztyű x2 4) ecset x1 5) Műanyag penge x1 6) Papírtölcsér x4 7) Elválasztó réteg x1 8) Maszk x2 9) Fém penge x1 10) Hálózati adapter x1 3D nyomtató...
- Seite 30 Interfész információ Eszközök 1) Kezdőlap 2) Fel 3) Le 4) Stop 5) Vissza MEGJEGYZÉS: Az UI információ csak tájékoztató jellegű, a tényleges felhasználói felület eltérő lehet. Rendszer MEGJEGYZÉS: Az UI információ csak tájékoztató jellegű, a tényleges felhasználói felület eltérő lehet. Nyomtatás 1) Fordítsa fel 1) Törlés...
- Seite 31 1 platform szintezése 1. Először emelje meg a platformot, majd lazítsa meg a gyantatartály bal és jobb oldalán található gumicsavarokat, és vegye ki a gyantatartályt. 2. Szerszám> Kézi> Kezdőlap, és ellenőrizze, hogy a platform rögzül-e a nyomtatási kijelzőre. MEGJEGYZÉS: A nyomtató platformot gyárilag szintezték. HA szállítás vagy egyéb okokból szintezés szükséges, kövesse az alábbi lépéseket a nyomtatóplatform beállításához.
- Seite 32 Gyanta betöltése Öntse az UV fényérzékeny gyantát a gyantatartályba. A nyílás kapacitása 140 ml / 170 ml / 225 ml / 285 ml. Tippek: A gyanta cseréje: Lassan vegye ki a gyantatartályt, öntse ki a maradék gyantát a tartályba, tisztítsa meg a gyantatartályt, öntsön be új gyantát, majd helyezze be a gyantatartályt a gépbe.
- Seite 33 Elválasztó réteg használata Telepítés sorrendje: a) Először távolítsa el a 14 csavart a tálca alján, és vegye ki a tönrement elválasztó réteget. b) Ezután helyezze az elválasztó réteget a két acélkeret közé. c) Végül tegye vissza az összeszerelt acélkeretet a tálcába, és húzza meg a 14 csavart. d) A beépített elválasztó...
- Seite 34 (alsó réteg paramétereinek javasolt beállítása 10-20-ra). 4) Kattintson a "Szelet" elemre -> várja a szelet elkészülését -> mentse a szeletelt fájlt (A szeletelési útmutató további részleteit a hivatalos www.creality.com webhelyen találja). 2) Nyomtatás 1) Generálja a G-kódot, és mentse a g-kód fájlt az U lemezre.
- Seite 35 3) A fájlok kiválasztásához nyomja meg a „fel” vagy a „le” gombot. 4) Válassza ki a nyomtatni kívánt fájlt, és nyomja meg a „print” gombot. 5) Nyomtatás. Tisztítsa meg a gyanta tartályt *Ha nyomtatás előtt maradvány van a gyantatartályban, először tisztítsa meg a gyanta tartályt.
-
Seite 36: Hibaelhárítás
Hibaelhárítás Kezdet -> Nyomtatás memóriakártyáról -> I/N N -> Fájl azonosítva vagy nem -> N -> U lemez -> 1. Törölje az U lemezt. 2. Formázza az U lemezt. 3. Cserélje ki az U lemezt. Y -> Más fájlok normálisan kinyomtathatók -> Szelet -> 1. Mozgassa a modell helyzetét és szeletelje újra. 2. -
Seite 37: Garanciális Feltételek
Garanciális feltételek Az Alza.cz értékesítési hálózatában megvásárolt új termékre 2 év garancia érvényes. Ha javításra vagy más karbantartási munkára van szüksége a jótállási időszak alatt, vegye fel a kapcsolatot közvetlenül a termék eladójával, a vásárlás bizonylatát benyújtva a vásárlás dátumával. A következő... - Seite 38 Sehr geehrter Kunde, vielen Dank für den Kauf unseres Produkts. Bitte lesen Sie die folgenden Anweisungen vor dem ersten Gebrauch sorgfältig durch und bewahren Sie diese Bedienungsanleitung zum späteren Nachschlagen auf. Beachten Sie insbesondere die Sicherheitshinweise. Wenn Sie Fragen oder Kommentare zum Gerät haben, wenden Sie sich bitte an den Kundenservice.
- Seite 39 Anmerkungen 1. Verwenden Sie den Drucker nur auf die hier beschriebene Weise, um Verletzungen oder Schäden zu vermeiden. 2. Stellen Sie den Drucker nicht in der Nähe von Wärmequellen oder brennbaren oder explosiven Gegenständen auf. Wir empfehlen, das Gerät in einer gut belüfteten, staubarmen Umgebung aufzustellen.
-
Seite 40: Geräteeinführung
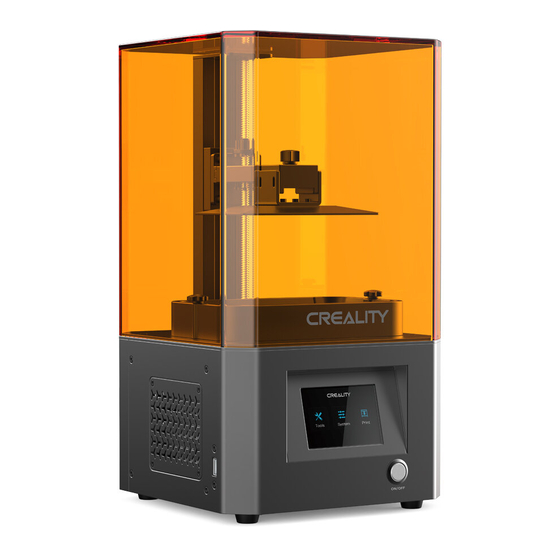
6) Touchscreen 10) Steckdose 3) Plattformplatte 7) Netzschalter aus Metall 11) 5,5-Zoll- Bildschirmanschluss 4) Innensechskantschraube 8) Grenzsensor 12) USB-Anschluss Geräteparameter Modell LD-002R Software-Sprache Englisch Druckmethode U-Diskette Auflösung der X / Y-Achse 1440 * 2560 Z-Achsen-Präzision 0,03-0,05 mm (Schichtdicke) Druckgeschwindigkeit 6-18s (Schichthöhe) Spezialfilamente Übliches starres lichtempfindliches Harz, Standardharz,... - Seite 41 Maschinengewicht 7 kg Bruttogewicht 8,7kg Anzeigebildschirm 3,5 Zoll Paket-Inhalt 1) Druckplattform 2) Harzbehälter 3) 3D- Drucker Werkzeugliste 1) U-Scheibe x1 2) 2#, 2.5 #, 3 # x1 3) Handschuhe x2 Pinsel x1 5) Kunststoffklinge x1 6) Papiertrichter x4 7) Trennfolie x1 8) Maske x2 9) Metallklinge x1 10) Netzteil x1...
-
Seite 42: Bedienpanel
Aufbau des 3D-Druckers 1) Maschinenkorpus 2) Kunststoffabdeckung HINWEIS: Setzen Sie die Kunststoffabdeckung auf den Maschinenkörper und die Installation ist abgeschlossen. Bedienpanel Werkzeuge 1) Startseite 2) Nach oben 3) Unten 4) Stoppen Sie 5) Zurück HINWEIS: Die Informationen zur Benutzeroberfläche dienen nur als Referenz. Die tatsächliche Benutzeroberfläche kann unterschiedlich sein. - Seite 43 System HINWEIS: Die Informationen zur Benutzeroberfläche dienen nur als Referenz. Die tatsächliche Benutzeroberfläche kann unterschiedlich sein. Drucken 1) Aufdrehen 1) Löschen 2) Drehen Sie nach unten 2) Drucken / Stoppen 3) Zurück 3) Zurück HINWEIS: Die Informationen zur Benutzeroberfläche dienen nur als Referenz. Die tatsächliche Benutzeroberfläche kann unterschiedlich sein.
- Seite 44 HINWEIS: Die Druckplattform wurde werkseitig ausgerichtet. Wenn es aus Transport- oder anderen Gründen nivelliert werden muss, befolgen Sie bitte die nachstehenden Schritte, um die Druckplattform anzupassen. Level-Plattform 2 Wenn die Plattform nicht am Druckbildschirm haftet, gehen Sie wie folgt vor: 1) Drücken Sie nach dem Lösen der Schraube auf „Home“, um die Plattform und den Druckbildschirm parallel zu halten.
-
Seite 45: Harz Einfüllen
Harz einfüllen Gießen Sie das UV-lichtempfindliche Harz in die Harzwanne. Die Schlitzkapazität beträgt 140 ml / 170 ml / 225 ml / 285 ml. TIPPS: So wechseln Sie das Harz: Den Harzbehälter langsam austakten, das restliche Harz in den Behälter gießen, den Harzbehälter reinigen, neues Harz einfüllen und dann den Harzbehälter in die Maschine einbauen. - Seite 46 Trennfolie anbringen Installationsschritte: a) Entfernen Sie zuerst die 14 Schrauben am Boden des Tabletts und nehmen Sie die gebrochene Trennfolie heraus. b) Legen Sie dann die Trennfolie zwischen die beiden Stahlrahmen. c) Setzen Sie zum Schluss den montierten Stahlrahmen wieder in das Fach ein und ziehen Sie die 14 Schrauben fest.
-
Seite 47: In Scheiben Zuschneiden
4) Klicken Sie auf „Slice“ -> warten Sie, bis der Slice fertig ist -> speichern Sie die geschnittene Datei (Sie können gerne weitere Informationen zum Slicen-Tutorial auf der offiziellen Website www.creality.com finden). 2) Drucken 1) Generieren Sie G-Code und speichern Sie die G-Code-Datei auf einem USB-Stick... -
Seite 48: Reinigen Des Harzbehälters
2) Legen Sie den USB-Stick ein -> drücken Sie die Drucktaste. 3) Drücken Sie "Auf" oder "Ab", um Dateien auszuwählen. 4) Wählen Sie die zu druckende Datei aus und drücken Sie auf „Drucken“. 5) Drucken. Reinigen des Harzbehälters * Wenn sich vor dem Drucken Rückstände im Harzbehälter befinden, reinigen Sie bitte zuerst den Harzbehälter. -
Seite 49: Kabelanschluss
Kabelanschluss Wi-FI-Modul Touchscreen-Teil RJ 485 5,5 Zoll 2K- Bildschirman Netzte Lüfter Achsen Mainboard Lichtqu Achseng motor -Lüfter elle renze... - Seite 50 Fehlerbehebung Start -> Von Speicherkarte drucken -> J / N. Nein -> Datei identifiziert oder nicht -> N -> USB-Stick -> 1. Wischen Sie den USB-Stick ab. 2. Formatieren Sie den USB-Stick . 3. Ersetzen Sie den USB-Stick. Y.-> Andere Dateien können normal gedruckt werden -> Slice -> 1. Verschieben Sie die Modellposition und schneiden Sie erneut.
-
Seite 51: Garantiebedingungen
Garantiebedingungen Für ein neues Produkt, das im Vertriebsnetz von Alza.cz gekauft wurde, gilt eine Garantie von 2 Jahren. Wenn Sie während der Garantiezeit Reparaturen oder andere Dienstleistungen benötigen, wenden Sie sich direkt an den Produktverkäufer. Sie müssen den Original-Kaufnachweis mit dem Kaufdatum vorlegen. Folgendes gilt als Konflikt mit den Garantiebedingungen, für die der geltend gemachte Anspruch möglicherweise nicht anerkannt wird: Verwendung des Produkts für einen anderen Zweck als den, für den das Produkt...