
Verwandte Anleitungen für Faber BELLA EG8 X A60 FB EXP


Inhaltszusammenfassung für Faber BELLA EG8 X A60 FB EXP
- Seite 1 Instructions Manual Manuel d’Instructions Bedienungsanleitung Manual de instrucciones...
-
Seite 2: Inhaltsverzeichnis
INDEX RECOMMENDATIONS AND SUGGESTIONS ........................3 CHARACTERISTICS ................................4 INSTALLATION..................................5 USE ......................................8 MAINTENANCE ..................................9 SOMMAIRE CONSEILS ET SUGGESTIONS............................11 CARACTERISTIQUES................................. 12 INSTALLATION..................................13 UTILISATION ..................................16 ENTRETIEN ..................................17 INHALTSVERZEICHNIS EMPFEHLUNGEN UND HINWEISE ........................... 19 CHARAKTERISTIKEN ................................. 20 MONTAGE ................................... -
Seite 3: Recommendations And Suggestions
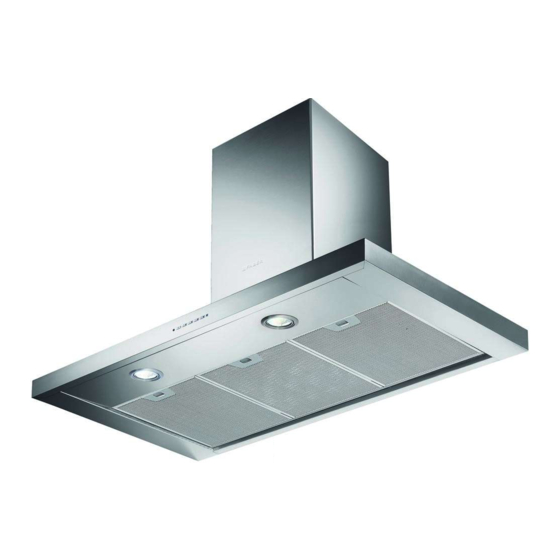
RECOMMENDATIONS AND SUGGESTIONS The Instructions for Use apply to several versions of this appliance. Accordingly, you may find descriptions of individual features that do not apply to your specific appliance. INSTALLATION • The manufacturer will not be held liable for any damages resulting from incorrect or im- proper installation. - Seite 4 CHARACTERISTICS Dimensions 598-698-798-898-1198 Min. Min. 650mm 650mm Components Ref. Q.ty Product Components 14.1 Hood Body, complete with: Controls, Light, Blower, Filters 12a 7.2.1 Telescopic Chimney comprising: Upper Section Lower Section Reducer Flange ø 150-120 mm 14.1 Air Outlet Connection Extension Air Outlet Connection Ref.
- Seite 5 INSTALLATION Wall drilling and bracket fixing 7.2.1 Wall marking: • Draw a vertical line on the supporting wall up to the ceiling, or as high as practical, at the centre of the area in which the hood will be installed. •...
- Seite 6 Mounting the hood body • Before attaching the hood body, tighten the two screws Vr lo- cated on the hood body mounting points. • Hook the hood body onto the screws 12a. • Fully tighten the support screws 12a. • Adjust the screws Vr to level the hood body. Connections DUCTED VERSION AIR EXHAUST SYSTEM When installing the ducted version, connect the hood to the...
-
Seite 7: Electrical Connection
ELECTRICAL CONNECTION • Connect the hood to the mains through a two-pole switch having a contact gap of at least 3 mm. • Remove the grease filters (see paragraph Maintenance) be- ing sure that the connector of the feeding cable is correctly inserted in the socket placed on the side of the fan. -
Seite 8: Control Panel
Control panel Button Function Turns the lights on/off at maximum strength. Fixed Turns the motor on/off at speed one. Fixed Turns the Motor on at speed two. Press and hold the button for approximately 3 seconds, with all the loads turned off (Motor and Lights), to turn the Activated Charcoal Filter alarm on. - Seite 9 MAINTENANCE REMOTE CONTROL (OPTIONAL) The appliance can be controlled using a remote control powered by a 1.5 V carbon-zinc alkaline batteries of the standard LR03- AAA type (not included). • Do not place the remote control near to heat sources. •...
-
Seite 10: Light Replacement
Activated Charcoal Filter (Recirculation Version) This cannot be washed or regenerated, and must be changed when led S1 starts to flash, or at least once every 4 months. The Alarm signal, if it has been activated, only appears when the Suction motor is turned on. -
Seite 11: Conseils Et Suggestions
CONSEILS ET SUGGESTIONS La présente notice d'emploi vaut pour plusieurs versions de l'appareil. Elle peut contenir des descrip- tions d'accessoires ne figurant pas dans votre appareil. INSTALLATION • Le fabricant décline toute responsabilité en cas de dommage dû à une installation non correcte ou non conforme aux règles de l’art. -
Seite 12: Caracteristiques
CARACTERISTIQUES Encombrement 598-698-798-898-1198 Min. Min. 650mm 650mm Composants Réf. Q.té Composants de Produit 14.1 Corps Hotte équipé de:Commandes, Lumière, Groupe Ventilateur,Filtres 12a 7.2.1 Cheminée Télescopique formée de : Cheminée Supérieure Cheminée Inférieure Flasque de Réduction ø 150-120 mm 14.1 Rallonge Raccord Sortie Air Raccord Sortie Air Réf. -
Seite 13: Installation
INSTALLATION Perçage Paroi et Fixation Brides 7.2.1 Tracer sur la paroi: • une ligne verticale allant jusqu’au plafond ou à la limite supérieure, au centre de la zone prévue pour le montage de la hotte; • une ligne horizontale à 650 mm min. au-dessus du plan de cuisson. •... - Seite 14 Montage Corps Hotte • Avant d’accrocher le corps hotte, serrer les deux vis Vr situées sur les points d’accrochage du corps hotte. • Accrocher le corps hotte aux vis 12a prévues à cet effet. • Serrer définitivement les vis 12a de support. •...
-
Seite 15: Branchement Electrique
BRANCHEMENT ELECTRIQUE • Brancher la hotte sur le secteur en interposant un interrup- teur bipolaire avec ouverture des contacts d’au moins 3 • Enlever les filtres à graisse (voir § "Entretien") et s'assurer que le connecteur du câble d'alimentation soit bien bran- ché... -
Seite 16: Utilisation
UTILISATION Tableau de commande Touche Led Fonction Allume/Éteint les lumières à la luminosité maximum. Fixe Démarre/Coupe le moteur à la première vitesse. Fixe Démarre le moteur à la deuxième vitesse. Garder la touche appuyée pendant environ 5 secondes, lorsque toutes les charges sont éteintes (Moteur+ Éclairage), l’alarme des filtres au charbon actif s’active et la led correspondante clignotera 2 fois. -
Seite 17: Entretien
ENTRETIEN TELECOMMANDE (FOURNIE SUR DEMANDE) Il est possible de commander cet appareil au moyen d’une télé- commande, alimentée avec des piles alcalines zinc-charbon 1,5 V du type standard LR03-AAA (non compris). • Ne pas ranger la télécommande à proximité de sources de cha- leur. - Seite 18 Filtres anti-odeur à charbon actif (version filtrante) Il n’est ni lavable, ni régénérable. Le remplacer lorsque la led S1 clignote ou au moins tous les 4 mois. Le signal d’alarme, si préalablement activé, se vérifie seulement lorsque le moteur d’aspiration est en marche. Activation du signal d’alarme •...
-
Seite 19: Empfehlungen Und Hinweise
EMPFEHLUNGEN UND HINWEISE Diese Gebrauchsanleitung gilt für mehrere Geräte-Ausführungen. Es ist möglich, dass einzelne Ausstattungsmerkmale beschrieben sind, die nicht auf Ihr Gerät zutreffen. MONTAGE • Der Hersteller haftet nicht für Schäden, die auf eine fehlerhafte und unsachgemäße Montage zurückzuführen sind. •... -
Seite 20: Charakteristiken
CHARAKTERISTIKEN Platzbedarf 598-698-798-898-1198 Min. Min. 650mm 650mm Komponenten Pos. Produktkomponenten 14.1 Haubenkörper mit Schaltern, Beleuchtung, Gebläse- gruppe, Filter 12a 7.2.1 Teleskopkamin bestehend aus: oberer Kaminteil unterer Kaminteil Reduzierflansch ø 150-120 mm 14.1 Verlängerung Luftaustritt-Anschlussstück Luftaustritt-Anschlussstück Pos. Montagekomponenten 7.2.1 Befestigungsbügel oberer Kaminteil Bügel für Anschlusshalter Dübel Schrauben 4,2 x 44,4... -
Seite 21: Montage
MONTAGE Bohren der Befestigungslöcher und Fixieren der Befestigungsbügel 7.2.1 Nachstehende Linien an die Wand zeichnen: • Eine vertikale Linie bis zur Decke oder oberen Begrenzung, und zwar in der Mitte des Bereiches, in dem die Haube montiert werden soll; • Eine horizontale Linie: mit einem minimalen Abstand von 650 mm zur Kochfläche. •... -
Seite 22: Anschluss Der Umluftversion
Montage des Haubenkörpers • Bevor der Haubenkörper eingehakt wird, die 2 Schrauben Vr bei den Haubenkörper-Anhakpunkten festziehen. • Den Haubenkörper bei den Schrauben 12a einhängen. • Die Halteschrauben 12a definitiv festziehen. • Den Haubenkörper mit Hilfe der Schrauben Vr ausrichten. Anschlüss in abluftversion Bei Abluftbetrieb kann die Haube vom Installateur wahlweise mittels Rohr oder Schlauch (ø... -
Seite 23: Elektroanschluss
ELEKTROANSCHLUSS • Bei Anschluss der Haube an das Stromnetz muss ein zweipoliger Schalter mit einem Öffnungsweg von min- destens 3 mm zwischengeschaltet werden. • Entfernen Sie die Fettfilter (s. Abschnitt „Wartung“) und versichern Sie sich, daß die Kabelverbindung in die Steckdose des Gebläses einwandfrei eingesteckt wird. -
Seite 24: Bedienung
BEDIENUNG Schalttafel Taste LED Funktion Schaltet die Beleuchtung bei maximaler Intensität ein/aus. Bleibend Schaltet den Motor bei der ersten Betriebsgeschwindigkeit ein/aus. Bleibend Schaltet den Motor bei der zweiten Betriebsgeschwindigkeit ein. Mit zirka 5 Sekunden langem Gedrückthalten der Taste bei abgeschalteten Verbrauchern (Motor+Licht) wird der Alarm für aktive Aktivkohlefilter aktiviert und die entsprechende LED blinkt zweimal. -
Seite 25: Wartung
WARTUNG FERNBEDIENUNG (OPTION) Dieses Gerät kann mit einer Fernbedienung gesteuert werden, welche mit alkalischen Zink-Kohle-Batterien 1,5 V des Standard- typs LR03-AAA versorgt wird (nicht mitgeliefert). • Die Fernbedienung nicht in die Nähe von Hitzequellen legen. • Batterien müssen vorschriftsmäßig entsorgt werden. Metallfettfilter Die Fettfilter sind spülmaschinengeeignet und müssen gewaschen werden, sobald sich die LED S1 einschaltet, oder mindestens alle... -
Seite 26: Auswechseln
Aktivkohle-Geruchsfilter (Filterversion) Der Aktivkohlefilter ist weder waschbar, noch regenerierbar und muss ausgewechselt werden, wenn die LED S1 blinkt, oder mindestens alle 4 Monate. Die Alarmmeldung, wenn zuvor ak- tiviert, erfolgt nur, wenn der Absaugmotor zugeschaltet ist. Aktivierung des Alarmsignals • Bei den Filterversionen der Abzugshauben wird die Alarmanzeige für Filtersättigung im Augenblick der Installation oder in der Folge aktiviert. -
Seite 27: Consejos Y Sugerencias
CONSEJOS Y SUGERENCIAS Las presentes instrucciones de servicio son válidas para diferentes modelos de aparato; por ello puede ser posible que se describan detalles y características de equipamiento que no concuerden íntegramente con las de su aparato concreto. INSTALACIÓN • El fabricante declina cualquier responsabilidad debida a los daños provocados por una instalación incorrecta o no conforme con las reglas. -
Seite 28: Características
CARACTERÍSTICAS Dimensiones 598-698-798-898-1198 Min. Min. 650mm 650mm Componentes Ref. Cant. Componentes del Producto 14.1 Cuerpo Campana dotado con: mandos, luz, grupo de ventilaciòn, filtros 12a 7.2.1 Chimenea telescópica formada por: Chimenea superior Chimenea inferior Brida de reducción ø 150-120 mm 14.1 Extensión del racor de salida del aire Racor de salida del aire... -
Seite 29: Instalación
INSTALACIÓN Taladrado pared y fijación de las bridas 7.2.1 Trazar en la pared: • una línea vertical hasta el cielorraso o límite superior, al centro de la zona prevista para el montaje de la campana; • una línea horizontal a 650 mm mín. sobre el plano de cocción. Apoyar como se indica la brida 7.2.1 a 1-2 mm del cielo o del límite superior, alineando su centro (muescas) con la línea vertical de referencia. - Seite 30 Montaje del cuerpo de la campana • Antes de enganchar el cuerpo de la campana,apretar los 2 tornillos Vr situados en los puntos de enganche del cuerpo de la campana . • Enganchar el cuerpo de la campana en los tornillos 12a predis- puestos.
-
Seite 31: Conexión Eléctrica
CONEXIÓN ELÉCTRICA • Conectar la campana a la red de alimentación eléctrica instalando un interruptor bipolar con apertura de los con- tactos de 3 mm como mínimo. • Quitar los Filtros antigrasa y asegurase de que el conector del Cable de acometida esté colocado correctamente en el enchufe del Aspirador. -
Seite 32: Uso
Tablero de mandos Tecla Led Función Enciende/Apaga las luces a la máxima velocidad. Fijo Enciende/Apaga el motor a la primera velocidad Fijo Enciende el motor a la segunda velocidad. Manteniendo presionada la tecla por aproximadamente 5 segundos, cuando todas las cargas están apagadas (Motor+Luz) se activa la alarma de los filtros al carbono activo visualizando un doble parpadeo del led correspondiente. -
Seite 33: Mantenimiento
MANTENIMIENTO MANDO A DISTANCIA (OPCIONAL) El aparato puede comandarse con un mando a distancia que fun- ciona con pilas alcalinas zinkcarbón de 1,5 V del tipo standard LR03-AAA (no incluido). • No dejar el mando a distancia cerca de una fuente de calor. •... -
Seite 34: Sustitución De Las Lámparas
Filtros antiolor al carbono activo (versión filtrante) No es lavable y no es regenerable, debe ser sustituido cuando el led S1parpadea o por lo menos cada 4 meses. La señalización de alarma si ha sido previamente activada, se verifica sólo cuando está... - Seite 35 µ µ µ , • µ µ µ • µ 650 mm ( µ µ µ µ µ • µ • • µ µ µ µ 120 mm. µ µ • • µ µ ( . . µ µ µ µ...
- Seite 36 598-698-798-898-1198 Min. Min. 650mm 650mm µ µ 14.1 µ µ : µ , µ 12a 7.2.1 µ µ µ µ o 150-120 mm 14.1 µ 7.2.1 µ µ µ 4,2 x 44,4 2,9 x 9,5 3 36...
- Seite 37 µ 7.2.1 • µ µµ µ • µ µµ : 650 mm min. µ . 7.2.1 1-2 mm µ µµ ) µ µµ • µ µ • µ . 7.2.1 X mm µ (X = µ µ ), µµ ) µ µµ...
- Seite 38 µ • µ µ • µ 12a. • 12a. • µ µ µ µ µ µ ø 150 ø 120 o150 120 mm, • µ o120 mm, µ • µ µ µ . • 14.1 • 14.1 • µ 7.3 µ...
- Seite 39 • µ µ µ 3 mm. • . “ ”) µ µ µ • 7.2.1 µ 7.2.1 • µ µ (2,9 x 9,5) µ . • µ µ µ µ µ • µ µ µ • µ µ µ 12c (2,9 x 9,5) µ...
- Seite 40 µ µ µ µ (µ µ µ µ µ Led. µ µ µ Led. µ µ (µ µ µ µ µ µ Led S1. µ µ µ µ µ µ µ , µ OFF. µ µ µ µ led. µ µ...
- Seite 41 µ µ 1,5 V LR03-AAA ( µ • µ • µ µ µ Led S1 2 µ µ µ • µ • , µ µ Led. µ • µ • µ µ µ µ • µ µ 4 41...
- Seite 42 µ ( µ led S1 4 µ µ µ , µ , µ µ µ µ • µ µ µ µ • µ • T2 µ µ Led: µ µ • µ • , µ µ Led. • • µ µ...
- Seite 43 • • • • • • • 2° 0,04 • • • • • • • • • • • • • 4 43...
- Seite 44 598-698-798-898-1198 Min. Min. 650mm 650mm 14.1 12a 7.2.1 ø 150-120 14.1 7.2.1 4,2 x 44,4 2,9 x 9,5 Bruksanvisning 4 44...
- Seite 45 7.2.1 • • . 650 7.2.1 • • 7.2.1 • • • • Ø 8 • • 12a (4,2 x 44,4 ). 7.2.1 • 7.2.1 12a (4,2 x 44,4). • 12a (4,2 x 44,4) 4 45...
- Seite 46 • • 12a. • 12a. • ø 150 ø 120 • Ø 120 • • 14.1 • 14.1 • 7.3, • 14.1 • ø 150 • 4 46...
- Seite 47 • • “ ”) 7.2.1 • 7.2.1 • 12c (2,9 x 9,5). • • • 12c (2,9 x 9,5). 4 47...
- Seite 48 4 48...
- Seite 49 LR03-AAA ( • • • • • • • 4 49...
- Seite 50 • • • • • • • • • • • • • 5 50...
- Seite 52 991.0270.557_ver1...