Riello PRESS 45 N 615 M Montage Und Bedienungs Anleitung
Heizölbrenner
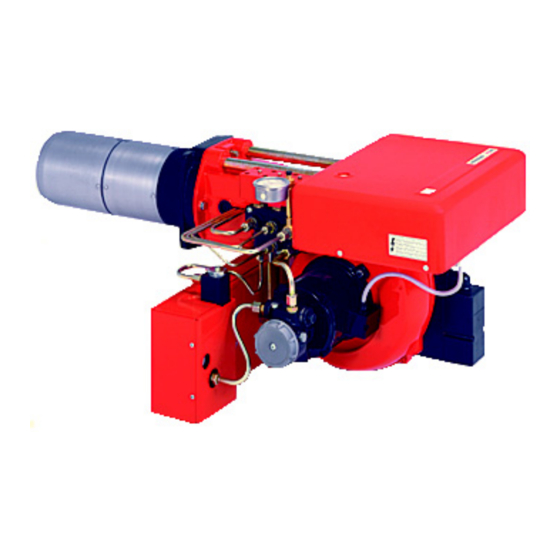
Vorschau ausblenden
Andere Handbücher für PRESS 45 N 615 M:
- Montage und bedienungs anleitung (36 Seiten)
Inhaltsverzeichnis
Werbung
Verfügbare Sprachen
Verfügbare Sprachen
Quicklinks
Istruzioni per installazione, uso e manutenzione
Montage und Bedienungs Anleitung
Installation, use and maintenance instructions
Manuel dʼentretien
Bruciatore di nafta
I
Heizölbrenner
D
Heavy oil burner
GB
Brûleur à fioul lourd
F
Funzionamento bistadio
Zweistufiger Betrieb
Two-stage operation
Fonctionnement à deux allures
CODICE
CODE
20132103
20132104
MODELLO - MODELL
MODELE - MODEL
PRESS 45 N
PRESS 45 N
TIPO - TYP
TYPE
615 M
615 M
20132263 (1) - 04/2017
Werbung
Inhaltsverzeichnis

Verwandte Anleitungen für Riello PRESS 45 N 615 M


Inhaltszusammenfassung für Riello PRESS 45 N 615 M
- Seite 1 Istruzioni per installazione, uso e manutenzione Montage und Bedienungs Anleitung Installation, use and maintenance instructions Manuel dʼentretien Bruciatore di nafta Heizölbrenner Heavy oil burner Brûleur à fioul lourd Funzionamento bistadio Zweistufiger Betrieb Two-stage operation Fonctionnement à deux allures CODICE MODELLO - MODELL TIPO - TYP CODE MODELE - MODEL...
- Seite 2 Istruzioni originali Übersetzung der Originalen Anleitungen Translation of the original instructions Traduction des instructions d’origine...
- Seite 21 Inhalt Erklärungen ....................................2 Allgemeine Informationen und Hinweise ..........................3 Informationen zur Bedienungsanleitung........................3 2.1.1 Einleitung..................................3 2.1.2 Allgemeine Gefahren..............................3 2.1.3 Weitere Symbole ................................. 3 2.1.4 Übergabe der Anlage und der Bedienungsanleitung ....................4 Garantie und Haftung ..............................4 Sicherheit und Vorbeugung ..............................
-
Seite 22: Erklärungen
Elektromagnetische Verträglichkeit Die Qualität wird durch ein gemäß ISO 9001:2015 zertifiziertes Qualitäts- und Managementsystem garantiert. Legnago, 01.12.2015 Generaldirektor Leiter der Abteilung Forschung und RIELLO S.p.A. - Geschäftsleitung Brenner Entwicklung RIELLO S.p.A. - Geschäftsleitung Brenner Ing. U. Ferretti Ing. F. Comencini... -
Seite 23: Allgemeine Informationen Und Hinweise
Allgemeine Informationen und Hinweise Allgemeine Informationen und Hinweise Informationen zur Bedienungsanleitung 2.1.1 Einleitung QUETSCHGEFAHR FÜR GLIEDMASSEN Die dem Brenner beiliegende Bedienungsanleitung: Dieses Symbol liefert Angaben zu sich bewegenden stellt einen wesentlichen und integrierenden Teil des Produkts Maschinenteilen: Quetschgefahr der Gliedmaßen. dar und darf von diesem nicht getrennt werden Es muss daher sorgfältig für ein späteres Nachschlagen aufbewahrt ACHTUNG MASCHINENTEILE IN BEWEGUNG... -
Seite 24: Übergabe Der Anlage Und Der Bedienungsanleitung
Allgemeine Informationen und Hinweise 2.1.4 Übergabe der Anlage und der Der Lieferant der Anlage den Anwender genau hinsichtlich folgender Themen informiert: Bedienungsanleitung – dem Gebrauch der Anlage, Bei der Übergabe der Anlage ist es erforderlich, dass: – den eventuellen weiteren Abnahmen, die vor der ... -
Seite 25: Sicherheit Und Vorbeugung
Sicherheit und Vorbeugung Sicherheit und Vorbeugung Einleitung Die Brenner wurden gemäß den gültigen Normen und Richtlinien Die Art und der Druck des Brennstoffs, die Spannung und unter Anwendung der bekannten Regeln zur technischen Frequenz Stromversorgung, Mindest- Sicherheit Berücksichtigung aller möglichen Höchstdurchsätze, auf die der Brenner eingestellt wurde, die Gefahrensituationen entworfen und gebaut. -
Seite 26: Technische Beschreibung Des Brenners
Technische Beschreibung des Brenners Technische Beschreibung des Brenners Technische Daten 615 M Feuerungswärmeleistung - Durchsatz 114/205 ÷ 513 kW – 10/18 ÷ 45 kg/h Brennstoff Öl mit max. Viskosität bis 50° C 50 mm (7° E) mit Kit bis zu 150 mm (20°... -
Seite 27: Betriebsbereich (2 Düsen In Betrieb)
Technische Beschreibung des Brenners Betriebsbereich (2 Düsen in Betrieb) Wenn der Brenner mit nur einer Düsen arbeitet, sind die La plage de puissance (Abb. 2) a été mesurée à Luftverdichtungsdedingungen günstiger und verursachen keine une température ambiante de 20 °C, à une Probleme. -
Seite 28: Installation
Installation Installation Sicherheitshinweise für die Installation Nehmen Sie die Installation nach einer sorgfältigen Reinigung Installation Brenners muss durch des gesamten zur Installation des Brenners bestimmten Bereichs Fachpersonal gemäß den Angaben in diesem und einer korrekten Beleuchtung des Raumes vor. Handbuch sowie in Übereinstimmung mit den Alle Arbeiten zur Installation, Wartung und Abbau gültigen gesetzlichen Normen und Bestimmungen ACHTUNG... -
Seite 29: Heizölversorgung
Installation Heizölversorgung 5.4.2 Ansaugzuleitung Explosionsgefahr durch Austreten von Brennstoff Für Öl mit einer max. Viskosität von 7°E / 50°C. bei vorhandener entzündbarer Quelle. Vorsichtsmaßnahmen: Stöße, Reibungen, Funken, Hitze vermeiden. Vor jedem Eingriff am Brenner ist zu prüfen, ob das Absperrventil für den Brennstoff geschlossen ist. Die Installation der Brennstoffzuleitung muss durch Fachpersonal in Übereinstimmung mit den gültigen gesetzlichen Normen und Bestimmungen... -
Seite 30: Ringleitung
Installation 5.4.3 Ringleitung Für Öl mit Viskosität bis zu 20°E / 50°C. D2631 Abb. 6 1 - Tank (beheizt für dickflüssiges Öl) 2 - Filter (mit Widerstand für Öl > 7°E / 50°C) 3 - Brenner (mit Kit für dickflüssiges Öl) 4 - Gekuppelte Absperrhähne um den Brenner auszuschliessen 5 - Förderpumpe 6 - Kontrollmanometer... -
Seite 31: Elektrische Anschlüsse
Installation Elektrische Anschlüsse Sicherheitshinweise für die elektrischen Anschlüsse Die elektrischen Anschlüsse müssen ohne Stromversorgung ausgeführt werden. Die elektrischen Anschlüsse müssen durch Fachpersonal nach den im Bestimmungsland gültigen Vorschriften ausgeführt werden. Siehe in den Schaltplänen. Der Hersteller lehnt jegliche Haftung für Änderungen oder andere Anschlüsse ab, die von denen in den GEFAHR Schaltplänen dargestellten abweichen. - Seite 32 Installation Innere Brennerverdrahtung (in der Fabrik fertig montiert) RMO88.53A2 RMO88.53A2 12 15 D2599 1 3 5 30 T2 T6 T8 Abb. 8 CMV Motorkontaktgeber Elektrische Anschlüsse an der Klemmeleiste Kontaktgeber der Heizwinderstande (vom Installateur auszuführen) Funkentstörer Fotowinderstand Störabschaltung-Fernmeldung Schalter für das manuelle Ausschalten Brenner-Klemmleiste Gebläsemotor Düsenstockwiderstand...
-
Seite 33: Inbetriebnahme, Einstellung Und Betrieb Des Brenners
Inbetriebnahme, Einstellung und Betrieb des Brenners Inbetriebnahme, Einstellung und Betrieb des Brenners Sicherheitshinweise für die erstmalige Inbetriebnahme Die erstmalige Inbetriebnahme des Brenners Prüfen Sie die richtige Funktionsweise der muss durch zugelassenes Fachpersonal gemäß Einstell-, Steuer- und Sicherheitsvorrichtungen. den Angaben in diesem Handbuch sowie in Übereinstimmung mit den gültigen gesetzlichen ACHTUNG ACHTUNG... -
Seite 34: Luftklappenmotor
Inbetriebnahme, Einstellung und Betrieb des Brenners Luftklappenmotor STILLSTAND - hellblauer Hebel Der hellblaue Hebel wird in der Fabrik senkrecht eingestellt. Mit dieser Stellung des Hebels ist die Luftklappe völlig Levier noire geschlossen. Um eine Teilöffnung der Klappe zu erhalten den Hebel nach links verstellen (+ Zeichen auf dem Schild). -
Seite 35: Betriebsablauf
Inbetriebnahme, Einstellung und Betrieb des Brenners Nur Filter mit einer Kerbe in der Sechskantverschraubung des Vorwärmers unterbrochen, so muss der Brennstoff für verwenden. mindestens 30 Minuten erwärmt werden, bevor man den Brenner einschaltet. Anderenfalls muss der Widerstand am Leitungen in der Leiste Düsenstock mit einer unabhängigen Monophasenleitung gespeist werden, welche von einer Sicherung 1 A geschützt wird. -
Seite 36: Diagnostik Betriebsstörungen
Inbetriebnahme, Einstellung und Betrieb des Brenners Diagnostik Betriebsstörungen Das mitgelieferte Steuergerät hat eine Diagnosefunktion, mit der Sicherheitszustand ist, dann mindestens drei Sekunden lang auf die möglichen Ursachen von Betriebsstörungen leicht auffindbar den Entriegelungsschalter drücken. Nach dem Loslassen des sind (Anzeige: ROTE LED). Schalters beginnt die ROTE LED zu blinken, wie in der hier folgenden Abbildung gezeigt. -
Seite 37: Wartung
Wartung Wartung Sicherheitshinweise für die Wartung Die regelmäßige Wartung ist für die gute Funktionsweise, die Stromversorgung Brenners durch Sicherheit, die Leistung und Nutzungsdauer des Brenners Betätigen Hauptschalters Anlage wesentlich. abschalten. Sie ermöglicht es, den Verbrauch und die Schadstoffemissionen GEFAHR zu verringern sowie das Produkt über die Zeit hinweg zuverlässig zu erhalten. -
Seite 38: Öffnen Des Brenners
Wartung Öffnen des Brenners Stromversorgung Brenners durch Warten Sie, Bauteile, Betätigen Hauptschalters Anlage Wärmequellen in Berührung kommen, komplett abschalten. abgekühlt sind. GEFAHR Das Brennstoffabsperrventil schließen. GEFAHR Schließen des Brenners Bauteile des Brenners wieder in der ursprünglichen Position einbauen. Nach Durchführung von Wartungs-, Reinigungs- oder Kontrollarbeiten müssen die Haube sowie alle Sicherheits- und Schutzvorrichtungen des Brenners wieder montiert werden.