Riello PRESS 30 N 614 M Montage Und Bedienungs Anleitung
Heizölbrenner
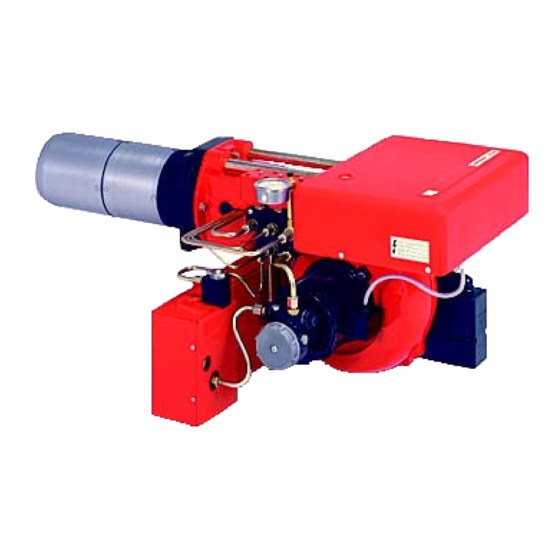
Vorschau ausblenden
Andere Handbücher für PRESS 30 N 614 M:
- Montage und bedienungs anleitung (36 Seiten)
Inhaltsverzeichnis
Werbung
Verfügbare Sprachen
Verfügbare Sprachen
Quicklinks
Istruzioni per installazione, uso e manutenzione
Montage und Bedienungs Anleitung
Installation, use and maintenance instructions
Instructions pour l'installation, l'utilisation et l'entretien
Bruciatori di nafta
I
Heizölbrenner
D
Heavy oil burners
GB
Brûleurs à fioul lourd
F
Funzionamento bistadio
Zweistufiger Betrieb
Two-stage operation
Fonctionnement à deux allures
CODICE
CODE
20132092
20132093
MODELLO - MODELL
MODELE - MODEL
PRESS 30 N
PRESS 30 N
TIPO - TYP
TYPE
614 M
614 M
20132157 (1) - 04/2017
Werbung
Kapitel
Inhaltsverzeichnis

Verwandte Anleitungen für Riello PRESS 30 N 614 M


Inhaltszusammenfassung für Riello PRESS 30 N 614 M
- Seite 1 Istruzioni per installazione, uso e manutenzione Montage und Bedienungs Anleitung Installation, use and maintenance instructions Instructions pour l’installation, l’utilisation et l’entretien Bruciatori di nafta Heizölbrenner Heavy oil burners Brûleurs à fioul lourd Funzionamento bistadio Zweistufiger Betrieb Two-stage operation Fonctionnement à deux allures CODICE MODELLO - MODELL TIPO - TYP...
- Seite 2 Istruzioni originali Übersetzung der Originalen Anleitungen Translation of the original instructions Traduction des instructions d’origine...
-
Seite 3: Inhaltsverzeichnis
Indice Dichiarazioni ....................................2 Informazioni ed avvertenze generali ............................3 Informazioni sul manuale di istruzione ........................3 2.1.1 Introduzione................................. 3 2.1.2 Pericoli generici ................................3 2.1.3 Altri simboli .................................. 3 2.1.4 Consegna dell’impianto e del manuale di istruzione ....................4 Garanzia e responsabilità............................ -
Seite 4: Dichiarazioni
La qualità viene garantita mediante un sistema di qualità e management certificato secondo ISO 9001:2015. Legnago, 01.12.2015 Direttore Generale Direttore Ricerca e Sviluppo RIELLO S.p.A. - Direzione Bruciatori RIELLO S.p.A. - Direzione Bruciatori Ing. U. Ferretti Ing. F. Comencini 20132157... -
Seite 5: Informazioni Ed Avvertenze Generali
Informazioni ed avvertenze generali Informazioni ed avvertenze generali Informazioni sul manuale di istruzione 2.1.1 Introduzione ATTENZIONE ORGANI IN MOVIMENTO Il manuale di istruzione dato a corredo del bruciatore: Questo simbolo fornisce indicazioni per evitare costituisce parte integrante ed essenziale del prodotto e non l’avvicinamento degli arti ad organi meccanici in va da esso separato;... -
Seite 6: Consegna Dell'impianto E Del Manuale Di Istruzione
Informazioni ed avvertenze generali Il fornitore dell’impianto informi accuratamente l’utente circa: 2.1.4 Consegna dell’impianto e del manuale di – l’uso dell’impianto, istruzione – gli eventuali ulteriori collaudi che dovessero essere neces- In occasione della consegna dell’impianto è necessario che: sari prima dell’attivazione dell’impianto, ... -
Seite 7: Sicurezza E Prevenzione
Sicurezza e prevenzione Sicurezza e prevenzione Premessa I bruciatori sono stati progettati e costruiti in conformità alle nor- sime alle quali il bruciatore è regolato, la pressurizzazione della me e direttive vigenti, applicando le regole tecniche di sicurezza camera di combustione, le dimensioni della camera di combu- conosciute e prevedendo tutte le potenziali situazioni di pericolo. -
Seite 8: Descrizione Tecnica Del Bruciatore
Descrizione tecnica del bruciatore Descrizione tecnica del bruciatore Designazione bruciatori Serie : PRESS Grandezza Regolazione: Bistadio Tristadio Modulante Emissione : Classe 1 EN267 Testa : Testa standard Testa lunga Sistema di controllo fiamma : Standard (1 stop ogni 24 h) Funzionamento continuo (1 stop ogni 72 h) Alimentazione elettrica del sistema : 1/230/50... -
Seite 9: Dati Tecnici
Descrizione tecnica del bruciatore Dati tecnici Modello PRESS 30 N Potenza termica 85/171 ÷ 342 Portata kg/h 7,5/15 ÷ 30 Combustibile Olio viscosità max. a 50° C 50 mm /s (7° E) con kit fino a 150 mm /s (20° E) Funzionamento Bistadio Impiego standard... -
Seite 10: Campo Di Lavoro (2 Ugelli Funzionanti)
Descrizione tecnica del bruciatore Campo di lavoro (2 ugelli funzionanti) Quando il bruciatore funziona con un solo ugello, le condizioni di Il campo di lavoro (Fig. 2) è stato ricavato alla pressurizzazione sono più favorevoli e non pongono problemi. temperatura ambiente di 20 °C, alla pressione ba- Portata minima con un solo ugello: 7,5 kg/h - 85 kW rometrica di 1013 mbar (circa 0 m s.l.m.) e con la ATTENZIONE... -
Seite 11: Installazione
Installazione Installazione Note sulla sicurezza per l’installazione Dopo avere effettuato un’accurata pulizia tutt’intorno all’area de- L’installazione del bruciatore deve essere effet- stinata all’installazione del bruciatore ed avere provveduto ad tuata da personale abilitato, secondo quanto ri- una corretta illuminazione dell’ambiente, procedere con le opera- portato nel presente manuale ed in conformità... -
Seite 12: Impianti Alimentazione Olio Combustibile
Installazione Impianti alimentazione olio combustibile 5.4.2 Impianto in aspirazione Rischio di esplosione a causa di fuoriuscita di Per olio leggero con viscosità max. 7°E / 50°C. combustibile in presenza di fonte infiammabile. Precauzioni: evitare urti, attriti, scintille, calore. Verificare la chiusura del rubinetto di intercettazio- ne del combustibile, prima di effettuare qualsiasi tipo di intervento sul bruciatore. -
Seite 13: Impianto Ad Anello
Installazione 5.4.3 Impianto ad anello Per olio denso con viscosità fino a 20°E / 50°C. D2631 Fig. 6 1 - Cisterna (riscaldata per olio denso) 2 - Filtro (con resistenza per olio > 7°E / 50°C) 3 - Bruciatore (con kit per olio denso) 4 - Saracinesche per esclusione bruciatore (accoppiate) 5 - Pompa di trasferimento 6 - Manometro di controllo... -
Seite 14: Collegamenti Elettrici
Installazione Collegamenti elettrici Note sulla sicurezza per i collegamenti elettrici I collegamenti elettrici devono essere eseguiti in assenza di alimentazione elettrica. I collegamenti elettrici devono essere eseguiti secondo le norme vigenti del paese di destinazione e da personale qualificato. - Seite 15 Installazione IMPIANTO ELETTRICO DEL BRUCIATORE (eseguito in fabbrica) RMO88.53A2 RMO88.53A2 15 12 1 3 5 D2571 7 8 9 11 12 Fig. 8 Condensatore COLLEGAMENTI ELETTRICI ALLA MORSETTIERA Contattore preriscaldatore (a cura dell’installatore) Soppressore Fotoresistenza Segnalazione di blocco a distanza Interruttore manuale Relè...
-
Seite 16: Messa In Funzione, Taratura E Funzionamento Del Bruciatore
Messa in funzione, taratura e funzionamento del bruciatore Messa in funzione, taratura e funzionamento del bruciatore Note sulla sicurezza per la prima messa in funzione La prima messa in funzione del bruciatore deve Verificare la corretta funzionalità dei dispositivi di essere effettuata da personale abilitato, secondo regolazione, comando e sicurezza. -
Seite 17: Regolazione Motorino Serranda Aria
Messa in funzione, taratura e funzionamento del bruciatore Regolazione motorino serranda aria SOSTA - Leva azzurra La leva azzurra è posizionata in fabbrica verticalmente e corri- sponde alla condizione di serranda aria totalmente chiusa. Leva nera Per avere un’apertura parziale della serranda, spostare tale leva verso sinistra (segno + sulla targhetta). -
Seite 18: Programma Di Avviamento
Messa in funzione, taratura e funzionamento del bruciatore Se si disinserisce l’alimentazione del preriscaldatore, biso- gna preriscaldare il combustibile per almeno 30 minuti prima Tubazioni tavoletta di accendere il bruciatore. In caso contrario provvedere ad alimentare la resistenza sul portaspruzzo con una linea monofase indipendente, protetta da un fusibile da 1 A. -
Seite 19: Diagnostica Mal Funzionamento
Messa in funzione, taratura e funzionamento del bruciatore Diagnostica mal funzionamento L’apparecchiatura in dotazione ha una sua funzione diagnosti- e premere il pulsante di sblocco per un tempo minimo di tre se- ca attraverso la quale è possibile facilmente individuare le condi. -
Seite 20: Manutenzione
Manutenzione Manutenzione Note sulla sicurezza per la manutenzione La manutenzione periodica è essenziale per il buon funziona- mento, la sicurezza, il rendimento e la durata del bruciatore. Togliere l’alimentazione elettrica al bruciatore, Essa consente di ridurre i consumi, le emissioni inquinanti e di agendo sull’interruttore generale dell’impianto. -
Seite 21: Apertura Bruciatore
Manutenzione Apertura bruciatore Togliere l’alimentazione elettrica al bruciatore, Attendere il completo raffreddamento dei compo- agendo sull’interruttore generale dell’impianto. nenti a contatto con fonti di calore. PERICOLO Chiudere il rubinetto di intercettazione del combu- stibile. PERICOLO Chiusura bruciatore Riposizionare tutti i componenti del bruciatore come in origine. Effettuate tutte le operazioni di manutenzione, pu- lizia o controllo, rimontare il cofano e tutti i dispo- sitivi di sicurezza e protezione del bruciatore. - Seite 23 Inhalt Erklärungen ....................................2 Allgemeine Informationen und Hinweise ..........................3 Informationen zur Bedienungsanleitung........................3 2.1.1 Einleitung..................................3 2.1.2 Allgemeine Gefahren..............................3 2.1.3 Weitere Symbole ................................. 3 2.1.4 Übergabe der Anlage und der Bedienungsanleitung ....................4 Garantie und Haftung ..............................4 Sicherheit und Vorbeugung ..............................
-
Seite 24: Erklärungen
Elektromagnetische Verträglichkeit Die Qualität wird durch ein gemäß ISO 9001:2015 zertifiziertes Qualitäts- und Managementsystem garantiert. Legnago, 01.12.2015 Generaldirektor Leiter der Abteilung Forschung und RIELLO S.p.A. - Geschäftsleitung Brenner Entwicklung RIELLO S.p.A. - Geschäftsleitung Brenner Ing. U. Ferretti Ing. F. Comencini... -
Seite 25: Allgemeine Informationen Und Hinweise
Allgemeine Informationen und Hinweise Allgemeine Informationen und Hinweise Informationen zur Bedienungsanleitung 2.1.1 Einleitung QUETSCHGEFAHR FÜR GLIEDMASSEN Die dem Brenner beiliegende Bedienungsanleitung: Dieses Symbol liefert Angaben zu sich bewegenden stellt einen wesentlichen und integrierenden Teil des Produkts Maschinenteilen: Quetschgefahr der Gliedmaßen. dar und darf von diesem nicht getrennt werden Es muss daher sorgfältig für ein späteres Nachschlagen aufbewahrt ACHTUNG MASCHINENTEILE IN BEWEGUNG... -
Seite 26: Übergabe Der Anlage Und Der Bedienungsanleitung
Allgemeine Informationen und Hinweise Der Lieferant der Anlage den Anwender genau hinsichtlich 2.1.4 Übergabe der Anlage und der folgender Themen informiert: Bedienungsanleitung – dem Gebrauch der Anlage, Bei der Übergabe der Anlage ist es erforderlich, dass: – den eventuellen weiteren Abnahmen, die vor der ... -
Seite 27: Sicherheit Und Vorbeugung
Sicherheit und Vorbeugung Sicherheit und Vorbeugung Einleitung Die Brenner wurden gemäß den gültigen Normen und Richtlinien Die Art und der Druck des Brennstoffs, die Spannung und unter Anwendung der bekannten Regeln zur technischen Frequenz Stromversorgung, Mindest- Sicherheit Berücksichtigung aller möglichen Höchstdurchsätze, auf die der Brenner eingestellt wurde, die Gefahrensituationen entworfen und gebaut. -
Seite 28: Technische Beschreibung Des Brenners
Technische Beschreibung des Brenners Technische Beschreibung des Brenners Brennerbestimmung Serie : PRESS Größe Einstellung: Zweistufig Dreistufig Modulierend Emission : Klasse 1 EN267 Flammkopf : Standard-Flammkopf Flammkopfverlängerung System zur Flammensteuerung: Standard (1 Halt aller 24 Std.) Dauerbetrieb (1 Halt aller 72 Std.) Stromversorgung des Systems : 1/230/50 1/230V/50Hz... -
Seite 29: Technische Daten
Technische Beschreibung des Brenners Technische Daten Modell PRESS 30 N Wärmeleistung 85/171 ÷ 342 Durchsatz kg/h 7,5/15 ÷ 30 Brennstoff Öl mit max. Viskosität bis 50° C 50 mm /s (7° E) mit Kit bis zu 150 mm /s (20° E) Betrieb Zweistufig Standardeinsatz... -
Seite 30: Betriebsbereich (2 Düsen In Betrieb)
Technische Beschreibung des Brenners Betriebsbereich (2 Düsen in Betrieb) Wenn der Brenner mit nur einer Düsen arbeitet, sind die Der Regelbereich (Abb. 2) wurde bei einer Luftverdichtungsdedingungen günstiger und verursachen keine Raumtemperatur von 20 °C, einem barometri- Probleme. schen Druck von 1013 mbar (etwa 0 m ü.d.M.) Mindestdurchsatz mit nür einer Düse: 7,5 kg/h - 85 kW. -
Seite 31: Installation
Installation Installation Sicherheitshinweise für die Installation Nehmen Sie die Installation nach einer sorgfältigen Reinigung Installation Brenners muss durch des gesamten zur Installation des Brenners bestimmten Bereichs Fachpersonal gemäß den Angaben in diesem und einer korrekten Beleuchtung des Raumes vor. Handbuch sowie in Übereinstimmung mit den Alle Arbeiten zur Installation, Wartung und Abbau ACHTUNG gültigen gesetzlichen Normen und Bestimmungen... -
Seite 32: Heizölversorgung
Installation Heizölversorgung 5.4.2 Ansaugzuleitung Explosionsgefahr durch Austreten von Brennstoff Für Öl mit einer max. Viskosität von 7°E / 50°C. bei vorhandener entzündbarer Quelle. Vorsichtsmaßnahmen: Stöße, Reibungen, Funken, Hitze vermeiden. Vor jedem Eingriff am Brenner ist zu prüfen, ob das Absperrventil für den Brennstoff geschlossen ist. Die Installation der Brennstoffzuleitung muss durch Fachpersonal in Übereinstimmung mit den gültigen gesetzlichen Normen und Bestimmungen... -
Seite 33: Ringleitung
Installation 5.4.3 Ringleitung Für Öl mit Viskosität bis zu 20°E / 50°C. D2631 Abb. 6 1 - Tank (beheizt für dickflüssiges Öl) 2 - Filter (mit Widerstand für Öl > 7°E / 50°C) 3 - Brenner (mit Kit für dickflüssiges Öl) 4 - Gekuppelte Absperrhähne um den Brenner auszuschliessen 5 - Förderpumpe 6 - Kontrollmanometer... -
Seite 34: Elektrische Anschlüsse
Installation Elektrische Anschlüsse Sicherheitshinweise für die elektrischen Anschlüsse Die elektrischen Anschlüsse müssen ohne Stromversorgung ausgeführt werden. Die elektrischen Anschlüsse müssen durch Fachpersonal nach den im Bestimmungsland gültigen Vorschriften ausgeführt werden. Siehe in den Schaltplänen. Der Hersteller lehnt jegliche Haftung für Änderungen oder andere Anschlüsse ab, die von denen in den GEFAHR Schaltplänen dargestellten abweichen. - Seite 35 Installation INNERE BRENNERVERDRAHTUNG (in der Fabrik fertig montiert) RMO88.53A2 RMO88.53A2 15 12 1 3 5 D2571 7 8 9 11 12 Abb. 8 Motorkondesator ELEKTRISCHE ANSCHLÜSSE AN DER Kontaktgeber der Heizwinderstande KLEMMELEISTE (vom Installateur auszuführen) Funkentstörer Fotowinderstand Störabschaltung-Fernmeldung Schalter für das manuelle Ausschalten des Brenners Relais Brenner-Klemmleiste Gebläsemotor...
-
Seite 36: Inbetriebnahme, Einstellung Und Betrieb Des Brenners
Inbetriebnahme, Einstellung und Betrieb des Brenners Inbetriebnahme, Einstellung und Betrieb des Brenners Sicherheitshinweise für die erstmalige Inbetriebnahme Die erstmalige Inbetriebnahme des Brenners Prüfen Sie die richtige Funktionsweise der muss durch zugelassenes Fachpersonal gemäß Einstell-, Steuer- und Sicherheitsvorrichtungen. den Angaben in diesem Handbuch sowie in ACHTUNG Übereinstimmung mit den gültigen gesetzlichen ACHTUNG... -
Seite 37: Luftklappenmotor
Inbetriebnahme, Einstellung und Betrieb des Brenners Luftklappenmotor STILLSTAND - hellblauer Hebel Der hellblaue Hebel wird in der Fabrik senkrecht eingestellt. Mit dieser Stellung des Hebels ist die Luftklappe völlig Levier noire geschlossen. Um eine Teilöffnung der Klappe zu erhalten den Hebel nach links verstellen (+ Zeichen auf dem Schild). -
Seite 38: Betriebsablauf
Inbetriebnahme, Einstellung und Betrieb des Brenners Widerstandes, der in Kontakt mit dem Temperaturfühler ist, Wenn der Brenner ausgeschaltet wird, muss die Zuleitung geprüft werden (Wert ca. 35 Ohm). des Vorwärmers weiter gespeist werden. Wird die Speisung des Vorwärmers unterbrochen, so muss der Brennstoff für Nur Filter mit einer Kerbe in der Sechskantverschraubung mindestens 30 Minuten erwärmt werden, bevor man den verwenden. -
Seite 39: Diagnostik Betriebsstörungen
Inbetriebnahme, Einstellung und Betrieb des Brenners Diagnostik Betriebsstörungen Das mitgelieferte Steuergerät hat eine Diagnosefunktion, mit der Sicherheitszustand ist, dann mindestens drei Sekunden lang auf die möglichen Ursachen von Betriebsstörungen leicht auffindbar den Entriegelungsschalter drücken. Nach dem Loslassen des sind (Anzeige: ROTE LED). Schalters beginnt die ROTE LED zu blinken, wie in der hier folgenden Abbildung gezeigt. -
Seite 40: Wartung
Wartung Wartung Sicherheitshinweise für die Wartung Die regelmäßige Wartung ist für die gute Funktionsweise, die Stromversorgung Brenners durch Sicherheit, die Leistung und Nutzungsdauer des Brenners Betätigen Hauptschalters Anlage wesentlich. abschalten. Sie ermöglicht es, den Verbrauch und die Schadstoffemissionen GEFAHR zu verringern sowie das Produkt über die Zeit hinweg zuverlässig zu erhalten. -
Seite 41: Öffnen Des Brenners
Wartung Öffnen des Brenners Stromversorgung Brenners durch Warten Sie, Bauteile, Betätigen Hauptschalters Anlage Wärmequellen in Berührung kommen, komplett abschalten. abgekühlt sind. GEFAHR Das Brennstoffabsperrventil schließen. GEFAHR Schließen des Brenners Bauteile des Brenners wieder in der ursprünglichen Position einbauen. Nach Durchführung von Wartungs-, Reinigungs- oder Kontrollarbeiten müssen die Haube sowie alle Sicherheits- und Schutzvorrichtungen des Brenners wieder montiert werden. - Seite 43 Contents Declarations....................................2 Information and general warnings............................3 Information about the instruction manual ........................3 2.1.1 Introduction.................................. 3 2.1.2 General dangers................................3 2.1.3 Other symbols ................................3 2.1.4 Delivery of the system and the instruction manual...................... 4 Guarantee and responsibility............................4 Safety and prevention................................
-
Seite 44: Declarations
The quality is guaranteed by a quality and management system certified in accordance with ISO 9001:2015. Legnago, 01.12.2015 Executive General Manager Research & Development Director RIELLO S.p.A. - Burner Department RIELLO S.p.A. - Burner Department Mr. U. Ferretti Mr. F. Comencini... -
Seite 45: Information And General Warnings
Information and general warnings Information and general warnings Information about the instruction manual 2.1.1 Introduction WARNING: MOVING PARTS The instruction manual supplied with the burner: This symbol indicates that you must keep limbs is an integral and essential part of the product and must not away from moving mechanical parts;... -
Seite 46: Delivery Of The System And The Instruction Manual
Information and general warnings The system supplier must carefully inform the user about: 2.1.4 Delivery of the system and the instruction – the use of the system; manual – any further tests that may be required before activating the When the system is delivered, it is important that: system;... -
Seite 47: Safety And Prevention
Safety and prevention Safety and prevention Introduction The burners have been designed and built in compliance with the type and pressure of the fuel, the voltage and frequency of the current regulations and directives, applying the known technical electrical power supply, the minimum and maximum deliveries for rules of safety and envisaging all the potential danger situations. -
Seite 48: Technical Description Of The Burner
Technical description of the burner Technical description of the burner Burner designation Series : PRESS Size Operation: Two stage Three stage Modulanting Emission : Class 1 EN267 Head : Standard head Extended head Flame control system : Standard (1 stop every 24 h) Continuos working (1 stop every 72 h) Electrical supply of the system : 1/230/50... -
Seite 49: Technical Data
Technical description of the burner Technical data Model PRESS 30 N Thermal power 85/171 ÷ 342 Output kg/h 7,5/15 ÷ 30 Oil with max. viscosity at 50° C 50 mm /s (7° E) Fuel for oil up to 150 mm /s (20°... -
Seite 50: Firing Rate (2 Nozzles In Operation)
Technical description of the burner Firing rate (2 nozzles in operation) When the burner operates with only one nozzle, the The firing rate value (Fig. 2) has been obtained pressurization conditions are improved and no problems arise. considering an ambient temperature of 20°C, an Minimal fuel capacity with one only nozzle: 7.5 kg/h - 85 kW. -
Seite 51: Installation
Installation Installation Notes on safety for the installation After carefully cleaning all around the area where the burner will The installation of the burner must be carried out be installed, and arranging the correct lighting of the by qualified personnel, as indicated in this manual environment, proceed with the installation operations. -
Seite 52: Fuel Oil Gravity Feed Systems
Installation Fuel oil gravity feed systems 5.4.2 Suction system Explosion danger due to fuel leaks in the For fuel oil with viscosity max. 7°E at 50°C. presence of a flammable source. Precautions: avoid knocking, attrition, sparks and heat. Make sure the fuel interception tap is closed before performing any operation on the burner. -
Seite 53: Ring Supply
Installation 5.4.3 Ring supply For heavy oil with viscosity up to 20°E / 50°C. D2631 Fig. 6 1 - Tank (properly heated for heavy oil) 2 - Filter (with resistance for oil > 7°E / 50°C) 3 - Burner (with kit for heavy oil) 4 - Couple of cocks (excluding the burner) 5 - Forwarding pump 6 - Manometer... -
Seite 54: Electrical Wiring
Installation Electrical wiring Notes on safety for the electrical wiring The electrical wiring must be carried out with the electrical supply disconnected. Electrical wiring must be made in accordance with the regulations currently in force in the country of destination and by qualified personnel. - Seite 55 Installation ELECTRICAL WIRING CONNECTIONS (carried out by the factory) RMO88.53A2 RMO88.53A2 15 12 1 3 5 D2571 7 8 9 11 12 Fig. 8 Capacitor ELECTRICAL CONNECTIONS TO THE BURNER TERMINAL Pre-heater contactor STRIP Suppressor (carried out by the installer) Photoresistance Remote lock-out signal Manual burner stop switch...
-
Seite 56: Start-Up, Calibration And Operation Of The Burner
Start-up, calibration and operation of the burner Start-up, calibration and operation of the burner Notes on safety for the first start-up The first start-up of the burner must be carried out Check the correct working of the adjustment, by qualified personnel, as indicated in this manual command and safety devices. -
Seite 57: Adjustment Of The Air Damper Motor
Start-up, calibration and operation of the burner Adjustment of the air damper motor STOP - Blue lever This lever leaves the factory vertically positioned and corresponds to the complete closing of the air damper. A partial opening of the air damper might be obtained by moving leftwards Black lever this lever (+ on the label). -
Seite 58: Burner Start-Up Cycle
Start-up, calibration and operation of the burner remain fed. Should the pre-heater line be turned off, the fuel must be pre-heated for approximately 30 minutes before the Tubes into aluminium plate burner start-up. On the contrary, the nozzle-holder resistance shall be supplied with an independent single-phase line, protected by a fuse of 1A. -
Seite 59: Operating Fault Diagnostics
Start-up, calibration and operation of the burner Operating fault diagnostics The control box has a self-diagnostic system, which easily allows After releasing the button, the RED LED starts flashing as shown identifying the operating faults (RED LED signal). in the diagram below. To use this function, wait at least ten seconds from the safety lock out, and then press the reset button for a minimum of 3 seconds. -
Seite 60: Maintenance
Maintenance Maintenance Notes on safety for the maintenance The periodic maintenance is essential for the good operation, safety, yield and duration of the burner. Disconnect the electrical supply from the burner It allows you to reduce consumption and polluting emissions and by means of the main system switch. -
Seite 61: Opening The Burner
Maintenance Opening the burner Disconnect the electrical supply from the burner Wait for the components in contact with heat by means of the main system switch. sources to cool down completely. DANGER Turn off the fuel interception tap. DANGER Closing the burner Refit all burner components as they were originally assembled. - Seite 63 Sommaire Déclarations....................................2 Informations et avertissements généraux ..........................3 Informations sur le manuel d'instructions ........................3 2.1.1 Introduction.................................. 3 2.1.2 Dangers de caractère générique..........................3 2.1.3 Autres symboles................................3 2.1.4 Livraison de l'équipement et du manuel d'instructions correspondant ................ 4 Garantie et responsabilité...
-
Seite 64: Déclarations
La qualité est garantie grâce à un système de qualité et de gestion certifié conforme à ISO 9001:2015. Legnago, 01.12.2015 Directeur Général Directeur Recherche et Développement RIELLO S.p.A. - Direction Brûleurs RIELLO S.p.A. - Direction Brûleurs Ing. U. Ferretti Ing. F. Comencini... -
Seite 65: Informations Et Avertissements Généraux
Informations et avertissements généraux Informations et avertissements généraux Informations sur le manuel d'instructions 2.1.1 Introduction ATTENTION ORGANES EN MOUVEMENT Le manuel d'instructions fourni avec le brûleur: Ce symbole fournit les indications pour éviter le il est une partie intégrante et fondamentale du produit et ne rapprochement des membres à... -
Seite 66: Livraison De L'équipement Et Du Manuel D'instructions Correspondant
Informations et avertissements généraux Le fournisseur de l'équipement doit informer l'utilisateur avec 2.1.4 Livraison de l'équipement et du manuel précision sur les points suivants: d'instructions correspondant – l'utilisation de l'équipement; Lors de la livraison de l'appareil, il faut que: –... -
Seite 67: Sécurité Et Prévention
Sécurité et prévention Sécurité et prévention Avant-propos Les brûleurs ont été conçus et réalisés conformément aux le type et la pression du combustible, la tension et la fréquence normes et directives en vigueur, en appliquant les règles du courant électrique d'alimentation, le débit maximum et techniques de sécurité... -
Seite 68: Description Technique Du Brûleur
Description technique du brûleur Description technique du brûleur Désignation des brûleurs Série : PRESS Taille Réglage: Deux allures Trois allures Modulant Émission : Classe 1 EN267 Tête : Tête standard Tête longue Système de contrôle flamme : Standard (1 arrêt toutes les 24 h) Fonctionnement continu (1 arrêt toutes les 72 h) Alimentation électrique du système : 1/230/50... -
Seite 69: Données Techniques
Description technique du brûleur Données techniques Modèle PRESS 30 N Puissance thermique 85/171 ÷ 342 Débit kg/h 7,5/15 ÷ 30 Combustible Fuel-oil viscosité max. à 50° C 50 mm /s (7° E) avec kit, jusqu’à 150 mm /s (20° E) Fonctionnement Deux allures Emploi standard... -
Seite 70: Plage De Travail (2 Gicleurs En Fonction)
Description technique du brûleur Plage de travail (2 gicleurs en fonction) Quand le brûleur fonctionne avec un seul gicleur, les conditions La plage de puissance (Fig. 2) a été mesurée à de pressurisation sont plus favorables et ne posent aucun une température ambiante de 20 °C, à... -
Seite 71: Installation
Installation Installation Indications concernant la sécurité pour l'installation Après avoir nettoyé soigneusement tout autour de la zone où le L'installation du brûleur doit être effectuée par le brûleur doit être installé et à avoir bien éclairé le milieu, effectuer personnel autorisé, selon les indications repor- les opérations d'installation. -
Seite 72: Alimentation En Fioul
Installation Alimentation en fioul 5.4.2 Installation en aspiration Risque d'explosion en raison de la fuite de com- Pour huile légère viscosité max. 7°E / 50°C. bustible en présence de sources inflammables. Précautions: éviter les chocs, les frottements, les étincelles, la chaleur. Vérifier la fermeture du robinet d'arrêt du combus- tible, avant d'effectuer une quelconque interven- tion sur le brûleur. -
Seite 73: Installation En Boucle
Installation 5.4.3 Installation en boucle Pour huile dense viscosité jusqu’à 20°E / 50°C. D2631 Fig. 6 1 - Citerne (réchauffée pour huile lourd) 2 - Filtre (avec résistance pour huile > 7°E / 50°C) 3 - Brûleur (avec kit pour huile lourd) 4 - Vannes d’isolement du brûleur 5 - Pompe de transfert 6 - Manomètre de contrôle... -
Seite 74: Branchements Électriques
Installation Branchements électriques Informations sur la sécurité pour les branchements électriques Les branchements électriques doivent être réalisés hors tension. Les branchements électriques doivent être effectués par du personnel qualifié, conformément aux normes en vigueur dans le pays de destination. Se référer aux schémas électriques. ... - Seite 75 Installation INSTALLATION ELECTRIQUE DU BRULEUR (exécuté en usine) RMO88.53A2 RMO88.53A2 15 12 1 3 5 D2571 7 8 9 11 12 Fig. 8 RACCORDEMENTS ELECTRIQUES AU BORNIER Condesateur du moteur (réalisés par l’installateur) Contacteur préchauffeur Suppresseur Cellule photoresistance Signalisation de sécurité à distance Interrupteur manuel Relais Bornier brûleur...
-
Seite 76: Mise En Marche, Réglage Et Fonctionnement Du Brûleur
Mise en marche, réglage et fonctionnement du brûleur Mise en marche, réglage et fonctionnement du brûleur Indications concernant la sécurité pour la première mise en marche La première mise en marche du brûleur doit être Vérifier le bon fonctionnement des dispositifs de effectuée par du personnel habilité, selon les indi- réglage, de commande et de sécurité. -
Seite 77: Reglage Du Moteur Du Volet D'air
Mise en marche, réglage et fonctionnement du brûleur Reglage du moteur du volet d’air ARRET - Levier bleu Le levier bleu, en usine, est positionné verticalement et correspond à la position du volet d’air totalement fermé. Pour avoir une ouverture partielle du volet d’air déplacer le levier vers Levier noire la gauche (signe + sur l’etiquette). -
Seite 78: Cycle De Demarrage
Mise en marche, réglage et fonctionnement du brûleur faut réchauffeur le fuel pour 30 minutes au moins avant Tuyauteries plaquette l’allumage du brûleur. Cas contraire, il faut alimenter la résistance sur le portegicleur par une ligne monophasée indépendante protégée par un fusible de 1A. Quand on arrête le brûleur, cette ligne ne doit jamais être coupée. -
Seite 79: Diagnostic Mauvais Fonctionnement
Mise en marche, réglage et fonctionnement du brûleur Diagnostic mauvais fonctionnement La boîte de contrôle fournie de série a une fonction diagnostic qui Pour utiliser cette fonction, il faut attendre au moins dix secondes permet de localiser facilement les causes possibles de mauvais après la mise en sécurité... -
Seite 80: Entretien
Entretien Entretien Indications concernant la sécurité pour l'entretien L'entretien périodique est indispensable pour un bon fonctionne- ment, la sécurité, le rendement et la durée de vie du brûleur. Couper l'alimentation électrique du brûleur, en ap- Il permet de réduire la consommation, les émissions polluantes puyant sur l'interrupteur général de l'équipement. -
Seite 81: Ouverture Du Brûleur
Entretien Ouverture du brûleur Couper l'alimentation électrique du brûleur, en ap- Attendre le refroidissement total des composants puyant sur l'interrupteur général de l'équipement. en contact avec des sources de chaleur. DANGER Fermer le robinet d'arrêt du combustible. DANGER Fermeture du brûleur Replacer tous les composants du brûleur comme à... - Seite 84 RIELLO S.p.A. I-37045 Legnago (VR) Tel.: +39.0442.630111 http:// www.riello.it http:// www.riello.com Con riserva di modifiche - Änderungen vorbehalten! - Subject to modifications - Sous réserve de modifications...