Herunterladen Inhalt Inhalt Diese Seite drucken

Axis Communications Q60-Serie Installationsanleitung

Vorschau ausblenden Andere Handbücher für Q60-Serie:
Inhaltsverzeichnis

Werbung

Verfügbare Sprachen
  • DE

Verfügbare Sprachen

  • DEUTSCH, seite 37
All manuals and user guides at all-guides.com
AXIS Q60-E Series
AXIS Q6042-E Mk II PTZ Dome Network Camera
AXIS Q6044-E PTZ Dome Network Camera
AXIS Q6045-E Mk II PTZ Dome Network Camera
Installation Guide

Werbung

Inhaltsverzeichnis
loading

Inhaltszusammenfassung für Axis Communications Q60-Serie

  • Seite 1 All manuals and user guides at all-guides.com AXIS Q60-E Series AXIS Q6042-E Mk II PTZ Dome Network Camera AXIS Q6044-E PTZ Dome Network Camera AXIS Q6045-E Mk II PTZ Dome Network Camera Installation Guide...
  • Seite 2 Axis Communications AB. See Contact to, the implied warranties of merchantability and fitness for information on page 3. a particular purpose. Axis Communications AB shall not Electromagnetic compatibility (EMC) be liable nor responsible for incidental or consequential This equipment has been designed and tested to fulfill...
  • Seite 3 きません。本製品をインターネットに接続する場 合は、必ずルータ等を経由し接続してください。 Contact information Korea 이 기기는 업무용 환경에서 사용할 목적으로 적합 Axis Communications AB 성평가를 받은 기기로서 가정용 환경에서 사용하 Emdalavägen 14 는 경우 전파간섭의 우려가 있습니다. 적절히 접지 223 69 Lund 된 STP (shielded twisted pair) 케이블을 사용하여...
  • Seite 4 All manuals and user guides at all-guides.com...
  • Seite 5: Hazard Levels

    All manuals and user guides at all-guides.com AXIS Q60-E Series Safety information Hazard levels DANGER Indicates a hazardous situation which, if not avoided, will result in death or serious injury. WARNING Indicates a hazardous situation which, if not avoided, could result in death or serious injury. CAUTION Indicates a hazardous situation which, if not avoided, could result in minor or moderate injury.
  • Seite 6 All manuals and user guides at all-guides.com AXIS Q60-E Series Safety instructions WARNING The Axis product shall be installed by a trained professional, and in compliance with local laws and regulations. NO TICE TICE TICE • The Axis product shall be used in compliance with local laws and regulations. •...
  • Seite 7 All manuals and user guides at all-guides.com AXIS Q60-E Series Lithium coin cell 3.0 V batteries contain 1,2-dimethoxyethane; ethylene glycol dimethyl ether (EGDME), CAS no. 110-71-4. Dome cover NO TICE TICE TICE • Be careful not to scratch, damage or leave fingerprints on the dome cover because this could decrease image quality.
  • Seite 8 All manuals and user guides at all-guides.com...
  • Seite 9: Installation Steps

    All manuals and user guides at all-guides.com AXIS Q60-E Series Installation Guide This Installation Guide provides instructions for installing one of the following network cameras on your network: • AXIS Q6042-E Mk II PTZ Dome Network Camera • AXIS Q6044-E PTZ Dome Network Camera •...
  • Seite 10: Optional Accessories

    All manuals and user guides at all-guides.com AXIS Q60-E Series • Cable shoe pliers • Diagonal pliers Optional accessories For a complete list of available accessories for this product, go to the product’s page on axis.com and select Software & Accessories. Hardware overview NO TICE TICE...
  • Seite 11 All manuals and user guides at all-guides.com AXIS Q60-E Series Control button Status LED indicator 10 SD card slot 11 Dome Dome Cover Dome bracket screw PH2 (4x) Dome bracket Rubber gasket Dome ring Dome ring screw T30 (4x) Dome cover...
  • Seite 12: Led Indicators

    All manuals and user guides at all-guides.com AXIS Q60-E Series Sunshield Screw holes Holes for unit holders LED Indicators Status LED Indication Unlit Connection and normal operation. Green Steady green for 10 seconds for normal operation after startup completed. Amber Steady during startup.
  • Seite 13: Specifications

    All manuals and user guides at all-guides.com AXIS Q60-E Series network devices are installed in accordance with the manufacturer’s instructions. For information about regulatory requirements, see Electromagnetic compatibility (EMC) on page 2. NO TICE TICE TICE To comply with the IP66-rated design of the camera and maintain the IP66 protection, the supplied RJ45 Push-pull Connector (IP66) shall be used.
  • Seite 14: Storage Conditions

    All manuals and user guides at all-guides.com AXIS Q60-E Series Product Classification Temperature Humidity AXIS Q6042-E Mk II IEC 60721-4-3 -50 °C to 50 °C 10–100% RH (condensing) Class 3K3, 3M3 (-58 °F to 122 °F)* AXIS Q6044-E IEC 60529 IP66 AXIS Q6045-E Mk II * Arctic Temperature Control enables camera start-up at temperatures as low as -50 °C (-58 °F) Storage Conditions...
  • Seite 15 All manuals and user guides at all-guides.com AXIS Q60-E Series network devices are installed in accordance with the manufacturer’s instructions. For information about regulatory requirements, see Electromagnetic compatibility (EMC) on page 2. • Mount the product with the dome cover facing downward. •...
  • Seite 16 All manuals and user guides at all-guides.com AXIS Q60-E Series Install the camera on a bracket mount WARNING Risk of electric shock. The product shall be grounded using a grounding wire. Make sure both ends of the grounding wire are in contact with their respective grounding surfaces. NO TICE TICE TICE...
  • Seite 17 All manuals and user guides at all-guides.com AXIS Q60-E Series Network connector – RJ45 Push-pull Connector (IP66) Network connector and network connector shield Ground screw T20 Washer Cable shoe 5. Attach the grounding wire (torque 1.5 to 2 Nm) to the cable shoe using cable shoe pliers. 6.
  • Seite 18: How To Access The Product

    All manuals and user guides at all-guides.com AXIS Q60-E Series Screw T30 (3x) Slot for unit holder (3x) Safety wire 11. Install the supplied midspan, see the Installation Guide delivered with the midspan or find it on www.axis.com How to access the product To find Axis devices on the network and assign them IP addresses in Windows®, use AXIS IP Utility or AXIS Device Manager.
  • Seite 19: Warranty Information

    All manuals and user guides at all-guides.com AXIS Q60-E Series Reset to factory default settings Further information • For the latest version of this document, see axis.com • The user manual is available at axis.com • To check if there is updated firmware available for your device, see axis.com/support •...
  • Seite 20 All manuals and user guides at all-guides.com...
  • Seite 21: Niveaux De Risques

    All manuals and user guides at all-guides.com AXIS Q60-E Series Informations sur la sécurité Niveaux de risques DANGER Indique une situation dangereuse qui, si elle n'est pas évitée, entraînera le décès ou des blessures graves. AVERTISSEMENT Indique une situation dangereuse qui, si elle n'est pas évitée, pourrait entraîner le décès ou des blessures graves.
  • Seite 22 All manuals and user guides at all-guides.com AXIS Q60-E Series Consignes de sécurité AVERTISSEMENT Le produit Axis doit être installé par un professionnel qualifié et conformément aux lois et règlementations locales en vigueur. A A A VIS • Le produit Axis doit être utilisé conformément aux lois et règlements locaux. •...
  • Seite 23 All manuals and user guides at all-guides.com AXIS Q60-E Series Batterie Le produit Axis utilise une batterie au lithium CR2032 3,0 V comme alimentation de son horloge en temps réel interne (RTC). Dans des conditions normales, cette batterie a une durée de vie minimale de cinq ans.
  • Seite 24 All manuals and user guides at all-guides.com...
  • Seite 25: Procédures D'installation

    All manuals and user guides at all-guides.com AXIS Q60-E Series Guide d’installation Ce guide d'installation explique comment installer l'une des caméras réseau suivantes sur votre réseau : • Caméra dôme réseau PTZ AXIS Q6042-E Mk II • Caméra dôme réseau PTZ AXIS Q6044-E •...
  • Seite 26: Accessoires En Option

    All manuals and user guides at all-guides.com AXIS Q60-E Series • Tournevis PH2 (pour remplacer le couvercle du dôme) • Pince à sertir pour cosses de câble • Pince coupante diagonale Accessoires en option Pour une liste complète des accessoires disponibles pour ce produit, accédez à la page du produit sur axis.com et sélectionnez Logiciel et accessoires.
  • Seite 27 All manuals and user guides at all-guides.com AXIS Q60-E Series Bouton d’alimentation Régulateur de chaleur Bouton de commande Voyant d’état 10 Emplacement pour carte SD 11 Dôme Couvercle de dôme Vis du support pour caméra dôme PH2 (x4) Support pour caméra dôme Joint en caoutchouc Garniture pour caméra dôme Vis de la garniture pour caméra dôme T30 (x4)
  • Seite 28 All manuals and user guides at all-guides.com AXIS Q60-E Series Pare-soleil Trous de vis Trous pour supports de caméra Voyants LED de statut Indication Branchement et fonctionnement normaux. Éteinte Vert Vert et fixe pendant 10 secondes pour indiquer un fonctionnement normal après le démarrage. Orange Fixe pendant le démarrage.
  • Seite 29 All manuals and user guides at all-guides.com AXIS Q60-E Series A A A VIS Le produit doit être connecté à l'aide d'un câble réseau blindé (STP). Tous les câbles reliant le produit au commutateur réseau doivent être destinés à leur usage spécifique. Assurez-vous que les périphériques réseau sont installés conformément aux instructions du fabricant.
  • Seite 30: Caractéristiques Techniques

    All manuals and user guides at all-guides.com AXIS Q60-E Series Caractéristiques techniques Conditions d'utilisation L'appareil Axis est uniquement destiné à des utilisations en extérieur. Produit Classification +Température Humidité AXIS Q6042-E Mk II IEC 60721-4-3 De - 50 °C à 50 °C 10 à...
  • Seite 31: Installation Du Matériel

    All manuals and user guides at all-guides.com AXIS Q60-E Series Installation du matériel Lisez toutes les instructions avant l'installation de l'appareil. Il serait préférable de réaliser certaines étapes en même temps parce qu'elles exigent le retrait du couvercle du dôme. A A A VIS •...
  • Seite 32 All manuals and user guides at all-guides.com AXIS Q60-E Series Installation d’une carte SD (facultatif) L'installation d’une carte SD est facultative. Une carte SD standard ou à haute capacité (non fournie) peut être utilisée pour sauvegarder des enregistrements dans l'appareil. 1.
  • Seite 33 All manuals and user guides at all-guides.com AXIS Q60-E Series Connecteur réseau - Connecteur pousser-tirer RJ45 (conforme à la norme IP66) Connecteur réseau et blindage du connecteur réseau Vis de mise à la terre T20 Rondelle Cosse de câble 5. Fixez le câble de mise à la terre (couple de 1,5 à 2 Nm) à la cosse de câble à l'aide de pinces à...
  • Seite 34: Comment Accéder Au Produit

    All manuals and user guides at all-guides.com AXIS Q60-E Series Vis T30 (x3) Trou pour support de la caméra (x3) Câble de sécurité 11. Installez l'injecteur fourni. Reportez-vous au Guide d’installation fourni avec l'injecteur ou téléchargez-le depuis www.axis.com Comment accéder au produit Pour trouver les périphériques Axis présents sur le réseau et leur attribuer des adresses IP sous Windows®, utilisez AXIS IP Utility ou AXIS Device Manager.
  • Seite 35: Réinitialiser Les Paramètres Par Défaut

    All manuals and user guides at all-guides.com AXIS Q60-E Series Pour plus d'informations sur l'utilisation du produit, consultez le Manuel de l'utilisateur disponible sur axis.com Réinitialiser les paramètres par défaut Informations complémentaires • Pour obtenir la version la plus à jour de ce document, voir axis.com •...
  • Seite 36 All manuals and user guides at all-guides.com...
  • Seite 37: Gefährdungsstufen

    All manuals and user guides at all-guides.com AXIS Q60-E Series Sicherheitsinformationen Gefährdungsstufen GEFAHR Weist auf eine gefährliche Situation hin, welche, falls nicht verhindert, zu Tod oder schweren Verletzungen führen kann. WARNUNG Weist auf eine gefährliche Situation hin, welche, falls nicht verhindert, zu Tod oder schweren Verletzungen führen kann.
  • Seite 38 All manuals and user guides at all-guides.com AXIS Q60-E Series Sicherheitsanweisungen WARNUNG Das Axis Produkt muss von fachmännisch geschultem Personal und unter Einhaltung der örtlich geltenden Bestimmungen installiert werden. HINWEIS HINWEIS HINWEIS • Das Axis-Produkt muss unter Beachtung der geltenden Gesetze und Bestimmungen betrieben werden.
  • Seite 39 All manuals and user guides at all-guides.com AXIS Q60-E Series Lithium-Knopfzellen (3,0 V) enthalten 1,2-Dimethoxyethan; Ethylenglycoldimethylether (EGDME), CAS-Nr. 110-71-4. Kuppelabdeckung HINWEIS HINWEIS HINWEIS • Achten Sie darauf, die Kuppelabdeckung weder zu zerkratzen, zu beschädigen oder darauf Fingerabdrücke zu hinterlassen, da dies die Bildqualität beeinträchtigen kann. Falls möglich entfernen Sie die Schutzfolie erst nachdem die Installation abgeschlossen ist.
  • Seite 40 All manuals and user guides at all-guides.com...
  • Seite 41: Installationsschritte

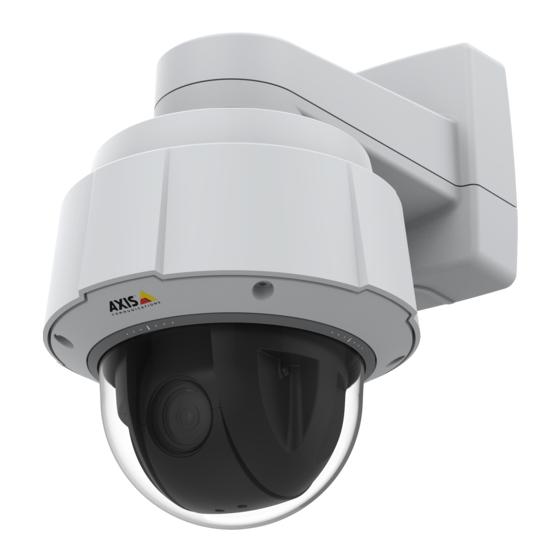
    All manuals and user guides at all-guides.com AXIS Q60-E Series Installationsanleitung In dieser Anleitung wird die Installation der folgenden Netzwerk-Kameras in Ihrem Netzwerk beschrieben: • AXIS Q6042-E Mk II-PTZ-Dome-Netzwerk-Kamera • AXIS Q6044-E-PTZ-Dome-Netzwerk-Kamera • AXIS Q6045-E Mk II-PTZ-Dome-Netzwerk-Kamera Weitere Informationen zur Nutzung dieses Produkts finden Sie im Benutzerhandbuch unter www.axis.com.
  • Seite 42: Optionales Zubehör

    All manuals and user guides at all-guides.com AXIS Q60-E Series • PH2-Schraubendreher (zum Austausch der Kuppelabdeckung) • Kabelschuh-Zange • Seitenschneider Optionales Zubehör Eine vollständige Liste lieferbaren Zubehörs für dieses Produkt finden Sie auf axis.com unter Produkt, Software und Zubehör. Übersicht über die Hardware HINWEIS HINWEIS HINWEIS...
  • Seite 43 All manuals and user guides at all-guides.com AXIS Q60-E Series Netzschalter Heizelement Steuertaste LED-Statusanzeige 10 SD-Kartensteckplatz 11 Kuppel Kuppelabdeckung Kuppelhalterungsschraube PH2 (4x) Kuppelhalterung Gummidichtung Kuppelring Kuppelringschraube T30 (4x) Kuppelabdeckung...
  • Seite 44: Anschlüsse Und Tasten

    All manuals and user guides at all-guides.com AXIS Q60-E Series Sonnenblende Schraubenbohrungen Bohrungen für Gerätehalter LEDs LED-Statusanzeige Bedeutung Leuchtet nicht Anschluss und Normalbetrieb. Grün Leuchtet bei Normalbetrieb nach Abschluss des Startvorgangs 10 Sekunden dauerhaft grün. Gelb Leuchtet beim Start. Blinkt während Firmware-Aktualisierung und Wiederherstellung der Werkseinstellungen.
  • Seite 45 All manuals and user guides at all-guides.com AXIS Q60-E Series HINWEIS HINWEIS HINWEIS Das Produkt muss mit einem abgeschirmten Netzwerkkabel (STP) angeschlossen werden. Alle Kabel, die das Produkt mit dem Netzwerkswitch verbinden, müssen hierfür ausgelegt sein. Stellen Sie sicher, dass die Netzwerkgeräte gemäß den Anweisungen des Herstellers installiert wurden.
  • Seite 46: Technische Daten

    All manuals and user guides at all-guides.com AXIS Q60-E Series Technische Daten Betriebsbedingungen Das Axis Produkt ist für die Verwendung im Außenbereich konzipiert. Produkt Klassifikation Temperatur Luftfeuchtigkeit AXIS Q6042-E Mk II IEC 60721-4-3 -50 °C bis 50 °C 10–100 % rF (kondensierend) Klasse 3K3, AXIS Q6044-E IEC 60529 IP66...
  • Seite 47: Die Hardware Installieren

    All manuals and user guides at all-guides.com AXIS Q60-E Series Die Hardware installieren Lesen Sie die Anweisungen, bevor Sie das Produkt installieren. Manche Installationsschritte sollten besser zusammen ausgeführt werden, denn sie erfordern die Entfernung der Kuppelabdeckung. HINWEIS HINWEIS HINWEIS • Das Produkt muss mit einem abgeschirmten Netzwerkkabel (STP) angeschlossen werden. Alle Kabel, die das Produkt mit dem Netzwerkswitch verbinden, müssen hierfür ausgelegt sein.
  • Seite 48: Installation Einer Sd-Speicherkarte (Optional)

    All manuals and user guides at all-guides.com AXIS Q60-E Series 7. Bringen Sie die Kuppelabdeckung an der oberen Abdeckung an, indem Sie die Ausbuchtung der Kuppelabdeckung am Heizelement der Kameraeinheit ausrichten und die Schrauben festziehen (Anzugsmoment 1,5 Nm). Installation einer SD-Speicherkarte (optional) Die Installation einer SD-Speicherkarte ist optional.
  • Seite 49 All manuals and user guides at all-guides.com AXIS Q60-E Series Netzwerkanschluss – RJ-45 Push-Pull-Steckverbinder (IP66) Netzwerkstecker und Abschirmung des Netzwerksteckers Masseschraube T20 Unterlegscheibe Kabelschuh 5. Befestigen Sie das Erdungskabel mithilfe der Kabelschuh-Zange (Anzugsmoment 1,5 bis 2 Nm) am Kabelschuh. 6. Bringen Sie den Kabelschuh und die Unterlegscheibe zurück in die Originalposition und ziehen Sie die Schrauben fest (Anzugsmoment 0,5 Nm).
  • Seite 50 All manuals and user guides at all-guides.com AXIS Q60-E Series 10. Befestigen Sie die Netzwerk-Kamera an der Wandhalterung, indem Sie die Schrauben festziehen. Schraube T30 (3x) Steckplatz für Gerätehalterung (3x) Sicherheitsdraht 11. Anweisungen zur Installation des mitgelieferten Midspan finden Sie in der beiliegenden Installationsanleitung oder unter www.axis.com.
  • Seite 51: Zugriff Auf Das Produkt

    All manuals and user guides at all-guides.com AXIS Q60-E Series Zugriff auf das Produkt Ermitteln Sie mit AXIS IP Utility und AXIS Device Manager die Axis-Geräte im Netzwerk und weisen Sie ihnen unter Windows® IP-Adressen zu. Beide Anwendungen sind kostenlos und können von axis.com/support heruntergeladen werden.
  • Seite 52 All manuals and user guides at all-guides.com...
  • Seite 53: Livelli Di Pericolo

    All manuals and user guides at all-guides.com AXIS Q60-E Series Informazioni di sicurezza Livelli di pericolo PERICOLO Indica una situazione pericolosa che, se non evitata, provoca morte o lesioni gravi. AVVERTENZA Indica una situazione pericolosa che, se non evitata, potrebbe provocare la morte o lesioni gravi.
  • Seite 54 All manuals and user guides at all-guides.com AXIS Q60-E Series Informazioni di sicurezza AVVERTENZA Il dispositivo Axis deve essere installato da un professionista qualificato, in conformità alle leggi e alle disposizioni locali. A A A VVISO VVISO VVISO • Il dispositivo Axis deve essere utilizzato in conformità alle leggi e alle normative locali. •...
  • Seite 55 All manuals and user guides at all-guides.com AXIS Q60-E Series Le batterie a bottone al litio da 3 V contengono 1,2-dimetossietano; etere dimetilico di glicole etilenico (EGDME), CAS n. 110-71-4. Copertura a cupola A A A VVISO VVISO VVISO • Fare attenzione a non graffiare, danneggiare o lasciare impronte sulla cupola di protezione, perché...
  • Seite 56 All manuals and user guides at all-guides.com...
  • Seite 57: Procedura Di Installazione

    All manuals and user guides at all-guides.com AXIS Q60-E Series Guida all'installazione Questa guida fornisce le istruzioni per l'installazione di una delle seguenti telecamere sulla rete in uso: • Telecamera di rete a cupola PTZ AXIS Q6042-E Mk II • Telecamera di rete a cupola PTZ AXIS Q6044-E •...
  • Seite 58: Accessori Opzionali

    All manuals and user guides at all-guides.com AXIS Q60-E Series • Cacciavite PH2 (per cambiare la cupola) • Pinza per il capocorda • Tronchese Accessori opzionali Per un elenco completo degli accessori disponibili per questo dispositivo, andare alla pagina del dispositivo al sito axis.com e selezionare Software e accessori.
  • Seite 59 All manuals and user guides at all-guides.com AXIS Q60-E Series Tasto di accensione Riscaldatore Pulsante di comando Indicatore LED di stato 10 Slot per scheda SD 11 Cupola Cupola di protezione Vite staffa cupola PH2 (4) Staffa cupola Guarnizione in gomma Anello cupola Viti anello cupola T30 (4x) Cupola di protezione...
  • Seite 60: Indicatori Led

    All manuals and user guides at all-guides.com AXIS Q60-E Series Parasole Fori per le viti Fori per i supporti dell’unità Indicatori LED LED di stato Indicazione Spento Connessione e funzionamento normale. Verde Luce verde fissa per 10 secondi per il normale funzionamento una volta completato l'avvio.
  • Seite 61 All manuals and user guides at all-guides.com AXIS Q60-E Series A A A VVISO VVISO VVISO Il dispositivo deve essere collegato tramite un cavo di rete schermato (STP). Tutti i cavi che collegano il dispositivo alla rete sono destinati al loro uso specifico. Accertarsi che i dispositivi di rete siano installati secondo le istruzioni del produttore.
  • Seite 62: Dati Tecnici

    All manuals and user guides at all-guides.com AXIS Q60-E Series Dati tecnici Condizioni di funzionamento Il dispositivo Axis è destinato all'uso esterno. Dispositivo Classificazione Temperatura Umidità AXIS Q6042-E Mk II IEC 60721-4-3 Da -50 °C a 50 °C 10-100% (umidità relativa Classe 3K3, con condensa) AXIS Q6044-E...
  • Seite 63: Installazione Dell'hardware

    All manuals and user guides at all-guides.com AXIS Q60-E Series Installazione dell'hardware Leggere attentamente tutte le istruzioni prima di installare il dispositivo. Alcune fasi d'installazione dovrebbero essere eseguite in parallelo perché richiedono la rimozione della cupola di protezione. A A A VVISO VVISO VVISO •...
  • Seite 64 All manuals and user guides at all-guides.com AXIS Q60-E Series Come installare una scheda SD (facoltativa) L'installazione di una scheda SD è facoltativa. Una scheda SD standard o ad alta capacità (non inclusa) può essere utilizzata per memorizzare le registrazioni localmente nel dispositivo. 1.
  • Seite 65 All manuals and user guides at all-guides.com AXIS Q60-E Series Connettore di rete – Connettore push-pull RJ45 (IP66) Connettore di rete e schermo del connettore di rete Vite a terra T20 Rondella Capocorda 5. Fissare il cavo di messa a terra (torque da 1,5 a 2 Nm) al capocorda utilizzando le pinze del capocorda.
  • Seite 66: Modalità Di Accesso Al Dispositivo

    All manuals and user guides at all-guides.com AXIS Q60-E Series Vite T30 (3x) Slot per supporti unità (3x) Cavo di sicurezza 11. Per installare il midspan fornito, consultare la guida all'installazione fornita con il midspan o disponibile all'indirizzo www.axis.com Modalità di accesso al dispositivo Per trovare i dispositivi Axis sulla rete e assegnare loro un indirizzo IP in Windows®, utilizza AXIS IP Utility o AXIS Device Manager.
  • Seite 67: Ripristino Delle Impostazioni Predefinite Di Fabbrica

    All manuals and user guides at all-guides.com AXIS Q60-E Series Per ulteriori informazioni sull'utilizzo del dispositivo, consultare il Manuale per l'utente disponibile sul sito Web all'indirizzo: axis.com Ripristino delle impostazioni predefinite di fabbrica Ulteriori Informazioni • Per la versione più recente di questo documento, visitare il sito all'indirizzo axis.com •...
  • Seite 68 All manuals and user guides at all-guides.com...
  • Seite 69: Niveles De Peligro

    All manuals and user guides at all-guides.com AXIS Q60-E Series Información de seguridad Niveles de peligro PELIGRO Indica una situación peligrosa que, si no se evita, provocará lesiones graves o la muerte. ADVERTENCIA Indica una situación peligrosa que, si no se evita, puede provocar lesiones graves o la muerte.
  • Seite 70 All manuals and user guides at all-guides.com AXIS Q60-E Series Instrucciones de seguridad ADVERTENCIA El producto de Axis debe instalarlo un profesional formado conforme las leyes y normativas locales. A A A VISO VISO VISO • Este producto de Axis debe utilizarse de acuerdo con las leyes y normativas locales. •...
  • Seite 71 All manuals and user guides at all-guides.com AXIS Q60-E Series Las pilas de botón de litio de 3,0 V contienen 1,2-dimetoxietano; éter dimetílico de etilenglicol (EGDME), n.º CAS 110-71-4. Cubierta del domo A A A VISO VISO VISO • Preste atención para no arañar, dañar o dejar las huellas en la cubierta del domo, puesto que esto puede provocar una disminución de la calidad de imagen.
  • Seite 72 All manuals and user guides at all-guides.com...
  • Seite 73: Contenido Del Paquete

    All manuals and user guides at all-guides.com AXIS Q60-E Series Guía de instalación Esta Guía de instalación incluye las instrucciones necesarias para instalar una de las siguientes cámaras de red en su red: • Cámara domo de red PTZ AXIS Q6042-E Mk II •...
  • Seite 74: Accesorios Opcionales

    All manuals and user guides at all-guides.com AXIS Q60-E Series • Destornillador PH2 (para sustituir la cubierta del domo) • Alicates de zapata para cable • Alicates de corte diagonal Accesorios opcionales Para conocer una lista completa de los accesorios disponibles para este producto, vaya a la página de productos en axis.com y seleccione Software y accesorios.
  • Seite 75 All manuals and user guides at all-guides.com AXIS Q60-E Series Botón de encendido Calefactor Botón de control Indicador LED de estado 10 Ranura para tarjetas SD 11 Domo Cubierta del domo Tornillo del soporte del domo PH2 (4x) Soporte del domo Junta de goma Anillo del domo Tornillo del anillo del domo T30 (4x)
  • Seite 76: Indicadores Led

    All manuals and user guides at all-guides.com AXIS Q60-E Series Parasol Orificios para tornillos Orificios para soportes de la unidad Indicadores LED LED de estado Indicación Apagado Conexión y funcionamiento normal. Verde Fijo en verde durante 10 segundos para indicar un funcionamiento normal después de completar el inicio.
  • Seite 77 All manuals and user guides at all-guides.com AXIS Q60-E Series A A A VISO VISO VISO El producto se conectará mediante un cable de red blindado (STP). Todos los cables que conecten el producto a la red deberán estar blindados para su uso específico. Asegúrese de que los dispositivos de red estén instalados de conformidad con las instrucciones del fabricante.
  • Seite 78: Especificaciones

    All manuals and user guides at all-guides.com AXIS Q60-E Series Especificaciones Condiciones de funcionamiento El producto de Axis se ha diseñado para su uso en exterior. Producto Clasificación Temperatura Humedad AXIS Q6042-E Mk II IEC 60721-4-3 De -50 °C a 50 °C Humedad relativa del 10 al Clase 3K3, 3M3 100 % (con condensación)
  • Seite 79: Instalación Del Hardware

    All manuals and user guides at all-guides.com AXIS Q60-E Series Instalación del hardware Lea todas las instrucciones antes de instalar el producto. Es recomendable realizar algunos pasos de la instalación juntos, ya que en ellos se precisa la extracción de la cubierta del domo. A A A VISO VISO VISO...
  • Seite 80 All manuals and user guides at all-guides.com AXIS Q60-E Series Cómo instalar una tarjeta SD (opcional) La instalación de una tarjeta SD es opcional. Puede emplearse una tarjeta SD estándar o de gran capacidad (no incluida) para el almacenamiento local de grabaciones en el producto. 1.
  • Seite 81 All manuals and user guides at all-guides.com AXIS Q60-E Series Conector de red: conector RJ45 con clasificación IP66 Conector de red y cubierta de conector de red Tornillo de toma de tierra T20 Arandela Zapata para cable 5. Conecte el cable de tierra (par de torsión de 1,5 a 2 Nm) a la zapata para cable utilizando unos alicates para zapatas.
  • Seite 82: Cómo Acceder Al Producto

    All manuals and user guides at all-guides.com AXIS Q60-E Series Tornillo T30 (3) Ranura para soporte de unidad (3) Cable de seguridad 11. Instale el midspan suministrado siguiendo las instrucciones de la guía de instalación facilitada con el midspan o localícelas en www.axis.com Cómo acceder al producto Para localizar dispositivos de Axis en la red y asignarles direcciones IP en Windows®, utilice AXIS IP Utility o AXIS Device Manager.
  • Seite 83: Restablecimiento A La Configuración Predeterminada De Fábrica

    All manuals and user guides at all-guides.com AXIS Q60-E Series Para obtener más información sobre el uso del producto, consulte el manual del usuario, disponible en axis.com. Restablecimiento a la configuración predeterminada de fábrica Más información • Para consultar la versión más reciente de este documento, vaya a axis.com. •...
  • Seite 84 All manuals and user guides at all-guides.com...
  • Seite 85 All manuals and user guides at all-guides.com AXIS Q60-E Series 安 安 安 全 全 全 情 情 情 報 報 報 危 危 危 険 険 険 レ レ レ ベ ベ ベ ル ル ル 危険 回避しない場合、死亡または重傷につながる危険な状態を⽰します。 警告 回避しない場合、死亡または重傷につながるおそれのある危険な状態を...
  • Seite 86 All manuals and user guides at all-guides.com AXIS Q60-E Series 安 安 安 全 全 全 ⼿ ⼿ ⼿ 順 順 順 警告 本製品の設置は、お使いになる地域の法律や規制に準拠して、訓練を受け た専⾨技術者が⾏ってください。 注記 • 本製品は、お使いになる地域の法律や規制に準拠して使⽤してください。 • 本製品は乾燥した換気のよい環境に保管してください。 • 本製品に衝撃または強い圧⼒を加えないでください。 • 本製品を不安定なポール、ブラケット、表⾯、または壁に設置しないで ください。 • 本製品を設置する際には、適切な⼯具のみを使⽤してください。 電動⼯具を 使⽤して過剰な⼒をかけると、製品が損傷することがあります。 • 化学薬品、腐⾷剤、噴霧式クリーナーは使⽤しないでください。 •...
  • Seite 87 All manuals and user guides at all-guides.com AXIS Q60-E Series リチウムコイン型3.0 V電池は、1,2-ジメトキシエタン (エチレングリコールジメチル エーテル (EGDME)、CAS番号110-71-4) を含有しています。 ド ド ド ー ー ー ム ム ム カ カ カ バ バ バ ー ー ー 注記 • 画質低下の原因となるため、ドームカバーに傷や指紋を付けたり、損傷しな いように注意してください。 可能であれば、設置が完了するまでドームカ バーに保護プラスチックを付けたままにしてください。 •...
  • Seite 88 All manuals and user guides at all-guides.com...
  • Seite 89 All manuals and user guides at all-guides.com AXIS Q60-E Series イ イ イ ン ン ン ス ス ス ト ト ト ー ー ー ル ル ル ガ ガ ガ イ イ イ ド ド ド このインストールガイドでは、次のネットワークカメラのいずれかをお使いのネッ トワークにインストールする⼿順について説明します。 AXIS Q6042-E Mk II PTZドームネットワークカメラ •...
  • Seite 90 All manuals and user guides at all-guides.com AXIS Q60-E Series ドライバーPH2 (ドームカバー交換⽤) • ケーブルシュープライヤー • ダイアゴナルプライヤー • オ オ オ プ プ プ シ シ シ ョ ョ ョ ン ン ン ア ア ア ク ク ク セ セ セ サ サ サ リ リ リ ー ー ー 本製品で利⽤可能なすべてのアクセサリーについては、axis.comで本製品のページを...
  • Seite 91 All manuals and user guides at all-guides.com AXIS Q60-E Series 電源ボタン ヒーター コントロールボタン ステータスLEDインジケーター 10 SDカードスロット 11 ドーム ド ド ド ー ー ー ム ム ム カ カ カ バ バ バ ー ー ー ドームブラケットネジ PH2 (×4) ドームブラケット ゴム製ガスケット...
  • Seite 92 All manuals and user guides at all-guides.com AXIS Q60-E Series サ サ サ ン ン ン シ シ シ ー ー ー ル ル ル ド ド ド ネジ⽳ ユニットホルダー取り付け⽳ LED イ イ イ ン ン ン ジ ジ ジ ケ ケ ケ ー ー ー タ タ タ ー ー ー ス...
  • Seite 93 All manuals and user guides at all-guides.com AXIS Q60-E Series 注記 本製品は、シールドネットワークケーブル (STP) を使⽤して接続してくださ い。 本製品は、⽤途に合ったケーブルを使⽤してネットワークに接続してく ださい。 ネットワーク装置がメーカーの指⽰どおりに設置されていることを Electromagnetic compatibility (EMC) on 確認します。 法的要件については、 page 2 を参照してください。 注記 カメラのIP66対応設計への準拠およびIP66保護等級の維持のため、必ず付属 のRJ45プッシュプルコネクタ (IP66等級) を使⽤してください。 あるいは、 RJ45コネクタ付きのIP66等級のケーブルをAxisの販売代理店から購⼊してくだ さい。 ネットワークコネクタのプラスチックシールドをカメラから取り外 さないでください。 SD カ カ カ ー ー ー ド ド ド ス ス ス ロ ロ ロ ッ ッ ッ ト ト ト 注記...
  • Seite 94 All manuals and user guides at all-guides.com AXIS Q60-E Series 仕 仕 仕 様 様 様 動 動 動 作 作 作 条 条 条 件 件 件 本製品は屋外対応モデルです。 製 製 製 品 品 品 等 等 等 級 級 級 温...
  • Seite 95 All manuals and user guides at all-guides.com AXIS Q60-E Series ハ ハ ハ ー ー ー ド ド ド ウ ウ ウ ェ ェ ェ ア ア ア の の の イ イ イ ン ン ン ス ス ス ト ト ト ー ー ー ル ル ル 製品を取り付ける前に、すべての説明に⽬を通してください。...
  • Seite 96 All manuals and user guides at all-guides.com AXIS Q60-E Series 7. ドームカバーの突起とカメラユニットのヒーターの位置を合わせ、ネジ (ト ルク1.5 Nm) を締めて、ドームカバーを上蓋に取り付けます。 SD カ カ カ ー ー ー ド ド ド の の の 装 装 装 着 着 着 ⽅ ⽅ ⽅ 法 法 法 ( ( ( オ オ オ プ プ プ シ シ シ ョ ョ ョ ン ン ン ) ) ) SDカードは、必要に応じて装着します。...
  • Seite 97 All manuals and user guides at all-guides.com AXIS Q60-E Series ネットワークコネクタ ‒ RJ45プッシュプルコネクタ (IP66) ネットワークコネクタとネットワークコネクタシールド アース端⼦ネジT20 ワッシャー ケーブルシュー 5. ケーブルシュープライヤーを使⽤して、アース線 (トルク1.5〜2 Nm) を ケーブルシューに取り付けます。 6. ケーブルシューとワッシャーを元の位置に戻し、ネジをしっかりと締め ます (トルク0.5 Nm)。 ケーブルシューがアース⾯と接触していることを 確認してください。 注記 接続時にネットワークケーブルを傷つけないよう、注意してください。 7. RJ45プッシュプルコネクタ (IP66) がネットワークケーブルに接続されていな い場合は、コネクタに付属の説明書をご覧ください。 IP66保護等級に準拠し 99ページ たRJ45コネクタの組み⽴て⽅法については、...
  • Seite 98 All manuals and user guides at all-guides.com AXIS Q60-E Series ネジ T30 (×3) ユニットホルダー⽤スロット (×3) 安全ワイヤー 11. 付属のミッドスパンを設置します。ミッドスパンに同梱のインストールガ www.axis.com イド、または を参照してください 製 製 製 品 品 品 の の の ア ア ア ク ク ク セ セ セ ス ス ス ⽅ ⽅ ⽅ 法 法 法 Windows®でネットワーク上のAxisデバイスを⾒つけて、それらにIPアドレスを割り...
  • Seite 99 All manuals and user guides at all-guides.com AXIS Q60-E Series axis.com 製品の使⽤の詳細については、Axisのホームページ ( ) でユーザーズマニュア ルを参照してください ⼯ ⼯ ⼯ 場 場 場 出 出 出 荷 荷 荷 時 時 時 の の の 設 設 設 定 定 定 に に に リ リ リ セ セ セ ッ ッ ッ ト ト ト す す す る る る 関...
  • Seite 100 All manuals and user guides at all-guides.com...
  • Seite 101 All manuals and user guides at all-guides.com AXIS Q60-E Series 安 安 安 全 全 全 信 信 信 息 息 息 危 危 危 险 险 险 等 等 等 级 级 级 危险 表示如果不避免则会导致死亡或严重伤害的危险情况。 警告 表示如果不避免则可能导致死亡或严重伤害的危险情况。 小心 表示如果不避免则可能导致轻微或中度伤害的危险情况。 注意...
  • Seite 102 All manuals and user guides at all-guides.com AXIS Q60-E Series 安 安 安 全 全 全 说 说 说 明 明 明 警告 安讯士产品应由受过培训的专业人员进行安装,并遵守当地法律和法规。 注意 • 使用安讯士产品时应遵守当地法律和法规。 • 在干燥通风的环境中存放安讯士产品。 • 避免将安讯士产品暴露在冲击或高压环境下。 • 请勿将产品安装在不稳固的立杆、支架、表面或墙壁上。 • 安装安讯士产品时,仅使用适用的工具。 使用电动工具过度施力可能导致 产品损坏。 • 请勿使用化学品、腐蚀剂或气雾剂。 • 使用蘸纯净水的干净布进行清洁。 •...
  • Seite 103 All manuals and user guides at all-guides.com AXIS Q60-E Series 半 半 半 球 球 球 罩 罩 罩 注意 • 小心不要划伤、损坏或在半球罩上留下指纹,因为这可能会降低图像质量。 如 果可能,请保留半球罩上的保护塑料,直至安装完成。 • 请勿清洁看起来干净的半球罩,也不要对表面进行抛光。 过度清洁可能会 损坏表面。 • 对于半球罩的一般清洁,建议将无腐蚀性、不含溶剂的中性肥皂或洗涤剂与纯 水混合,并使用柔软、干净的布进行清洁。 用温水冲洗干净。 用一块柔软 干净的布擦干,以避免留下水渍。 • 切勿使用带有刺鼻气味的洗涤剂、汽油、苯、丙酮或类似化学品。 • 避免在阳光直射或高温下清洁半球罩。 • 确保在操作模式下连接半球,否则可能会影响对焦。...
  • Seite 104 All manuals and user guides at all-guides.com...
  • Seite 105 All manuals and user guides at all-guides.com AXIS Q60-E Series 安 安 安 装 装 装 指 指 指 南 南 南 本安装指南说明了如何在网络上安装以下一款网络摄像机: AXIS Q6042-E Mk II PTZ 球型网络摄像机 • AXIS Q6044-E PTZ 球型网络摄像机 • AXIS Q6045-E Mk II PTZ 球型网络摄像机 •...
  • Seite 106 All manuals and user guides at all-guides.com AXIS Q60-E Series 斜口钳(Diagonal pliers) • 可 可 可 选 选 选 附 附 附 件 件 件 欲查看本产品可用附件的完整列表,请转到 axis.com 上的产品页并选择“软件和 附件”。 硬 硬 硬 件 件 件 概 概 概 览 览 览 注意...
  • Seite 107 All manuals and user guides at all-guides.com AXIS Q60-E Series LED 状态指示灯 10 SD 卡插槽 11 球型罩 球 球 球 型 型 型 罩 罩 罩 球型支架螺丝 PH2 (4x) 球型支架 橡胶密封垫 球型环 球型环螺丝 T30 (4x) 球型罩...
  • Seite 108 All manuals and user guides at all-guides.com AXIS Q60-E Series 遮 遮 遮 阳 阳 阳 罩 罩 罩 螺丝孔 单元固定装置孔 LED 指 指 指 示 示 示 灯 灯 灯 LED 状 状 状 态 态 态 指 指 指 示 示 示 灯 灯 灯 指...
  • Seite 109 All manuals and user guides at all-guides.com AXIS Q60-E Series 注意 该产品应使用屏蔽网络电缆 (STP) 进行连接。 将产品连接到网络的所有电缆应 专用于其特定用途。 确保根据制造商的说明安装网络设备。 有关法规要求的信 Electromagnetic compatibility (EMC) on page 2 息,请参见 。 注意 为了符合 IP66 级摄像机设计要求并维持 IP66 防护,应使用随附的 RJ45 推拉式 连接器 (IP66)。 或者,使用带有预安装连接器的 RJ45 IP66 级电缆(可从安讯 士经销商处购买)。...
  • Seite 110 All manuals and user guides at all-guides.com AXIS Q60-E Series 产 产 产 品 品 品 分 分 分 类 类 类 温 温 温 度 度 度 湿 湿 湿 度 度 度 AXIS Q6042-E Mk IEC 60721- -50 °C 至 50 °C 10–100% 相对湿度(冷...
  • Seite 111 All manuals and user guides at all-guides.com AXIS Q60-E Series 注意 • 产品应当使用屏蔽网线 (STP) 进行连接。将产品连接至网络的所有线缆必须使 用专用线缆。确保网络设备按照制造商的说明进行安装。有关监管要求的信 Electromagnetic compatibility (EMC) on page 2 息,请参见 。 • 安装产品,球型罩朝下。 • 切勿刮伤或损坏球型罩或在球型罩上留下指纹,因为这样会降低图像质量。请 尽可能地将防护塑料保留在球型罩上,直至安装完成。 安 安 安 装 装 装 遮 遮 遮 阳 阳 阳 罩 罩 罩 ( ( ( 可 可 可 选 选 选 ) ) ) 遮阳罩可保护摄像机免于紫外线辐射,并帮助将摄像机内的温度保持在较低水平。...
  • Seite 112 All manuals and user guides at all-guides.com AXIS Q60-E Series 将 将 将 摄 摄 摄 像 像 像 机 机 机 安 安 安 装 装 装 在 在 在 安 安 安 装 装 装 支 支 支 架 架 架 上 上 上 警告...
  • Seite 113 All manuals and user guides at all-guides.com AXIS Q60-E Series 接地螺钉 T20 垫圈 线缆终端 5. 使用线缆终端钳子将接地线(扭矩 1.5-2 纳米 连接至线缆终端。 6. 将线缆终端和垫圈放回原始位置,拧紧螺丝(扭矩 0.5 纳米)。请确保线缆 终端与接地表面有效接触。 注意 连接时注意不要损坏网线。 7. 如果随附的 RJ45 推拉式接口 (IP66) 未连接至网线,请参见接口随附的说明。 第115页 有关如何安装 IP66 级 RJ45 接口的信息,请参见 。 8. 连接网线。 9.
  • Seite 114 All manuals and user guides at all-guides.com AXIS Q60-E Series 螺丝 T30 (3x) 单元固定装置插槽 (3x) 保险丝 11. 安装随附的 PoE 模块时请参考 PoE 模块随附的安装指南,或访问 www.axis.com 查找安装指南。 如 如 如 何 何 何 访 访 访 问 问 问 产 产 产 品 品 品 若要在网络中查找安讯士设备并为它们分配...
  • Seite 115 All manuals and user guides at all-guides.com AXIS Q60-E Series 重 重 重 置 置 置 为 为 为 出 出 出 厂 厂 厂 默 默 默 认 认 认 设 设 设 置 置 置 更 更 更 多 多 多 信 信 信 息 息 息 axis.com 有关本文档的最新版本,请参见...
  • Seite 116 All manuals and user guides at all-guides.com Installation Guide Ver. M7.2 AXIS Q60-E Series Date: January 2020 © Axis Communications AB, 2014 - 2020 Part No. 1485660...

Diese Anleitung auch für:

Q6042-e mk iiQ6044-eQ6045-e mk ii

Inhaltsverzeichnis