Herunterladen Diese Seite drucken
ABC Design Condor 4S Bedienungsanleitung
Vorschau ausblenden Andere Handbücher für Condor 4S:

Werbung

Verfügbare Sprachen
  • DE

Verfügbare Sprachen

  • DEUTSCH, seite 1
ABC Design GmbH
Article for baby and child
Dr. Rudolf-Eberle Str. 29
D - 79774 Albbruck
Tel. +49 (0)77539393-0
Email. info@abc-design.de
www.abc-design.de

Werbung

loading

Inhaltszusammenfassung für ABC Design Condor 4S

  • Seite 1 ABC Design GmbH Article for baby and child Dr. Rudolf-Eberle Str. 29 D - 79774 Albbruck Tel. +49 (0)77539393-0 Email. info@abc-design.de www.abc-design.de...
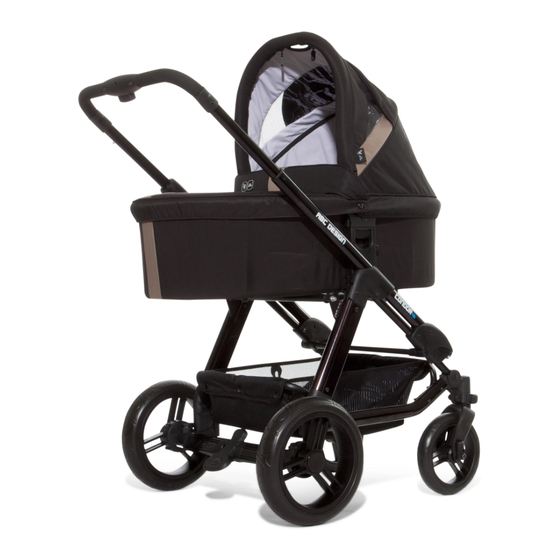
  • Seite 2 Condor 4S...
  • Seite 3: Upute Za Upotrebu

    - DE (01-04) Bedienungsanleitung - EN (05-08) Instructions for use - ES (09-12) Instrucciones de uso - FR (13-16) Instructions de service - IT (17-20) Istruzioni per l’uso - NL (21-24) Gebruikshandleiding - PL (25-28) - CZ (29-32) - RU (33-36) - HU (37-40) Használati útmutató...
  • Seite 5 1. Öffnen des Wagens Ziehen Sie den Griff des Sportwagens (1) so weit nach oben bis das Gestell einrastet (2). WARNUNG: Vergewissern Sie sich vor Gebrauch, dass alle Verriegelungen geschlossen sind. 2. Montage der Räder Drücken Sie den Knopf (1) und stecken Sie dann das Hinterrad in die Führung (2) bis es fest einrastet. Um die Räder abzunehmen, drücken Sie den Knopf (1), damit das Rad entriegelt wird.
  • Seite 6 8. Fixieren und wechseln des Comfort Set Sitzeinlage: Öffnen Sie den Gurt. Gehen Sie hierzu wie unter Punkt 11 erklärt vor. Ziehen Sie nun den Schrittgurt durch die Öffnung an der Sitzeinlage. Fixieren Sie die Lasche am Kopfteil der Sitzeinlage mit Hilfe des Klettverschlusses an der Rückenlehne. Schutzbügelbezug: Klettverschlusses.
  • Seite 7 16. Anbringen des Adapters an die Tragewanne Stecken Sie den Adapter von unten auf die Tragewanne bis er in die vorgesehenen Halterungen einrastet. Vergewissern Sie sich das der Adapter fest eingerastet ist. 17. Einlegen der Matratze Legen Sie die Matratze in den Bezug. Drücken Sie die Matratze auf den Wannenboden.
  • Seite 8 handle car seat front wheels Care instructions Exposure to such things as salt in the air, road-gritting salt or acid rain will encourage the onset of corrosion, as will inappropriate storage of the product. engaged in position. Customer complaints the product. shortcomings in production conditions.
  • Seite 9 Pull the handle on the stroller (1) upwards until the frame clicks into place (2). Ensure that all the catches are engaged before use. 2. Fitting the wheels Press the button (1) and insert the rear wheel in the slot (2) until it engages. To remove the wheels, press the button (1) to release the wheels.
  • Seite 10 8. Fitting and changing the Tec Comfort Set Seat liner: Undo the strap. For more information, follow the instructions in section 9. Then pull the crotch belt through the opening in the seat liner. Fix the tab on the head end of the seat liner with the Velcro fastening on the backrest. Guard rail cover: Fit the cover around the guard rail and secure it in place with the Velcro fastening.
  • Seite 11 17. Inserting the mattress Insert the mattress in the cover. NB: The mattress is wedge-shaped. Make sure that the raised part is at the head end. 19. Fitting the apron Extend the apron over the cot. Secure the ends of the apron with the Velcro fastening provided on the outside of the hood. release it from the catches.
  • Seite 12 sobrepuesta cambiable 4 posiciones bloqueables magnético necesidad volver a remachar las piezas movibles. Indicaciones de seguridad ATENCIÓN: ADVERTENCIA: mismo. cochecito. de silla ha engatillado correctamente. seguridad. defecto. un defecto del producto. ES - 09...
  • Seite 13 1. Abrir el cochecito ADVERTENCIA: 6. Colocar la capota ES - 10...
  • Seite 14 Acolchado del asiento: prevista. 13. Abrir la cuna de transporte Levante las paredes laterales de la cuna de transporte. 14. Colocar la pieza suspendida en la cuna 15. Colocar la capota en la pieza suspendida de la cuna ES - 11...
  • Seite 15 16. Colocar el adaptador en la cuna de transporte previstos. lado de la cabeza. 19. Colocar el recubrepiernas Ponga la parte cerrada del recubrepiernas sobre el extremo de los pies de la cuna de transporte. En el lateral largo de la cuna de transporte se encuentra el adaptador. ADVERTENCIA: engatille.
  • Seite 16 « Risus » hauteur magnétique Design Consignes d’entretien et d’utilisation Consignes de sécurité AVERTISSEMENT : Consignes en cas de réclamation FR - 13...
  • Seite 17 2. Montage des roues roues. 3. Fixation et orientation des roues Levez le levier pour la position orientable. 4. Fixation et desserrage des freins Pour desserrer les freins, levez le levier. 6. Montage de la capote 7. Fixation et retrait de l’anse de protection FR - 14...
  • Seite 18 8. Fixation et changement du Tec Comfort Set Matelassage : Housse de la barre de protection : 10. Bouclage de la ceinture AVERTISSEMENT: combinaison avec la ceinture ventrale. Landau 13. Dépliage du landau 14. Positionnement de la suspension sur le landau du landau.
  • Seite 19 16. Fixation de l’adaptateur au landau 17. Mise en place du matelas Mettez le matelas dans la housse. Enfoncez le matelas sur le fond du sac. 18. Réglage de la poignée de transport 20. Montage du landau sur la poussette enfant AVERTISSEMENT: 21.
  • Seite 20 Design in altezza posizioni bloccabili chiusura magnetica ABC Design Istruzioni d’uso e manutenzione esporre il prodotto ai raggi solari per tempi prolungati. Scolorimenti, alterazioni di colore e sbiadimenti lavaggio a freddo (detersivo per delicati). elementi mobili. sparso in inverno sulle strade, le piogge acide e la sistemazione in un luogo non adatto, favoriscono la corrosione.
  • Seite 21 1. Apertura della carrozzina AVVERTENZA: correttamente chiusi. 2. Montaggio delle ruote corretto bloccaggio. Per lo smontaggio, premere il bottone (1) per sbloccare la ruota. Per smontare le ruote, premere il bottone sul supporto ruota ed estrarre la ruota. 3. Blocco e sblocco delle ruote Spingere verso il basso la levetta per bloccare le ruote.
  • Seite 22 8. Fissaggio e sostituzione del Tec Comfort Set Imbottitura seggiolino: Sganciare la cintura. Procedere come descritto al punto 9. seggiolino. Rivestimento protezione anteriore anticaduta: velcro. 9. Regolazione del poggiagambe Rilasciare i pulsanti per permettere il bloccaggio in posizione del poggiagambe. 10.
  • Seite 23 17. Inserimento del materassino Inserire il materassino nella fodera coprimaterasso. Adagiare il materassino sul fondo della navicella. sistemata sul lato della testa. 18. Regolazione della capottina Per regolare la capottina, premere i rispettivi bottoni su entrambi i lati. 19. Applicazione del coprigambe Sistemare la parte chiusa del coprigambe sul lato dei piedi della navicella.
  • Seite 24 telescopische duwstang overtrek van dit artikel is wasbaar. U kunt de overtrek zowel met de hand als in de machine op lage geolied en indien nodig opnieuw te worden vastgeklonken. uw product. Milieu-invloeden zoals het zoutgehalte in de lucht, strooizout of zure regen, alsmede een verkeerde opberging kunnen tot corrosie leiden.
  • Seite 25 1. De kinderwagen uitklappen Trek de duwstang van de wagen (1) omhoog totdat het frame vastklikt (2). Waarschuwing Druk op de knop (1) en steek de achterwielen in de achteras (2) tot ze vastzitten. Druk, om de wielen af te nemen, op de knop (1) om de wielen te ontgrendelen. De wielen kunnen nu uit de as gehaald worden.
  • Seite 26 Inleg Trek nu de kruisgordel door de opening in de inleg. Bevestig de lus aan het hoofdeind van de inleg met behulp van de klittenband aan de rugleuning. Beschermbeugelhoes Leg de beschermbeugelhoes om de beschermbeugel en maak deze met behulp van de klittenband vast.
  • Seite 27 Plaats de adapter onderlangs op de reiswieg in de aanwezige steunen. 17. Plaats de matras Schuif de matras in de hoes. Leg de matras op de bodem. NB: De matras is wigvormig. Zorg ervoor dat het verhoogde deel aan het hoofdeinde wordt geplaatst. Plaats de reiswieg zo op het onderstel, dat de adapter goed in de steun valt.
  • Seite 28 siedzenia UWAGA:...
  • Seite 29 4. Blokada i luzowanie hamulca 5. Mocowanie i przestawianie siedziska...
  • Seite 30 UWAGA:...
  • Seite 31 16. Mocowanie adaptera na gondoli UWAGA: UWAGA:...
  • Seite 32 poloh Pozor CZ - 29...
  • Seite 33 (2). zacvakne. CZ - 30...
  • Seite 34 CZ - 31...
  • Seite 35 mechanismus zacvakne. CZ - 32...
  • Seite 36 RU - 33...
  • Seite 37 RU - 34...
  • Seite 40 kompatibilis FIGYELEM: FIGYELMEZTETÉS:...
  • Seite 41 FIGYELMEZTETÉS: 2. A kerekek felszerelése ugranak.
  • Seite 42 - 39...
  • Seite 43 kerül. oldalon. FIGYELMEZTETÉS: FIGYELMEZTETÉS: - 40...
  • Seite 44 Design Risus Upozornenie: SK - 41...
  • Seite 45 miesto. 4. Zabrzdenie a odbrzdenie zdvihnite. SK - 42...
  • Seite 46 SK - 43...
  • Seite 47 zapadla na miesto. SK - 44...
  • Seite 48 potrebno Sigurnosne upute tereta.
  • Seite 49 osovine.
  • Seite 51 Umetnite madrac u navlaku i postavite ga na bazu.
  • Seite 52 1888: 2005 telescopic picioare. inalbitor, adecvat programului. bunei functionari in conditii de siguranta si a integritatii produsului. Expunerea indelungata la conditii ambientale ce contin aer sarat in concentratie mare, sare sau material antiderapant rutier, ploaie instalarea coroziunii pe piesele metalice. inainte de depozitarea produsului.
  • Seite 53 caruciorul este gata de utilizare. înainte de utilizare. 2. Montarea si demontarea rotilor de pe cadrul caruciorului sistemului de cuplare si pierderea garantiei. scoasa roata cu axul ei cu tot. Nerespectarea ordinii operatiilor duce la deteriorarea sistemului de cuplare si pierderea garantiei. 3.
  • Seite 54 8. Fixarea si schimbarea Setului Confort Husa pentru sezut: Desfaceti hamul de siguranta . Scoateti cureaua centrala prin locasul din husa (conform desenului de mai sus). locasul din husa. Protectie suplimentara pentru bara de protectie: Fixati protectia suplimentara pentru bara de protectie peste bara existenta si cuplati-o prin sistemul 10.
  • Seite 55 16. Fixarea adaptorilor de cuplare pe cadrul landoului Pentru cuplare, cadrul metalic impreuna cu adaptorii sunt introdusi in locasuri peste cadrul landoului (ca prin tragere usoara corectitudinea cuplarii barei cu adaptori. 17. Adaugarea saltelei la landou corespunzator pe baza landoului. landoului, la picioare.
  • Seite 56 10 a 10 b...
  • Seite 58 DE - 01...