Herunterladen Diese Seite drucken
ABC Design Cobra Bedienungsanleitung
Vorschau ausblenden Andere Handbücher für Cobra:

Werbung

Verfügbare Sprachen
  • DE

Verfügbare Sprachen

  • DEUTSCH, seite 1
ABC Design GmbH
Article for baby and child
Dr. Rudolf-Eberle Str. 29
D - 79774 Albbruck
Tel. +49 (0)77539393-0
Email. info@abc-design.de
www.abc-design.de

Werbung

loading

Inhaltszusammenfassung für ABC Design Cobra

  • Seite 1 ABC Design GmbH Article for baby and child Dr. Rudolf-Eberle Str. 29 D - 79774 Albbruck Tel. +49 (0)77539393-0 Email. info@abc-design.de www.abc-design.de...
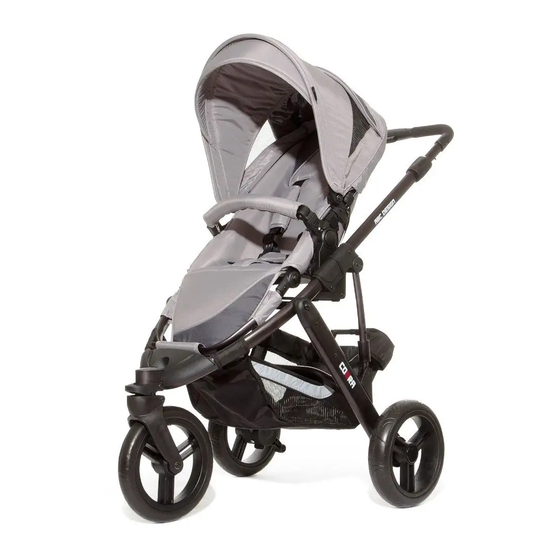
  • Seite 2 Cobra...
  • Seite 3: Upute Za Upotrebu

    Bedienungsanleitung - DE (01-04) Instructions for use - EN (05-08) Instrucciones de uso - ES (09-12) Instructions de service - FR (13-16) Istruzioni per l’uso - IT (17-20) Gebruikshandleiding - NL (21-24) - PL (25-28) - CZ (29-32) - RU (33-36) Használati útmutató...
  • Seite 5 1. Öffnen des Wagens Lösen Sie die Transportsicherung. Ziehen Sie den Griff des Sportwagens (1) so weit nach oben bis das Gestell einrastet (2). WARNUNG: Vergewissern Sie sich vor Gebrauch, dass alle Verriegelungen geschlossen sind. 2. Montage der Räder Stecken Sie die Hinterräder in die Führung bis sie fest einrasten. Um die Räder abzunehmen, drücken Sie den Hebel an der Hinterachse nach unten, damit das Rad entriegelt wird.
  • Seite 6 8. Schließen des Gurtes Um den Gurt zu schließen, stecken Sie die beiden oberen Plastikteile ineinander. Schieben Sie anschließen die verbundenen Teile in die untere Plastikhalterung. Stellen Sie den Gurt so ein, dass das Kind in seiner vorgesehenen Position gehalten wird. 9.
  • Seite 7 16. Einlegen der Matratze Legen Sie die Matratze in den Bezug. Drücken Sie die Matratze auf den Wannenboden Wichtig: Die Matratze ist keilförmig achten Sie beim einlegen drauf, dass der erhöhte Teil auf der Kopfseite ist. 17. Verstellen des Tragegriffs Um den Tragegriff zu verstellen, drücken Sie die Knöpfe auf beiden Seiten.
  • Seite 8 corrosion, as will inappropriate storage of the product. WARNING: engaged in position. the product. shortcomings in production conditions.
  • Seite 9 Release the transportation lock. Pull the handle on the stroller (1) upwards until the frame clicks into place (2). WARNING: Ensure that all the catches are engaged before use. 2. Fitting the wheels Insert the front wheel in the slot until it clicks into place. To remove the front wheel, push the button forwards and take the wheel off.
  • Seite 10 8. Fastening the harness To fasten the harness, bring the top two plastic catches together and interlock them. Then insert the interlocked catches into the bottom part of the fastening. 9. Unfastening the harness To open the harness, press the button on the side. WARNING: in that position.
  • Seite 11 16. Inserting the mattress Insert the mattress in the cover. NB: The mattress is wedge-shaped. Make sure that the raised part is at the head end. 18. Fitting the apron Secure the ends of the apron with the Velcro fastening provided on the outside of the hood. Lift the cot up until it disengages.
  • Seite 12 necesidad volver a remachar las piezas movibles. Indicaciones de seguridad mismo. cochecito. de silla ha engatillado correctamente. seguridad. defecto. un defecto del producto. ES - 09...
  • Seite 13 1. Abrir el cochecito ES - 10...
  • Seite 14 prevista. engatille. Ahora se puede plegar el cochecito sin problemas. 13. Abrir la cuna de transporte Levante las paredes laterales de la cuna de transporte. ES - 11...
  • Seite 15 lado de la cabeza. En el lateral largo de la cuna de transporte se encuentra el adaptador. hacia arriba. ES - 12...
  • Seite 16 AVERTISSEMENT : FR - 13...
  • Seite 17 AVERTISSEMENT: 2. Montage des roues Levez le levier pour la position orientable. Pour desserrer les freins, levez le levier. FR - 14...
  • Seite 18 8. Bouclage de la ceinture AVERTISSEMENT : combinaison avec la ceinture ventrale. Tournez le bouton (2) vers la gauche et poussez le guidon vers la bas. AVERTISSEMENT :...
  • Seite 19 16. Mise en place du matelas Mettez le matelas dans la housse. Enfoncez le matelas sur le fond du sac. AVERTISSEMENT :...
  • Seite 20 esporre il prodotto ai raggi solari per tempi prolungati. Scolorimenti, alterazioni di colore e sbiadimenti lavaggio a freddo (detersivo per delicati). elementi mobili. sparso in inverno sulle strade, le piogge acide e la sistemazione in un luogo non adatto, favoriscono la corrosione.
  • Seite 21 1. Apertura della carrozzina Togliere la protezione per il trasporto. AVVERTENZA: correttamente chiusi. 2. Montaggio delle ruote Per togliere le ruote, premere la levetta dell‘asse posteriore verso il basso, in modo tale che la ruota si sblocchi. Per togliere la ruota anteriore, premere la levetta in avanti e dopo estrarre la ruota. Per bloccare la ruota anteriore, premere verso il basso la levetta.
  • Seite 22 8. Aggancio della cintura Regolare la cintura in modo che il bambino possa essere mantenuto nella posizione corretta. 9. Sgancio della cintura Per sganciare la cintura, premere sul pulsante laterale. AVVERTENZA: Utilizzare sempre la cintura centrale insieme alla cintura subaddominale. 10.
  • Seite 23 16. Inserimento del materassino Inserire il materassino nella fodera coprimaterasso. Adagiare il materassino sul fondo della navicella. sistemata sul lato della testa. 17. Regolazione della capottina Per regolare la capottina, premere i rispettivi bottoni su entrambi i lati. 18. Applicazione del coprigambe Sistemare la parte chiusa del coprigambe sul lato dei piedi della navicella.
  • Seite 24 overtrek van dit artikel is wasbaar. U kunt de overtrek zowel met de hand als in de machine op lage geolied en indien nodig opnieuw te worden vastgeklonken. uw product. Milieu-invloeden zoals het zoutgehalte in de lucht, strooizout of zure regen, alsmede een verkeerde opberging kunnen tot corrosie leiden.
  • Seite 25 Maak de transportvergrendeling los. Trek de duwstang van de wandelwagen (1) naar boven, tot het onderstel vastklikt (2). Verzeker u er voor het gebruik van dat alle vergrendelingen Steek de achterwielen in de geleiding, tot ze goed vastklikken. wordt dan ontgrendeld en u kunt het van de as trekken.
  • Seite 26 Schuif de zo verbonden onderdelen aansluitend in de onderste plastic houder. Stel de gordel zo in, dat uw kind in de gewenste positie wordt gehouden. Laat de knop los wanneer de duwstang op de gewenste hoogte staat. Houd de knop (1) ingedrukt. Draai nu de knop (2) naar links en duw de duwstang naar beneden.
  • Seite 27 Schuif de matras in de hoes. Leg de matras op de bodem. NB: De matras is wigvormig. Zorg ervoor dat het verhoogde deel aan het hoofdeinde wordt geplaatst. Plaats de reiswieg zo op het onderstel, dat de adapter goed in de steun valt. hendel (2) naar boven te trekken.
  • Seite 28 UWAGA:...
  • Seite 29 4. Blokada i luzowanie hamulca 5. Mocowanie i przestawianie siedziska...
  • Seite 30 15. Mocowanie budki na tapicerce gondoli...
  • Seite 32 - 29...
  • Seite 33 - 30...
  • Seite 34 - 31...
  • Seite 35 - 32...
  • Seite 36 RU - 33...
  • Seite 37 RU - 34...
  • Seite 40 FIGYELEM: FIGYELMEZTETÉS:...
  • Seite 41 FIGYELMEZTETÉS:...
  • Seite 42 FIGYELMEZTETÉS: - 39...
  • Seite 43 oldalon. - 40...
  • Seite 44 Upozornenie: SK - 41...
  • Seite 45 4. Zabrzdenie a odbrzdenie SK - 42...
  • Seite 46 Upozornenie: SK - 43...
  • Seite 47 zapadla na miesto. SK - 44...
  • Seite 48 potrebno Sigurnosne upute tereta.
  • Seite 51 Umetnite madrac u navlaku i postavite ga na bazu.
  • Seite 52 - 49...
  • Seite 57 19 a 19 a 19 b...
  • Seite 58 DE - 01...