Herunterladen Diese Seite drucken
Vorschau ausblenden Andere Handbücher für CMS-10R:

Werbung

Verfügbare Sprachen
  • DE

Verfügbare Sprachen

  • DEUTSCH, seite 1
ComatReleco Messaging System
CMS-10R
Installationsanleitung
de
Installation Guide
en
Notice d'installation
fr
Guida all'installazione
it
Guía de instalación
es
Installationsguide
sv
Guia de instalação
pt
Руководство по установке
ru

Werbung

loading

Inhaltszusammenfassung für Comat Releco CMS-10R

  • Seite 1 ComatReleco Messaging System CMS-10R Installationsanleitung Installation Guide Notice d’installation Guida all’installazione Guía de instalación Installationsguide Guia de instalação Руководство по установке...
  • Seite 2: Installation

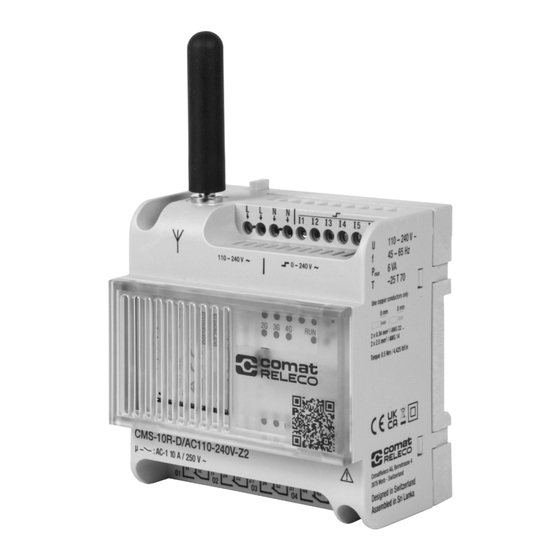
    Deutsch CMS-10R Installationsanleitung Bevor Sie diese Anleitung befolgen, lesen Sie die Sicherheitshinweise des CMS-10R. Ausführliche Informationen finden Sie in der Bedienungsanleitung auf https://www.comatreleco.com/betriebsanleitung_cms Teilebezeichnung Gerätespeisung «Test»-Taste Eingänge digital «Reset»-Taste Status-LEDs Mobilfunk Status-LEDs Ausgänge Status-LEDs Eingänge Löcher für Wandmontage «RUN»-LED Relais-Ausgänge...
  • Seite 3 Schritt 1a Rollenverteilung Schritt 1 Im CMS-10R System gibt es folgende Rollen: Möchten Sie ein neues Gerät auf dem Konto einrichten oder möchten Sie ein Gerät mit Dem «Besitzer» gehört das Gerät, er kann es konfigurieren und trägt die einem Einladungscode hinzufügen? Dienstleistungskosten.
  • Seite 4 Deutsch Schritt 2 Schritt 2a Schritt 3 Schritt 2 Sind Sie der «Besitzer» des Gerätes? Nein Weiter zu Schritt 2a Weiter zu Schritt 3 Schritt 2a Definieren Sie den «Besitzer». Dieser wird der Rechnungsempfänger sein. Weiter zu Schritt 3. Schritt 3 Benennen Sie Ihr Gerät und wählen Sie anschliessend das entsprechende Gerätemodell aus.
  • Seite 5 Schritt 4 Schritt 5 Schritt 6 Schritt 4 Klicken Sie auf die Schaltfläche «Koppeln». Weiter zu Schritt 5. Schritt 5 Geben Sie die auf dem Gerät ersichtliche Seriennummer ein. Die 12-stellige Seriennummer befindet sich auf der Oberseite des Gerätes. (Teilebezeichnung Nr. 13) Klicken Sie dann auf den Button «Koppeln».
  • Seite 6: Part Description

    English CMS-10R Installation Guide Before following this guide, please read the Safety instructions of the CMS-10R. Detailed information can be found in the user manual at https://www.comatreleco.com/en/user-manual/ Part description Device power supply «Test» Button Inputs digital «Reset» Button Status LEDs mobile network...
  • Seite 7 Step 1a Role assignment Step 1 The CMS-10R system offers the following roles: Do you want to set up a new device on the account or do you want to add a device with an invitation code? The «owner» owns the device, he/she can configure it and bears the costs.
  • Seite 8 English Step 2 Step 2a Step 3 Step 2 Are you the «owner» of the device? Go to step 2a Go to step 3 Step 2a Define the «owner», who will be the recipient of the invoice. Go to step 3. Step 3 Enter the device name and choose the corresponding device model.
  • Seite 9 Step 4 Step 5 Step 6 Step 4 Click on Pair button. Go to step 5. Step 5 Enter the device serial number shown on the device to pair it. The 12-digit serial number is located on the top of the device. (Part description no. 13) Click on Pair button.
  • Seite 10: Description Des Éléments

    Français Notice d’installation du CMS-10R Avant de suivre cette notice, veuillez lire les consignes de sécurité du CMS-10R. Pour des informations détaillées, consultez le Manuel utilisateur disponible à l’adresse https://www.comatreleco.com/en/user-manual-fr/ Description des éléments Alimentation de l’appareil Bouton «Test» Entrées numériques Bouton «Reset»...
  • Seite 11 Étape 1a Attribution des rôles Étape 1 Le système CMS-10R offre les rôles suivants : Voulez-vous configurer un nouvel appareil sur le compte ou voulez-vous ajouter un appareil avec un code d’invitation ? Le «propriétaire» est propriétaire de l’appareil ; il/elle peut le configurer et en supporte Avec un code d’invitation...
  • Seite 12 Français Étape 2 Étape 2a Étape 3 Étape 2 Êtes-vous le «propriétaire» de l’appareil ? Continuer à l’étape 2a Continuer à l’étape 3 Étape 2a Définissez le «propriétaire», qui sera le destinataire de la facture. Continuer à l’étape 3. Étape 3 Entrez le nom de l’appareil et sélectionnez le modèle d’appareil correspondant.
  • Seite 13 Étape 4 Étape 5 Étape 6 Étape 4 Cliquez sur le bouton «Coupler». Continuer à l’étape 5. Étape 5 Entrez le numéro de série de l’appareil (indiqué sur l’appareil) pour le coupler. Le numéro de série à 12 chiffres figure sur le dessus de l’appareil. (Description des éléments, n° 13) Cliquez sur le bouton «Coupler».
  • Seite 14: Descrizione Dei Componenti

    Italiano Guida all’installazione del sistema CMS-10R Prima di seguire questa guida, leggere le istruzioni per la sicurezza relative al sistema CMS-10R. Per informazioni dettagliate, consultare il manuale d’uso disponibile all’indirizzo https://www.comatreleco.com/en/user-manual-it/ Descrizione dei componenti Alimentazione dispositivo Pulsante «Test» Ingressi digitali Pulsante «Reset»...
  • Seite 15 Passo 1a Ripartizione di ruoli Passo 1 Il sistema CMS-10R offre i seguenti ruoli: Vuoi impostare un nuovo dispositivo sull’account o vuoi aggiungere un dispositivo con un codice di invito? Il «proprietario» possiede il dispositivo, può configurarlo e sostiene i costi.
  • Seite 16 Italiano Passo 2 Passo 2a Passo 3 Passo 2 Sei il «proprietario» del dispositivo? Vai al passo 2a Vai al passo 3 Passo 2a Definire il «proprietario», chi sarà il destinatario della fattura. Vai al passo 3. Passo 3 Inserire il nome del dispositivo e selezionare il modello di dispositivo corrispondente. Vai al passo 4.
  • Seite 17 Passo 4 Passo 5 Passo 6 Passo 4 Fare clic sul pulsante di abbinamento. Vai al passo 5. Passo 5 Inserire il numero di serie riportato sul dispositivo per eseguire l’abbinamento. Il numero di serie a 12 cifre è riportato sulla parte superiore del dispositivo. (N. 13 nella Descrizione dei componenti) Fare clic sul pulsante di abbinamento.
  • Seite 18: Instalación

    Español Guía de instalación CMS-10R Antes de seguir esta guía, lea las Instrucciones de seguridad del CMS-10R. Puede encontrar información detallada en el manual de usuario https://www.comatreleco.com/en/user-manual-es/ Descripción de la pieza Suministro de alimentación del dispositivo Botón «Test» Entradas digitales Botón «Reset»...
  • Seite 19 Paso 1a Asignación de roles Paso 1 El sistema CMS-10R ofrece los roles siguientes: ¿Desea configurar un nuevo dispositivo en la cuenta o desea añadir un dispositivo con un código de invitación? El «propietario» posee el dispositivo, puede configurarlo y soporta los costes.
  • Seite 20 Español Paso 2 Paso 2a Paso 3 Paso 2 ¿Es usted el «propietario» del dispositivo? Vaya al paso 2a Sí Vaya al paso 3 Paso 2a Defina el «propietario» que será el destinatario de la factura. Vaya al paso 3. Paso 3 Introduzca el nombre del dispositivo y elija el modelo de dispositivo correspondiente.
  • Seite 21 Paso 4 Paso 5 Paso 6 Paso 4 Haga clic en el botón Emparejar. Vaya al paso 5. Paso 5 Introduzca el número de serie del dispositivo mostrado en el dispositivo para emparejarlo. El número de serie de 12 dígitos se encuentra en la parte superior del dispositivo. (Descripción de la pieza n.º...
  • Seite 22 Svenska CMS-10R Installationsguide Läs igenom den säkerhetsinstruktioner för CMS-10R innan du följer denna guide. Detaljerad information finns i användarhandledningen på https://www.comatreleco.com/en/user-manual-sv/ Delbeskrivning Enhetens strömförsörjning «Test»-knapp Digitala ingångar «Reset»-knapp Status-LEDs för mobilt nätverk Utgång till status-LEDs Ingångar till status-LEDs Hål för väggmontering «RUN»-LED...
  • Seite 23 Steg 1 Steg 1a Tilldelning av roller Steg 1 CMS 10R-systemet erbjuder följande roller: Vill du konfigurera en ny enhet på kontot eller vill du lägga till en enhet med en lägga till en inbjudningskod? «Ägaren» ägare enheten. Han/hon kan konfigurera den och bär kostanderna. Med inbjudningskod Fortsätt till steg 1a «Installatören»...
  • Seite 24 Svenska Steg 2 Steg 2a Steg 3 Steg 2 Är du «ägaren» till enheten? Fortsätt till steg 2a Fortsätt till steg 3 Steg 2a Definiera «ägaren», vilken kommer att vara mottagare av fakturan. Fortsätt till steg 3. Steg 3 Ange enhetens namn och välj motsvarande enhetsmodell. Fortsätt till steg 4.
  • Seite 25 Steg 4 Steg 5 Steg 6 Steg 4 Klicka på Pair-knappen. Fortsätt till steg 5. Steg 5 Ange enhetens serienummer som finns på enheten för att parkoppla den. Det 12-siffriga serienumret finns på enhetens ovansida. (Delbeskrivning nr 13) Klicka på Pair-knappen. Steg 6 Ta bort det genomskinliga höljet från enheten.
  • Seite 26 Português Guia de instalação CMS-10R Antes de seguir este guia, leia as Instruções de Segurança do CMS-10R. Pode encontrar informações detalhadas no manual do utilizador em https://www.comatreleco.com/en/user-manual/ Descrição da peça Fonte de alimentação do dispositivo Botão «Test» Entradas digitais Botão «Reset»...
  • Seite 27 Passo 1a Atribuição de funções Passo 1 O sistema CMS-10R oferece as seguintes atribuições: Deseja criar um novo dispositivo na conta ou deseja adicionar um dispositivo com um código de convite? O «proprietário» detém o dispositivo, pode configurá-lo e suporta os custos.
  • Seite 28 Português Passo 2 Passo 2a Passo 3 Passo 2 É o «proprietário» do dispositivo? Não Ir para o passo 2a Ir para o passo 3 Passo 2a Defina o «proprietário», que irá ser o destinatário da fatura. Ir para o passo 3. Passo 3 Insira o nome do dispositivo e escolha o modelo correspondente do dispositivo.
  • Seite 29 Passo 4 Passo 5 Passo 6 Passo 4 Clique no botão Pair. Ir para o passo 5. Passo 5 Insira o número de série do dispositivo indicado no mesmo para o emparelhar. O número de série de 12 dígitos encontra-se na parte de cima do dispositivo. (Descrição da peça n.º...
  • Seite 30 Русский Руководство по установке CMS-10R Прежде чем следовать этому руководству, ознакомьтесь с инструкциями по технике безопасности CMS-10R. Подробную информацию можно найти в руководстве пользователя по адресу https://www.comatreleco.com/en/user-manual/ Описание детали Источник питания устройства Кнопка «Тест» Цифровые входы Кнопка «Сброс» Светодиоды состояния мобильной сети...
  • Seite 31 Шаг 1 Шаг 1a Назначение ролей Шаг 1 В системе CMS-10R возможны следующие функции: Хотите настроить новое устройство в учетной записи или добавить устройство с кодом приглашения? «Владелец» владеет устройством, он/она может настраивать его и несет С кодом приглашения Перейти к шагу 1a расходы.
  • Seite 32 Русский Шаг 2 Шаг 2a Шаг 3 Шаг 2 Вы являетесь «владельцем» устройства? Нет Перейти к шагу 2a Да Перейти к шагу 3 Шаг 2a Определите «владельца», который будет получателем счета-фактуры. Перейти к шагу 3. Шаг 3 Введите имя устройства и выберите соответствующую модель устройства. Перейти...
  • Seite 33 Шаг 4 Шаг 5 Шаг 6 Шаг 4 Нажмите кнопку Pair (Сопряжение). Перейти к шагу 5. Шаг 5 Введите серийный номер устройства, указанный на устройстве, чтобы соединить его. 12-значный серийный номер расположен в верхней части устройства. (Описание детали № 13) Нажмите...
  • Seite 34 ComatReleco AG | Bernstrasse 4 | CH-3076 Worb | Phone +41 31 838 55 77 | Fax +41 31 838 55 99 | comatreleco.com | info@comatreleco.com...
  • Seite 35 45013-051-54-007...
  • Seite 36 ComatReleco AG | Bernstrasse 4 | CH-3076 Worb | Phone +41 31 838 55 77 | Fax +41 31 838 55 99 | comatreleco.com | info@comatreleco.com...