Seite 1
All manuals and user guides at all-guides.com Quic Quic k Ins Quic k Ins k Ins t t t t t all k Ins all a a a a a tion Guide tion Guide tion Guide tion Guide Quic Quic k Ins tion Guide Version 1.0...
All manuals and user guides at all-guides.com Copyright Notice The material in this document is the intellectual property of MICRO-STAR INTERNATIONAL. We take every care in the preparation of this document, but no guarantee is given as to the correctness of its contents. Our products are under continual improvement and we reserve the right to make changes without notice.
Seite 3
All manuals and user guides at all-guides.com CONTENTS English ......................5 French (FRANÇAIS) ....................DEUTSCH) ..................... German ( ESPAÑOL) ....................Spanish ( ITALIANO) ....................Italy ( РУССКИЙ ) ..............Russian ( POLSKI) ..................... Polish ( Chinese (繁體中文) ..................... 75 Simplified Chinese (簡体中文) ................. 85 Japanese (日本語) ..................
Seite 4
Alternatively, please try the following help resources for further guidance. Visit the MSI website for FAQ, technical guide, BIOS updates, driver updates, and other information: http:// www.msi.com.tw/ Contact our technical staff at: support@msi.com.tw...
All manuals and user guides at all-guides.com overview The MEGA400 is shipped out as a bare bone. Some components are equipped while some are optional. See the following for the standard and op- tional items: Standard Mainboard, Power Supply, Case, Cables, Cooler, Radio Antenna, Remote Controller, Card Reader, CD, Manual Optional TV-Tuner Card MS-8606...
Seite 6
All manuals and user guides at all-guides.com Installation Flowchart Remove Cover Start I n s t a l l C P U & I n s t a l l O p t i c a l Install HDD Cooler Drives Install RAM Replace Cover...
Seite 7
All manuals and user guides at all-guides.com Removing Cover Use your hand to free and remove the three thumb screws on the back panel. Use your two hands to remove the cover. Follow the direction indicated to remove the cover. Check the bare bone inside.
Seite 8
All manuals and user guides at all-guides.com Installing hdd Locate the bracket. Remove the screws to take out the bracket. Follow the direction indicated to take out the bracket. Insert the HDD module into the bracket. Use Type 2 screws to secure the module from the right side.
Seite 9
All manuals and user guides at all-guides.com Use Type 2 screws to secure the module from the left side. Insert the HDD bracket into the case. Use Type 2 screws to secure the HDD bracket from the left side. Connect the specific HDD cable which is marked “HDD Master”.
Seite 10
All manuals and user guides at all-guides.com Installing CPU Locate the CPU socket. Pull the lever away from the socket and raise it up to a 90-degree angle. Put the CPU onto the socket. Make sure the pins are completely embedded into the socket.
Seite 11
All manuals and user guides at all-guides.com Installing CPU cooler Insert the cooler into the bare bone and put it onto the CPU. NOTE: Please follow the description of stick on the cover to install CPU cooler. Use the screw driver to secure the built-in screws.
Seite 12
All manuals and user guides at all-guides.com Installing CD-ROM Use your two hands to insert the CD-ROM module into the place indicated. Follow the orientation as indicated. Connect the CD-ROM cable, audio cable and specific power cord which is marked “CD- ROM”.
Seite 13
All manuals and user guides at all-guides.com Installing DIMM Use your two hands to insert the DDR DIMM vertically into the slot. NOTE: The DIMM has only one notch on the center of module. It will only fit in the right direction. The plastic clip at each side of the DIMM slot will automatically close.
Seite 14
All manuals and user guides at all-guides.com ○ ○ ○ ○ ○ ○ ○ ○ ○ ○ ○ ○ ○ ○ ○ ○ ○ ○ ○ ○ ○ ○ ○ ○ ○ ○...
Seite 15
All manuals and user guides at all-guides.com Introduction Le MEGA400 est livré en tant que système minimum (barebone). Certains composants sont standards tandis que d’autres sont optionnels. Voir dans la liste ci-dessous les composants standards et optionnels : Carte mère, Alimentation, Boîtier, Câbles, Standard Radiateur, Antenne radio, Télécommande, CD, Manuel, Lecteur de cartes...
Seite 16
All manuals and user guides at all-guides.com Diagramme d’installation Retirez le Démarrage couvercle Installez le Installez le Installez les processeur et le disque dur lecteurs radiateur optiques Installez la Remettez le mémoire couvercle Vérifiez les composants Avant de commencer l’assemblage, vérifiez les composants dans vous aurez besoin.
All manuals and user guides at all-guides.com Retirer le couvercle Dévissez à la main les trois vis à tête moletée sur le panneau arrière et retirez- les. Retirez le couvercle avec vos deux mains. Suivez la direction indiquée pour retirer le couvercle. Vérifiez l’intérieur du système minimum.
Seite 18
All manuals and user guides at all-guides.com Installer le disque dur Cherchez le support. Retirez les vis pour enlever le support. Suivez la direction indiquée à sortent la parenthèse. Insérez le module disque dur dans le support. Utilisez des vis de type 2 pour fixer le module sur le côté...
Seite 19
All manuals and user guides at all-guides.com Utilisez des vis de type 2 pour fixer le module sur le côté gauche. Insérez le support de disque dur dans le boîtier. Utilisez des vis de type 2 pour fixer le support de disque dur sur le côté gauche.
Seite 20
All manuals and user guides at all-guides.com Installer le processeur Cherchez le support du processeur. Levez le levier en l’éloignant du support et levez-le à un angle de 90 degrés. Mettez le processeur dans le support. Vérifiez que les broches sont complètement enfoncées dans le support.
Seite 21
All manuals and user guides at all-guides.com Installer le radiateur du processeur Insérez le radiateur dans le système minimum et placez-le sur le processeur. REMARQUE : Veuillez suivre la description du bâton sur la couverture pour installer le refroidisseur d’unité centrale de traitement. Utilisez le tournevis pour securiser votre montage.
Seite 22
All manuals and user guides at all-guides.com Installer le lecteur de CD-ROM Insérez avec vos deux mains le module lecteur de CD-ROM à l’endroit indiqué. Suivez l’orientation comme indiqué. Branchez le câble du lecteur de CD- ROM, le câble audio et le cordon d’alimentation correspondant étiqueté...
Seite 23
All manuals and user guides at all-guides.com Installer le module DIMM Utilisez vos deux mains pour insérer le DDR DIMM verticalement dans la fente. REMARQUE : Le module DIMM a seulement une encoche au milieu du module. Il ne peut rentrer que dans la bonne direction.
Seite 24
All manuals and user guides at all-guides.com ○ ○ ○ ○ ○ ○ ○ ○ ○ ○ ○ ○ ○ ○ ○ ○ ○ ○ ○ ○ ○ ○ ○ ○ ○ ○...
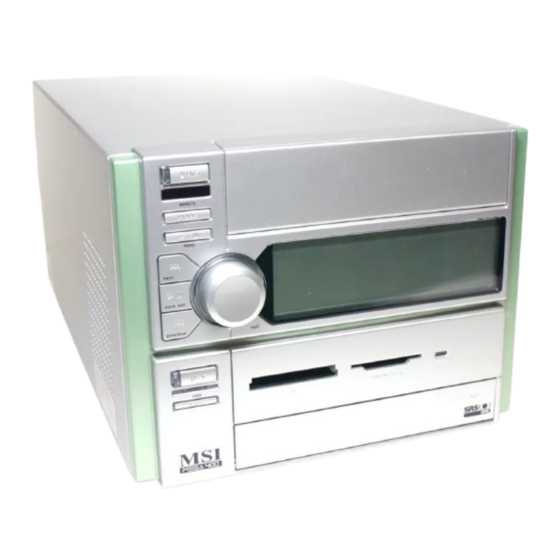
All manuals and user guides at all-guides.com Überblick Das MEGA400 wird als Bare Bone verschickt. Einige Zubehörteile sind beigefügt, andere sind als Optionen erhältlich. Die folgenden Informationen geben Aufschluss standardmäßiges und optionales Zubehör: Hauptplatine, Stromversorgungseinheit, Gehäuse, Standard Kabel, Kühler, Radio Antenne, Fernbedienung, CD, Anleitung, Card Reader Optional TV-Tuner-Karte 8606...
All manuals and user guides at all-guides.com Ablaufdiagramm Abdeckung Start entfernen CPU & Kühler Optisches installieren installieren Laufwerk installieren Abdeckung installieren anbringen Komponenten kontrollieren Vor dem Einbau sollten Sie die Vollständigkeit der Komponenten prüfen. HDD-Modul CPU-Kühler CD-ROM-Modul DDR-DIMM Radioantenne HINWEIS!!! Um einen Gesamtuberblick uber die einzelnen mechanischen Schritte zu erhalten, folgen Sie bitte unbedingt den...
All manuals and user guides at all-guides.com Die Abdeckung entfernen Lösen und entfernen Sie die drei Schrauben an der Rückseite. Entfernen Sie die Abdeckung mit beiden Händen. Folgen Sie dabei den Anweisungen. Prüfen Sie das Innere des Bare Bone. Der Card Reader ist schon installiert.
All manuals and user guides at all-guides.com Installation der HDD Suchen Sie den Befestigungswinkel. Lösen Sie die Schrauben und nehmen Sie den Befestigungswinkel heraus. Folgen Sie der Richtung, die angezeigt wird, herausnehmen den Haltewinkel. Setzen Sie das HDD-Modul in den Befestigungswinkel.
Seite 29
All manuals and user guides at all-guides.com Sichern Sie das Modul von links mit Hilfe der Schrauben des Typs 2. Bringen sie den HDD-Befestigungswinkel im Gehäuse an. Sichern Sie den Befestigungswinkel der HDD von links mit Hilfe der Schrauben des Typs 2. Schließen Sie das spezifische HDD Kabel an, das gekennzeichneter “HDD Meister ist”.
All manuals and user guides at all-guides.com Installation der CPU Suchen Sie den CPU-Steckplatz. Ziehen Sie den Hebel vom Steckplatz weg, so dass er in einem 90 Grad Winkel steht. Stecken Sie die CPU in den Steckplatz. Versichern Sie sich, dass die Kontaktstifte fest im Steckplatz stecken.
All manuals and user guides at all-guides.com Installation des CPU-Kühlers Legen Sie den Lüfter in den Bare Bone und bringen Sie ihn auf der CPU an. HINWEIS: Folgen Sie bitte der Beschreibung des Stockes auf der Abdeckung, um CPU Kühlvorrichtung zu installieren. Ziehen Sie die Einbauschrauben mit einem Schraubenzieher fest.
Seite 32
All manuals and user guides at all-guides.com Installation des CD-ROM-Laufwerks Bringen Sie das CD-ROM-Laufwerk mit beiden Händen an den vorgesehenen Platz. Folgen Sie der Lagebestimmung, wie angezeigt. Schließen Sie CD-ROM-Kabel, Audiokabel und das mit „CD-ROM“ bezeichnete Netzkabel an. Die Jumper müssen sich in Master-Stellung befinden.
Seite 33
All manuals and user guides at all-guides.com Installation des DIMM-Modul Benutzen Sie Ihre zwei Hände, um das DDR DIMM vertikal in den Schlitz einzusetzen. HINWEIS: Das DIMM hat eine Kerbe in der Mitte. Es passt nur in einer Richtung. Die Plastikclips an beiden Seiten des DIMM-Steckplatzes schließen sich automatisch.
Seite 34
All manuals and user guides at all-guides.com ○ ○ ○ ○ ○ ○ ○ ○ ○ ○ ○ ○ ○ ○ ○ ○ ○ ○ ○ ○ ○ ○ ○ ○ ○ ○...
All manuals and user guides at all-guides.com Visión general El MEGA400 es enviado como una raspa descubierta. Algunos componentes son equipados mientras que otros son opcionales. Vea lo siguiente para los artículos estándares y opcionales: Tablero Principal, Fuente de alimentación, Caja, Estándar Cables, Enfriador, Antena del Radio, Controlador Remoto, CD, Manual, Lector de Tarjetas...
Seite 36
All manuals and user guides at all-guides.com Organigrama de la Instalación Quite la Inicio Cubierta Instala CPU & Instalar las Instala HDD Enfriador Unidades Opticas Instala RAM Reemplace la Cubierta Examinando los Artículos Antes de iniciar el montaje, examina los artículos que usted necesite. Enfriador de CPU Módulo de HDD Antena del Radio...
Seite 37
All manuals and user guides at all-guides.com Quitando la Cubierta Utiliza sus manos para liberar y quitar los tres tornillos de pulgar en el panel trasero. Utiliza sus dos manos para quitar la cubierta. Sigue la dirección indicada para quitar la cubierta. Examina el barebone interior.
Seite 38
All manuals and user guides at all-guides.com Instalando hdd Situe el soporte. Quite los tornillos para sacar el soporte. Siga la dirección indicada a toman hacia fuera el corchete. Inserta el módulo de HDD dentro del soporte. Utilize los tornillos Tipo 2 para asegurar el módulo desde el lado derecho.
Seite 39
All manuals and user guides at all-guides.com Utilice los tornillos Tipo 2 para fijar el módulo desde el lado izquierdo. Inserta el soporte de HDD dentro de la caja. Utiliza los tornillos Tipo 2 para fijar el sopoerte de HDD desde el lado izquierdo.
Seite 40
All manuals and user guides at all-guides.com Instalando CPU Situe el zócalo de CPU. Tire la palanca fuera desde el zócalo y elévala a un ángulo de 90-grados. Coloca el CPU en el zócalo. Asegure que los pines son completamente encajados dentro del zócalo.
Seite 41
All manuals and user guides at all-guides.com Instalando el enfriador de CPU Inserta el enfriador dentro de la raspa descubierta y colocarlo dentro del CPU. NOTA: Siga por favor la descripción del palillo en la cubierta para instalar el refrigerador de la CPU.
Seite 42
All manuals and user guides at all-guides.com Instalando CD-ROM Utilice sus dos manos para insertar el módulo de CD-ROM en el lugar indicado. Siga la orientación según lo indicado. Conecte el cable de CD-ROM, cable de audio y el cordel de alimentación específico que es marcado “CD-ROM”.
Seite 43
All manuals and user guides at all-guides.com Instalando DIMM Utilice sus dos manos para insertar el DDR DIMM verticalmente en la ranura. NOTA: El DIMM tiene una sóla muesca en el centro del módulo. Esto sólo encaja en la dirección derecha. Se cerrará...
Seite 44
All manuals and user guides at all-guides.com ○ ○ ○ ○ ○ ○ ○ ○ ○ ○ ○ ○ ○ ○ ○ ○ ○ ○ ○ ○ ○ ○ ○ ○ ○ ○...
Seite 45
All manuals and user guides at all-guides.com Anteprima La MEGA400 è consegnata come barebone. Alcuni componenti sono forniti, altri sono opzionali. Di seguito sono elencati i componenti standard e opzionali: Scheda Madre, Alimentatore, Chassis, Cavi, Standard Ventola, Antenna Radio, Telecomando, CD, Manuale Lettore Scheda Opzionale Scheda TV-Tuner 8606...
Seite 46
All manuals and user guides at all-guides.com Diagramma di Installazione Rimuovere il Avvio Coperchio Installare CPU & I n s t a l l a r e Installare l’Unità Ventola Ottiche I n s t a l l a r e S o s t i t u i r e i l CD-ROM Coperchio...
All manuals and user guides at all-guides.com Rimozione del Coperchio Con una mano libera, svitare le tre viti con testa ad alette sul retro del pannello posteriore. Con due mani, rimuovere il coperchio. Effettuare le operazioni indicati per rimuovere il coperchio. Controllare l’interno del barebone.
Seite 48
All manuals and user guides at all-guides.com Installazione dell’HDD Localizzare il sostegno. Rimuovere le viti per togliere il sostegno. Segua il senso indicato a eliminano la staffa. Inserire il modulo HDD nel sostegno e fissare la parte destra con le viti del tipo 2. ○...
Seite 49
All manuals and user guides at all-guides.com Fissare la parte sinistra con le viti del tipo 2. Inserire il sostegno HDD nello chassis e fissare la parte sinistra con le viti del tipo Colleghi il cavo specifico di HDD che è “supervisore contrassegnato di HDD”.
Seite 50
All manuals and user guides at all-guides.com Installazione della CPU Localizzare la socket della CPU. Tirare la leva lontano dalla socket e levarlo in un angolo di 90-gradi. Inserire la CPU nella socket. Assicurarsi che i pin sono completamente inseriti nella socket.
Seite 51
All manuals and user guides at all-guides.com Installazione della ventola della CPU Inserire la ventola nel sostegno e installarlo sulla CPU. NOTA: Segua prego la descrizione del bastone sulla copertura per installare il dispositivo di raffreddamento del CPU. Utilizzi il cacciavite per fissare le viti incorporate.
Seite 52
All manuals and user guides at all-guides.com Installare l’unità CD-ROM Inserire il modulo CD-ROM con due mani al posto indicato. Segua l’orientamento come indicato. Collegare il cavo CD-ROM, cavo audio e il cavo alimentazione marcato “CD-ROM”. Controllare che il ponticello è impostato in modalità...
Seite 53
All manuals and user guides at all-guides.com Installare la DIMM Utilizzi le vostre due mani per inserire il D D R D I M M v e r t i c a l m e n t e n e l l a scanalatura.
Seite 54
All manuals and user guides at all-guides.com ○ ○ ○ ○ ○ ○ ○ ○ ○ ○ ○ ○ ○ ○ ○ ○ ○ ○ ○ ○ ○ ○ ○ ○ ○ ○...
Seite 55
All manuals and user guides at all-guides.com Обозрение MEGA400 поставляется как основа. Некоторые компоненты являются стандартными, некоторые - опциональными. Ознакомтесь со следующий информацией по стандартным и опциональным компонентам: Стандарт Основная плата, Блок питания, Сумка, Провода, ные Кулер, Радио Антенна, Пульт дистанционного управления, Компакт...
Seite 56
All manuals and user guides at all-guides.com Порядок Инсталяции Удалите Начало Корпус Установка Установите Установите CPU Оптических и Вентилятор дисководов Установите Установите Корпус Список комплектующих Прежде чем приступать к сборке, свертесть со писком необходимых вам комплектующих. Кулер CPU Модуль HDD Модуль...
Seite 57
All manuals and user guides at all-guides.com Демонтаж корпуса На задней панели, удалите три винта, фиксирующих положение корпуса. Возмитесь двумя руками за корпус и снемите его. При демонтажа следуйте обозначением на корпусе. Проверьте “голую” основу. На ней уже установлен Card Reader Card Reader ○...
Seite 58
All manuals and user guides at all-guides.com Инсталяция HDD Найдите скобу, удалите винты фиксирующие ее полоджение и извлеките скобу. Последуйте за направлением показанным к примите вне кронштейн. Установите модуль HDD в скобу. По средствам отвертки Тип 2 закрепите правую часть модуля. ○...
Seite 59
All manuals and user guides at all-guides.com По средствам отвертки Тип 2 закрепите левую часть модуля. Установите скобу HDD на место . По средствам отвертки Тип 2 , закрепите левую часть скобы HDD. Соедините специфически кабель HDD будет маркированным “оригиналом HDD”.
Seite 60
All manuals and user guides at all-guides.com Установите CPU Найдите гнездо CPU. Отодвиньте рычажок от гнезда и поднимите его на 90 градусов. Установите CPU в гнездо. Убедитесь, что контакты полностью ввошли в разъемы гнезда Установка CPU осуществима только при его правильном...
Seite 61
All manuals and user guides at all-guides.com Инсталяция кулера CPU Установите кулер на железный каркас и установите его над ЦПУ. По средствам отвертки закрепите втсроенные винтики-фиксаторы. Винтики-фиксаторы следует закреплять в указанной последовательности. По средствам отвертки закрепите четрвертый витик-фиксатор. Подсоедините сетевой шнур. ○...
Seite 62
All manuals and user guides at all-guides.com Инсталяция CD-ROM Двумя руками установите модуль CD- ROM в указаное место. Последуйте за ориентацией как показано. Подсоедините провод CD-ROM , аудио провод и специальный провод, имеющий маркировку “CDROM”. Убедитесь, что джампер установлен в ведущем...
Seite 63
All manuals and user guides at all-guides.com Инсталяция DIMM Используйте ваши 2 руки для того чтобы ввести DDR DIMM вертикальн в шлиц. ПРИМЕЧАНИЕ: DIMM имеет всего одну канавку в центре модуля. Установка осуществима только при правилном положение. Пластиковые зажимы по обеем сторонам...
Seite 64
All manuals and user guides at all-guides.com ○ ○ ○ ○ ○ ○ ○ ○ ○ ○ ○ ○ ○ ○ ○ ○ ○ ○ ○ ○ ○ ○ ○ ○ ○ ○...
All manuals and user guides at all-guides.com Informacje ogólne MEGA400 jest dostarczany jako system bare bone. Niektóre komponenty są dostarczone w zestawie, podczas gdy inne są opcjonalne. Poniżej przedstawiamy ich listę: Płyta Główna, Zasilacz, Obudowa, Kable, Czytnik W zestawie: Kart Wiatraczek, Antena Radiowa, Pilot, CD, Instrukcja Opcjonalnie: Karta Tunera Telewizyjnego MS-8606...
Seite 66
All manuals and user guides at all-guides.com Diagram instalacji Usuń pokrywę Start Instaluj procesor Instaluj HDD Instaluj napędy i wentylator optyczne Instaluj RAM Załóż ponownie pokrywę Sprawdzenie posiadanych komponentów Przed rozpoczęciem montażu, sprawdź czy posiadasz wszystko czego potrzebujesz. Wentylator Dysk Twardy Procesor Antena Radiowa Napęd CD...
Seite 67
All manuals and user guides at all-guides.com Zdejmowanie obudowy Poluzuj i zdejmij trzy śrubki na tylnym panelu. Zdejmij pokrywę rękoma przesuwając ją we wskazanym na zdjęciu kierunku. Popatrz na wnętrze obudowy. Czytnik kart jest już zamontowany. Czytnik kart. ○ ○ ○ ○ ○ ○ ○ ○ ○ ○ ○ ○ ○ ○ ○ ○ ○ ○ ○ ○ ○ ○ ○ ○ ○ ○ ○...
Seite 68
All manuals and user guides at all-guides.com Instalacja dysku twardego Znajdź metalową ramę. Wykręć śrubki aby ją usunąć. Aby usunąć ramę, wyciągaj ją w kierunku przedstawionym na zdjęciu. Włóż dysk twardy w ramę. Użyj śrubek typu 2 do przykręcenia dysku z prawej strony.
Seite 69
All manuals and user guides at all-guides.com Użyj śrubek typu 2 do przykręcenia dysku z drugiej strony. Włóż ramę z twardym dyskiem do obudowy. Użyj śrubek typu 2 do przykręcenia ramy z lewej strony. Podłącz kabel który oznaczony jest “HDD Master”.
Seite 70
All manuals and user guides at all-guides.com Instalacja procesora Znajdź gniazdo na procesor. Odciągnij dźwigienkę przy gnieździe procesora i podnieś ją aż będzie ona w pozycji prostopadłej do gniazda. Włóż procesor do gniazda. Upewnij się że nóżki procesora dokładnie wchodzą w gniazdo.
Seite 71
All manuals and user guides at all-guides.com Instalacja chłodzenia procesora Włóż zestaw chłodzenia do obudowy i umieść je na procesorze. Używając śrub zabepiecz system wentylacji. Umieść je w odpowiednich miejscach, zgodnie z podanym schematem. Za pomocą śrubokręta dokręć wszystkie cztery śruby. Podłącz kabel zasilający.
Seite 72
All manuals and user guides at all-guides.com Instalacja napędu CD-ROM Użyj dwóch rąk aby umieścić napęd w obudowie, w sposób jaki pokazano na zdjęciu. Podłącz kabel CD-ROM, kabel audio, i konkretny kabel zasilający oznaczony “CD-ROM”. Upewnij się ze zworka na napędzie jest w pozycji ‘master’.
Seite 73
All manuals and user guides at all-guides.com Instalacja pamięci DIMM Użyj dwóch rąk do włożenia pamięci DDR DIMM poziomo w gniazdo. UWAGA: Kość DIMM ma jedno wcięcie na środku. Kość będzie pasować tylko w odpowiednim kierunku. Plastikowy zatrzask po obu stronach gniazda powinien się...
Seite 74
All manuals and user guides at all-guides.com ○ ○ ○ ○ ○ ○ ○ ○ ○ ○ ○ ○ ○ ○ ○ ○ ○ ○ ○ ○ ○ ○ ○ ○ ○ ○...
Seite 76
All manuals and user guides at all-guides.com 安 裝 流 程 安 裝 流 程 安 裝 流 程 安 裝 流 程 安 裝 流 程 取下外蓋 開始 安裝 C P U 與 安裝光碟機 安裝硬碟 散熱器 裝回外蓋 安裝記憶體 檢 查 元 件 項 目 檢...
Seite 77
All manuals and user guides at all-guides.com 取下外蓋 取下外蓋 取下外蓋 取下外蓋 取下外蓋 用手將背板上的 3 個手捻螺絲旋鬆,並將其 取下。 請依指示方向用手取下外蓋。 檢查內部的基本裝置。圖例中已配備有讀卡 機。 讀卡機 ○ ○ ○ ○ ○ ○ ○ ○ ○ ○ ○ ○ ○ ○ ○ ○ ○ ○ ○ ○ ○ ○ ○ ○ ○ ○ ○...
Seite 78
All manuals and user guides at all-guides.com 安裝硬碟 安裝硬碟 安裝硬碟 安裝硬碟 安裝硬碟 先找到托架。卸下螺絲,以取出托架。 依指示方向取出托架。 將硬碟模組插入托架。使用類型 2 螺絲,從 右側將其固定。 ○ ○ ○ ○ ○ ○ ○ ○ ○ ○ ○ ○ ○ ○ ○ ○ ○ ○ ○ ○ ○ ○ ○ ○ ○ ○...
Seite 79
All manuals and user guides at all-guides.com 使用類型2螺絲,從左側將其固定。 將硬碟托架插入機殼內。使用類型 2 螺絲, 從左側將其固定。 接上標有“H D D M a s t e r ”的硬碟專用排 線。 接上電源線。 ○ ○ ○ ○ ○ ○ ○ ○ ○ ○ ○ ○ ○ ○ ○ ○ ○ ○ ○ ○ ○ ○ ○ ○ ○ ○ ○...
Seite 80
All manuals and user guides at all-guides.com 安裝 安裝 安裝 CPU 安裝 安裝 找到 CPU 安裝插座。 將插座上的把手拉起,並使其保持在 90 度 的直角。 將 CPU 放置到插座上。務必確定所有的接 腳均已和插座完全嵌合。只有在方向正確的 狀況下, CPU 才可能完全嵌合。 扣上把手,即可完成安裝。 ○ ○ ○ ○ ○ ○ ○ ○ ○ ○ ○ ○ ○ ○ ○ ○ ○ ○ ○ ○ ○ ○ ○ ○ ○ ○...
Seite 81
All manuals and user guides at all-guides.com 安裝 安裝 冷卻器 冷卻器 安裝 CPU CPU 冷卻器 冷卻器 安裝 安裝 冷卻器 將冷卻器插入系統中,並將其放到 CPU 上 面。 注意 注意 注意:請遵照蓋上的固定說明指示來安裝 CPU 冷 注意 注意 卻器。 使用螺絲起子將內建的四個彈簧鎖固定住 (按 照圖上標示的順序)。 使用螺絲起子將內建的第四個彈簧鎖固定住。 接上電源線。 ○ ○ ○ ○ ○ ○ ○ ○ ○ ○ ○ ○ ○ ○ ○ ○ ○ ○ ○ ○ ○ ○ ○ ○ ○ ○ ○...