Herunterladen Inhalt Inhalt Diese Seite drucken
Samsung RSH1UTPE Benutzerhandbuch

Samsung RSH1UTPE Benutzerhandbuch

Kuehl-gefrier-kombination
Inhaltsverzeichnis

Werbung

Verfügbare Sprachen

Verfügbare Sprachen

All manuals and user guides at all-guides.com
Refrigerator
user manual
English
imagine
the possibilities
Thank you for purchasing a Samsung product.
To receive a more complete service,
please register your product at
www.samsung.com/register
Free Standing Appliance

Werbung

Inhaltsverzeichnis
loading

Inhaltszusammenfassung für Samsung RSH1UTPE

  • Seite 1 All manuals and user guides at all-guides.com Refrigerator user manual English imagine the possibilities Thank you for purchasing a Samsung product. To receive a more complete service, please register your product at www.samsung.com/register Free Standing Appliance...
  • Seite 2 All manuals and user guides at all-guides.com features of your new refrigerator KEy fEaturEs of your nEw rEfrigErator Your Samsung Side-By-Side Refrigerator comes equipped with many space-saving, innovative storage and energy-efficient features. HiDDEn HingEs & Door s/w • Slick-covered hidden hinges & door s/w helps Neat & Stylish square frontal view.
  • Seite 3: Safety Information

    All manuals and user guides at all-guides.com safety information safEty inforMation • Before operating the appliance, please read this manual thoroughly and retain it for your reference. WARNING • Because these following operating instructions cover various models, the characteristics of your refrigerator may differ slightly from those described in this manual.
  • Seite 4 All manuals and user guides at all-guides.com safety information • In order to avoid the creation of a flammable gas-air mixture if a leak in the refrigerating circuit occurs, the size of the room in which the appliance may be sited depends on the amount of WARNING refrigerant used.
  • Seite 5 - You run risk of causing a fire, malfunction and/or personal injury. • If you smell pharmaceutical or smoke, pull out power plug immediately and contact your Samsung electronics service center. • Keep ventilation opening in the appliance enclosure or mounting structure clear of obstruction.
  • Seite 6 All manuals and user guides at all-guides.com safety information Caution signs for CLEaning • Do not insert your hands into the bottom area under the appliance. - Any sharp edges may cause personal injury. • Never put fingers or other objects into the dispenser hole and ice chute. - It may cause personal injury or material damage.
  • Seite 7: Additional Tips For Proper Usage

    All manuals and user guides at all-guides.com safety information aDDitionaL tiPs for ProPEr usagE • Allow the appliance to stand for 2hours after installation. • To get best performance of product, - Do not place foods too closely in front of the vents at the rear of the appliance as it can obstruct free air circulation in the freezer compartment.
  • Seite 8: Inhaltsverzeichnis

    17 Making minor adjustments to the doors 18 Checking the water dispenser line(optional) rEfrigErator 19 Installing the water dispenser line oPErating tHE saMsung 23 Setting up the refrigerator 24 Operating the refrigerator siDE-By-siDE rEfrigErator 25 Using the digital display...
  • Seite 9 Congratulations on the purchase of your Samsung Side-By-Side Refrigerator. We hope you will enjoy the many state-of-the-art features and efficiencies that this new appliance has to offer. Selecting the best location for the refrigerator •...
  • Seite 10: Removing The Refrigerator Doors

    All manuals and user guides at all-guides.com rEMoVing tHE rEfrigErator Doors If your entrance won’t allow the refrigerator to pass easily through it, you can remove the doors. 1. Removing the Front Leg Cover First, open both the freezer and refrigerator doors, and then take off the front leg cover by turning the three screws counter-clockwise.
  • Seite 11 All manuals and user guides at all-guides.com setting up your side-by-side refrigerator 2. Removing the freezer door A few things to mention first. • Make sure that you lift the door straight up so the hinges are not bent or broken. •...
  • Seite 12 All manuals and user guides at all-guides.com Removing the Fridge Door 1. With the door closed, remove the upper hinge cover using a screwdriver. 2. Remove hinge screws and the ground screw by turning counter-clockwise, and take off the upper hinge .
  • Seite 13: Reattaching The Refrigerator Doors

    All manuals and user guides at all-guides.com setting up your side-by-side refrigerator rEattaCHing tHE rEfrigErator Doors Once you have safely placed your refrigerator where you plan for it to stay, it is time to put the doors back on. Reattaching the Freezer Door 1.
  • Seite 14 All manuals and user guides at all-guides.com Reattaching the Fridge Door 1. Insert the lower hinge back into the lower hinge bracket 2. Fit the hole in the corner of the fridge door over the lower hinge 3. Insert the upper hinge shaft into the hole on the hinge .
  • Seite 15 All manuals and user guides at all-guides.com setting up your side-by-side refrigerator Reattaching the Water Supply Line 1. Insert the water line into the coupler Reattaching the Front Leg Cover Before attaching the cover, check water connector for leakage. Replace the front leg cover by turning the three screws clockwise, as shown in the figure. front Leg Cover screw setting up...
  • Seite 16: Leveling The Refrigerator

    All manuals and user guides at all-guides.com LEVELing tHE rEfrigErator Now that the doors are back on the refrigerator, you will want to make sure the refrigerator is level so you can then make final adjustments. If the refrigerator is not level, it will not be possible to get the doors perfectly even. The front of the refrigerator is also adjustable.
  • Seite 17: Making Minor Adjustments To The Doors

    All manuals and user guides at all-guides.com setting up your side-by-side refrigerator MaKing Minor aDJustMEnts to tHE Doors Remember, a leveling refrigerator is necessary for getting the doors perfectly even. If you need help, review the previous section on leveling the refrigerator. When the door of the freezer is higher than the fridge...
  • Seite 18: Checking The Water Dispenser Line(Optional)

    CHECKing tHE watEr DisPEnsEr LinE (oPtionaL) A water dispenser is just one of the helpful features on your new Samsung refrigerator. To help promote better health, the Samsung water filter removes unwanted particles from your water. However, it does not sterilize or destroy microorganisms.
  • Seite 19 Before being used, the leakage in these places should be examined CAUTION • Samsung Warranty does not cover WATER LINE INSTALLATION. • It’ll be done at customer’s charge except the retail price includes installation cost.
  • Seite 20: Replacement Instructions

    All manuals and user guides at all-guides.com instaLLing tHE watEr DisPEnsEr LinE For Exterior model Parts for water line Installation Water line fixer and pipe Water line purifier lock-clip screws connector purifier Connecting to the water supply line CAUTION Connect the water pipe with coupler and tap. The water line must be connected to the cold water pipe.
  • Seite 21 All manuals and user guides at all-guides.com setting up your side-by-side refrigerator Remove any residual matter inside the purifier. (Model with the purifier) - Open the main water tap to check whether water OUTLET SIDE is running through the water tube on the water inlet OF PURIFIER PURIFIER side of the purifier.
  • Seite 22 All manuals and user guides at all-guides.com Removing any residual matter inside the water supply line after installing filter. 1. Turn ON the main water supply & turn OFF the valve to the water supply line. 2. Run water through the dispenser until the water runs clear (approx.
  • Seite 23: Setting Up The Refrigerator

    If you have any further questions, contact your Samsung Electronics service center. 1. Place the refrigerator in an appropriate location with reasonable clearance between the wall and the refrigerator.
  • Seite 24: Operating The Refrigerator

    All manuals and user guides at all-guides.com oPErating tHE rEfrigErator USINg THE CONTROL PANEL rsH1K/J, rsH3K rsH1f/D, rsH3f/D rsH1n/B, rsH3n Speeds up the time needed to freeze products in the freezer. This can be helpful if poWER FREEZE you need to quickly freeze items that spoil easily or if the temperature in the freezer BUTTON has warmed dramatically (For example, if the door was left open).
  • Seite 25: Using The Digital Display

    All manuals and user guides at all-guides.com operating the SAMSUNG side-by-side refrigerator using tHE DigitaL DisPLay “88” segment on Freezer part indicates the current Freezer temperature. “88” segment on Fridge part indicates the current Fridge temperature. “Quick Cool”, “thaw”, “soft freeze” and “0 Zone” indicates the status of the CoolSelect Zone™ Drawer.
  • Seite 26: Controlling The Temperature

    All manuals and user guides at all-guides.com Filter Indicator When the filter indicator light is on, it is time to change the filter. Typically this happens about every 6 months. After removing the old water filter and installing a new one (see page 38 for instructions on how to do this), reset the indicator status light by pressing the Ice Type button for about 3 seconds.
  • Seite 27: Using The Ice And Cold Water Dispenser

    All manuals and user guides at all-guides.com operating the SAMSUNG side-by-side refrigerator using tHE iCE anD CoLD watEr DisPEnsEr Press the Ice Type button to select the type of ice you want No Ice Select this if you want to turn off the icemaker Ice is made in cubes.
  • Seite 28: Shelves And Bins

    All manuals and user guides at all-guides.com sHELVEs anD Bins Freezer Ice Maker Bucket (Optional) Lamp Cover Ice Chute Glass Shelves Plastic Shelf Door Bins Drawers Front Leg Cover Fridge Water Filter (Optional) Lamp Cover Dairy Bin Glass Shelf Wine Shelf(Optional) Z Shelf(Optional) Moving Shelf(Optional) Door Bins...
  • Seite 29: Storing Food

    Storing Food in the Freezer The Samsung Side-By-Side Refrigerator has been designed to provide you with maximum spacesaving features and functions. Here are some of the customized compartments we have created to keep your food fresher, longer. Remember, in order to prevent odor penetration to the ice, stored food should be wrapped securely and as airtight as possible.
  • Seite 30 All manuals and user guides at all-guides.com Storing Food in the Freezer Do not put your fingers, hands or any other objects in the ice ICE CHUTE chute or the ice maker bucket. This may result in personal injury WARNING or material damage. SHELVES Can be used to store all types of frozen food.
  • Seite 31: Using The Coolselect Zone™ Drawer (Optional)

    All manuals and user guides at all-guides.com operating the SAMSUNG side-by-side refrigerator using tHE CooLsELECt ZonE™ DrawEr (oPtionaL) The CoolSelect Zone™ Drawer is designed to make your busy life just a little bit easier. Quick Cool Button You can use the “Quick Cool” operation with the CoolSelect Zone™...
  • Seite 32: Select Button

    All manuals and user guides at all-guides.com Select Button 1. When “soft freeze” is selected on the CoolSelect Zone™ Drawer, the temperature on the drawer digital panel displays 23°F(- 5°C), regardless of the overall temperature setting of the refrigerator. This feature helps keep meat and fish fresh for longer.
  • Seite 33: Removing The Freezer Accessories

    All manuals and user guides at all-guides.com operating the SAMSUNG side-by-side refrigerator rEMoVing tHE frEEZEr aCCEssoriEs Cleaning and rearranging the interior of the freezer is a snap. 1. Remove the glass shelf by pulling the shelf out as far as it will go.
  • Seite 34 All manuals and user guides at all-guides.com rEMoVing tHE friDgE aCCEssoriEs 1. Remove the spill Proof Glass Shelf by pulling the shelf out as far as it will go. Then, gently lift it up and gently remove it. 2. Remove the Vegetable & Fruit Drawer by pressing on the indentations found on the inside left and right sides of the Veggie Box/Dry Box cover and remove by pulling forward.
  • Seite 35: Cleaning The Refrigerator

    SAMSUNG side-by-side refrigerator CLEaning tHE rEfrigErator Caring for your Samsung Side-By-Side Refrigerator prolongs the life of your appliance and helps keep it odor and germ-free. Cleaning the Interior Clean the inside walls and accessories with a mild detergent and then wipe dry with a soft cloth.
  • Seite 36 All manuals and user guides at all-guides.com Cleaning the Deodorizer (Optional) To clean the twin deodorizer, remove the cover with a flat blade screwdriver. Remove the deodorizer cartridge from the cover and soak it in clean, warm water for at least 4 hours. Then, allow the cartridge to dry completely before replacing it in the holder.
  • Seite 37: Changing The Interior Lights

    All manuals and user guides at all-guides.com operating the SAMSUNG side-by-side refrigerator CHanging tHE intErior LigHts Pull the power plug out of the socket before changing the interior light of the refrigerator. - Otherwise, there is a risk of electric shock. If you experience difficulty when changing the WARNING light, contact your service center.
  • Seite 38: Changing The Interior Lights In The Freezer

    All manuals and user guides at all-guides.com Changing the Interior Lights in the Freezer The freezer light is located in the bottom of the auger motor case. 1. Lift the lamp cover up and pull out with 2 hands in the direction of arrows. 2.
  • Seite 39: Using The Doors

    This is due to air getting into the line. It should pose no problem to operation. Ordering replacement filters To order more water filter cartridges, contact your authorized Samsung dealer. using tHE Doors The refrigerator doors are equipped with a door opening and closing feature that ensures that the doors close all the way and are securely sealed.
  • Seite 40 All manuals and user guides at all-guides.com troubleshooting pRoBLEM SoLUTIoN the refrigerator does not • Check that the power plug is properly connected. work at all or it does not • Is the temperature control on the display panel set to the correct temperature? Try chill sufficiently.
  • Seite 41 All manuals and user guides at all-guides.com Correct Disposal of This Product English (Waste Electrical & Electronic Equipment) (Applicable in the European Union and other European countries with separate collection systems) This marking shown on the product or its literature, indicates that it should not be disposed with other household wastes at the end of its working life.
  • Seite 42: Contact Samsung World Wide

    All manuals and user guides at all-guides.com Contact SAMSUNG WORLD WIDE If you have any questions or comments relating to Samsung products, please contact the SAMSUNG customer care center. In an effort to promote recycling this user manual is printed on recycled paper.
  • Seite 43 All manuals and user guides at all-guides.com Kühl - Gefri e r-Kombi n ati o n Benutzerhandbuch Deutsch Unvorstellbare Möglichkeiten Wir freuen uns, dass Sie sich für ein Samsung- Produkt entschieden haben! Für einen besonders umfassenden Service registrieren Sie bitte Ihr Gerät unter www.samsung.com/register...
  • Seite 44: Funktionen Ihres Neuen Kühlgeräts

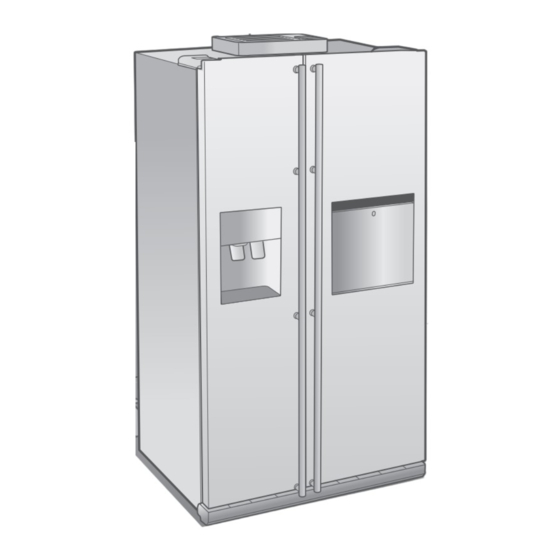
    All manuals and user guides at all-guides.com Funktionen Ihres neuen Kühlgeräts HauPtfunKtionEn iHrEs nEuEn KÜHLgErÄts Ihre Kühl-gefrier-Kombination von Samsung ist mit vielen innovativen Funktionen zum platzsparenden Aufbewahren von Lebensmitteln und zum Energiesparen ausgestattet. niCHt siCHtBarE sCHarniErE unD tÜrsCHaLtEr • Nicht sichtbare, geschmierte Scharniere und Türschalter sorgen für eine schöne und stilvolle Front.
  • Seite 45: Sicherheitsinformation

    All manuals and user guides at all-guides.com Sicherheitsinformation warn- unD siCHErHEitsHinwEisE • Lesen Sie diese Bedienungsanleitung vor der Inbetriebnahme des geräts sorgfältig durch und bewahren Sie sie für zukünftige Verwendung auf. WARNUNG • Weil die folgende Bedienungsanleitung für verschiedene Modelle gilt, können die Merkmale Ihres Geräts leicht von den in dieser Anleitung beschriebenen Merkmalen abweichen.
  • Seite 46 All manuals and user guides at all-guides.com Sicherheitsinformation • Damit im Fall eines Lecks des Kühlkreislaufs kein entzündliches gas-Luft-gemisch entstehen kann, ist die Größe des Raumes, in dem das Gerät aufgestellt werden darf, von der Menge des WARNUNG verwendeten Kühlmittels abhängig. •...
  • Seite 47 - Dies könnte zu einem Brand, zu Fehlfunktionen und/oder Verletzungen führen. • Wenn Sie anormale gerüche oder Rauch bemerken, ziehen Sie sofort den Netzstecker und wenden Sie sich an den nächsten Samsung-Electronics-Kundendienst. • Achten Sie darauf, dass Belüftungsöffnungen im Rahmen und gehäuse des gerätes nicht abgedeckt werden.
  • Seite 48 All manuals and user guides at all-guides.com Sicherheitsinformation HinwEisE Zur rEinigung • greifen Sie mit den Händen nicht in den Bereich unter dem gerät. - Sie könnten sich an scharfen Kanten verletzen. • Stecken Sie niemals einen Finger oder gegenstände in die Öffnung des Wasserspenders und die Eisrutsche.
  • Seite 49 All manuals and user guides at all-guides.com Sicherheitsinformation wEitErE tiPPs fÜr DiE riCHtigE VErwEnDung • Lassen Sie das gerät nach der Installation zwei Stunden lang stehen. • Beachten Sie folgende Hinweise, um optimale geräteleistungen zu erzielen: - Legen Sie keine Lebensmittel zu dicht vor die Lüftungsöffnungen an der Geräterückseite, damit die Luftzirkulation im Gefrierabteil nicht blockiert wird.
  • Seite 50: Kühlgefrierkombination Von Samsung

    KÜHLgEFRIERKoMBINaTIoN 19 Installieren der Leitung des Wasserspenders BETRIEB DER 23 Inbetriebnahme des Kühlgerätes KÜHLgEFRIERKoMBINaTIoN VoN 24 Betreiben des Kühlgerätes SaMSUNg 25 Verwenden des digitalen Displays 26 Temperatureinstellung 27 Benutzung des Eis- und Kaltwasserspenders 28 Fachböden und Behälter 29 Einlagerung von Lebensmitteln 31 Benutzung des CoolSelect Zone™ - Schubfachs (Optional) 33 Herausnehmen des Zubehörs aus dem Gefrierabteil...
  • Seite 51: Aufstellen Ihrer Kühl-Gefrier-Kombination

    Aufstellen Ihrer Kühl-Gefrier- Kombination Vor DEr aufstELLung DEs KÜHLgErÄtEs Herzlichen glückwunsch zum Kauf Ihrer Samsung Kühl-gefrier-Kombination! Wir hoffen, dass Sie viel Freude an den hochmodernen Funktionen und Leistungen dieses neuen Gerätes haben werden. Auswahl des Aufstellorts für das Kühlgerät • Wählen Sie einen Standort aus, von dem aus Sie leichten Zugang zur Wasserversorgung haben.
  • Seite 52: Abbauen Der Türen Des Kühlgerätes

    All manuals and user guides at all-guides.com aBBauEn DEr tÜrEn DEs KÜHLgErÄtEs Wenn Ihr Kühlgerät nicht leicht durch Ihren Eingang passt, dann können Sie die Türen abbauen. 1. Entfernen der vorderen Sockelblende Öffnen Sie zuerst die Türen von gefrier- und Kühlabteil und dann nehmen Sie die vordere Sockelblende ab, indem Sie die drei Schrauben gegen den Uhrzeigersinn lösen.
  • Seite 53: Abnehmen Der Tür Des Gefrierabteils

    All manuals and user guides at all-guides.com Aufstellen Ihrer Kühl-Gefrier- Kombination 2. Abnehmen der Tür des Gefrierabteils Bitte lesen Sie zuvor folgende Hinweise. • Achten Sie darauf, dass Sie die Tür gerade nach oben anheben, sodass die Scharniere nicht verbogen oder zerbrochen werden. •...
  • Seite 54: Abnehmen Der Tür Des Kühlabteils

    All manuals and user guides at all-guides.com Abnehmen der Tür des Kühlabteils 1. Entfernen Sie bei geschlossener Tür die Abdeckung des oberen Scharniers mit einem Schraubendreher. 2. E ntfernen Sie die Schrauben des Scharniers und die Erdungsschraube , indem Sie sie entgegen dem Uhrzeigersinn drehen.
  • Seite 55: Wiederanbauen Der Türen Des Kühlgerätes

    All manuals and user guides at all-guides.com Aufstellen Ihrer Kühl-Gefrier- Kombination wiEDEranBauEn DEr tÜrEn DEs KÜHLgErÄtEs Wenn Sie Ihr Kühlgerät am gewünschten Platz aufgestellt haben, können Sie die Türen wieder anbauen. Anbauen der Tür des Gefrierabteils 1. Setzen Sie die Tür des Gefrierabteils wieder ein, indem Sie den Schlauch durch die untere Ecke der Tür führen und dann durch die Öffnung im unteren Scharnier ziehen.
  • Seite 56: Anbauen Der Tür Des Kühlabteils

    All manuals and user guides at all-guides.com Anbauen der Tür des Kühlabteils 1. Setzen Sie das untere Scharnier wieder in die Halterung des unteren Scharniers ein. 2. Positionieren Sie die Öffnung in der Ecke der Tür des Kühlabteils über dem unteren Scharnier 3.
  • Seite 57: Wiederanschließen Der Wasserleitung

    All manuals and user guides at all-guides.com Aufstellen Ihrer Kühl-Gefrier- Kombination Wiederanschließen der Wasserleitung 1. Setzen Sie die Wasserleitung in die Kupplung ein. Einse er vorderen Sockelblende Bevor Sie die Blende wieder aufsetzen, prüfen Sie, ob die Wasserverbindung dicht ist. Setzen Sie die vordere Sockelblende wieder auf und fixieren Sie sie, indem Sie die drei Schrauben wie abgebildet im Uhrzeigersinn anziehen.
  • Seite 58: Ausrichtung Des Kühlgerätes

    All manuals and user guides at all-guides.com ausriCHtung DEs KÜHLgErÄtEs Wenn die Türen wieder am Kühlgerät montiert sind, kann das Kühlgerät ausgerichtet werden. Anschließend können Sie die Feineinstellung der Türen vornehmen. Wenn das Kühlgerät nicht ausgerichtet ist, können die Türen nicht auf gleicher Höhe sein. Auch die Frontseite des Kühlgerätes ist einstellbar.
  • Seite 59: Geringfügige Änderungen An Den Türen

    All manuals and user guides at all-guides.com Aufstellen Ihrer Kühl-Gefrier- Kombination gEringfÜgigE ÄnDErungEn an DEn tÜrEn Bevor Sie die Feineinstellung der Türen durchführen, muss das Kühlgerät ausgerichtet werden. Das Verfahren zur Ausrichtung des Kühlgeräts wird im vorhergehenden Abschnitt erläutert. Wenn die Tür des Gefrierabteils höher als die des Kühlabteils ist Einstellfuß...
  • Seite 60: Prüfen Der Leitung Des Wasserspenders (Optional)

    Wenn Sie die Mutter nicht sichern, kann sich der Bolzen lösen. PrÜfEn DEr LEitung DEs wassErsPEnDErs (oPtionaL) Der Wasserspender ist eine sehr praktische Funktion Ihres neuen Samsung-Kühlgeräts. Mit dem Samsung- Wasserfilter werden Partikel aus dem Wasser gefiltert, das Wasser wird dadurch jedoch nicht sterilisiert und Mikroorganismen werden nicht zerstört.
  • Seite 61 Sie wieder eine passende dichte Verbindung erhalten. Vor dem Betrieb sollten diese Stellen auf Lecks überprüft werden aCHTUNg • Samsung-garantieleistungen gelten nicht für die Installation der WASSERLEITUNg. • Die Kosten müssen vom Kunden selbst getragen werden, wenn nicht der Einzelhandelspreis die Installationskosten mit enthält.
  • Seite 62: Leitung Des Wasserspenders Installieren

    All manuals and user guides at all-guides.com LEitung DEs wassErsPEnDErs instaLLiErEn Modell mit externem Filter Bauteile zur Installation der Wasserleitung Befestigung und Schrauben Rohraachluss Wasserleitung Halteklemmen für für Wasserleitung Reinigungsfilter Filter Anschluss an einen Wasserhahn aCHTUNg Der Wasserschlauch muss an eine Anschluss an einen Wasserhahn : Kaltwasserleitung angeschlossen werden. Wird 1.
  • Seite 63: Montage Der Halteklemmen Für Den Reinigungsfilter

    All manuals and user guides at all-guides.com Aufstellen Ihrer Kühl-Gefrier- Kombination Wählen Sie die Stelle aus, an der Sie den Filter installieren möchten (Modell mit Filter). WASSER - Kürzen Sie den am Filter befestigten FILTER SCHLAUCH Wasserschlauch auf die erforderliche Länge; dazu messen Sie den Abstand zwischen Filter und WASSER Kaltwasserhahn aus.
  • Seite 64: Entfernen Aller Rückstände In Der Wasserzuleitung Nach Installation Des Filters

    All manuals and user guides at all-guides.com Entfernen aller Rückstände in der Wasserzuleitung nach Installation des Filters 1. Drehen Sie die Hauptwasserleitung auf und schließen Sie das Wasser Ventil der Wasserzuleitung. 2. Lassen Sie Wasser durch den Spender laufen, bis das Wasser klar wird (approx.
  • Seite 65: Betrieb Der Kühl-Gefrier-Kombination Von Samsung

    All manuals and user guides at all-guides.com Betrieb der Kühl-Gefrier- Kombination von Samsung inBEtriEBnaHME DEs KÜHLgErÄtEs Nach der Aufstellung Ihres neuen Kühlgeräts können Sie es nun in Betrieb nehmen und die vielen praktischen Funktionen des Gerätes nutzen. Wenn Sie die folgenden Schritte durchgeführt haben, sollte Ihr Kühlgerät voll funktionsfähig sein. Wenn das nicht der Fall ist, dann überprüfen Sie die Stromversorgung oder gehen wie in der Fehlersuche hinten in...
  • Seite 66: Betreiben Des Kühlgerätes

    All manuals and user guides at all-guides.com BEtrEiBEn DEs KÜHLgErÄtEs VERWENDEN DES BEDIENFELDS rsH1K/J, rsH3K rsH1f/D, rsH3f/D rsH1n/B, rsH3n Verkürzt die Zeit für das Einfrieren von Produkten im gefrierabteil. Dies kann nützlich sein, TaSTE "power wenn Sie schnell Produkte einfrieren müssen, die leicht verderblich sind oder wenn die Freeze"...
  • Seite 67: Verwenden Des Digitalen Displays

    All manuals and user guides at all-guides.com Betrieb der Kühl-Gefrier- Kombination von Samsung VErwEnDEn DEs DigitaLEn DisPLays Die zweistellige Temperaturanzeige im Feld "FREEZER" gibt die aktuelle Temperatur im Gefrierabteil an. Die zweistellige Temperaturanzeige im Feld "FRIDGE" gibt die aktuelle Temperatur im Kühlabteil an.
  • Seite 68: Kindersicherung

    All manuals and user guides at all-guides.com Filteranzeige Wenn die Filteranzeige leuchtet, ist es Zeit, den Filter zu wechseln. Gewöhnlich geschieht dies alle 6 Monate. Nach dem Entfernen des alten Wasserfilters und Installieren des neuen Filters (siehe Abschnitt "Installation des Wasserfilters" auf Seite 38) setzen Sie die Anzeige zurück, indem Sie die Taste "Ice Type"...
  • Seite 69: Benutzung Des Eis- Und Kaltwasserspenders

    All manuals and user guides at all-guides.com Betrieb der Kühl-Gefrier- Kombination von Samsung BEnutZung DEs Eis- unD KaLtwassErsPEnDErs Drücken Sie ein- oder mehrmals die Taste "Ice Type", um Eis in Würfeln oder zerstoßen auszugeben bzw. um die Eisherstellung auszuschalten. Kein Eis Damit schalten Sie den Eisbereiter aus.
  • Seite 70: Fachböden Und Behälter

    All manuals and user guides at all-guides.com faCHBÖDEn unD BEHÄLtEr Gefrierabteil Eisbereiter (optional) Lampenabdeckung Eisrutsche Glasböden Kunststoffboden Türfächer Schubfächer Vordere Sockelblende Kühlabteil Wasserfilter (optional) Lampenabdeckung Milchproduktefach Glasboden Weinfach(Optional) Z- Fachboden (optional) Herausziehbarer Fachboden (optional) Türfächer CoolSelect Zone- EIERBEHÄLTER Schubfach (optional) Obst- und Gemüseschubfächer betrieb...
  • Seite 71: Einlagerung Von Lebensmitteln

    EinLagErung Von LEBEnsMittELn Lebensmittel im Gefrierabteil einlagern Die Kühl-gefrier-Kombination von Samsung ist für maximale Raumausnutzung konzipiert. Die praktische Innenaufteilung und die Fächer des Kühlgeräts stellen sicher, dass Ihre Lebensmittel möglichst lange frisch bleiben. Um zu verhindern, dass Gerüche zum Eis gelangen können, sollten die eingelagerten Lebensmittel sicher und so luftdicht wie möglich eingepackt sein.
  • Seite 72 All manuals and user guides at all-guides.com Lebensmittel im Gefrierabteil einlagern Stecken Sie nicht Ihre Finger, Hände oder andere Gegenstände in EISRUTSCHE die Ausgabeöffnung oder den Behälter des Eisbereiters. Dies kann Verletzungen oder Sachschäden zur Folge haben. WARNUNG Hier kann jede Art von Tiefkühl- FaCHBÖDEN Lebensmitteln eingelagert werden.
  • Seite 73: Benutzung Des Coolselect Zone™- Schubfachs (Optional)

    All manuals and user guides at all-guides.com Betrieb der Kühl-Gefrier- Kombination von Samsung BEnutZung DEs CooLsELECt ZonE™- sCHuBfaCHs (oPtionaL) Die Schublade der Cool Select-Zone erleichtert Ihnen die tägliche Arbeit in der Küche. Taste "Quick Cool" Mit der “Quick Cool”–Funktion des CoolSelect Zone™-Schubfachs können Sie in etwa einer...
  • Seite 74 All manuals and user guides at all-guides.com Auswahltaste “Select” 1. Wenn Sie mit der Taste "Select" die Einstellung "Soft Freeze” für das CoolSelect Zone™-Schubfach gewählt haben, dann zeigt die Temperatur auf dem Display für das Schubfach -5°C an, unabhängig von der Einstellung der Temperatur des gesamten Kühlabteils.
  • Seite 75: Herausnehmen Des Zubehörs Aus Dem Gefrierabteil

    All manuals and user guides at all-guides.com Betrieb der Kühl-Gefrier- Kombination von Samsung HErausnEHMEn DEs ZuBEHÖrs aus DEM gEfriEraBtEiL Der Innenraum des Gefrierabteils ist schnell gereinigt und wieder eingeräumt. 1. Entfernen Sie den glasboden, indem Sie ihn so weit wie möglich herausziehen.
  • Seite 76: Herausnehmen Des Zubehörs Aus Dem Kühlabteil

    All manuals and user guides at all-guides.com HErausnEHMEn DEs ZuBEHÖrs aus DEM KÜHLaBtEiL 1. Entfernen Sie den überlaufsicheren glasboden, indem Sie ihn so weit wie möglich herausziehen. Dann heben Sie ihn vorsichtig an und nehmen ihn heraus. 2. Nehmen Sie das Obst- und Gemüseschubfach heraus, indem Sie auf die Vertiefungen drücken, die links und rechts innen in der Abdeckung des Schubfachs sind und ziehen Sie es nach vorn heraus.
  • Seite 77: Reinigen Des Kühlgerätes

    All manuals and user guides at all-guides.com Betrieb der Kühl-Gefrier- Kombination von Samsung rEinigEn DEs KÜHLgErÄtEs Wenn Sie Ihre Kühl-gefrier-Kombination pflegen, wird die Lebensdauer Ihres gerätes erhöht und die Bildung von gerüchen und Keimen wird verhindert. Reinigen des Innenraumes Reinigen Sie die Innenwände und die Zubehörteile mit einem milden Reinigungsmittel und wischen Sie sie dann mit einem trockenen Tuch ab.
  • Seite 78: Reinigen Der Geruchsfilter (Optional)

    All manuals and user guides at all-guides.com Reinigen der Geruchsfilter (Optional) Zur Reinigung der beiden Geruchsfilter (Twin- Deodorizer) entfernen Sie deren Abdeckung mit einem Schlitzschraubendreher. Nehmen Sie die Geruchsfilter von der Abdeckung ab und weichen Sie sie in sauberem, warmen Wasser etwa 4 Stunden lang ein.Dann lassen Sie die Filter vollkommen trocken werden, bevor Sie sie wieder in die Halterung einsetzen.
  • Seite 79: Auswechseln Der Lampen Der Innenbeleuchtung

    All manuals and user guides at all-guides.com Betrieb der Kühl-Gefrier- Kombination von Samsung auswECHsELn DEr LaMPEn DEr innEnBELEuCHtung Ziehen Sie den Stecker aus der Steckdose, bevor Sie die Lampe im Kühlgerät auswechseln. WARNUNG - Anderenfalls besteht die Gefahr eines elektrischen Schlags.
  • Seite 80: Lampe Im Gefrierabteil Auswechseln

    All manuals and user guides at all-guides.com Lampe im Gefrierabteil auswechseln Die Beleuchtung des Gefrierabteils befindet sich unter dem Eisbereiter. 1. Heben Sie die Lampenabdeckung an und nehmen Sie sie in Pfeilrichtung ab. 2. Ersetzen Sie die Lampe durch eine neue. 3.
  • Seite 81: Bestellen Von Ersatzfiltern

    All manuals and user guides at all-guides.com Betrieb der Kühl-Gefrier- Kombination von Samsung 6. Nach Austausch des Filters wie in den vorhergehenden Schritten beschrieben, halten Sie die Taste "Ice Type" 3 Sekunden lang gedrückt. 7. Lassen Sie abschließend einen Liter Wasser durch den Spender laufen und entsorgen Sie es.
  • Seite 82 All manuals and user guides at all-guides.com Fehlersuche pRoBLEM LÖSUNg/MaSSNaHMEN Die Kühl-gefrier- • Prüfen Sie, ob der Netzstecker richtig eingesteckt ist. Kombination funktioniert • Ist der Temperaturregler auf dem Display auf die richtige Temperatur eingestellt? überhaupt nicht oder Versuchen Sie es mit der Einstellung einer niedrigeren Temperatur. • Steht das Kühlgerät in direktem Sonnenlicht oder in der Nähe einer Wärmequelle? kühlt nicht ausreichend.
  • Seite 83 All manuals and user guides at all-guides.com Korrekte Entsorgung dieses Produkts (Elektromüll) Deutsch ( Anzuwenden in den Ländern der Europäischen Union und anderen europäischen Ländern mit einem separaten Sammelsystem) Die Kennzeichnung auf dem Produkt bzw. auf der dazugehörigen Literatur gibt an, dass es nach seiner Lebensdauer nicht zusammen mit dem normalen Haushalts- müll entsorgt werden darf.
  • Seite 84 All manuals and user guides at all-guides.com Kontakt zu Samsung Falls Sie Fragen oder Anregungen zu Samsung-Produkten haben, wenden Sie sich bitte an den Samsung-Kundendienst. Samsung Electronics GmbH Samsung House Am Kronberger Hang 65824 Schwalbach/Ts. Deutschland 01805 - SAMSUNG(726-7864, € 0.14/Min) www.samsung.de...
  • Seite 85: Manuale Dell'utente

    All manuals and user guides at all-guides.com Frigorifero Manuale dell’utente italiano immagina le possibilità Grazie per aver acquistato un prodotto Samsung. Per ricevere un’assistenza più completa, è necessario registrare il prodotto all’indirizzo www.samsung.com/register Elettrodomestico indipendente...
  • Seite 86 All manuals and user guides at all-guides.com Caratteristiche del nuovo frigorifero PrinCiPaLi CarattEristiCHE DEL nuoVo frigorifEro Il frigorifero Samsung Side-By-Side presenta numerose caratteristiche mirate al risparmio di spazio, a metodi di conservazione innovativi e all’efficienza energetica. CErniErE nasCostE E PortiEra s/w •...
  • Seite 87: Informazioni Per La Sicurezza

    All manuals and user guides at all-guides.com Informazioni per la sicurezza inforMaZioni PEr La siCurEZZaaVVErtEnZa • Prima di attivare l’elettrodomestico, leggere per intero questo manuale e conservarlo per qualsiasi riferimento futuro. aVVERTENZa • Poiché le presenti istruzioni per l’uso trattano vari modelli, le caratteristiche del frigorifero a propria disposizione possono variare leggermente da quelle descritte in questo manuale.
  • Seite 88 All manuals and user guides at all-guides.com Informazioni per la sicurezza • Per evitare la formazione di una miscela infiammabile di gas e aria, qualora si dovesse verificare una perdita nel circuito di refrigerazione, le dimensioni della stanza in cui l’elettrodomestico può aVVERTENZa essere posizionato dipendono dalla quantità...
  • Seite 89: Segnali Di Attenzione

    • Se si avvertono odori di medicinali o fumo, staccare immediatamente la spina del cavo di alimentazione e rivolgersi a un centro di assistenza Samsung Electronics. • Assicurarsi che le fessure di ventilazione presenti nella struttura esterna e di sostegno non si ano ostruite.
  • Seite 90 All manuals and user guides at all-guides.com Informazioni per la sicurezza sEgnaLi Di attEnZionE PEr La PuLiZia • Non introdurre le mani nell’area sottostante all’elettrodomestico. - Gli spigoli appuntiti possono provocare lesioni personali. • Non mettere mai le dita od oggetti nell’apertura dell’erogatore e nello scivolo del ghiaccio. - Si possono subire lesioni personali o causare danni materiali.
  • Seite 91 All manuals and user guides at all-guides.com informazioni per la sicurezza uLtEriori suggEriMEnti PEr un utiLiZZo CorrEtto • Dopo l’installazione dell’elettrodomestico, attendere almeno 2 ore prima di attivarlo. • Per ottimizzare le prestazioni del prodotto, procedere come segue: - Non collocare i cibi in prossimità delle aperture di sfiato poste sul retro dell’elettrodomestico, poiché...
  • Seite 92 19 Installazione della linea dell’erogatore di acqua funZionaMEnto DEL frigorifEro 23 Impostazione del frigorifero 24 Funzionamento del frigorifero saMsung siDE-By-siDE 25 Utilizzo del display digitale 26 Controllo della temperatura 27 Utilizzo dell’erogatore di ghiaccio e acqua fredda 28 Ripiani e contenitori 29 Conservazione dei cibi 31 Utilizzo del cassetto CoolSelect Zone™...
  • Seite 93 DEL frigorifEro Congratulazioni per l’acquisto del Suo nuovo frigorifero Side by Side Samsung. Ci auguriamo che apprezzerà lo stato dell’arte delle tecnologia e delle caratteristihe che questo frigorifero ha da offrirLe. Scelta dell’ubicazione migliore per il frigorifero •...
  • Seite 94: Rimozione Degli Sportelli Del Frigorifero

    All manuals and user guides at all-guides.com riMoZionE DEgLi sPortELLi DEL frigorifEro Se le dimensioni della porta d’ingresso non sono sufficienti per consentire il passaggio del frigorifero, è possibile rimuovere gli sportelli. 1. Rimozione della protezione dei piedini anteriori Prima di tutto, aprire gli sportelli del congelatore e del frigorifero e rimuovere la protezione dei piedini anteriori girando le tre viti in senso antiorario.
  • Seite 95 All manuals and user guides at all-guides.com Impostazione del frigorifero side-by-side 2. Rimozione dello sportello del congelatore Operazioni preliminari: • Assicurarsi di sollevare lo sportello per evitare il piegamento o la rottura dei cardini. • Fare attenzione a non schiacciare il tubo dell’acqua e i cavi sullo sportello. •...
  • Seite 96 All manuals and user guides at all-guides.com Rimozione dello sportello del frigorifero 1. Con lo sportello chiuso, rimuovere la protezione del cardine superiore utilizzando un cacciavite. 2. Rimuovere le viti del cardine e la vite di messa a terra girando in senso antiorario, quindi estrarre il cardine superiore .
  • Seite 97: Rimontaggio Degli Sportelli Del Frigorifero

    All manuals and user guides at all-guides.com Impostazione del frigorifero side-by-side riMontaggio DEgLi sPortELLi DEL frigorifEro Dopo aver installato il frigorifero nella posizione desiderata, occorre rimontare gli sportelli. Rimontaggio dello sportello del congelatore 1. Rimontare lo sportello del congelatore inserendo nuovamente il tubo nell’angolo inferiore dello sportello e all’interno del foro presente nel cardine inferiore .
  • Seite 98 All manuals and user guides at all-guides.com Rimontaggio dello sportello del frigorifero 1. Reinserire il cardine inferiore nella staffa corrispondente 2. Allineare il foro nell’angolo dello sportello del frigorifero con il cardine inferiore 3. Inserire l’albero del cardine superiore nel foro presente sul cardine .
  • Seite 99 All manuals and user guides at all-guides.com Impostazione del frigorifero side-by-side Rimontaggio della linea di alimentazione dell’acqua 1. Inserire il tubo dell’acqua nell’accoppiatore Rimontaggio della protezione dei piedini anteriori Prima di montare la protezione, verificare l’assenza di perdite nel raccordo dell’acqua. Riposizionare la protezione dei piedini anteriori girando le tre viti in senso orario, come mostrato nella figura.
  • Seite 100: Livellamento Del Frigorifero

    All manuals and user guides at all-guides.com LiVELLaMEnto DEL frigorifEro Dopo aver rimontato gli sportelli, verificare che il frigorifero sia in piano, in modo da poter effettuare le ultime regolazioni. In caso contrario, non sarà possibile livellare perfettamente gli sportelli. È...
  • Seite 101: Piccole Regolazioni Delle Porte

    All manuals and user guides at all-guides.com Impostazione del frigorifero side-by-side PiCCoLE rEgoLaZioni DELLE PortE Tenere presente che per livellare perfettamente gli sportelli è necessario che il frigorifero sia in piano. Per ulteriori informazioni, consultare la sezione precedente sul livellamento del frigorifero. Se lo sportello del congelatore è...
  • Seite 102: Controllo Della Linea Dell'erogatore Di Acqua(Opzionale)

    L’erogatore di acqua è solo una delle numerose caratteristiche utili del nuovo frigorifero Samsung. Per ottimizzare l’igiene, il filtro dell’acqua Samsung rimuove le particelle nocive presenti nell’acqua, ma non sterilizza né distrugge alcun microrganismo. A questo scopo, è necessario acquistare un sistema di purificazione dell’acqua. Per un utilizzo corretto del dispositivo di produzione di ghiaccio, l’acqua deve avere una pressione di 138 ~862 Kpa psi (Pounds per Square Inch).
  • Seite 103: Impostazione Del Frigorifero

    Prima dell’uso, esaminare la perdita in questi punti aTTENZIoNE • L’INSTALLAZIONE DEL TUBO DELL’ACQUA non è coperta dalla garanzia Samsung. • Questa operazione verrà eseguita a carico del cliente, a meno che il prezzo al dettaglio non includa il costo di installazione.
  • Seite 104: Istruzioni Per La Sostituzione

    All manuals and user guides at all-guides.com instaLLaZionE DELLa LinEa DELL’ErogatorE Di aCQua Controllo delle parti Componenti le l’installazione della linea d’acqua Dispositivo di Connettore Linea fissaggio Fermaglio fissaggio filtro tubo dell’acqua Depuratore linea acqua e viti Connettere il tubo dell’acqua con aTTENZIoNE raccordo e rubinetto. Il tubo dell’acqua va collegato al tubo dell’acqua - Chiudere il rubinetto generale dell’acqua.
  • Seite 105 All manuals and user guides at all-guides.com Impostazione del frigorifero side-by-side Rimuovere gli eventuali residui all’interno del depuratore (modello con il depuratore) LATO DI USCITA DEL - Aprire il rubinetto dell’acqua principale e controllare DEPURATORE DEPURATORE se l’acqua scorre nel tubo sul lato di entrata dell’acqua del depuratore.
  • Seite 106 All manuals and user guides at all-guides.com Rimozione di eventuali residui all’interno della linea di alimentazione dell’acqua dopo l’installazione del filtro. 1. Aprire l’erogazione di acqua principale e chiudere la valvola della linea di alimentazione dell’acqua. acqua ghiaccio 2. Far scorrere l’acqua nell’erogatore finché non fuoriesce pulita (circa 1L).
  • Seite 107: Funzionamento Del Frigorifero

    Per ulteriori domande, rivolgersi al centro di assistenza Samsung Electronics. 1. Posizionare il frigorifero in un luogo appropriato con uno spazio sufficiente tra il muro e l’elettrodomestico.
  • Seite 108 All manuals and user guides at all-guides.com funZionaMEnto DEL frigorifEro UTILIZZO DEL PANNELLO DI CONTROLLO rsH1K/J, rsH3K rsH1f/D, rsH3f/D rsH1n/B, rsH3n Consente di velocizzare il processo di congelamento dei prodotti nel congelatore. Ciò può risultare utile pULSaNTE se è necessario congelare in modo rapido prodotti facilmente deperibili oppure se la temperatura nel poWER FREEZE congelatore è...
  • Seite 109: Utilizzo Del Display Digitale

    All manuals and user guides at all-guides.com Funzionamento del frigorifero SAMSUNG side-by-side utiLiZZo DEL DisPLay DigitaLE La dicitura “88” sul display del congelatore indica la temperatura corrente nel congelatore. La dicitura “88” sul display del frigorifero indica la temperatura corrente nel frigorifero.
  • Seite 110: Controllo Della Temperatura

    All manuals and user guides at all-guides.com Spia del filtro Se la spia è accesa significa che è necessario sostituire il filtro. In genere, la spia si accende circa ogni 6 mesi. Dopo aver rimosso il filtro precedente e aver installato quello nuovo (per istruzioni su questa procedura, vedere pagina 38), è...
  • Seite 111: Utilizzo Dell'erogatore Di Ghiaccio E Acqua Fredda

    All manuals and user guides at all-guides.com Funzionamento del frigorifero SAMSUNG side-by-side utiLiZZo DELL’ErogatorE Di gHiaCCio E aCQua frEDDa Premere il pulsante Ice Type per selezionare il tipo di ghiaccio desiderato. produzione ghiaccio disattivata Questa funzione consente di disattivare il dispositivo di produzione di ghiaccio.
  • Seite 112: Ripiani E Contenitori

    All manuals and user guides at all-guides.com riPiani E ContEnitori Congelatore Dispositivo di produzione di ghiaccio (opzionale) Copri lampadina Scivolo del ghiaccio Ripiani di vetro Ripiano di plastica Contenitori dello sportello Cassetti Protezione dei piedini anteriori Frigorifero Filtro dell’acqua (opzionale) Copri lampadina Cassetto latticini Ripiano di vetro...
  • Seite 113: Conservazione Dei Cibi

    ConsErVaZionE DEi CiBi Conservazione dei cibi nel congelatore Il frigorifero Samsung Side-By-Side è stato progettato per garantire il massimo risparmio di spazio. Di seguito sono illustrati alcuni degli scomparti personalizzati che consentono di mantenere il cibo più fresco e più a lungo. Per evitare la formazione di cattivi odori nel congelatore, avvolgere accuratamente il cibo conservato in modo che sia a tenuta d’aria.
  • Seite 114 All manuals and user guides at all-guides.com Conservazione dei cibi nel congelatore Non mettere le dita, le mani o qualsiasi altro oggetto nello SCIVoLo DEL scivolo o nel secchiello del dispositivo di produzione di ghiaccio. gHIaCCIo aVVERTENZa Si potrebbero subire lesioni personali o causare danni materiali. CoNTENIToRI DELLo Per conservare tutti i tipi di cibi congelati.
  • Seite 115: Utilizzo Del Cassetto Coolselect Zone™ (Opzionale)

    All manuals and user guides at all-guides.com Funzionamento del frigorifero SAMSUNG side-by-side utiLiZZo DEL CassEtto CooLsELECt ZonE™ (oPZionaLE) Il cassetto Zona di controllo refrigerazione è stato disegnato per facilitare la vostra vita piena di impegni. Pulsante Quick Cool È possibile utilizzare la funzione “Quick Cool” (refrigerazione rapida) del cassetto CoolSelect Zone™...
  • Seite 116 All manuals and user guides at all-guides.com Pulsante Select 1. Quando si sceglie “Soft Freeze” congelamento leggero) nel cassetto CoolSelect Zone™, sul pannello digitale viene visualizzata una temperatura di -5°C, indipendentemente dall’impostazione della temperatura globale del frigorifero. Questa funzione consente di conservare più a lungo la freschezza di carne e pesce.
  • Seite 117: Rimozione Degli Accessori Del Congelatore

    All manuals and user guides at all-guides.com Funzionamento del frigorifero SAMSUNG side-by-side riMoZionE DEgLi aCCEssori DEL CongELatorE È possibile pulire e riordinare l’interno del congelatore in modo estremamente rapido. 1. Per rimuovere il ripiano di vetro, estrarlo al massimo e sollevarlo leggermente.
  • Seite 118: Rimozione Degli Accessori Del Frigorifero

    All manuals and user guides at all-guides.com riMoZionE DEgLi aCCEssori DEL frigorifEro 1. Per rimuovere il ripiano di vetro antiversamento, estrarlo al massimo e sollevarlo leggermente. 2. Per rimuovere il cassetto frutta e verdura, premere sulle rientranze presenti sui lati interni destro e sinistro del coperchio del cassetto verdura/a tenuta d’aria, quindi estrarlo.
  • Seite 119: Pulizia Del Frigorifero

    Funzionamento del frigorifero SAMSUNG side-by-side PuLiZia DEL frigorifEro Un’accurata pulizia del frigorifero Samsung Side-By-Side consente di prolungare la durata dell’elettrodomestico e di evitare la formazione di odori e germi. Pulizia delle parti interne Per pulire le pareti e gli accessori interni, utilizzare un detergente delicato e un panno morbido per asciugare.
  • Seite 120 All manuals and user guides at all-guides.com Pulizia dei due deodoratori (opzione) Per pulire i due deodoratori, rimuovere la protezione con un cacciavite a testa piatta. Rimuovere la cartuccia del deodoratore dalla protezione e immergerla in acqua pulita e calda per almeno 4 ore. Quindi, lasciarla asciugare completamente prima di riporla nel contenitore.
  • Seite 121: Sostituzione Delle Lampadine Interne

    All manuals and user guides at all-guides.com Funzionamento del frigorifero SAMSUNG side-by-side sostituZionE DELLE LaMPaDinE intErnE Prima di sostituire la lampadina interna del frigorifero, staccare la spina dalla presa elettrica. - In caso contrario, si correrebbe il rischio di ricevere scosse elettriche. In caso di difficoltà...
  • Seite 122: Sostituzione Del Filtro Dell'acqua

    All manuals and user guides at all-guides.com Sostituzione delle lampadine interne nel congelatore La lampadina del congelatore è situata nella parte inferiore del telaio del motore tritaghiaccio. 1. Sollevare il coperchio della lampada e tirare verso l’esterno in direzione delle frecce. 2.
  • Seite 123: Utilizzo Degli Sportelli

    Come ordinare i filtri di ricambio Per ordinare altre cartucce per il filtro dell’acqua, rivolgersi a un rivenditore autorizzato Samsung. utiLiZZo DEgLi sPortELLi Gli sportelli del frigorifero dispongono di una speciale funzione di apertura e chiusura che garantisce la perfetta e costante chiusura.
  • Seite 124: Risoluzione Dei Problemi

    All manuals and user guides at all-guides.com Risoluzione dei problemi pRoBLEMa SoLUZIoNE il frigorifero non funziona • Verificare che la spina del cavo di alimentazione sia collegata correttamente. • Il controllo della temperatura sul pannello del display è impostato sulla temperatura o non raffredda in modo corretta? Provare a impostarlo su una temperatura più...
  • Seite 125 All manuals and user guides at all-guides.com Corretto smaltimento del prodotto (rifiuti elettrici ed elettronici) Italiano (Applicabile in i paesi dell’Unione Europea e in quelli con sistema di raccolta differenziata) Il marchio riportato sul prodotto o sulla sua documentazione indica che il prodotto non deve essere smaltito con altri rifiuti domestici al termine del ciclo di vita.
  • Seite 126 All manuals and user guides at all-guides.com Contatta SAMSUNG WORLD WIDE Se avete commenti o domande sui prodotti Samsung, contattate il Servizio Clienti Samsung Samsung Electronics Italia S.p.A Via C. Donat Cattin, 5 20063, Cernusco Sul Naviglio (MI) 800-SAMSUNg(7267864) www.samsung.com/it...
  • Seite 127 All manuals and user guides at all-guides.com Réfrigérateur Mode d’emploi français Imaginez les possibilités Merci d’avoir acheté un produit Samsung. Pour bénéficier d’une assistance technique plus complète, enregistrez votre produit sur : Fonctions de votre nouveau réfrigérateur Appareil en pose libre...
  • Seite 128 All manuals and user guides at all-guides.com Fonctions de votre nouveau réfrigérateur fonCtions PrinCiPaLEs DE VotrE nouVEau rEfrigEratEur Votre nouveau réfrigérateur Side-By-Side de Samsung dispose de nombreux espaces de rangement et de fonctions permettant de réduire la consommation d’énergie. CHarniErEs CaCHEEs & intErruPtEur PortE •...
  • Seite 129: Consignes De Sécurité

    All manuals and user guides at all-guides.com Consignes de sécurité ConsignEs DE sECuritE • Avant de mettre l’appareil en service, lisez attentivement ce mode d’emploi et conservez-le pour pouvoir vous y référer ultérieurement. DaNgER • Ce manuel étant commun à plusieurs modèles, les caractéristiques de votre réfrigérateur peuvent légèrement différer de celles présentées ci-dessous.
  • Seite 130: Consignes De Sécurité Importantes

    All manuals and user guides at all-guides.com Consignes de sécurité • Pour éviter la formation d’un mélange gazair inflammable en cas de fuite du circuit de réfrigération, installez l’appareil dans une pièce dont le volume est adapté à la quantité de fluide DaNgER frigorigène utilisée.
  • Seite 131 - Vous pourriez déclencher un incendie, provoquer un dysfonctionnement et/ou vous blesser. • Si vous détectez une odeur anormale ou de la fumée, débranchez immédiatement la prise d’alimentation et contactez le centre technique Samsung Electronics le plus proche. • Veillez à ne pas obstruer les orifices de ventilation internes et externes.
  • Seite 132: Consignes De Nettoyage

    All manuals and user guides at all-guides.com Consignes de sécurité ConsignEs DE nEttoyagE • Ne passez pas vos doigts sous l’appareil. - Le rebord affilé pourrait vous blesser. • N’introduisez jamais vos doigts ni aucun objet dans l’orifice du distributeur d’eau ou la conduite d’éjection de glace.
  • Seite 133 All manuals and user guides at all-guides.com Consignes de sécurité ConsEiLs suPPLÉMEntairEs • Après l’installation, attendez 2 heures avant d’utiliser l’appareil. • Afin de garantir des performances optimales : - Ne plaquez pas les aliments contre les orifices situés au fond de l’appareil. Vous risqueriez d’empêcher la circulation de l’air dans le congélateur.
  • Seite 134 All manuals and user guides at all-guides.com Sommaire instaLLation DE VotrE Préparation de l’installation 10 Démontage des portes du réfrigérateur rÉfrigÉratEur siDE-By-siDE 13 Montage des portes du réfrigérateur 16 Mise à niveau du réfrigérateur instaLLation DE VotrE 17 Réalisation de réglages mineurs sur les portes 18 Vérification de l’alimentation en eau rÉfrigÉratEur siDE-By-siDE 19 Installation de l’alimentation en eau...
  • Seite 135: Préparation De L'installation

    Installation de votre réfrigérateur Side-By-Side PrÉParation DE L’instaLLation Félicitations ! Vous venez d’acquérir un réfrigérateur Side-By-Side de Samsung. Nous espérons que ses fonctions innovantes répondront à toutes vos attentes. Choix du lieu d’installation • La pièce doit disposer d’une arrivée d’eau.
  • Seite 136: Démontage Des Portes Du Réfrigérateur

    All manuals and user guides at all-guides.com DEMontagE DEs PortEs Du rEfrigEratEur Si nécessaire, vous pouvez démonter les portes du réfrigérateur pour faciliter son transport. 1. Démontage de la plinthe avant Ouvrez les portes du congélateur et du réfrigérateur puis dévissez la plinthe. Débranchement de la ligne d’arrivée d’eau 1.
  • Seite 137 All manuals and user guides at all-guides.com Installation de votre réfrigérateur Side-By-Side 2. Démontage de la porte du congélateur Veuillez vérifier les points ci-dessous. • Soulevez la porte de façon parfaitement verticale afin de ne pas endommager les charnières. • Veillez à ne pas pincer la conduite d’eau et le faisceau de câble de la porte. •...
  • Seite 138 All manuals and user guides at all-guides.com Démontage de la porte du réfrigérateur 1. Fermez la porte et retirez le capot de la charnière supérieure à l’aide d’un tournevis. 2. Retirez les vis de la charnière et la vis de terre puis démontez la charnière supérieure .
  • Seite 139: Montage Des Portes Du Réfrigérateur

    All manuals and user guides at all-guides.com Installation de votre réfrigérateur Side-By-Side MontagE DEs PortEs Du rEfrigEratEur Une fois le réfrigérateur correctement installé, remettez les portes en place. Montage de la porte du congélateur 1. Remettez la porte du congélateur en place en insérant la conduite dans l’angle inférieur de la porte puis dans l’orifice de la charnière inférieure .
  • Seite 140 All manuals and user guides at all-guides.com Montage de la porte du réfrigérateur 1. Insérez la charnière inférieure dans son support 2. Enclenchez la porte du réfrigérateur sur la charnière inférieure 3. Insérez la tige de la charnière supérieure dans l’orifice de la charnière .
  • Seite 141 All manuals and user guides at all-guides.com Installation de votre réfrigérateur Side-By-Side Montage de la ligne d’arrivée d’eau 1. Insérez la conduite dans le raccord Montage de la plinthe avant Avant de fixer la plinthe, assurez-vous que le raccord ne présente aucune fuite. Vissez la plinthe, comme indiqué...
  • Seite 142: Mise À Niveau Du Réfrigérateur

    All manuals and user guides at all-guides.com MisE À niVEau Du rÉfrigÉratEur Une fois les portes installées, vous devez vous assurer que le réfrigérateur est parfaitement de niveau avant de procéder aux derniers réglages. Si le réfrigérateur n’est pas de niveau, les portes ne pourront pas être correctement ajustées.
  • Seite 143: Réalisation De Réglages Mineurs Sur Les Portes

    All manuals and user guides at all-guides.com Installation de votre réfrigérateur Side-By-Side rÉaLisation DE rÉgLagEs MinEurs sur LEs PortEs Avant toute chose, vérifiez que le réfrigérateur est de niveau. Si nécessaire, reportez-vous à la section précédente. La porte du congélateur est plus haute que celle du réfrigérateur...
  • Seite 144: Installation De L'alimentation En Eau

    ControLE DE L’arriVÉE D’Eau Du DistriButEur (En oPtion) Votre nouveau réfrigérateur Samsung est équipé d’un distributeur d’eau. Par mesure d’hygiène, les particules étrangères sont retenues par un filtre à eau. Cependant, ce filtre ne stérilise pas l’eau et ne détruit pas les micro-organismes.
  • Seite 145: Installation Du Filtre À Eau

    Avant toute utilisation, vous devez vérifier les éventuelles fuites dans ces zones DaNgER • La garantie Samsung ne couvre pas l’INSTALLATION DE LA LIgNE D’ALIMENTATION EN EAU. • Cette opération reste à la charge du client, à...
  • Seite 146 All manuals and user guides at all-guides.com instaLLation Du DistriButEur D’Eau pour le modèle extérieur Composants pour l’installation des tuyaux d’arrivée d’eau. Fixations et vis Joints des Tube à eau Clip de fermeture de des tuyaux d’eau tuyaux l’épurateur purificateur Connectez la conduite d’eau au aTTENTIoN coupleur et au robinet Le tuyau d’eau doit être raccordé sur une 1.
  • Seite 147 All manuals and user guides at all-guides.com Installation de votre réfrigérateur Side-By-Side Elimination des résidus éventuels dans le purificateur (modèle avec purificateur) - Ouvrez le robinet d’eau principal et vérifiez que l’eau SORTIE DU coule par le tuyau d’eau à l’entrée du purificateur. PURIFICATEUR PURIFICATEUR - Si l’eau ne coule pas par le tuyau, vérifiez que le...
  • Seite 148 All manuals and user guides at all-guides.com Purge du système d’alimentation en eau après installation du filtre 1. Ouvrez l’alimentation en eau principale et fermez le robinet d’arrivée d’eau. glace 2. Laissez couler l’eau du distributeur jusqu’à ce que celle-ci devienne parfaitement claire (approx.
  • Seite 149: Réglage De L'appareil

    Si ce n’est pas le cas, vérifiez l’alimentation électrique ou consultez la section Dépannage de ce mode d’emploi. Pour plus d’informations, contactez le service après-vente de votre revendeur Samsung. 1. Installez le réfrigérateur dans une pièce appropriée, en prévoyant suffisamment d’espace tout autour de l’appareil.
  • Seite 150: Fonctionnement Du Réfrigérateur

    All manuals and user guides at all-guides.com fonCtionnEMEnt Du rÉfrigÉratEur PANNEAU DE COMMANDE rsH1K/J, rsH3K rsH1f/D, rsH3f/D rsH1n/B, rsH3n Permet de congeler rapidement les aliments placés dans le congélateur. CoNgÉLaTIoN Cette fonction est utile pour congeler rapidement des denrées périssables RapIDE ou abaisser la température du congélateur si celle-ci est trop élevée (si vous avez laissé...
  • Seite 151: Afficheur Numérique

    All manuals and user guides at all-guides.com Fonctionnement de votre réfrigérateur Side-By-Side affiCHEur nuMÉriQuE La valeur numérique de la partie supérieure correspond à la température du congélateur. La valeur numérique de la partie inférieure correspond à la température du réfrigérateur. Les indications “Quick Cool”, “Thaw”, “Soft Freeze”...
  • Seite 152: Verrouillage Enfants

    All manuals and user guides at all-guides.com Filtre à eau Ce voyant s’allume lorsque vous devez remplacer le filtre. Le remplacement du filtre doit s’effectuer tous les 6 mois environ. Après avoir remplacé le filtre (voir page 38 pour les instructions), maintenez la touche Ice Type enfoncée pendant 3 secondes pour que le voyant s’éteigne.
  • Seite 153: Utilisation Du Distributeur D'eau Et De Glace

    All manuals and user guides at all-guides.com Fonctionnement de votre réfrigérateur Side-By-Side utiLisation Du DistriButEur D’Eau Et DE gLaCE Appuyez sur la touche Ice Type pour sélectionner le type de glace désiré. pas de glace Permet d’arrêter la fabrication de glace. Initialement, la glace est produite sous forme de glaçons. La glace pilée est obtenue par broyage de ces glaçons dans la fabrique de glace.
  • Seite 154: Clayettes Et Bacs

    All manuals and user guides at all-guides.com CLayEttEs Et BaCs Congélateur Fabrique de glace (en option) Cache de l’ampoule Conduite d’éjection de glace Clayettes en verre Clayette en plastique Balconnets Tiroirs Plinthe avant Réfrigérateur Filtre à eau (en option) Cache de l’ampoule Produits laitiers Clayette en verre Porte-bouteilles...
  • Seite 155: Rangement Des Aliments

    DEs aLiMEnts Rangement des aliments dans le congélateur Votre nouveau réfrigérateur Side-By-Side de Samsung dispose de nombreux espaces de rangement et de multiples fonctions. Différents compartiments sont prévus afin que vos aliments conservent toute leur fraîcheur plus longtemps. Afin d’éviter la propagation des odeurs, n’oubliez pas de placer vos aliments dans des emballages aussi hermétiques que possible.
  • Seite 156 All manuals and user guides at all-guides.com Rangement des aliments dans le congélateur CoNDUITE N’introduisez jamais vos doigts, vos mains ni aucun autre objet dans la conduite d’éjection ou le bac à glace. Vous pourriez D’ÉJECTIoN DaNgER vous blesser ou endommager le système de distribution. DE gLaCE CLaYETTES Permettent de ranger tous types d’aliments.
  • Seite 157: Tiroir Coolselect Zone

    All manuals and user guides at all-guides.com Fonctionnement de votre réfrigérateur Side-By-Side tiroir CooLsELECt ZonE™ La Zone de Sélection de Froid, ce tiroir est conçu dans le but de rendre votre vie occupée juste un petit peu plus facile. Touche Quick Cool (refroidissement rapide) La fonction “Quick Cool”...
  • Seite 158 All manuals and user guides at all-guides.com Touche Select 1. En mode “Soft Freeze” (congélation douce), la température du tiroir CoolSelect Zone™ passe à -5°C. Cette fonction permet de conserver de la viande ou du poisson plus longtemps. 2. En mode “0 Zone” (refroidissement), la température du tiroir CoolSelect Zone™...
  • Seite 159: Démontage Des Accessoires Du Congélateur

    All manuals and user guides at all-guides.com Fonctionnement de votre réfrigérateur Side-By-Side DEMontagE DEs aCCEssoirEs Du CongELatEur Les accessoires du congélateur sont faciles à démonter et à nettoyer. 1. Tirez la Clayette en verre vers vous jusqu’à ce qu’elle arrive en butée. Puis, soulevez-la pour la retirer. 2.
  • Seite 160: Démontage Des Accessoires Du Réfrigérateur

    All manuals and user guides at all-guides.com DEMontagE DEs aCCEssoirEs Du rÉfrigEratEur 1. Tirez la Clayette anti-salissures vers vous jusqu’à ce qu’elle arrive en butée. Puis, soulevez-la délicatement pour la retirer. 2. Appuyez sur les ergots de chaque côté du Bac à fruits et légumes puis tirez celui-ci vers vous.
  • Seite 161: Nettoyage Du Réfrigérateur

    Fonctionnement de votre réfrigérateur Side-By-Side nEttoyagE Du rÉfrigÉratEur Le nettoyage régulier de votre réfrigérateur Side-By-Side de Samsung vous permettra de prolonger sa durée de vie. En outre, vous empêcherez l’apparition d’odeurs et la prolifération de bactéries. nettoyage de l’intérieur Nettoyez les parois et les accessoires avec un détergent doux, puis essuyez-les à...
  • Seite 162 All manuals and user guides at all-guides.com nettoyage des désodoriseurs (En OPTIOn) Pour nettoyer les désodoriseurs, retirez le cache à l’aide d’un tournevis. Démontez la cartouche et laissez-la tremper dans de l’eau chaude pendant au moins 4 heures. Attendez que la cartouche soit entièrement sèche avant de la remettre en place dans son support. Dans une pièce bien aérée, la cartouche sèche en 8 heures environ.
  • Seite 163: Remplacement Des Ampoules

    All manuals and user guides at all-guides.com Fonctionnement de votre réfrigérateur Side-By-Side rEMPLaCEMEnt DEs aMPouLEs Débranchez l’appareil du secteur avant de remplacer les ampoules. - Dans le cas contraire, vous pourriez vous électrocuter. DaNgER Si vous rencontrez des difficultés lors du remplacement de l’ampoule, contactez le centre technique.
  • Seite 164: Remplacement Du Filtre À Eau

    All manuals and user guides at all-guides.com Remplacement des ampoules du congélateur L’ampoule du congélateur est située à l’arrière du bloc moteur. 1. Soulevez la protection de la lampe et retirez-la en la tirant dans la direction des flèches. 2. Remplacez l’ampoule. 3.
  • Seite 165: Ouverture Et Fermeture Des Portes

    Commande de cartouches de rechange Vous pouvez commander des cartouches de rechange Pour ce faire, contactez votre revendeur Samsung. ouVErturE Et fErMEturE DEs PortEs Les portes du réfrigérateur sont équipées d’un système d’ouverture et de fermeture destiné à garantir l’étanchéité...
  • Seite 166 All manuals and user guides at all-guides.com Dépannage pRoBLÈME SoLUTIoN L’appareil ne fonctionne • Assurez-vous que la fiche d’alimentation est correctement branchée. pas du tout ou la • La température indiquée sur le panneau de commande est-elle correctement température est trop réglée? Abaissez la température.
  • Seite 167: Circuit Diagram

    All manuals and user guides at all-guides.com circuit diagram...
  • Seite 168 All manuals and user guides at all-guides.com circuit diagram...
  • Seite 169 All manuals and user guides at all-guides.com circuit diagram...
  • Seite 170 All manuals and user guides at all-guides.com MEMO...
  • Seite 171 All manuals and user guides at all-guides.com Comment éliminer ce produit (déchets d’équipements électriques et Français électroniques) (Applicable dans les pays de l’Union Européen et aux autres pays européens disposant de systémes de collecte sélective) Ce symbole sur le produit ou sa documentation indique qu’il ne doit pas être éliminé en fin de vie avec les autres déchets ménagers.
  • Seite 172 All manuals and user guides at all-guides.com Comment contacter Samsung dans le monde Si vous avez des suggestions ou des questions concernant les produits Samsung, veuillez contacter le Service Consommateurs Samsung. Samsung Service Consommateurs 66 rue des Vanesses BP 50116 - Villepinte -95950 ROISSY cedex France 3260 SAMSUNg(7267864, €...

Inhaltsverzeichnis