Epson ELPMB65 Anleitung
Quicklinks
ELPMB65
Mount Plate User's Guide
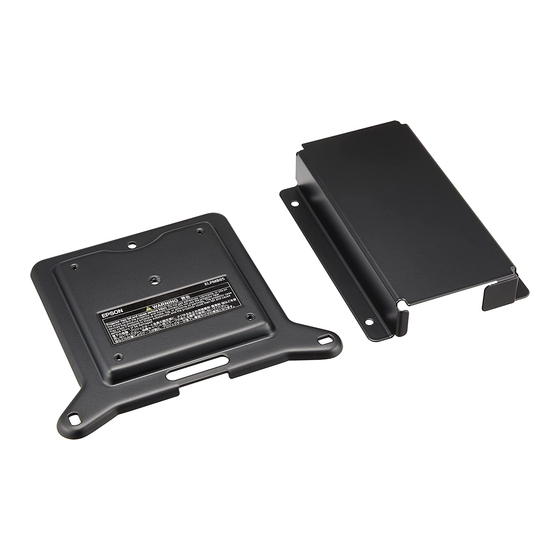
Included items: Mount plate x1; Installation screws x3;
AC adapter holder x1
You can use the mount plate to attach the projector to a VESA compliant
mount (75 x 75 mm), or to a tripod (with 1/4-20 UNC size fixing screws). See
the "User's Guide" supplied with your projector for more detailed installation
instructions.
When installing in a high place such as a ceiling, attach the optional Safety
Wire Attachment (ELPWR01) for safety reasons.
Mode d'emploi de la plaque de montage
Éléments inclus : Plaque de montage x1 ; Vis
d'installation x3 ; Support d'adaptateur secteur x1
Vous pouvez utiliser la plaque de montage pour fixer le projecteur sur un
support compatible VESA (75 x 75 mm) ou sur un trépied (avec des vis
de fixation 1/4-20 UNC). Consultez le « Mode d'emploi » fourni avec votre
projecteur pour des instructions d'installation plus détaillées.
En cas d'installation en hauteur, comme un plafond, fixez le câble de
sécurité optionnel (ELPWR01) pour des raisons de sécurité.
Anleitung für Montageplatte
Inbegriffene Teile: Montageplatte x1;
Befestigungsschrauben x3; Netzadapterhalter x1
Verwenden Sie die Montageplatte für die Befestigung des Projektors an einer
VESA-Halterung (75 x 75 mm) oder einem Stativ (mit Befestigungsschrauben
der Größe 1/4-20 UNC). Ausführliche Anweisungen finden Sie in der
Anleitung für Ihren Projektor.
Bei Montage an einem höher gelegenen Ort wie beispielsweise an der
Decke sollten Sie aus Sicherheitsgründen das optionale Sicherheitskabel
(ELPWR01) verwenden.
Manuale dell'utente della piastra di montaggio
Articoli inclusi: piastra di montaggio x1; Viti per
installazione x3; Supporto per alimentatore CA x1
È possibile utilizzare la piastra di montaggio per fissare il proiettore a un
supporto omologato VESA (75 x 75 mm) o a un treppiede (con viti di fissaggio
dimensioni UNC 1 / 4-20). Consultare la "Manuale dell'utente" fornita con il
proiettore per istruzioni di installazione più dettagliate.
Quando si esegue l'installazione in un luogo alto come un soffitto, collegare
il cavo di sicurezza opzionale (ELPWR01) per motivi di sicurezza.
1.
Turn off the projector and unplug the power cord.
2.
Turn the projector upside down.
3.
Turn the two rear feet counterclockwise to remove them.
See
4.
Attach the mount plate to the projector using the screws supplied.
See
1.
Éteignez le projecteur et débranchez le cordon d'alimentation.
2.
Retournez le projecteur.
3.
Tournez les deux pieds arrière dans le sens inverse des aiguilles
d'une montre pour les retirer.
Figure
4.
Fixez la plaque de montage sur le projecteur à l'aide des vis fournies.
Figure
1.
Schalten Sie den Projektor aus und ziehen Sie das Netzkabel.
2.
Stellen Sie den Projektor auf den Kopf.
3.
Drehen Sie die beiden hinteren Füße gegen den Uhrzeigersinn
heraus.
Siehe
4.
Befestigen Sie die Montageplatte mit den zugehörigen Schrauben
am Projektor.
Siehe
1.
Spegnere il proiettore e scollegare il cavo elettrico.
2.
Capovolgere il proiettore.
3.
Ruotare i due piedini posteriori in senso antiorario per rimuoverli.
Vedere
4.
Fissare la piastra di montaggio al proiettore utilizzando le viti fornite.
Vedere
5.
Attach the projector with the mount plate to a VESA compliant
mount or tripod.
6.
If necessary, secure the AC adapter to the wall or ceiling using the
AC adapter holder supplied.
See
: Make sure you prepare screws that are appropriate for the
material of the wall or ceiling.
5.
Fixez le projecteur avec la plaque de montage sur un support
compatible VESA ou un trépied.
6.
Si nécessaire, fixez l'adaptateur secteur au mur ou au plafond à
l'aide du support pour adaptateur secteur fourni.
Figure
: Assurez-vous de préparer des vis appropriées pour le
matériau du mur ou du plafond.
5.
Befestigen Sie den Projektor mit der Montageplatte an einer VESA-
Halterung oder an einem Stativ.
6.
Sichern Sie den Netzadapter gegebenenfalls mit der mitgelieferten
Netzadapterhalterung an der Wand oder an der Decke.
Siehe
: Halten Sie für das Material der Wand bzw. Decke geeignete
Schrauben bereit.
5.
Fissare il proiettore con la piastra di montaggio a un supporto o
treppiede conforme a VESA.
6.
Se necessario, fissare l'alimentatore CA alla parete o al soffitto
utilizzando il supporto dell'alimentatore CA in dotazione.
Vedere
: Assicurarsi di preparare delle viti adeguate al materiale
della parete o del soffitto.

Verwandte Anleitungen für Epson ELPMB65


Inhaltszusammenfassung für Epson ELPMB65
- Seite 1 ELPMB65 Mount Plate User's Guide Turn off the projector and unplug the power cord. Attach the projector with the mount plate to a VESA compliant Included items: Mount plate x1; Installation screws x3; mount or tripod. Turn the projector upside down.
- Seite 2 包括:1 個安裝板、3 顆安裝螺絲、1 個 AC 變壓器固定座 將投影機上下翻轉。 参看 : 請確定您準備適用於牆壁或天花板材質的螺絲。 逆時針旋轉兩個後腳墊,以拆下後腳墊。 您可以使用安裝板將投影機裝上 VESA 相容底座 (75 x 75 mm) 或三腳架 参看 ( 使用 1/4-20 UNC 大小的固定螺絲 )。如需更詳細的安裝說明,請參閱投 製造商: SEIKO EPSON CORPORATION 使用隨附的螺絲將安裝板裝上投影機。 影機隨附的「使用說明書」 。 地址 : 3-5, Owa 3-chome, Suwa-shi, Nagano-ken 392-8502 Japan 電話 : 81-266-52-3131 参看 進口商: 台灣愛普生科技股份有限公司 安裝在如天化板等高處時,請連接選購的安全纜線附件 (ELPWR01),...