Inhaltsverzeichnis
Werbung
Quicklinks
Werbung
Inhaltsverzeichnis

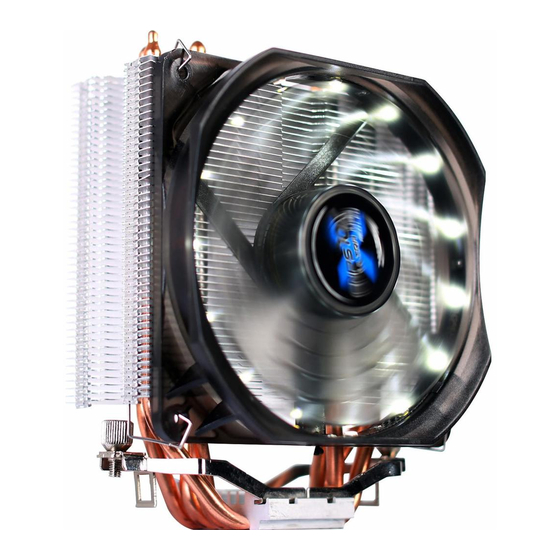
Inhaltszusammenfassung für ZALMAN CNPS9X OPTIMA
- Seite 1 User's Manual Ver. 041919 Intel Socket LGA115X/775 CPUs AMD Socket AM4/AM3+/AM3/FM2+/FM2 CPU & APUs * To ensure safe and easy installation, please read the following precaution. * Product design and specifications may be revised to improve quality and performance. www.zalman.com...
-
Seite 2: Sicherheitshinweise
■ Zalman Tech Co., Ltd. Is not responsible for any damages dne to overclocking CPU such as, CPU and system components. ■ During transportation of the system, the cooler must be removed. Zalman Tech Co., Ltd. is not responsible for any damages that occur during the transport of a system. -
Seite 3: Меры Предосторожности
■ Zalman Tech Co., Ltd. no se responsabiliza de los daños que se produzcan en el «overclocking» de la CPU, como en la propia CPU como en los componentes del sistema. - Seite 4 ■ A nossa empresa não se responsabiliza por qualquer problema que ocorra devido à utilização do produto para finalidades que não as previstas e/ou na sequência de negligência por parte do consumidor. ■ A Zalman Tech Co., Ltd. não se responsabiliza por quaisquer danos ao CPU, bem como aos componentes do sistema, causados por overclocking.
-
Seite 5: Środki Ostrożności
■ Cégünk nem vállal felelősséget a termék szakszerűtlen vagy nem megfelelő használatából eredő problémákért. ■ Zalman Tech Co., Ltd. Is not responsible for any damages dne to overclocking CPU such as, CPU and system components. - Seite 6 ■ Zalman Tech Co., Ltd. non è responsabile di alcun danno a CPU overcloccate e componenti della CPU e del sistema. ■ Durante il trasporto del sistema, il raffreddatore deve essere rimosso. Zalman Tech Co., Ltd. non è responsabile per eventuali danni che dovessero verificarsi durante il trasporto di un sistema.
-
Seite 7: Specifications
Specifications Model CNPS9X OPTIMA Dimensions 123(L) x 72(W) x 156(H)mm Weight 594g Material Pure Copper, Aluminum Dimensions 120 x 120 x 25(H)mm Speed 600 ~ 1,500 ±10% RPM Max Noise Level 26 dB(A) ±10% Bearing Type Rifle Bearing Control Method... -
Seite 8: Installation Requirements
Installation Requirements Cooler Space Requirements 72㎜ 156㎜ 123㎜ English Français Space Requirements Conditions d’espace nécessaires The cooler’s installation requires an unobstructed space of L’installation du refroidisseur nécessite un espace non obstrué 72mm(width) 123mm(length) and 156mm(height) with the CPU as a de 72 mm (largeur), 123 mm (longueur) et 156 mm (hauteur) en central reference point. - Seite 9 中国 Português 空间要求 Requisitos de espaço 冷却器的安装要求一块以 CPU 为中心参考点、大小为 72 mm A instalação do refrigerador requer um espaço desimpedido (宽)×123 mm(长)× 156 mm(高)的无阻碍空间。请检查 com 72 mm (largura),123 mm (comprimento) e 156 mm (altura) ODD 和 PSU 等部件是否突入所要求的空间。 com a CPU como ponto de referência central. Verifique se os componentes, tais como as ODD e a PSU, sobressaem para o 移除导风板...
-
Seite 10: Installation
Installation Intel User Socket 115X Socket 775 English Français Align the Inter Clip Support's lever with the socket type and fasten th Aligner le levier du support de clip de Intel avec le type de socket et le the motherboard with pushpins. fixer sur la carte-mère avec les poussoirs. - Seite 11 Intel & AMD User English Français Attach the damper on to fan screw hole. Fixez l’amortisseur sur l’orifice de la vis du ventilateur. Español Deutsch Coloque el amortiguador en el orificio del tornillo del ventilador. Setzen Sie den Dämpfer auf das Loch der Lüfterschraube. 日本語...
- Seite 12 Intel & AMD User English Français Latch the Fan Fixing Clips to the notches located on the sides of the Verrouiller les fixations du ventilateur dans les encoches situées sur les heatsink. côtés du dissipateur thermique. Español Deutsch Encaje los clips de fijación del ventilador en las muescas ubicadas a Rasten Sie die Lüfter-Halte-Clips in die Aussparungen an den ambos lados del disipador de calor.
- Seite 13 Intel & AMD User English Français Clear off any particles or residue from the CPU's surface. Then Nettoyer toutes particules ou tous résidus de la surface du spread a thorough layer of Thermal Grease on the CPU and the microprocesseur. Puis étaler une couche de graisse thermique sur le base of The cooler.
- Seite 14 Intel User AMD User English Français Install the cooler on the Intel / AMD Clip support as shown in the picture Installer le refroidisseur sur le support du Intel / AMD clip comme and connect the lug slot of the clip on to the lug on the clip support. Then indiqué...
- Seite 15 Intel & AMD User English Français Connect the cooler’s 4-pin connector to the motherboard’s CPU Fan Connecter les 4 tiges du connecteur du refroidisseur à la tête du header. ventilateur de l’unité centrale de la carte-mère. Please make sure that PWM Control Mode is activated in the motherboard’s BIOS settings. Assurez-vous que le mode de commande PWM est activé...
- Seite 16 제품 보증서 제품명 모델명 구입일 년 월 일 Serial No. 구입처 판매 금액 1. 품질 보증기간 : 제품 구입일로부터 1년. (단, 구입 영수증이 있을 때) 2. 무상 A/S : 품질 보증기간 내에 제품 자체 성능 상의하자 및 불량 발생 시. 3.
- Seite 17 Memo...
- Seite 18 Memo...
- Seite 19 Memo...
- Seite 20 www.zalman.com...


