Werbung
Quicklinks
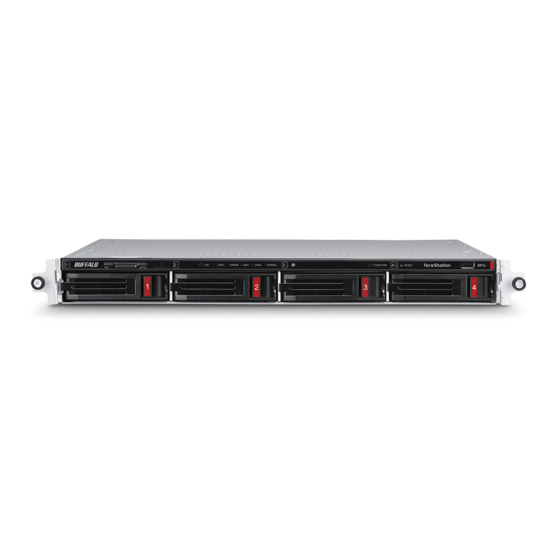
TeraStation™ 3020
TS3420RN Quick Setup Guide
Hardware Installation
EN
1 Connect the power cable to the TeraStation's power connector and the outlet.
2 Connect the Ethernet cable to the LAN port of both the TeraStation and switch. Make sure
the Ethernet cable clicks when inserted.
3 Turn the TeraStation on. Refer to the "Initial Setup" section below to start configuring the
TeraStation.
Hardware-Installation
DE
1 Schließen Sie das Netzkabel an den Stromanschluss der TeraStation und an die Steckdose
an.
2 Schließen Sie das Ethernet-Kabel an den LAN-Anschluss der TeraStation und des Switches
an. Stellen Sie sicher, dass das Ethernet-Kabel beim Einstecken hörbar klickt.
3 Schalten Sie die TeraStation ein. Schlagen Sie unten im Abschnitt „Ersteinrichtung" nach,
um mit der Konfiguration der TeraStation zu beginnen.
Installation du matériel
FR
1 Connectez le câble d'alimentation à la fiche d'alimentation de la TeraStation et à la prise
de courant.
2 Connectez le câble Ethernet aux ports LAN de la TeraStation et du scotch. Vous entendrez
un déclic lors que le câble Ethernet est bien branché.
3 Allumez la TeraStation. Reportez-vous à la section « Configuration initiale » ci-dessous
pour commencer à configurer la TeraStation.
Initial Setup
EN
1 Download the NAS Navigator2 software from http://d.buffalo.jp/TS3420RN/. Your
computer must be connected to the Internet to download NAS Navigator2.
2 Unzip the downloaded file and double-click NASNaviInst.exe in the extracted folder. NAS
Navigator2 will be installed.
3 Double-click the NAS Navigator2 icon (
TeraStation's icon and click Properties, then set the TeraStation's IP address.
4 Right-click the TeraStation's icon again and select Settings. Settings will open.
5 Enter the admin username and password, then click OK to log in to Settings. We
recommend that you change the password after you log in for the first time. Until it is
changed, the default username is "admin" and the password is "password".
6 Once you log in, step through the wizard to finish initial setup.
After finishing initial setup, your usage environment information, such as the number of
shared folders on the TeraStation, will automatically be sent to Buffalo. If you don't want
this function, disable update notifications. For more information on this or other functions,
refer to the TeraStation's user manual, available from http://d.buffalo.jp/TS3420RN/.
Ersteinrichtung
DE
1 Laden Sie die NAS Navigator2-Software unter http://d.buffalo.jp/TS3420RN/ herunter. Ihr
Computer muss mit dem Internet verbunden sein, um NAS Navigator2 herunterladen zu
können.
2 Entpacken Sie die heruntergeladene Datei und doppelklicken Sie im extrahierten Ordner
auf [NASNaviInst.exe]. NAS Navigator2 wird installiert.
3 Doppelklicken Sie auf das NAS Navigator2-Symbol (
Klicken Sie mit der rechten Maustaste auf das TeraStation-Symbol und klicken Sie auf
[Eigenschaften]. Legen Sie dann die IP-Adresse der TeraStation fest.
4 Klicken Sie mit der rechten Maustaste auf das TeraStation-Symbol in NAS Navigator2, und
klicken Sie anschließend auf [Öffnen Sie die Webeinstellungen]. Die Einstellungen werden
geöffnet.
5 Geben Sie den Benutzernamen und das Kennwort des Administratorkontos ein, und
klicken Sie auf [OK], um sich bei den Einstellungen anzumelden. Wir empfehlen, das
Administratorkennwort zu ändern. Bis es geändert wird, lautet der standardmäßige
Benutzername „admin" und das Kennwort „password".
6 Melden Sie sich an und führen Sie die Schritte im Assistenten aus, um das erste Setup zu
konfigurieren.
Nach Abschluss der Ersteinrichtung werden Ihre Anwendungsumgebungsinformationen,
z. B. die Anzahl an freigegebenen Ordnern auf der TeraStation, automatisch
an Buffalo gesendet. Wenn Sie dies nicht möchten, deaktivieren Sie die
Aktualisierungsbenachrichtigung. Weitere Informationen zu dieser und anderen Funktionen
finden Sie im TeraStation-Benutzerhandbuch unter http://d.buffalo.jp/TS3420RN/.
July 2019
a.
b.
c.
) to open NAS Navigator2. Right-click the
), um NAS Navigator2 zu öffnen.
Installazione Hardware
IT
1 Collegare il cavo di alimentazione al connettore di alimentazione della TeraStation e alla
presa.
2 Collegare il cavo Ethernet alla porta LAN della TeraStation e all'interruttore. Assicurarsi
che il cavo Ethernet scatti quando viene inserito.
3 Accendere la TeraStation. Fare riferimento alla sezione sottostante "Configurazione
iniziale" per iniziare a configurare la TeraStation.
Instalación del hardware
ES
1 Conecte el cable de alimentación al conector de alimentación de la TeraStation y a la
toma de corriente.
2 Conecte el cable Ethernet al puerto LAN de la TeraStation y del conmutador. Asegúrese
de que el cable Ethernet haga clic cuando lo enchufe.
3 Encienda la TeraStation. Consulte la sección "Configuración inicial" de más adelante para
empezar a configurar la TeraStation.
Installation av hårdvara
SV
1 Anslut strömkabeln till TeraStationens strömkontakt och uttaget.
2 Anslut Ethernet-kabeln till LAN-porten för både TeraStation och strömbrytaren.
Kontrollera att du hör ett klick när Ethernet-kabeln ansluts.
3 Slå på TeraStation. Se avsnittet "Grundinstallation" nedan för att påbörja konfigurationen
av TeraStation.
Laitteen asentaminen
FI
1 Liitä virtajohto TeraStationin virtaliittimeen ja pistorasiaan.
2 Liitä ethernet-kaapeli sekä TeraStationin että kytkimen LAN-porttiin. Varmista, että
ethernet-kaapeli napsahtaa paikoilleen.
3 Kytke TeraStation päälle. Aloita TeraStationin määritysten tekeminen alla olevan
osion "Alkuasennus" mukaisesti.
ZH-TW
硬體安裝
1 將電纜線連接到 TeraStation 的電源接頭和插座。
2 將乙太網路纜線連接到 TeraStation 和交換器的 LAN 連接埠。插入纜線時,請確認乙太網路
纜線發出「喀嚓」聲。
3 開啟 TeraStation。請參閱下方的 "初始設定" 區段,開始設定 TeraStation。
Configuration initiale
FR
1 Téléchargez le logiciel NAS Navigator2 sur le site http://d.buffalo.jp/TS3420RN/. Votre
ordinateur doit être connecté à Internet pour pouvoir télécharger NAS Navigator2.
2 Décompressez le fichier téléchargé et double-cliquez sur [NASNaviInst.exe] dans le
dossier qui a été extrait. L'installation du logiciel NAS Navigator2 démarrera.
3 Double-cliquez sur l'icône NAS Navigator2 (
clic droit sur l'icône de la TeraStation et sélectionnez [Propriétés], puis définissez l'adresse
IP de la TeraStation.
4 Effectuez un clic-droit sur l'icône de la TeraStation dans le NAS Navigator2 et sélectionnez
[Ouvrir les paramètres Web]. Les Réglages s'ouvrent.
5 Pour vous connecter aux Réglages, saisissez le nom d'utilisateur et le mot de passe
administrateur, puis cliquez sur [OK]. Il est recommandé de modifier le mot de passe
administrateur. Par défaut, le nom d'utilisateur est « admin » et le mot de passe
« password ».
6 Une fois connecté, suivez les étapes de l'assistant pour terminer la configuration initiale.
Après avoir terminé la configuration initiale, les informations sur votre environnement
d'utilisation, telles que le nombre de dossiers partagés sur la TeraStation, seront
automatiquement envoyées à Buffalo. Si vous ne le souhaitez pas, désactivez la notification
des mises à jour. Pour plus d'informations sur ce sujet ou sur d'autres fonctions, consultez le
manuel d'utilisation de la TeraStation, disponible à l'adresse http://d.buffalo.jp/TS3420RN/.
Configurazione iniziale
IT
1 Scaricare il software NAS Navigator2 da http://d.buffalo.jp/TS3420RN/. Il computer deve
essere connesso a Internet per scaricare NAS Navigator2.
2 Decomprimere il file scaricato e fare doppio click su [NASNaviInst.exe] nella cartella
estratta. NAS Navigator2 sarà installato.
3 Cliccare due volte sull'icona di NAS Navigator2 (
destro sull'icona della TeraStation, poi su [Proprietà], e quindi impostare l'indirizzo IP
della TeraStation.
4 Fare clic con il tasto destro sull'icona della TeraStation sul NAS Navigator2 e selezionare
[Apri impostazioni Web]. Si apriranno le Impostazioni.
5 Inserire nome utente e la password di amministratore, quindi cliccare su [OK] per
accedere a Impostazioni. Si consiglia di cambiare la password di amministratore. Finché
non cambiano, il nome utente e la password predefiniti sono, rispettivamente "admin"
e "password".
6 Dopo aver effettuato il login, seguire la procedura di configurazione guidata per
completare l'installazione iniziale.
Dopo aver completato la configurazione iniziale, le informazioni sull'ambiente di utilizzo,
come il numero di cartelle condivise sulla TeraStation, saranno inviate automaticamente
a Buffalo. Se non si desidera questa funzione, disattivare le notifiche degli aggiornamenti.
Per maggiori informazioni su questa o su altre funzioni, fare riferimento al manuale utente
di TeraStation, disponibile su http://d.buffalo.jp/TS3420RN/.
) pour lancer NAS Navigator2. Faites un
) per avviarlo. Cliccare con il tasto
Werbung

Verwandte Anleitungen für Buffalo TeraStation 3020 Serie


Inhaltszusammenfassung für Buffalo TeraStation 3020 Serie
- Seite 1 After finishing initial setup, your usage environment information, such as the number of « password ». shared folders on the TeraStation, will automatically be sent to Buffalo. If you don’t want 6 Une fois connecté, suivez les étapes de l’assistant pour terminer la configuration initiale.
- Seite 2 6 När du loggar in ska du gå igenom guiden för att slutföra den initiala installationen. Efter slutförande av grundinställningarna kommer din information om användningsmiljön, såsom antal delade mappar på TeraStation, automatiskt att skickas till Buffalo. Om du inte vill använda den här funktionen ska du inaktivera uppdateringsmeddelandet. För mer information om detta eller andra funktioner, se bruksanvisningen för TeraStation på...