Herunterladen Inhalt Inhalt Diese Seite drucken
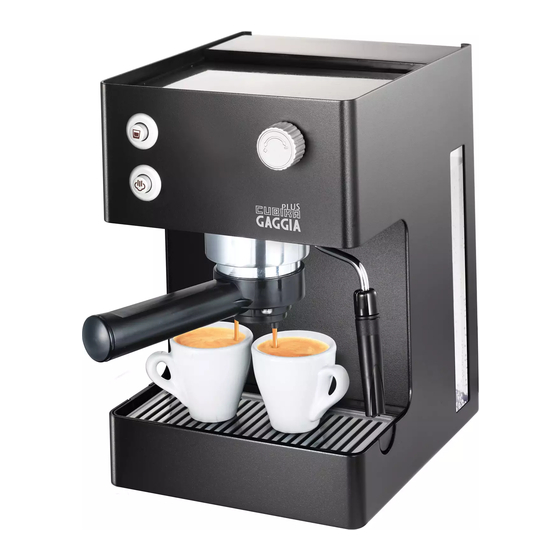
Gaggia Cubika Plus Bedienungsanleitung
Vorschau ausblenden Andere Handbücher für Cubika Plus:

Werbung

Verfügbare Sprachen
  • DE

Verfügbare Sprachen

  • DEUTSCH, seite 22
All manuals and user guides at all-guides.com
ISTRUZIONI PER L'USO
OPERATING INSTRUCTIONS
MODE D'EMPLOI
BEDIENUNGSANLEITUNG
INSTRUÇÕES PARA O USO
INSTRUCCIONES PARA EL USO
GEBRUIKSAANWIJZING
INSTRUKCJE OBSŁUGI
LEGGERE ATTENTAMENTE QUESTE ISTRUZIONI D'USO PRIMA DI UTILIZZARE LA MACCHINA.
READ THESE OPERATING INSTRUCTIONS CAREFULLY BEFORE USING THE MACHINE.
LIRE ATTENTIVEMENT CES INSTRUCTIONS AVANT D'UTILISER LA MACHINE.
DIESE BEDIENUNGSANLEITUNG IST VOR DEM ERSTEN GEBRAUCH DER MASCHINE AUFMERKSAM ZU LESEN.
LER ATENTAMENTE ESTAS INSTRUÇÕES PARA O USO ANTES DE USAR A MÁQUINA.
LÉANSE ATENTAMENTE LAS SIGUIENTES INSTRUCCIONES DE USO ANTES DE UTILIZAR LA MÁQUINA.
LEES DEZE INSTRUCTIES AANDACHTIG DOOR VOORDAT U HET APPARAAT IN GEBRUIK NEEMT.
PRZECZYTAĆ UWAŻNIE NINIEJSZE INSTRUKCJE OBSŁUGI PRZED UŻYTKOWANIEM URZĄDZENIA.

Werbung

Inhaltsverzeichnis
loading

Inhaltszusammenfassung für Gaggia Cubika Plus

  • Seite 1 All manuals and user guides at all-guides.com ISTRUZIONI PER L'USO OPERATING INSTRUCTIONS MODE D’EMPLOI BEDIENUNGSANLEITUNG INSTRUÇÕES PARA O USO INSTRUCCIONES PARA EL USO GEBRUIKSAANWIJZING INSTRUKCJE OBSŁUGI LEGGERE ATTENTAMENTE QUESTE ISTRUZIONI D'USO PRIMA DI UTILIZZARE LA MACCHINA. READ THESE OPERATING INSTRUCTIONS CAREFULLY BEFORE USING THE MACHINE. LIRE ATTENTIVEMENT CES INSTRUCTIONS AVANT D’UTILISER LA MACHINE.
  • Seite 2 All manuals and user guides at all-guides.com 20 cm 8 in 20 cm 8 in 20 cm 8 in Fig.A - Abb.A - Afb.A - Rys.A • 2 •...
  • Seite 3 All manuals and user guides at all-guides.com Fig.1 - Abb.1 - Afb.1 - Rys.1 Fig.2 - Abb.2 - Afb.2 - Rys.2 Fig.3 - Abb.3 - Afb.3 - Rys.3 Fig.4 - Abb.4 - Afb.4 - Rys.4 Fig.5 - Abb.5 - Afb.5 - Rys.5 Fig.6 - Abb.6 - Afb.6 - Rys.6 Fig.7 - Abb.7 - Afb.7 - Rys.7 Fig.8 - Abb.8 - Afb.8 - Rys.8...
  • Seite 4 All manuals and user guides at all-guides.com Fig.13 - Abb.13 - Afb.13 - Rys.13 Fig.14 - Abb.14 - Afb.14 - Rys.14 Fig.15 - Abb.15 - Afb.15 - Rys.15 Fig.16 - Abb.16 - Afb.16 - Rys.16 Fig.17 - Abb.17 - Afb.17 - Rys.17 Fig.18 - Abb.18 - Afb.18 - Rys.18 Fig.19 - Abb.19 - Afb.19 - Rys.19 Fig.20 - Abb.20 - Afb.20 - Rys.20...
  • Seite 5: Dati Tecnici

    All manuals and user guides at all-guides.com GENERALITÀ DATI TECNICI La macchina per caffè è indicata per la preparazione Il costruttore si riserva il diritto di modifi care le caratteri- di 1 o 2 tazze di caffè espresso ed è dotata di un tubo stiche tecniche del prodotto.
  • Seite 6 All manuals and user guides at all-guides.com caffè si consiglia quanto segue: Alimentazione di corrente • Scegliere un piano d’appoggio ben li vel la to; Collegare la macchina per caffè soltanto ad una presa • Scegliere un ambiente suf fi cien te men te illuminato, igie- di corrente adeguata.
  • Seite 7: Installazione

    All manuals and user guides at all-guides.com il tubo d'aspirazione dell’acqua. INSTALLAZIONE • (Fig.4) - Sciacquare il serbatoio e riempirlo con ac qua fre sca potabile evitando di immetterne una quantità Per la propria sicurezza e quella di ter zi at te ner si eccessiva.
  • Seite 8: Scelta Del Tipo Di Caf Fè - Con Si Gli

    All manuals and user guides at all-guides.com • (Fig.12) - Ruotare il portafi ltro da si ni stra verso destra fi no portafi ltro “Cre ma” (que sta operazione si rende ne ces sa ria al suo bloccaggio. Lasciare la presa dal ma ni co del porta- solo per il primo caffè).
  • Seite 9: Acqua Calda

    All manuals and user guides at all-guides.com verso l’alto per rendere uniforme il riscaldamento. AC QUA CALDA • Al termine, chiudere il rubinetto (3); prelevare la tazza con il latte montato. Pericolo di scottature! All’inizio dell’erogazione • (Fig.19) - Premere nuovamente l’interruttore va po re posso no ve ri fi...
  • Seite 10 Si consiglia L’adeguata raccolta differenziata per l’avvio successivo d'utilizzare il decalcifi cante Gaggia. dell’apparecchiatura dismessa al riciclaggio, al tratta- mento e allo smaltimento ambientalmente compatibile Attenzione! Non utilizzare in nessun caso l’aceto contribuisce ad evitare possibili effetti negativi sull’am-...
  • Seite 11 All manuals and user guides at all-guides.com Guasto Cause possibili Rimedio Macchina non collegata alla rete La macchina non si ac cen de. Collegare la macchina alla rete elettrica. elettrica. La pompa è molto ru mo ro sa. Manca acqua nel ser ba to io. Rabboccare con acqua.(par.4.4).
  • Seite 12 All manuals and user guides at all-guides.com DICHIARAZIONE DI CONFORMITA' CE EC 2006/95, EC 2004/108, EC 1992/31, EC 1993/68 Gaggia s.p.a. Strada prov. per Abbiategrasso, snc 20087 Robecco sul Naviglio - Milano . Italy dichiariamo sotto la nostra responsabilità che il prodotto :...
  • Seite 13: Important Safeguards

    All manuals and user guides at all-guides.com IMPORTANT SAFEGUARDS When using electrical appliances, basic safety precautions should always be followed, including the following: 1. Read all instructions. 2. Do not touch hot surfaces. Use handles or knobs. 3. To protect against fire, electric shock and injury to persons do not immerse cord, plugs, or appliance in water or other liquid.
  • Seite 14 All manuals and user guides at all-guides.com INSTRUCTIONS FOR THE POWER SUPPLY CORD A A short power-supply cord is provided to reduce risks of tangling or tripping over a longer cord. B Longer extension cords are available and may be used if care is exercised in their use. If a long extension cord is used: 1 the marked electrical rating of the extension cord should be at least as great as the electrical rating of the appliance.
  • Seite 15: General Information

    All manuals and user guides at all-guides.com GENERAL INFORMATION TECHNICAL DATA This coffee machine is made for brewing 1 or 2 cups of The manufacturer reserves the right to make changes to espresso coffee and features a swivel steam and hot the technical specifi...
  • Seite 16: Installation

    All manuals and user guides at all-guides.com Power supply Storing the Machine Only connect the coffee machine to a suitable socket. If the machine is to remain out of use for a long time, turn The voltage must correspond to the indication on the it off and unplug it from the socket.
  • Seite 17 All manuals and user guides at all-guides.com The coffee machine is now ready to be connected to the • Push the brew button (15) and close the hot water/steam power supply. knob (3) by turning it clockwise. Remove the container. Note: It is recommended that machine parts be The machine is now ready to brew coffee and dispense washed before their fi...
  • Seite 18: Hot Water

    All manuals and user guides at all-guides.com The speed of coffee dispensing can be modifi ed by Note for cleaning: Keep the fi lter of the Portafi lter slightly changing the amount of coffee in the fi lter and/or clean, by removing and washing it with drinking using a different coffee grind.
  • Seite 19: Descaling Cycle

    You can use a non-toxic and/or non-harmful descaling product for coffee machines (com- Note: If it is not possible to dispense steam as mercially available). We recommend using Gaggia described, prime the circuit as explained in sec- descaling solution. tion 4.5 and then repeat the steps.
  • Seite 20 All manuals and user guides at all-guides.com indicates that this product may not be treated as environment and human health, which could otherwise household waste. Instead it shall be handed over to the be caused by inappropriate waste handling of this applicable collection point for the recycling of electrical product.
  • Seite 21: Ec Declaration Of Conformity

    All manuals and user guides at all-guides.com EC DECLARATION OF CONFORMITY EC 2006/95, EC 2004/118, EC 1992/31, EC 1993/68 Gaggia s.p.a. We : Strada prov. per Abbiategrasso, snc 20087 Robecco sul Naviglio - Milano . Italy declare under our responsibility that the product :...
  • Seite 22: Technische Daten

    All manuals and user guides at all-guides.com ALLGEMEINES TECHNISCHE DATEN Die Kaffeemaschine eignet sich für die Zubereitung von Der Hersteller behält sich das Recht vor, technische 1 oder 2 Tassen Espresso und ist mit einem drehba- Änderungen am Produkt vorzunehmen. ren Rohr für die Dampf- und die Heißwasserausgabe ausgestattet.
  • Seite 23 All manuals and user guides at all-guides.com tenz verwendet zu werden, es sei denn, sie werden von abgezogen werden. einer Person überwacht, die für ihre Sicherheit verant- Darüber hinaus abwarten, bis die Maschine abgekühlt ist. wortlich ist oder sie werden im Gebrauch der Maschine Die Maschine keinesfalls in Wasser tauchen! geschult.
  • Seite 24 All manuals and user guides at all-guides.com • Den Stecker in eine Wandsteckdose mit geeigneter Filteradapter für Kaffeepads Spannung einstecken. Filterhalter “Crema” Leuchtschalter Kaffeeausgabe Leuchtschalter Dampfausgabe Wassertank Schalter EIN/AUS • (Abb. 1) - Den Deckel des Wassertanks (4) abnehmen. • (Abb. 2) - Den Wasseransaugschlauch anheben und den AUFSTELLUNG Wassertank (5) herausnehmen;...
  • Seite 25 All manuals and user guides at all-guides.com sertank der Maschine eine ausreichende Menge Wasser Betrieb mit Kaffeepads enthält. • (Abb. 9-A) - Den Filter für den gemahlenen Kaffee (11) • Warten, bis die Kontrolllampe der Taste für die Kaffee- aus dem Filterhalter "Crema" (14) herausnehmen, indem ausgabe (15) "Maschine bereit"...
  • Seite 26: Auswahl Der Kaffeesorte - Empfeh

    All manuals and user guides at all-guides.com • (Abb. 19) - Den Dampschalter (16) drücken. Die Kontroll- AUSWAHL DER KAFFEESORTE - EMPFEH- lampe der Taste für die Kaffeeausgabe (15) erlischt. LUNGEN • Warten, bis die Kontrolllampe des Dampschalters (16) leuchtet; nun ist die Maschine für die Dampfausgabe Im Allgemeinen können alle handelsüblichen Kaffee- bereit.
  • Seite 27 All manuals and user guides at all-guides.com und/oder chemisch aggressive Produkte verwendet • (Abb. 7) - Die Maschine durch Drücken des Schalters werden. EIN/AUS (17) einschalten. • Es wird empfohlen, den Wassertank täglich zu reinigen • (Abb. 8) - Einen Behälter unter die Dampfdüse stellen. und mit frischem Trinkwasser zu füllen.
  • Seite 28 All manuals and user guides at all-guides.com Störung Mögliche Ursachen Abhilfe Die Maschine schaltet sich Die Maschine ist nicht an das Strom- Schließen Sie die Maschine an das nicht ein. netz angeschlossen. Stromnetz an. Die Pumpe ist sehr laut. Wasser im Tank fehlt. Füllen Sie Wasser nach (Abschn.
  • Seite 29 All manuals and user guides at all-guides.com KONFORMITÄTSERKLÄRUNG CE 2006/95/EG, 2004/108/EG, 1992/31/EG, 1993/68/EG Gaggia s.p.a. Wir: Strada prov. per Abbiategrasso, snc 20087 Robecco sul Naviglio - Milano . Italy erklären unter eigener Verantwortung, dass das Produkt: EINZELKAFFEEMASCHINE TYP : SIN 15XN auf das sich diese Erklärung bezieht, folgenden Normen entspricht:...
  • Seite 30 All manuals and user guides at all-guides.com IMPORTANT Lors de l’utilisation d’appareils électriques, il est indispensable de respecter toujours les précautions de sécurité principales, y compris les suivantes : 1. Lire toutes les instructions. 2. Ne pas toucher de surfaces chaudes. Utiliser les poignées ou les boutons. 3.
  • Seite 31 All manuals and user guides at all-guides.com INSTRUCTIONS SUR LE CORDON ELECTRIQUE A. Votre appareil est muni d’un cordon électrique court ou d’un cordon d’alimentation détachable, afin d’éviter de trébucher ou de s’emmêler avec un câble plus long. B. Des cordons détachables plus longs ou bien des rallonges sont disponibles et ne peuvent être utilisés que si l’on prend toutes les précautions d’usage.
  • Seite 32: Données Techniques

    All manuals and user guides at all-guides.com GÉNÉRALITÉS DONNÉES TECHNIQUES Cette machine à café est appropriée pour la préparation Le constructeur se réserve le droit d'apporter des modifi - d’une ou de deux tasses de café expresso. Elle est cations aux caractéristiques techniques du produit. équipée d’une buse orientable pour la distribution de la vapeur et de l’eau chaude.
  • Seite 33 All manuals and user guides at all-guides.com Alimentation secteur Espace pour l’utilisation et l’entretien La machine à café ne peut être branchée que sur une pri- Pour un fonctionnement correct et effi cace de la machine se de courant appropriée. La tension doit correspondre à à...
  • Seite 34: Mise En Place

    All manuals and user guides at all-guides.com MISE EN PLACE Réservoir à eau • (Fig.1) - Enlever le couvercle du réservoir à eau (4). Pour votre sécurité et celle des tiers, s’en tenir scru- • (Fig.2) - Soulever le tuyau d'aspiration et extraire le puleusement aux «...
  • Seite 35 All manuals and user guides at all-guides.com • Laisser la prise de la poignée du porte-fi ltre « Crema ». Un Avec du café moulu système automatique va ramener légèrement la poignée • (Fig.9-A) - Introduire le fi ltre (11) dans le porte-fi ltre « vers la gauche.
  • Seite 36: Eau Chaude

    All manuals and user guides at all-guides.com Déplacer lentement le récipient du bas vers le haut, afi n EAU CHAUDE d'obtenir un réchauffage uniforme. • Une fois ce procédé terminé, fermer le robinet (3) et Danger de brûlures ! Au début de la distribution, prendre la tasse avec le lait émulsionné.
  • Seite 37 à la collecte sélective toxique et/ou non nocive. Nous recommandons l’emploi de cet appareil en vous conformant au mode de reprise de la solution détartrante Gaggia. mis en place dans votre commune (collecte ponctuelle des encombrants, déchèterie), ou en faisant appel au Attention ! Ne jamais utiliser de vinaigre pour service de reprise proposé...
  • Seite 38 All manuals and user guides at all-guides.com Panne Causes possibles Remède La machine ne se met pas en La machine n’est pas branchée sur le Brancher la machine sur le réseau marche réseau électrique. électrique. La pompe est très bruyante Manque d’eau dans le réservoir.
  • Seite 39: Déclaration Ce De Conformité

    All manuals and user guides at all-guides.com DÉCLARATION CE DE CONFORMITÉ CE 2006/95, CE 2004/108, CE 1992/31, CE 1993/68 Gaggia s.p.a. Nous : Strada prov. per Abbiategrasso, snc 20087 Robecco sul Naviglio - Milano . Italy déclarons sous notre responsabilité que le produit : MACHINE À...
  • Seite 40: Información De Carácter General

    All manuals and user guides at all-guides.com INFORMACIÓN DE CARÁCTER GENERAL DATOS TÉCNICOS La máquina de café prepara 1 o 2 tazas de café exprés El fabricante se reserva el derecho de modifi car las y dispone de un tubo orientable para el suministro del características técnicas del producto.
  • Seite 41 All manuals and user guides at all-guides.com Alimentación de corriente eléctrica Espacio para el uso y el mantenimiento Conectar la máquina de café sólo a una toma de co- Para un funcionamiento correcto de la máquina de café rriente adecuada. La tensión debe corresponder al valor se recomienda lo siguiente: indicado en la placa del aparato.
  • Seite 42: Instalación

    All manuals and user guides at all-guides.com INSTALACIÓN Depósito de agua • (Fig.1) - Retirar la tapa del depósito de agua (4). Para su seguridad y la seguridad de terceras personas • (Fig.2) - Levantar el tubo de aspiración y extraer el observar atentamente las “Normas de seguridad”...
  • Seite 43 All manuals and user guides at all-guides.com Este movimiento garantiza el perfecto funcionamiento del Con café molido portafi ltro “Crema”. • (Fig.9-A) - Introducir el fi ltro (11) en el portafi ltro “Crema” • (Fig.14) - Precalentar el portafi ltro “Crema” pulsando (14).
  • Seite 44: Agua Caliente

    All manuals and user guides at all-guides.com del reloj; mover lentamente el recipiente que contiene AGUA CALIENTE la leche de abajo para arriba para que la operación de calentamiento sea uniforme. ¡Riesgo de quemaduras! Al empezar el suministro • Al fi nal, cerrar el mando (3) y retirar la taza con la leche se pueden producir pequeñas salpicaduras de montada.
  • Seite 45: Eliminación Del Aparato

    Se aconseja el reciclaje de este producto, póngase en contacto con el uso del líquido descalcifi cante Gaggia. la administración de su ciudad, con su servicio de dese- chos del hogar o con la tienda donde compró el producto.
  • Seite 46 All manuals and user guides at all-guides.com Avería Posibles causas Solución Máquina no conectada a la red La máquina no se enciende. Conectar la máquina a la red eléctrica. eléctrica. La bomba es muy ruidosa. Falta agua en el depósito. Llenar con agua (apartado 4.4).
  • Seite 47: Declaración De Conformidad Ce

    All manuals and user guides at all-guides.com DECLARACIÓN DE CONFORMIDAD CE 2006/95 CE, 2004/108 CE, 1992/31 CE, 1993/68 CE Gaggia s.p.a. Nosotros, la empresa : Strada prov. per Abbiategrasso, snc 20087 Robecco sul Naviglio - Milano . Italy declaramos bajo nuestra responsabilidad que el producto : MÁQUINA DE CAFÉ...
  • Seite 48: Dados Técnicos

    All manuals and user guides at all-guides.com GENERALIDADES DADOS TÉCNICOS A máquina de café é indicada para a preparação de 1 ou O fabricante reserva-se o direito de alterar as caracterís- 2 chávenas de café expresso e é equipada com um tubo ticas técnicas do produto.
  • Seite 49 Nunca tente reparar uma máquina com avaria. estantes. Todas as reparações deverão ser realizados por um Serviço de Assistência Técnica autorizado. A Gaggia não Protecção de outras pessoas assume qualquer responsabilidade por reparações feitas Mantenha as crianças sob a supervisão, para evitar que fora destes Serviços.
  • Seite 50: Distribuição Do Café

    All manuals and user guides at all-guides.com INSTALAÇÃO Reservatório de água • (Fig.1) - Remova a tampa do reservatório de água (4). Para a sua segurança e a de terceiros, siga escrupulosa- • (Fig.2) - Levante o tubo de aspiração e retire o reservató- mente as “Normas de segurança”...
  • Seite 51 All manuals and user guides at all-guides.com • (Fig.14) - Pré-aqueça o porta-fi ltro “Crema” pressionando Com café moído o interruptor do café (15) a água começará a sair do • (Fig.9-A) - Introduza o fi ltro (11) no porta-fi ltro “Crema” porta-fi...
  • Seite 52: Água Quente

    All manuals and user guides at all-guides.com (3) rodando-o no sentido anti-horário; rode lentamente o ÁGUA QUENTE recipiente com o leite, de baixo para cima para tornar uniforme o aquecimento. Perigo de queimaduras! Durante o início da • No fi m, feche a torneira (3); retire a chávena com o leite distribuição podem-se verifi...
  • Seite 53 à venda. Aconselha-se a utilizar o forma adquada. Para obter informações mais detalhadas descalcifi cante da Gaggia. sobre a reciclagem deste produto, por favor contacte o gabinete da câmara municipal da sua cidade ou a loja Atenção! Nunca utilize o vinagre como descal-...
  • Seite 54 All manuals and user guides at all-guides.com Avaria Causas possíveis Solução A máquina não se liga. Máquina não ligada à rede eléctrica. Ligue a máquina à rede eléctrica. A bomba é muito ruidosa. Falta a água no reservatório. Abasteça com água (par.4.4). O indicador luminoso do interruptor (15) de “máquina pronta”...
  • Seite 55: Declaração De Conformidade Ce

    All manuals and user guides at all-guides.com DECLARAÇÃO DE CONFORMIDADE CE CE 2006/95, CE 2004/108, CE 1992/31, CE 1993/68 Gaggia s.p.a. Nós : Strada prov. per Abbiategrasso, snc 20087 Robecco sul Naviglio - Milano . Italy declaramos sob nossa inteira responsabilidade que o produto : MÁQUINA DE CAFÉ...
  • Seite 56: Technische Gegevens

    All manuals and user guides at all-guides.com ALGEMEEN TECHNISCHE GEGEVENS De koffi emachine is geschikt voor het zetten van 1 of De constructeur behoudt zich het recht voor om de tech- 2 kopjes espresso en is voorzien van een zwenkbaar nische eigenschappen van het product te wijzigen.
  • Seite 57 All manuals and user guides at all-guides.com • Kies een voldoende verlichte, hygiënische omgeving met Stroomvoeding een gemakkelijk toegankelijk stopcontact; Sluit de koffi emachine alleen aan op een geschikt • Zorg ervoor dat het apparaat op een minimumafstand van stopcontact. De spanning moet overeenstemmen met de wanden staat, zoals op de afbeelding is aangegeven de spanning die op het plaatje van het apparaat staat (Afb.
  • Seite 58 All manuals and user guides at all-guides.com INSTALLATIE Waterreservoir • (Afb.1) - Verwijder de deksel van het waterreservoir (4). Houd u voor uw eigen veiligheid en die van anderen strikt • (Afb.2) - Til het aanzuigbuisje op en verwijder het water- aan de “Veiligheidsvoorschriften”...
  • Seite 59 All manuals and user guides at all-guides.com links terug. Met gemalen koffi e Deze beweging garandeert een perfecte werking van de • (Afb.9-A) - Plaats het fi lter (11) in de “Crema” fi lterhouder “Crema” fi lterhouder. (14). • (Afb.14) - Verwarm de “Crema” fi lterhouder voor. Als op •...
  • Seite 60: Warm Water

    All manuals and user guides at all-guides.com • (Afb.19) - Druk opnieuw op de stoomschakelaar (16). WARM WATER • Vul het circuit zoals in par. 4.5 is beschreven om de machine operatief te maken. Gevaar voor brandwonden! Aan het begin van de afgifte kan wat heet water vrijkomen.
  • Seite 61 Wij raden u aan het ontkalkingsmiddel in verband met het recyclen van dit product, neemt u het van Gaggia te gebruiken. best contact op met de gemeentelijke instanties, het be- drijf of de dienst belast met de verwijdering van huishoud- Let op! Gebruik in geen geval azijn als ontkal- afval of de winkel waar u het product hebt gekocht.
  • Seite 62 All manuals and user guides at all-guides.com Storing Mogelijke oorzaken Oplossing De machine kan niet worden Machine niet aangesloten op het Sluit de machine op het elektriciteitsnet ingeschakeld. elektriciteitsnet. aan. De pomp maakt veel lawaai. Geen water in het reservoir. Voeg water toe (par.4.4).
  • Seite 63: Eg-Conformiteitsverklaring

    All manuals and user guides at all-guides.com EG CONFORMITEITSVERKLARING EG 2006/95, EG 2004/108, EG 1992/31, EG 1993/68 Gaggia s.p.a. Wij : Strada prov. per Abbiategrasso, snc 20087 Robecco sul Naviglio - Milano . Italy verklaren onder eigen verantwoordelijkheid dat het product:...
  • Seite 64: Informacje Ogólne

    All manuals and user guides at all-guides.com INFORMACJE OGÓLNE DANE TECHNICZNE Ekspres do kawy jest przeznaczony do przygotowywania Producent zastrzega sobie prawo do cech technicznych 1 lub 2 fi liżanek kawy espresso, i jest on wyposażonz w produktu. nastawną rurkę do przygotowywania pary i gorącej wody. Sterowania umieszczone na przedniej części urządzenia Napięcie nominalne –...
  • Seite 65 All manuals and user guides at all-guides.com czającego doświadczenia lub odpowiedniego przygoto- zanurzać nigdy urządzenia w wodzie! wania; może się to odbywać jedynie pod nadzorem osoby Jest surowo wzbronione przeprowadzanie interwencji odpowiedzialnej za bezpieczeństwo wyżej wymienionych wewnątrz urządzenia. osób oraz po uprzednim ich pouczeniu co do sposobu Nie używać...
  • Seite 66: Parzenie Kawy

    All manuals and user guides at all-guides.com INSTALACJA Pojemnik wody • (Rys.1) - Zdjąć pokrywę pojemnika wody (4). Dla własnego bezpieczeństwa oraz bezpieczeństwa • (Rys.2) - Podnieść rurkę zasysającą i wyciągnąć pojemnik innych osób zastosować się skrupulatnie do „Norm wody (5); uważać by nie uszkodzić rurki zasysającej bezpieczeństwa”...
  • Seite 67 All manuals and user guides at all-guides.com Ten ruch gwarantuje poprawne funkcjonowanie uchwytu Przy użyciu kawy mielonej fi ltra „Crema”. • (Rys.9-A) - Włożyć fi ltr (11) do uchwytu fi ltra “Crema” • (Rys.14) - Ogrzać wstępnie uchwyt fi ltra „Crema” naci- (14).
  • Seite 68: Gorąca Woda

    All manuals and user guides at all-guides.com spienionym mlekiem. GORĄCA WODA • (Rys.19) - Nacisnąć ponownie wyłącznik pary (16). • Przystąpić do napełnienia obwodu, tak jak to opisano w Niebezpieczeństwo poparzeń! Na początku parze- par.4.5 by urządzenie stało się operatywne. nia mogą...
  • Seite 69 Zaleca się stosowanie tywnego zbioru odpadów elektrycznych i elektronicz- odwapniaczy Gaggia. nych, lub dostarczyć ponownie sprzedawcy w momencie zakupu nowego urządzenia tego samego typu. Uwaga! Nie używać w żadnym wypadku octu Odpowiedni selektywny zbiór odpadów i wysłanie do ry-...
  • Seite 70 All manuals and user guides at all-guides.com Usterka Możliwe przyczyny Możliwe rozwiązanie Urządzenie nie jest połączone do sieci Urządzenie nie włącza się. Podłączyć urządzenie do sieci elektycznej. eletrycznej. Pompa jest bardzo hałaśliwa. Brakuje wody w pojemniku. Uzupełnić wodę. (par.4.4). Lampka kontrolna wyłącznika (15) Zaczekać...
  • Seite 71 All manuals and user guides at all-guides.com DEKLARACJA ZGODNOŚCI WE 2006/95 WE, 2004/108 WE, 1992/31 WE, 1993/68 WE Gaggia s.p.a. Strada prov. per Abbiategrasso, snc 20087 Robecco sul Naviglio - Milano . Italy niniejszym deklarujemy, ponosząc za to pełną odpowiedzialność, że produkt:...
  • Seite 72 All manuals and user guides at all-guides.com GAGGIA S.p.a. si riserva il diritto di apportare tutte le modifi che ritenute necessarie. GAGGIA S.p.a. reserves the right to carry out all modifi cations which might be considered necessary. GAGGIA S.p.a. hält das Recht alle notwendigen Aenderungen durchzuführen.

Inhaltsverzeichnis