
Verwandte Anleitungen für Klarstein VITA PURE 2G


Inhaltszusammenfassung für Klarstein VITA PURE 2G
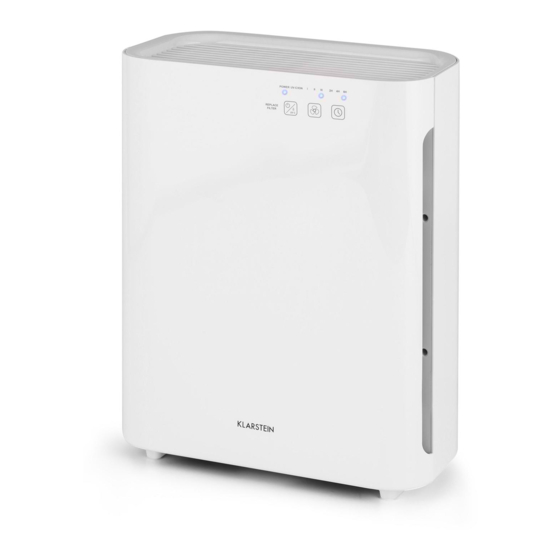
- Seite 1 VITA PURE 2G Luftreiniger Air Purifier Purificador del aire Purificateur d‘air Depuratore dell‘aria 10028709 10028710 www.klarstein.com...
-
Seite 3: Inhaltsverzeichnis
Sehr geehrter Kunde, wir gratulieren Ihnen zum Erwerb Ihres Gerätes. Lesen Sie die folgenden Hinweise sorgfältig durch und befolgen Sie diese, um möglichen Schäden vorzubeugen. Für Schäden, die durch Missachtung der Hinweise und unsachgemäßen Gebrauch entstehen, übernehmen wir keine Haftung. Scannen Sie den folgenden QR-Code, um Zugriff auf die aktuellste Bedienungsanleitung und weitere Informationen rund um das Produkt zu erhalten. -
Seite 4: Sicherheitshinweise
SICHERHEITSHINWEISE • Lesen Sie sich alle Hinweise durch und bewahren Sie die Anleitung zum Nachschlagen gut auf. • Um die Gefahr eines Stromschlags bei einer Störung oder Fehlfunktion zu verringern, muss das Gerät an eine geerdete Steckdose angeschlossen werden. Falls Sie sich nicht sicher sind, ob Ihre Steckdose den Anforderungen entspricht, lassen Sie sich von einem Elektriker beraten. -
Seite 5: Geräteübersicht
GERÄTEÜBERSICHT Lüftungsschlitze Vordere Abdeckung 3-in-1-Filter (mit Vorfilter, HEPA- UV-C-Lampe mit Filter, Aktivkohlefilter) Photokatalysator-Filter Bedienfeld Gerätebasis Hinweis: Der Ionisator befindet sich im Inneren des Geräts in der Nähe des Luftauslasses. FILTERÜBERSICHT • Vorfilter: Entfernt grobe Staubpartikel und Allergene. • HEPA-Filter: Entfernt bis zu 99,97 % Staub, Rauchpartikel, Pollen und Allergene. -
Seite 6: Inbetriebnahme Und Bedienung
INBETRIEBNAHME UND BEDIENUNG Vor dem ersten Betrieb • Nehmen Sie das Gerät vorsichtig aus der Verpackung und entfernen Sie das komplette Verpackungsmaterial. • Stellen Sie das Gerät auf einen stabilen, ebenen Untergrund. Lassen Sie um das Gerät herum mindestens 30 cm Platz, damit die Luft ausreichend zirkulieren kann. -
Seite 7: Reinigung Und Pflege
REINIGUNG UND PFLEGE Filterwechsel Sobald die POWER-leuchte grün blinkt, ist es an der Zeit den Filter zu wechseln. Wechseln Sie den Filter gemäß der folgenden Anleitung. Halten Sie nach dem Filterwechsel die POWER/UV-C-Taste 5 Sekunden lang gedrückt, um einen Neustart durchzuführen. -
Seite 8: Fehlerbehebung
FEHLERBEHEBUNG Problem Mögliche Ursache Unzureichender Überprüfen Sie ob die Filter zugesetzt sind. Luftfluss. Überprüfen Sie ob die Lüftungsschlitze verstopft sind. Das Gerät Überprüfen Sie den Stromanschluss und die Sicherungen. startet nicht. Überprüfen Sie, ob die vordere Abdeckung richtig sitzt. Überprüfen Sie, ob die Filter-Kombination richtig sitzt. Laute Überprüfen Sie ob Fremdkörper den Ventilator blockieren. - Seite 9 Dear Customer, Congratulations on purchasing this device. Please read the following instructions carefully and follow them to prevent possible damages. We assume no liability for damage caused by disregard of the instructions and improper use. Scan the QR code to get access to the latest user manual and more product information.
-
Seite 10: Safety Instructions
SAFETY INSTRUCTIONS • Read all instructions and keep this manual in a safe place for future reference. • To reduce the risk of electric shock in the event of a malfunction or failure, the instrument must be connected to a grounded outlet. If you are not sure whether your outlet meets the requirements, consult an electrician for help. -
Seite 11: Device Overview
DEVICE OVERVIEW Ventilation slots Front cover 3-in-1 filter (with pre-filter, HEPA UV-C lamp with photocatalyst filter, activated carbon filter) filter Control panel Device base Note: The ionizer is located inside the unit near the air outlet. FILTER OVERVIEW • Pre-filter: Removes coarse dust particles and allergens. •... -
Seite 12: Commissioning And Operation
COMMISSIONING AND OPERATION Before the first operation • Carefully remove the unit from its packaging and remove all packaging material. • Place the device on a stable, level surface. Leave at least 30 cm of space around the device so that the air can circulate sufficiently. Make sure that the ventilation slots are not covered. -
Seite 13: Cleaning And Maintenance
CLEANING AND MAINTENANCE Changing the filter As soon as the POWER light flashes green, it is time to change the filter. Change the filter according to the following instructions. After changing the filter, press and hold the POWER/UV-C key for 5 seconds to restart. After that, the light should stop flashing. -
Seite 14: Troubleshooting
TROUBLESHOOTING Problem Possible cause Insufficient air Check if the filters are clogged. flow. Check whether the ventilation slots are clogged. The unit does Check the power connection and the fuses. not start. Check if the front cover is properly seated. Check if the filter combination is properly seated. -
Seite 15: Datos Técnicos
Estimado cliente: Le felicitamos por la adquisición de este producto. Lea atentamente el siguiente manual y siga cuidadosamente las instrucciones de uso con el fin de evitar posibles daños. La empresa no se responsabiliza de los daños ocasionados por un uso indebido del producto o por haber desatendido las indicaciones de seguridad. -
Seite 16: Indicaciones De Seguridad
INDICACIONES DE SEGURIDAD • Lea atentamente estas indicaciones y conserve este manual para consultas posteriores. • Para evitar riesgo de descarga eléctrica causada por un fallo en el funcionamiento del aparato, este tendrá que estar conectado a una toma de corriente con toma de tierra. Si no está seguro de que se cumpla esta condición, pida asesoramiento a un técnico electricista. -
Seite 17: Descripción Del Aparato
DESCRIPCIÓN DEL APARATO Ranura de ventilación Carcasa delantera Filtro 3 en 1 (con prefiltro, filtro Luz UV-C con filtro foto HEPA y filtro de carbón activo) catalizador Panel de control Base del aparato Nota: El ionizador se encuentra dentro de la unidad cerca de la salida de aire. DESCRIPCIÓN DEL FILTRO •... -
Seite 18: Puesta En Marcha Y Uso
PUESTA EN MARCHA Y USO Antes del primer uso • Retire el aparato del embalaje con cuidado y deshágase del material de embalaje. • Coloque el aparato en una superficie plana y estable. Sitúe el aparato a una distancia mínima de 30 cm de otros objetos o paredes para que el aire pueda circular correctamente. -
Seite 19: Limpieza Y Cuidado
LIMPIEZA Y CUIDADO Cambio de filtro Cuando se ilumine la luz verde de POWER, necesitará cambiar el filtro. Cambie el filtro regularmente siguiendo estas instrucciones. Tras el cambio de filtro, mantenga pulsado el botón POWER/UV-C durante cinco segundos para reiniciar el aparato. -
Seite 20: Resolución De Problemas
RESOLUCIÓN DE PROBLEMAS Problema Posible causa Circulación de Compruebe si el filtro está colocado. aire insuficiente. Compruebe si las ranuras de ventilación están obstruidas. El aparato no se Compruebe la conexión eléctrica y los fusibles. enciende. Compruebe si la carcasa frontal está bien colocada. Compruebe si el filtro combinado está... -
Seite 21: Fiche Technique
Chère cliente, cher client, Toutes nos félicitations pour l’acquisition de ce nouvel appareil. Veuillez lire attentivement et respecter les instructions de ce mode d’emploi afin d’éviter d’éventuels dommages. Le fabricant ne saurait être tenu pour responsable des dommages dus au non-respect des consignes de sécurité et à... -
Seite 22: Consignes De Sécurité
CONSIGNES DE SÉCURITÉ • Lire attentivement les consignes suivantes et conserver ce mode d’emploi pour une consultation ultérieure. • Pour éviter tout risque d’électrocution suite à une panne ou un dysfonctionnement, l’appareil doit être branché à une prise avec mise à terre. En cas de doute, consulter un électricien. -
Seite 23: Aperçu De L'appareil
APERÇU DE L’APPAREIL Fentes d’aération Panneau protecteur avant Filtre 3 en 1 (préfiltre, filtre Lampe UV-C avec filtre HEPA et filtre à charbon actif) photocatalyseur Panneau de commande Boîtier central Note: L‘ioniseur est situé à l‘intérieur de l‘appareil près de la sortie d‘air. APERÇU DES FILTRES •... -
Seite 24: Utilisation Et Fonctionnement
UTILISATION ET FONCTIONNEMENT Avant la première utilisation • Retirer avec précaution l’appareil de l’emballage et retirer tous les éléments d’emballage. • Installer l’appareil sur une surface stable et plane. Maintenir un espace libre d’au moins 30 cm autour de l’appareil pour que l’air puisse circuler correctement. -
Seite 25: Nettoyage Et Entretien
NETTOYAGE ET ENTRETIEN Changer le filtre HEPA Le filtre doit être changé dès que le témoin lumineux vert POWER se met à clignoter. Changer le filtre con- formément aux indications fournies à continuation. Une fois le filtre remplacé, maintenir la touche POWER/ UV-C enfoncée pendant 5 secondes pour redémarrer l’appareil. -
Seite 26: Résolution De Problèmes
RÉSOLUTION DE PROBLÈMES Problème Possibles causes Ventilation Vérifier l’état du filtre. insuffisante Vérifier que les fentes d’aération ne soient pas obstruées. L’appareil ne Vérifier le branchement électrique et les fusibles. s’allume pas. Vérifier que le cache protecteur avant soit correctement placé. Vérifier que les filtres soient bien en place. - Seite 27 Gentile cliente, La ringraziamo per aver acquistato il dispositivo. La preghiamo di leggere attentamente le seguenti istruzioni per l’uso e di seguirle per evitare possibili danni tecnici. Non ci assumiamo alcuna responsabilità per danni scaturiti da una mancata osservazione delle avvertenze di sicurezza e da un uso improprio del dispositivo.
-
Seite 28: Avvertenze Di Sicurezza
AVVERTENZE DI SICUREZZA • Leggere attentamente tutte le avvertenze di sicurezza e conservare il manuale per consultazioni future. • Per evitare il pericolo di scosse elettriche in caso di guasti o malfunzionamenti, collegare il dispositivo ad una presa dotata di messa a terra. In caso di dubbi, rivolgersi ad un elettricista. -
Seite 29: Descrizione Del Prodotto
DESCRIZIONE DEL PRODOTTO Fessure di aereazione Coperchio frontale Filtro 3 in 1 (con prefiltro, filtro Lampada UV-C con filtro HEPA, filtro a carbone attivo) fotocatalizzatore Pannello di controllo Base del dispositivo Nota: Lo ionizzatore è situato all‘interno dell‘unità vicino alla presa d‘aria. DESCRIZIONE DEI FILTRI •... -
Seite 30: Messa In Funzione E Utilizzo
MESSA IN FUNZIONE E UTILIZZO Avvertenze per il primo utilizzo • Togliere con cautela il dispositivo dalla confezione e rimuovere completamente il materiale d’imballaggio. • Collocare il dispositivo su una superficie stabile e piana. Lasciare intorno al dispositivo almeno 30 cm di spazio libero, affinché l’aria possa circolare liberamente. -
Seite 31: Pulizia E Manutenzione
PULIZIA E MANUTENZIONE Cambiare il filtro combinato Appena la spia POWER lampeggia ed è verde, cambiare il filtro combinato seguendo le istruzioni che seguono. Dopo aver sostituito il filtro, riavviare il dispositivo tenendo premuto per 5 secondi il tasto POWER/UV-C. Al termine di questa operazione, la spia POWER smette di lampeggiare. -
Seite 32: Risoluzione Dei Problemi
RISOLUZIONE DEI PROBLEMI Problema Causa possibile Flusso d’aria Controllare di aver inserito i filtri. insufficiente Assicurarsi che le fessure di aereazione non siano ostruite. Il dispositivo Controllare l’attacco alla corrente e i fusibili. non si avvia Controllare che il coperchio frontale sia inserito correttamente. Assicurarsi che il filtro combinato sia inserito correttamente.