Herunterladen Inhalt Inhalt Diese Seite drucken

Werbung

Verfügbare Sprachen
  • DE

Verfügbare Sprachen

  • DEUTSCH, seite 1
Luftreiniger
Air Cleaner
Purificador de aire
Purificateur d'air
Purificatore d´aria
10032001 10032002

Werbung

Inhaltsverzeichnis
loading

Inhaltszusammenfassung für Klarstein 10032001

  • Seite 1 Luftreiniger Air Cleaner Purificador de aire Purificateur d’air Purificatore d´aria 10032001 10032002...
  • Seite 3: Inhaltsverzeichnis

    Vor dem ersten Betrieb 7 Inbetriebnahme und Bedienung 7 Reinigung und Pflege 10 Fehlersuche und Fehlerbehebung 10 Hinweise zur Entsorgung 1 1 TECHNISCHE DATEN Artikelnummer 10032001, 10032002 Stromversorgung 220-240 V ~ 50 Hz Leistung 50 W KONFORMITÄTSERKLÄRUNG Hersteller: Chal-Tec GmbH, Wallstraße 16, 10179 Berlin, Deutschland.
  • Seite 4: Sicherheitshinweise

    SICHERHEITSHINWEISE • Lesen Sie sich alle Hinweise vor der Benutzung sorgfältig durch. • Verändern Sie das Gerät nicht. • Schließen Sie das Gerät nur an Steckdosen an, die der Spannung des Geräts entsprechen. • Verlegen Sie das Kabel so, dass keiner darüber fällt. Achten Sie darauf, dass das Kabel keine heißen Oberflächen berührt.
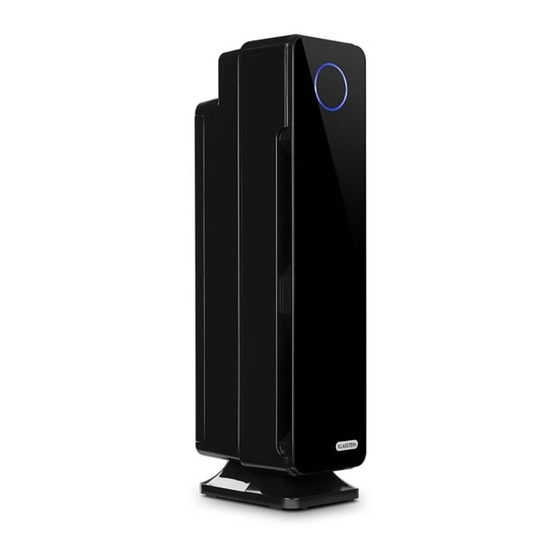
  • Seite 5: Geräteübersicht Und Bedienfeld

    GERÄTEÜBERSICHT UND BEDIENFELD Gerät Bedienfeld Blauer UV-C-Ring Basis Luftauslass Gehäuse Griff Verriegelungs-/ Entriegelungstaste (Für Filter und UV-Lampe) Kombifilter Lufteinlass Bedienfeld 10 Display 1 1 UV-C ein/aus 12 Lüftergeschwindigkeit 13 Timer einstellen 14 Filterwechsel-Anzeige 15 Ein/Aus-Taste...
  • Seite 6: Filtersystem

    FILTERSYSTEM Durch die Kombination von HEPA-Filter, Aktivkohlefilter und UV-Licht entfernet das Gerät effizient Allergene, Bakterien, Keime, Pilze und schlechte Gerüche aus der Luft. • Vorfilter: Erfasst anfängliche Staub- und Allergiepartikel. Hinweis: Vorfilter und Aktivkohlefilter sind zu einer Schicht kombiniert, die an den HEPA Filter anhängt. •...
  • Seite 7: Vor Dem Ersten Betrieb

    VOR DEM ERSTEN BETRIEB Stellen Sie das Gerät auf einen festen, ebene Untergrund. Damit die Luft ausreichend zirkulieren kann, lassen Sie um das Gerät herum mindestens 30 cm Platz zu allen Seiten. Achten Sie darauf, dass die Lüftungsöffnungen nicht blockiert werden.
  • Seite 8 Anzeigen und Töne • Filterwechsel-Anzeige: Wenn das HEPA-Licht auf dem Bedienfeld leuchtet und flackert, muss der Filter ersetzt werden. Ersetzen Sie den Filter wie bereits geschildert und drücken Sie dann die Timer-Taste für 3 Sekunden, um das System neu zu starten. •...
  • Seite 9 Lösen Sie die alte Lampe vorsichtig heraus, indem Sei sie mit einem sauberen Lappen greifen und herausziehen. HINWEIS: Die Lampe ist erst zu sehen, nachdem der metallschild entfernt wurde. Schieben Sie die neue Lampe vorsichtig in Schlitze oben am Gerät.
  • Seite 10: Reinigung Und Pflege

    REINIGUNG UND PFLEGE Das Gerät sollte mindestens einmal im Monat gereinigt werden. Der Vorfilter bzw. der Aktivkohlefilter, der an den HEPA-Filter angeschlossen ist, sollte jeden Monat gereinigt werden. Je nach Umgebungsbedingungen kann eine häufigere Reinigung erforderlich sein. Vor-/Aktivkohlefilter reinigen Reinigen Sie die Filter mit dem Bürstenaufsatz Ihres Staubsaugers. So lassen sich Flusen und Schmutz effektiv entfernen.
  • Seite 11: Hinweise Zur Entsorgung

    Problem Mögliche Ursache und Lösungsansatz Die Luft zirkuliert nicht. Ziehen Sie den Stecker und überprüfen Sie die Filter. Reinigen Sie die Filter, falls nötig. Ersetzen Sie den HEPA-Filter, falls nötig. Das Gerät wird lauter. Überprüfen Sie die Filter und reinigen/ersetzen Sie sie falls nötig.
  • Seite 12: Technical Data

    Before first Use 16 Use and Operation 16 Care and Cleaning 19 Troubleshooting 19 Hints on Disposal 20 TECHNICAL DATA Item number 10032001, 10032002 Power supply 220-240 V ~ 50 Hz Power consumtion 50 W DECLARATION OF CONFORMITY Producer: Chal-Tec GmbH, Wallstraße 16, 10179 Berlin, Germany.
  • Seite 13: Safety Instructions

    SAFETY INSTRUCTIONS • Read all instructions before using appliance. • Do not attempt to defeat this safety feature. • To avoid fire or shock hazard, plug the appliance directly into a 220~240V AC electrical outlet. • Keep the cord out of heavy traffic areas. To avoid fire hazard, NEVER put the cord under rugs, near heat registers, radiator, stoves or heaters.
  • Seite 14: Product Description And Keys

    PRODUCT DESCRIPTION AND KEYS Product Control Panel Blue UV-C Ring Base Air Outlet Body Handle Lock & Release Button (for accessing Filter and Bulb) Filter Access Cover Air Inlet Control Panel 10 Display 1 1 UV-C On/Off 12 Fan Speed Seletion 13 Timer Set Button 14 HEPA Reset Light 15 Power On/Off...
  • Seite 15: Air Cleaning Layers

    AIR CLEANING LAYERS Improve your indoor air quality with your new Air Cleaning System. Multiple levels of cleaning include a combination True HEPA filter that captures allergens, and Charcoal filter to remove odors. UV-C light technology enhances germ-killing. • Pre-Filter: Captures initial dust and allergen particles. Pre-Filter and Charcoal Filter are combined into one layer that attaches to the HEPA Filter.
  • Seite 16: Before First Use

    BEFORE FIRST USE Select a firm, level and flat location for the air purifier. For proper air flow, locate the unit at least 1 foot from any wall or furniture. Make sure none of the grills are blocked. Plug the power cord into a 220~240V AC outlet. NOTE: When moving the air purifier, always lift unit by the carrying handle located on back.
  • Seite 17 Indicators and Sounds • Filter replacement Indicator: The Replace HEPA light on the control panel will illuminate and flicker indicating that it is time to replace your filter. Replace the filter according to directions (E-6) then press and hold the Timer button for 3 seconds to restart the system.
  • Seite 18 The UV-C Bulb is removed by carefully grasping the bulb with a clean cloth or tissue and pulling the bulb straight out of the unit. NOTE: Bulb is NOT visible until the UV-C METAL SHIELD has been removed. The UV-C Bulb is reinstalled by sliding it, horizontally, back into the slots at the top of the unit.
  • Seite 19: Care And Cleaning

    CARE AND CLEANING The air purifier should be cleaned at least once every month and the outer Pre-/ Charcoal Filter attached to the HEPA Filter should be cleaned every month. More frequent cleaning may be required depending on environmental conditions. Pre-/Charcoal Filter Clean with the brush attachment of your vacuum cleaner.
  • Seite 20: Hints On Disposal

    Problem Possible cause and solution approach No air circulating from Unplug unit. Check Pre-/Charcoal and HEPA Filters. unit. Clean Pre-/Charcoal Filter if necessary. Replace HEPA Filter if necessary. Ersetzen Sie den HEPA-Filter, falls nötig. Increase in noise level. Make sure the filters are clean. Replace if necessary. Red light is flashing.
  • Seite 21: Datos Técnicos

    Antes del primer uso 25 Puesta en marcha y uso 25 Limpieza y cuidado 28 Detección y resolución de problemas 28 Retirada del aparato 29 DATOS TÉCNICOS Número de artículo 10032001, 10032002 Suministro eléctrico 220-240 V ~ 50 Hz Potencia 50 W DECLARACIÓN DE CONFORMIDAD Fabricante: Chal-Tec GmbH, Wallstraße 16, 10179 Berlín (Alemania).
  • Seite 22: Indicaciones De Seguridad

    INDICACIONES DE SEGURIDAD • Lea atentamente estas indicaciones antes de utilizar el aparato. • No modifique el aparato. • Conecte el aparato solamente a tomas de corriente que se adecuen a la tensión del mismo. • Coloque el cable de tal manera que nadie pueda pisarlo ni tropezar con él. Asegúrese de que el cable de alimentación no entre en contacto con superficies calientes.
  • Seite 23: Descripción Del Aparato Y Panel De Control

    DESCRIPCIÓN DEL APARATO Y PANEL DE CONTROL Dispositivo Panel de control Anillo azul UV-C Base Salida de aire Estructura Botón de desbloqueo/ bloqueo (para filtros y lámpara UV) Filtro combinado Entrada de aire Panel de control 10 Display 1 1 UV-C on/off 12 Velocidad del ventilador 13 Ajustar el temporizador 14 Indicador de cambio de...
  • Seite 24: Sistema De Filtrado

    SISTEMA DE FILTRADO Con la combinación del filtro HEPA, el filtro de carbón activo y la luz UV, el aparato elimina los alérgenos, bacterias, gérmenes, hongos y malos olores del aire. • Prefiltro: Atrapa las partículas iniciales de polvo y alérgenos. Advertencia: El prefiltro y el filtro de carbón activo se combina junto con el filtro HEPA.
  • Seite 25: Antes Del Primer Uso

    ANTES DEL PRIMER USO Coloque el aparato en una superficie sólida, plana y estable. Deje al menos 30 cm de distancia alrededor del aparato para que el aire pueda circular correctamente. Asegúrese de que los orificios de ventilación del aparato no estén bloqueados. Introduzca el enchufe en la toma de corriente de 220~240 V.
  • Seite 26 Indicadores y tonos • Indicador de cambio de filtro: Si la luz HEPA se ilumina y parpadea en el panel de control, debe sustituir el filtro. Sustituya el filtro como se ha ilustrado anteriormente y a continuación presione el botón del temporizador durante 3 segundos para reiniciar el sistema.
  • Seite 27 Suelte la lámpara con cuidado agarrándola con un paño limpio y tirando de ella. ADVERTENCIA: Verá la lámpara una vez haya retirado la placa metálica. Desplace la lámpara nueva en la ranura situada en la parte delantera del aparato.
  • Seite 28: Limpieza Y Cuidado

    LIMPIEZA Y CUIDADO El aparato debe limpiarse como mínimo una vez al mes. El prefiltro y el filtro de carbón activo unido al filtro HEPA debe limpiarse cada mes. En función de las condiciones del entorno es posible que se requiera una limpieza más frecuente. Limpiar el filtro de carbón activo y el prefiltro Limpie los filtros con el cepillo de su aspiradora.
  • Seite 29: Retirada Del Aparato

    Problema Posible causa y solución El aire no circula. Desconecte el enchufe y limpie el filtro. Limpie los filtros si fuera necesario. Coloque el filtro HEPA si fuera necesario. El aparato emite mucho Compruebe el filtro y límpielo o sustitúyalo si es necesario. ruido.
  • Seite 30: Fiche Technique

    Avant la première utilisation 34 Mise en service et utilisation 34 Nettoyage et entretien 37 Identification et résolution des problèmes 37 Conseils pour le recyclage 38 FICHE TECHNIQUE Numéro d’article 10032001, 10032002 Alimentation 220-240 v ~ 50 Hz Puissance 50 w DÉCLARATION DE CONFORMITÉ Fabricant : Chal-Tec GmbH, Wallstraße 16, 10179 Berlin, Allemagne.
  • Seite 31: Consignes De Sécurité

    CONSIGNES DE SÉCURITÉ • Avant l’utilisation, lisez attentivement toutes les consignes. • Ne modifiez pas l’appareil. • Ne branchez l’appareil que sur des prises dont la tension correspond à celle de l’appareil. • Installez le câble de façon à ce que personne ne trébuche dessus. Veillez à ce que le câble ne soit en contact avec aucune surface chaude.
  • Seite 32: Aperçu De L'appareil Et Panneau De Commande

    APERÇU DE L’ APPAREIL ET PANNEAU DE COMMANDE Appareil Panneau de commande Cercle bleu UV-C Socle Sortie d‘air Châssis Poignée Touche de verrouillage et de déverrouillage (pour le filtre et la lampe à UV) Filtre combiné Entrée d‘air Panneau de commande 10 Display 1 1 Lampe à...
  • Seite 33: Système De Filtration

    SYSTÈME DE FILTRATION Grâce à l’association d’un filtre HEPA, d’un filtre à charbon actif et de la lumière UV, l’appareil élimine efficacement de l’air les allergènes, bactéries, germes, champignons et mauvaises odeurs. • Préfiltre : capture les poussières et les particules allergisantes en formation. Remarque : le préfiltre et le filtre à...
  • Seite 34: Avant La Première Utilisation

    AVANT LA PREMIÈRE UTILISATION Placez l’appareil sur un support solide et horizontal. Pour que l’air puisse circuler librement, laissez au moins 30 cm d’espace tout autour de l’appareil. veillez à ce que les ouvertures d’aération ne soient pas obstruées. Branchez le câble d’alimentation dans une prise 220~240 v. IMPORTANT : lorsque vous déplacez l’appareil, soulevez-le toujours par sa poignée située au dos.
  • Seite 35 Affichages et sons • Témoin de changement de filtre : lorsque le témoin lumineux HEPA s’allume sur le panneau de commande et scintille, il est nécessaire de remplacer le filtre. Remplacez le filtre comme indiqué précédemment et appuyez ensuite sur la touche Timer pendant 3 secondes pour redémarrer le système.
  • Seite 36 Sortez délicatement l’ancienne lampe en la saisissant avec un chiffon propre et en la tirant vers vous. REMARQUE : vous ne pouvez voir la lampe qu’après avoir démonté la plaque métallique. Glissez avec précaution la nouvelle lampe dans la fente en haut de l’appareil.
  • Seite 37: Nettoyage Et Entretien

    NETTOYAGE ET ENTRETIEN L’appareil doit en principe être nettoyé au moins une fois par mois. Le préfiltre ou le filtre à charbon actif qui est fixé sur le filtre HEPA doit être nettoyé tous les mois en principe. En fonction des conditions environnementales, il peut être nécessaire de nettoyer l’appareil plus fréquemment.
  • Seite 38: Conseils Pour Le Recyclage

    Problème Cause possible et solution L’air ne circule pas. Débranchez la fiche et vérifiez les filtres. Nettoyez les filtres si besoin. Remplacez le filtre HEPA si nécessaire. L’appareil devient Vérifiez les filtres et nettoyez/remplacez-les si nécessaire. bruyant. Un témoin rouge Remplacez les filtres et redémarrez le système.
  • Seite 39: Dati Tecnici

    Avvertenze per il primo utilizzo  43 Messa in funzione e utilizzo 43 Pulizia e manutenzione 46 Ricerca e risoluzione dei problemi 46 Smaltimento 47 DATI TECNICI Articolo numero 10032001, 10032002 Alimentazione 220-240 V ~ 50 Hz Potenza 50 W DICHIARAZIONE DI CONFORMITÀ Produttore: Chal-Tec GmbH, Wallstraße 16, 10179 Berlino, Germania.
  • Seite 40: Avvertenze Di Sicurezza

    AVVERTENZE DI SICUREZZA • Prima dell‘uso leggere attentamente tutte le istruzioni. • Non apportare modifiche al dispositivo. • Collegare il dispositivo solo ad una presa che corrisponde alla tensione indicata. • Installare il dispositivo in modo che nessuno vi inciampi. Assicurarsi che il cavo di alimentazione non tocchi superfici calde.
  • Seite 41: Descrizione Del Prodotto E Pannello Dei Comandi

    DESCRIZIONE DEL PRODOTTO E PANNELLO DEI COMANDI Dispositivo Pannello dei comandi Anello UV-C blu Base Uscita aria Alloggiamento Maniglia Tasto di blocco / di sblocco (per i filtri e per la lampada UV) Filtro combinato Ingresso aria Pannello dei comandi 10 Display 1 1 UV-C on/off 12 Velocità...
  • Seite 42: Sistema Filtri

    SISTEMA FILTRI Grazie alla combinazione del filtro HEPA, del filtro a carbone attivo e della luce UV, il dispositivo rimuove dall´aria in modo efficace allergeni, batteri, germi, funghi e cattivi odori. • Prefiltro: rimuove la polvere iniziale e gli allergeni. Nota: il prefiltro e il filtro a carbone attivo formano un unico strato combinato al filtro HEPA.
  • Seite 43: Avvertenze Per Il Primo Utilizzo

    AVVERTENZE PER IL PRIMO UTILIZZO Posizionare il dispositivo su una superficie piana e stabile. Lasciare almeno 30 cm di spazio libero intorno al dispositivo affinché l´aria possa circolare. Prestare attenzione a non bloccare le fessure di ventilazione. Inserire il cavo di alimentazione in una presa 220~240 V. IMPORTANTE: se si sposta il dispositivo, sollevarlo sempre tramite l´impugnatura posta sul retro.
  • Seite 44 Spie e segnali acustici • Spia di sostituzione del filtro: quando la spia HEPA si accende e lampeggia sul pannello dei comandi, è necessario sostituire il filtro. Sostituire il filtro come descritto nella sezione precedente. Tenere premuto per 3 secondi il tasto timer per riavviare il sistema.
  • Seite 45 Rimuovere con cautela la vecchia lampada afferrandola con un panno. NOTA: la lampada è visibile solo dopo aver rimosso la piastra in metallo. Inserire con cautela la nuova lampada nelle scanalature sulla parte superiore del dispositivo.
  • Seite 46: Pulizia E Manutenzione

    PULIZIA E MANUTENZIONE Pulire il dispositivo almeno una volta al mese. Inoltre pulire ogni mese il prefiltro e il filtro a carbone attivo collegato al filtro HEPA. A seconda delle condizioni ambientali, potrebbe essere necessario pulire il dispositivo con una frequenza maggiore. Pulizia del prefiltro e del filtro a carbone attivo Pulire i filtri con la spazzola dell´aspirapolvere.
  • Seite 47: Smaltimento

    Problema Causa possibile e soluzione L´aria non circola. Staccare la spina dalla presa e controllare i filtri. Pulire i filtri se necessario. Sostituire il filtro HEPA se necessario. Il dispositivo è Controllare i filtri e pulirli/sostituirli se necessario. rumoroso. Una spia rossa Sostituire i filtri e riavviare il sistema.

Diese Anleitung auch für:

10032002

Inhaltsverzeichnis