Progress PHN13001X Benutzerinformation
Inhaltsverzeichnis
Verfügbare Sprachen
Verfügbare Sprachen
Quicklinks
Kapitel
Inhaltsverzeichnis
Fehlerbehebung

Verwandte Anleitungen für Progress PHN13001X


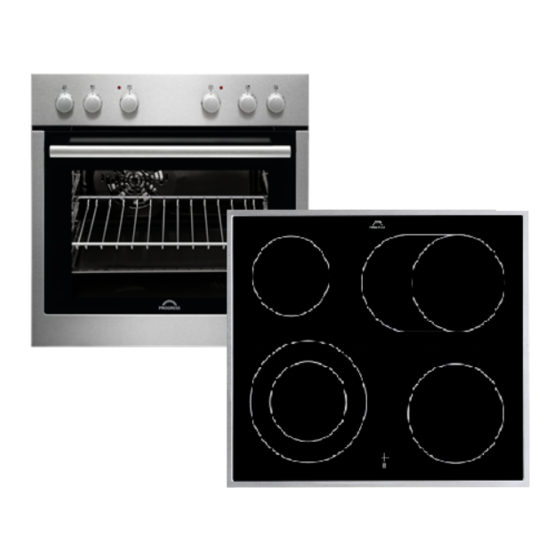
Inhaltszusammenfassung für Progress PHN13001X
- Seite 1 User Manual Benutzerinformation Oven Backofen PHN13001X...
-
Seite 25: Sicherheit Von Kindern Und Schutzbedürftigen Personen
Progress 25 INHALTSVERZEICHNIS Sicherheitshinweise Zusatzfunktionen Sicherheitsanweisungen Tipps und Hinweise Gerätebeschreibung Reinigung und Pflege Vor der ersten Inbetriebnahme Fehlersuche Täglicher Gebrauch Montage Verwendung des Zubehörs Energieeffizienz Änderungen vorbehalten. SICHERHEITSHINWEISE Lesen Sie vor der Montage und dem Gebrauch des Geräts zuerst die Gebrauchsanleitung. Bei Verletzungen oder Schäden infolge nicht ordnungsgemäßer Montage oder... -
Seite 26: Allgemeine Sicherheit
26 Progress Halten Sie Kinder und Haustiere während des Betriebs • oder der Abkühlphase vom Gerät fern. Berührbare Teile sind heiß. Falls Ihr Gerät mit einer Kindersicherung ausgestattet ist, • empfehlen wir, diese einzuschalten. Kinder dürfen keine Reinigung und Wartung ohne •... -
Seite 27: Sicherheitsanweisungen
Progress 27 Führen Sie zum Einsetzen der Einhängegitter die obigen Schritte in umgekehrter Reihenfolge durch. Gemäß den Verdrahtungsregeln muss bei • Festverdrahtung eine Vorrichtung zur Trennung des Gerätes von der Spannungsversorgung vorhanden sein. SICHERHEITSANWEISUNGEN Montage • Alle elektrischen Anschlüsse sind von einem geprüften Elektriker... -
Seite 28: Verwendung
28 Progress • Verwenden Sie nur geeignete • Laden Sie keine entflammbaren Trenneinrichtungen: Überlastschalter, Produkte oder Gegenstände, die mit Sicherungen (Schraubsicherungen entflammbaren Produkten benetzt sind, müssen aus dem Halter entfernt in das Gerät und stellen Sie solche werden können), nicht in die Nähe oder auf das Gerät. -
Seite 29: Entsorgung
Progress 29 • Ersetzen Sie die Türglasscheiben Benutzen Sie diese nicht für die umgehend, wenn sie beschädigt sind. Raumbeleuchtung. Wenden Sie sich an den autorisierten • Trennen Sie das Gerät von der Kundendienst. Stromversorgung, bevor Sie die Lampe • Gehen Sie beim Aushängen der Tür austauschen. -
Seite 30: Vor Der Ersten Inbetriebnahme
30 Progress Zubehör • Backblech Für Kuchen und Plätzchen. • Kombirost Für Kochgeschirr, Kuchenformen, Braten. VOR DER ERSTEN INBETRIEBNAHME 1. Stellen Sie die Funktion ein.Stellen WARNUNG! Siehe Kapitel Sie die Höchstemperatur ein. Sicherheitshinweise. 2. Lassen Sie den Backofen 1 Stunde lang eingeschaltet. -
Seite 31: Funktion
Progress 31 Ofen‐ Anwendung Ofen‐ Anwendung funktion funktion Zum Backen und Braten auf Diese Funktion ist entwickelt einer Ebene. worden, um während des Garvorgangs Energie zu Ober-/ Feuchte sparen. Die Kochanleitun‐ Unterhitze heißluft gen finden Sie im Kapitel (Ober-/ "Hinweise und Tipps", Unterhit‐... -
Seite 32: Verwenden Der Zweikreis-Kochzone (Falls Vorhanden)
32 Progress Kochstufen Verwenden der Zweikreis- Kochzone (falls vorhanden) Knopfstellung Funktion Drehen Sie den Knopf im Stellung Aus Uhrzeigersinn, um die Zweikreis-Kochzone 1 - 9 Kochstufen einzuschalten. Drehen Sie ihn jedoch nicht über die Zweikreiszonen‐ Endposition hinaus. schalter 1. Drehen Sie den Knopf im 1. -
Seite 33: Zusatzfunktionen
Progress 33 Die kleine Einkerbung auf der Oberseite erhöht die Sicherheit. Diese Einkerbungen dienen auch als Kippsicherung. Durch den umlaufend erhöhten Rand des Rosts ist das Kochgeschirr gegen Abrutschen vom Rost gesichert. ZUSATZFUNKTIONEN Kühlgebläse gefährlichen Überhitzung führen. Um dies zu verhindern, ist der Backofen mit einem... -
Seite 34: Back- Und Brattabelle
34 Progress vermeiden, geben Sie jedes Mal, wenn Beobachten Sie den Garfortschritt am das Wasser verdampft ist, erneut Wasser Anfang. Finden Sie heraus, welche in die Brat- und Fettpfanne. Geräteeinstellungen (Garstufe, Gardauer, usw.) für Ihr Kochgeschirr, Ihre Rezepte Garzeiten und die von Ihnen zubereiteten Die Garzeiten hängen von der Art des... - Seite 35 Progress 35 Speise Ober-/Unterhitze Umluft Dauer Bemer‐ (Min.) kungen Tempe‐ Ein‐ Tempe‐ Ein‐ ratur (°C) schub‐ ratur (°C) schub‐ ebene ebene Biskuit 90 - 120 In einer (Biskuit Kuchen‐ ohne But‐ form (26 ter) Stollen/ 50 - 60 In einer Üppiger...
- Seite 36 36 Progress Speise Ober-/Unterhitze Umluft Dauer Bemer‐ (Min.) kungen Tempe‐ Ein‐ Tempe‐ Ein‐ ratur (°C) schub‐ ratur (°C) schub‐ ebene ebene Üppiger 110 - 120 In einer Früchte‐ Kuchen‐ kuchen form (24 Engli‐ 50 - 60 In einer scher Kuchen‐...
- Seite 37 Progress 37 Pudding Speise Ober-/Unterhitze Umluft Dauer Bemer‐ (Min.) kungen Tempe‐ Ein‐ Tempe‐ Ein‐ ratur (°C) schub‐ ratur (°C) schub‐ ebene ebene Nudelauf‐ 40 - 50 In einer lauf Auflauf‐ form Gemüse‐ 45 - 60 In einer auflauf Auflauf‐ form...
- Seite 38 38 Progress Speise Ober-/Unterhitze Umluft Dauer Bemer‐ (Min.) kungen Tempe‐ Ein‐ Tempe‐ Ein‐ ratur (°C) schub‐ ratur (°C) schub‐ ebene ebene Roast‐ 44 - 50 Kombi‐ beef, rost und englisch tiefes Blech Roast‐ 51 - 55 Kombi‐ beef, me‐ rost und...
-
Seite 39: Heißluftgrillen
Progress 39 Fisch Speise Ober-/Unterhitze Umluft Dauer Bemer‐ (Min.) kungen Tempe‐ Ein‐ Tempe‐ Ein‐ ratur (°C) schub‐ ratur (°C) schub‐ ebene ebene Forelle/ 2 (1 und 40 - 55 3 - 4 Fi‐ Seebras‐ sche Thun‐ 2 (1 und 35 - 60 4 - 6 Fi‐... -
Seite 40: Feuchte Heißluft
40 Progress Speise Menge Dauer (Min.) Stück (kg) 1. Seite 2. Seite Rollbraten (Pu‐ 30 - 40 20 - 30 Hähnchen (in 25 - 30 20 - 30 zwei Hälften) Hähnchenun‐ 15 - 20 15 - 18 terschenkel Wachteln 25 - 30 20 - 25 Gemüsegratin... -
Seite 41: Informationen Für Prüfinstitute
Progress 41 Speise Zubehör Temperatur Ein‐ Dauer (Min.) (°C) schub‐ ebene Englischer Backform auf Kombirost 35 - 45 Rührkuchen Fisch, ge‐ Backblech oder tiefes 35 - 45 dämpft, 0,3 kg Blech Fisch, 0,2 kg Backblech oder tiefes 35 - 45... -
Seite 42: Reinigung Und Pflege
42 Progress Speise Funktion Zube‐ Ein‐ Tem‐ Dauer (Min.) Bemerkungen hör pera‐ ub‐ ebe‐ (°C) Kleiner Ober-/ Back‐ 20 - 30 20 kleine Ku‐ Kuchen Unterhitze blech chen auf ein Backblech le‐ gen. Apfelku‐ Ober-/ Kombi‐ 80 - 120 2 Formen (20... -
Seite 43: Öfen Mit Edelstahl- Oder Aluminiumfront
Progress 43 Reinigen Sie die Metalloberflächen mit Lesen Sie in den allgemeinen einem speziellen Reinigungsmittel. Informationen zur Reinigung nach, was bei der Reinigung der Türdichtung Reinigen Sie den Innenraum des beachtet werden muss. Backofens nach jedem Gebrauch. Fettansammlungen und Speisereste Entfernen der Einhängegitter... - Seite 44 44 Progress Die Backofentür kann sich schließen, wenn Sie versuchen, die innere Glasscheibe zu entfernen, bevor Sie die Backofentür abnehmen. VORSICHT! Benutzen Sie den Backofen nicht ohne die innere Glasscheibe. 1. Öffnen Sie die Tür vollständig und fassen Sie beide Scharniere an.
-
Seite 45: Austauschen Der Lampe
Progress 45 Achten Sie darauf, die innere Glasscheibe richtig in die Aufnahmen einzusetzen. 90° Austauschen der Lampe 7. Heben Sie die Glasscheibe vorsichtig WARNUNG! an und entfernen Sie sie. Stromschlaggefahr. Die Lampe kann heiß sein. 1. Schalten Sie den Backofen aus. -
Seite 46: Servicedaten
46 Progress Störung Mögliche Ursache Abhilfe Der Backofen heizt nicht. Die Sicherung ist durchge‐ Vergewissern Sie sich, dass brannt. die Sicherung der Grund für die Störung ist. Brennt die Sicherung wiederholt durch, wenden Sie sich an eine zu‐ gelassene Elektrofachkraft. -
Seite 47: Elektrischer Anschluss Des Kochfelds
Progress 47 Elektrischer Anschluss des Anschlusssteckern ausgerüstet. Um das Kochfelds Kochfeld an den Backofen anzuschließen, stecken Sie die Stecker in die richtigen Die Anschlussbuchse für das Kochfeld Buchsen am Backofen. Die Stecker und befindet sich oben auf dem Buchsen sind so ausgelegt, dass keine Backofengehäuse. -
Seite 48: Energieeffizienz
48 Progress 1 = 45 mm 1 2 3 4 5 2 = 45 mm 230V 3~ 3 = 60 mm 4 = 60 mm = 70 mm 1 2 3 4 5 230V 1~ 1 2 3 4 5 400V 2N~ L 1 –... -
Seite 49: Energie Sparen
Progress 49 Energie sparen Garvorgangs auf die Mindesttemperatur. Durch die Restwärme des Backofens Der Backofen verfügt über werden die Speisen weiter gegart. Funktionen, mit deren Hilfe Sie Nutzen Sie die Restwärme, um andere beim täglichen Kochen Energie Speisen aufzuwärmen. sparen können. - Seite 50 50 Progress...
- Seite 51 Progress 51...
- Seite 52 867348521-A-392018...